The Balthus Tie Knot is a less-commonly known knot used for tying a tie. It creates a very large and wide knot with a triangular shape.
Its name comes from its inventor – Balthasar Klossowski.
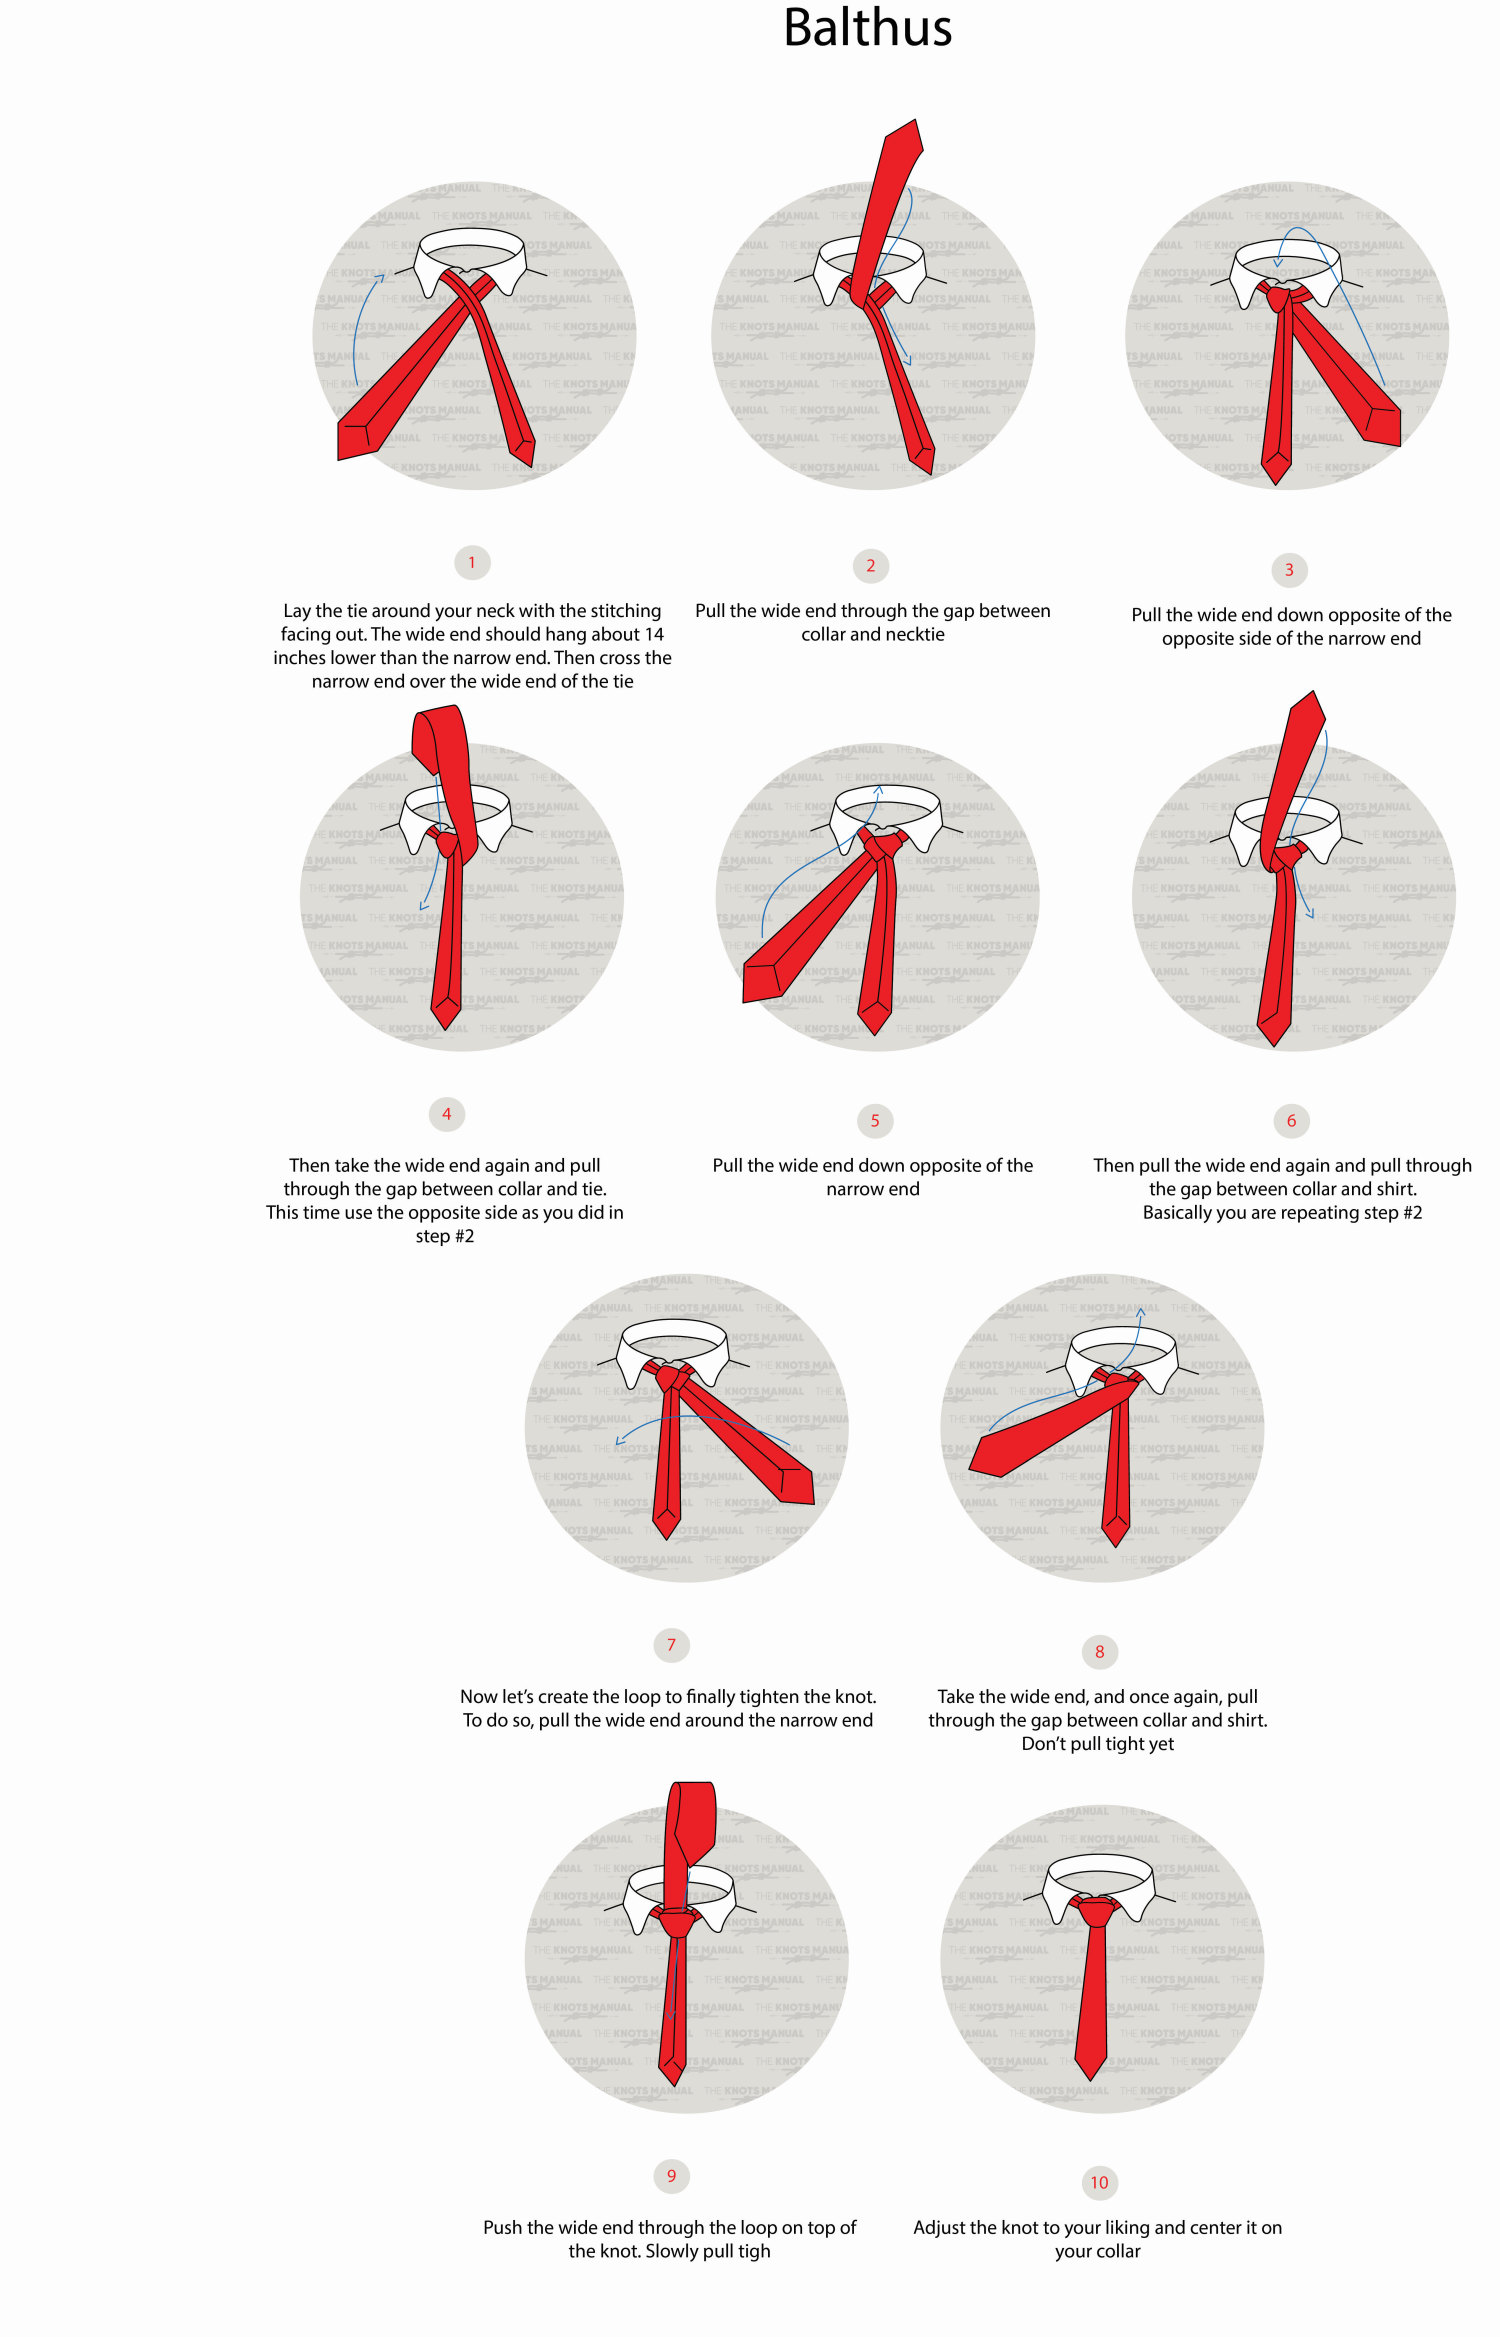
Quick Guide: Tying the Balthus Tie Knot
To tie the Balthus Tie Knot, wrap the tie around your neck. Lay it out in a way where the back side of the tie is visible with stitches.
Pass the wide end under the narrow end (step 1). Now pass it over the knot and exit on the left side (step 2). Again, pass it over and exit on the right side (steps 3-4). Pass it again for the third time over the knot and exit on the left side (steps 5-6). Now pass the wide end sideways across the front of the knot (step 7) and over it from the back (step 8). Finally, pass the wide end through the front loop of the knot (step 9).
If you still found it difficult, here’s an even shorter version – Wrap the wide end around the right side, then left, then right, then sideways, and finally through the front.
Finally, tighten and dress the knot (step 10). Make sure that it feels secure, sits straight, and that all strands are hidden under the front loop.
It’s important to tighten the knot after each full turn. This will make dressing the knot much easier.
About the Balthus Tie Knot
The Balthus Tie Knot is considered to be the largest tie knot, even larger than the Full Windsor Knot. It has a very wide profile and if tied correctly, it’s almost perfectly triangular.
It best works with shirts that have a very wide collar. Otherwise, the knot creeps into the collar and looks too big. But it can also work with narrow collar shirts if the tie is very slim and made from a thin material.
The Balthus Tie Knot is a very good choice for shorter people. That’s because it considerably shortens the length of the tie due to the many turns required. It’s also good for ties that are too long.
It’s perfectly symmetrical, creating a classic and polished look. You can wear it to formal events and dinner parties where you want to impress other people.
Another benefit is that it doesn’t loosen over time. It creates a fairly good amount of friction on the narrow end of the tie. This means that you won’t need to readjust it all the time.
The only downside to the Balthus Tie Knot is that it’s difficult to tie. It involves a lot of turns and is easy to get wrong. That’s why it’s usually only used by people who aren’t new to wearing ties.
Knots Like the Balthus Tie Knot
Full Windsor Tie Knot: Another tie knot with a large profile. It involves one less turn than the Balthus Knot and is much more widely used. It looks very similar to the Balthus Knot, except a bit smaller.
Half Windsor Tie Knot: A smaller and easier version of the Balthus Tie Knot. It’s made using one less turn than the Full Windsor Knot. It also is symmetrical and triangular-shaped, only much smaller.
Pratt Tie Knot: A tie knot that’s very similar to the Half Windsor Tie Knot. It also looks professional and classic, which is why it can be used instead of the Balthus Tie Knot.
Prince Albert Tie Knot: This knot has a much smaller profile than the Balthus Tie Knot and it’s also more square-shaped. It creates a modern look, which is best worn in informal events or with narrow collar shirts.
Kelvin Tie Knot: A very similar tie knot to the Prince Albert Tie Knot. It’s also much smaller than the Balthus Tie Knot and square-shaped.
Four-In-Hand Tie Knot: The easiest tie knot out there, usually taught to children. It can be considered the opposite of the Balthus Tie Knot. It’s best used for informal events and in everyday office situations.
Step-By-Step Guide: How to Tie the Balthus Tie Knot

A step-by-step guide on how to tie the Balthus Tie Knot.
Step 1:
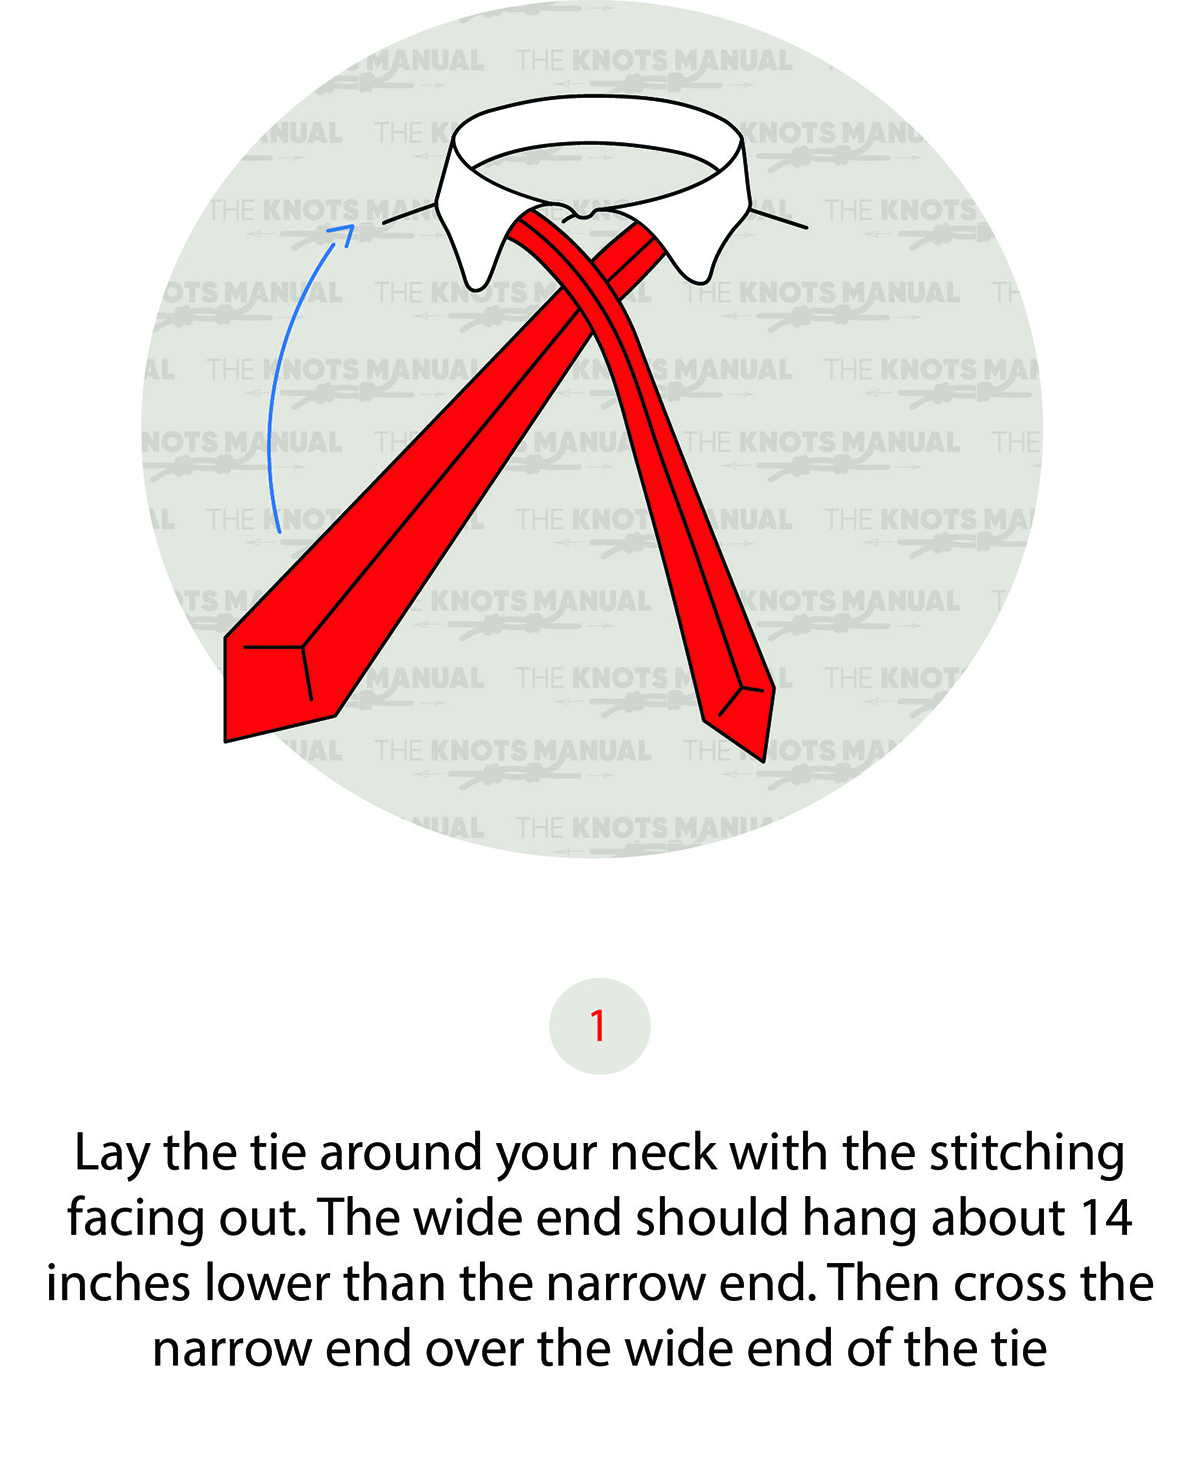
Wrap the tie around your neck with the stitches visible and the wide end considerably lower than the narrow end. Pass the wide end under the narrow end.
Step 2:
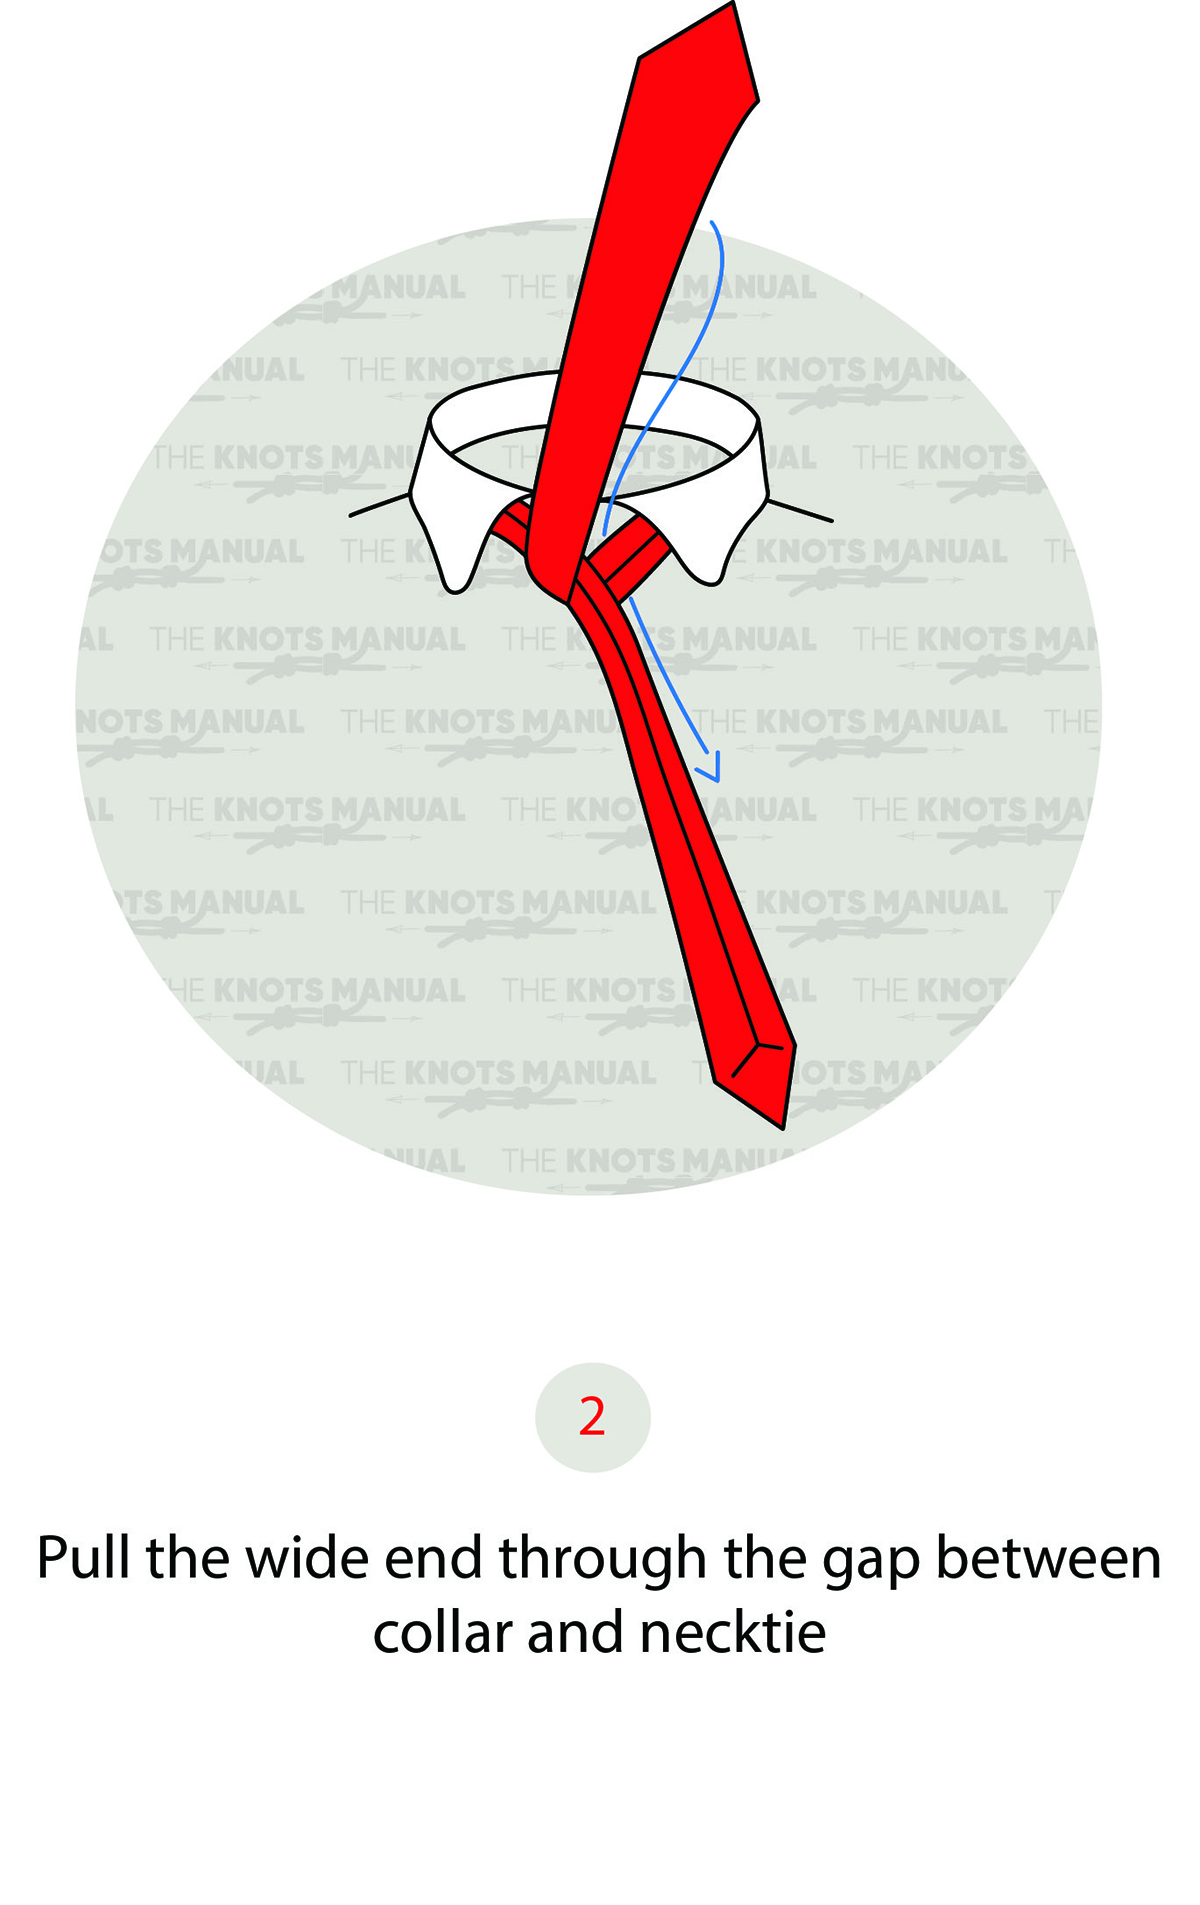
Wrap the wide end around the right side of the collar from the top.
Step 3:
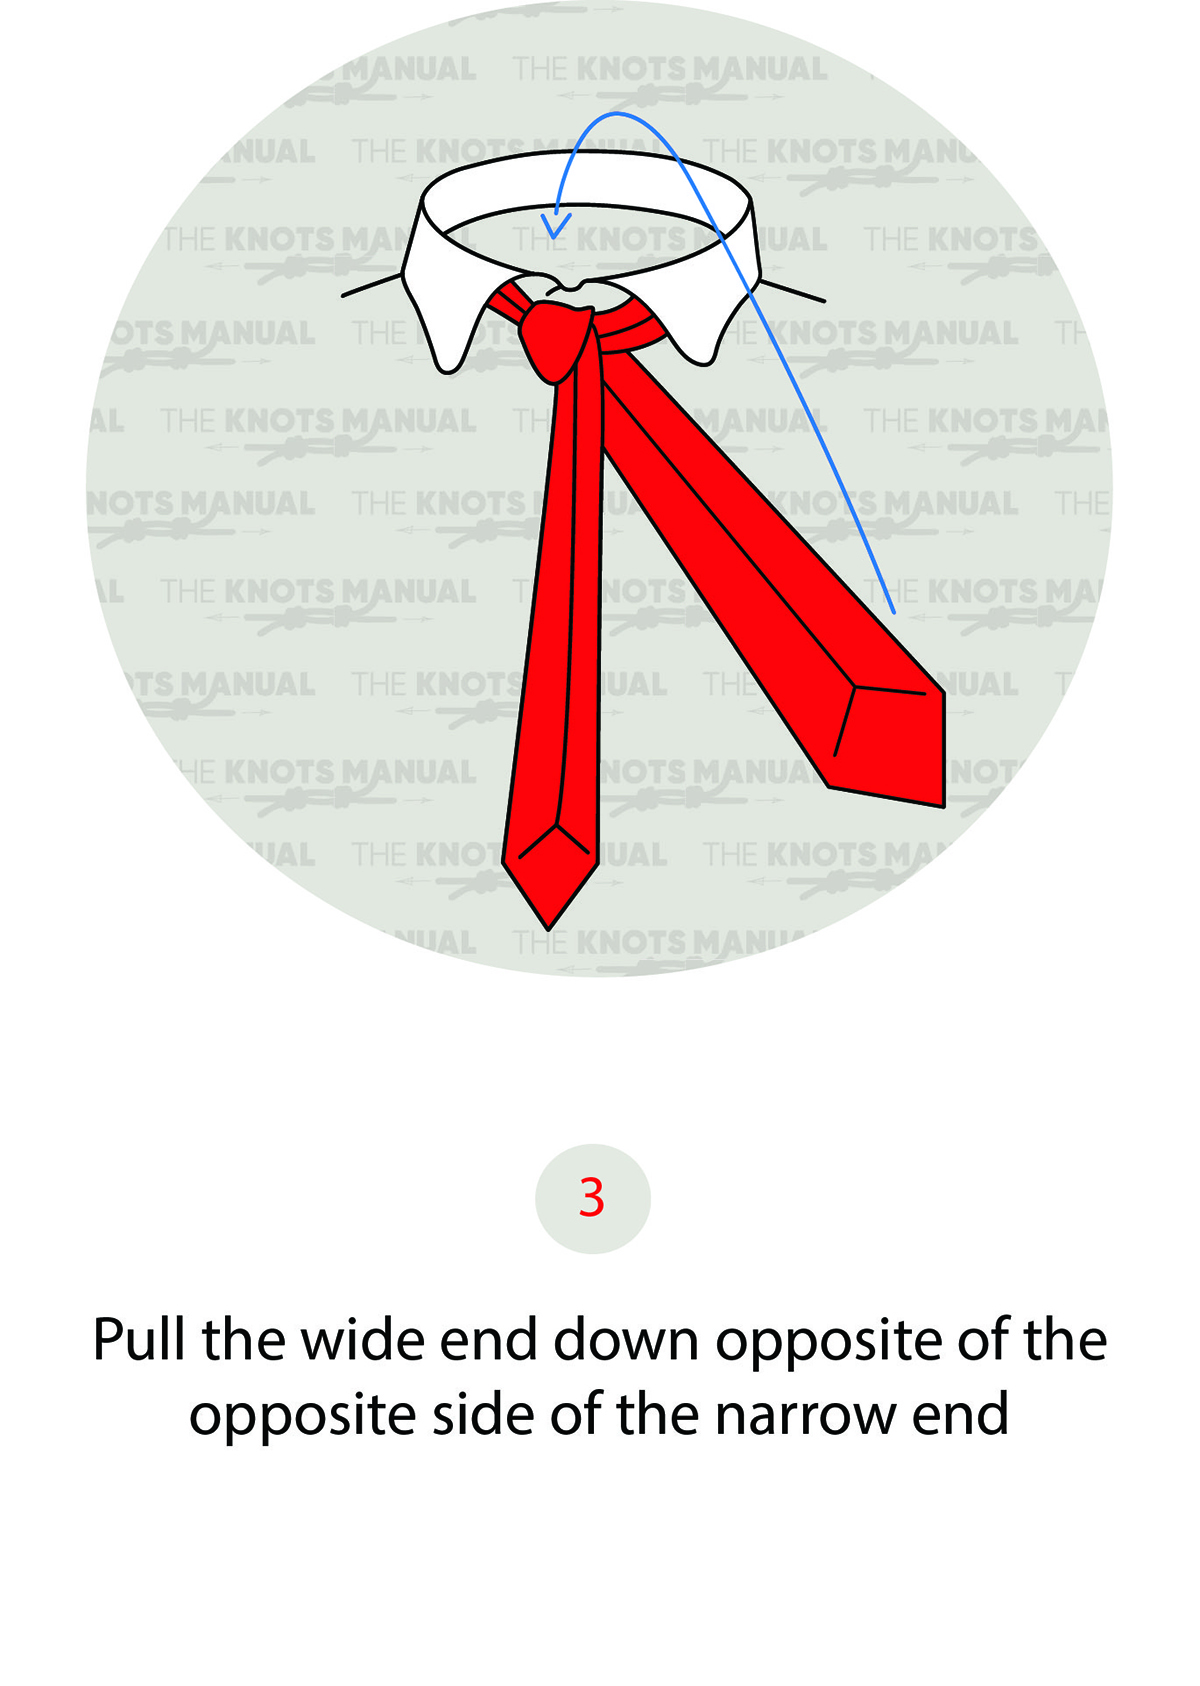
Now pass it over the knot from the other left side.
Step 4:
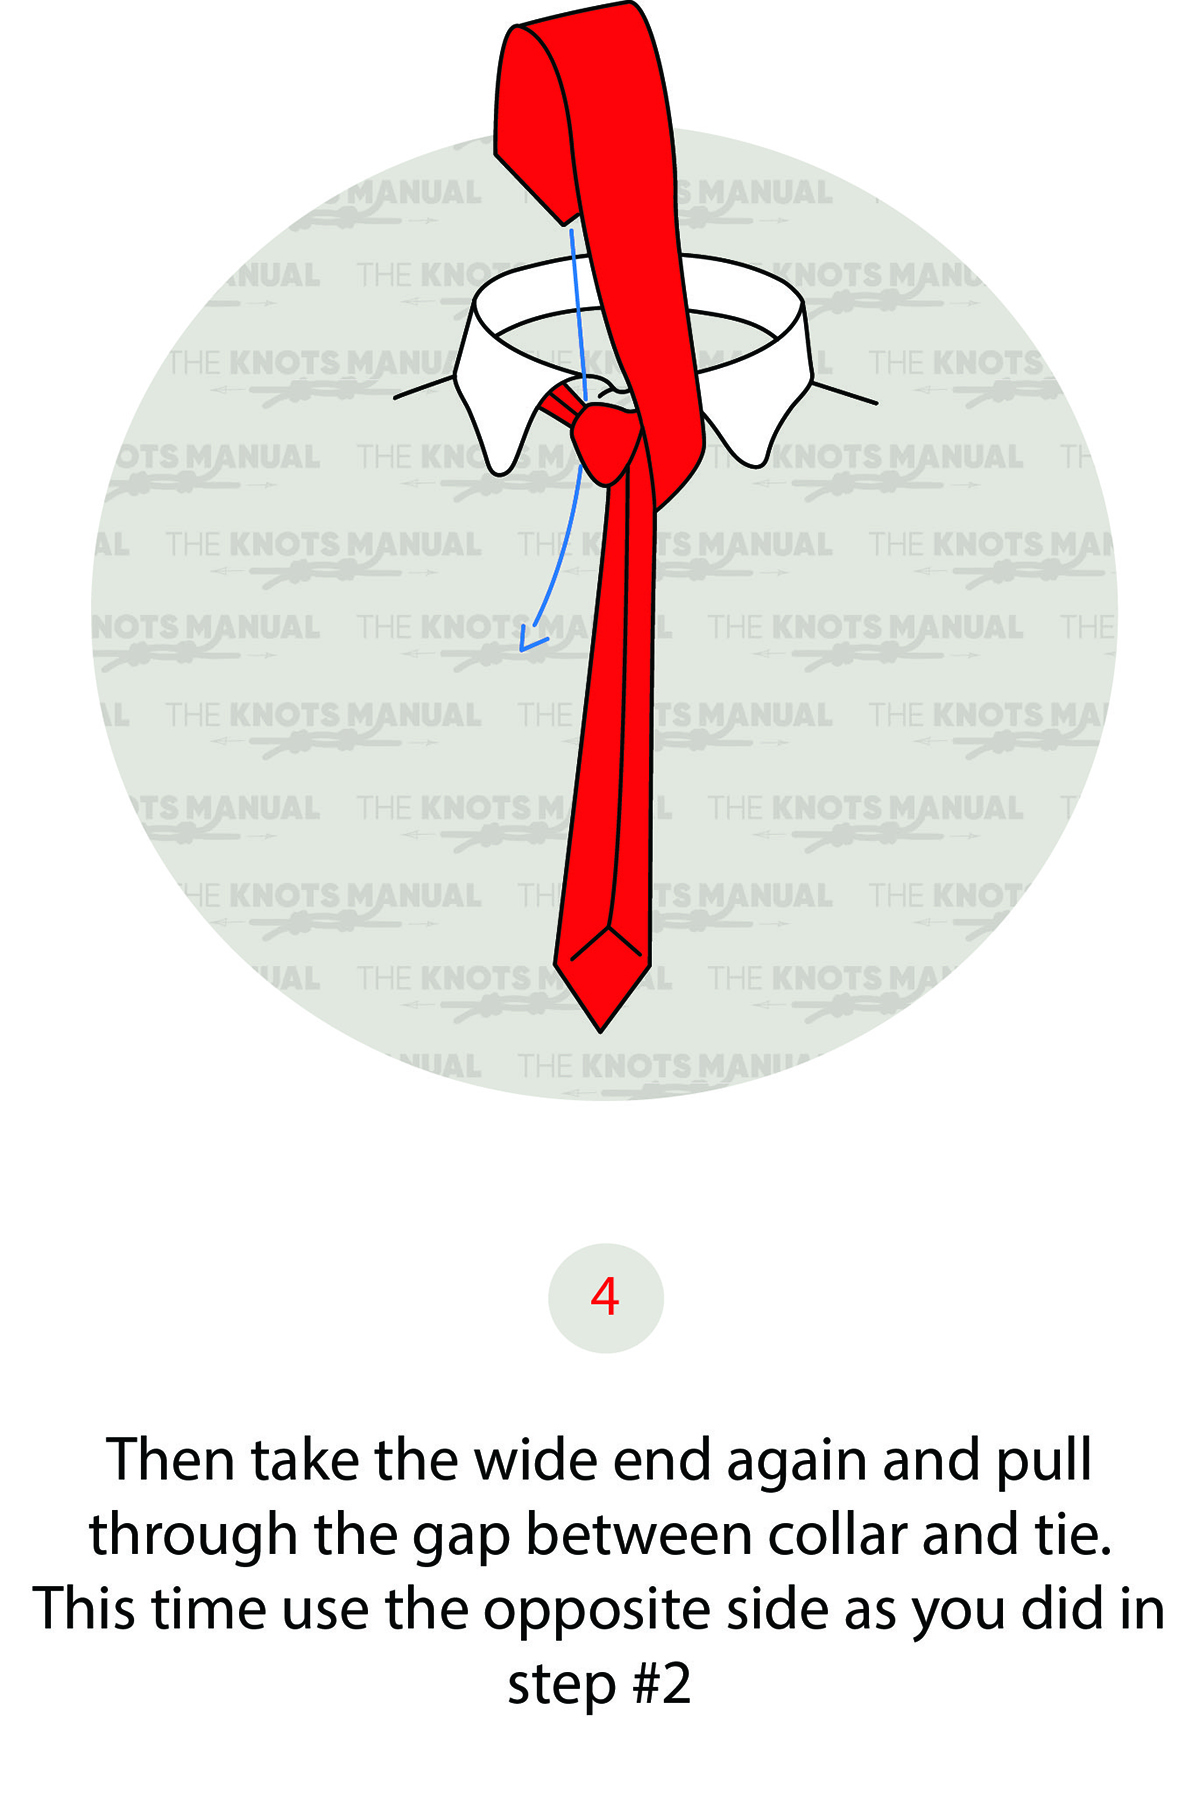
Exit on the right side.
Step 5:
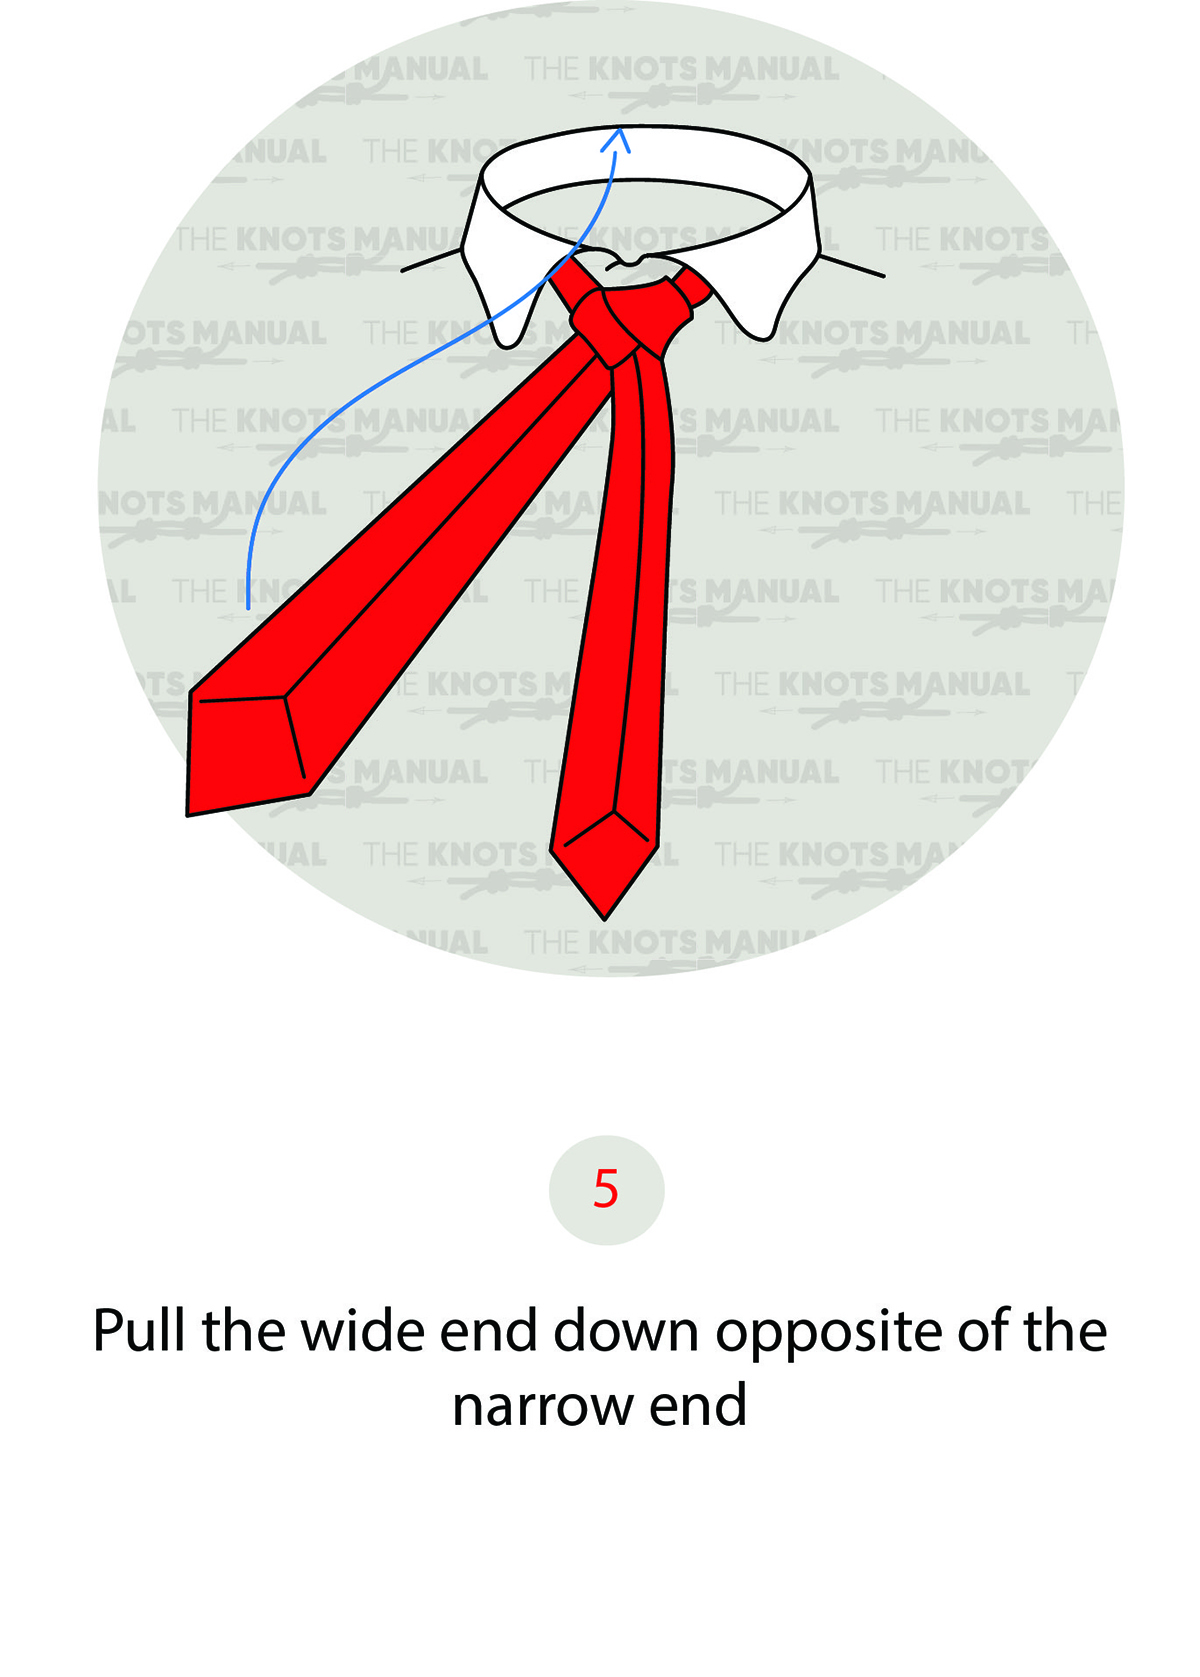
Pass it again over the knot from the right side.
Step 6:
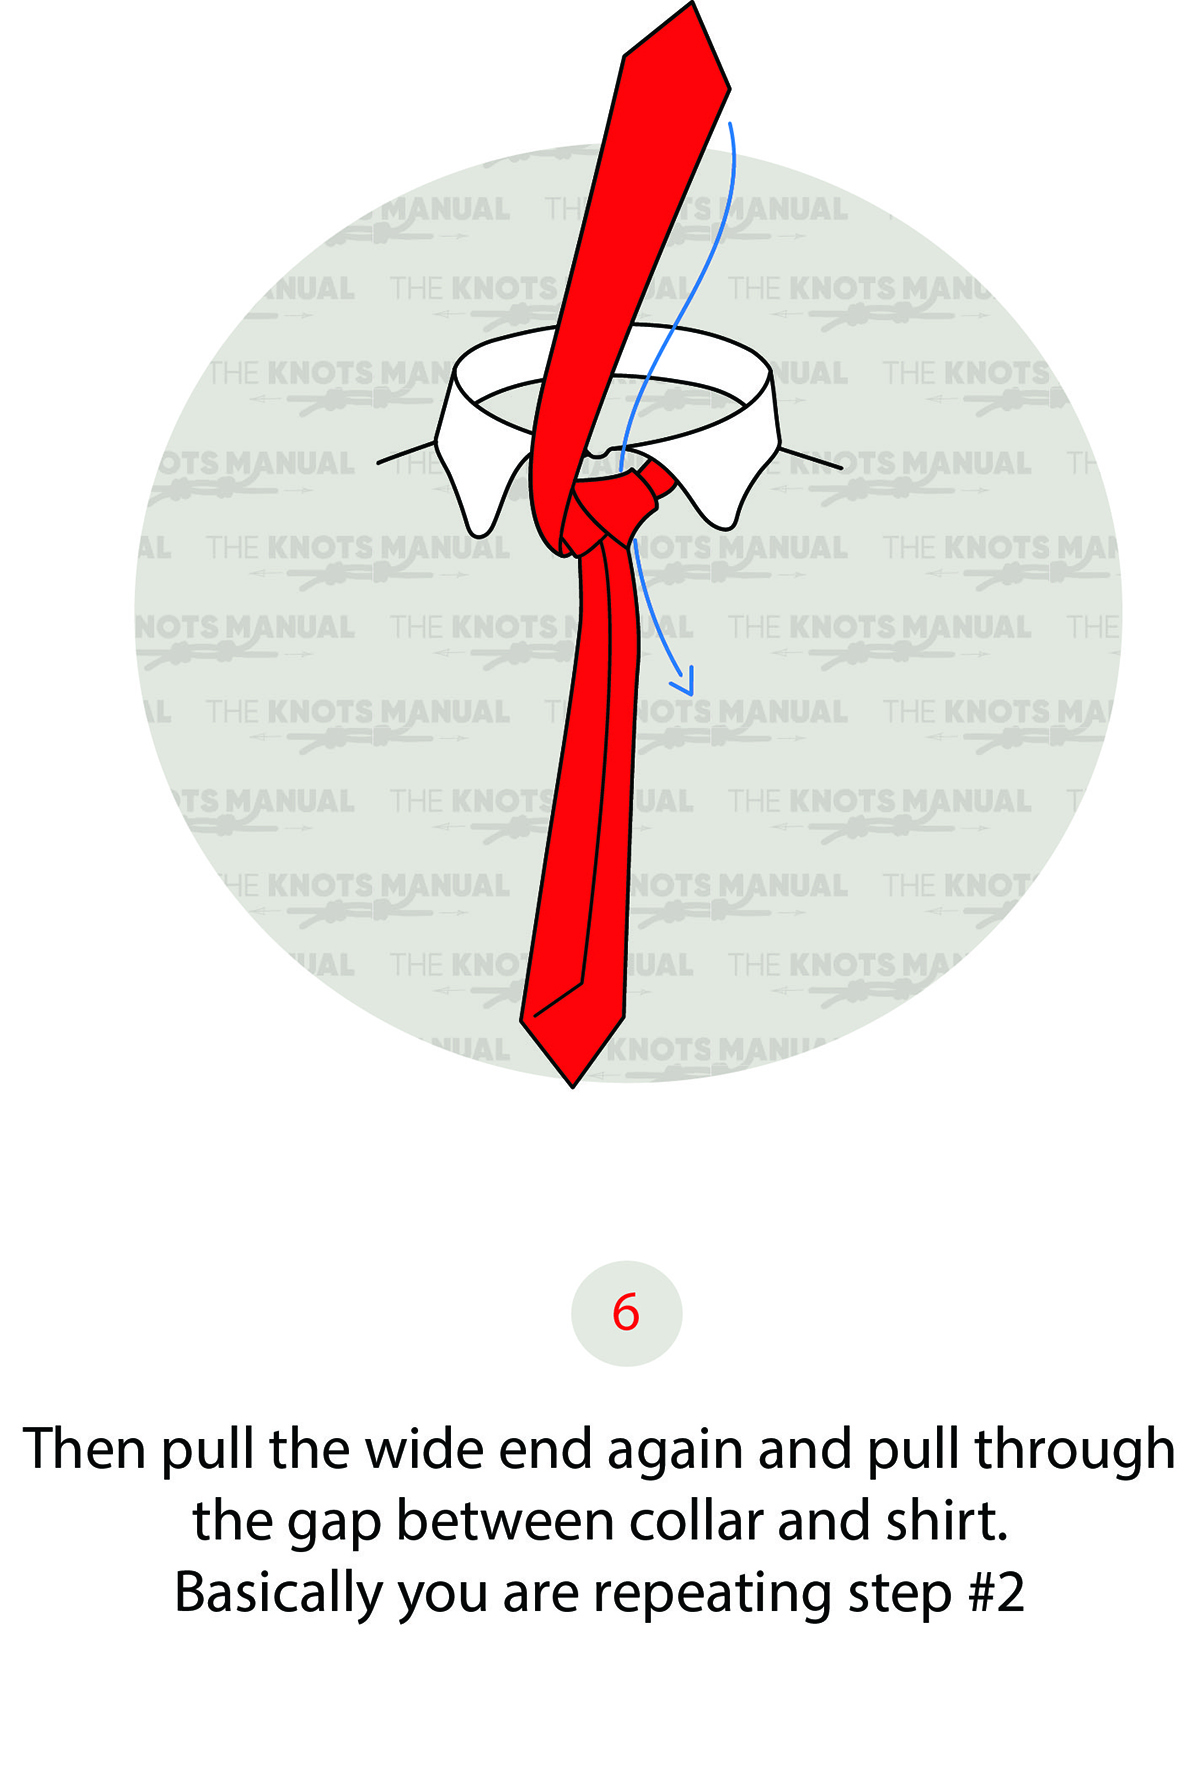
Exit on the left side.
Step 7:
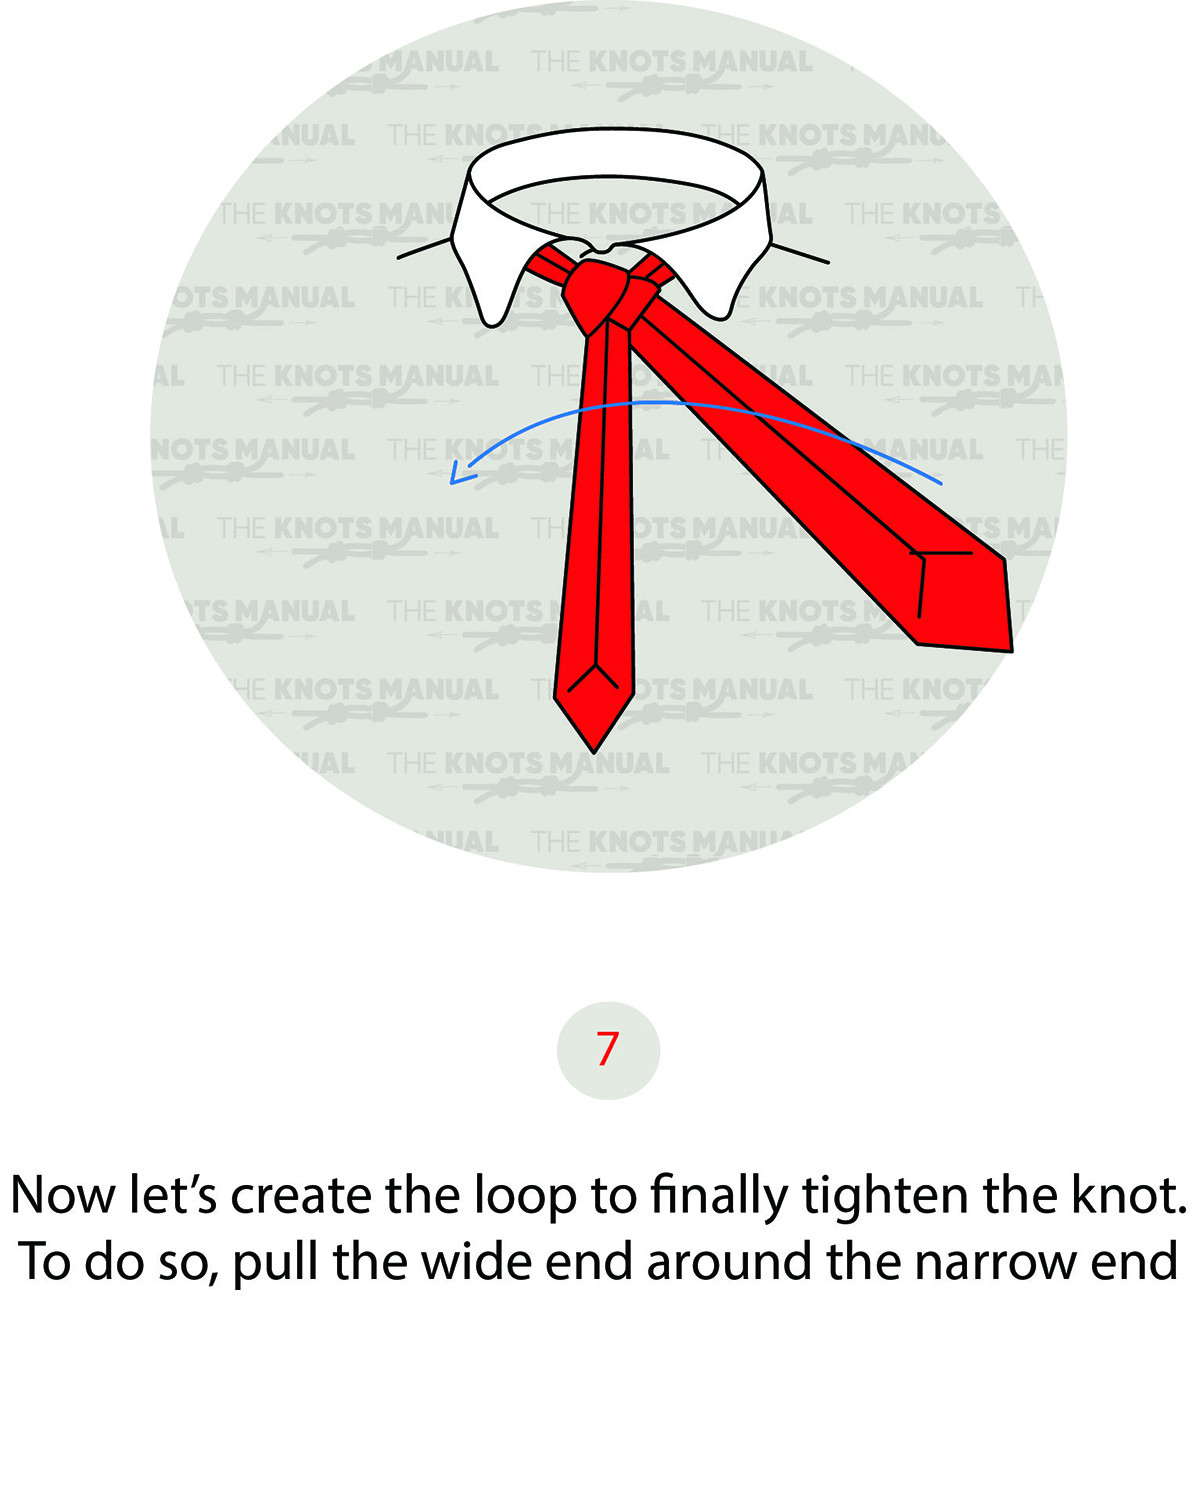
Pass the wide end sideways across the front of the knot.
Step 8:
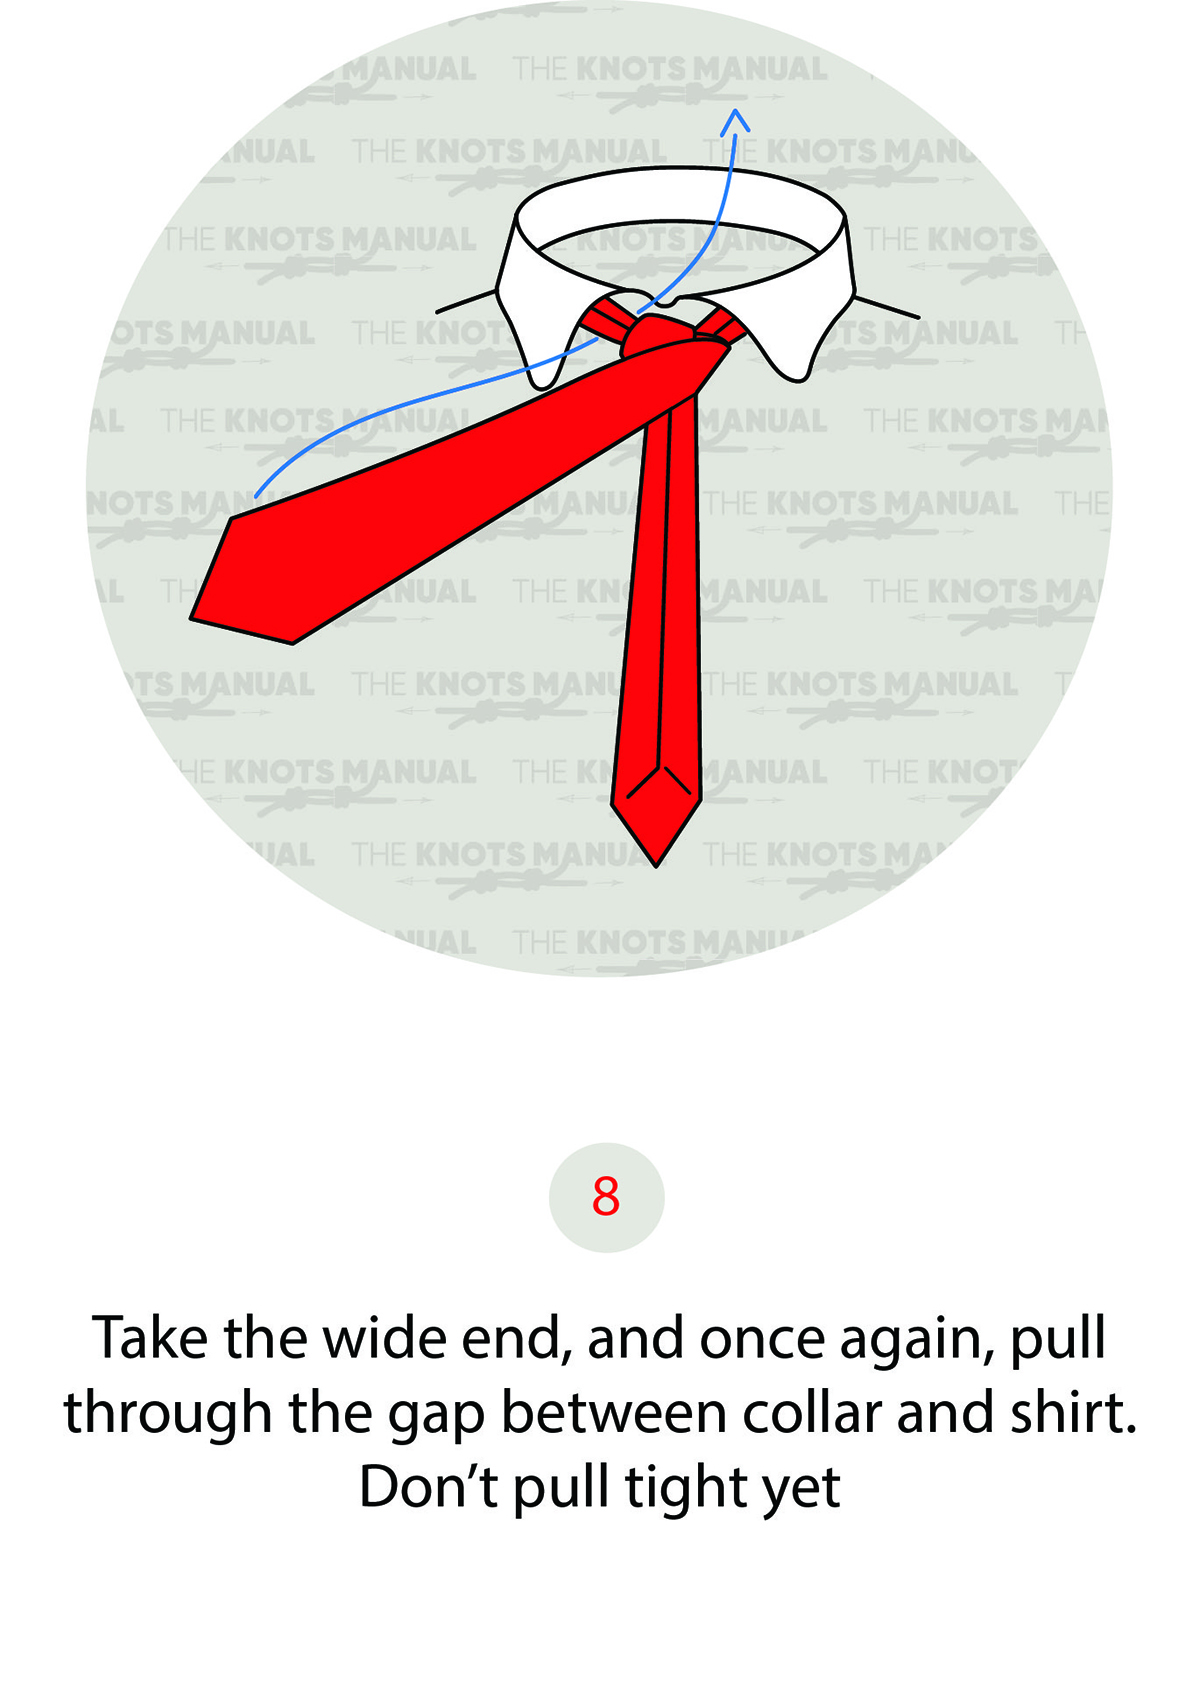
Pass it behind and over the knot.
Step 9:
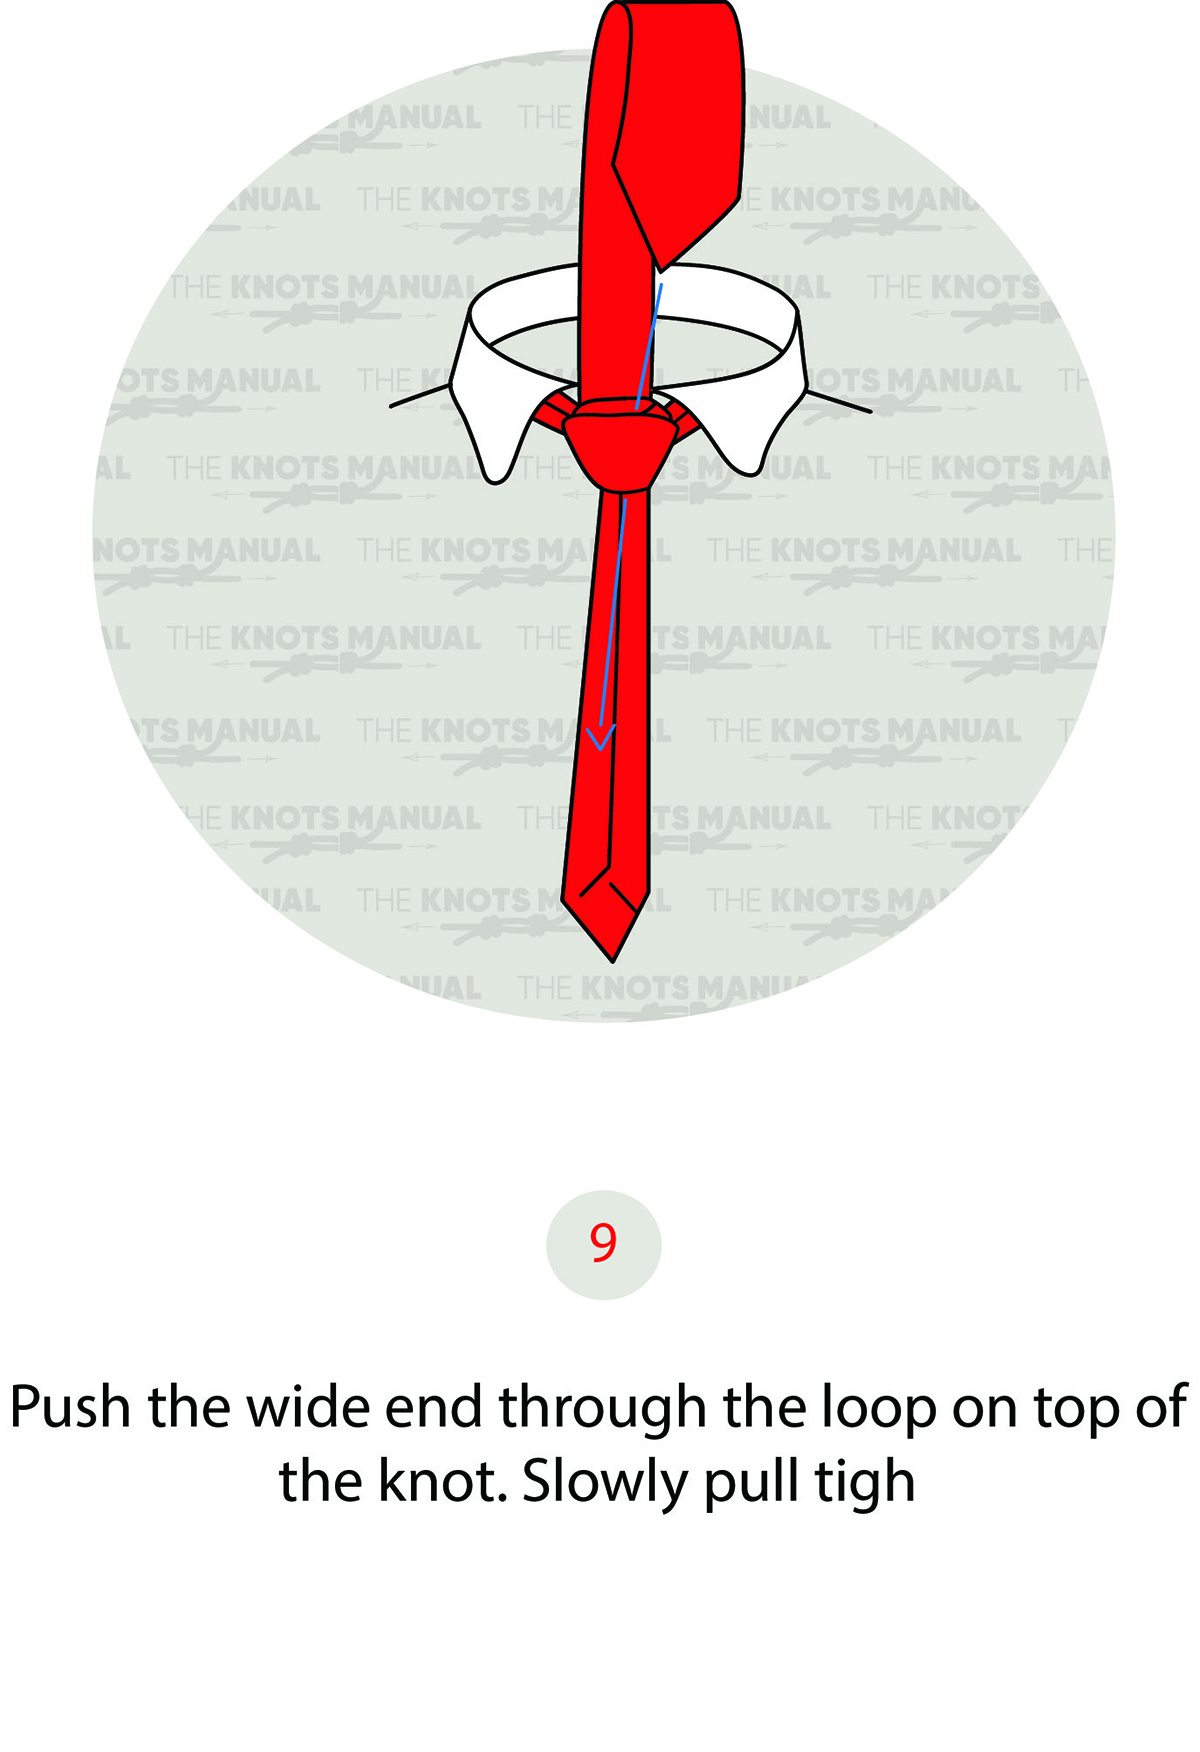
Pass it through the front loop.
Step 10:
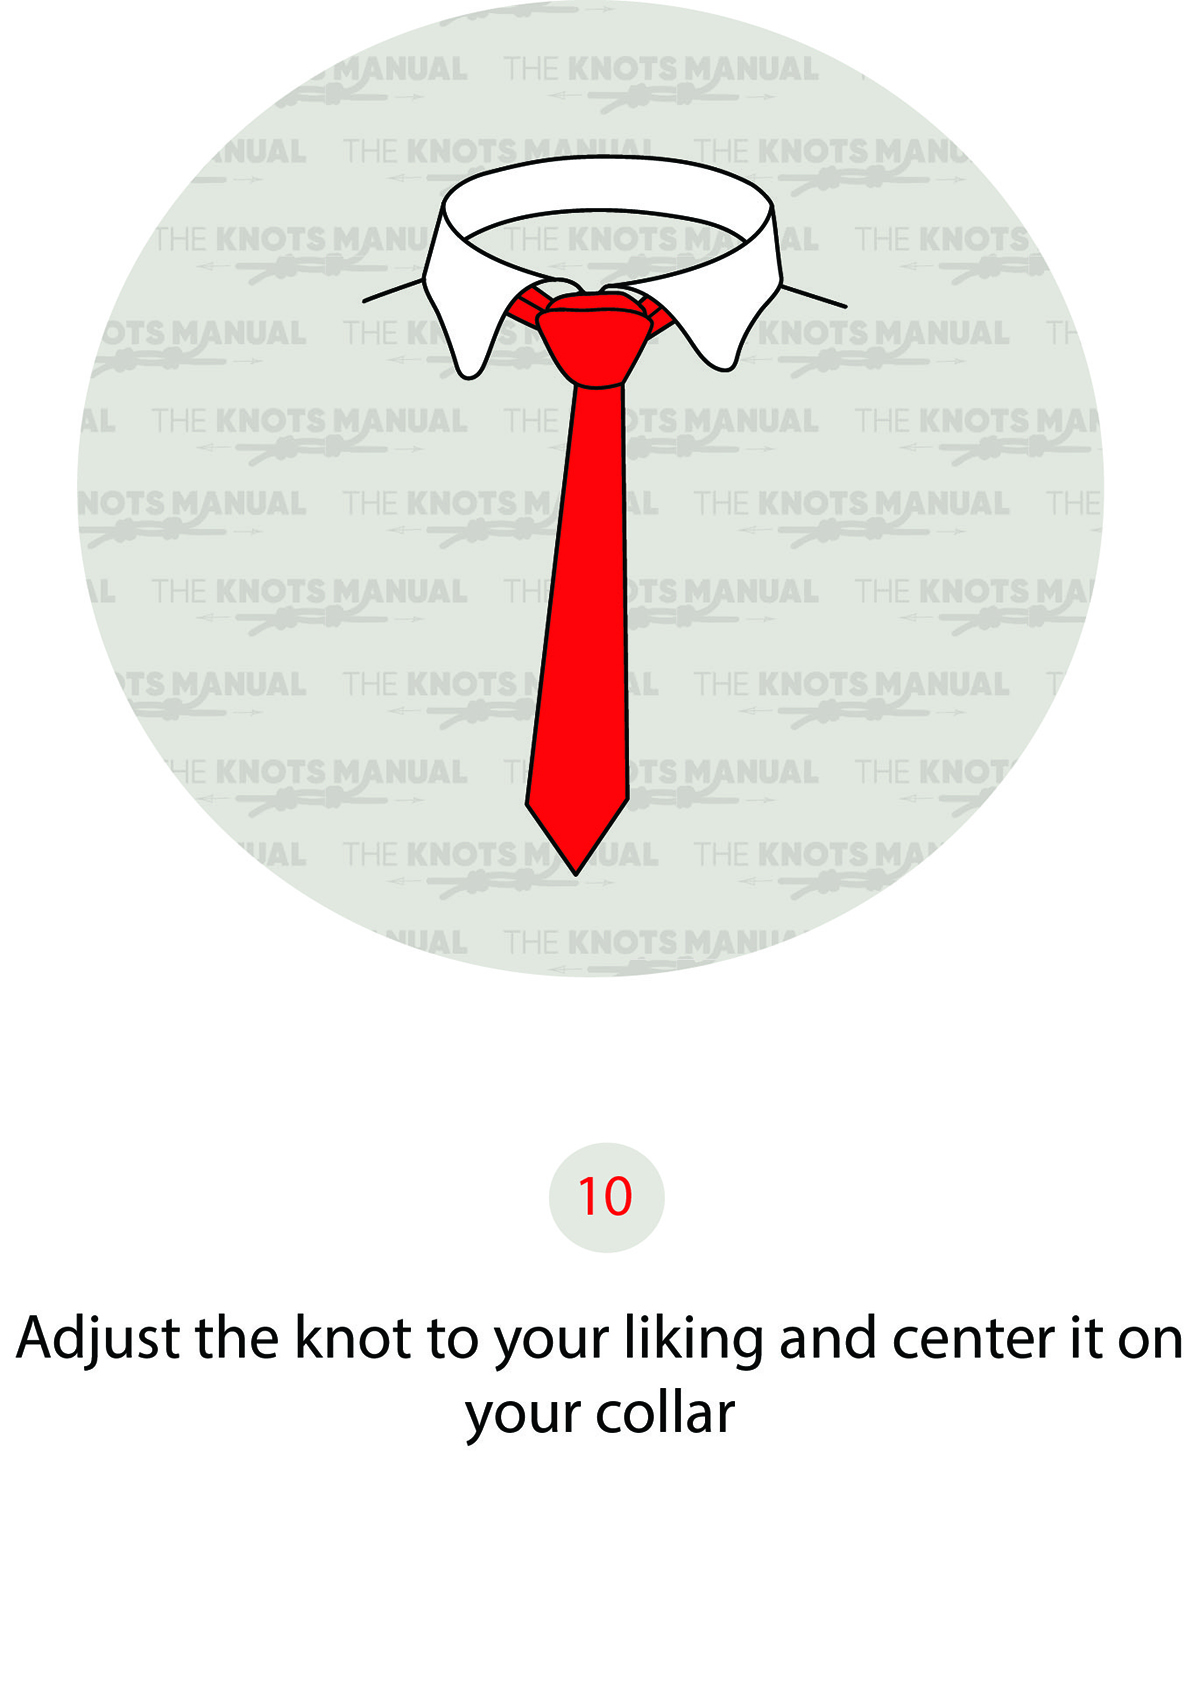
Tighten and dress to finish the Balthus Tie Knot.