The Kelvin Tie Knot is a less popular knot used to tie a tie. It forms a medium-sized, square-shaped knot, which is slightly bulkier than the Four-In-Hand (Simple) Knot.
It’s named after the British mathematician Lord Kelvin due to his contributions to the Knot Theory.
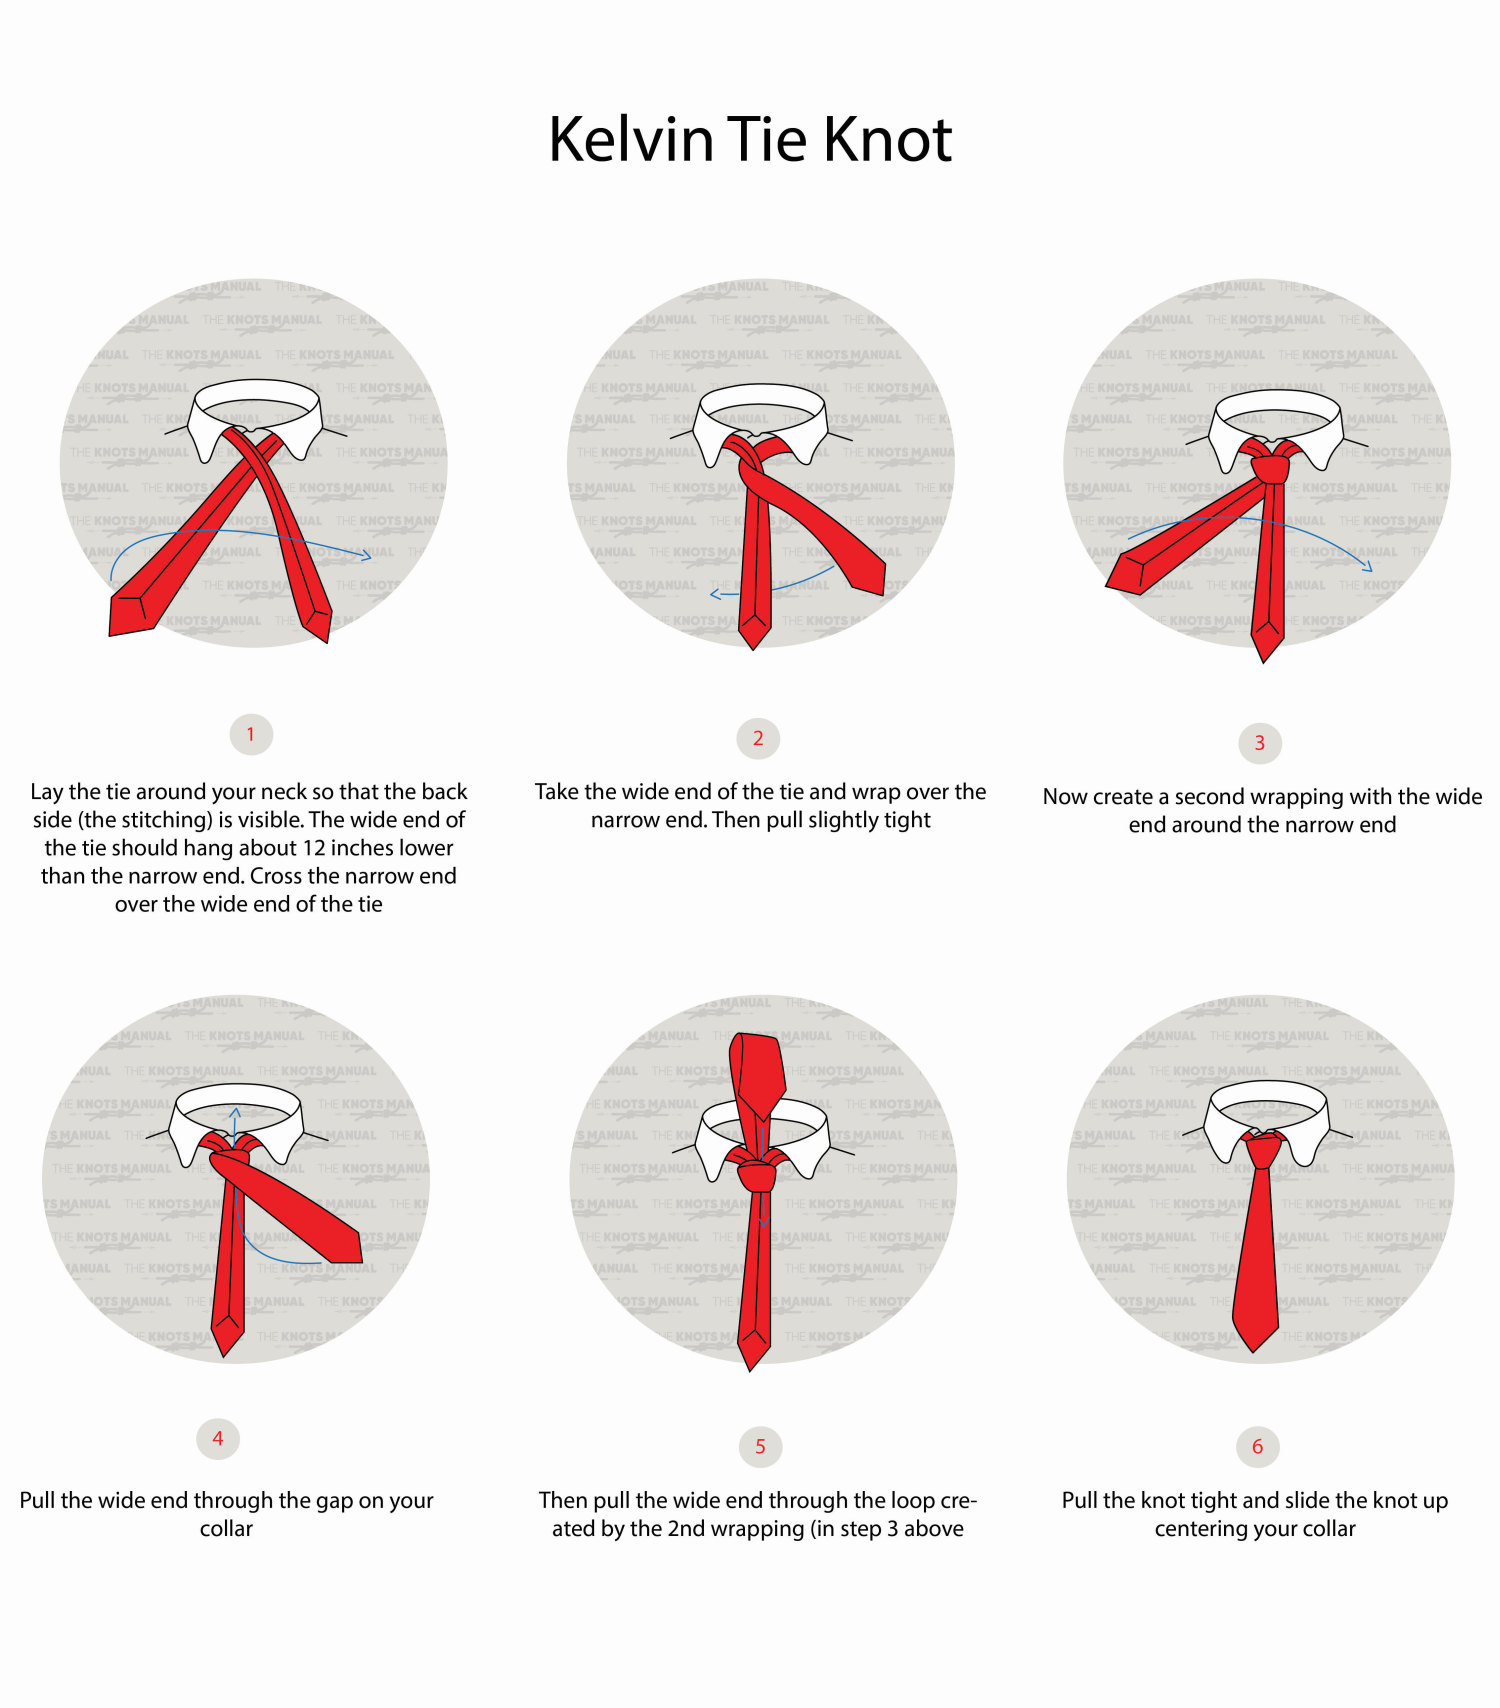
Quick Guide: Tying the Kelvin Tie Knot
To tie the Kelvin Tie Knot, lay out the tie around your neck with both ends in front of you. The tie should be laid out backward, with stitches visible. The short end of the tie should also be 12 inches (30 cm) shorter than the wide end.
Pass the wide end underneath the shorter one (step 1). Then wrap the wide end around it one and a half full turns (steps 2-3). Finally, pass the wide end over the top of the knot (from the backside) and through the front loop (steps 4-5).
As you tighten the knot, make sure to carefully dress it. If you do a good job at dressing the knot, it should look almost symmetrical and not lean over to either side.
About the Kelvin Tie Knot
The Kelvin Knot isn’t a very popular knot. It’s most commonly used by people who are looking for new ways to tie their ties.
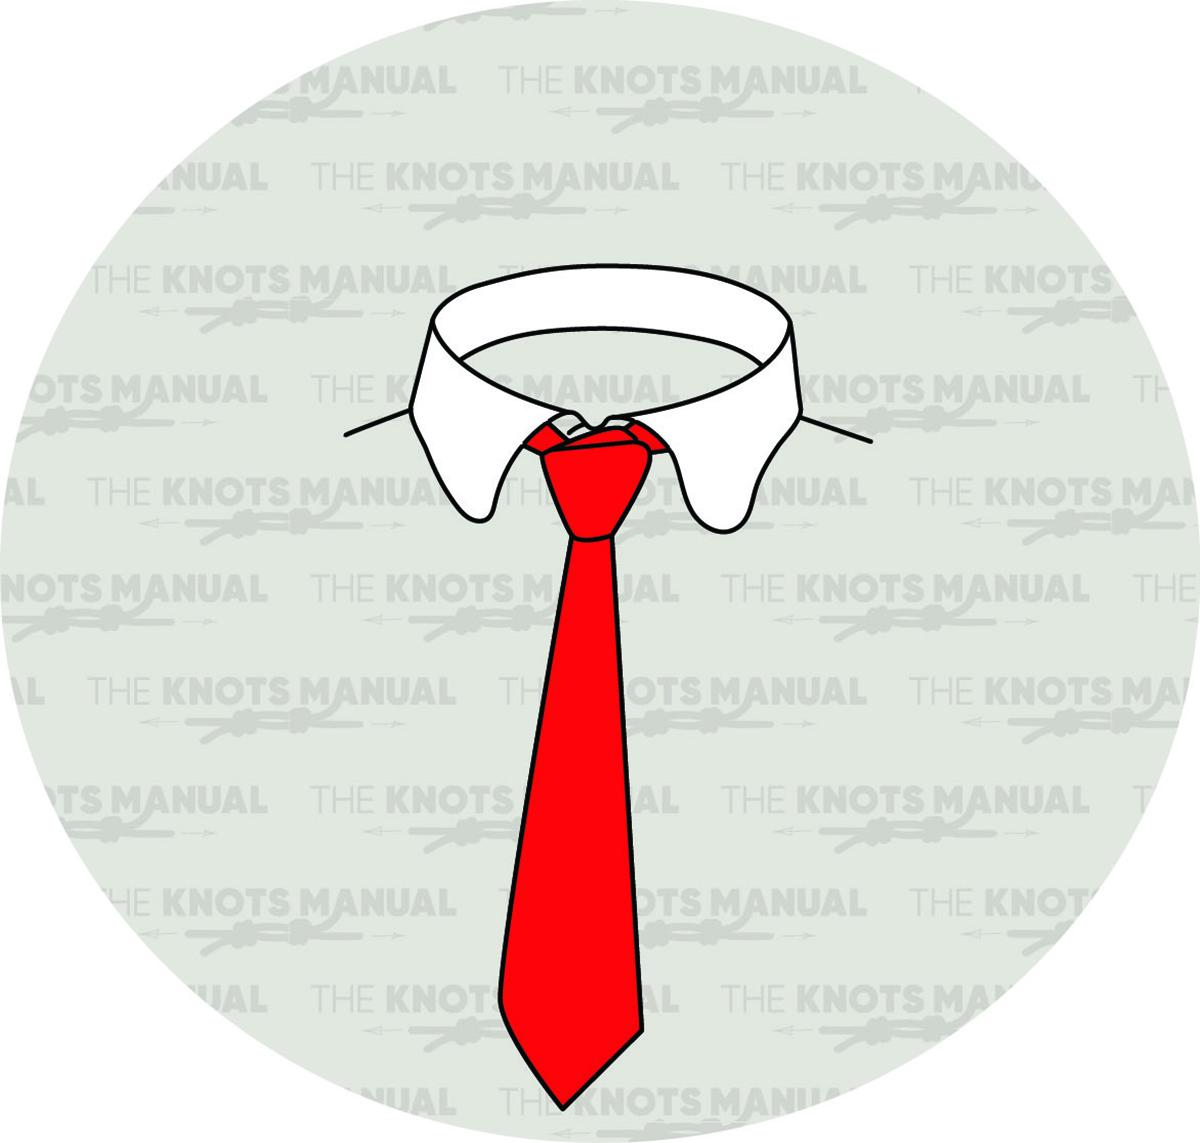
It creates a medium-sized knot that’s more square-shaped than triangular. It’s also one of the few knots that starts from the other side of the tie, with the stitches visible on the collar loop. This creates a very distinct and unique look, which is why this knot is perfect for evening events where you want to impress other guests.
It goes together well with all types of collars, but it looks best with wide-collar shirts. It also looks better with narrow ties.
One of the main advantages of the Kelvin Knot is that it is easy to tie. You only need to wrap the wide end around one and a half full turns, and then loop it through the front. It’s also easy to dress because it isn’t complicated.
The only downside is that the Kelvin Knot isn’t perfectly symmetrical. Because it’s tied only around one end, it leans over to one side. By adjusting the knot, you can make it more symmetrical, but it will lean back over time.
Knots Like the Kelvin Tie Knot
Four-In-Hand Tie Knot (Simple Knot): The Kelvin Knot is based on this knot. The only difference is that the Kelvin Knot involves one extra half-turn around the narrow end. This results in a slightly bulkier and more symmetric knot.
Pratt (Shelby) Tie Knot: Another very similar knot to the Kelvin Tie Knot. Its only difference is that in the second step, it’s tied around the top end, not the bottom one. This makes it look slightly more triangular.
Half Windsor Tie Knot: A very popular tie knot that’s slightly more symmetrical and bulkier than the Kelvin Tie Knot. It involves a few extra turns, so it’s also a bit more difficult to tie.
Full Windsor Tie Knot: A much bulkier and more triangular tie knot compared to the Kelvin Knot. It also is a bit more complicated, as it adds another turn to the Half Windsor Tie Knot.
Prince Albert Tie Knot: A slightly more square-shaped tie knot compared to the Kelvin Tie Knot, but with a similarly wide profile. The final end of the tie goes through two loops, which creates an interesting look.
Balthus Tie Knot: One of the largest tie knots because it involves many more turns than the Kelvin Tie Knot. It’s usually only worn on special occasions or with extra-thin ties.
Step-By-Step Guide: How to Tie the Kelvin Tie Knot
A step-by-step guide on how to tie the Kelvin Tie Knot.
Step 1:
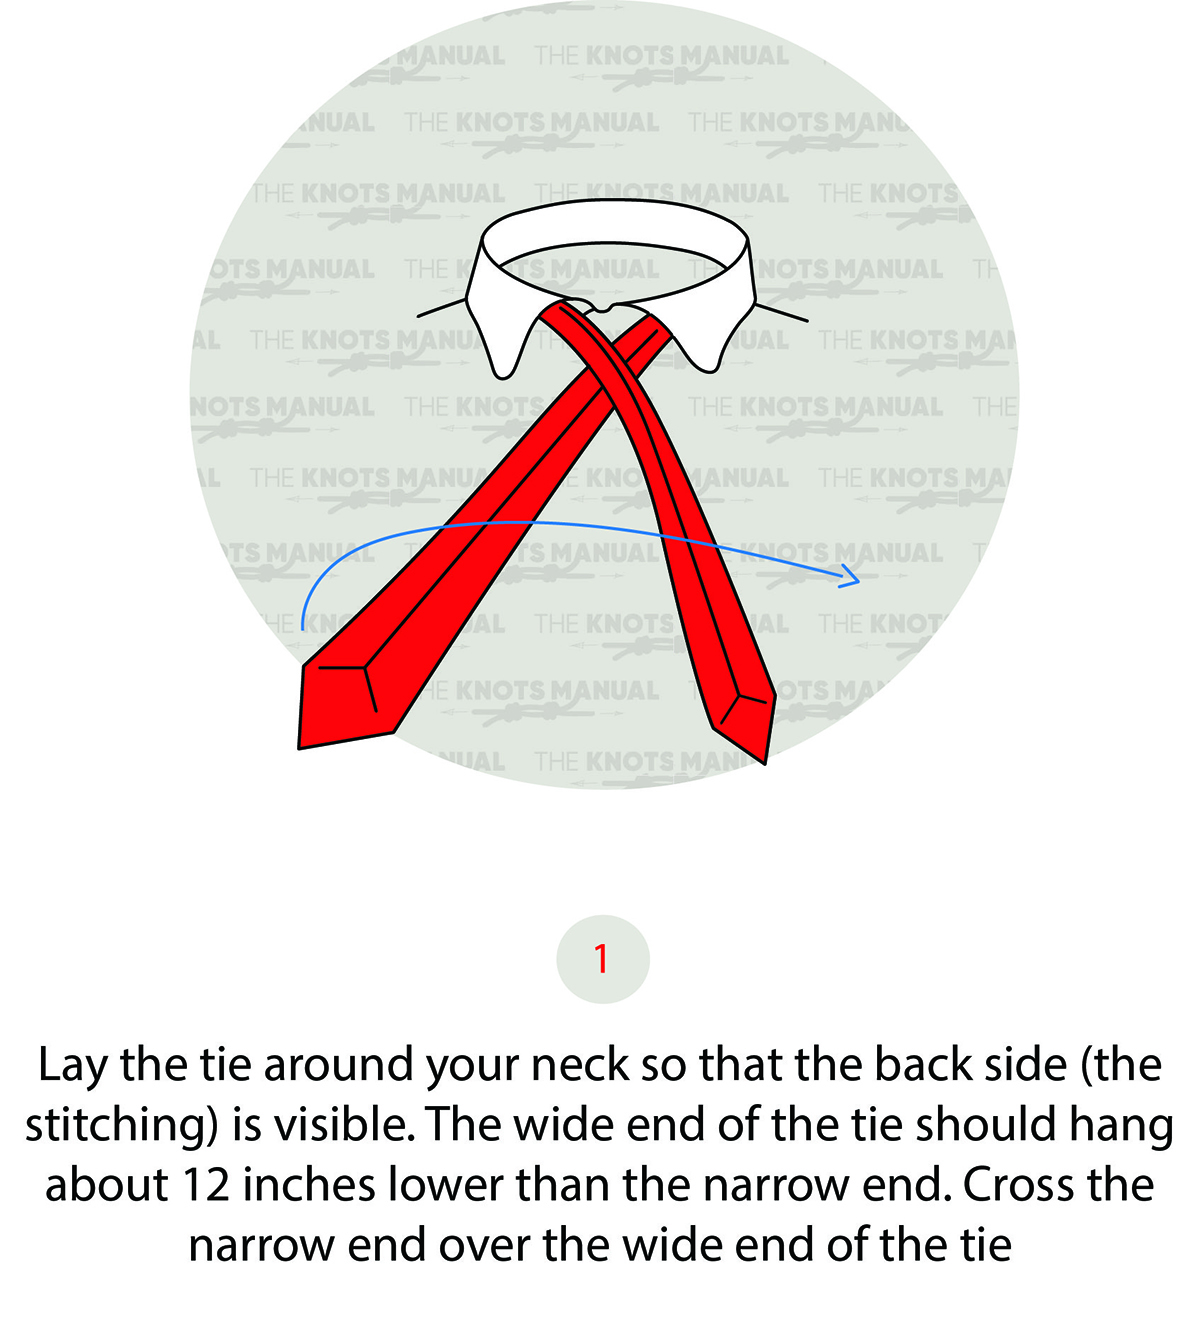
Place the tie around your neck as illustrated above, with stitches visible and the wide end 12 inches (30 cm) longer.
Step 2:
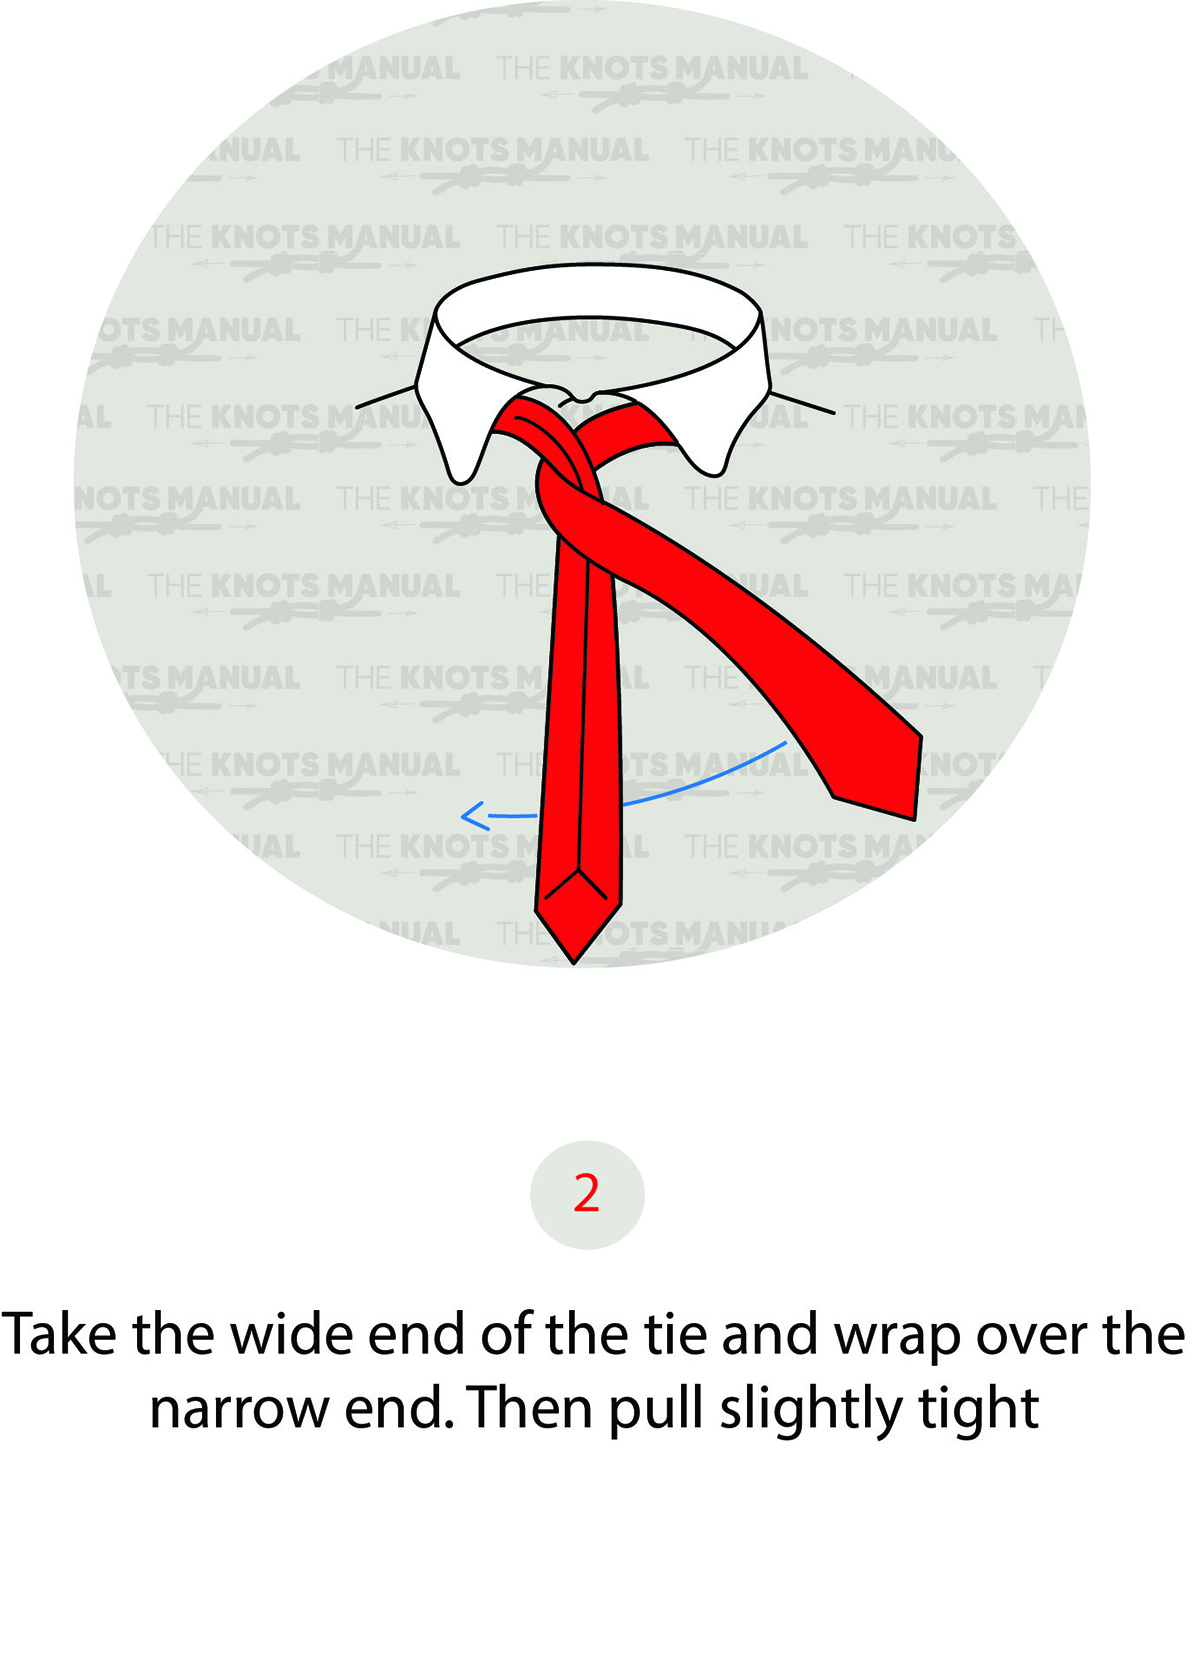
Wrap the wide end around the narrow one from the backside.
Step 3:
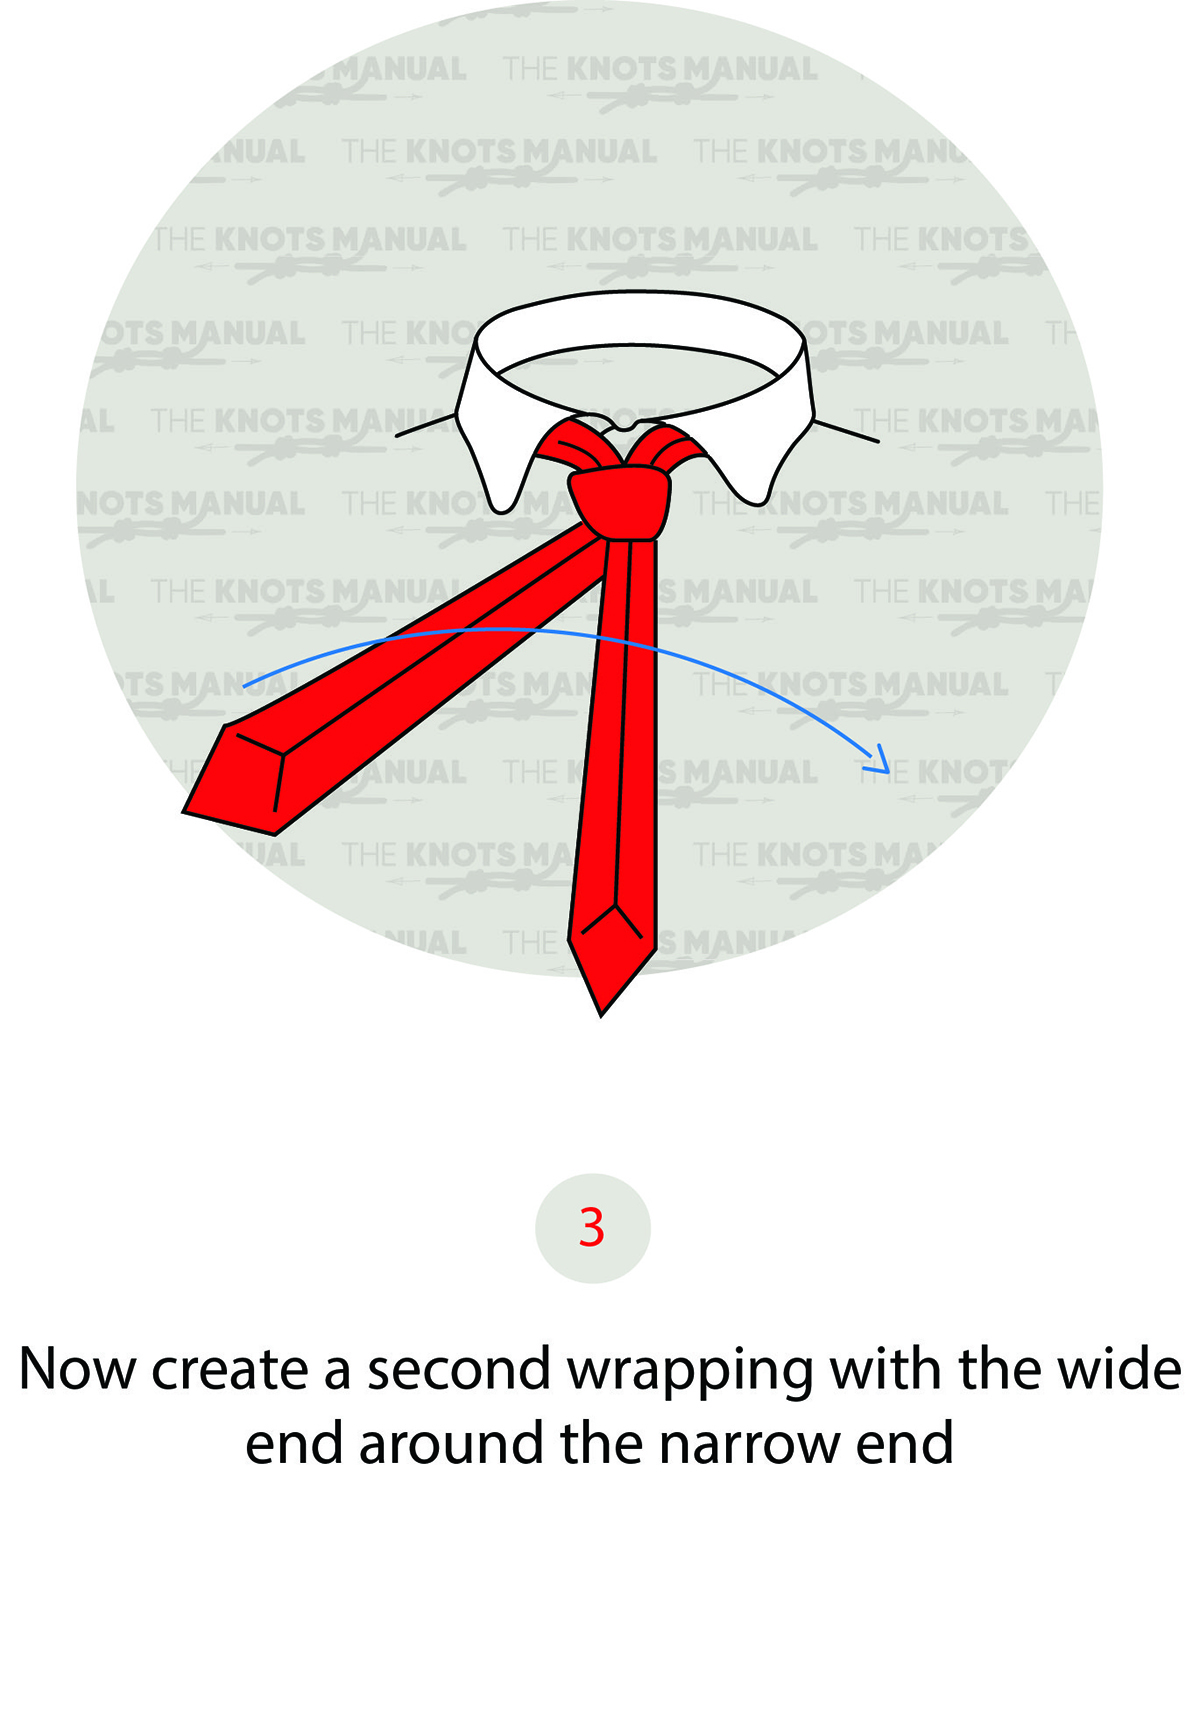
Now make another half-turn around the wide end.
Step 4:
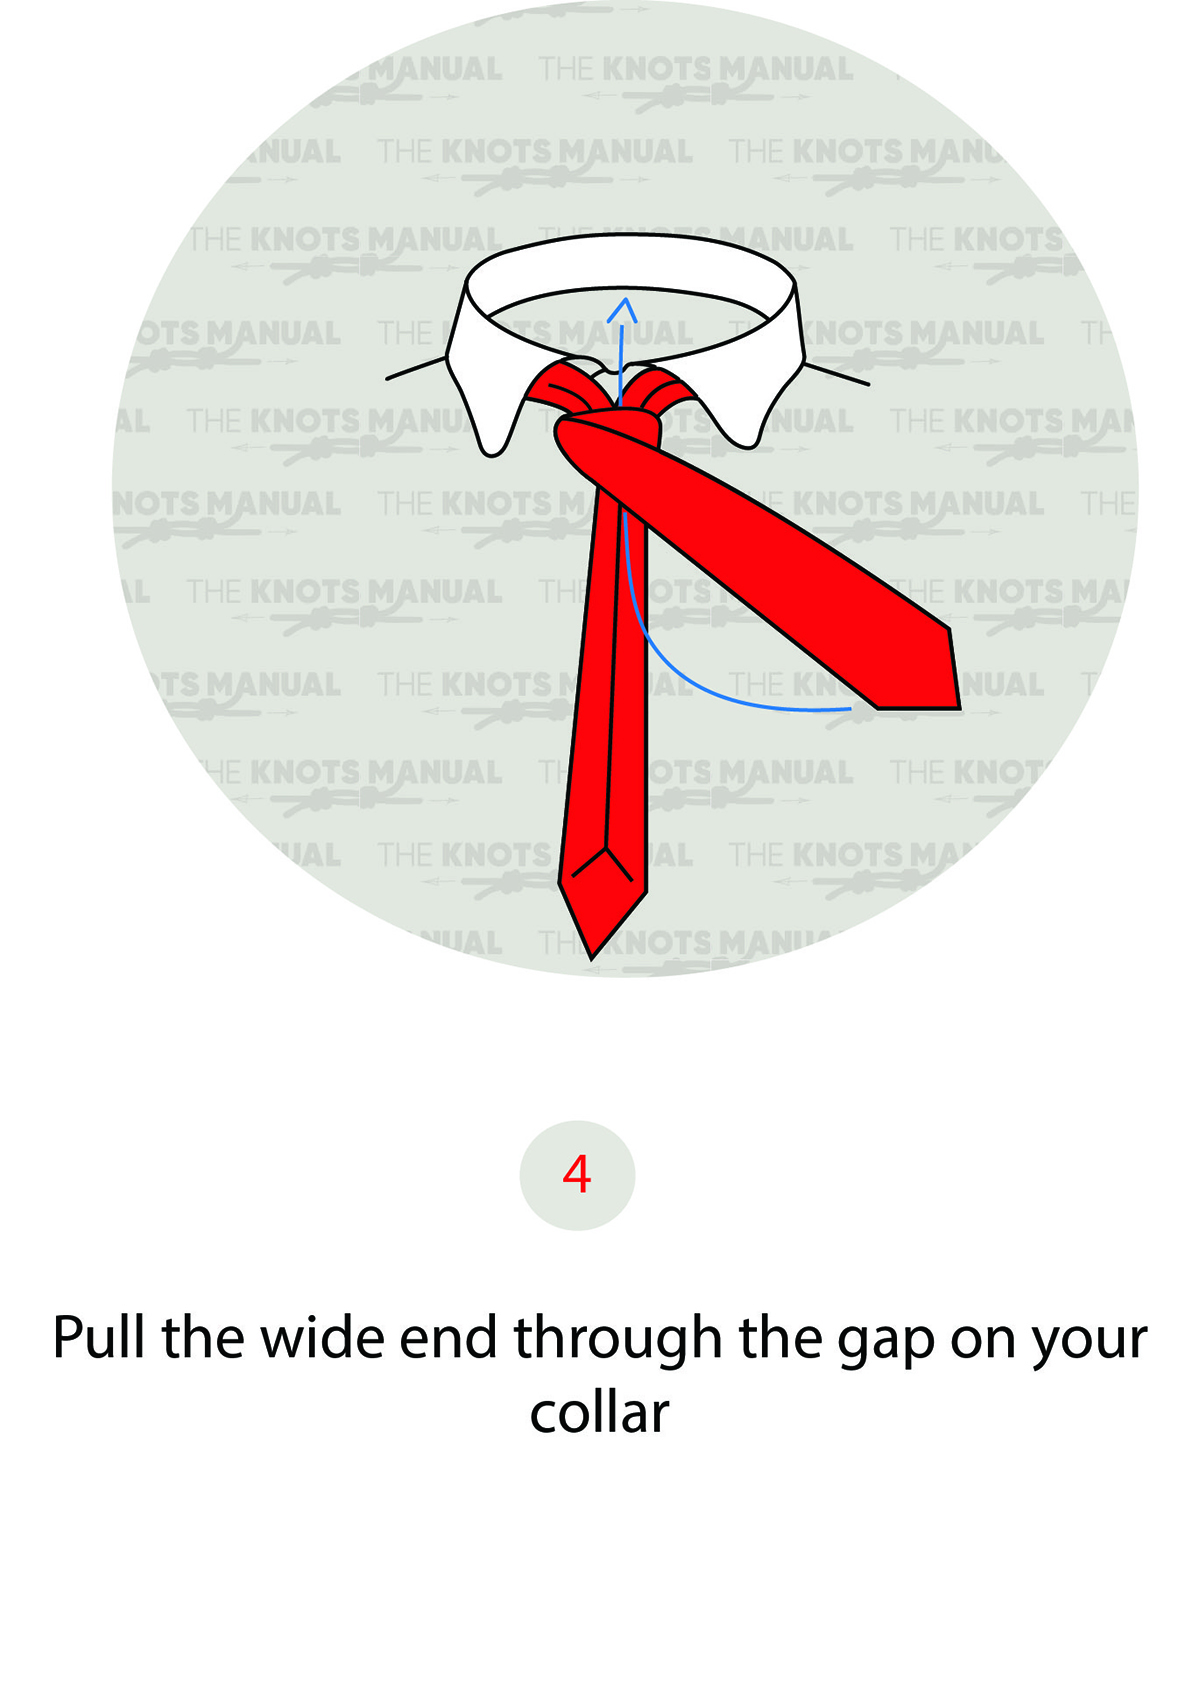
Pass the wide end over the top of the knot from the backside.
Step 5:

Pass the wide end through the front loop.
Step 6:
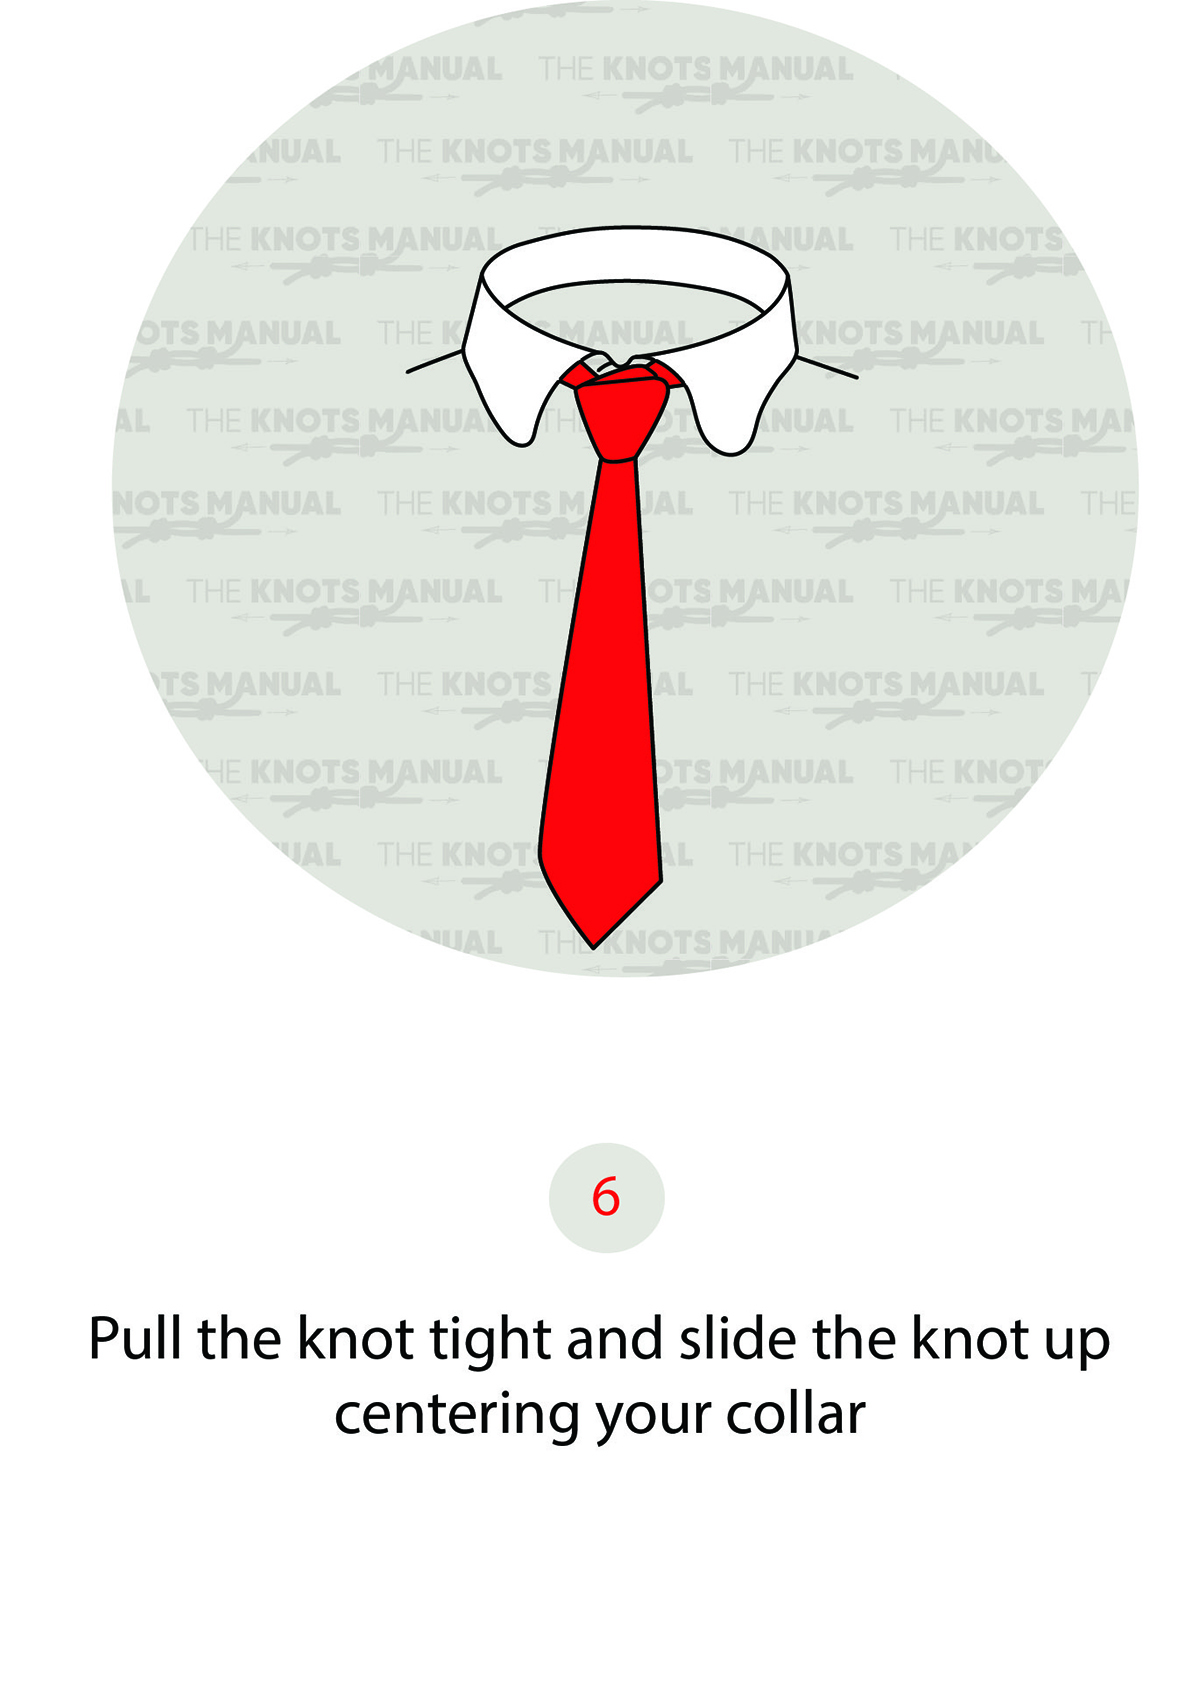
Tighten and dress to finish the Kelvin Knot.