The Four-In-Hand Tie Knot is one of the simplest, smallest, and most popular tie knots. It’s usually taught to kids, people who are new to wearing ties, or to people who value simplicity.
In other sources, it’s also sometimes referred to as the Simple Knot or the Schoolboy Knot.
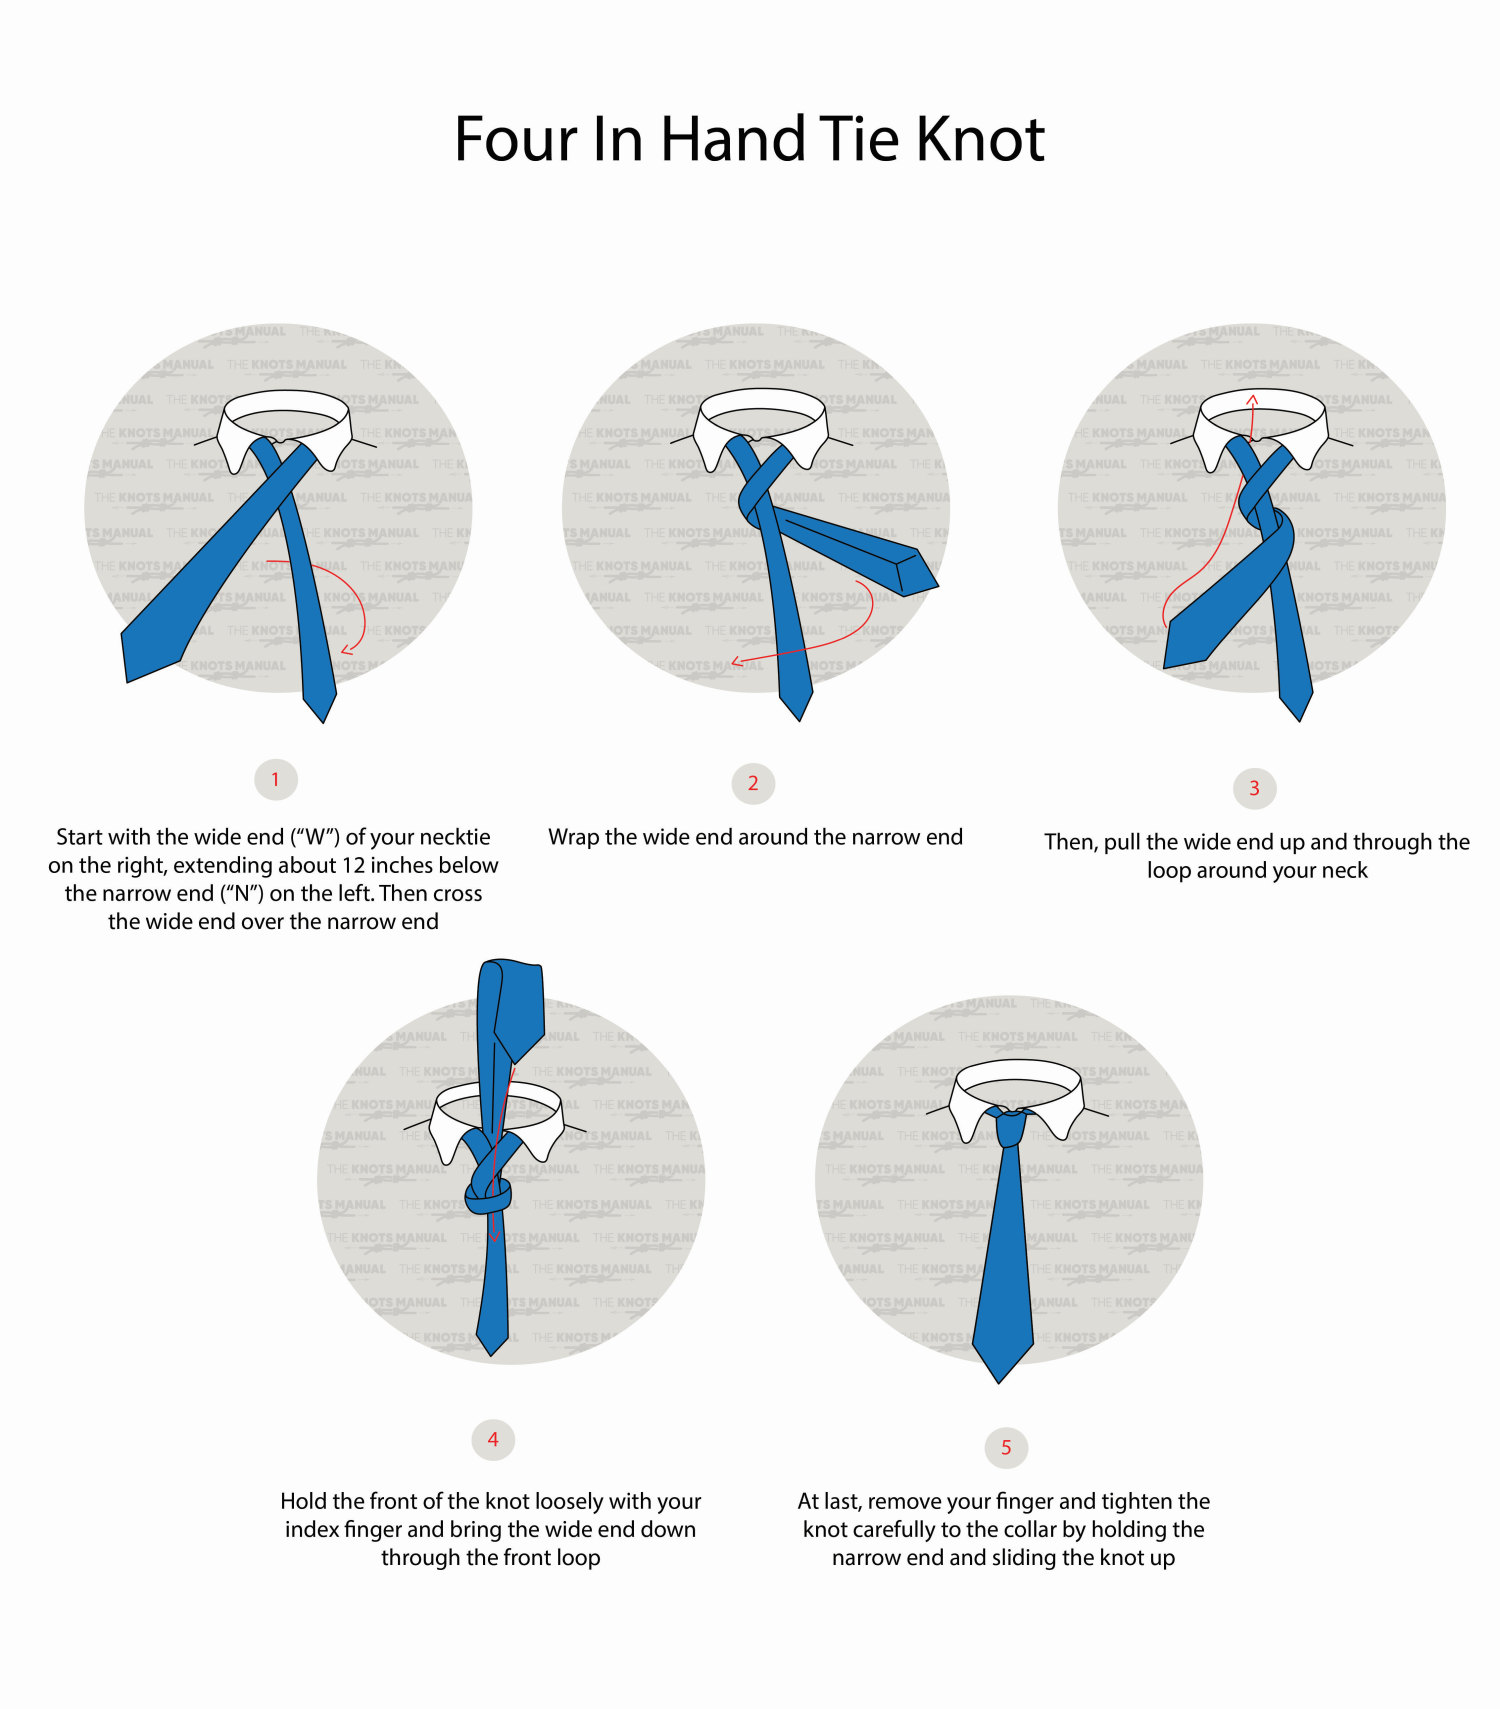
Quick Guide: Tying the Four-In-Hand Tie Knot
To tie the Four-In-Hand Tie Knot, lay out the tie around your neck. The wider end of the tie should be 12 inches (30) cm longer than the narrow end. Now cross it over the narrow end (step 1).
Wrap the wide end around the narrow end one full turn (step 2). Next, pass the wide end over the knot from the back (step 3) and through the front loop (step 4).
Dress the knot and dress it by holding it with one hand while pulling the end with your other hand. It should look symmetrical and tightened.
About the Four-In-Hand Tie Knot
The Four-In-Hand Tie Knot has a very small profile due to its simplicity. It also looks more square-shaped than triangular.
It goes together well with all types of collars (wide and short). Due to its small shape, it looks good when tied with ties that are made from thicker materials.
Its main benefit is that it is so easy to tie. You just need to wrap the wide end around the short one, and then pass the end through the front loop. That’s why it’s often taught to kids as the go-to knot for the beginning of the school year and other events. It’s also very commonly used by people who wear suits every day to the office.
Another benefit is that it is a self-releasing tie knot. If you pull the narrow end through it, it unties completely.
The main downside of the Four-In-Hand Knot is that it isn’t perfectly symmetrical. It leans over to one side, which means that you’ll have to correct it somewhat frequently if you want to look professional.
Knots Like the Four-In-Hand Tie Knot:
Half Windsor Tie Knot: Another popular and easy tie Knot. It has a slightly bulkier and more triangular profile than the Four-In-Hand Tie Knot.
Full Windsor Tie Knot: The most popular tie knot. It adds another extra turn compared to the Half Windsor Tie Knot, which makes it bulkier, more triangular, and more symmetrical. If the Four-In-Hand knot is more of an everyday knot, the Full Windsor Knot is better suited for official events.
Prince Albert Tie Knot: Tied identically to the Four-In-Hand Knot, except with one more turn around the narrow end of the tie. The end is also passed through two loops, instead of one. It offers a similar look, only bulkier.
Balthus Tie Knot: A more bulkier version of the Full Windsor Tie Knot. This knot is much less frequently used compared to the Four-In-Hand Tie Knot.
Pratt Tie Knot: A medium-size tie knot that’s only marginally more difficult than the Four-In-Hand Tie Knot. Its main benefits are that it is more symmetrical and has a larger profile.
Kelvin Tie Knot: A very similar knot to the Four-In-Hand Tie Knot. It has a bulkier profile because it’s wrapped around the narrow end two times.
Step-By-Step Guide: How to Tie the Four-In-Hand Tie Knot
A step-by-step guide on how to tie the Four-In-Hand Tie Knot.
Step 1:
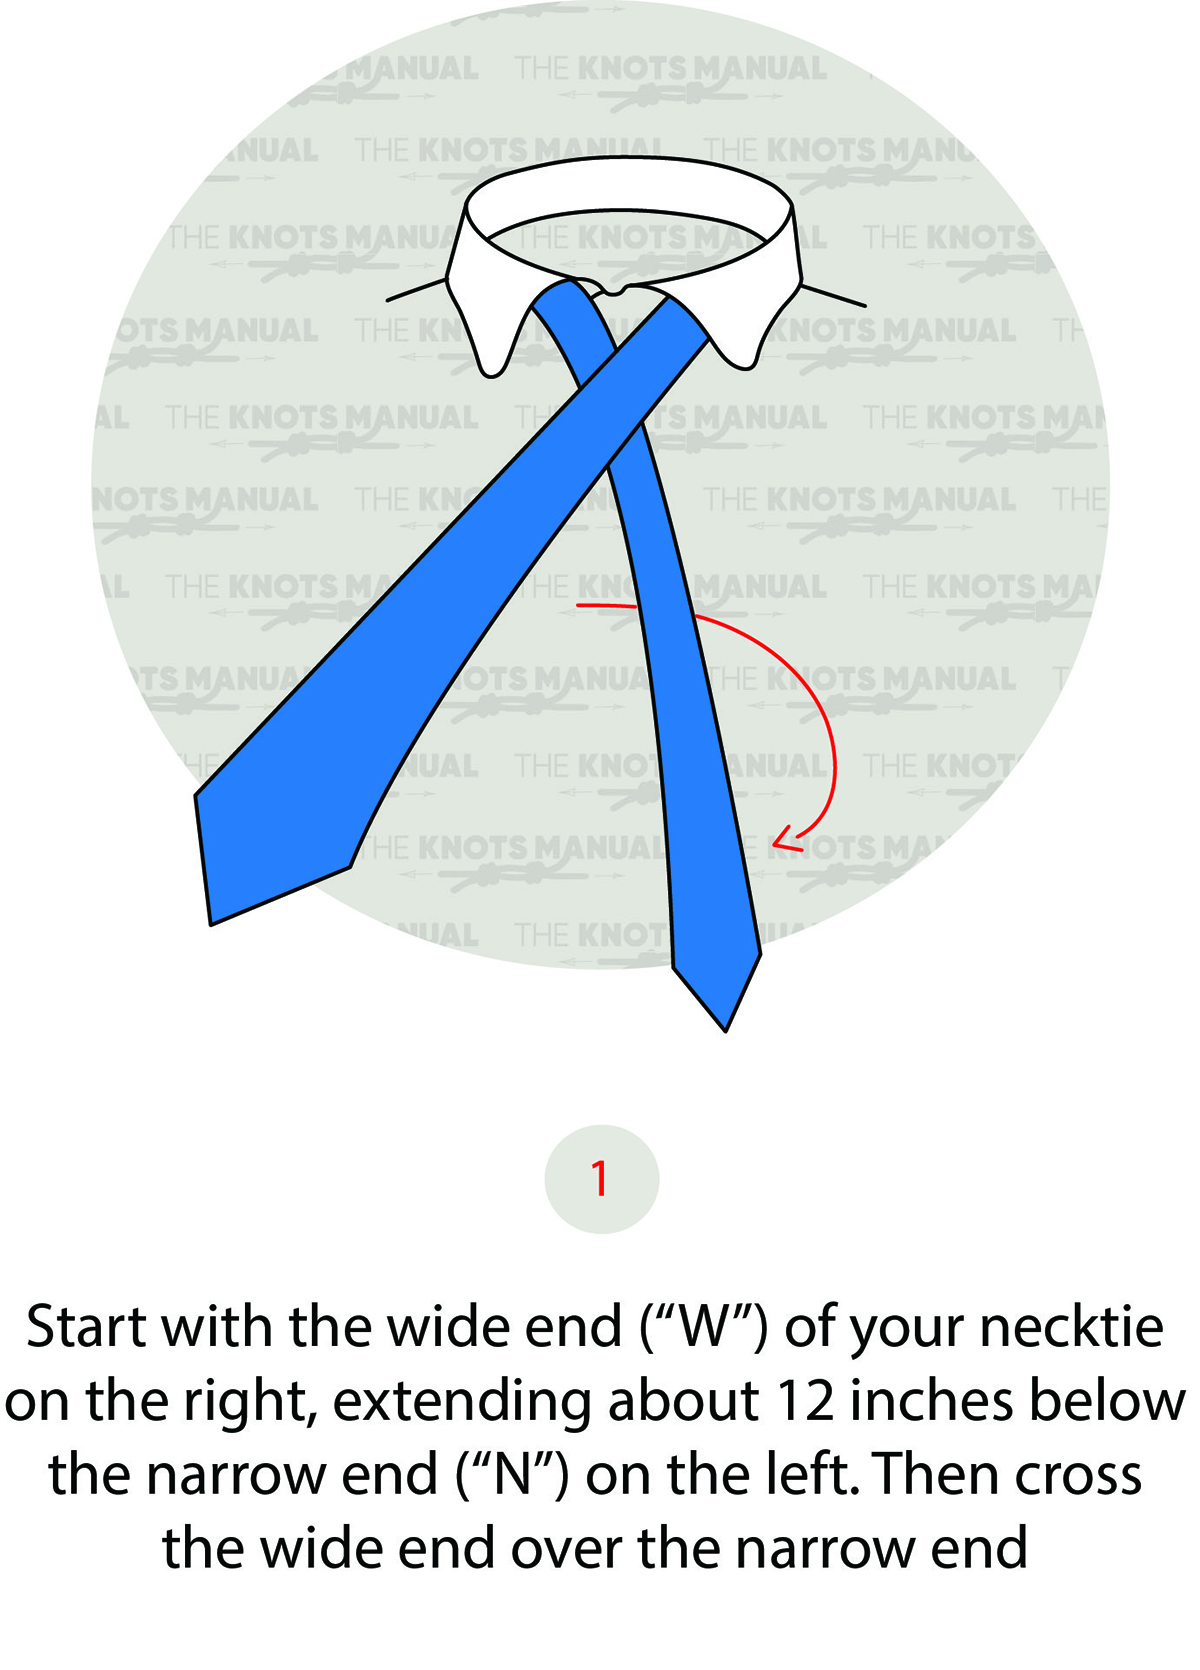
Place the tie around your neck with both ends in front. The wide tie end should be 12 inches (30 cm) longer than the short one.
Step 2:
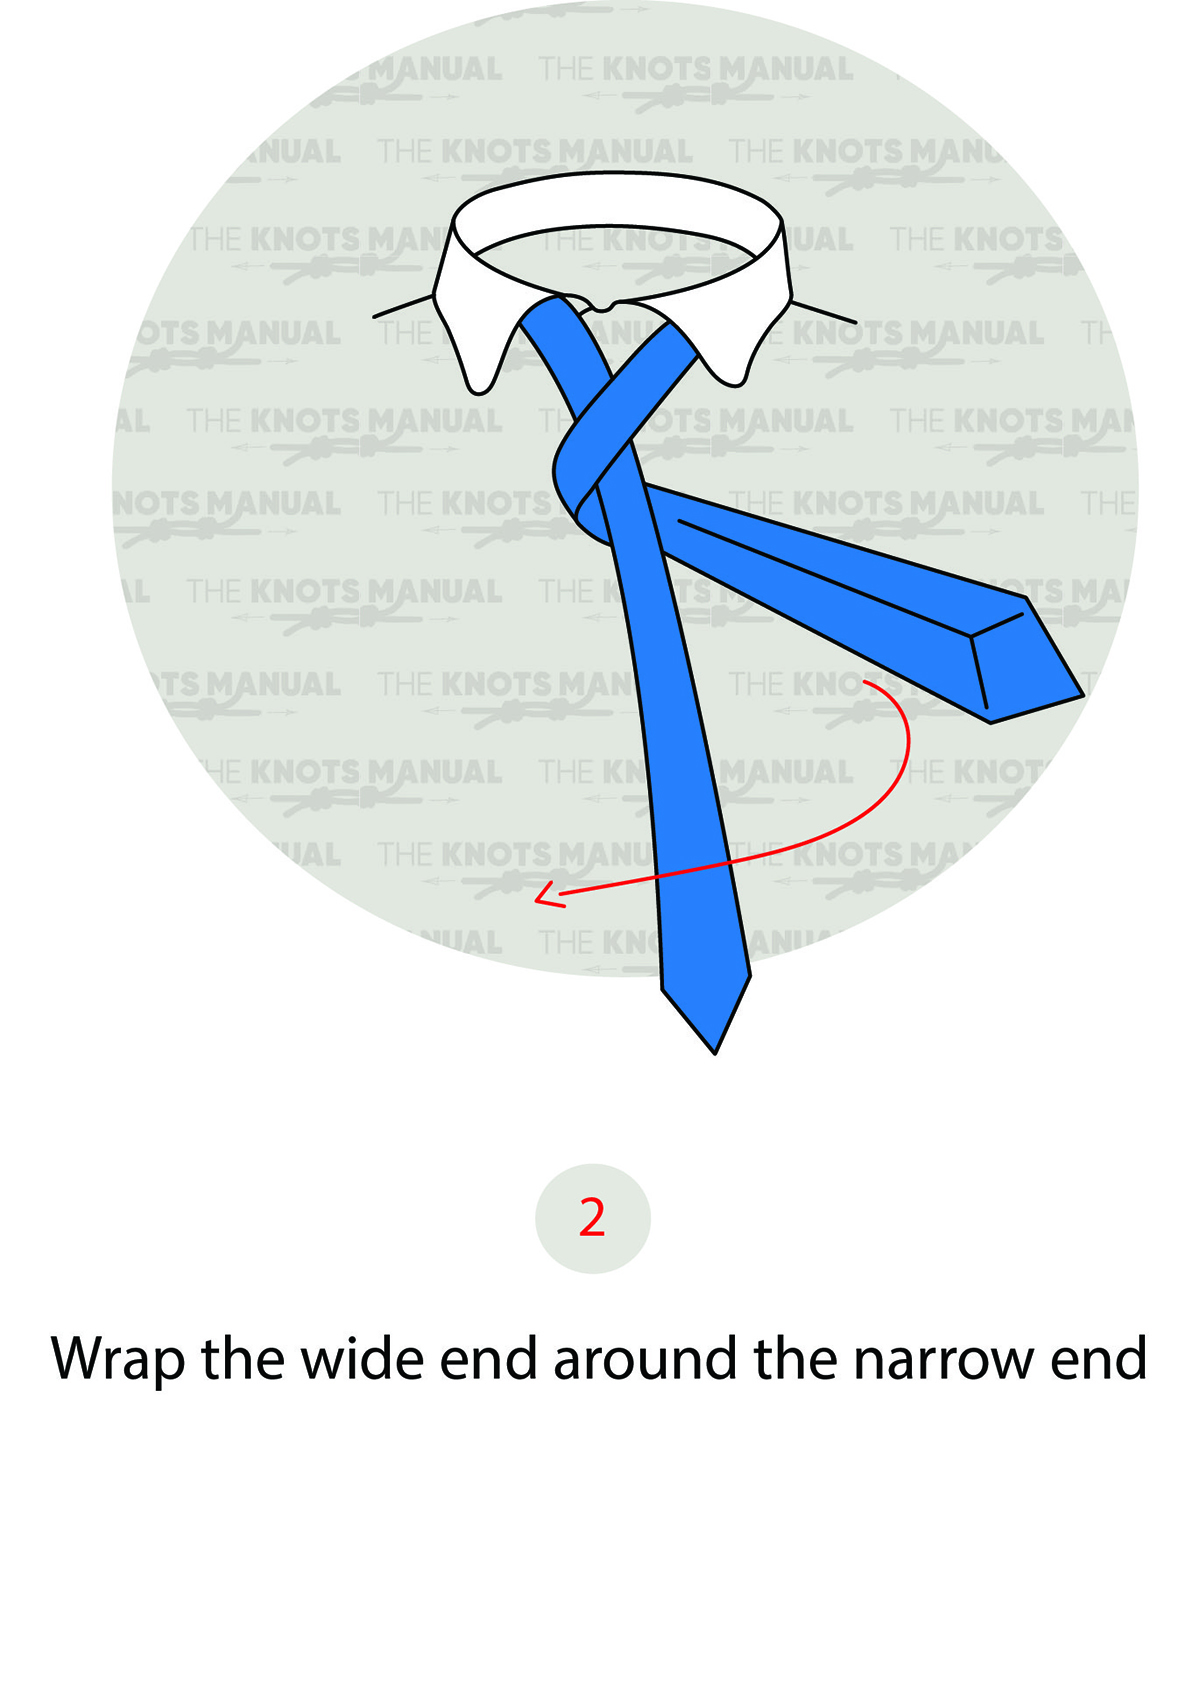
Wrap the wide end around the narrow end.
Step 3:
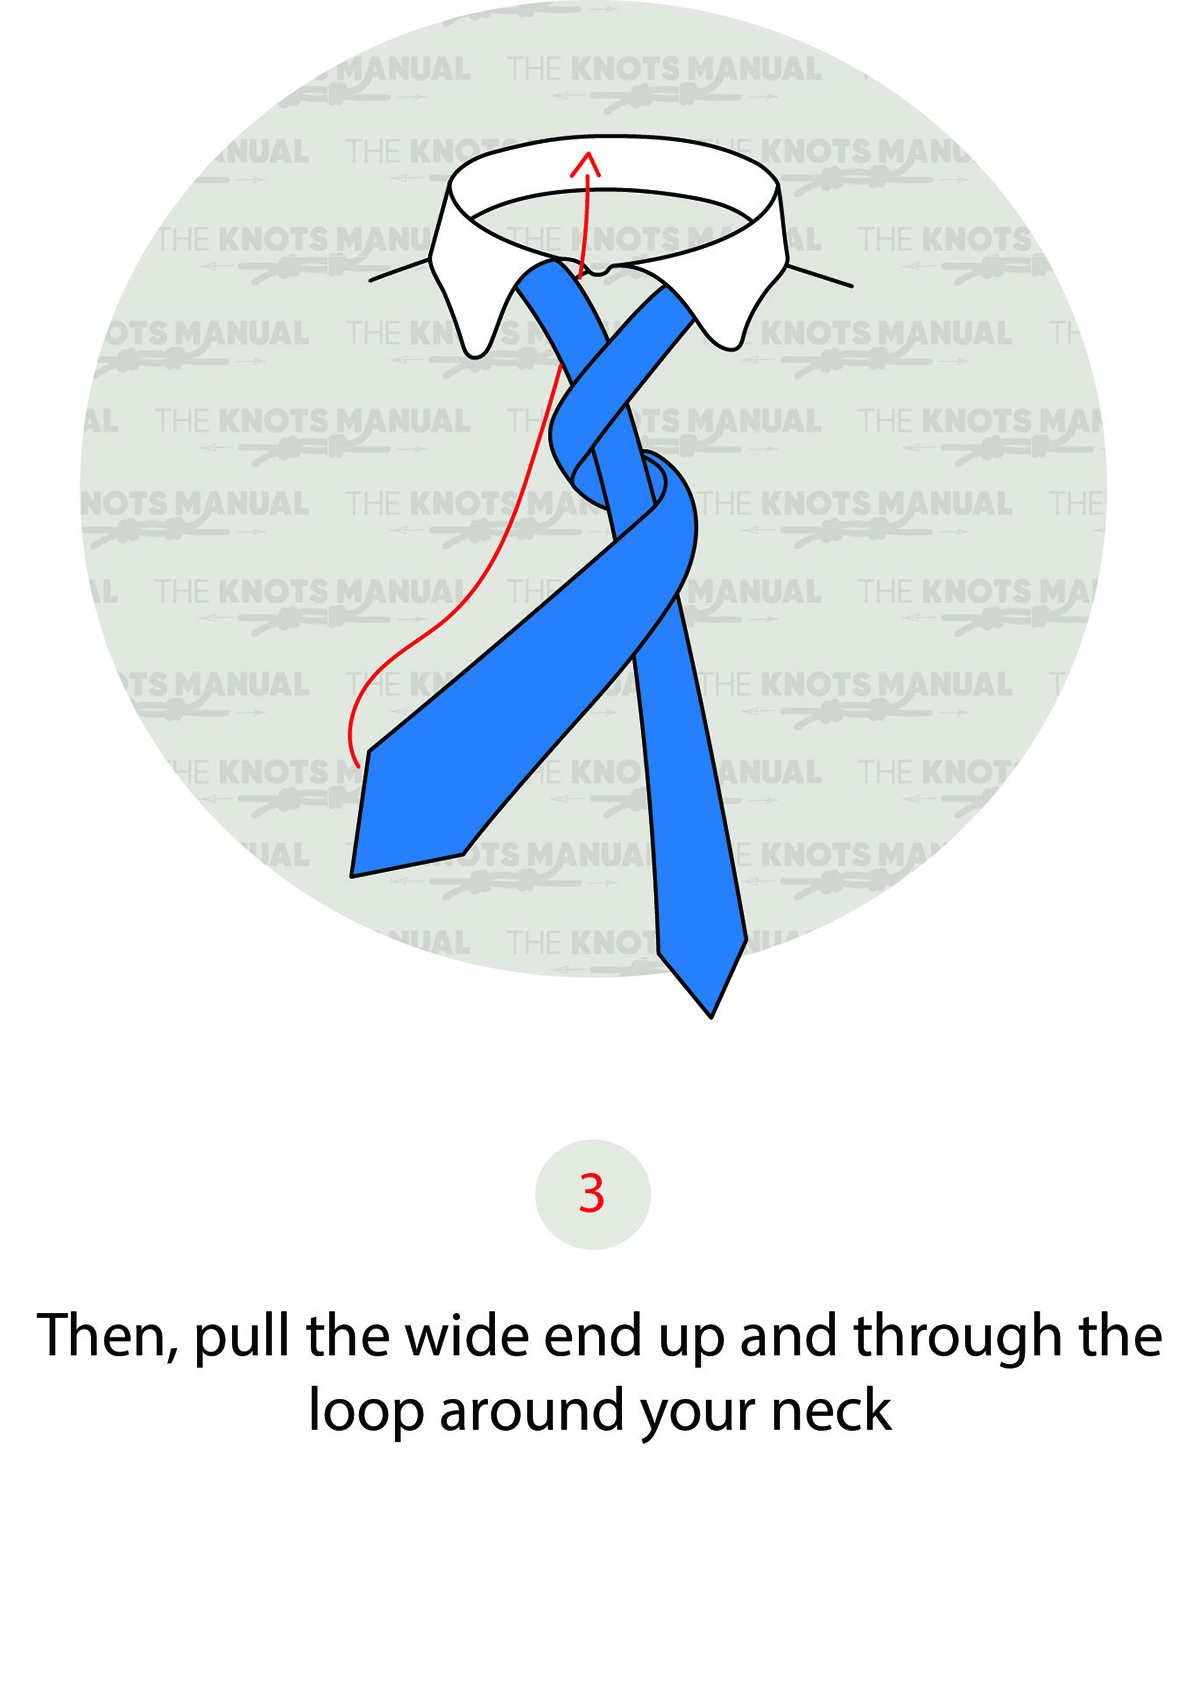
Go behind the knot and over the top from the back.
Step 4:
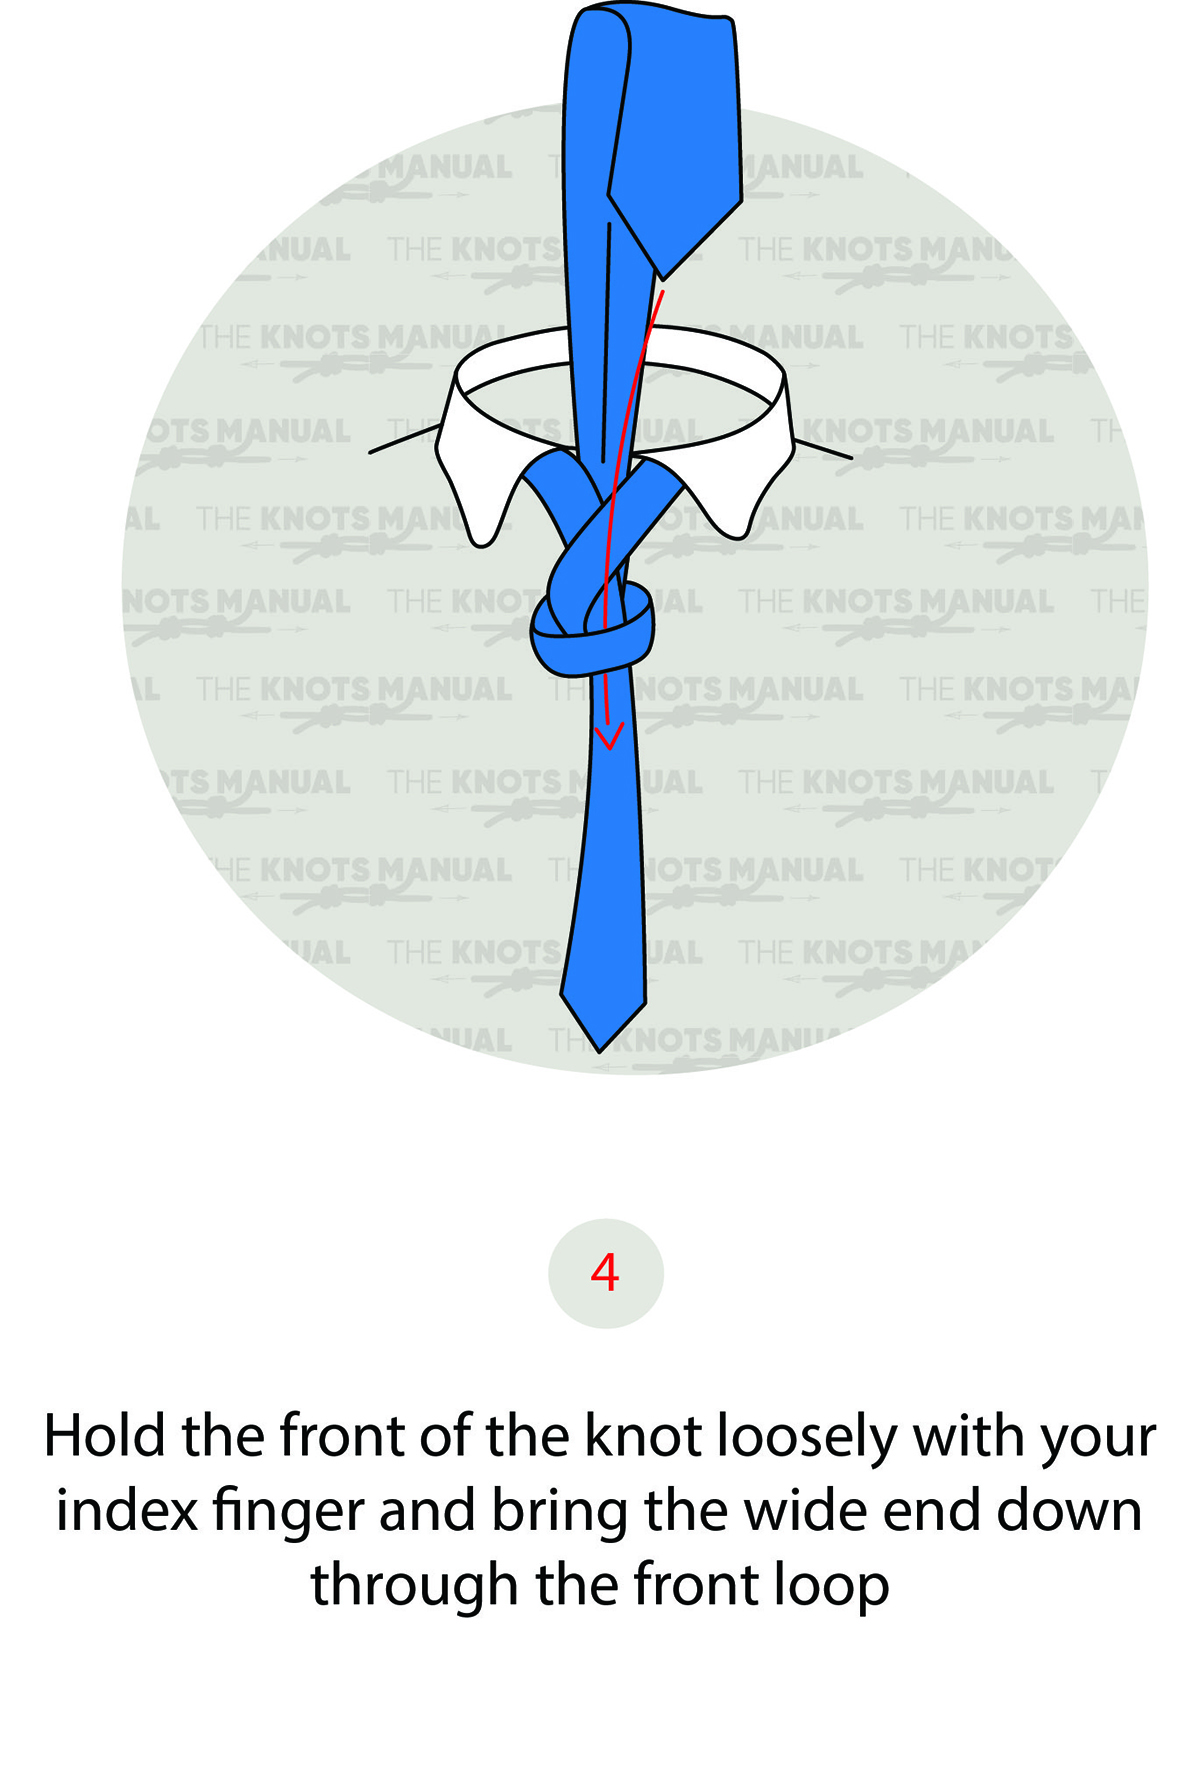
Pass the wide end through the front loop.
Step 5:
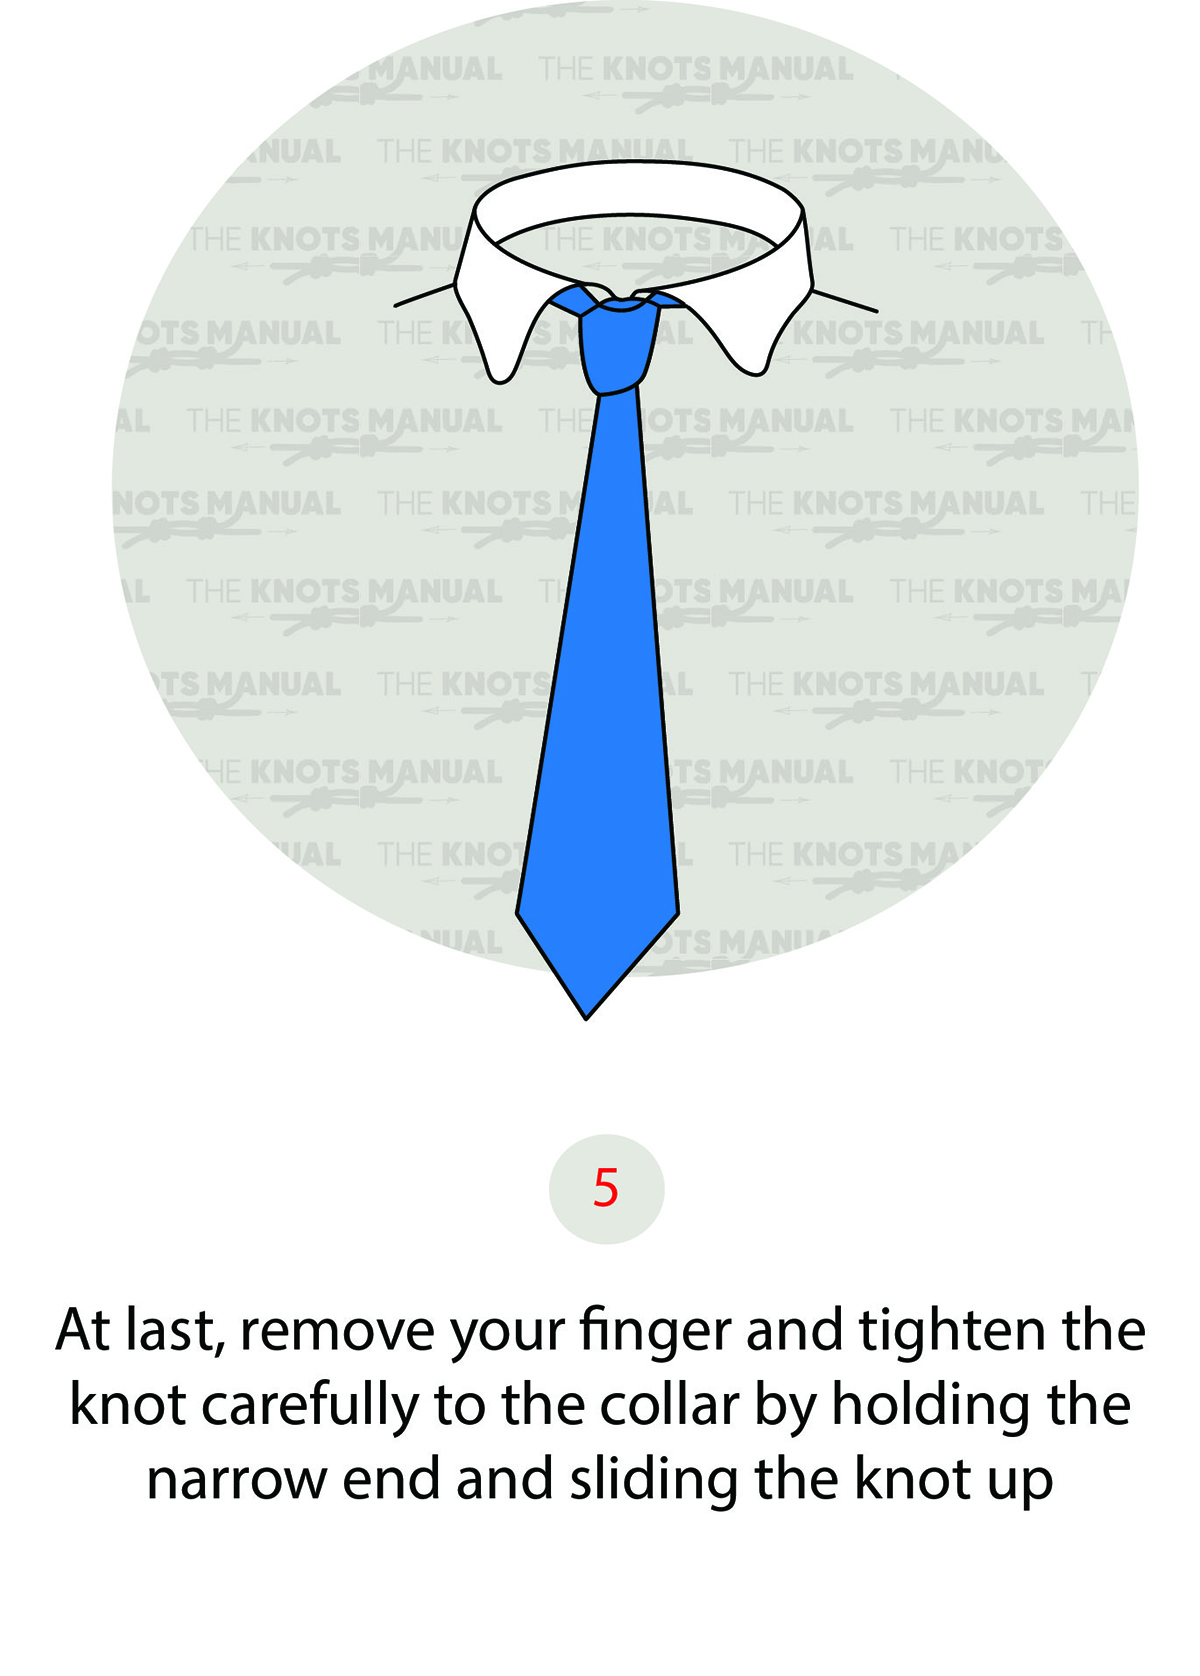
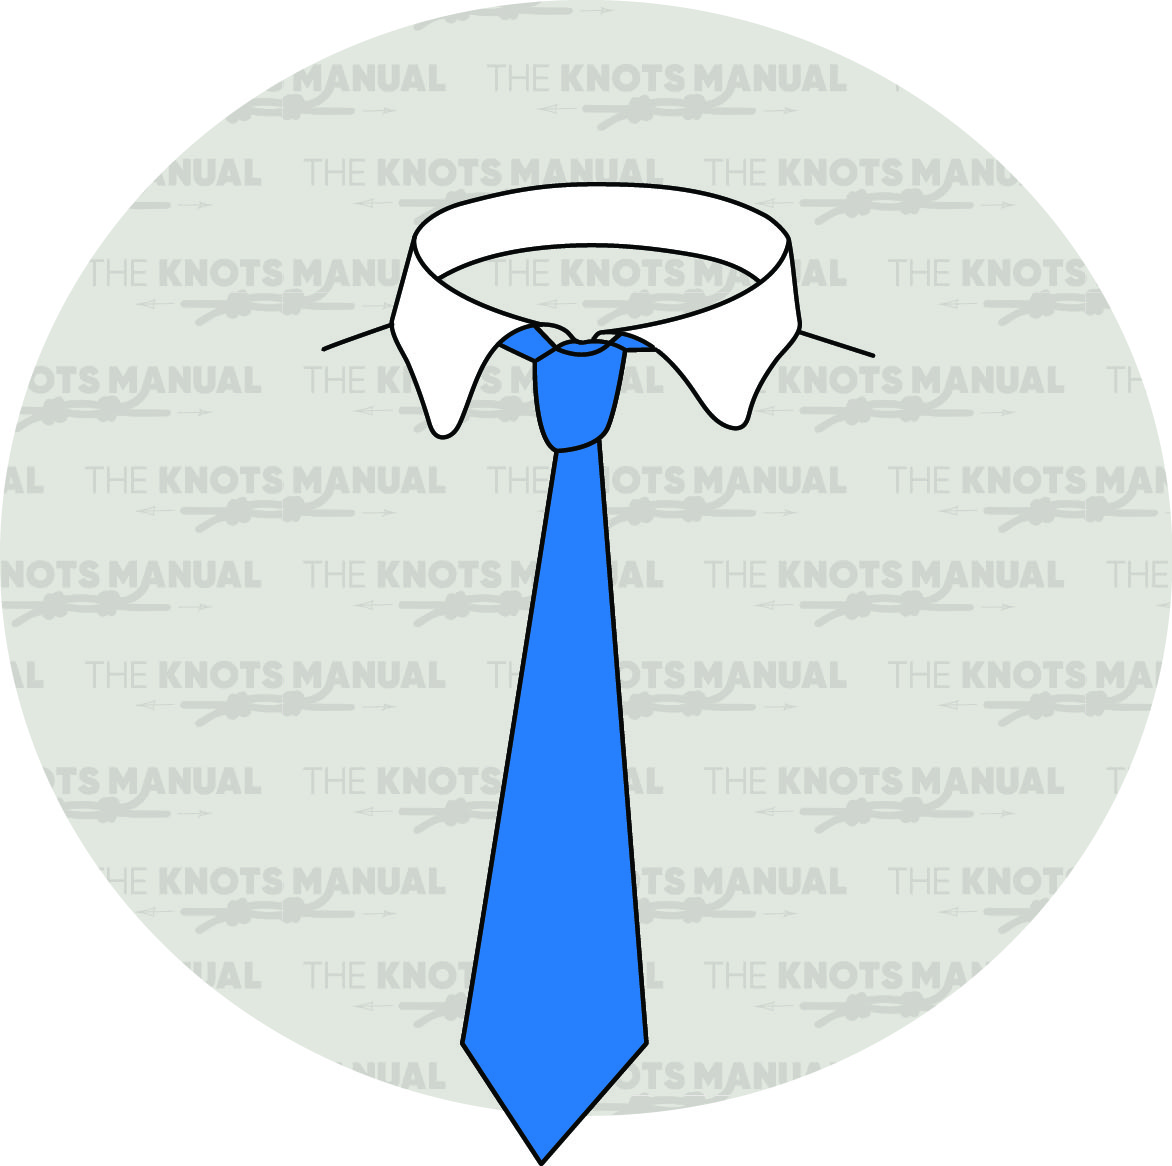
Tighten and dress the knot until it looks neat and professional.