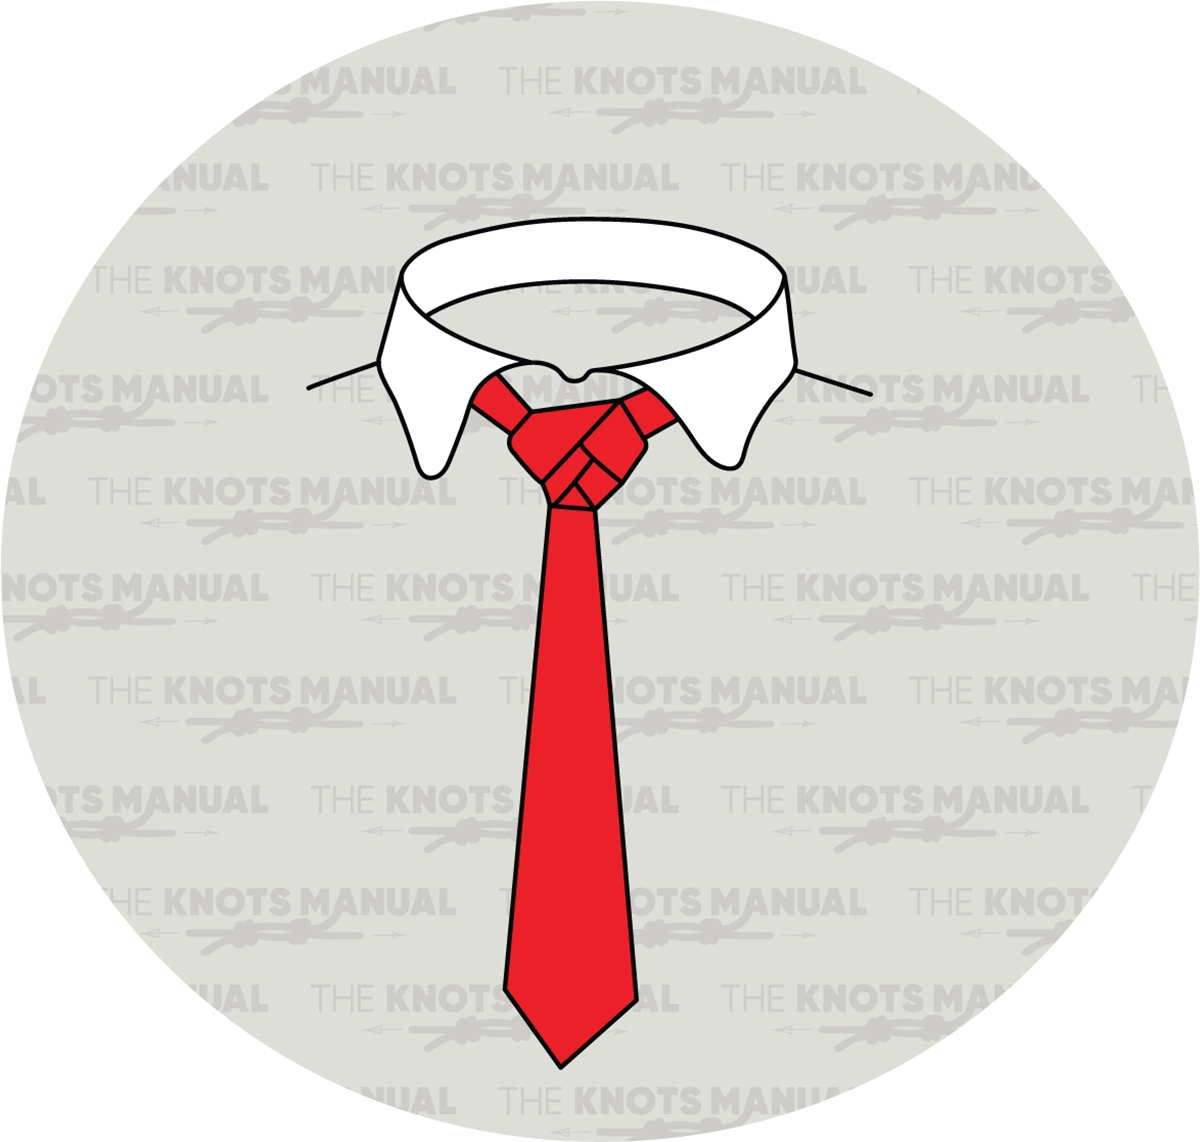
The Eldredge Tie Knot is a complicated tie knot with a large, triangular, and symmetrical shape. It has a unique look that is sure to turn heads and make you the center of attention.
Quick Guide: Tying the Eldredge Tie Knot
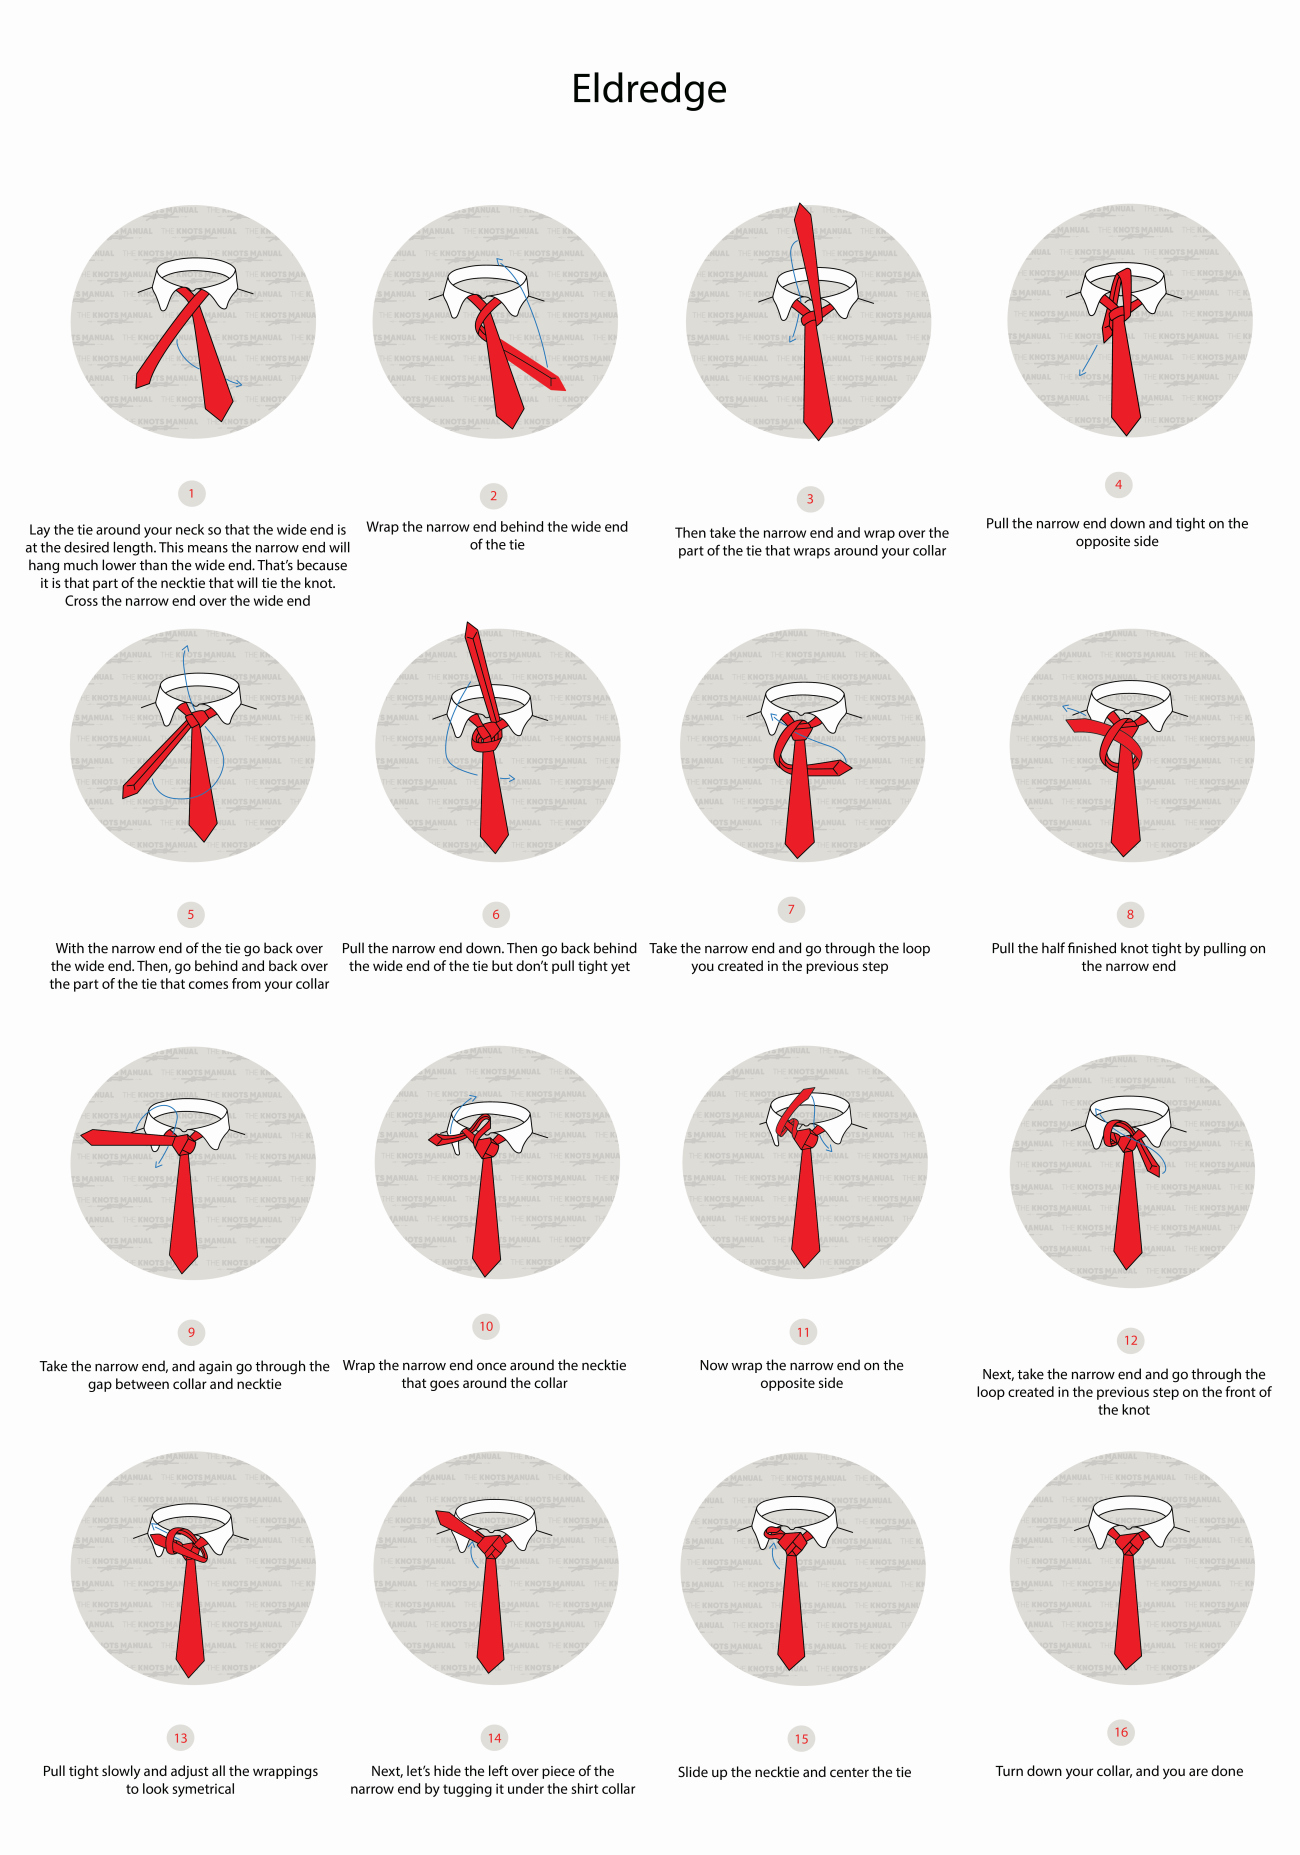
To tie the Eldredge Tie Knot, first lay the tie around your neck with the wide end sitting at the desired length. When tying the Eldredge Tie Knot, the wide end will remain static – you only need to move the narrow end.
Pass the narrow end over and around the wide end (steps 1-2). Then pass it around the right side, exiting on the left side (steps 3-4). Wrap it around the wide end sideways and go through the back of the knot, exiting on the top (steps 5-6). Now create a loop on the left side and go through it from the right side (steps 7-8). Wrap it around the left side, then go over to the right side, and tuck it back underneath itself (steps 9-14). Tuck the narrow end underneath the collar and adjust the knot to finish it (steps 15-16).
Tip: As you tie the knot, tighten and dress it after each turn. This will make it easier to tighten in the end.
About the Eldredge Tie Knot
The Eldredge Tie Knot was invented by Jeffrey Eldredge in 2007. It isn’t a very popular tie knot, but it has gained a lot of attention due to its unique looks.
It creates a very bulky, triangular, and symmetrical knot. In fact, nearly the whole narrow end is used up in tying the know, which makes it extra bulky.
The main downside to this knot is that it is very hard to tie, requiring a whopping 16 steps in total. It’s one of the few knots that is tied with the narrow end of the tie. Feel free to come back to this guide whenever you need to tie it.
How and When to Wear the Eldredge Tie Knot
In appearance, the Eldredge Tie Knot doesn’t resemble any other tie knot. You can use this to your advantage if you want to stand out. Wear it to informal dinner parties, events, and weddings to turn some heads.
The Eldredge Tie Knot should be worn with wide-collar shirts to leave enough room for the knot. Because it’s so bulky, it’s usually worn with thinner and narrower ties. But if you want to make an even stronger statement, then you can also wear it with a bulky and wide tie.
Knots Like the Eldredge Tie Knot
Trinity Tie Knot: Tied similarly to the Eldredge Tie Knot, except with fewer turns and marginal differences. It creates a symmetrical, hexagon-shaped knot with three parts. It’s also worn as a statement piece because of its unique looks.
Windsor Tie Knot: A classic tie knot with a very wide, triangular, and symmetrical profile. It’s also worn with wide-collar shirts and is an excellent choice to wear to formal events.
Balthus Tie Knot: One of the largest tie knots, with a very wide, triangular shape. It’s even larger than the Full Windsor Tie Knot, but not as large as the Eldredge Tie Knot.
Murrell Tie Knot: Another tie knot that is sure to turn some heads. It’s tied with the narrow end exiting in front of the wide end, which results in a very interesting look. It has a medium-sized, triangular shape.
Prince Albert Tie Knot: A medium-sized tie knot with a square-like appearance. Wearing this knot will make you stand out from the crowd of more typical triangular tie knots.
Step-By-Step Guide: How to Tie the Eldredge Tie Knot
A step-by-step guide on how to tie the Eldredge Tie Knot.
Step 1:
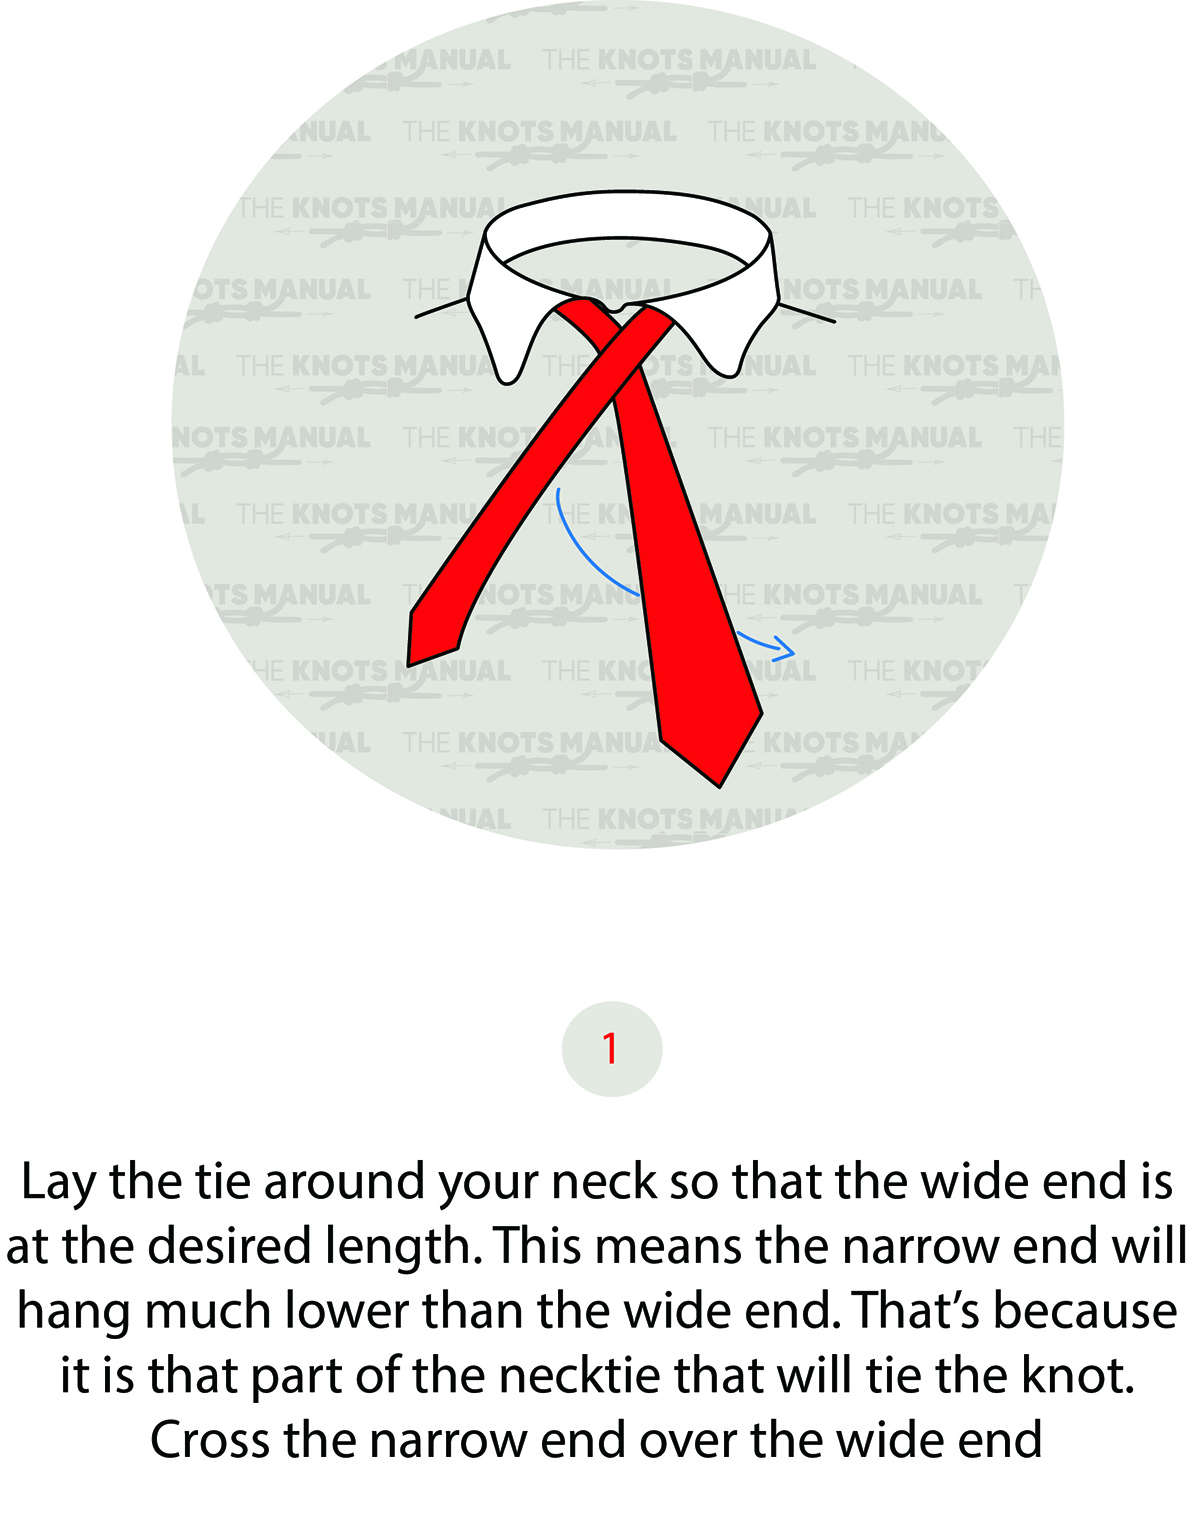
Lay the tie around your neck with the wide end sitting at the desired length and stitch-side hidden. Now cross the narrow end over and behind the wide end.
Step 2:
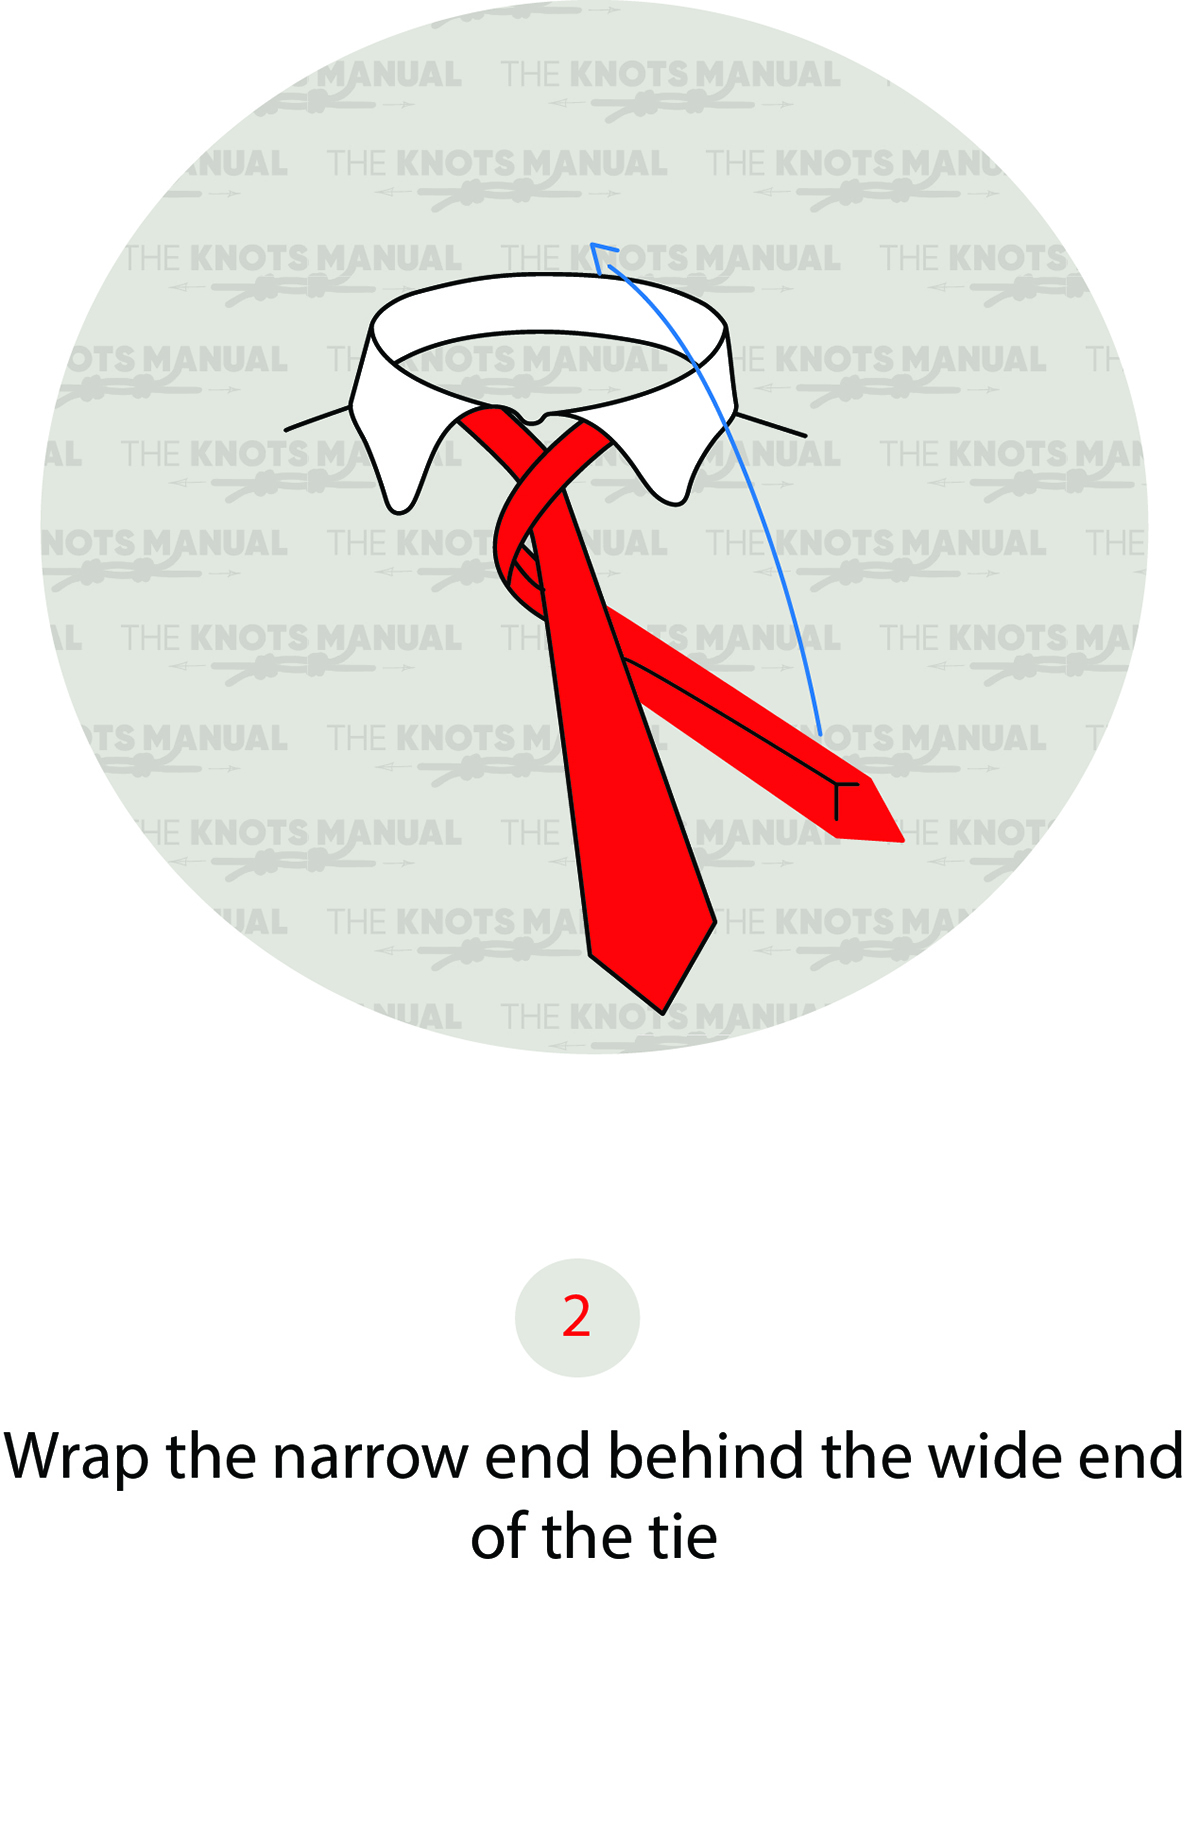
Move the narrow end upwards, as illustrated.
Step 3:
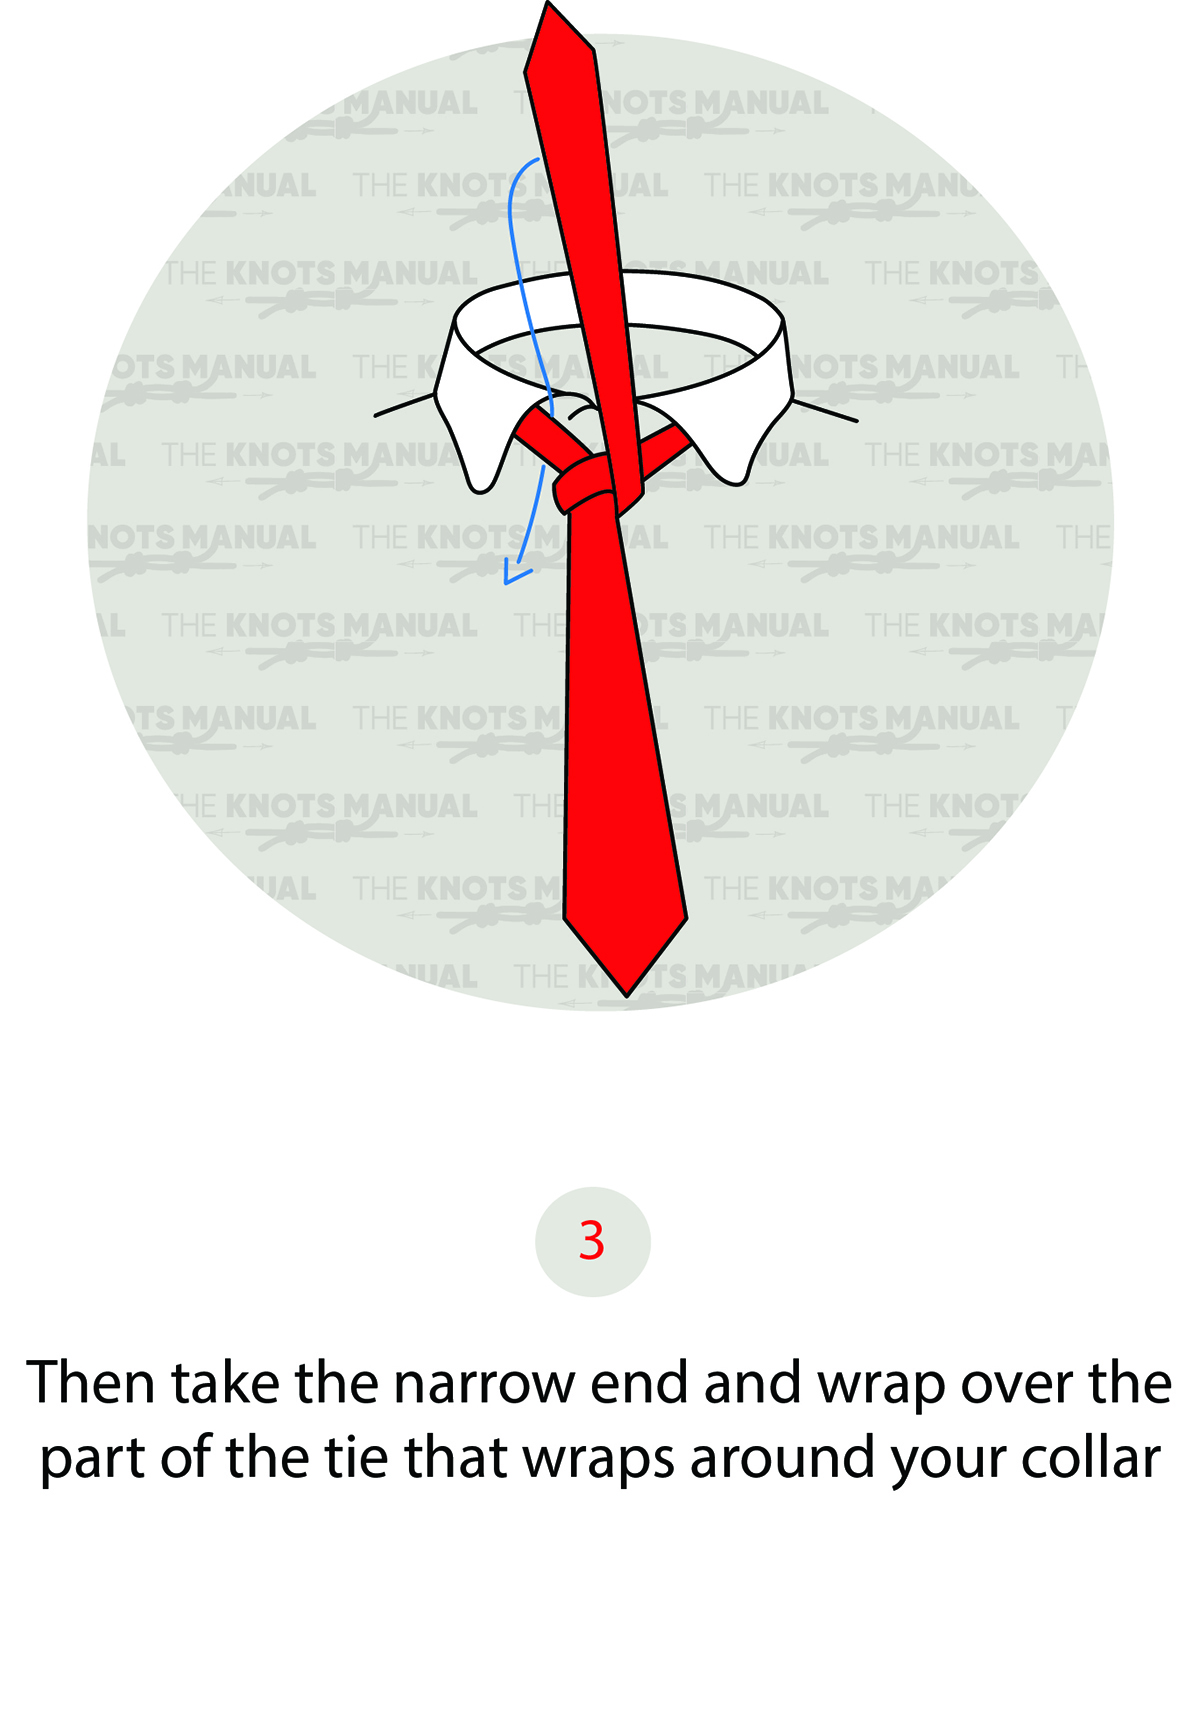
Pass the narrow end through the top of the knot.
Step 4:
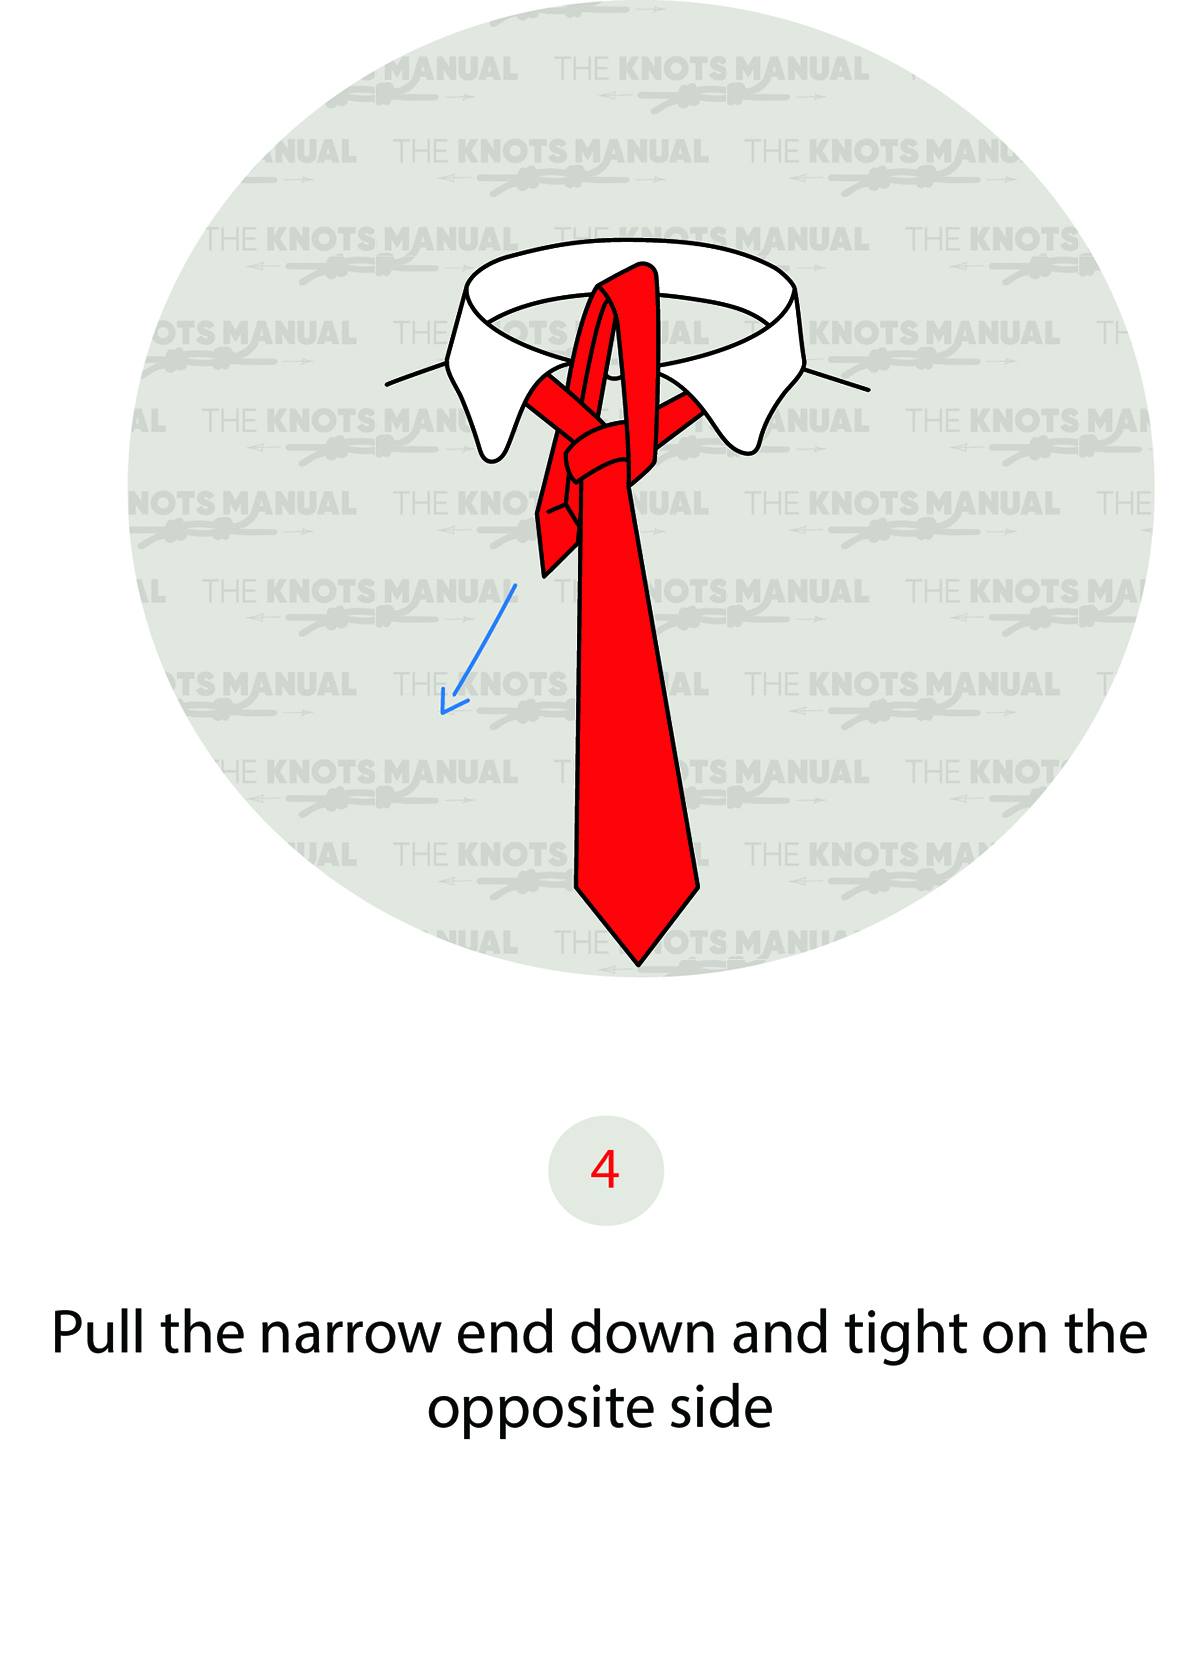
Exit on the left side of the knot.
Step 5:
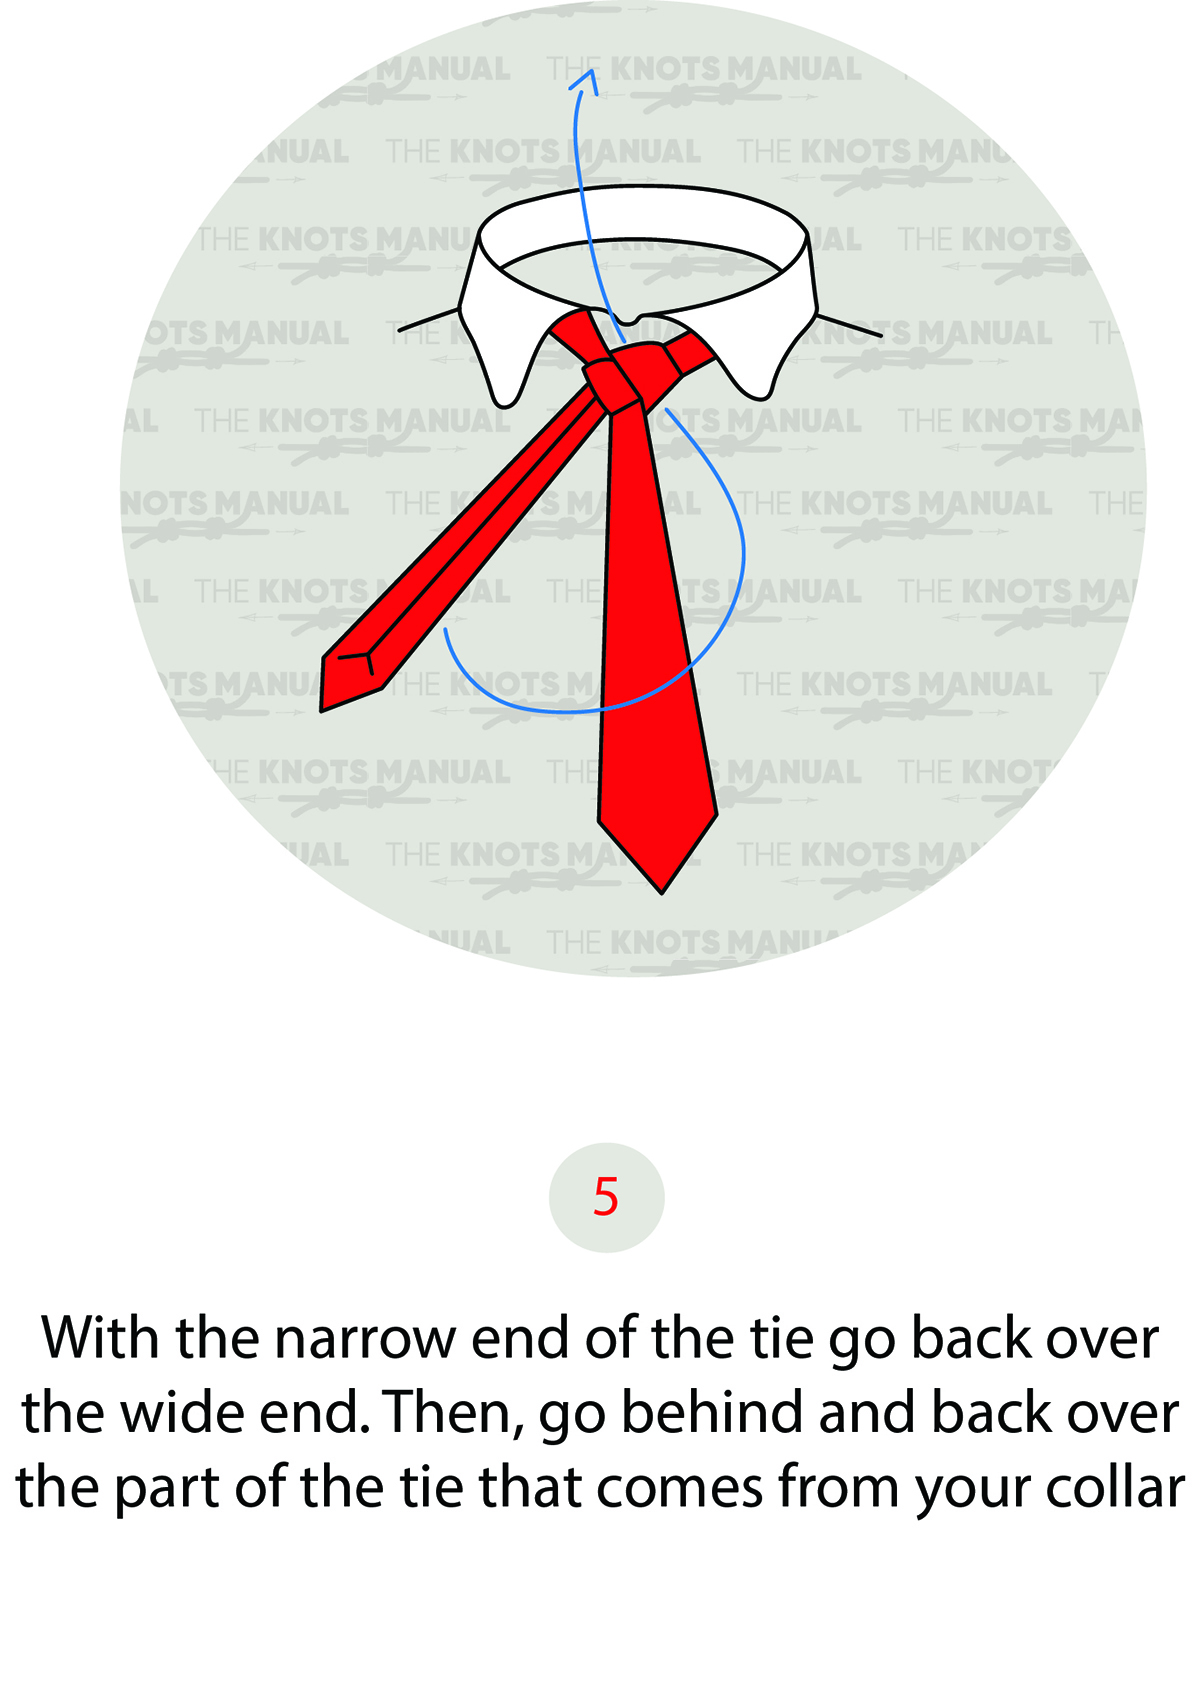
Now pass the narrow end in front of the wide end and behind the knot, exiting on the top side.
Step 6:
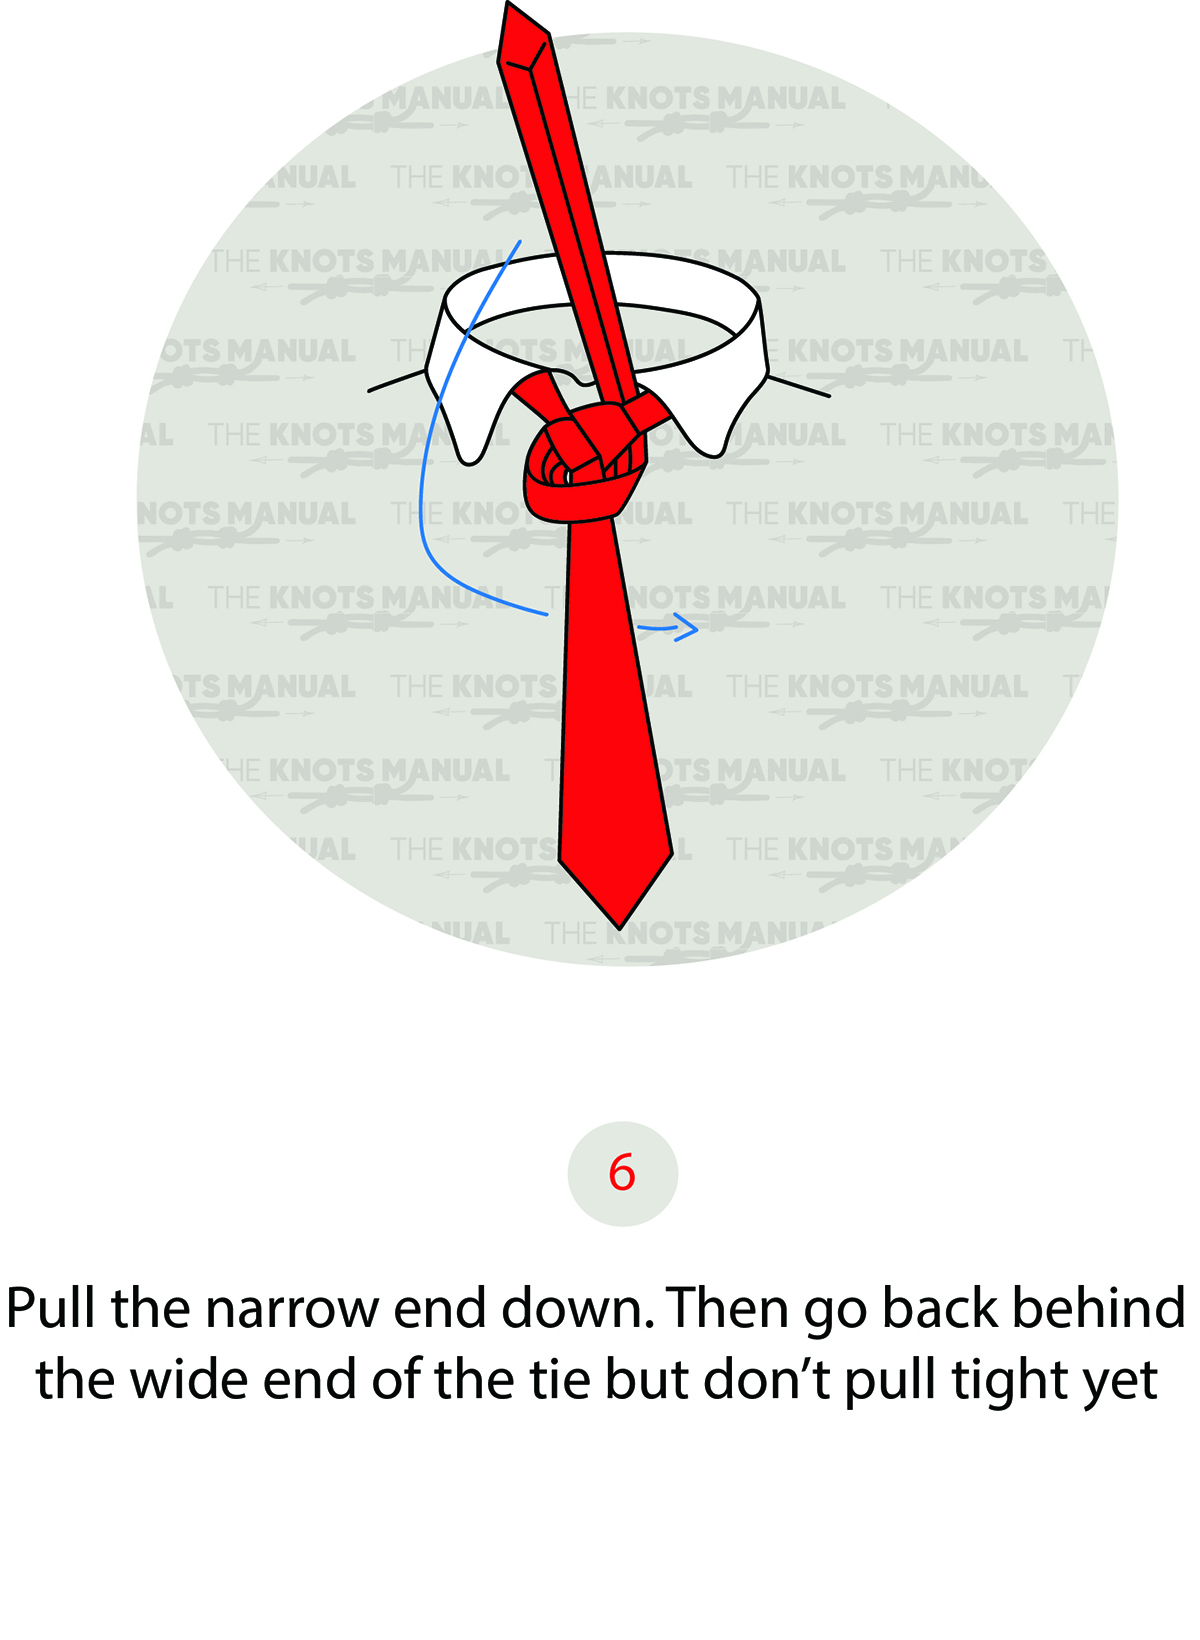
Now pass the narrow end behind the wide end.
Step 7
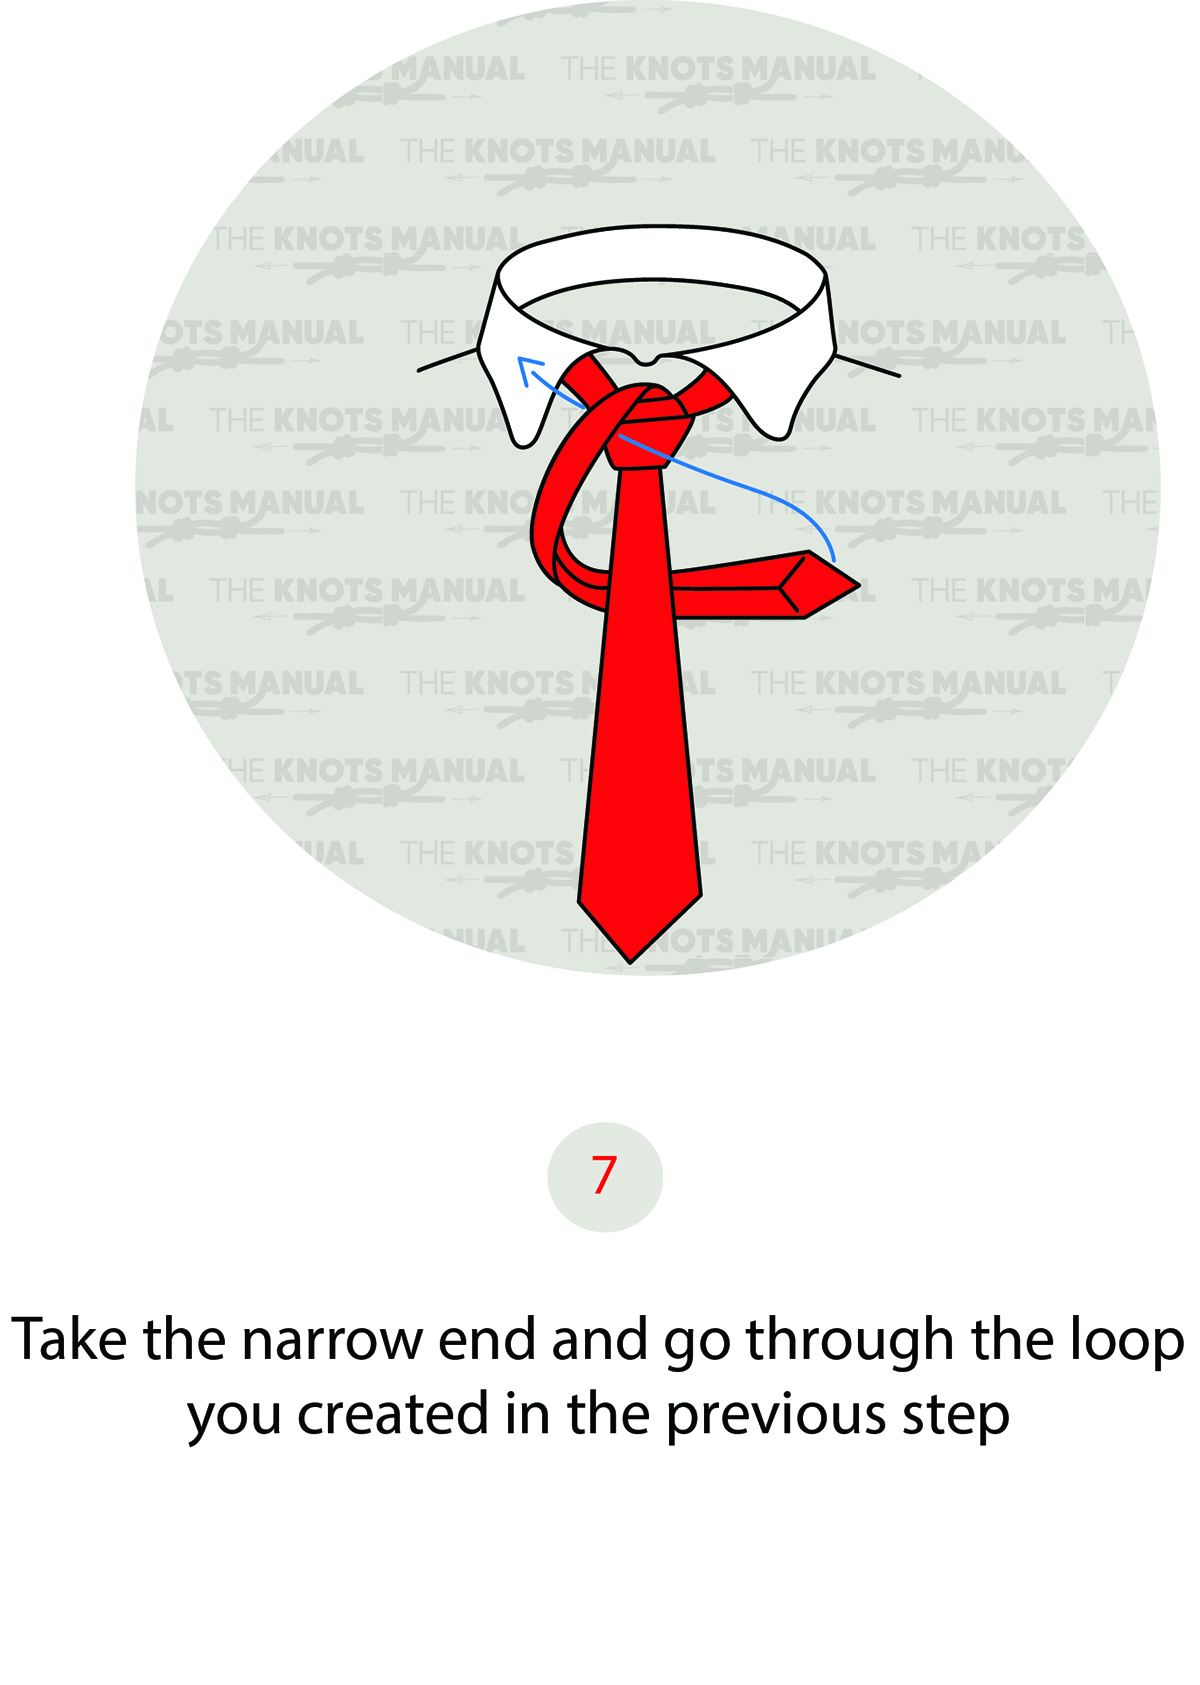
Pass the narrow end underneath itself in front of the wide end.
Step 8:
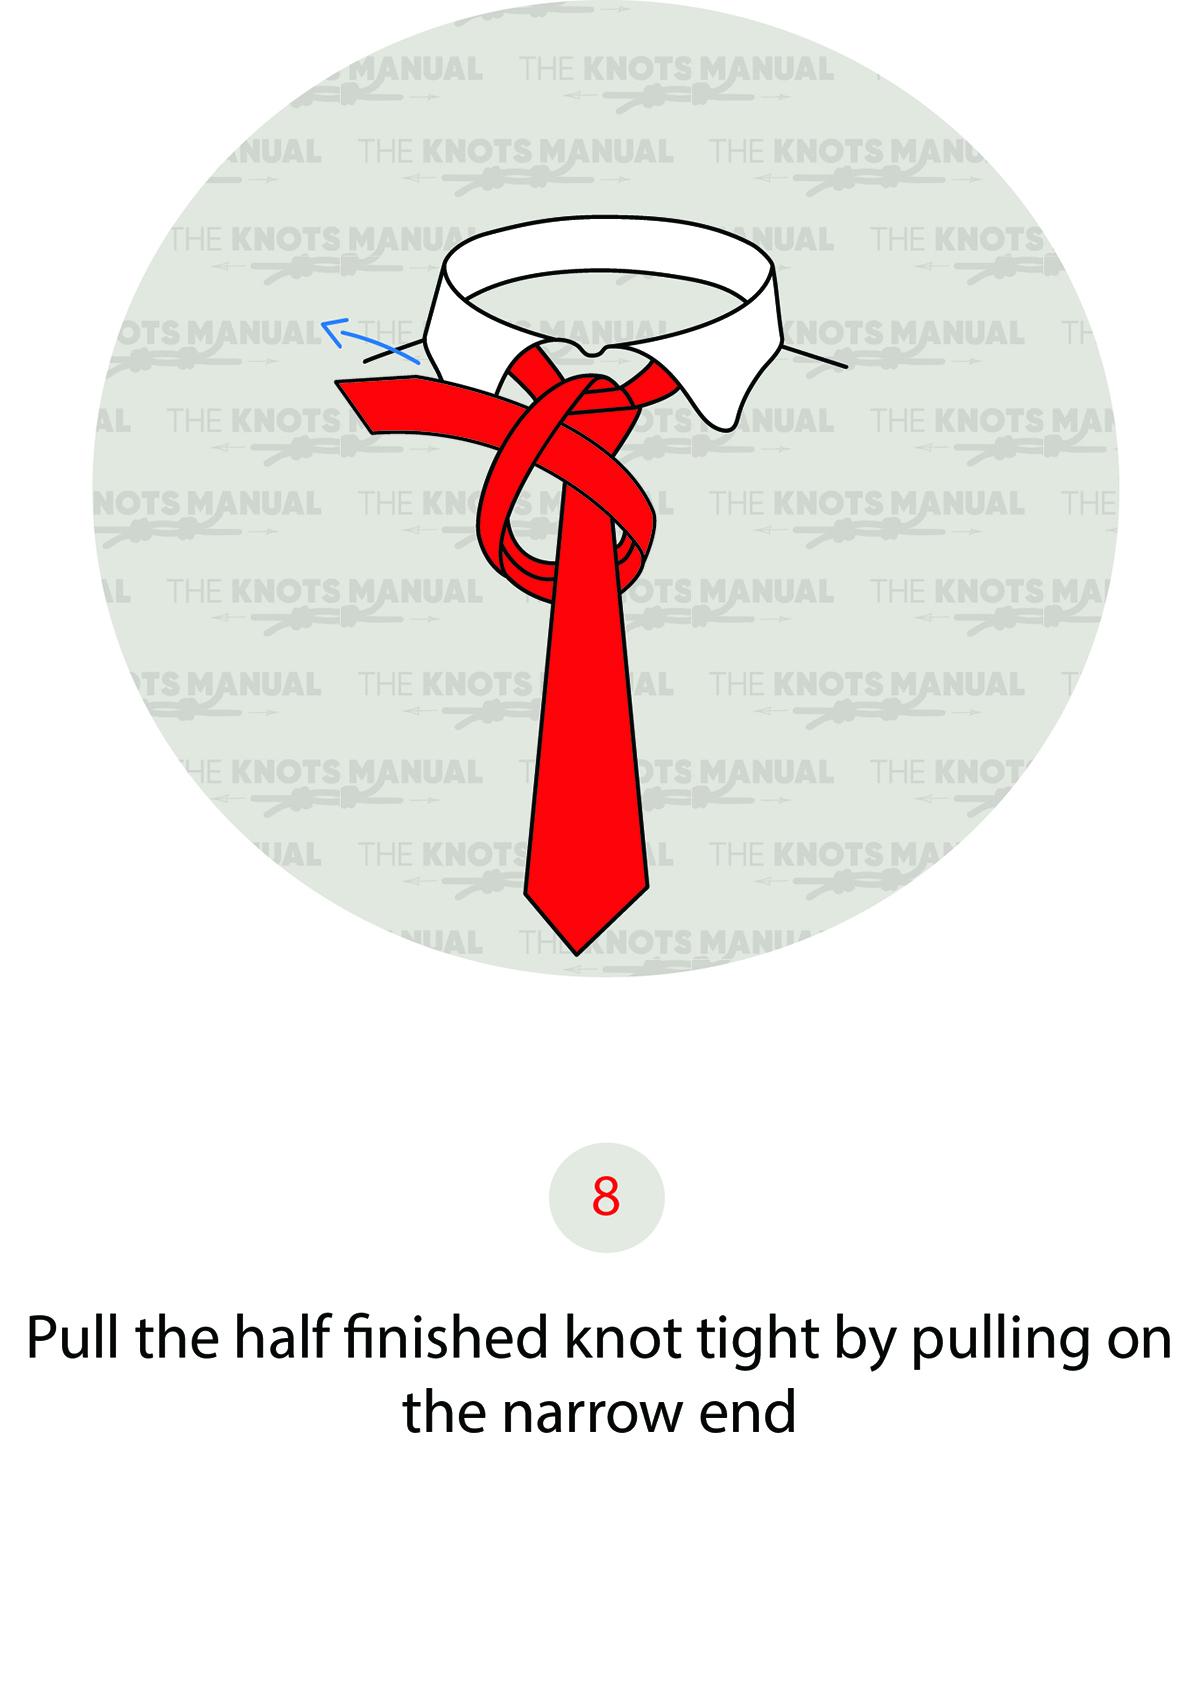
Tighten the knot.
Step 9:
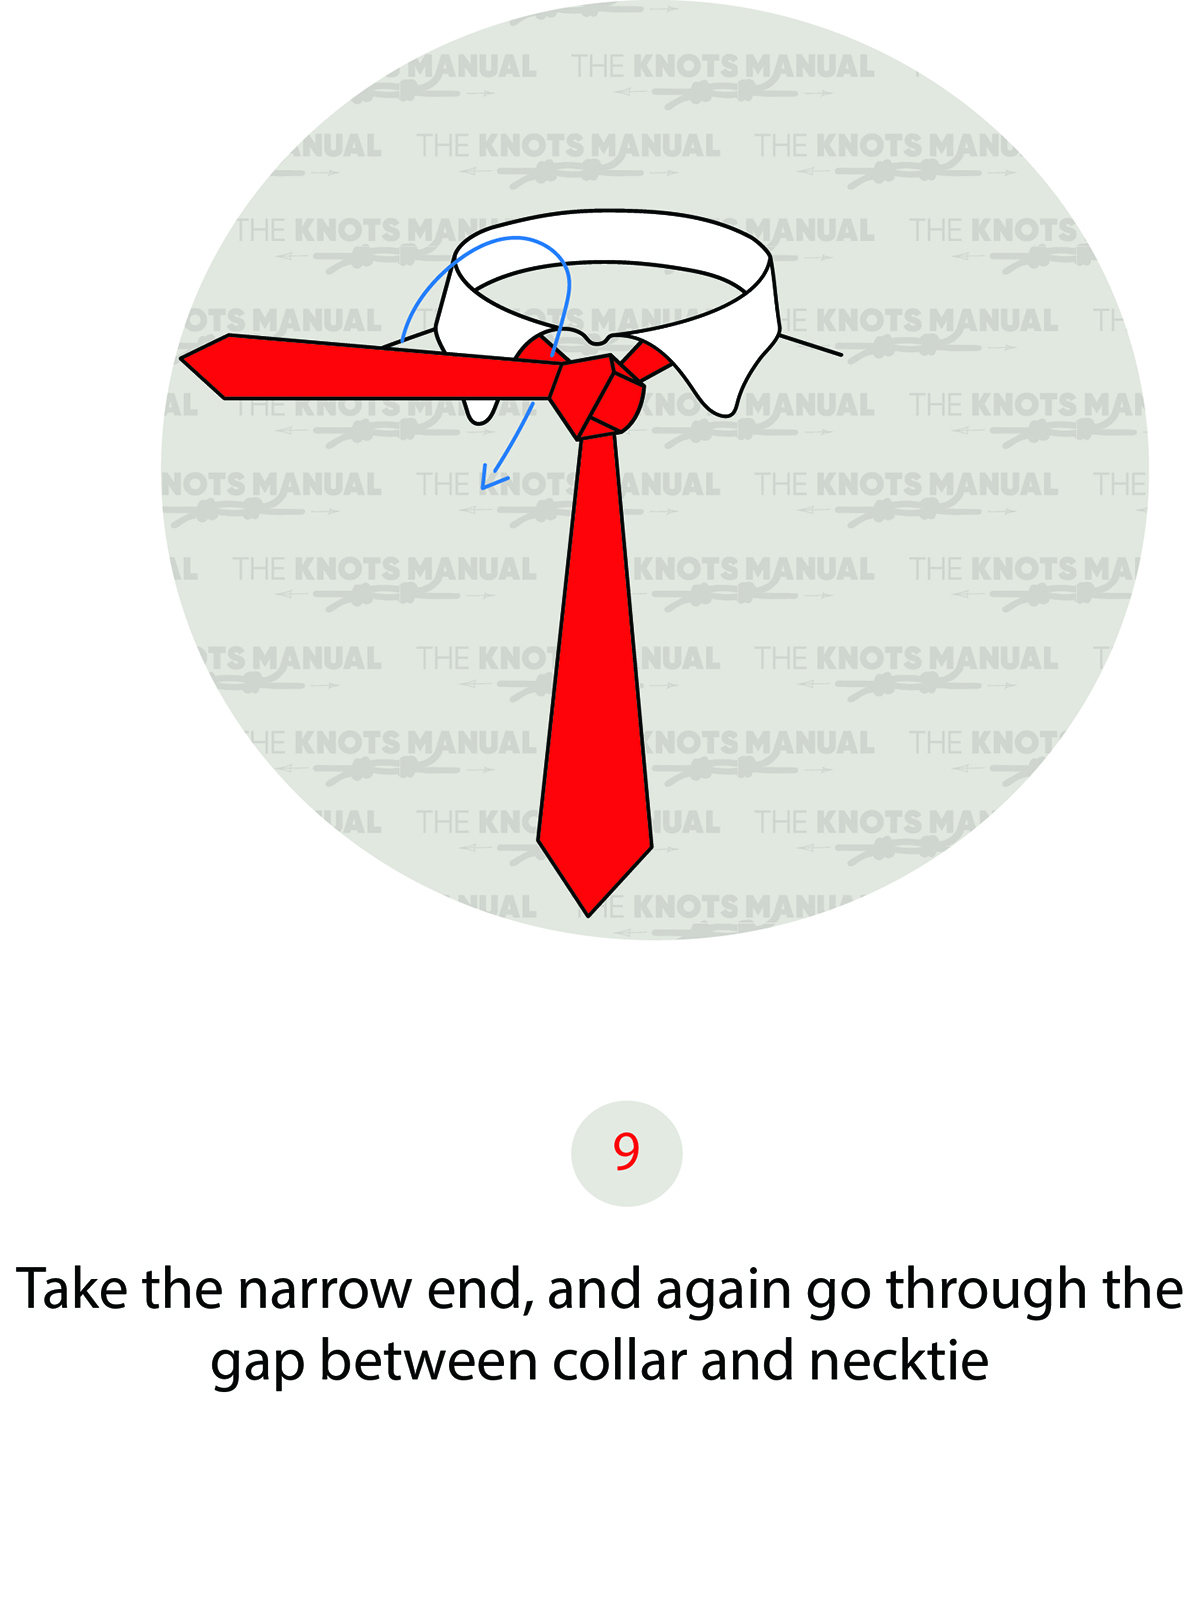
Pass the narrow end behind itself on the left side.
Step 10:

Tighten, and move it in front of the knot.
Step 11:
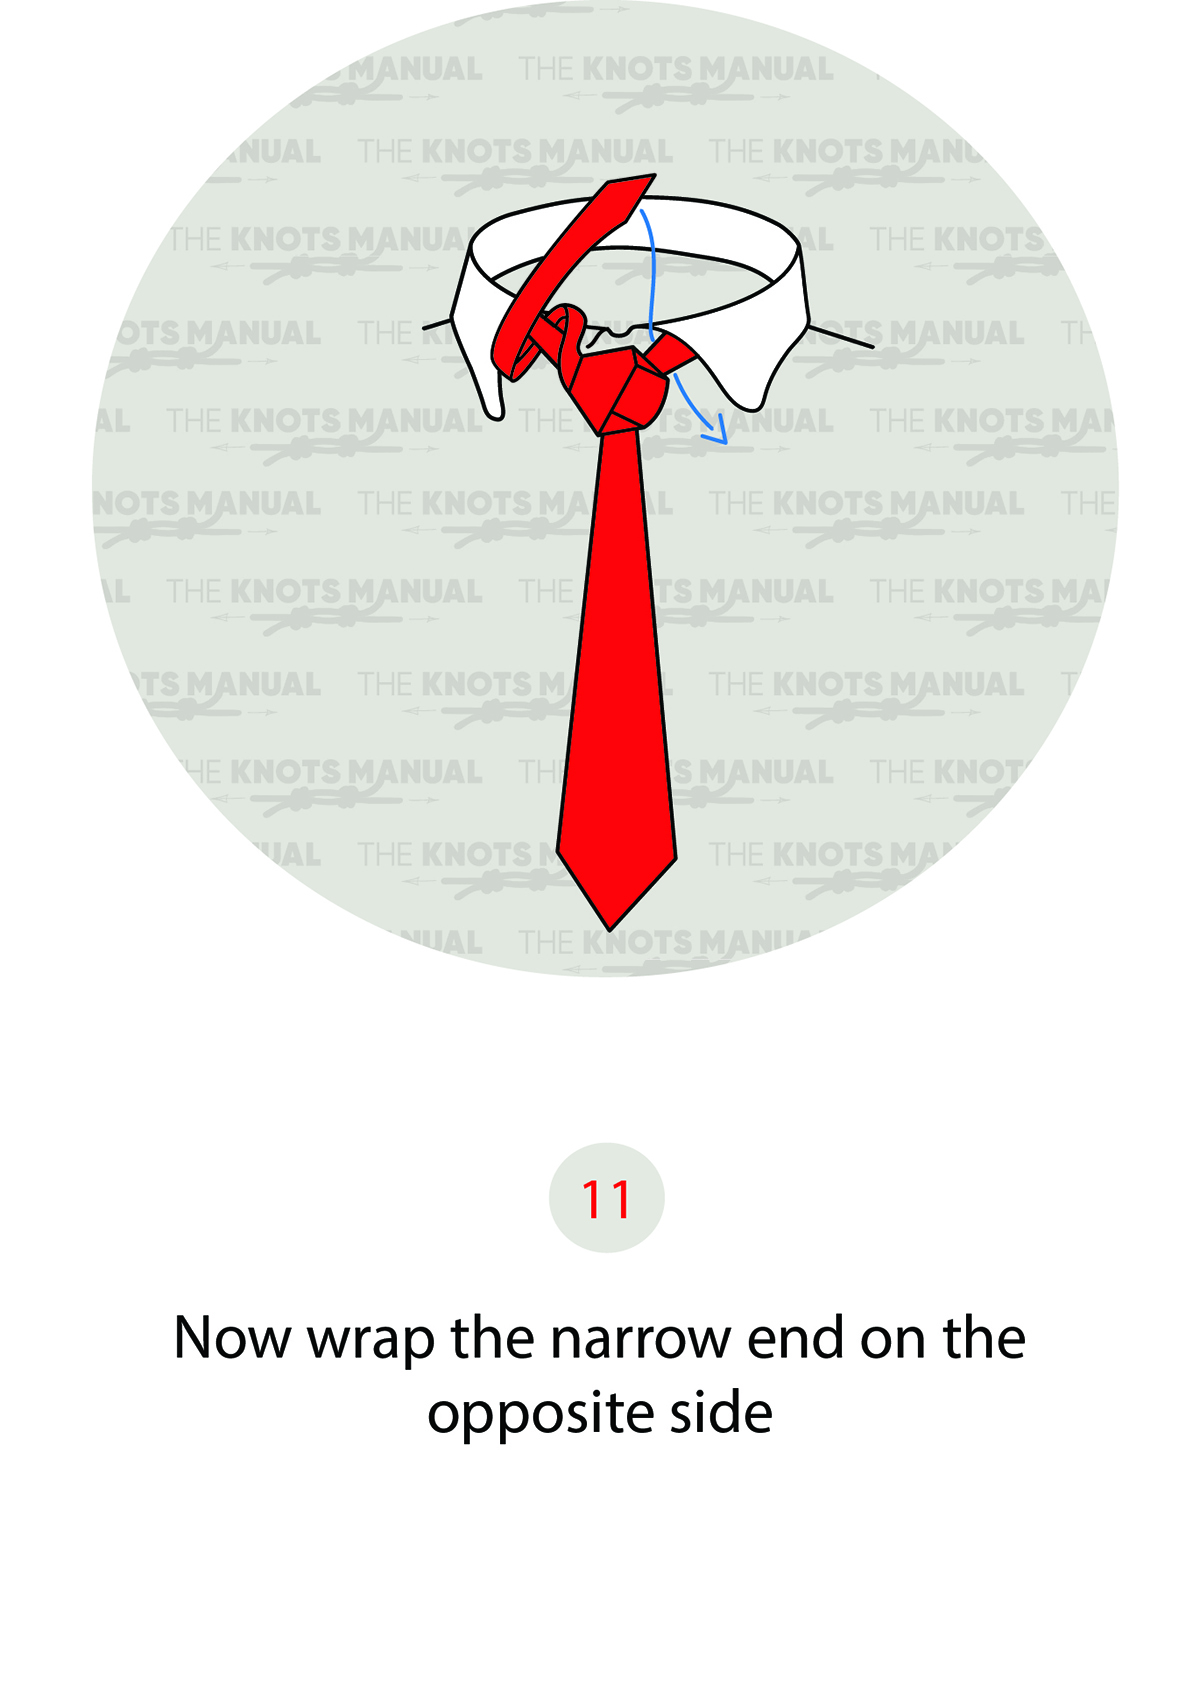
Pass it behind the knot on the right side.
Step 12:
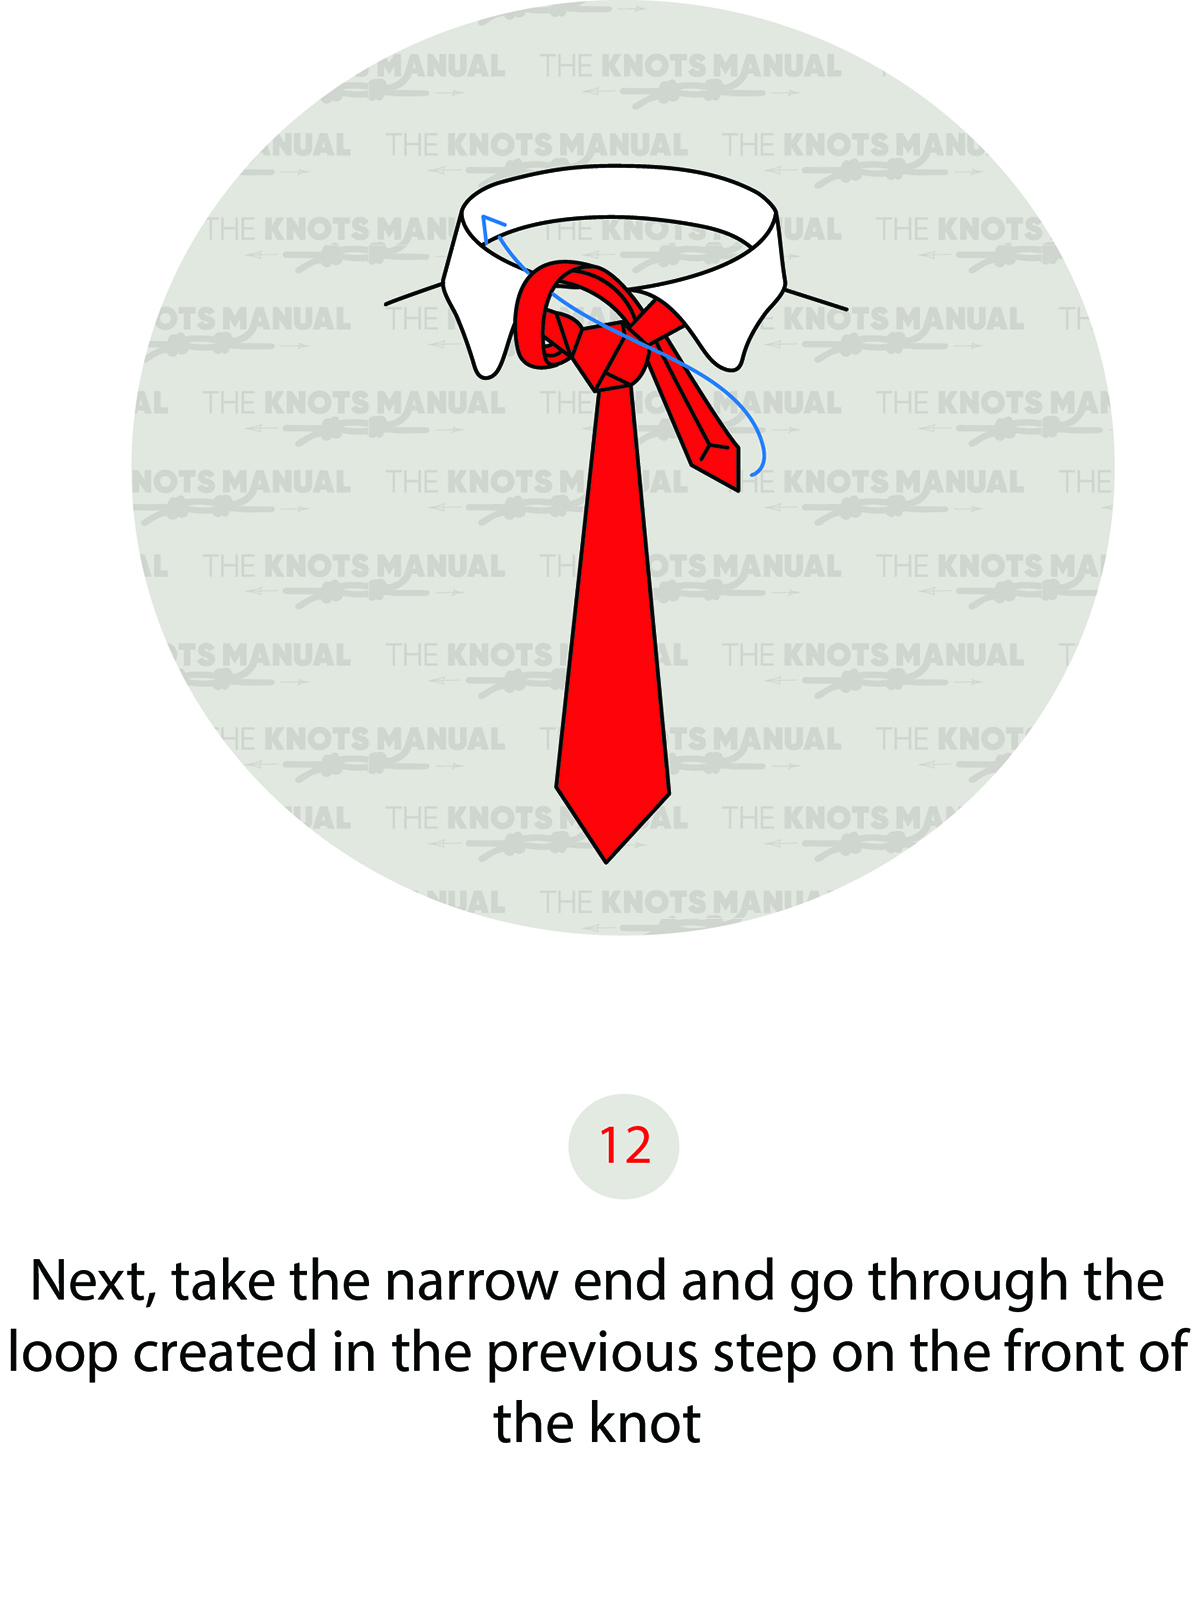
Pass it under itself on the left side of the knot.
Step 13:
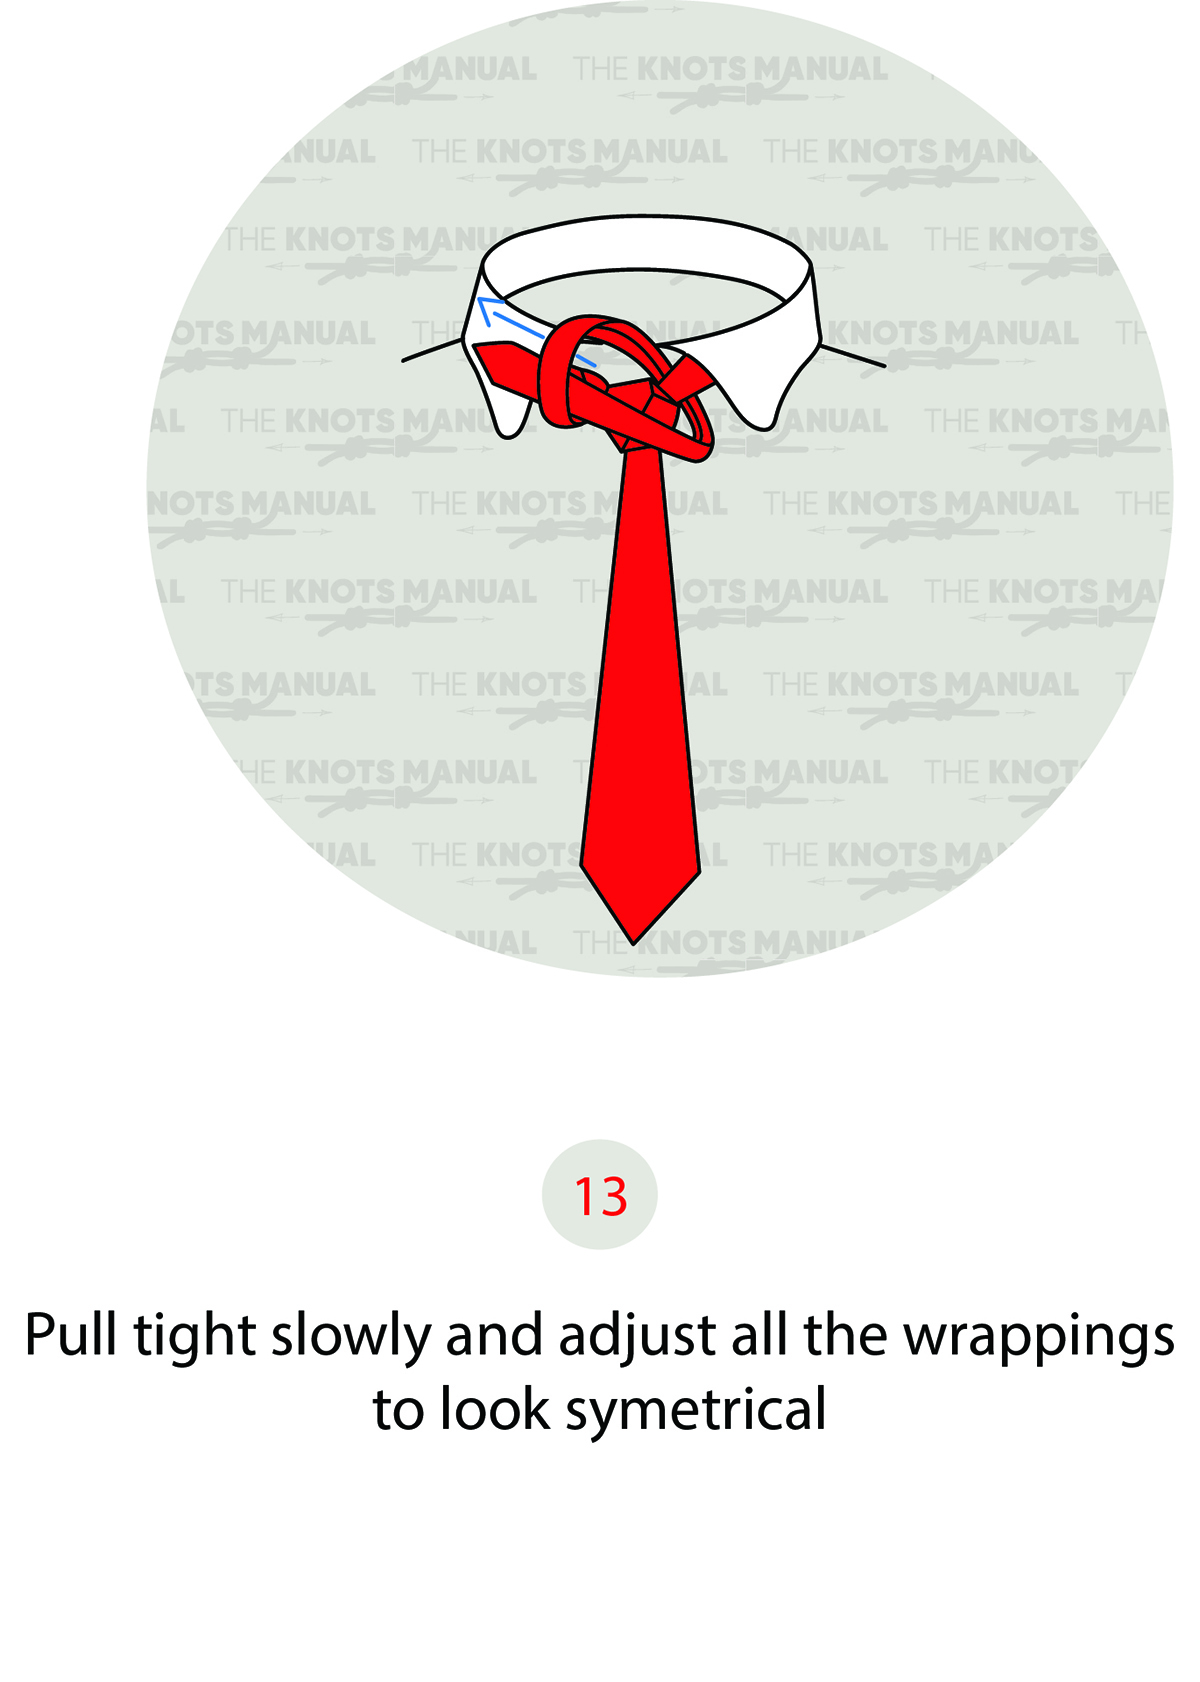
Tighten the knot, making sure that everything looks symmetrical.
Step 14:
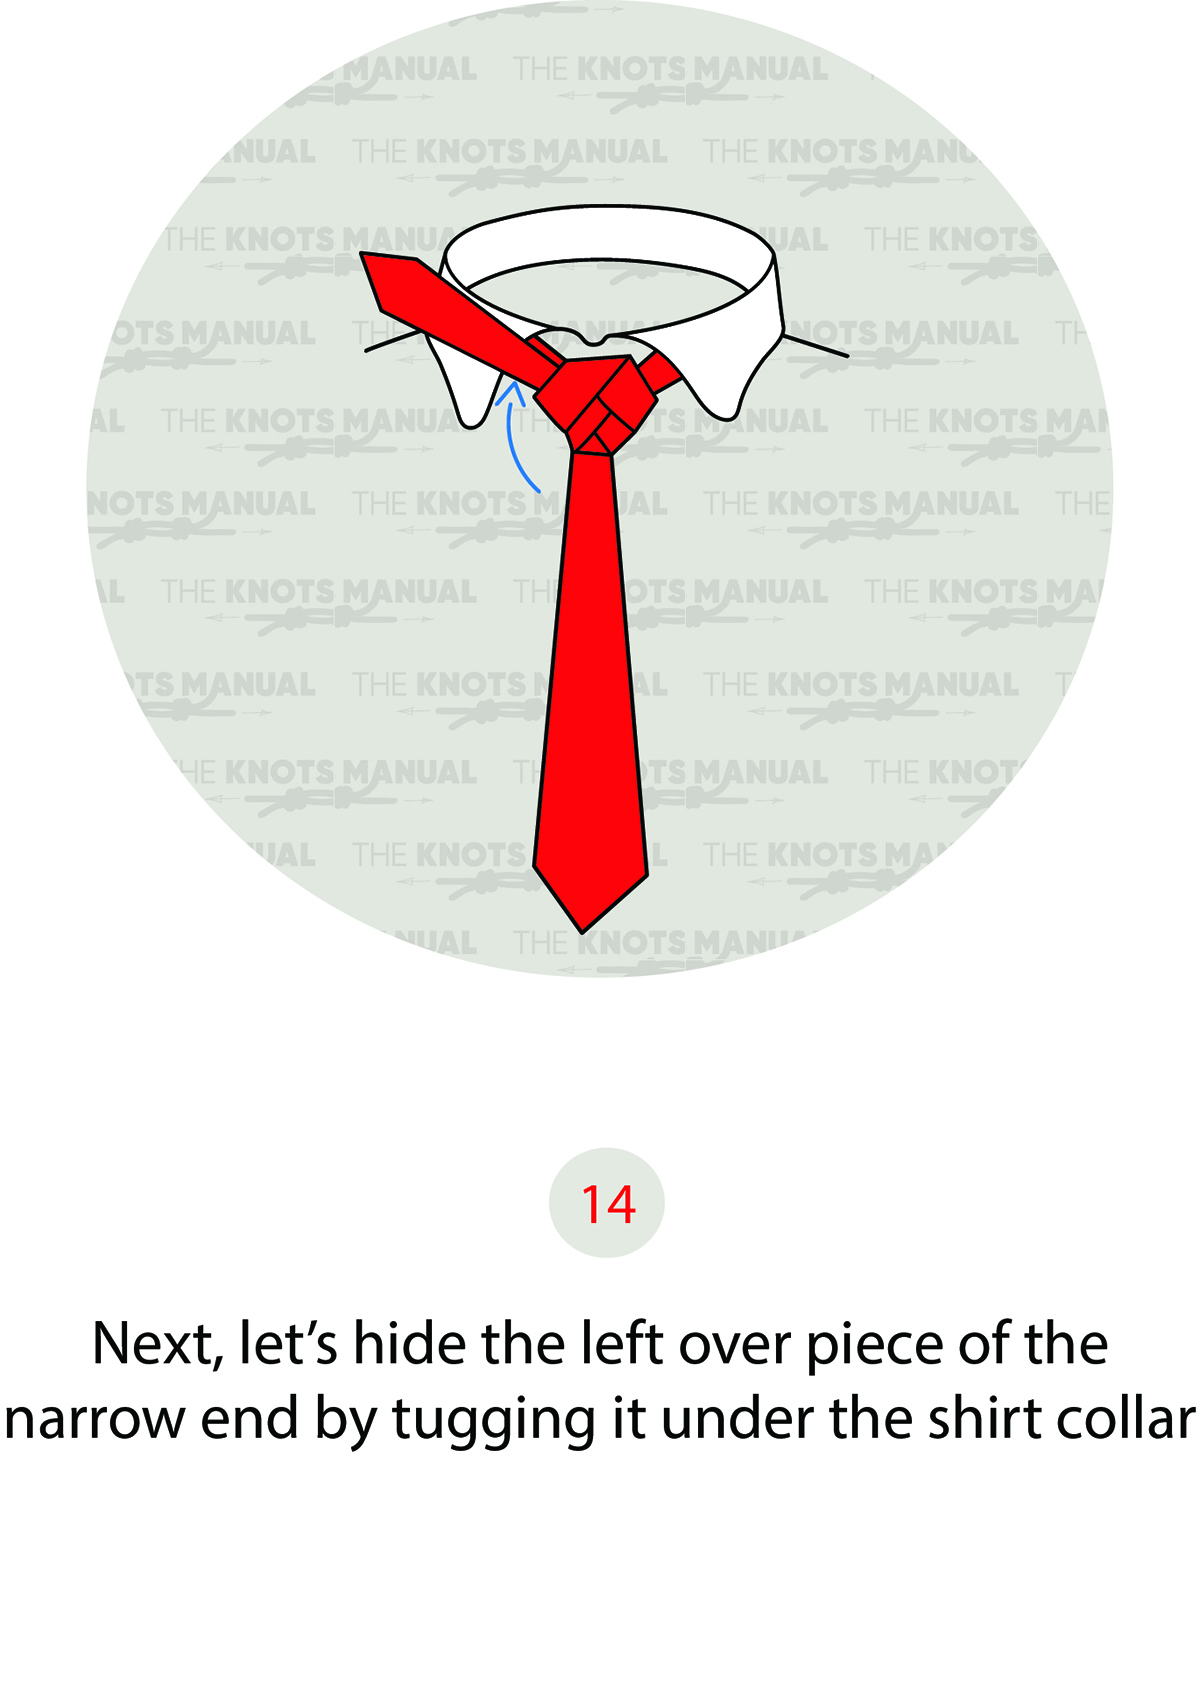
Hide the narrow end under the shirt collar on the left side.
Step 15:
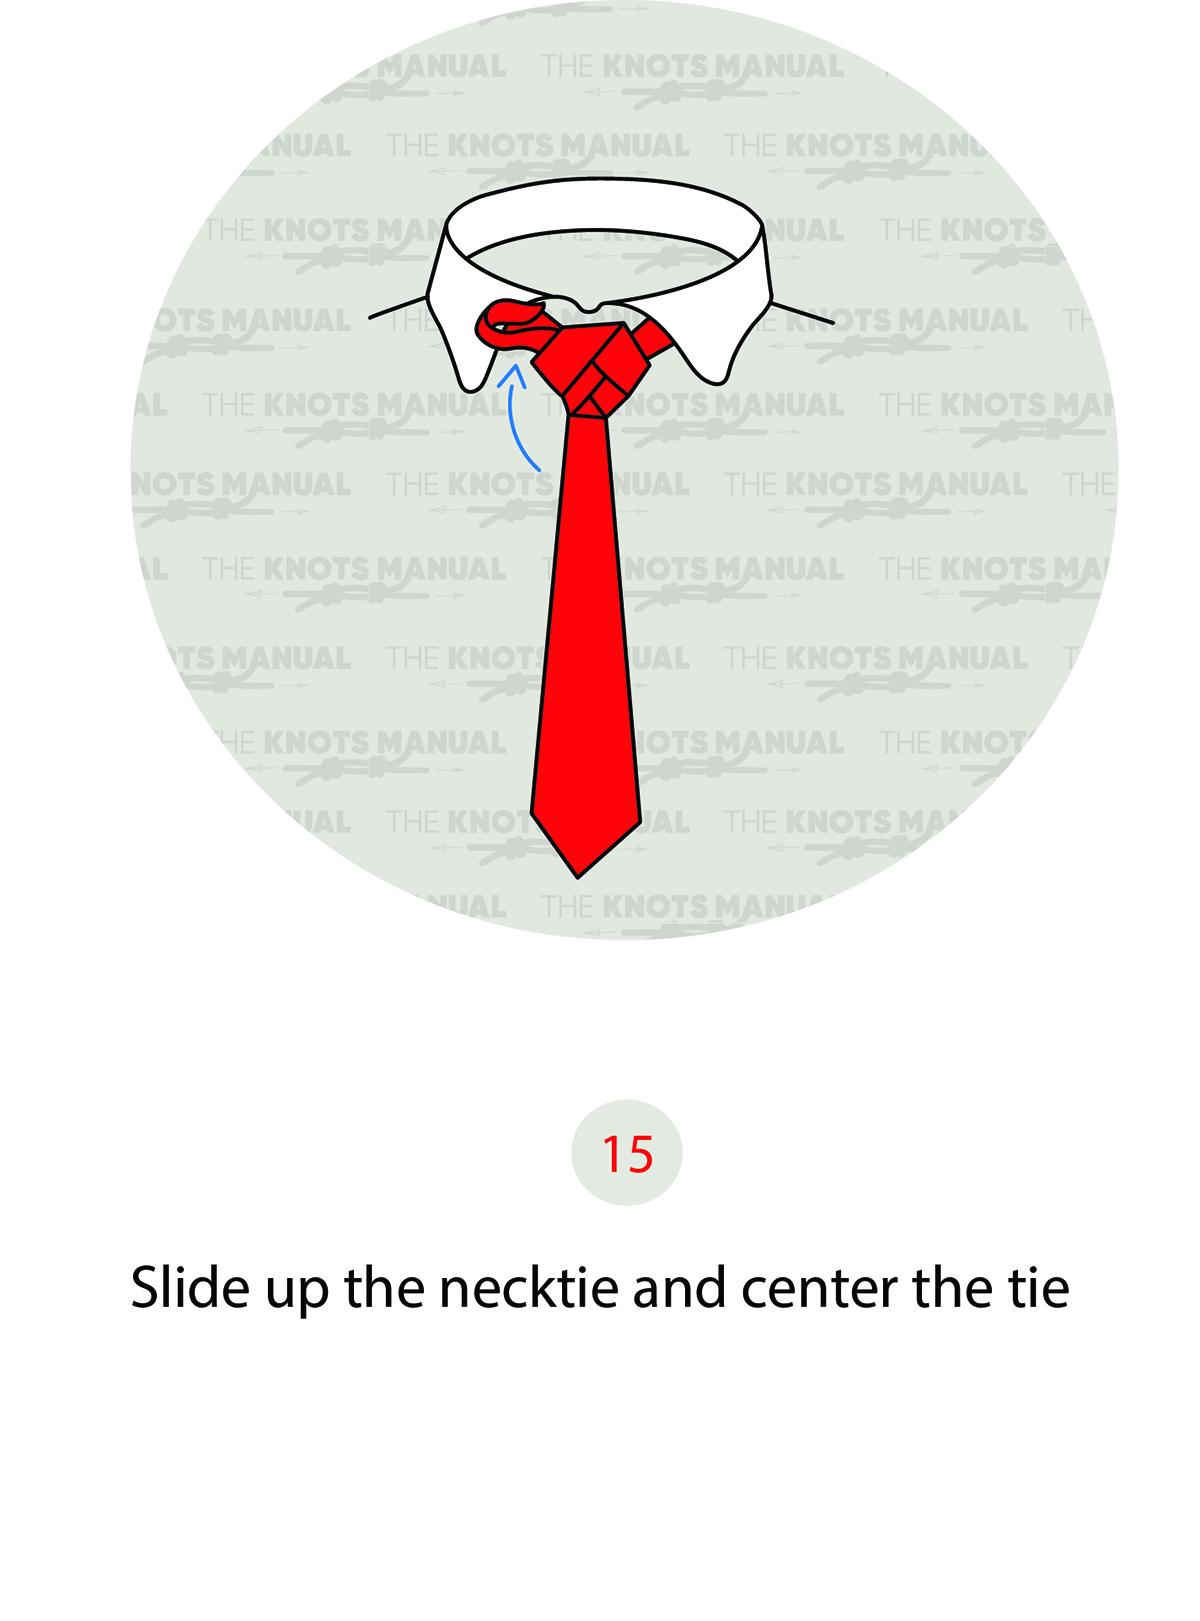
Dress and tighten the knot.
Step 16:
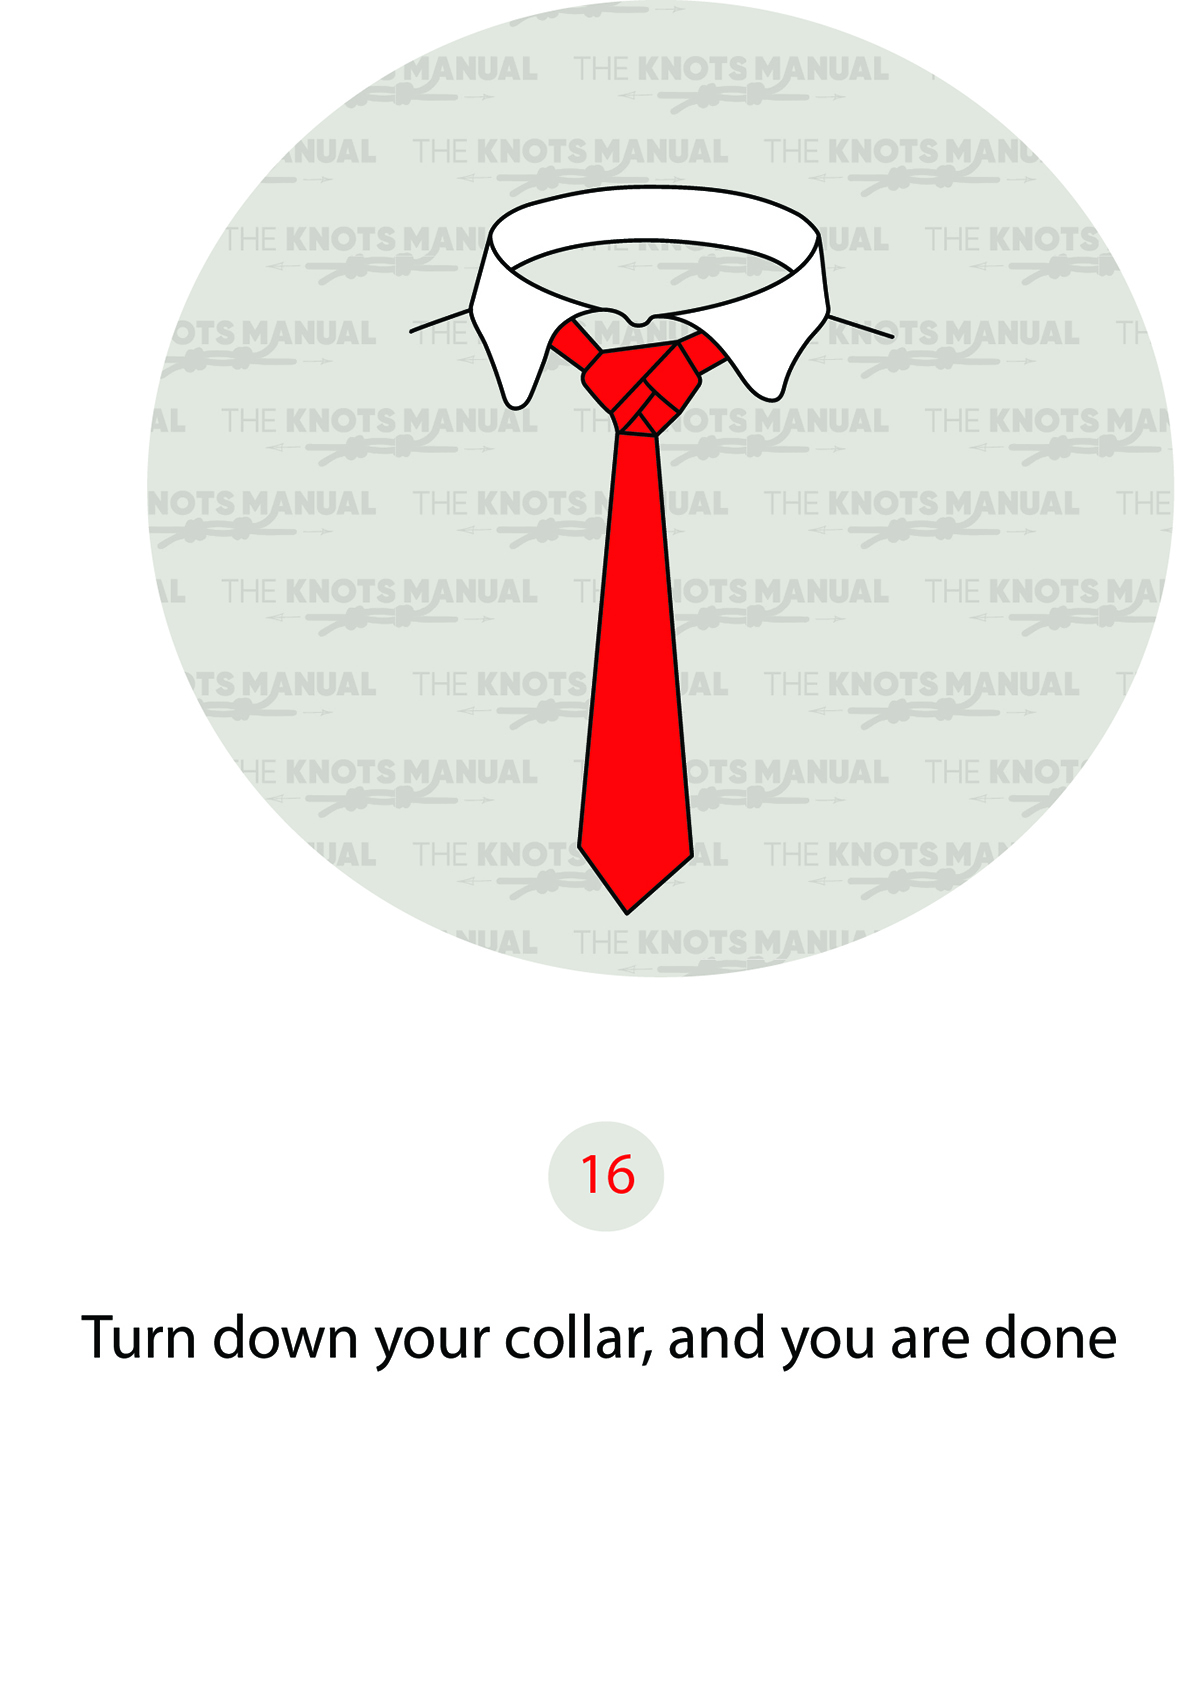
The Eldredge Tie Knot is now finished.