How to Tie a Bowline Knot

The Bowline Knot is one of the most popular and useful knots. It forms a strong, fixed loop at the end of a rope. It’s most commonly used for attaching one end of a rope to a fixed object.

It’s a very old knot, dating back to the 17th century, and it’s mainly used in boating. It’s often also referred to as “the King of Knots” due to its popularity and usefulness in various applications.

Quick Guide: How to Tie a Bowline Knot

To tie the Bowline Knot, form a small loop near the end of the rope. Pass the working end through this loop, then go around the standing end, and finally back through the loop, only the other way. Tighten the knot by pulling the working end opposite to the fixed loop.

You can check that it’s tied correctly by inspecting it. It should form three identical lobes on one side and a bight crossed by a perpendicular rope on the other side.

It’s important to leave a rather long end after the knot to account for slippage. Some sources recommend keeping the end at least 35 times as long as the diameter of the rope.

If used in critical applications, like climbing, caving, mountaineering, or search and rescue, you should also tie a stopper knot after it. Most commonly, people use the Double Overhand Stopper Knot for this purpose. There are also many variations for this knot that are much more secure, like the Yosemite, Water, or Double Bowline knots.

How to tie a bowline knot - step by step

Pros and Cons of the Bowline Knot

The Bowline Knot is very easy to tie and remember, which is why it’s often taught to beginners.

This knot is also reasonably strong. Once put under load, it’s very unlikely to come undone, so it can be used for securing heavy loads.

The Bowline can also be tied one-handed, which is useful if you’re injured or you need to hold on to something with your other hand while tieing the knot.

But the best part about this knot is that it’s very easy to untie if the rope isn’t loaded. Even after loading the knot with high force, the Bowline doesn’t jam and is very easy to untie.

Unfortunately, its ability to easily untie is also its main downside. If put under cycling loads (where the loop isn’t loaded all the time), it can eventually come undone. That’s why tying a stopper knot after the Bowline is important when used for intermittent loads.

The Bowline can also capsize and slip if loaded sideways. That’s why for important loads, most people choose to tie other knots like the Figure 8 Follow Through Knot.

And lastly, you can’t tie and untie this knot if the rope is under load. You need the rope to be free and flexible in order to tie (or untie) this knot.

Common Uses for the Bowline Knot

Most commonly, the Bowline knot is used for securing Mooring lines. Its ability to easily create a strong, fixed loop that’s easy to untie makes it ideal for this task. It’s also used in various other applications in sailing for securing a rope around a fixed object.

The Bowline Knot is also commonly used in search and rescue. You can tie this knot around a person’s waist and safely lift them up. Being able to tie this knot only with one hand is also really useful in this situation.

You can also use the Bowline for connecting two ropes together. Tie a Bowline on the end of the first rope and then tie into it with the end of the other rope.

Knots Like the Bowline Knot

Yosemite Bowline Knot: A more secure version of the Bowline Knot. It’s also easier to untie after being put under load. That’s why it’s very commonly used in climbing to tie into a harness.

French Bowline Knot: A similarly strong knot to the regular Bowline Knot, only it creates two loops instead of one. It’s most commonly used in search and rescue to create a seat for rescuing injured people.

Water Bowline: A stronger and more secure version of the Bowline Knot. Instead of a single hitch, it uses two, which increases the grip on the working end.

Double Bowline: This variation is very similar to the Water Bowline, only the two loops are formed on top of each other. It works in a similar principle, by providing more grip on the working end and decreasing the chances of the knot slipping or capsizing.

Running Bowline: The Running Bowline is essentially a regular Bowline Knot, just tied around a post and passing the standing end through the fixed loop. It creates a noose that tightens as you pull on the rope.

Spanish Bowline: A very similar knot to the French Bowline. It also creates two loops and is very commonly used in search and rescue.

Figure 8 Follow Through: A more secure knot for tieing into a fixed object. It’s more difficult to tie than a bowline and harder to untie, but stronger. It’s most commonly used by climbers for tieing into a harness.

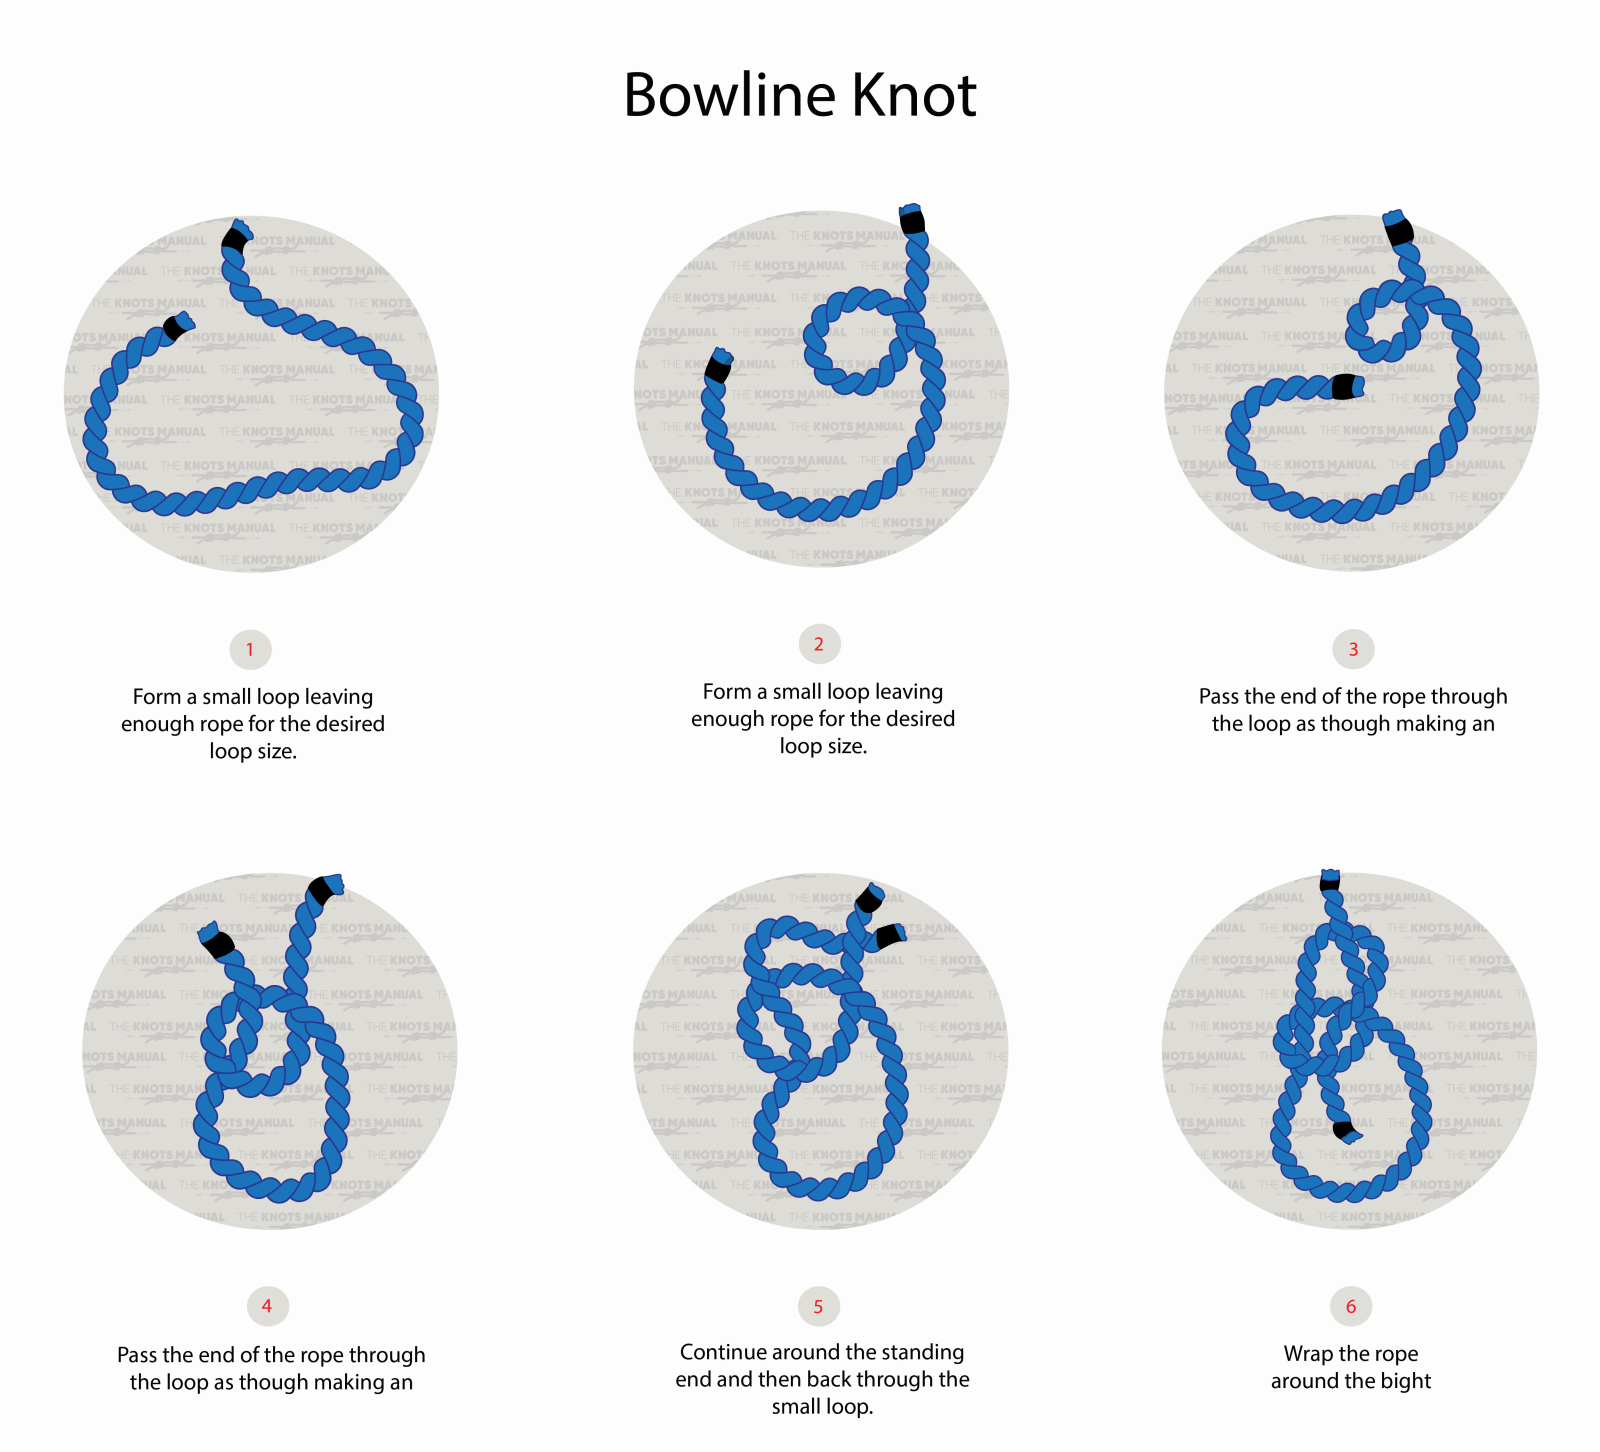
Step-By-Step Guide on How to Tie the Bowline Knot

How to tie a bowline knot

A step-by-step guide on how to tie the Bowline Knot

Step 1:

Bowling knot step 1

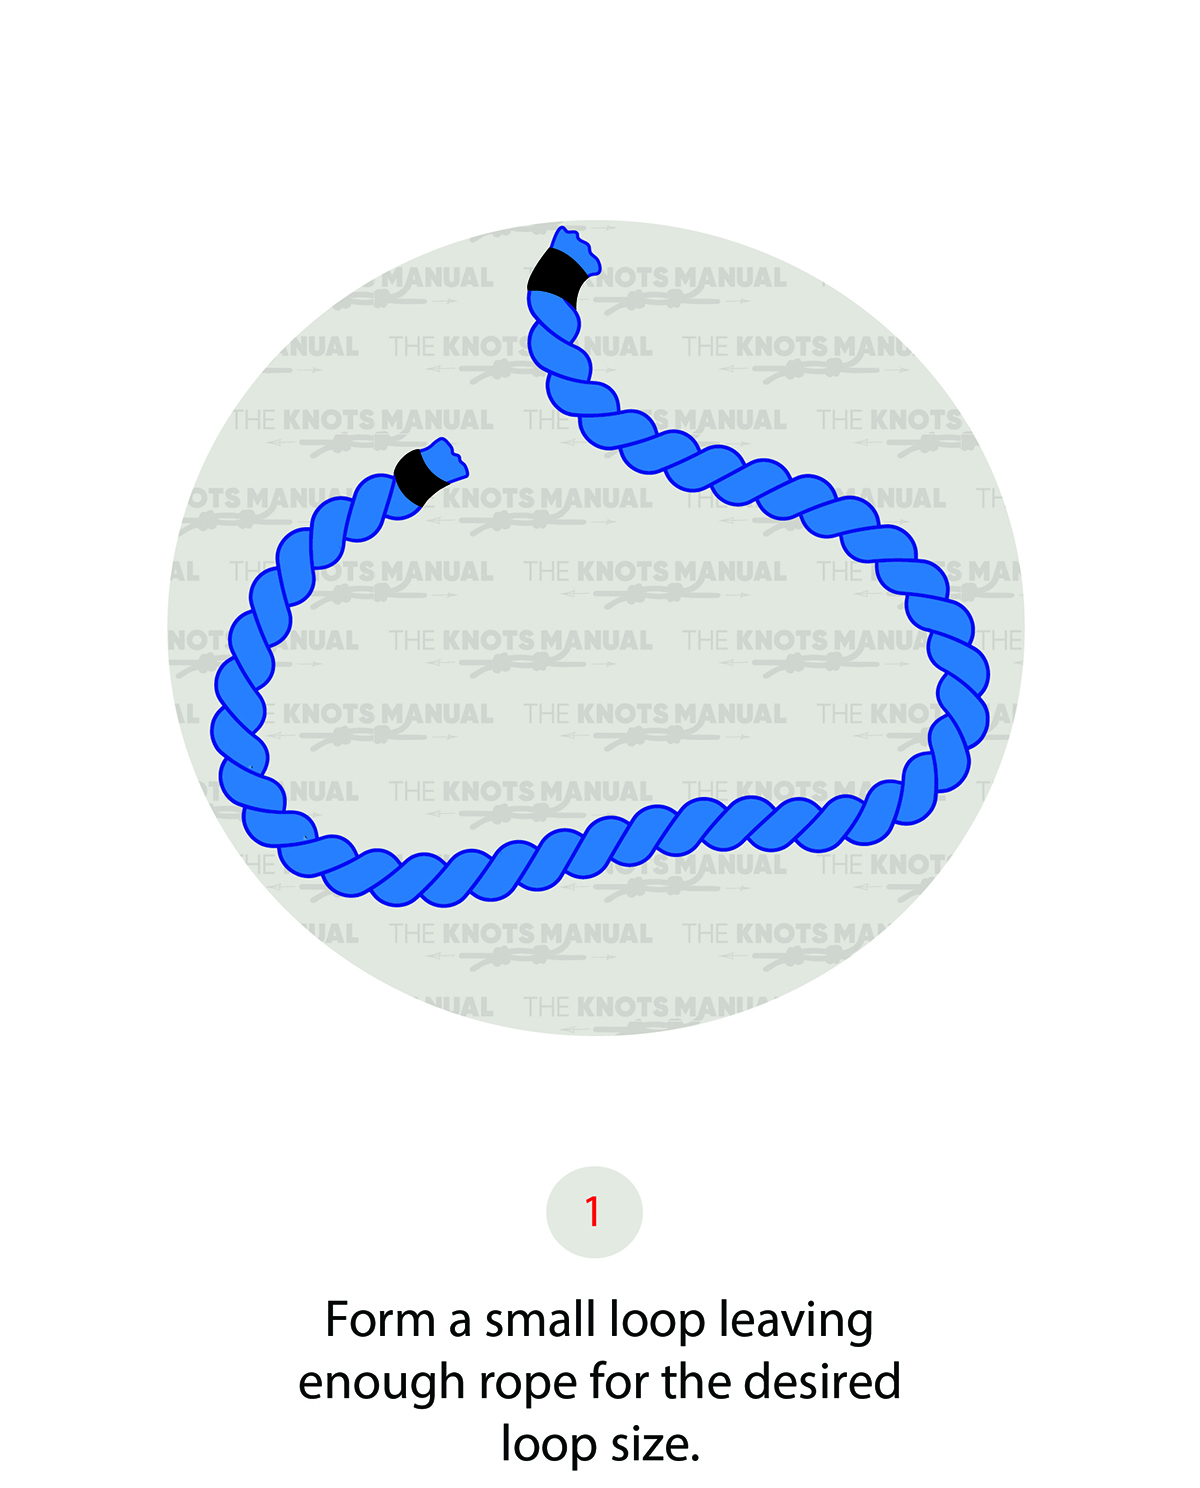
Leave a rather long end of the working end, based on how large you want the loop to be.

Step 2:

Bowling knot step 2

Form a loop near the end of the rope.

Step 3:

Bowling knot step 3

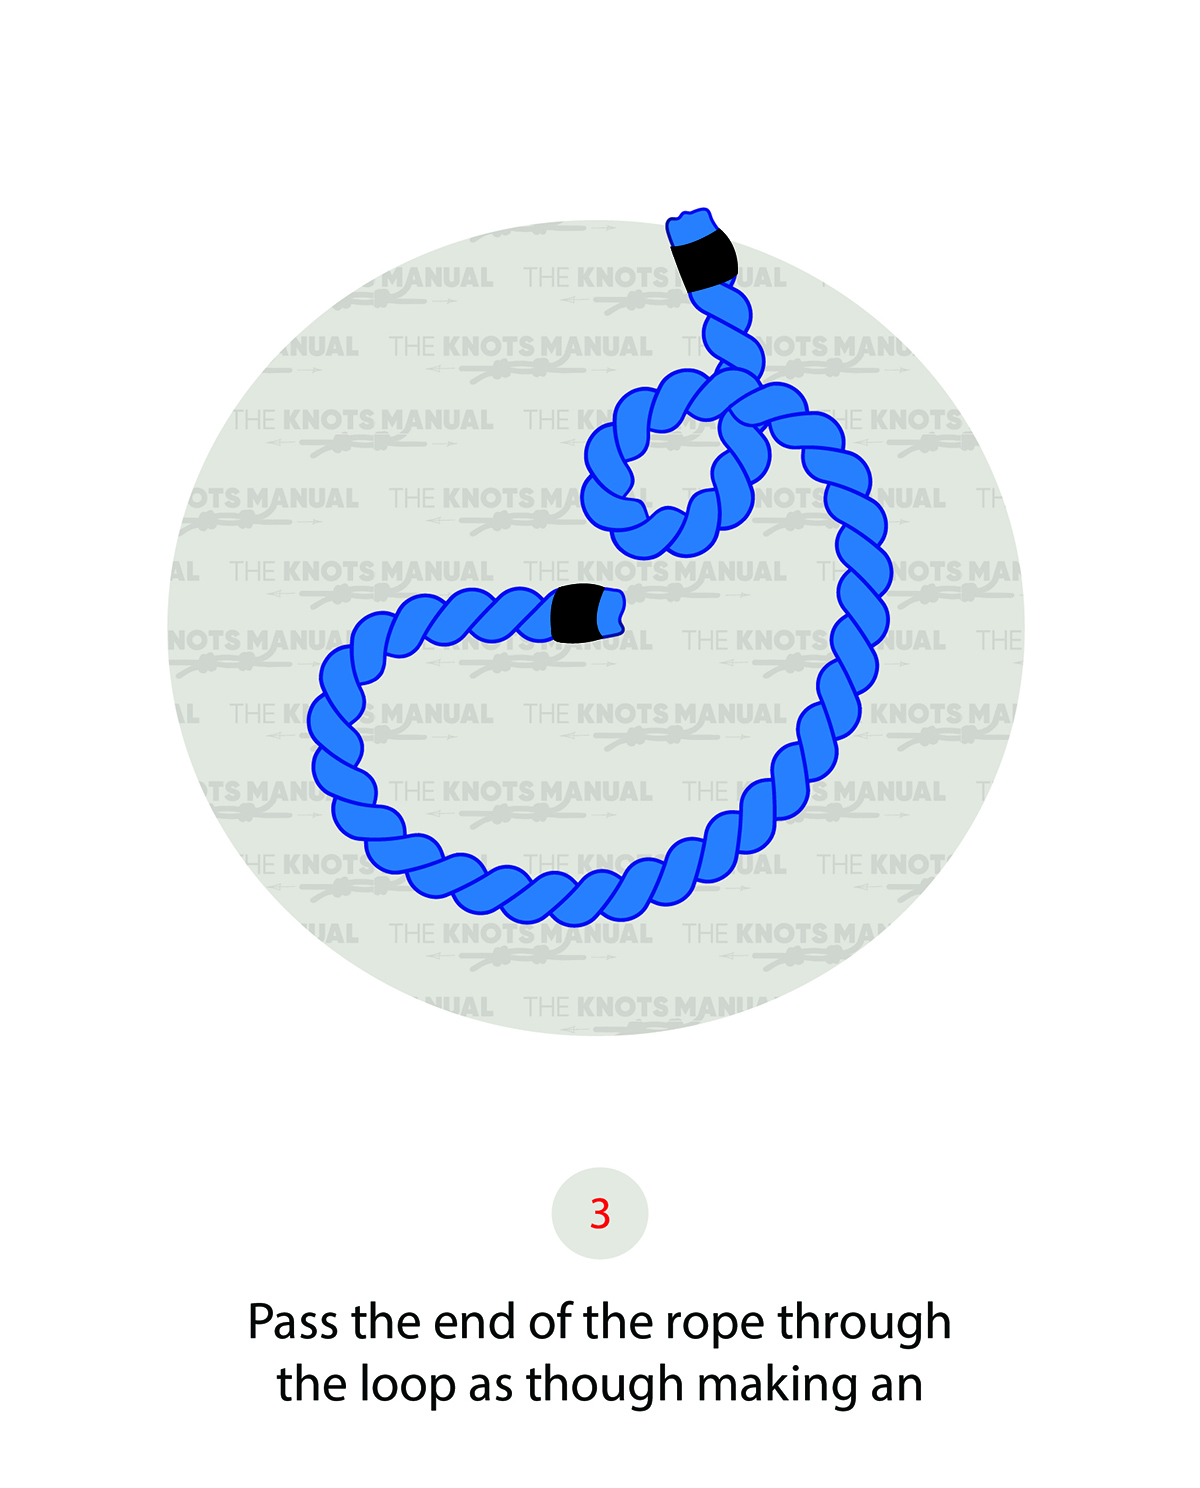
Pass the working end through this loop.

Step 4:

Bowling knot step 4

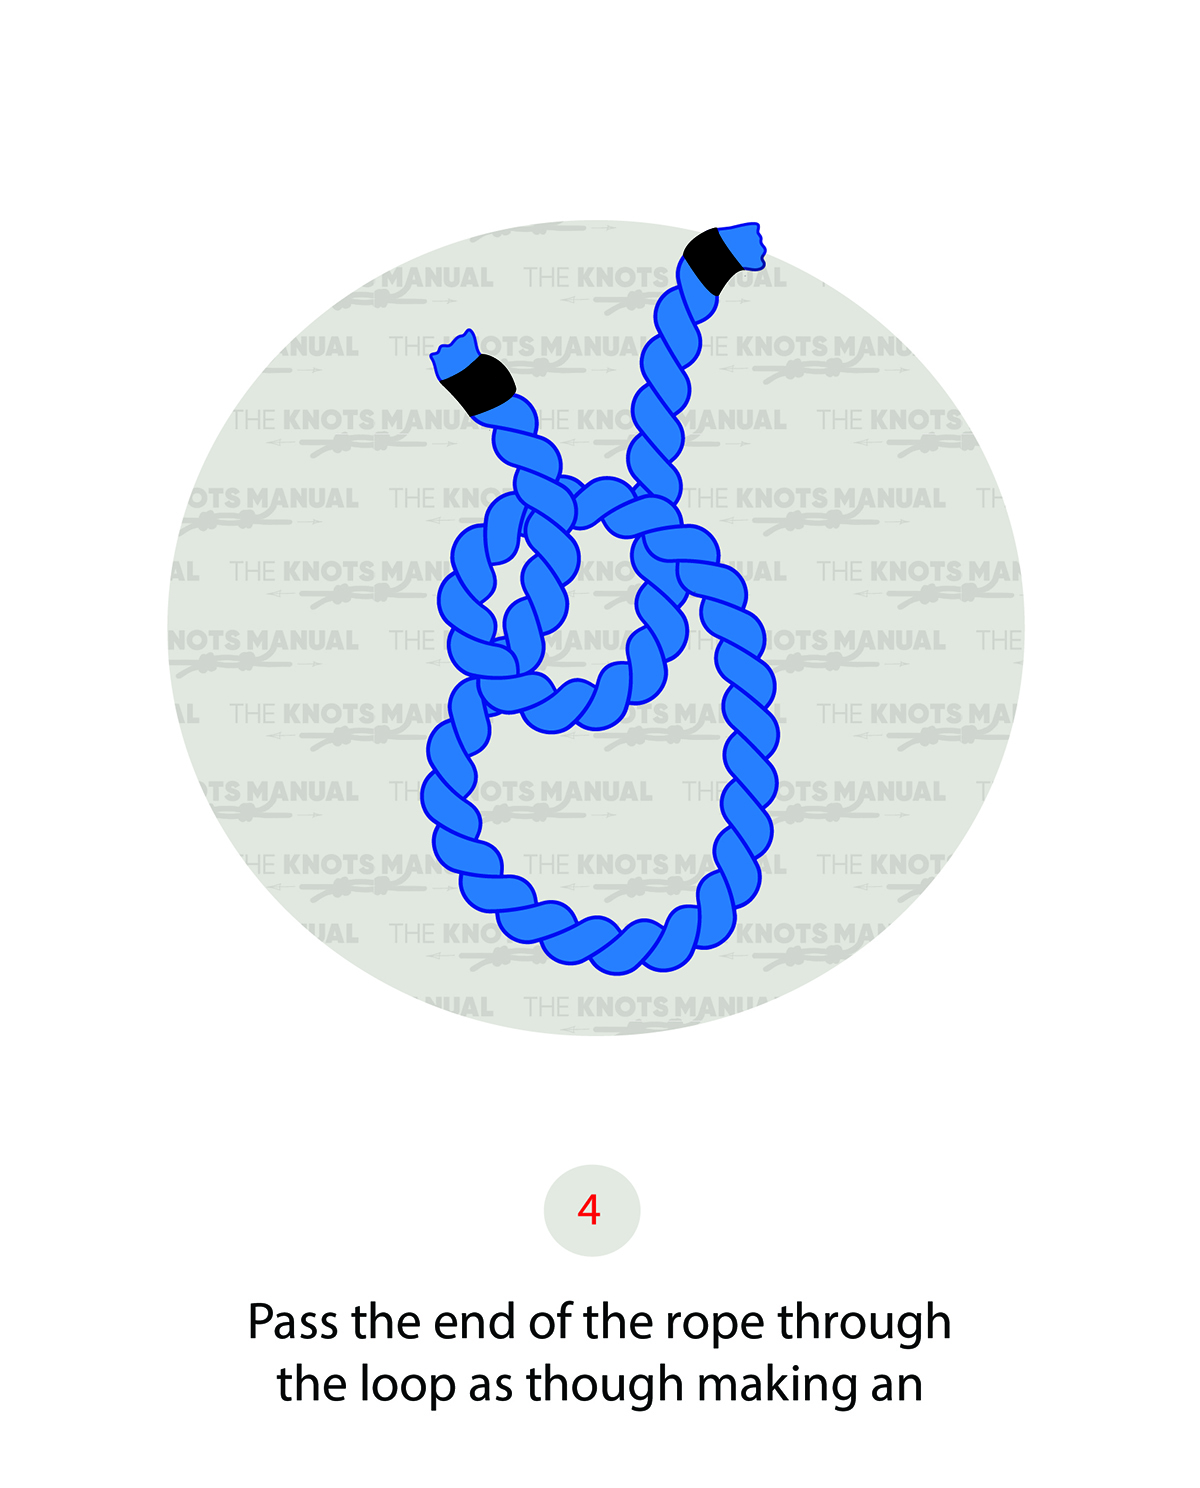
Go out of this loop on the left side of the standing end.

Step 5:

Bowling knot step 5

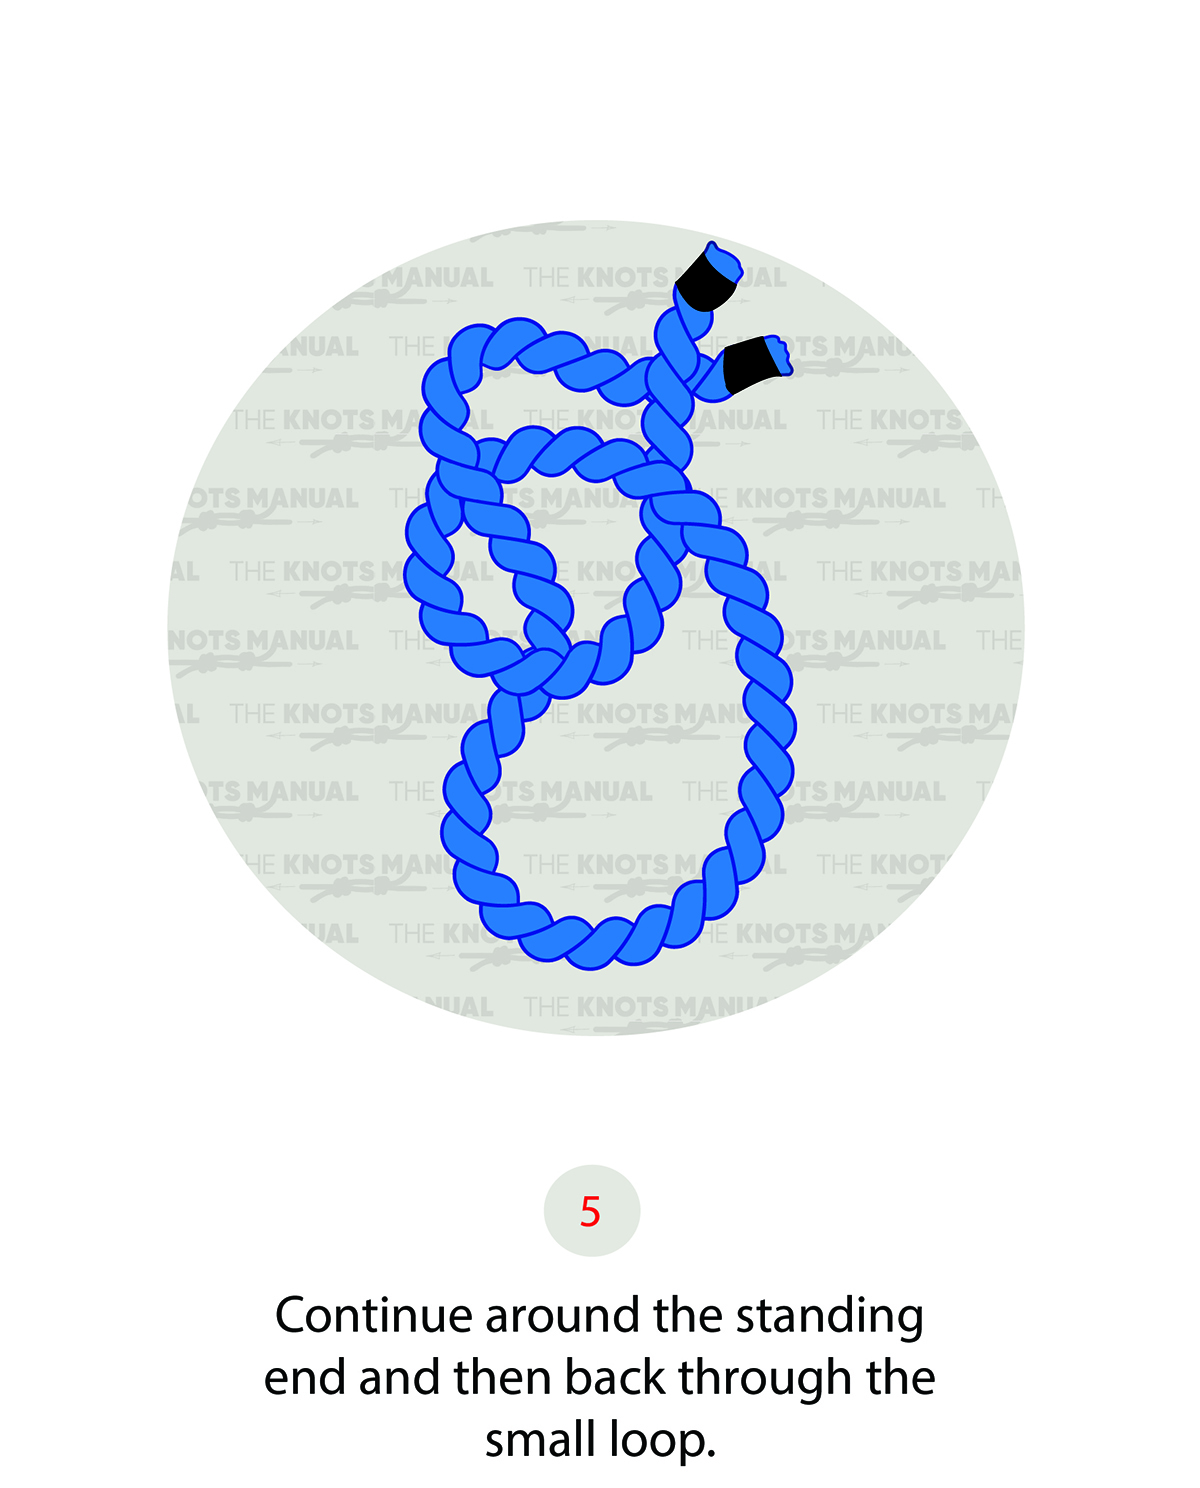
Pass the working end around the standing end.
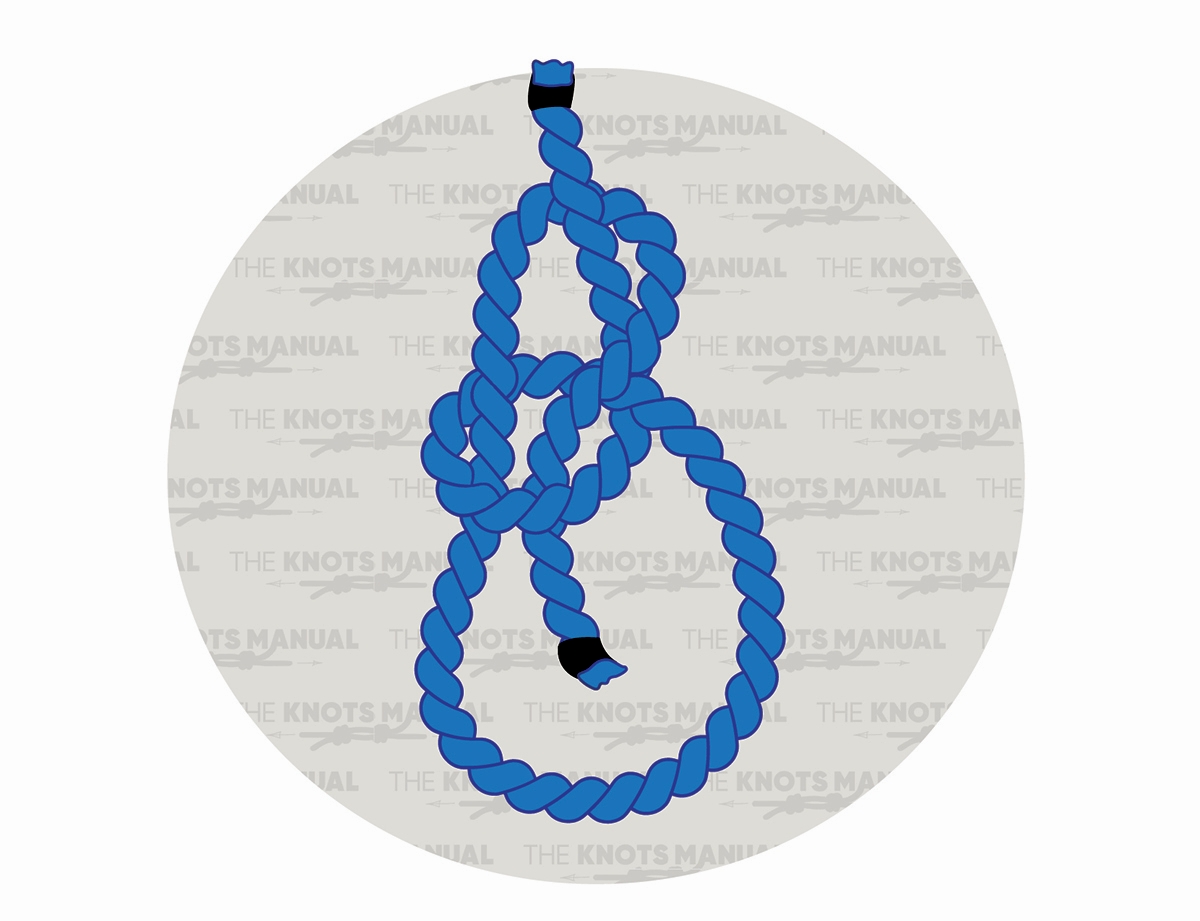
Step 6:

Bowling knot step 6

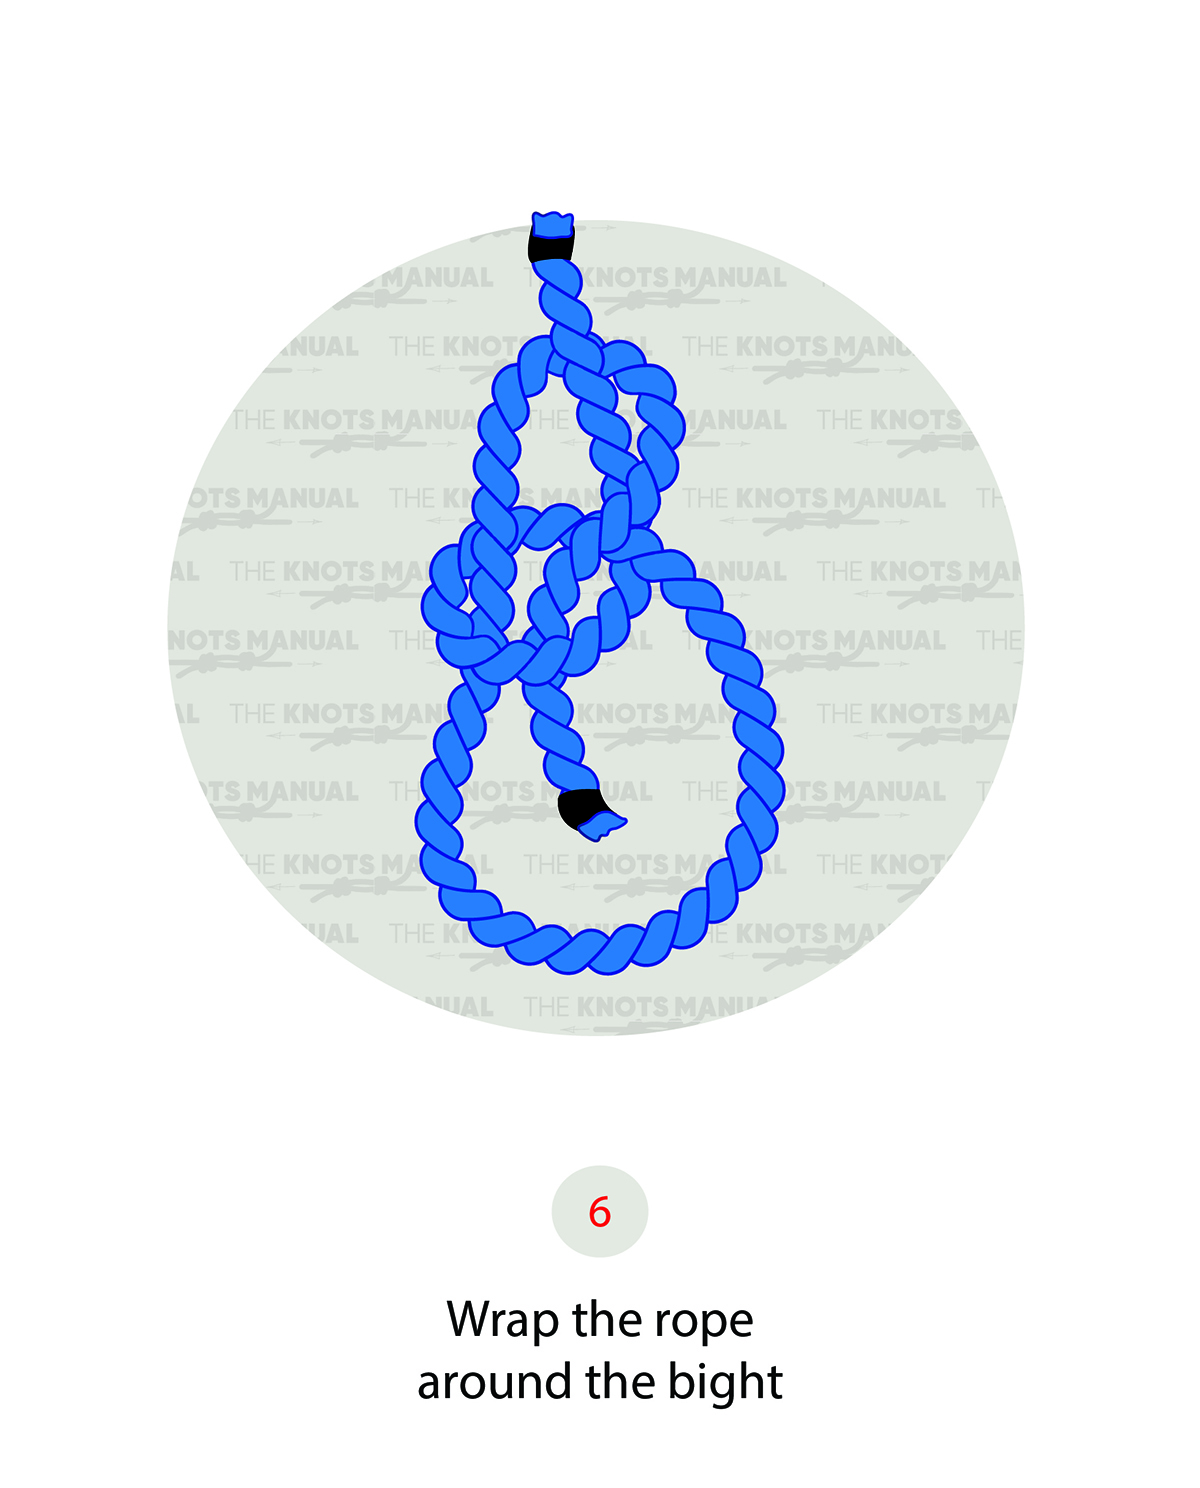
Pass the working end through the loop that you formed in step 2, only in the opposite direction. Finally, tighten the knot.


Frequently Asked Questions

How Strong Is the Bowline Knot?

The Bowline Knot retains about 2/3 of the rope strength. It’s a fairly secure knot, but it can’t be used for critical applications because it can become undone when not loaded. Once loaded, and if the load isn’t “cycling”, the Bowline Knot is very unlikely to come undone. However, there are more secure variations of this knot, like the Double Bowline, Water Bowline, and Yosemite Bowline.

Can the Bowline Knot Be Used for Climbing?

The Bowline Knot can be used in climbing, but not without a stopper knot. If you tie a Double Overhand Stopper knot right after it, the chances of it coming undone when not loaded decrease drastically. You can use this combination to tie into a climbing harness or to attach a rope to a carabiner. However, a more secure knot for climbing purposes is the Figure 8 Follow Through.

About the author
Oscar is a freelance writer who writes about traveling, hiking, and the outdoors. In his free time, he enjoys trekking in the mountains and camping in remote areas all across Europe.