The Spanish Bowline creates two fixed loops in the middle of a rope. It’s most commonly used in rescue situations to create a Bosun’s Chair for safely lifting up the injured person.
Quick Guide: How to Tie the Spanish Bowline Knot
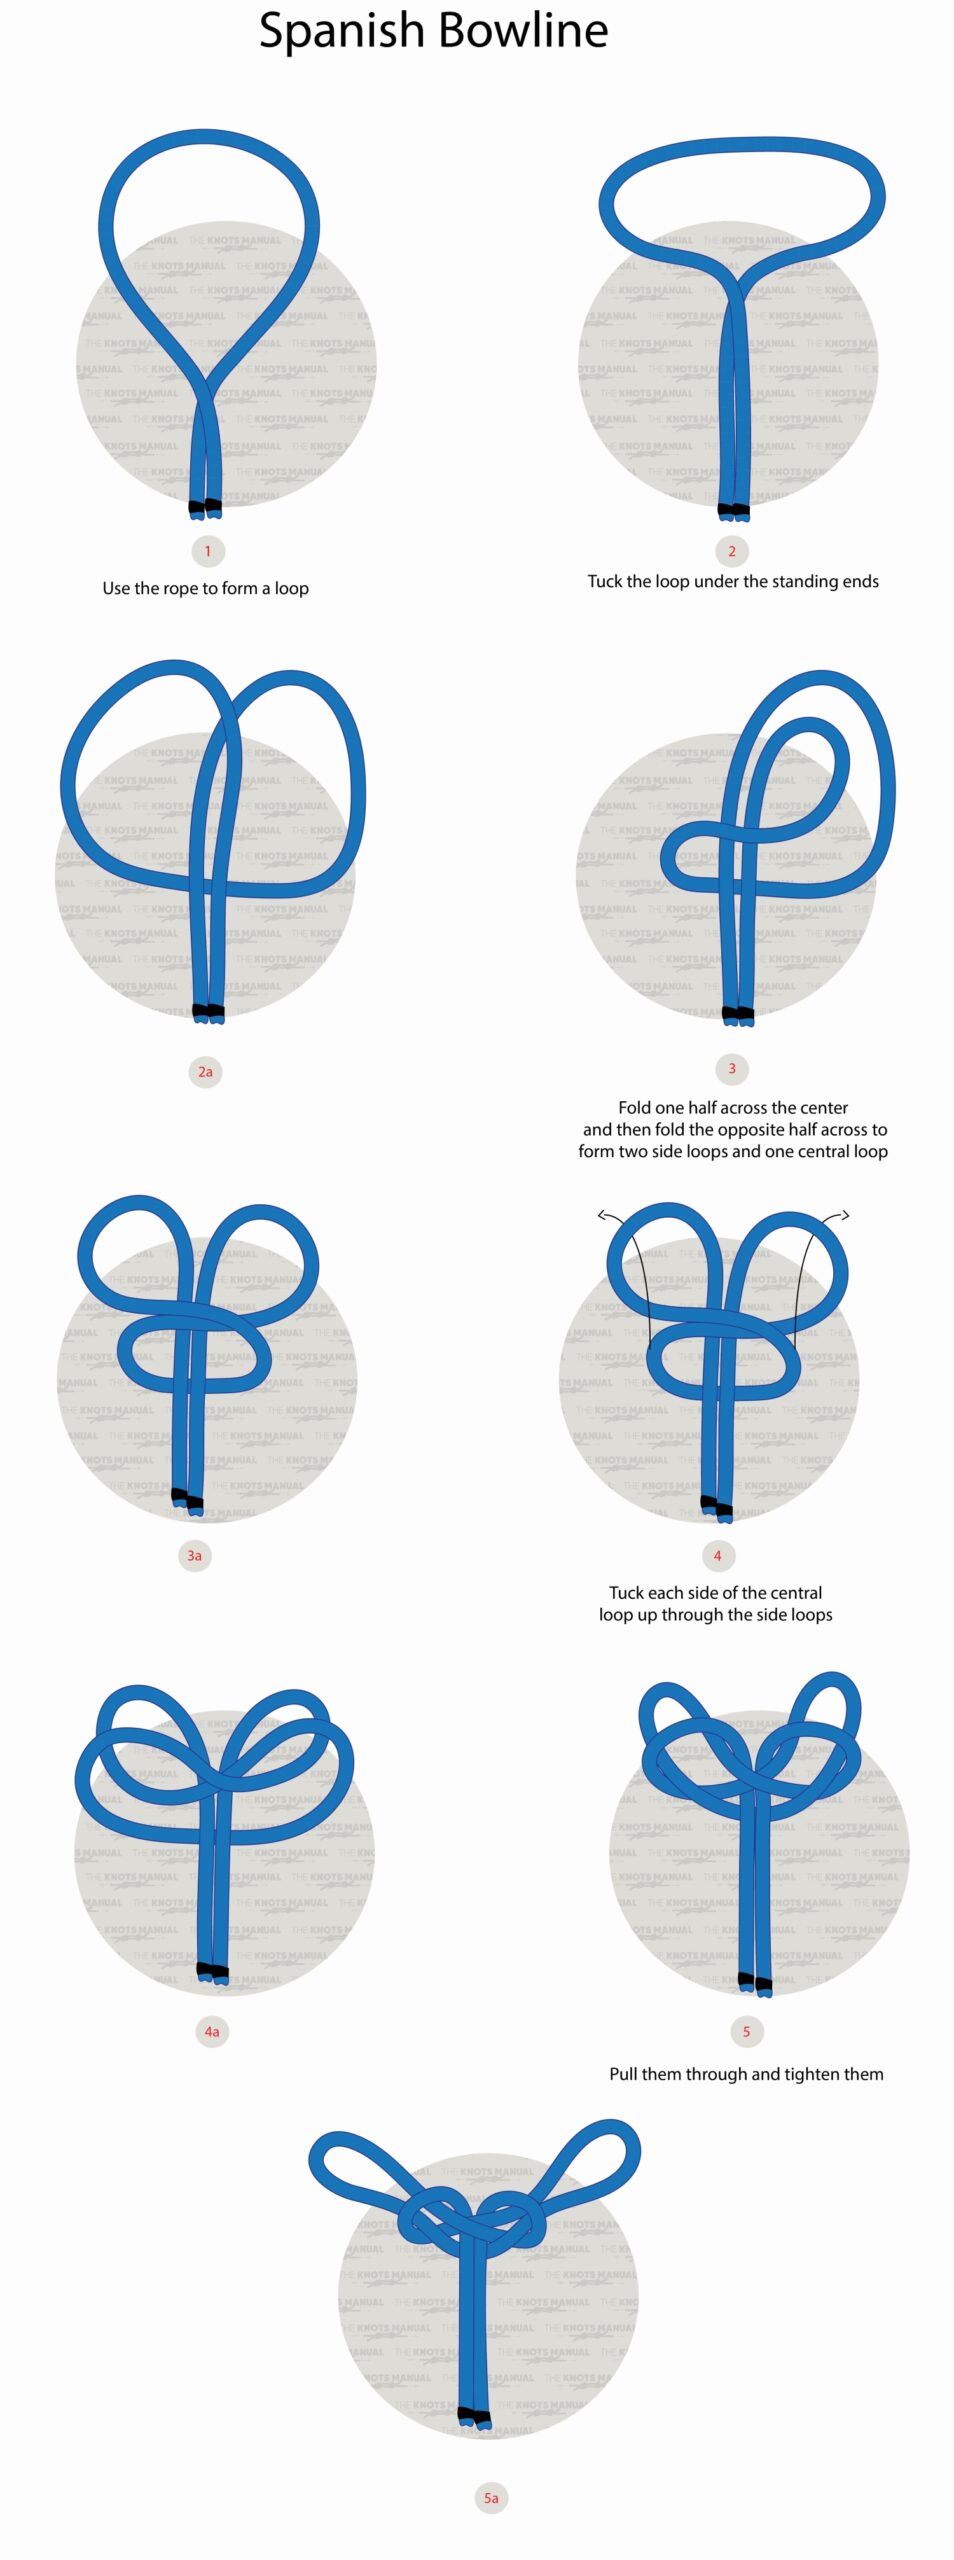
To tie the Spanish Bowline, first, create a closed loop in the middle of the rope (steps 1-2). Then fold it down, creating 2 loops in the process (step 2a). Fold the left loop over to the right, and the right one over to the left (step 3a). Another loop should form at the bottom. Tuck each side of the bottom loop through each side loop (steps 4-5). Finish the knot by pulling the loops while holding the standing ends in place.
The Spanish Bowline Knot should be tightened firmly before use. Otherwise, if you pull only one of the loops, the free one will tighten.
Some people also like to tie the Spanish Bowline using a different technique. In this case, steps 1-3 are different. They’re replaced with the following procedure: Create 2 loops in the middle of the rope, twist them, and pass the left loop through the right one. The result should look identical to step 3a in our illustration.
Pros and Cons of the Spanish Bowline Knot
One benefit of the Spanish Bowline is that one of the loops can be made larger than the other one. You should adjust the size of them before tightening the knot. Once the knot is tightened firmly, each loop will hold in place.
Another benefit is that each of the loops is facing in opposite directions. In other knots that create two fixed loops, usually, they exit from the same direction. This makes the Spanish Bowline advantageous in certain situations where a “T” profile is needed.
The Spanish Bowline is a very reliable knot. It cannot come undone, even if only one of the loops is loaded. In this scenario, the other loop will untie but the one being loaded will remain intact.
This knot is also somewhat easy to untie, even after shock loads.
One downside to this knot is that it’s somewhat difficult to tie. That’s why most people prefer to tie other knots when a similar knot is required.
Another downside is that the loops of the Spanish Bowline can become loose if not tightened properly. In this case, if you lightly pull one of the loops, the other one will tighten. This isn’t ideal for rescue operations.
Common Uses for the Spanish Bowline Knot
Most commonly, the Spanish Bowline is used to create a Bosun’s Chair for lifting injured people in Search and Rescue operations. The injured person’s legs are passed through each of the loops.
In this case, the person must be conscious, because he needs to hold on to the standing lines of the rope. If the person is unconscious, then another loop should be tied around their chest. A good knot to use for this situation is Bowline on a Bight.
This knot can also be used to distribute weight between 2 anchor points. Because the Spanish Bowline forms a T profile, you can attach another line to each of the loops and then tie each one around an object. If one anchor snaps or comes loose, the other one won’t come loose.
Knots Like the Spanish Bowline
French Bowline Knot: Another variation of the Bowline Knot. In this case, one end of the rope is needed to tie the knot. It’s also used for similar search and rescue operations to create a Bosun’s Chair.
Double Figure 8 Knot: This knot also creates two fixed loops in the middle of the rope. It’s advantageous over the Spanish Bowline because each loop remains fixed more reliably, and it’s stronger and more reliable.
Double Alpine Butterfly Loop: This knot creates two strong, fixed loops in the middle of a rope. It’s most commonly used in mountaineering and by rock climbers.
Bowline on a Bight: This knot is often used in combination with the Spanish Bowline to create two extra loops that fit around a person’s chest when rescuing unconscious people. It also creates two reliable loops in the middle of the rope, only is much easier to tie compared to the Spanish Bowline.
The Handcuff Knot: This is one of the weakest knots for creating two loops in the middle of the rope. It won’t come undone, but the loops aren’t fixed in place.
Fireman’s Chair Knot: This is an improved version of the Handcuff Knot, where each loop is fixed in place. This knot is more commonly used in Search and Rescue situations, as it’s slightly advantageous over the Spanish Bowline.
Step-By-Step Guide: How to Tie the Spanish Bowline Knot
A step-by-step guide on how to tie the Spanish Bowline Knot.
Step 1:
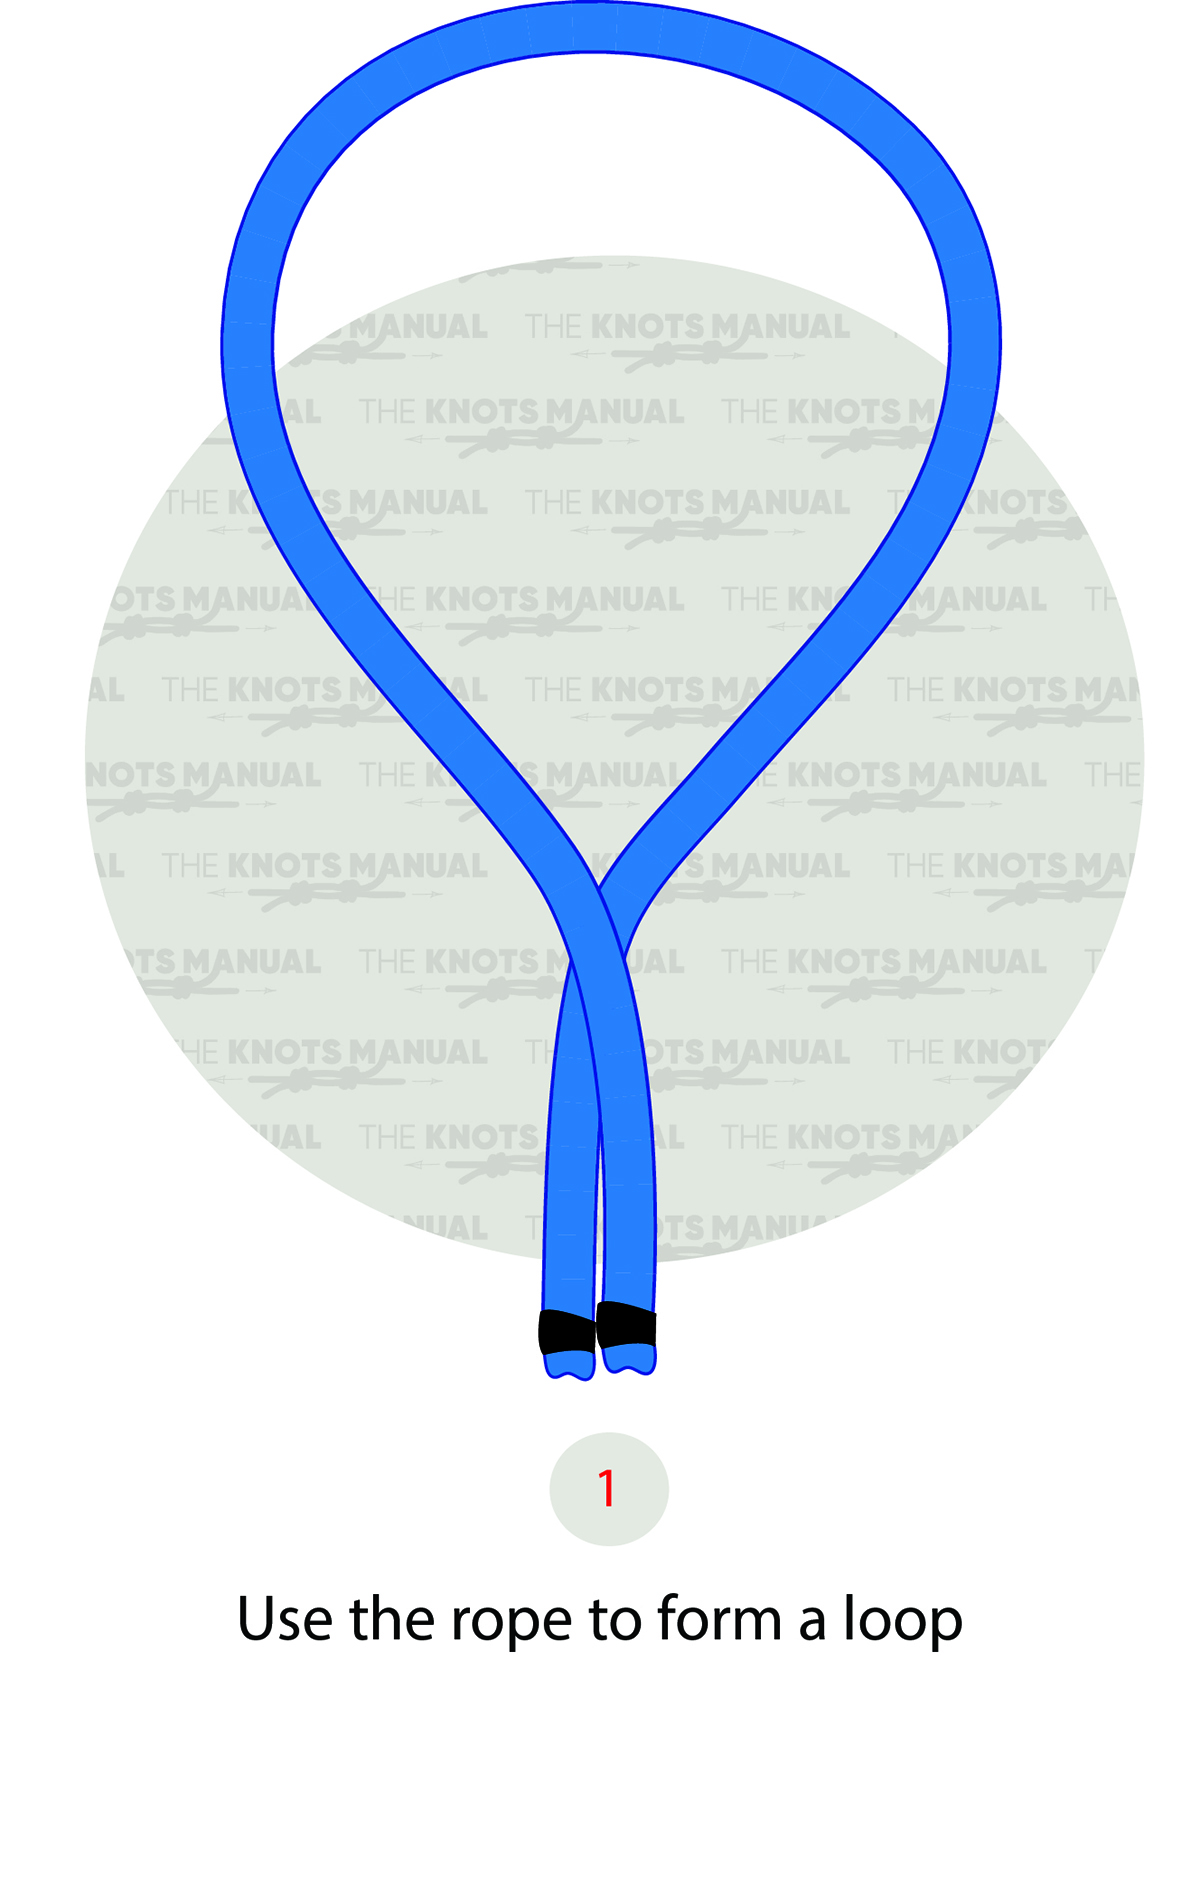
Create a loop with crossed ends parallel to one another in the middle of the rope.
Step 2:
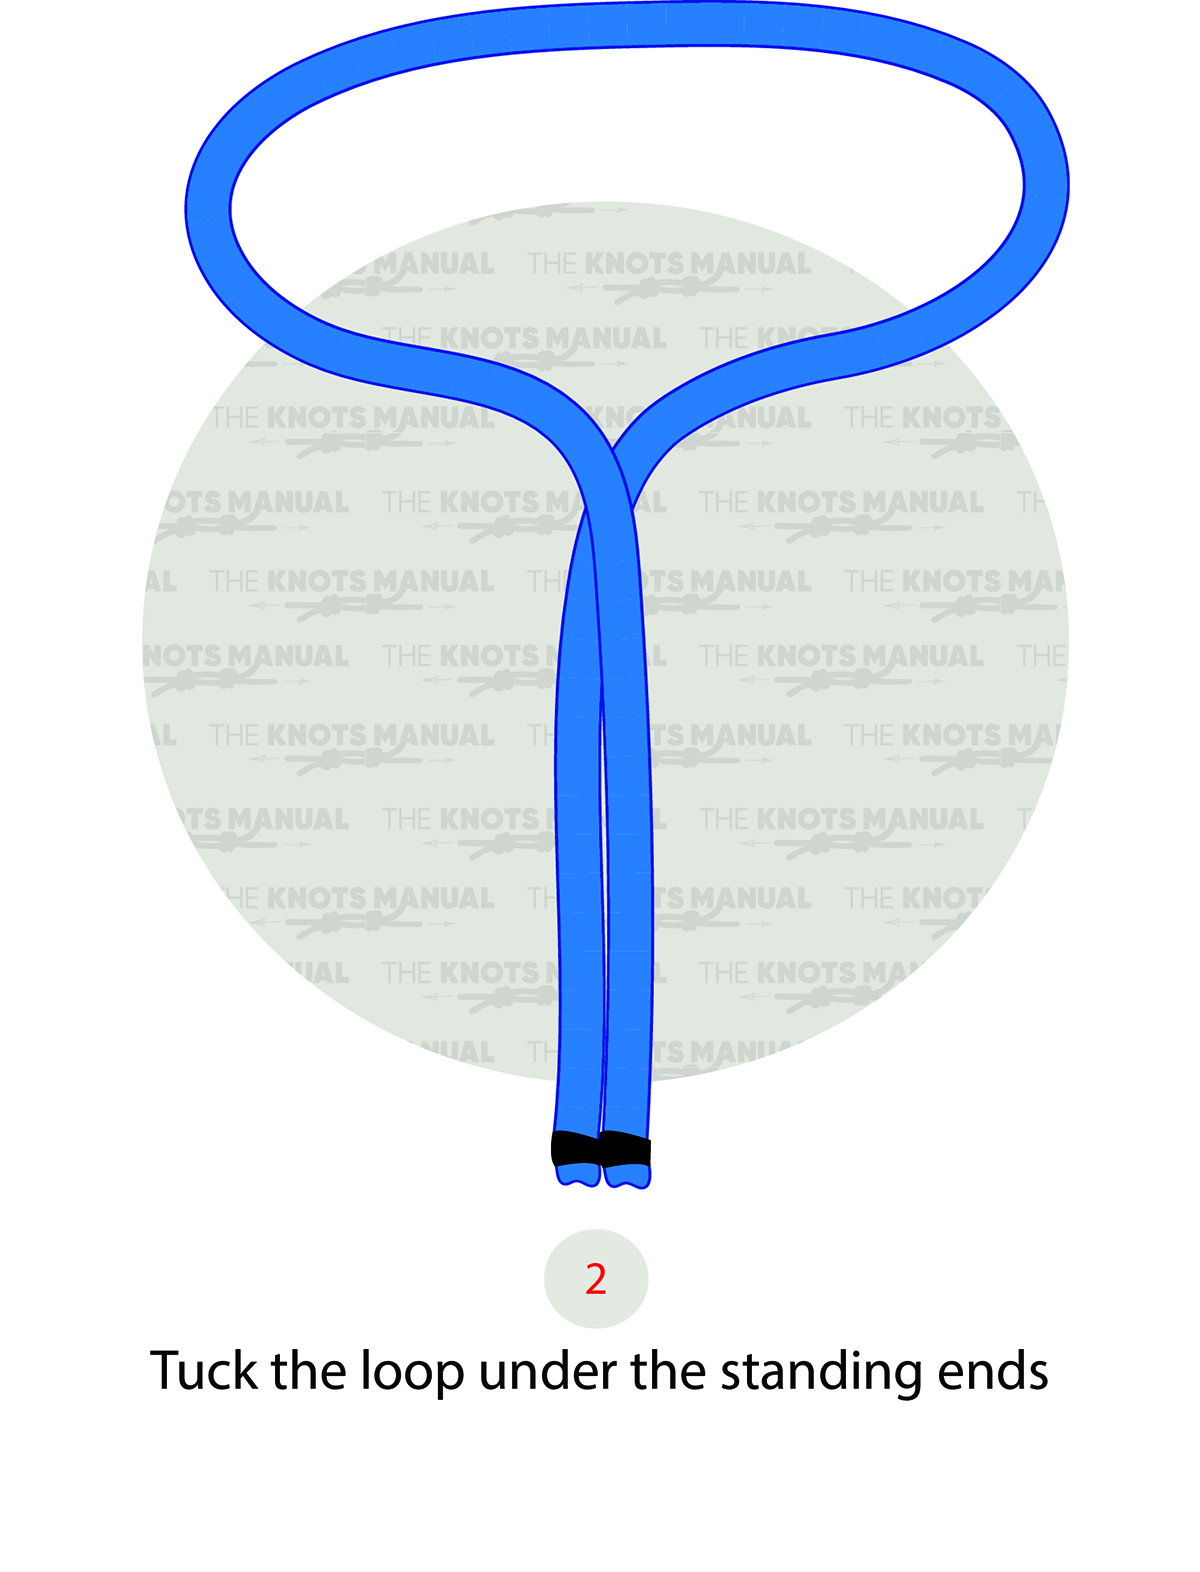
Fold the loop underneath both ends.
Step 2a:
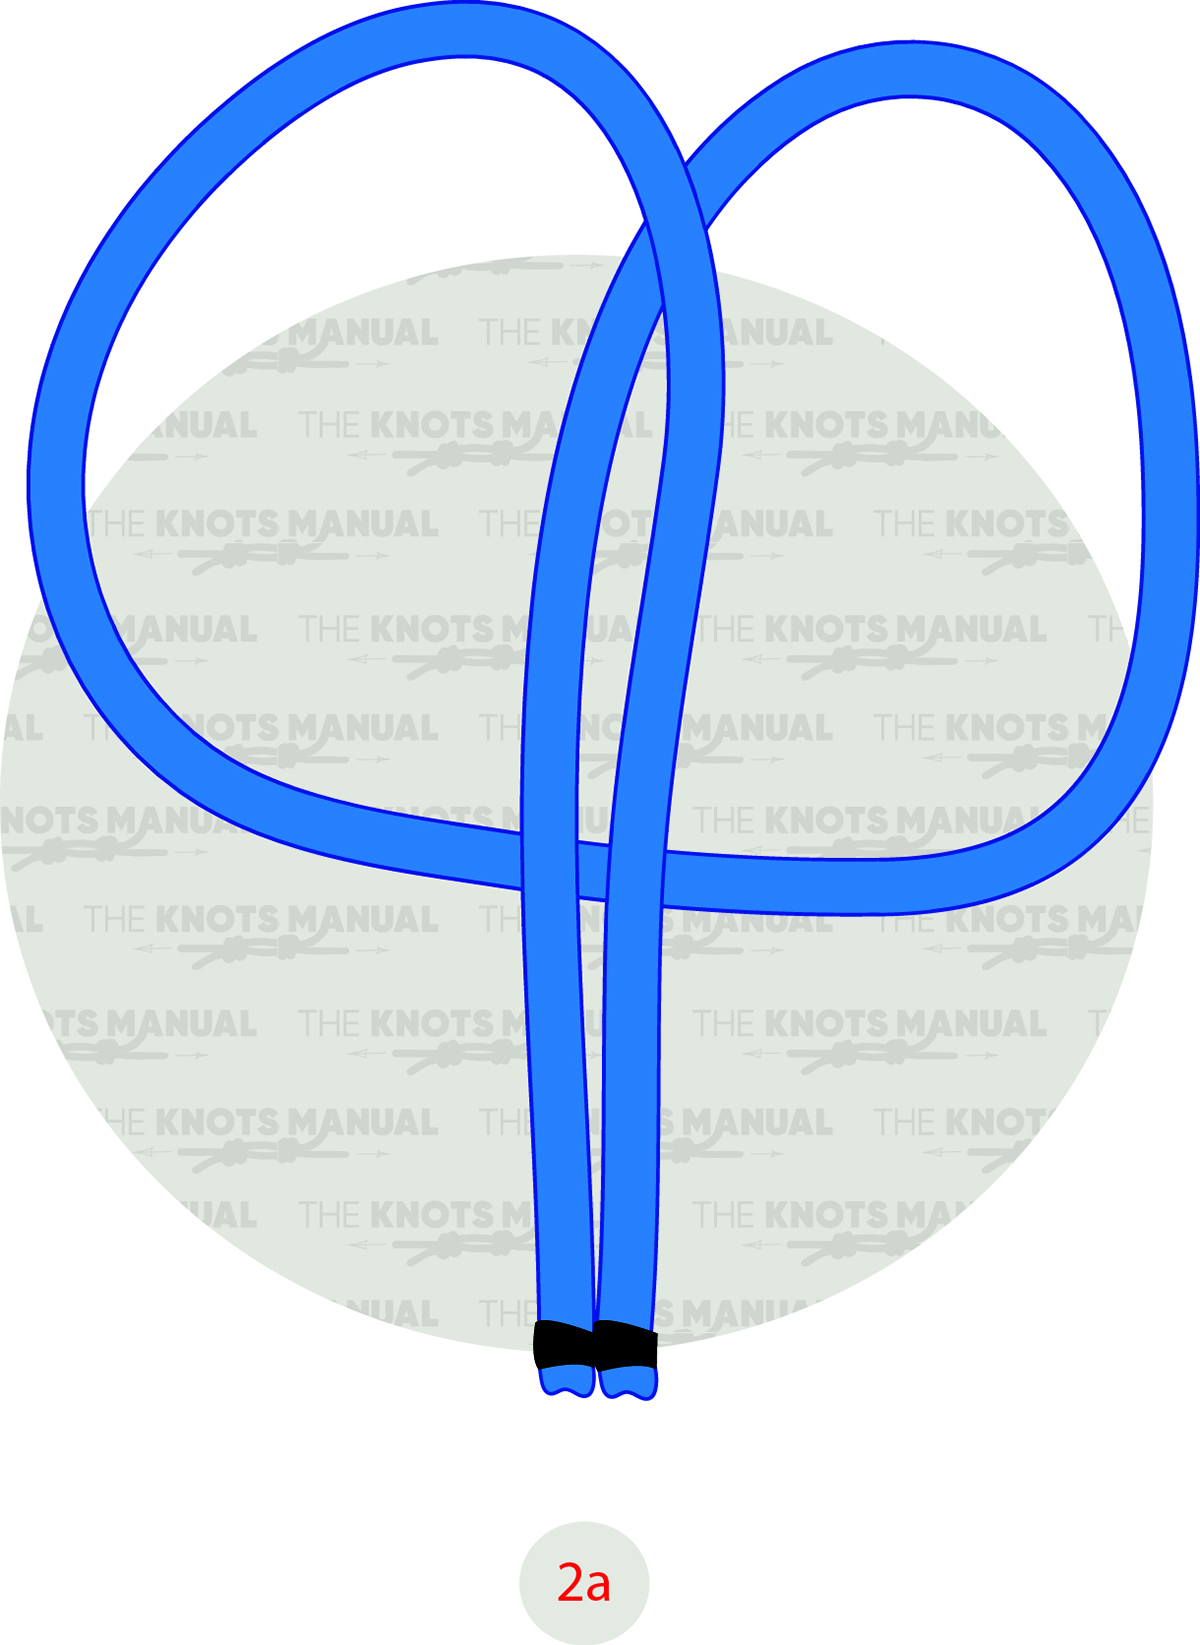
Doing this should form two loops – one on the left side and one on the right one.
Step 3:
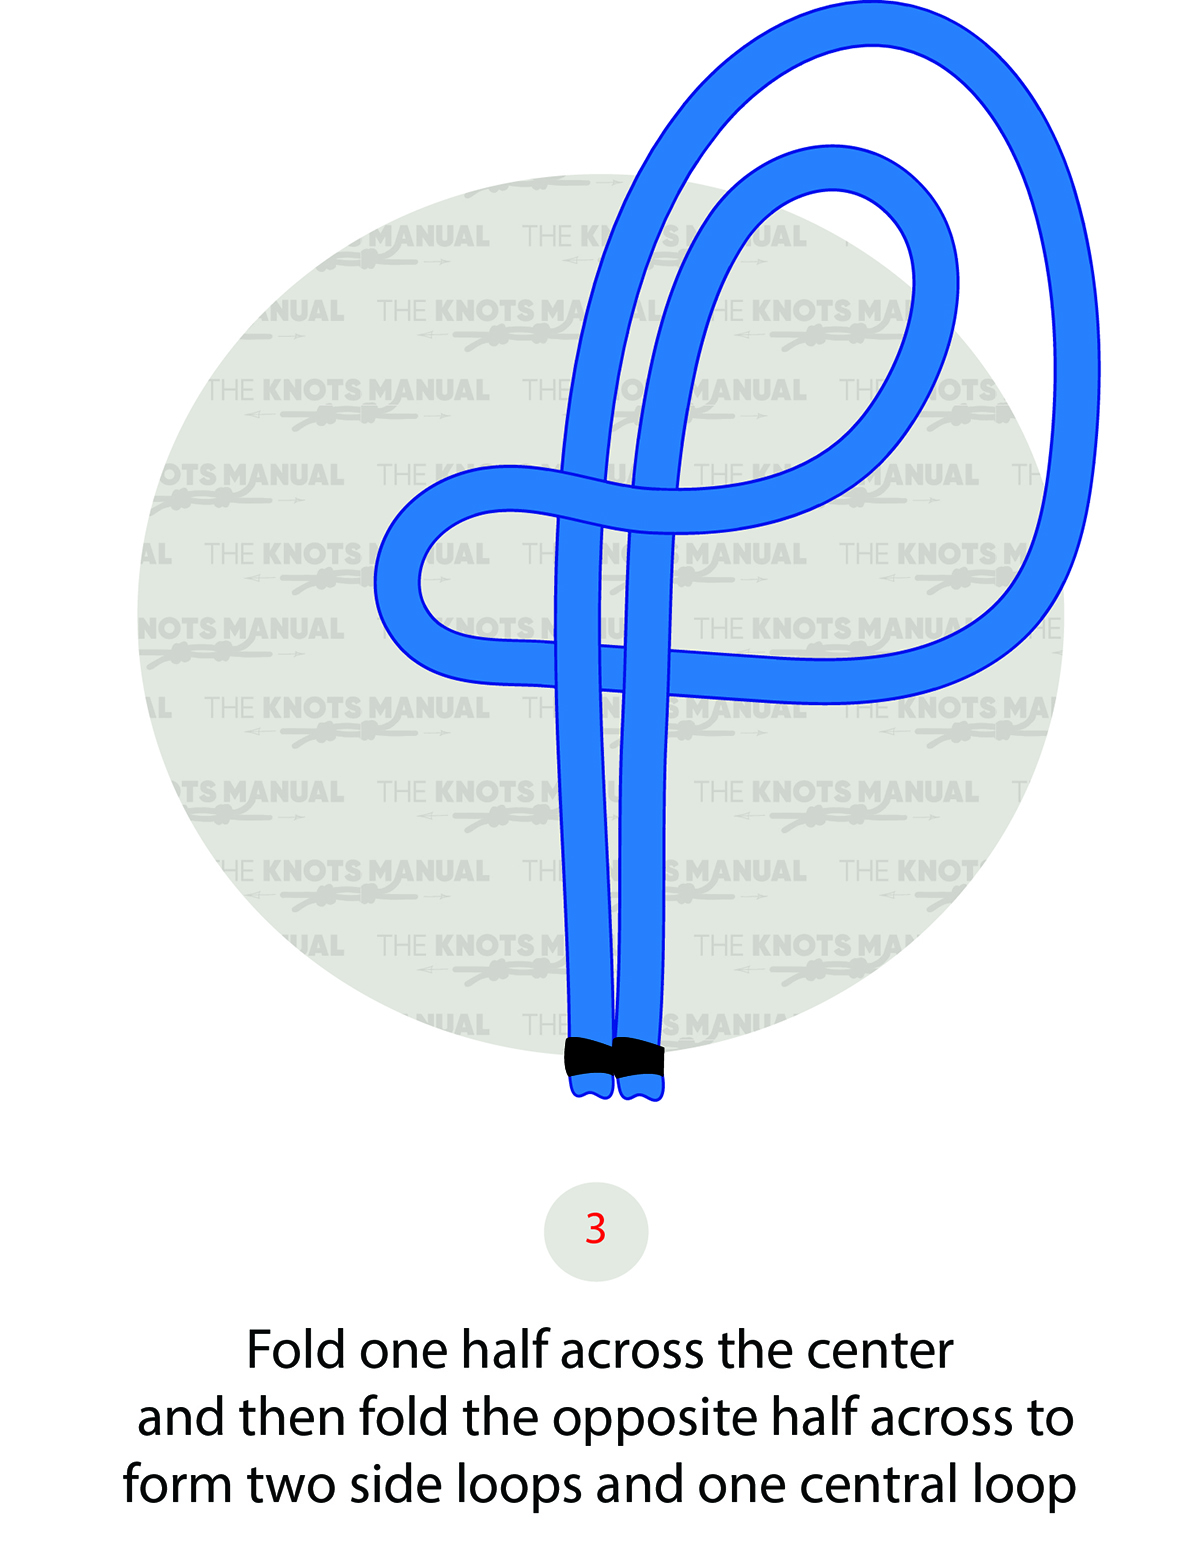
Fold the left loop over to the right side.
Step 3a:
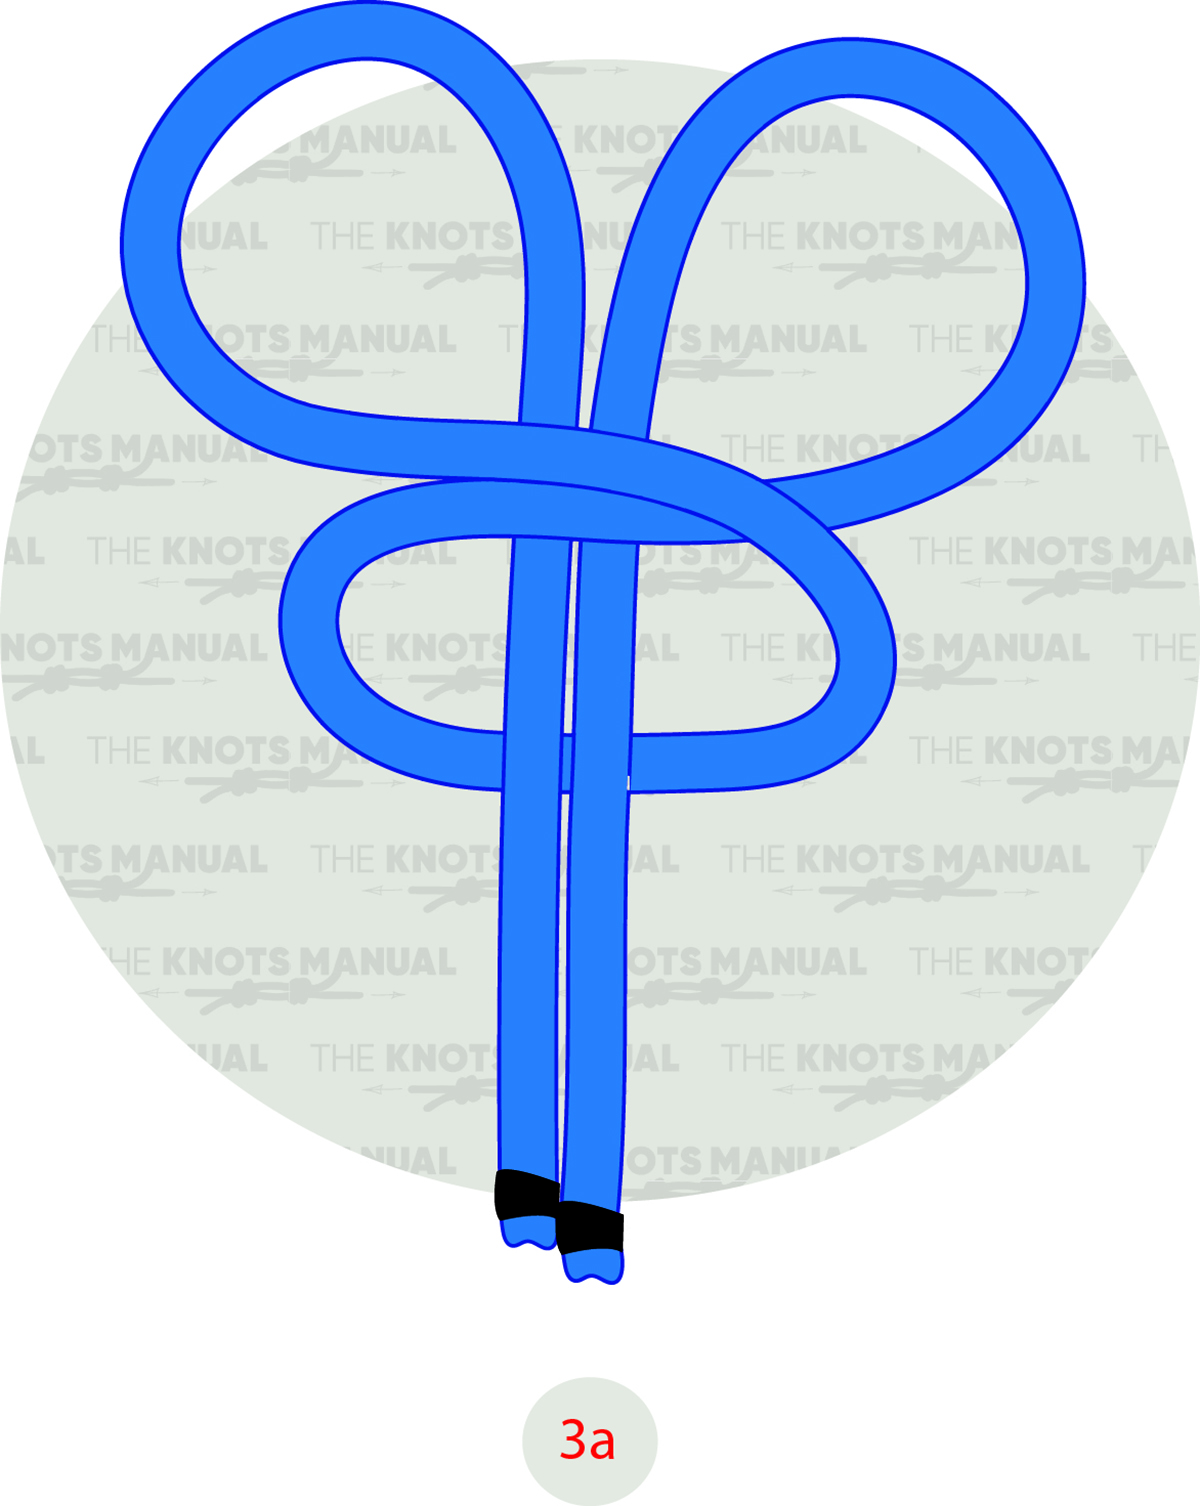
Now fold the right loop over to the left side.
Step 4:
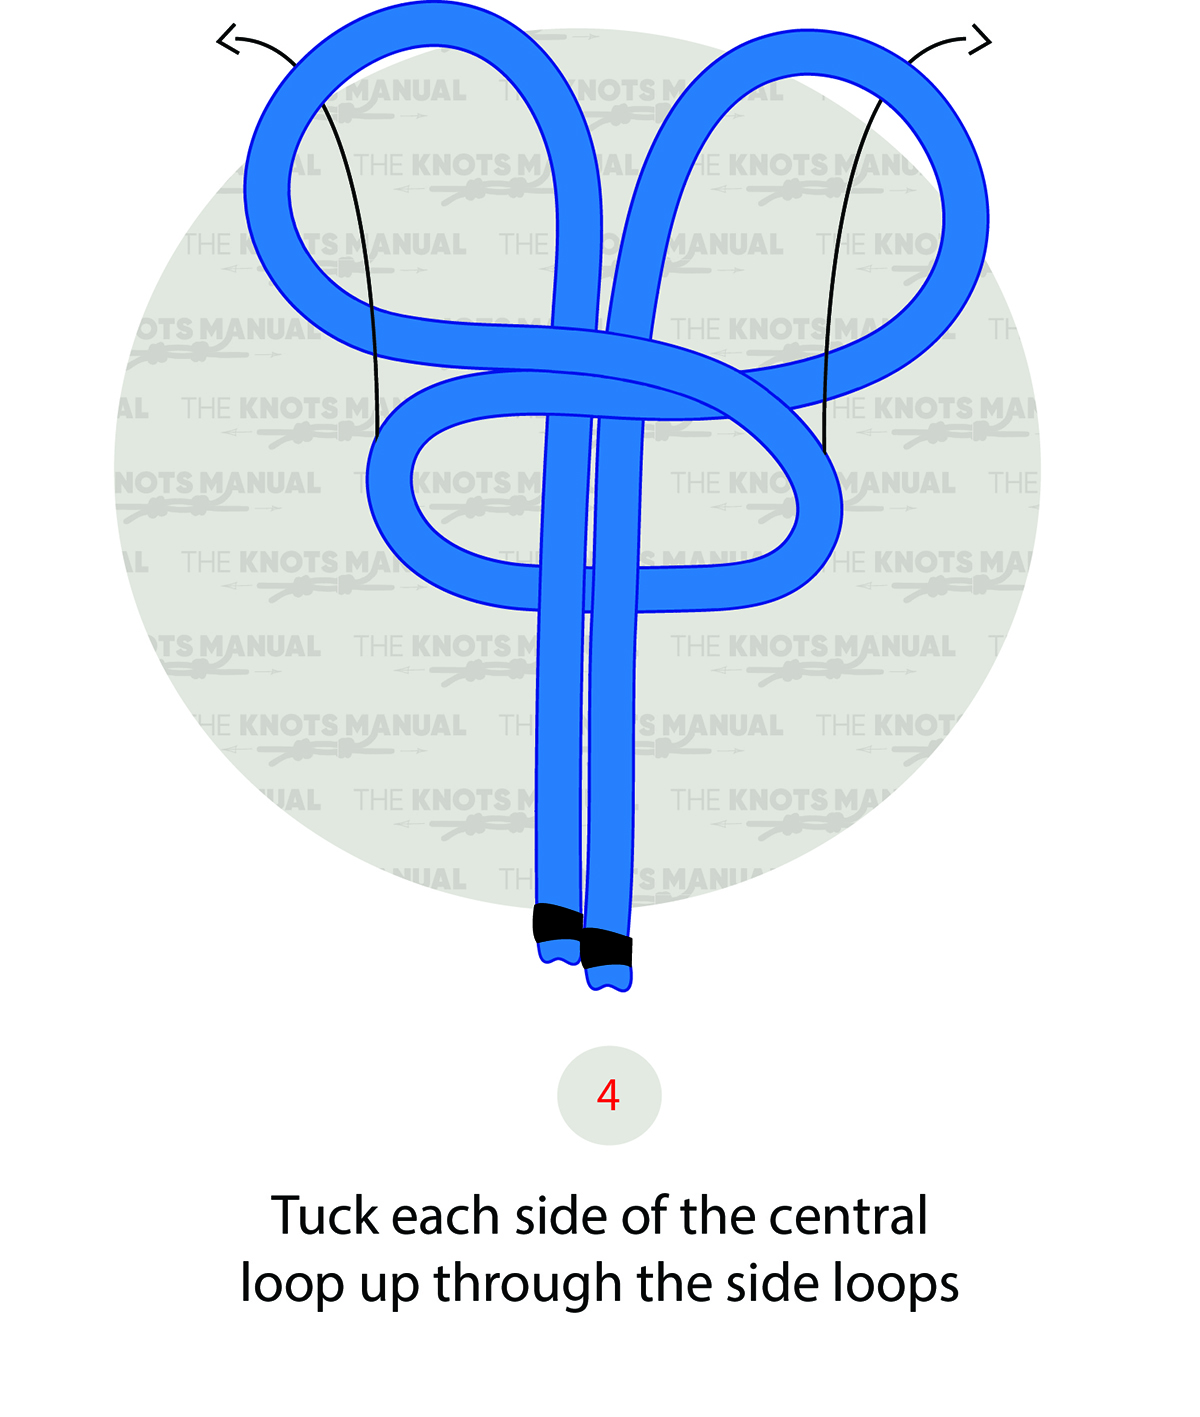
Pass the bottom (newly-formed) loop through the top ones as shown in the illustration.
Step 5:

Pull both loops to tighten the knot.
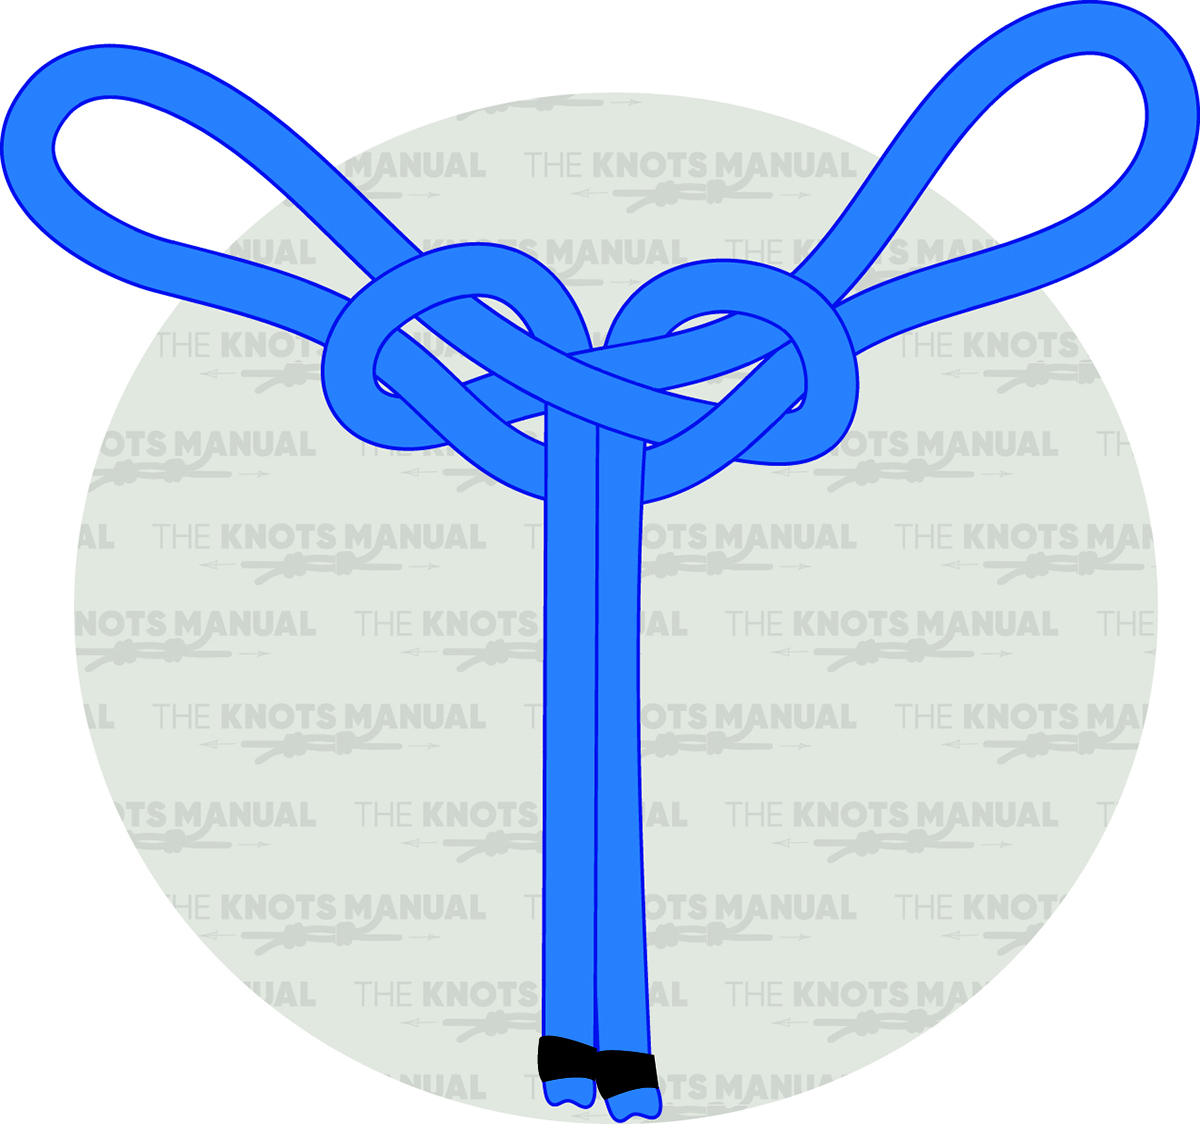
Step 5a:
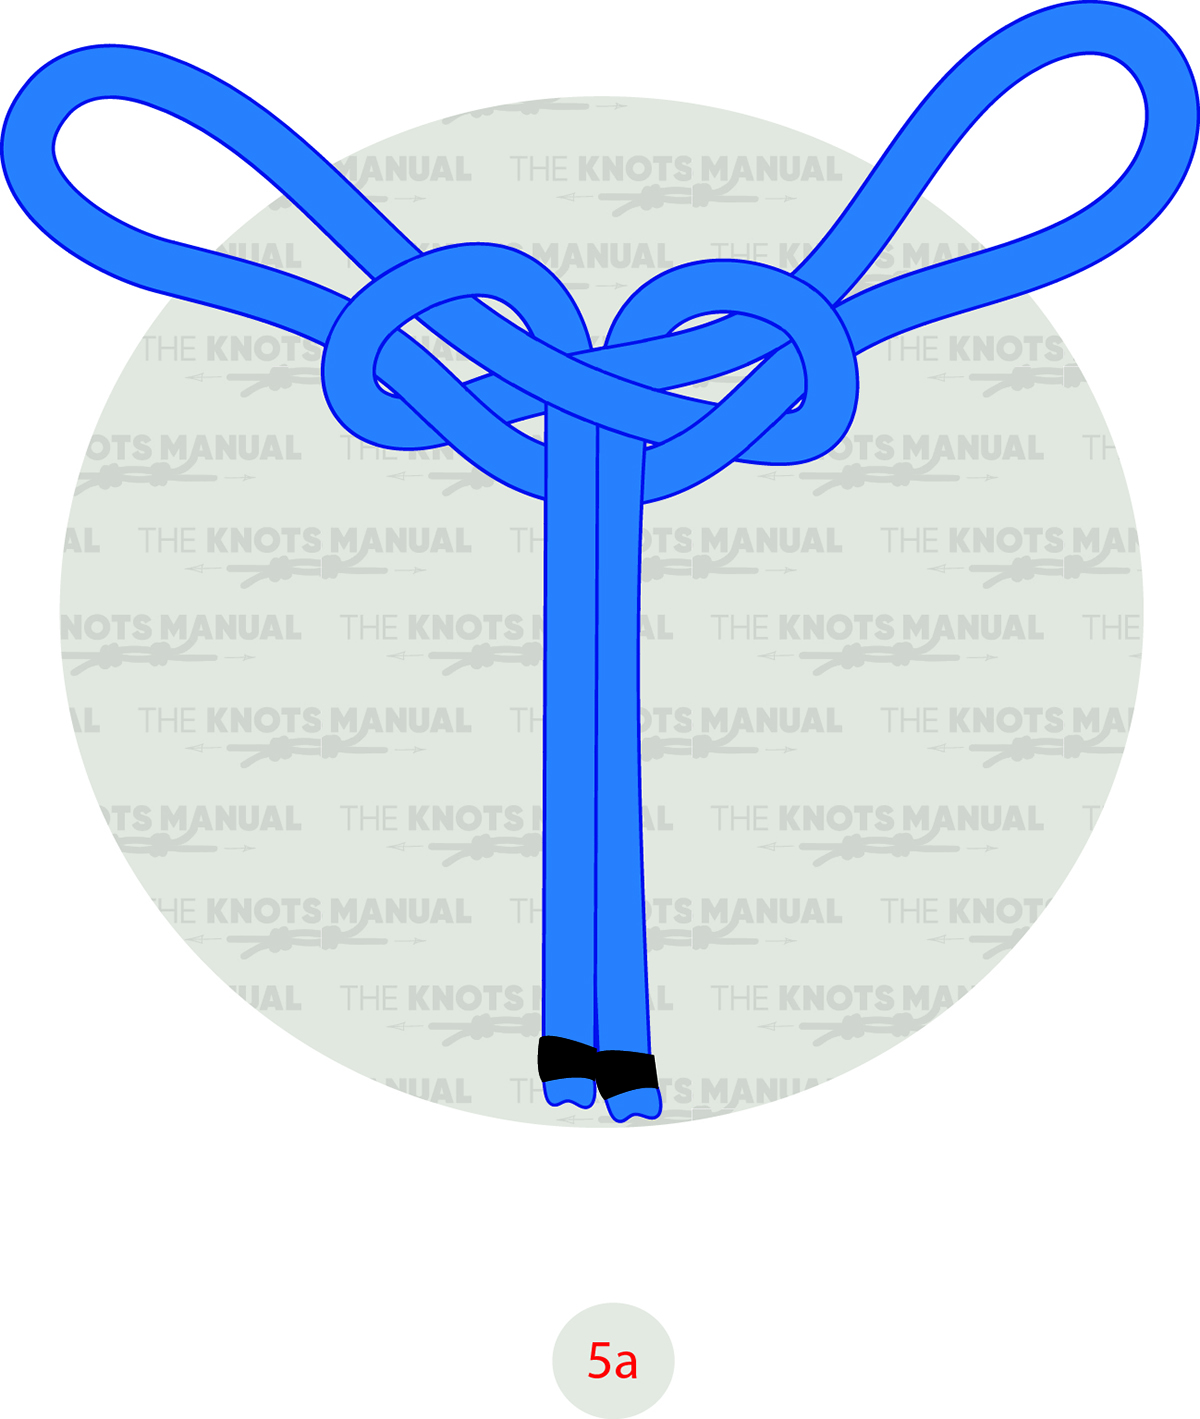
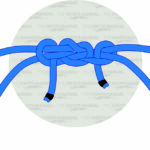
The Spanish Bowline Knot is finished.