The Yosemite bowline knot is also known as the “Yosemite finish.” It is a more secure variation of the traditional bowline knot. The bowline knot was the prime knot used by climbers for a significant amount of time.
After some time, climbers began shying away from the bowline knot. The hesitation was due to its tendency to capsize and become dangerous. Instead, climbers began opting for the figure 8 knot. Then, we came up with a variation of the bowline knot: the Yosemite bowline knot.
The Yosemite finish is meant to address all the safety issues with the bowline knot. The Yosemite bowline knot is considered the best for climbers, but most don’t know it exists. Climbers continue to use the figure 8 knot over the Yosemite bowline knot.
Follow our simple instructions below to learn how to tie the Yosemite bowline knot.
What Is The Yosemite Bowline Knot?
The Yosemite bowline is a loop knot more secure than a traditional bowline knot. The Yosemite bowline prevents the knot from capsizing into a dangerous slip knot. Still, be very careful when tying these knots. An incorrectly tied knot that capsizes can be disastrous.
For instance, Lynn Hill went climbing in the Buoux, Haute Provence of France. She used the Yosemite bowline knot during her climb. Unfortunately, the knot was tied or tightened incorrectly, causing it to capsize. Hill ended up dropping 85 ft (25 m) to the base of the climb below. Fortunately, she lived to tell the tale and was back to climbing shortly after.
The rope’s free end wraps around the leg of the loop and is tucked back through the knot. Then, a final round turn is completed.
To achieve even more security, you can tie the knot’s tail. The completion of this extra secure knot is known as the “figure 8 Yosemite finish.” It gets its name because the working end forms a figure eight.
Experts recommend using a standard or double bowline knot with a backup stopper. Using a stopper prevents the knot from capsizing. The backup stopper knot is added to the tail of the rope. These kinds of knots are less prone to error and tend to be safer.
You can also apply the “Yosemite finish” to a standard or double bowline knot, then tie a stopper knot at the end. Doing so creates a knot that is extra safe and secure.
How To Tie A Yosemite Bowline Knot

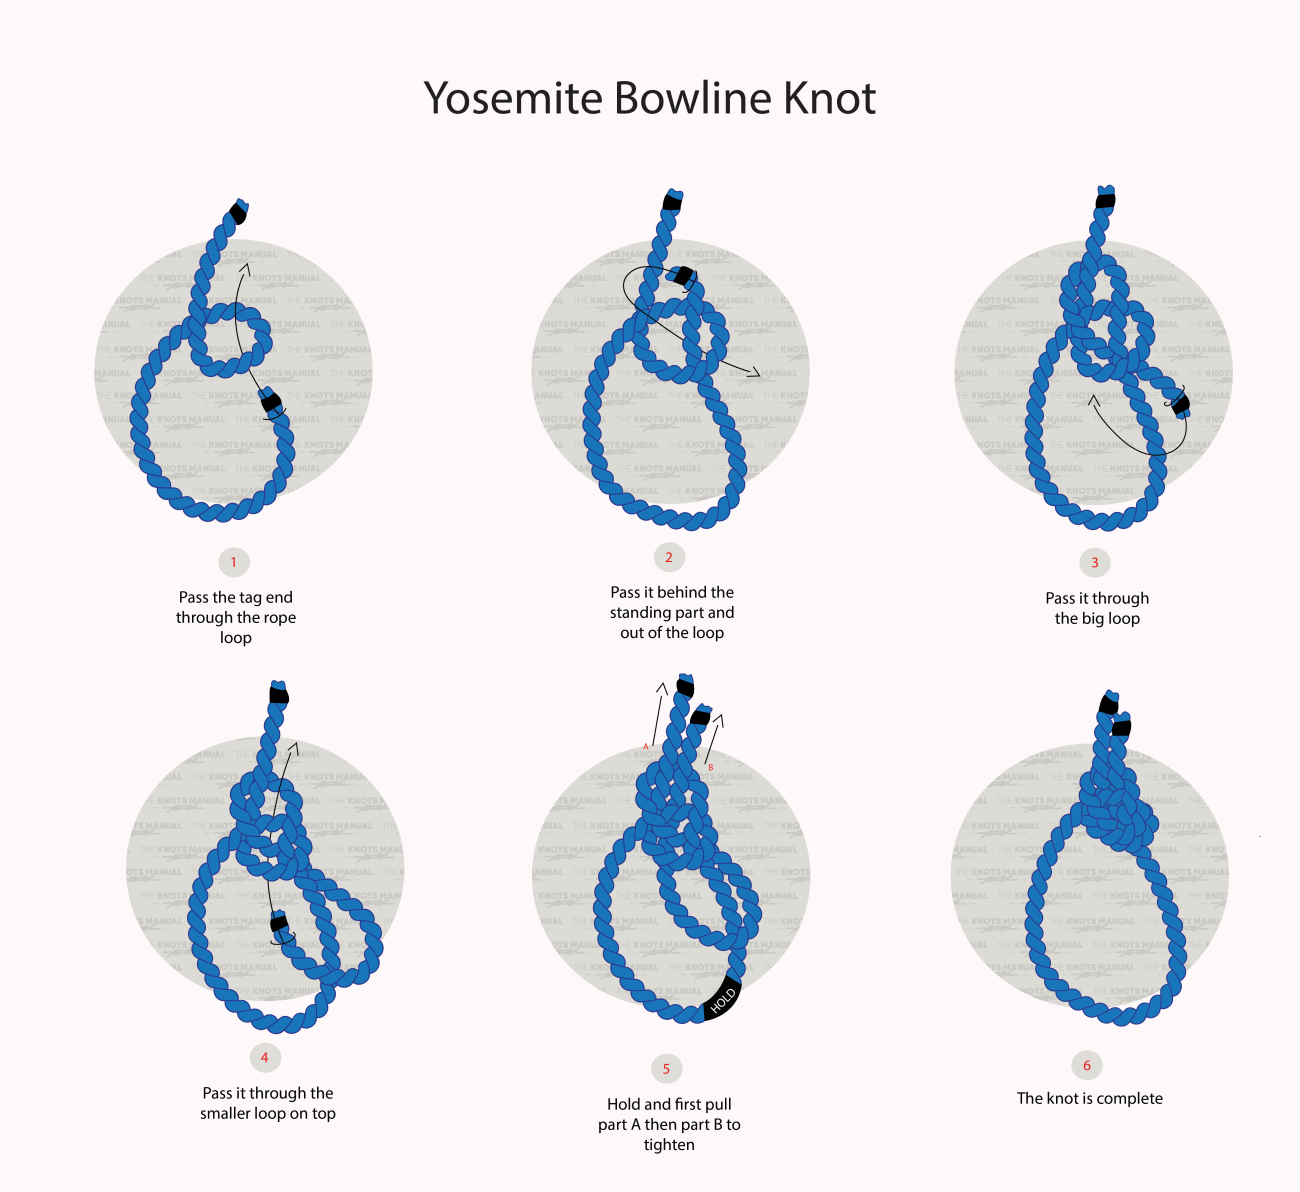
To learn how to tie a Yosemite bowline knot, follow the simple instructions below:
Step 1:
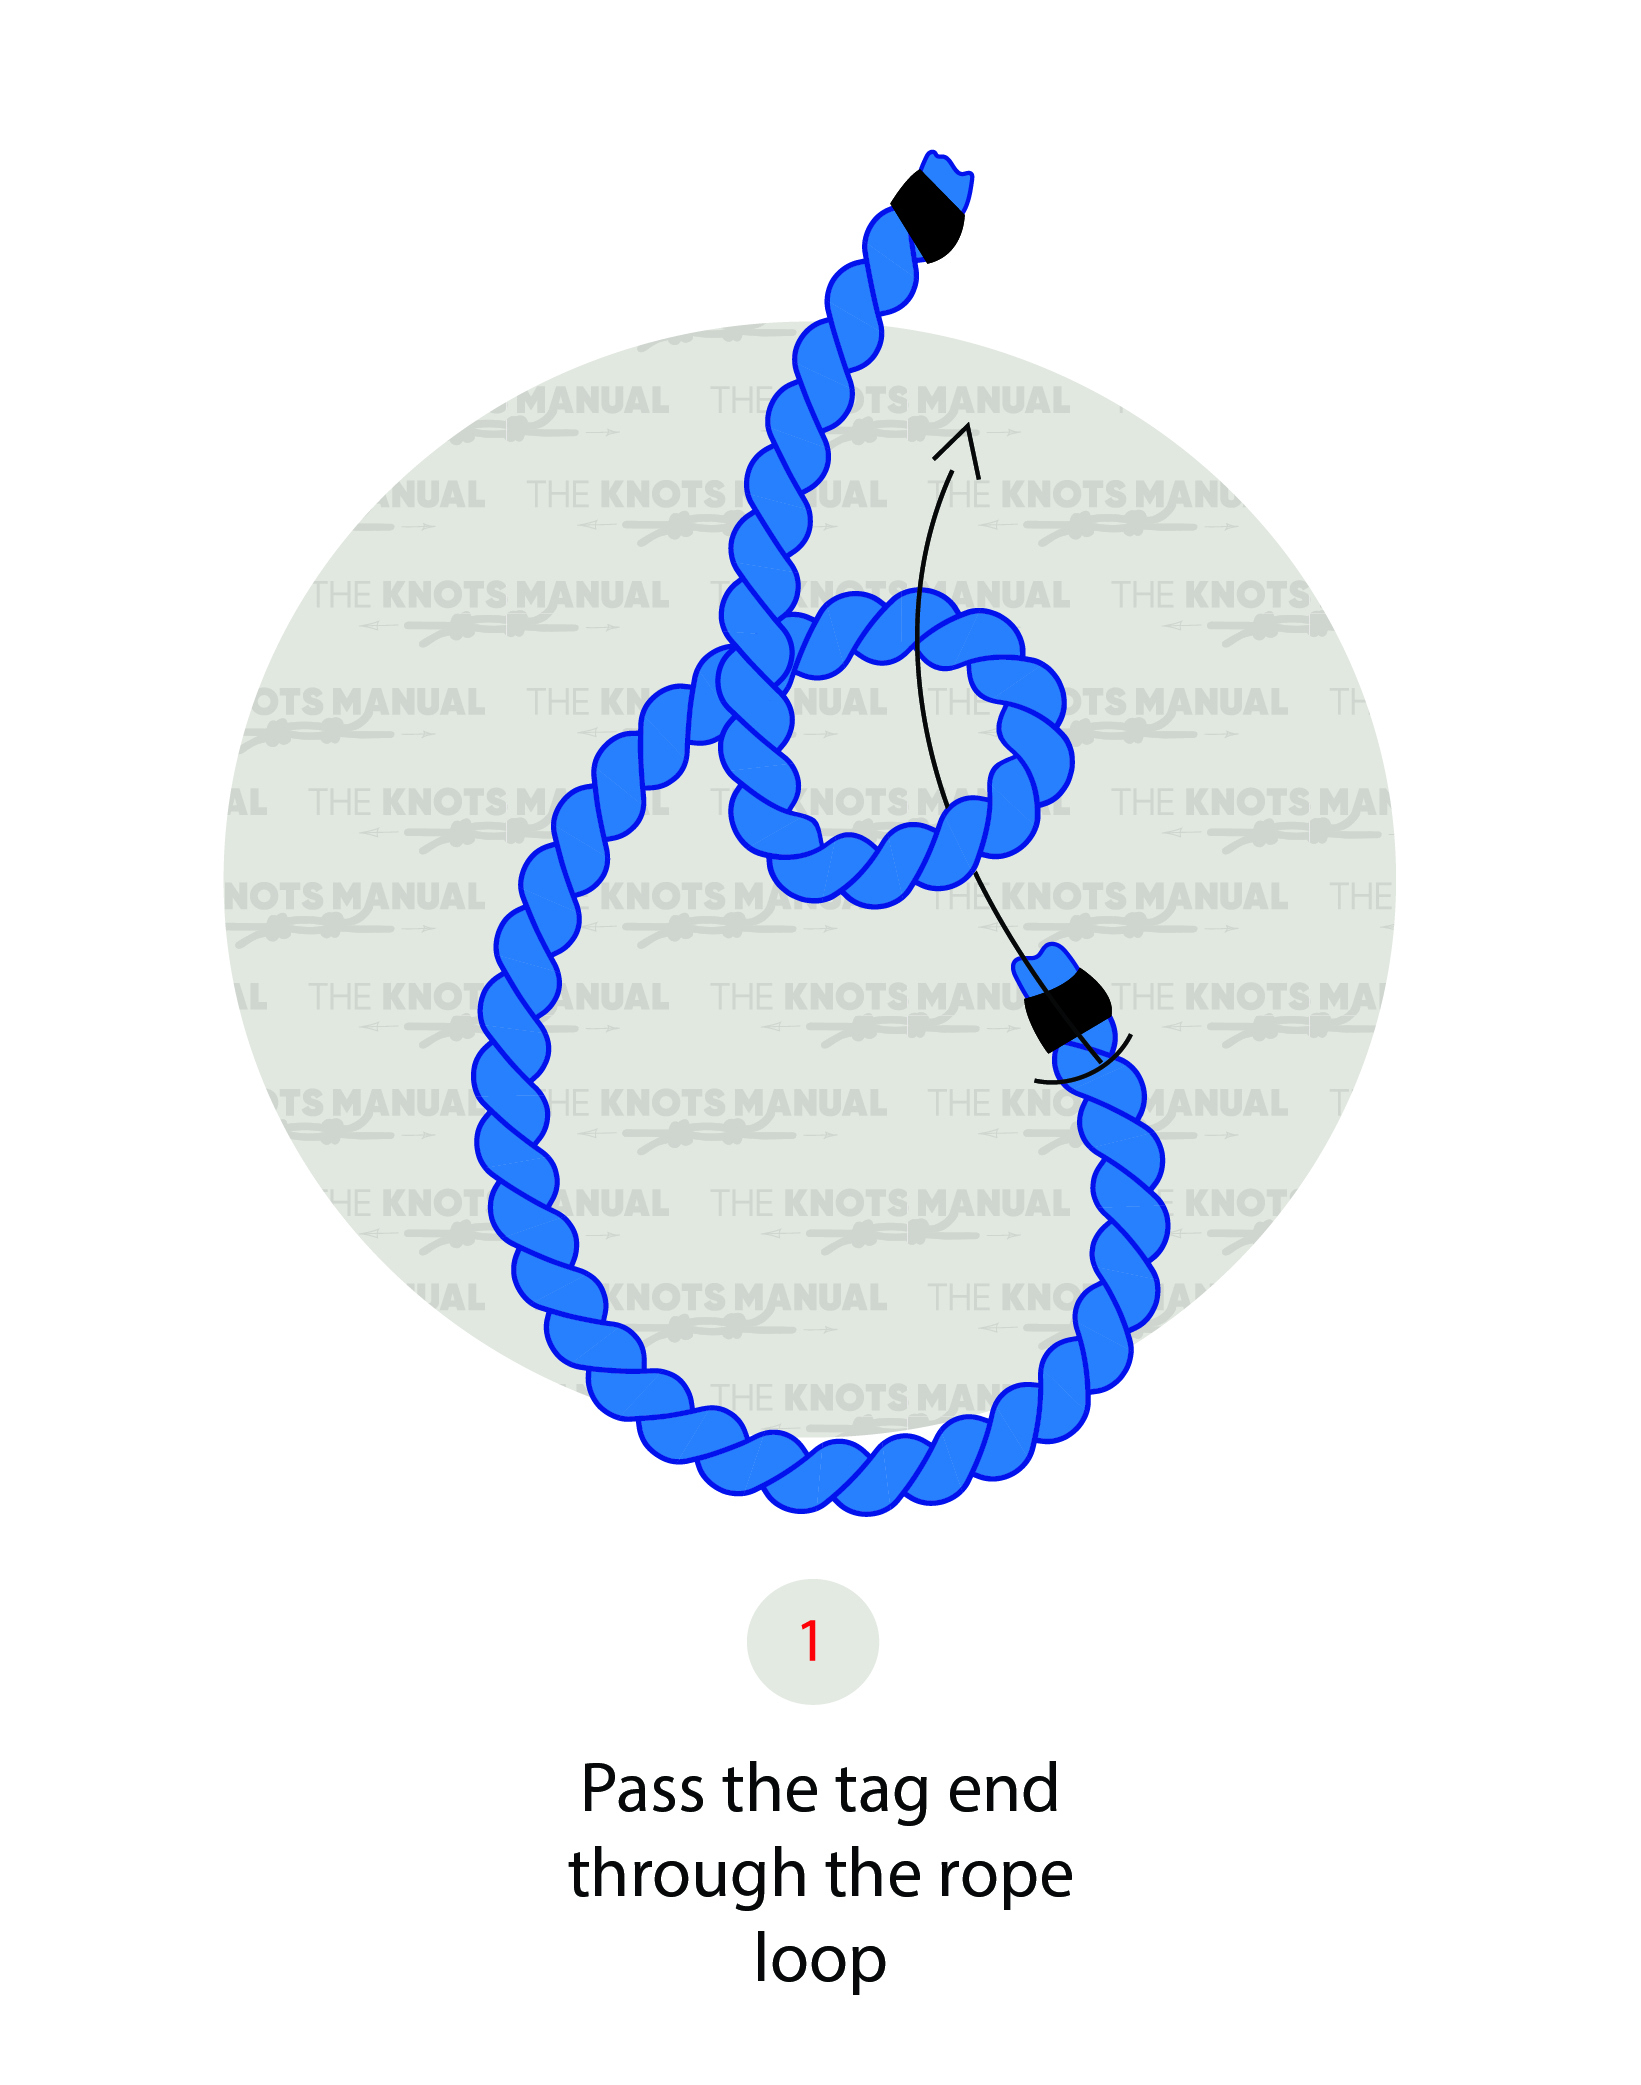
Create a loop in your rope.
Step 2:
Pass the rope’s working end through the loop.
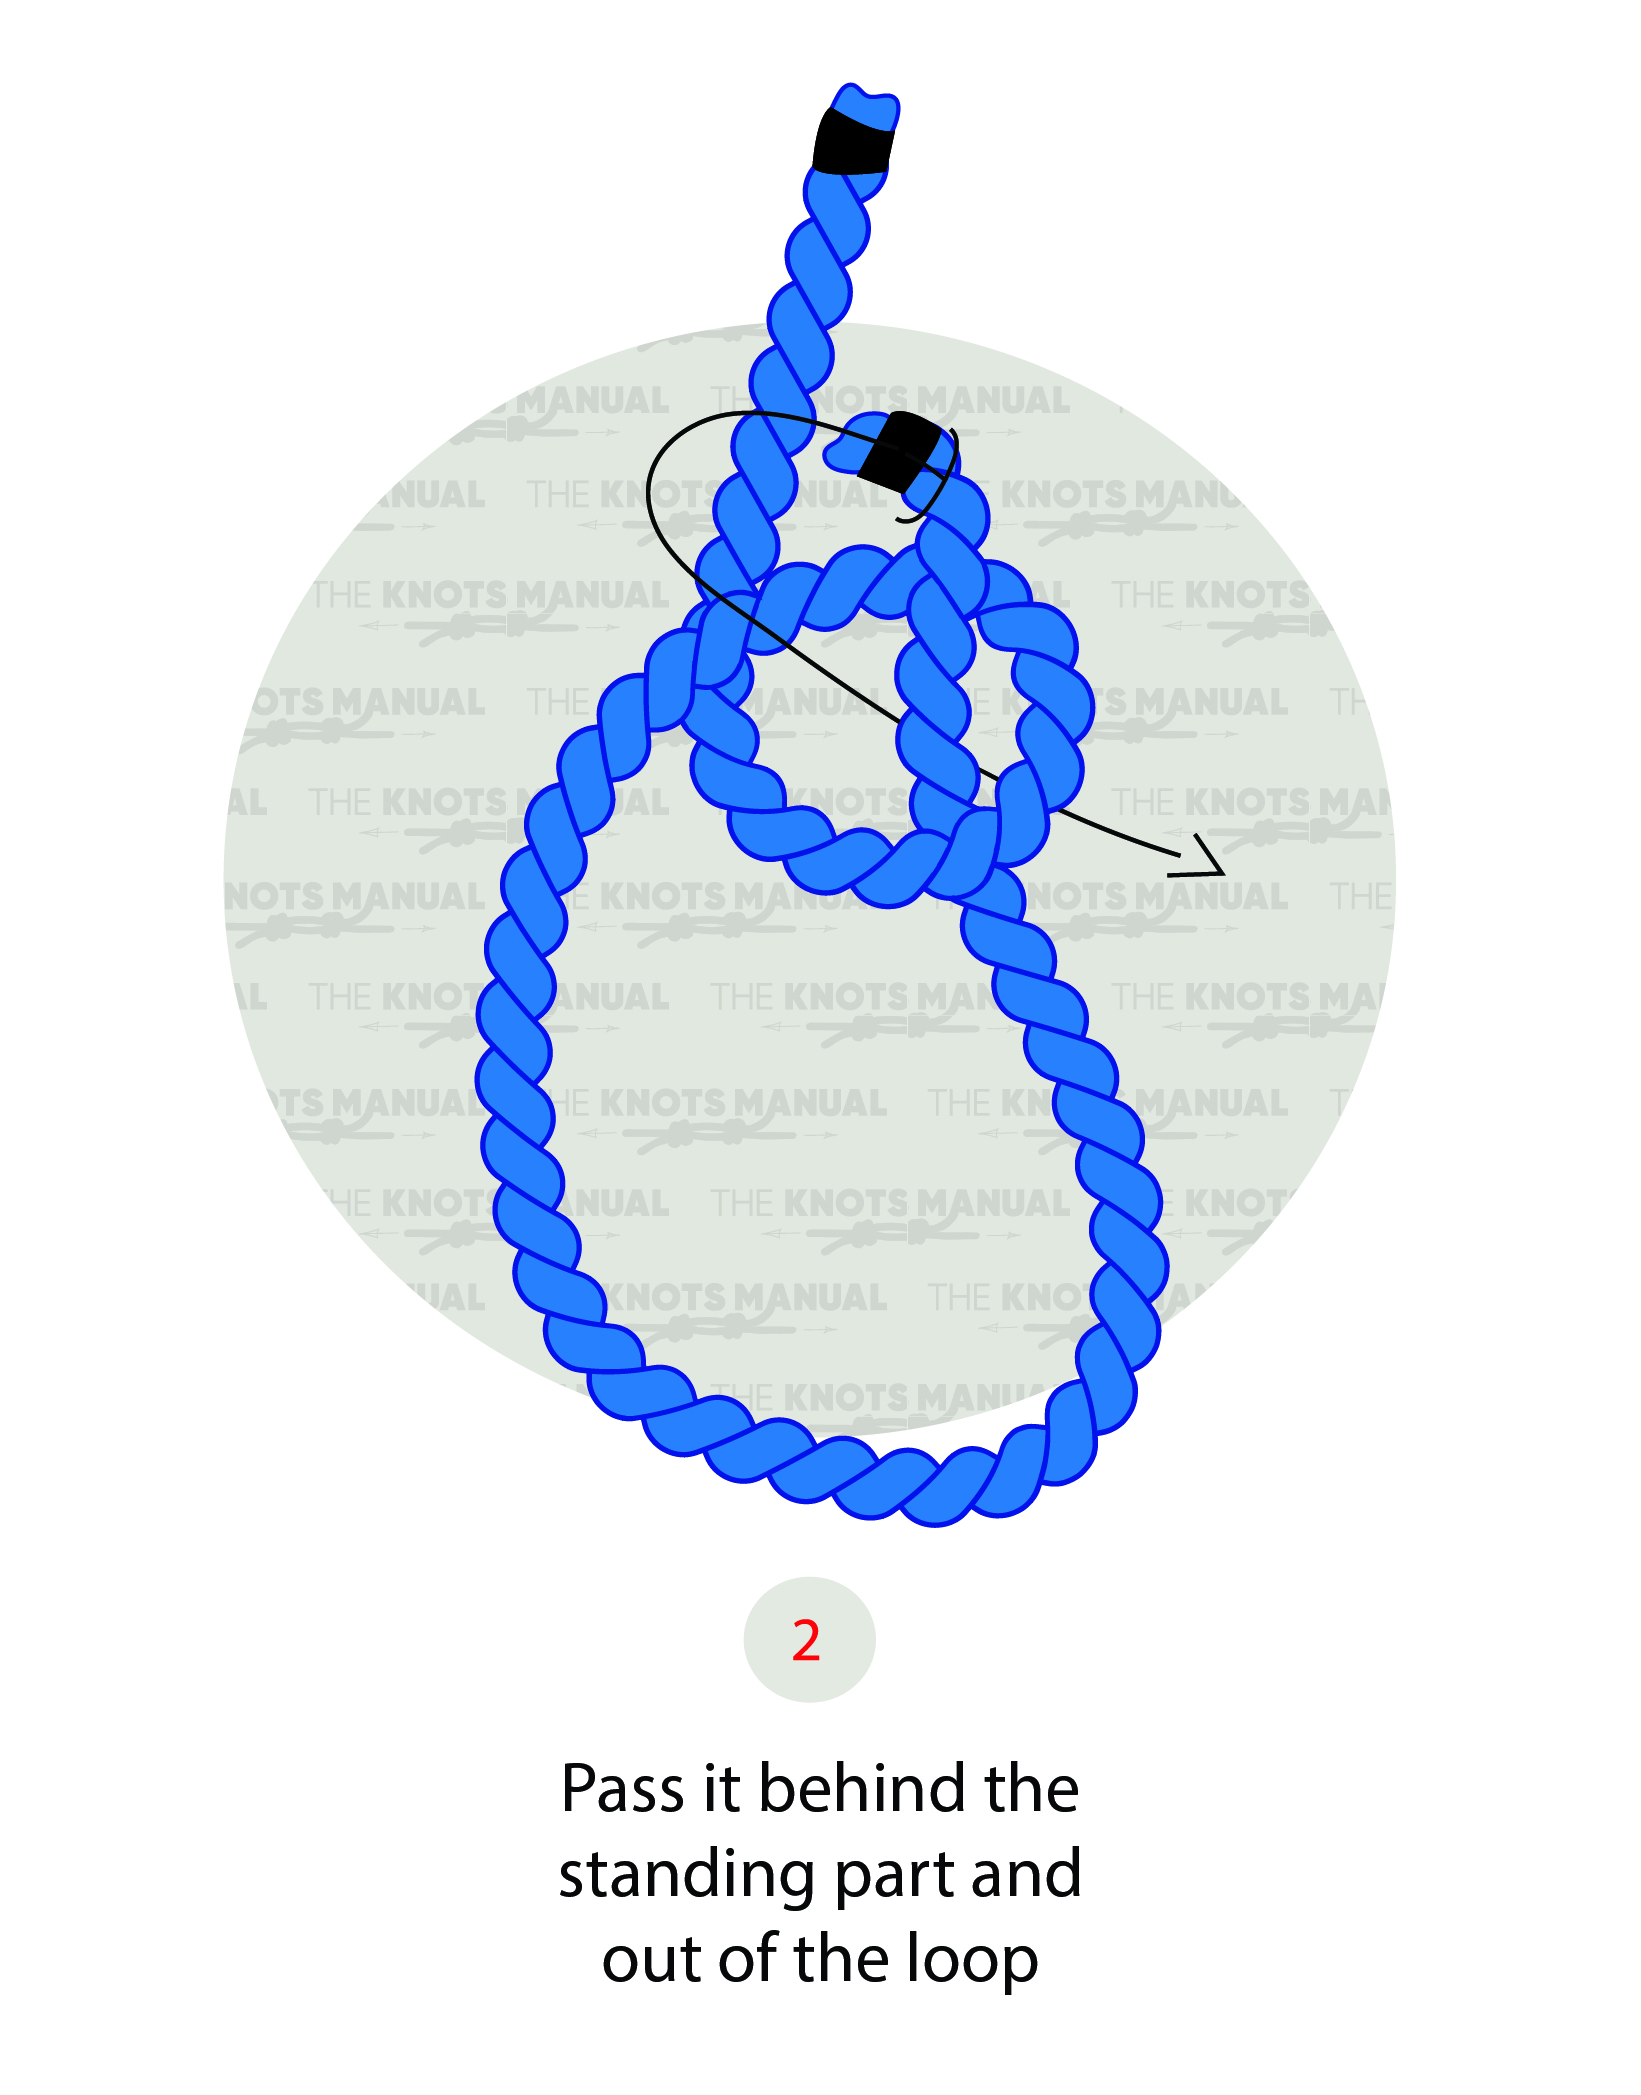
Step 3:
Pass the working end behind the rope’s standing end.
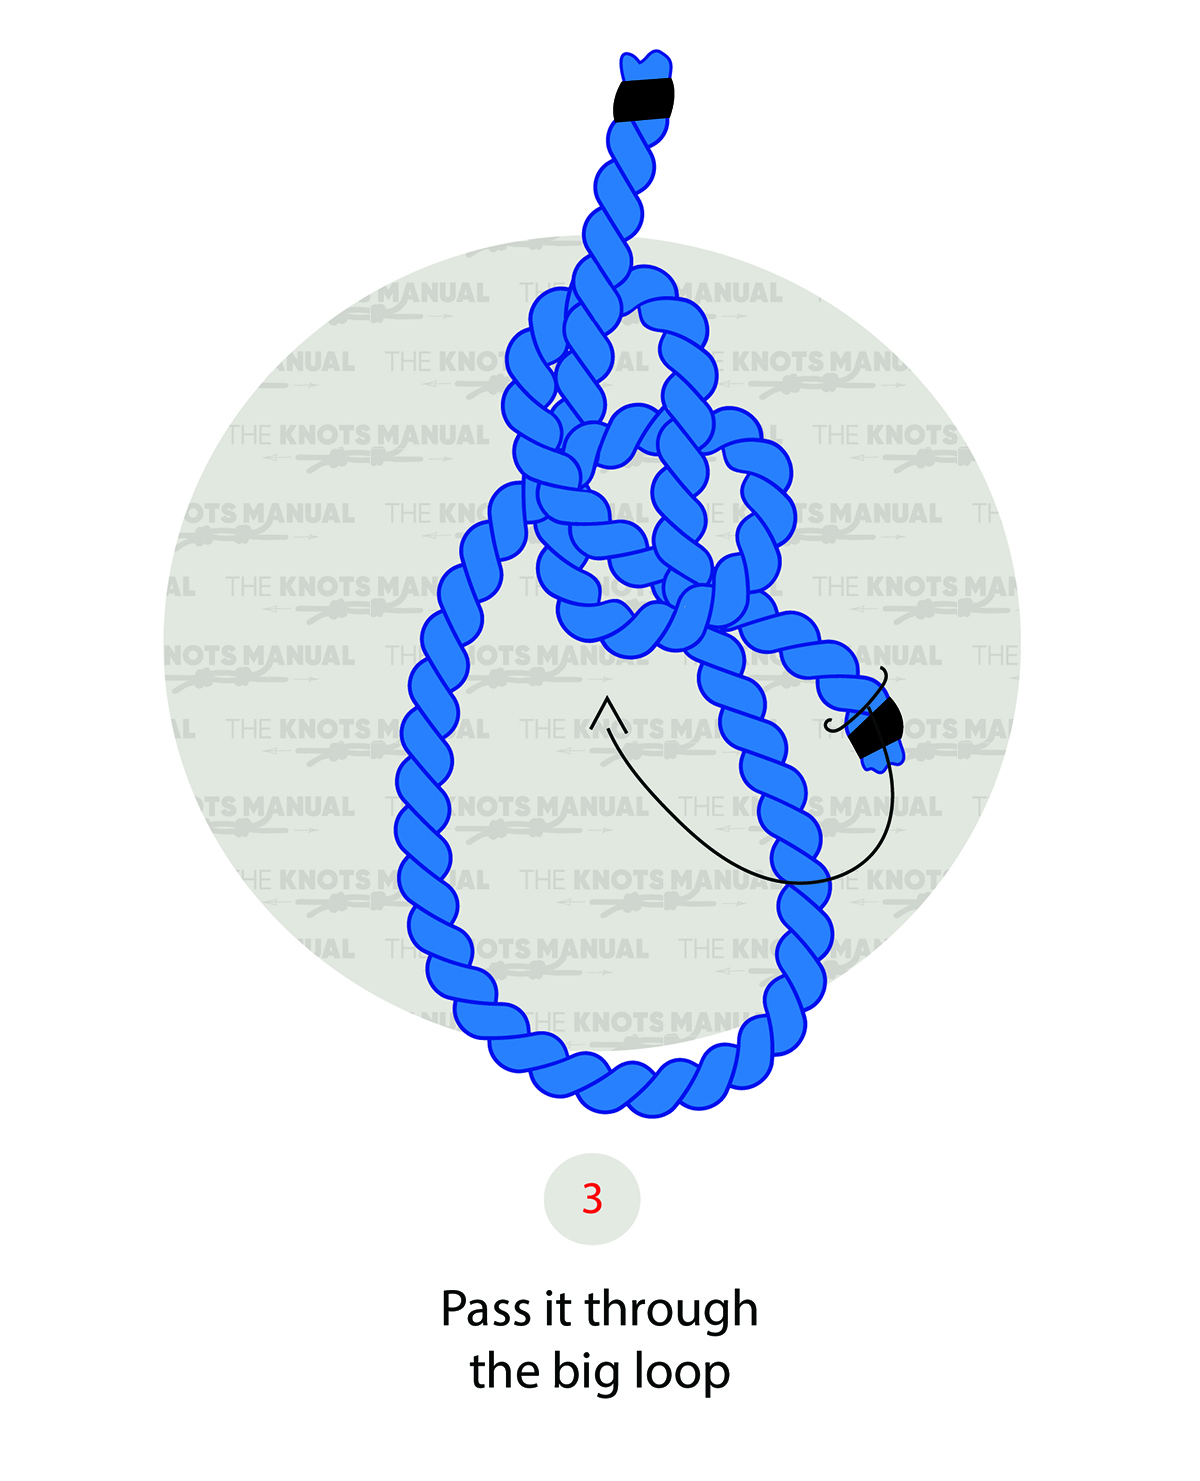
Step 4:
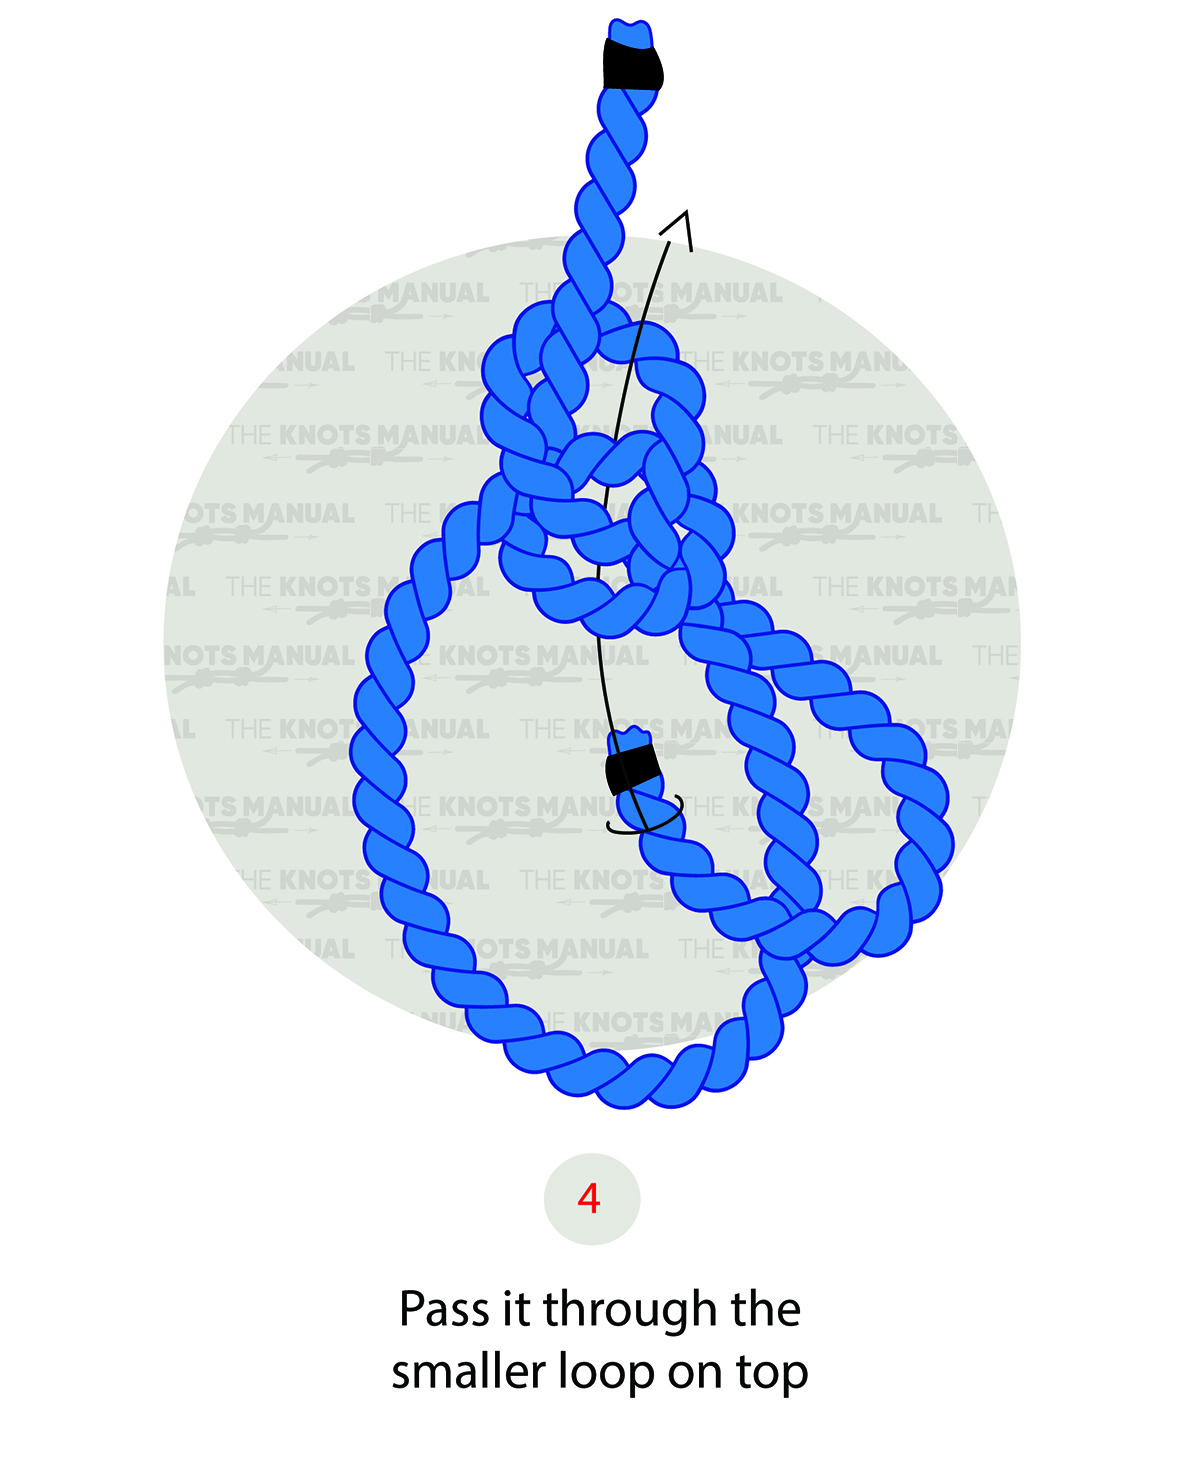
Pass the working end through the small upper loop.
Step 5:
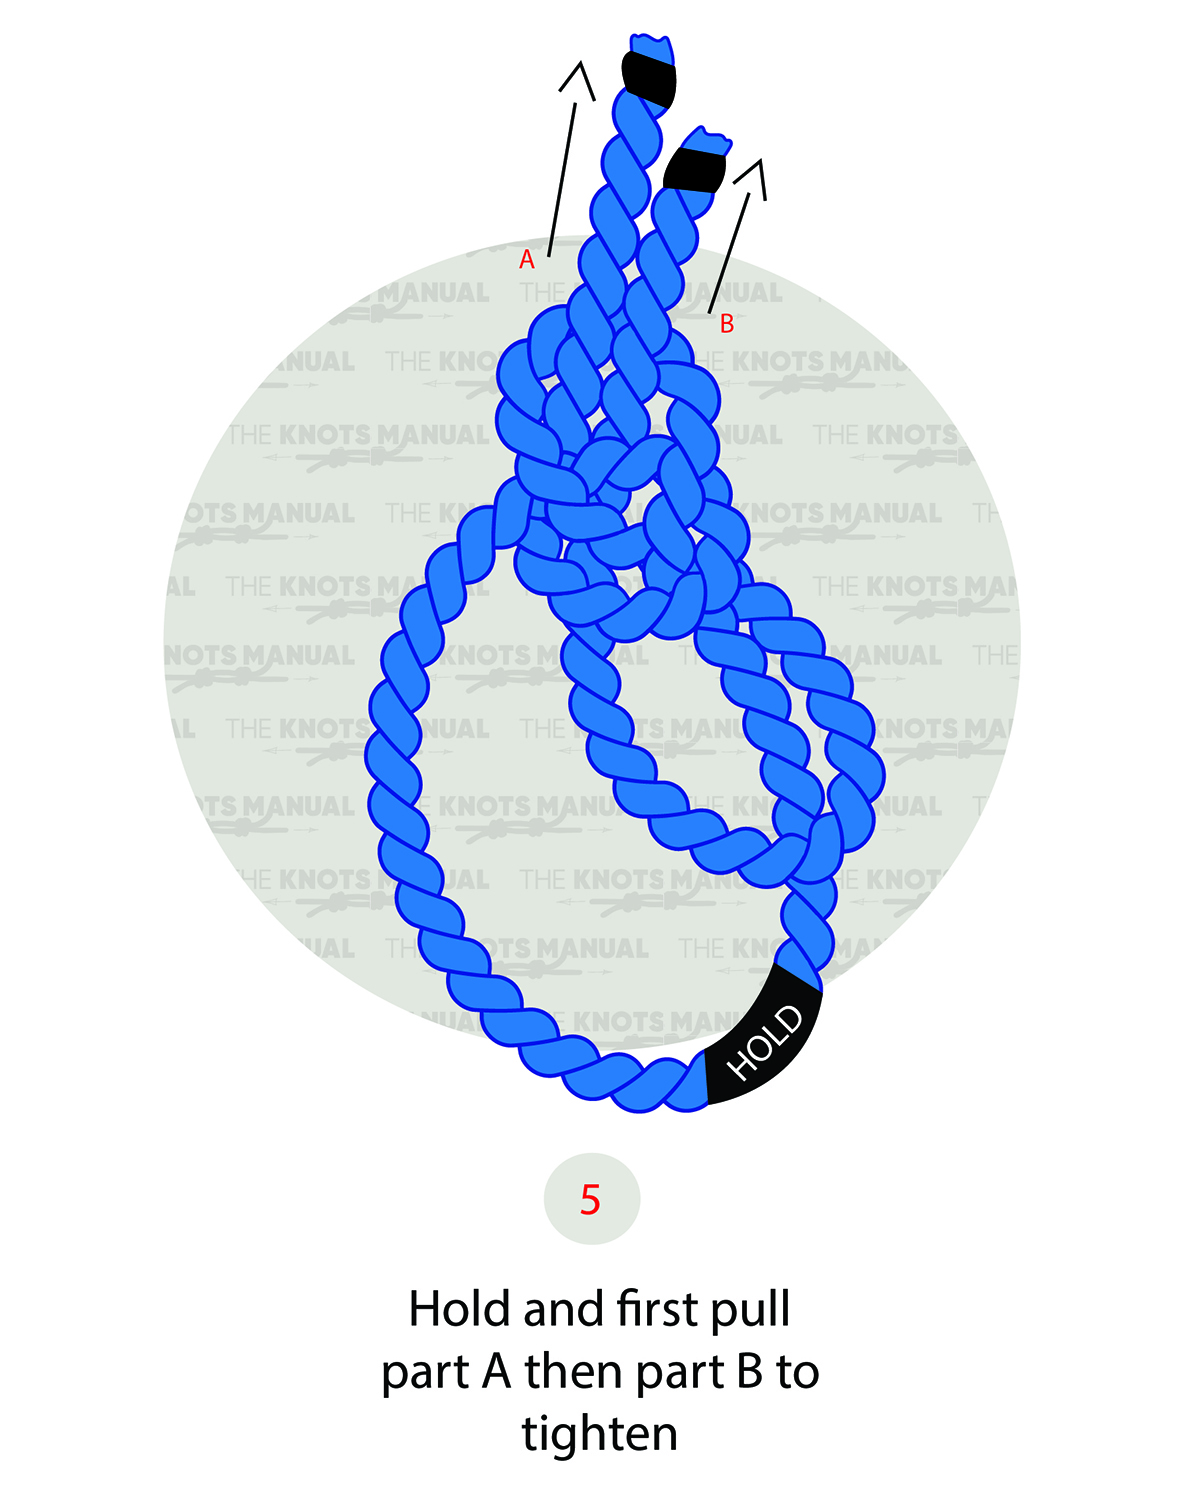
Pass the working end back around the large lower loop. With one hand, hold the larger lower loop. Then, pull upwards on the standing end to tighten the bowline knot. You MUST do this step first to set the knot correctly.
Step 6:
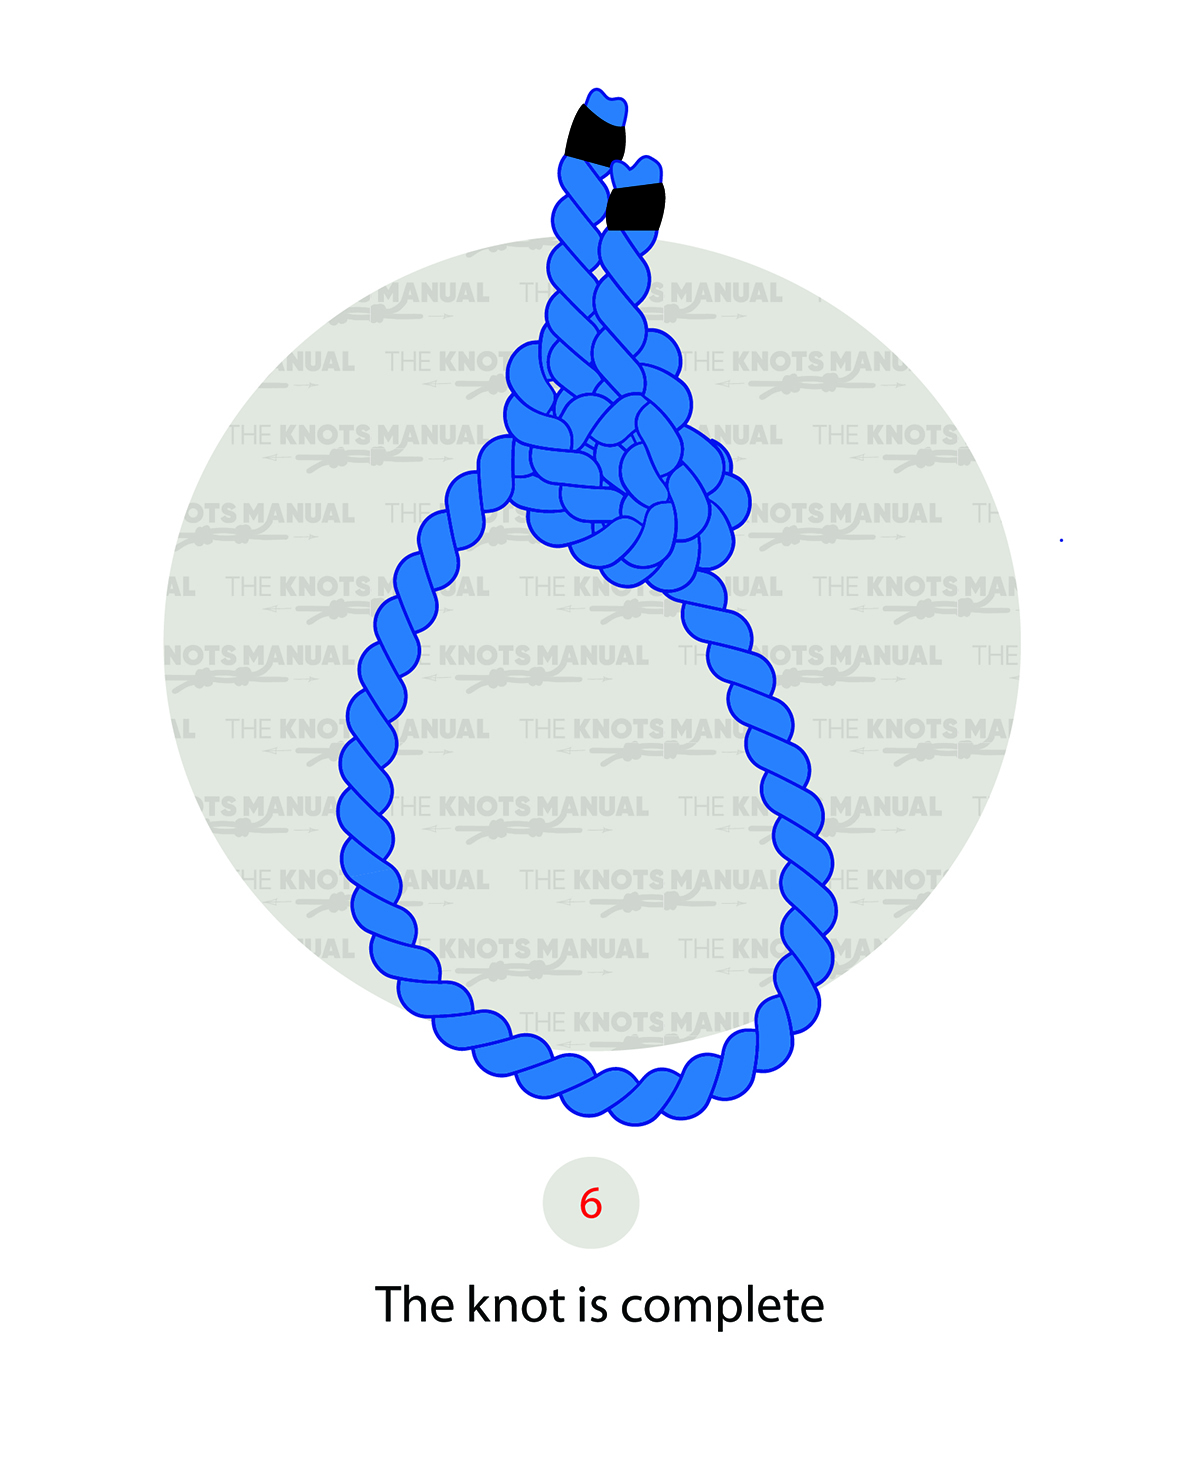
Then, hold the large lower loop and pull on the working end to tighten the Yosemite finish.
Never tighten the working end first. You will lose your original bowline knot and end up with a completely different knot. The resulting knot will not be secure and is very dangerous!
Uses Of The Yosemite Bowline Knot
The Yosemite bowline knot is most often used for climbing because of its versatility. It is an easy tie-in knot convenient for attaching a climber’s rope to their harness. The “figure 8 Yosemite finish” is more well-known than the standard Yosemite finish. It is also easier to check for errors. Climbers tend to prefer the “figure 8 Yosemite finish.” Still, The Mountaineering Handbook suggests the standard finish is better.
Yosemite bowline knots are ideal because they’re easy to untie under loads, even when wet or frozen. They are also simple to tie in with only one hand, so you can keep your other hand free.
The Yosemite bowline knot is also useful for hauling heavy loads.
It’s always recommended to use a stopper knot when attaching a rope to a climbing harness. A stopper knot prevents failure of the primary safety knot and keeps the ends of the rope tidy. In case the primary knot was to fail, the stopper knot acts as a secondary safety knot.
Knots Similar To The Yosemite Bowline Knot
Double Yosemite Bowline Knot: These are double bowline knots with a Yosemite finish.
Standard Bowline Knot: These knots are reasonably secure and tied at the rope’s end. It doesn’t slip or bind when under a load, and it is easy to untie when there is no load.
Double Bowline Knot: These knots are bowline knots with two overhand loops. You can also make it by wrapping an extra turn around a bight. It is more secure than the standard bowline knot and prevents capsizing.
Figure 8 Follow Through: These knots aren’t as well suited for climbing as the Yosemite finish. Still, they tend to be more popular for securing a rope to a climbing harness. Many climbers do not trust their life with the Yosemite finish. They distrust it due to the dangerous capsizing when tied incorrectly.
FAQs
How Did The Yosemite Bowline Knot Get Its Name?
Yosemite National Park in California is one of the best places in the world for rock climbing. The traditional bowline knot is often called the “king of knots.” So, it makes sense that this safer variation would be named after Yosemite National Park.