The Figure 8 Follow Through knot (also called “Trace Eight knot”) is a variation of the Figure 8 knot. It’s used for tieing one end of a rope to a pole, harness, ring, docking post, or other type of fixed object.
This knot creates a loop that doesn’t tighten when the rope is pulled. That’s why it’s often used in climbing, boating, caving, and firefighting. It’s one of the strongest knots out there and it can support very heavy loads.
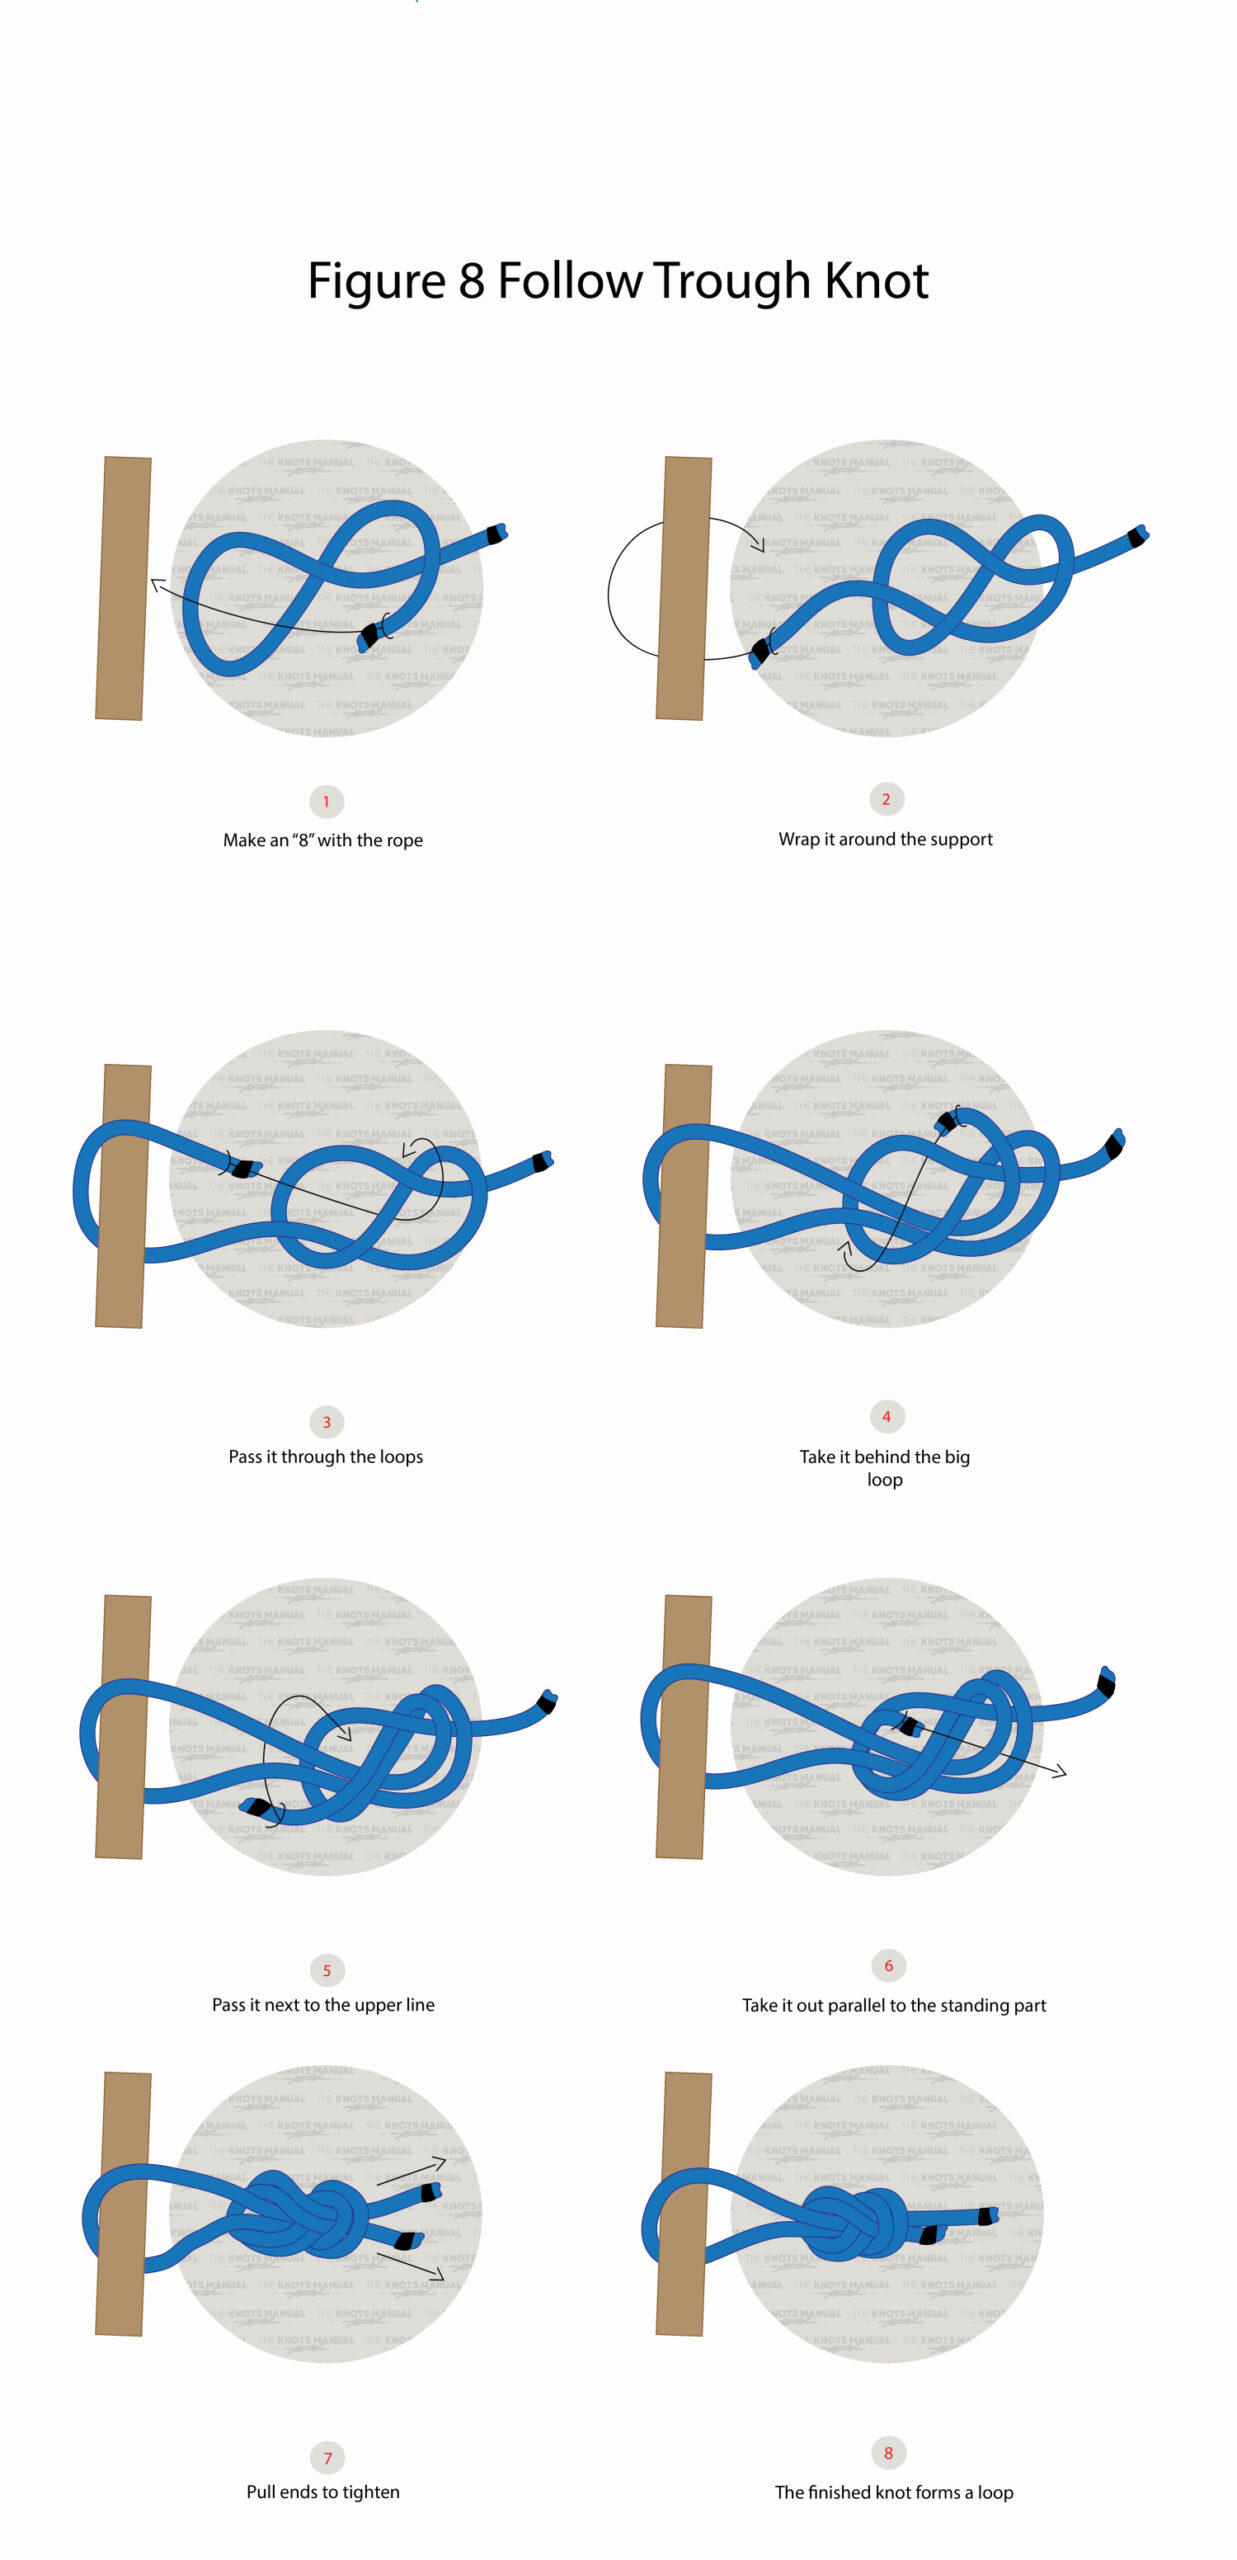
How to Tie a Figure 8 Follow Through Knot
If you know how to tie a Figure 8 knot, then the Figure 8 Follow Through knot is very simple. Essentially, you tie a regular Figure 8 knot (step 1), then wrap the end of the rope around support (step 2), and do another Figure 8 knot, only backward (steps 3-6).
After finishing the knot, you should dress (tighten) it very tightly to avoid it from untying. To do this, pull both ropes from both sides at the same time (step 7). If you need to tighten it very tightly, pull each rope separately. But keep in mind that it may be difficult to untie this knot later on.
If used for climbing, it’s advised to tie a stopper knot after Figure 8 Follow Through Knot. A simple Overhand knot or a Double Fisherman’s knot should work fine. But make sure to tie it right after the Figure 8 Follow Through knot so that it’s pressing against it and has a smaller chance of untying.
In applications where the loop around the support can be slipped on (for example, a docking post for a boat), this knot can be tied more quickly. You need to bend the end of the rope parallel to it to create a bight, and then do a regular Figure 8 Knot. This is called Figure 8 on a bight.
Pros and Cons of the Figure 8 Follow Through Knot
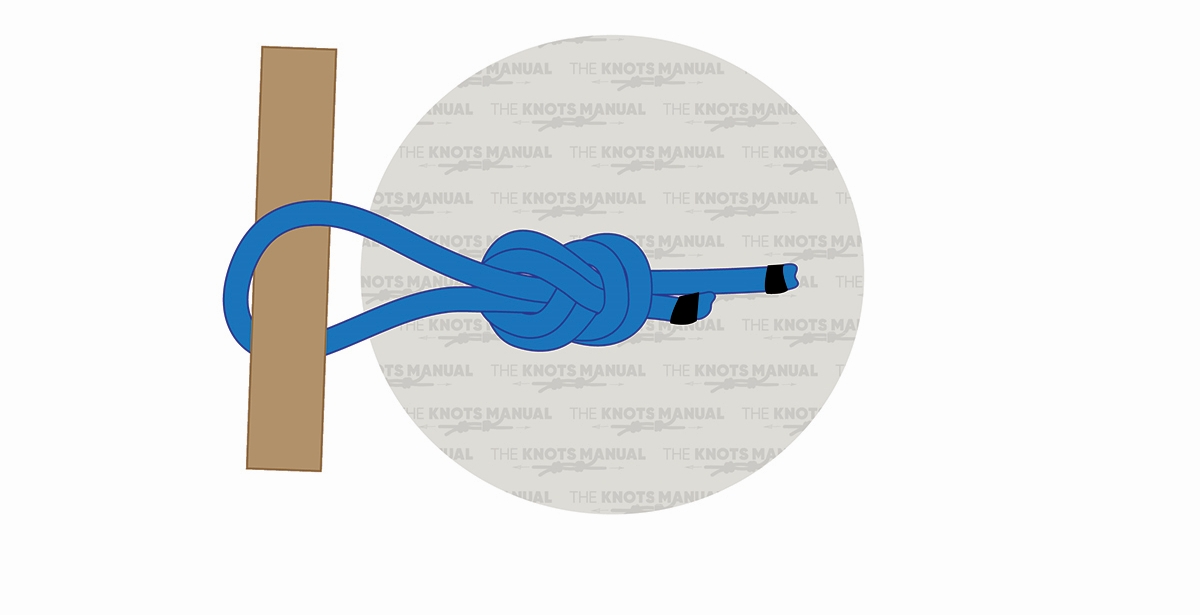
The Figure 8 Follow Through knot is very beginner-friendly because it’s easy to remember to easy to check. To inspect that the knot is tied correctly, make sure that it has three sets of parallel ropes from both sides. (as shown in step 8).
It’s also a very strong knot. If tied correctly, it won’t untie by itself, which makes it ideal for applications where the strength of the knot is very important. It’s even more secure than Yosemite Bowline and Double Bowline knots, which are often used in similar applications.
The main downside to this knot is that it can be very hard to untie, especially if you’ve tightened it very much. Some climbers have even had to cut their rope after finishing a climb because they couldn’t untie it.
Common Uses for the Figure 8 Follow Through Knot
The Figure 8 Follow Through knot is most often used in rock climbing to attach a rope to a harness. It’s the most common knot used in climbing that all beginner climbers should learn. It can also be used to create loops that need to be connected to carabiners.
This knot is so popular in climbing because it doesn’t require a stopper knot – the Figure 8 Follow Through is a stopper knot by itself. But most people like to add an overhand stopper knot after it just in case.
It’s a versatile and useful knot to know because it can also be used in a variety of other applications, not only climbing. It’s often used when docking a boat around a docking post. Arborists and firefighters also use it to tie ropes around trees and other objects. You can also create a makeshift tow rope by tieing Figure 8 Follow Through knots on each end.
Knots Like the Figure 8 Follow Through Knot
Yosemite Bowline knot: A more secure variation of the Bowline Knot. It’s almost as secure as Figure 8 Follow Through knot but easier to untie. It’s used less often because it’s more difficult to do correctly.
Double Bowline knot: It’s another variation of the bowline knot which uses two loops instead of one. Like the Yosemite Bowline knot, this one also is more difficult to tie and check than a Figure 8 Follow Through, but it’s easier to untie.
French Bowline knot: This knot creates two adjustable loops, and it’s often used to create makeshift harnesses for lifting people.
Step-by-Step Guide on How to Tie a Figure 8 Follow Through Knot
Learn how to tie a Figure 8 Follow Through knot in a few easy steps.
Step 1:
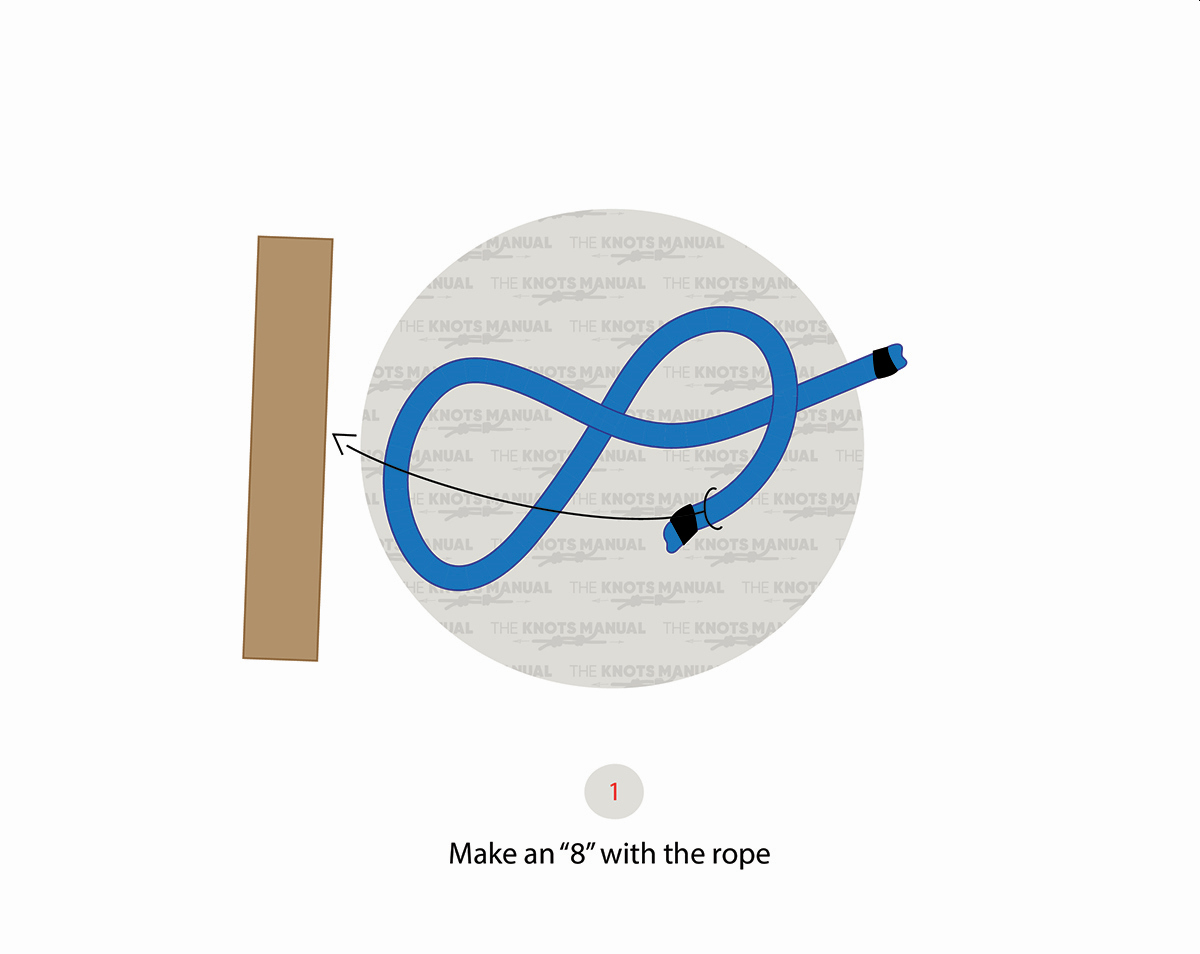
Tie a loose Figure 8 knot. You can do this by making a loop and then passing the rope through it from the other side. Keep the end of the rope 10-40 inches long, depending on its thickness.
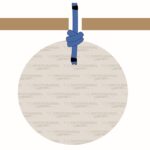
Step 2:
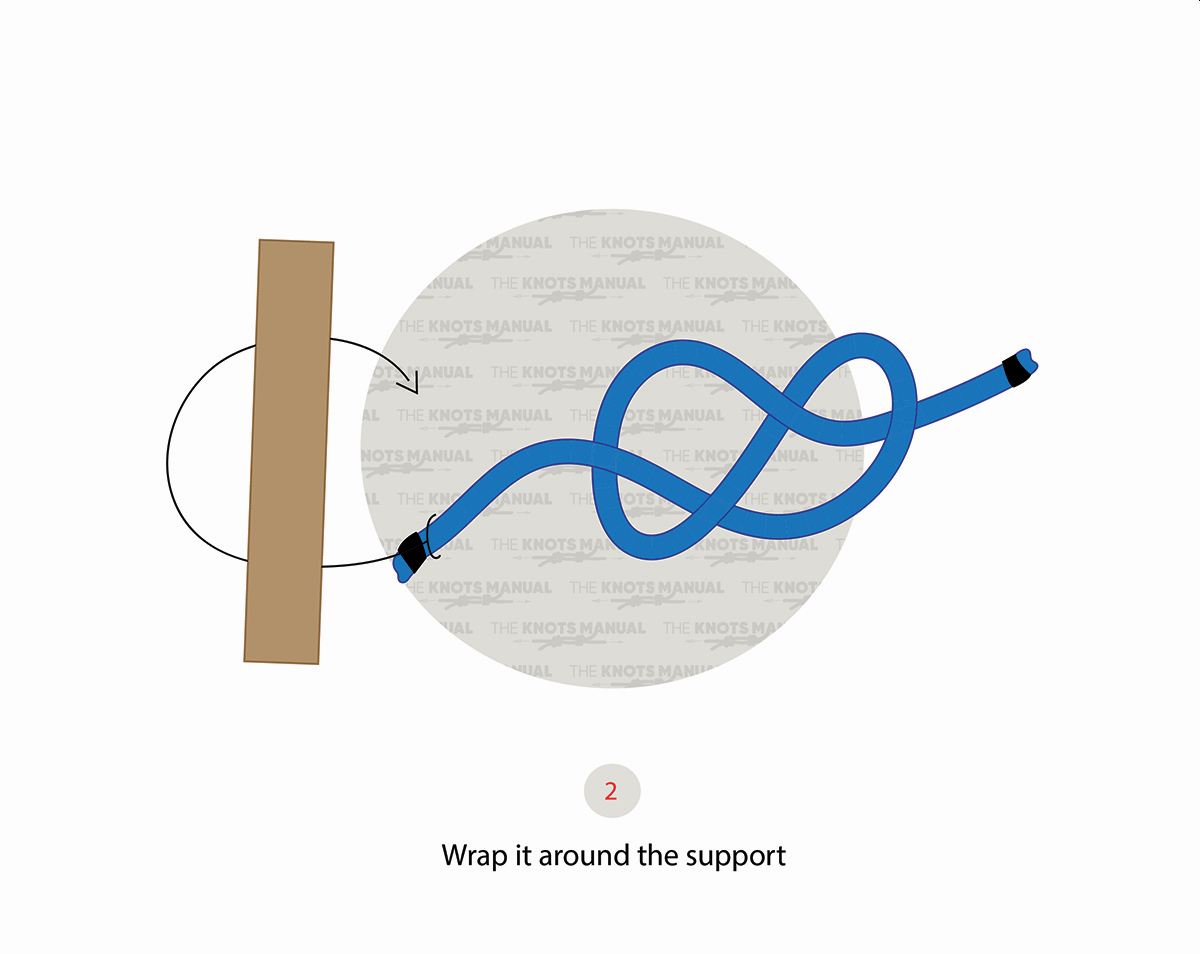
Wrap the end around a stick, harness, or ring, forming a loop.
Step 3:
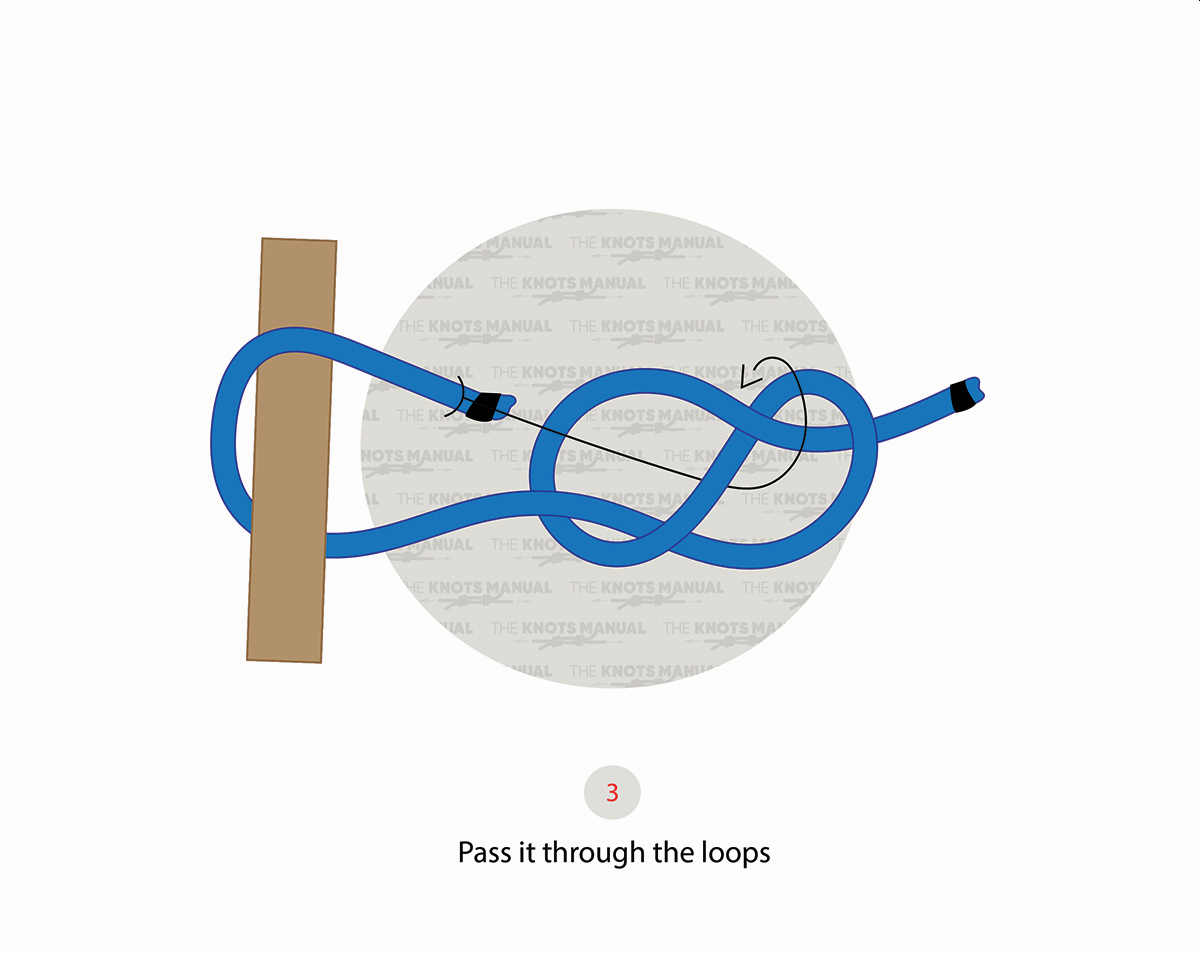
Now follow the Figure 8 knot that you made in step 1, only in the other direction. First, pass it through both loops.
Step 4:
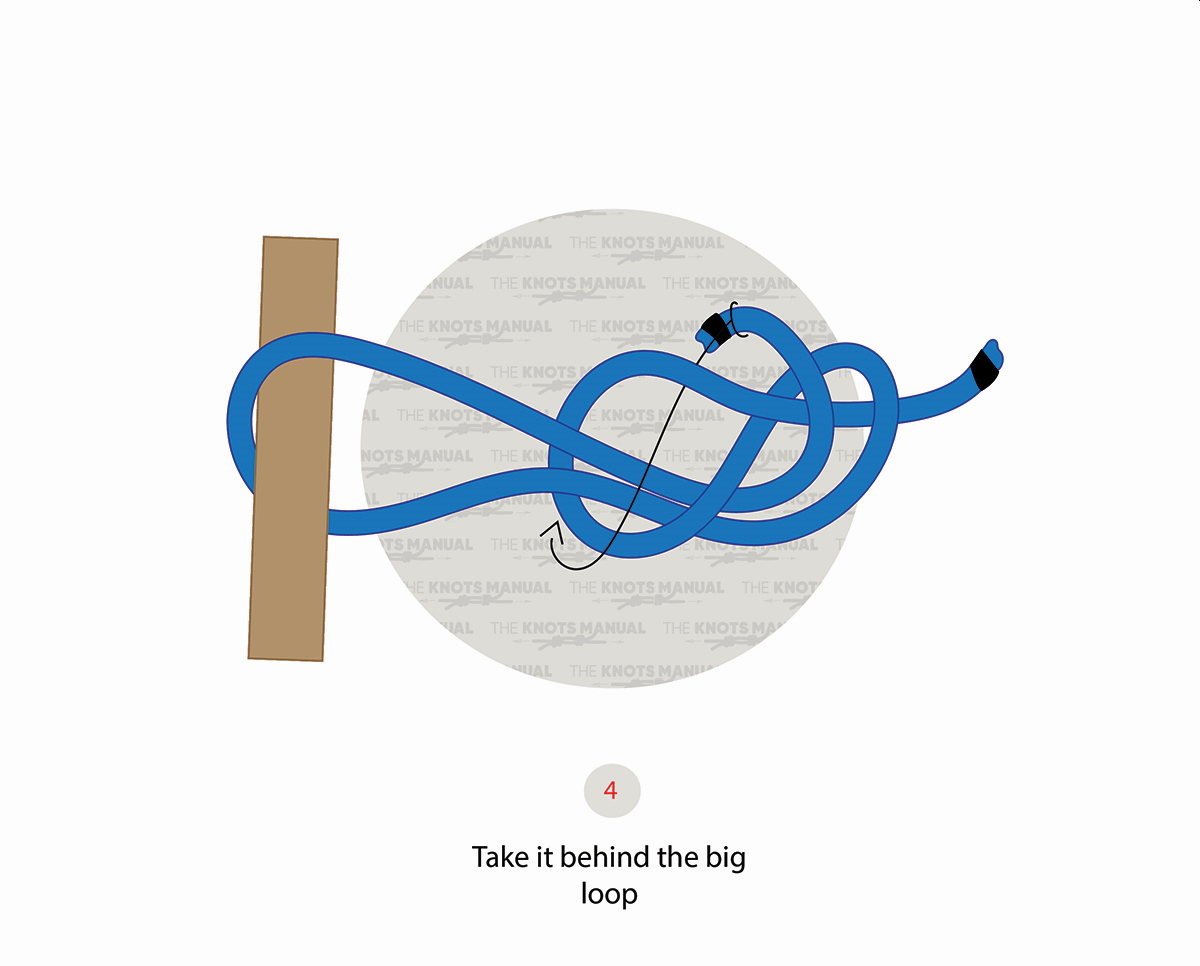
Keep following the Figure 8 knot and pass it through the bigger loop.
Step 5:
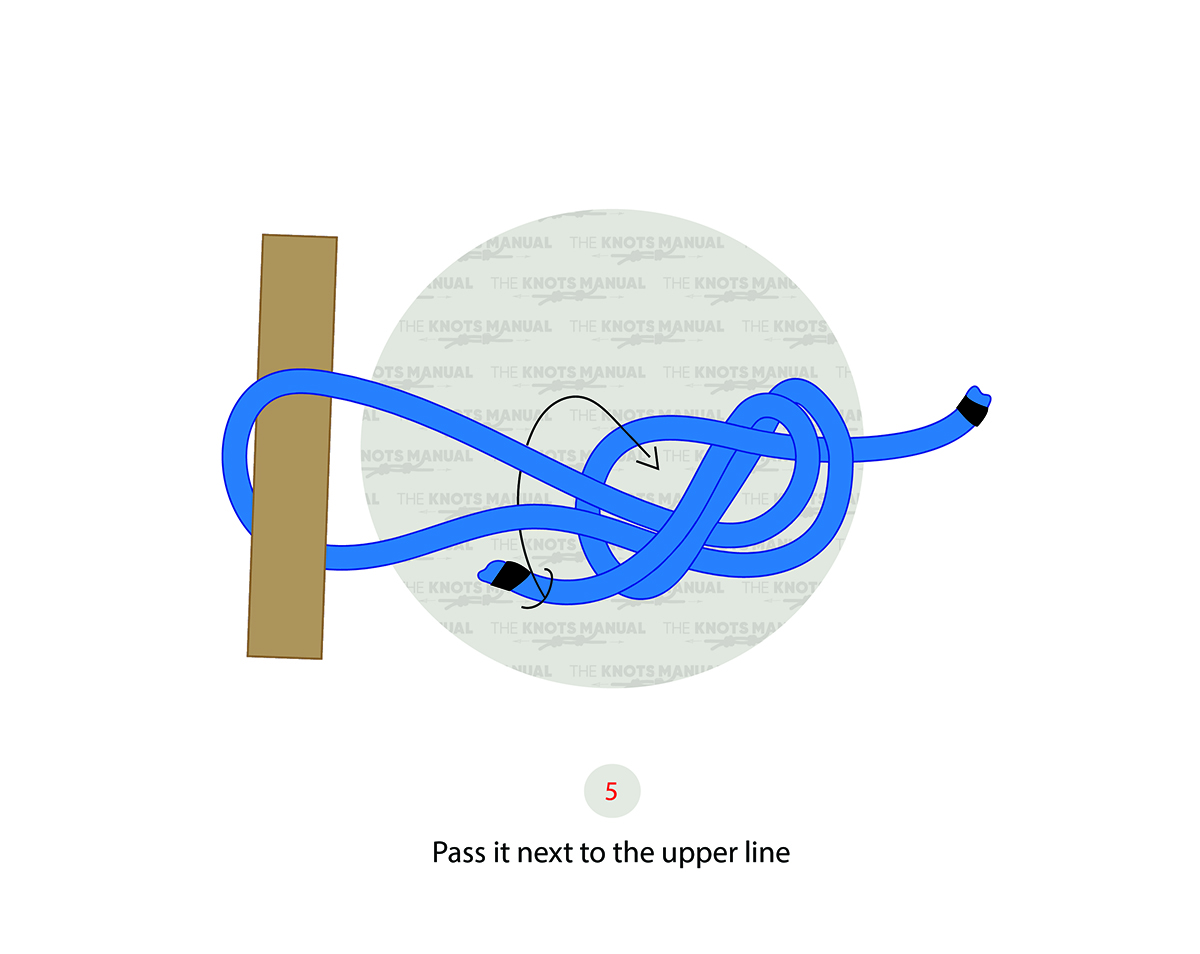
Keep following the rope, wrapping it around the support loop, and going through the bigger loop again.
Step 6:
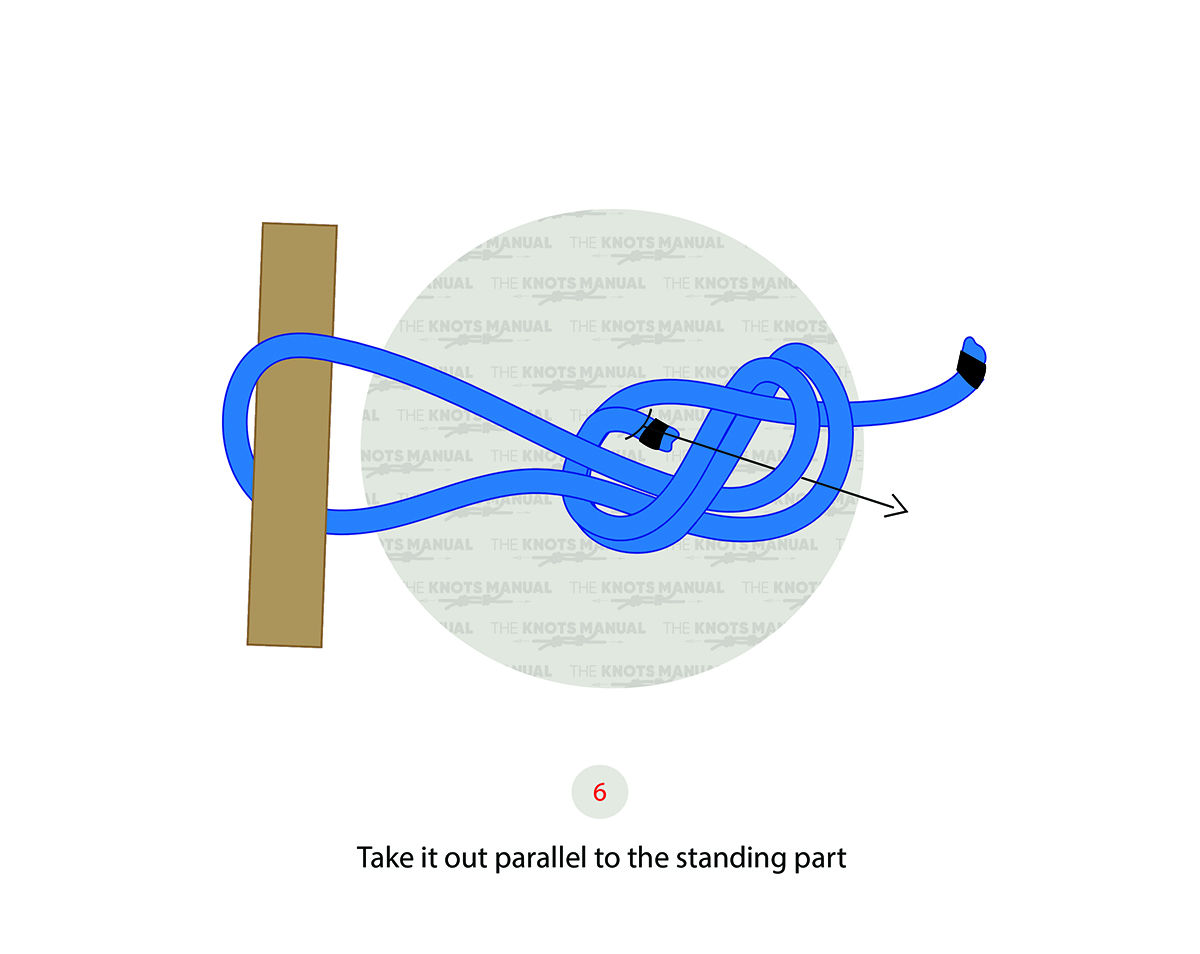
Finally, pass it through the smaller loop along the rest of the rope.
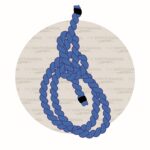
Step 7:
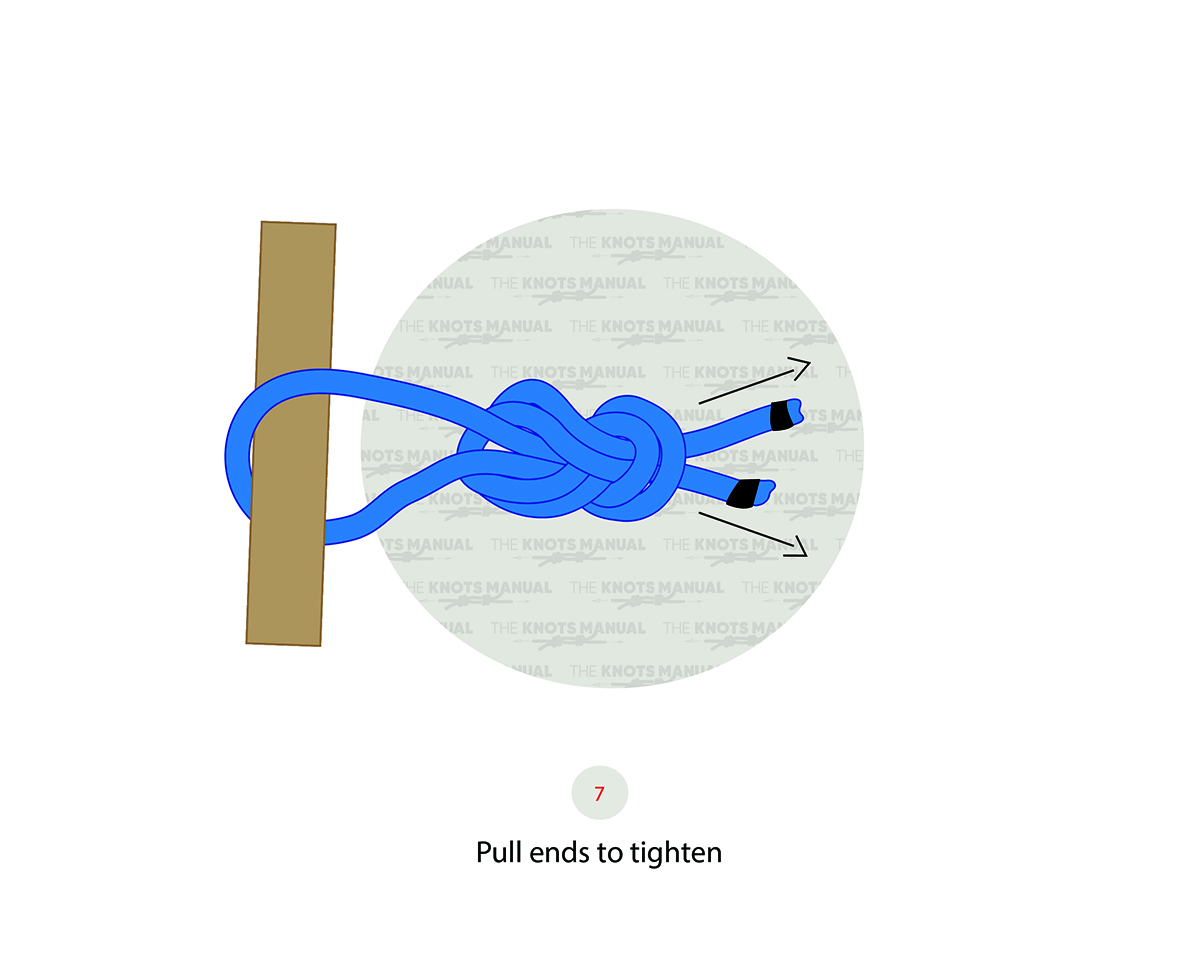
For the best result, pull each rope separately from both ends to tighten it.
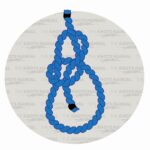
Step 8:
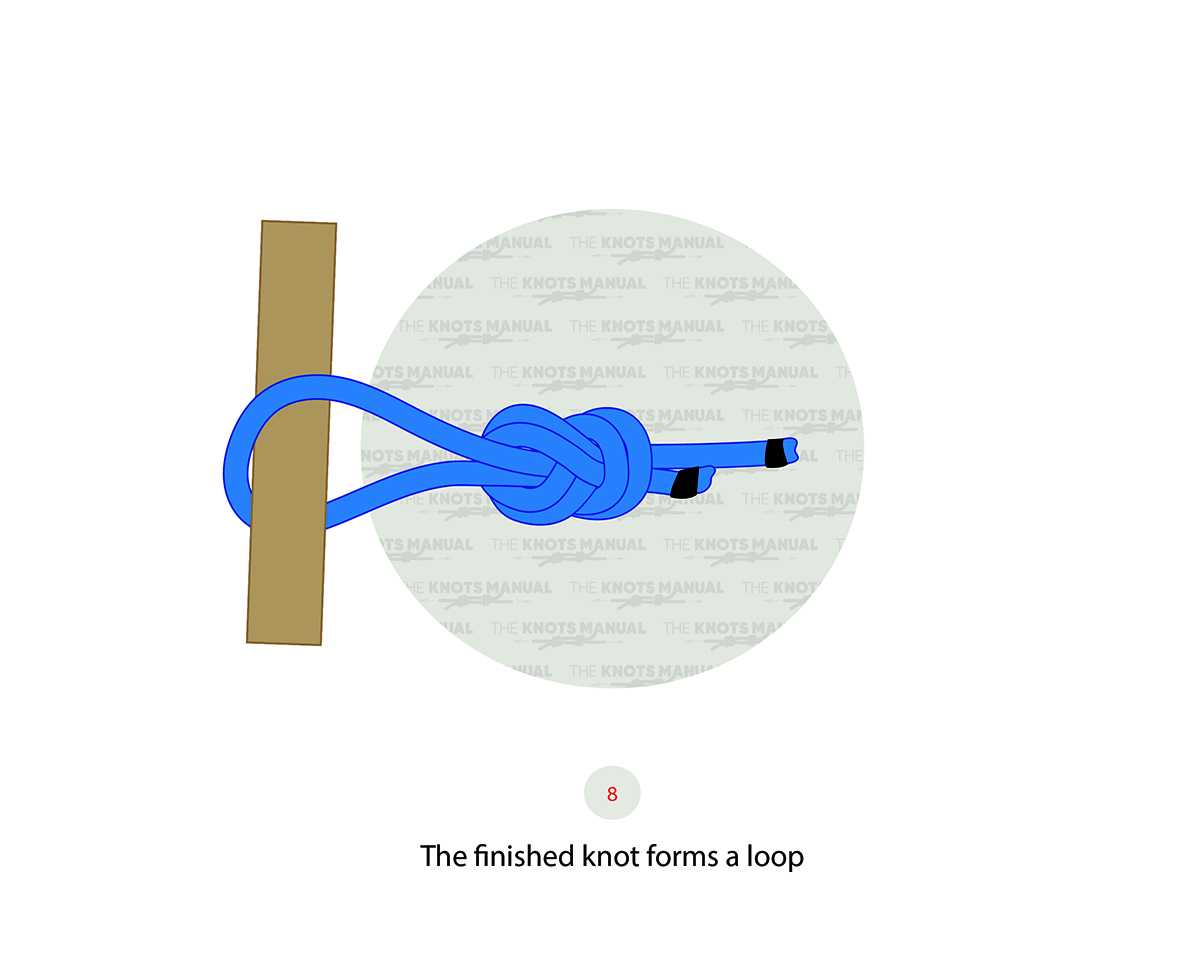
In the end, you should form a loop that can support very strong loads without untying.
Frequently Asked Questions
Is Figure 8 Follow Through the Best Knot for Climbing?
Most people will tell that the Figure 8 Follow Through knot is the best knot for attaching a rope to your rock climbing harness. That’s because it’s a very easy and strong knot, and it’s easy to visually inspect. Its main downside is that it’s hard to untie, which is why some people prefer to use bowline knots in combination with stopper knots.
How strong is Figure 8 Follow Through Knot?
The Figure 8 Follow Through knot is one of the strongest knots for attaching a rope to a fixed object. When combined with a stopper knot, this knot is very unlikely to untie under extreme pressure, such as high rock climbing falls.