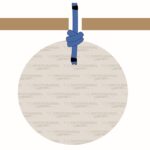
The Ashley’s Stopper Knot is one of the best stopper knots, which creates a bulky and secure stopper knot at the end of the rope. It can be used to make other knots more secure or to keep the rope from slipping through narrow openings.
In other sources, the Ashley Stopper Knot is also referred to as Oysterman’s Stopper Knot. It’s a very old knot, developed in 1910, and its name comes from its inventor – Clifford Warren Ashley.
Quick Guide: How to Tie the Ashley’s Stopper Knot
To tie the Ashley’s Stopper Knot, you’ll need access to the working end of the rope.
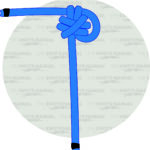
First, make a wide bight near the end of the rope and then flip it to create two loops. The left loop near the standing end should be slightly larger than the other one. Then pass the larger loop through the smaller one. Finally, pass the working end through the final loop.
It’s important to tighten this knot in 3 steps. First, tighten the knot on the left side. Then pull the standing end to tighten the loop. And finally, pull the working end.
To check that it’s tied correctly, turn the knot 90 degrees clockwise. You should see three separate lobes of equal lengths.
Pros and Cons of the Ashley Stopper Knot
The Ashley’s Stopper Knot is one of the bulkiest stopper knots. This means that it’s less likely to slip through other knots.
It also has a very high resistance against slipping when pulled. When you bend it, it’s much less likely to loosen and slip compared to Figure 8 and Double Overhand Stopper knots.
This knot is also easy to tie and remember, so it’s beginner-friendly.
The main downside to this knot is that if it isn’t tightened correctly in three steps (in our illustration steps 4-5a), it can capsize and slip. So you should always make sure that it’s tightened correctly whenever used in critical applications.
Common Uses for the Ashley’s Stopper Knot
The Ashley Stopper Knot can be used whenever you need to create a secure stopper knot. It’s most commonly used in climbing, caving, boating, sailing, and by arborists.
You can tie it right after other knots that you don’t want to come undone. You can also use this knot to keep the rope from slipping through narrow ring anchors, where the knot is wider than the anchor opening.
Knots Like the Ashley Stopper Knot
Double Overhand Stopper Knot: The Double Overhand Stopper Knot is most commonly used by climbers to secure the harness tie-in Figure 8 Follow Through Knot. It’s an easy stopper knot that’s secure, but not as secure as the Ashley Stopper Knot.
Overhand Stopper Knot: The Overhand Knot is one of the easiest and most popular stopper knots. Its main downside is that it’s also one of the weakest.
Figure 8 Stopper Knot: The Figure 8 Knot is one of the most popular stopper knots. It’s more secure than an Overhand Stopper Knot, but not as secure as the Double Overhand or the Ashley Stopper Knots. The Figure 8 Knot is also used as a basis for many other useful knots, like the Figure 8 Bend, Figure 8 Follow Through, Double Figure 8 Loop, and the Directional Figure 8 Loop.
EStar Stopper Knot: This is another secure stopper knot that may be used with very slippery ropes, like ones made from Dynema. Its main disadvantage is that it is very hard to untie.
Stevedore Stopper Knot: This is also a very secure stopper knot, like the Double Overhand, Ashley, and EStar stopper knots. It’s tied similarly to Overhand and Figure 8 knots, only with an extra turn.
Step-By-Step Guide: How to Tie the Ashley Stopper Knot
A detailed tutorial on how to tie the Ashley Stopper Knot.
Step 1:
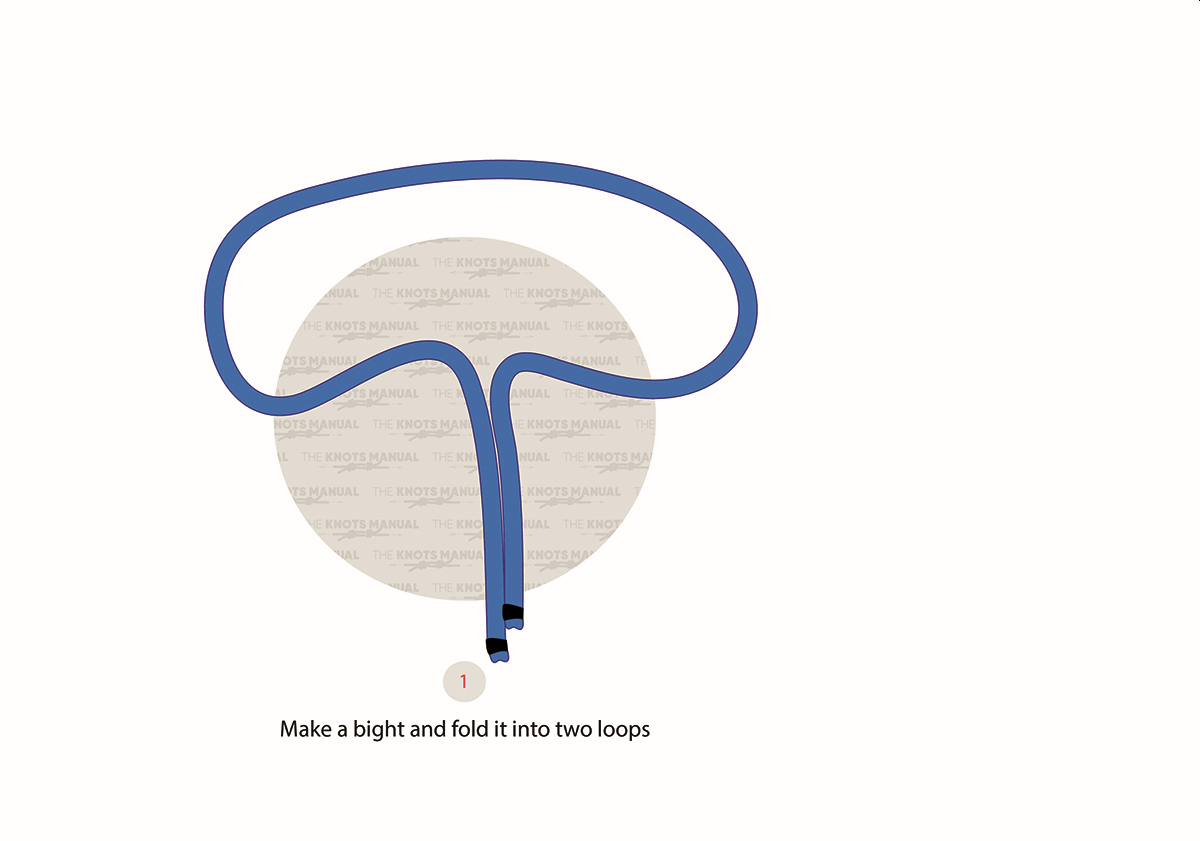
Make a long, wide bight close to the end of the rope.
Step 1a:
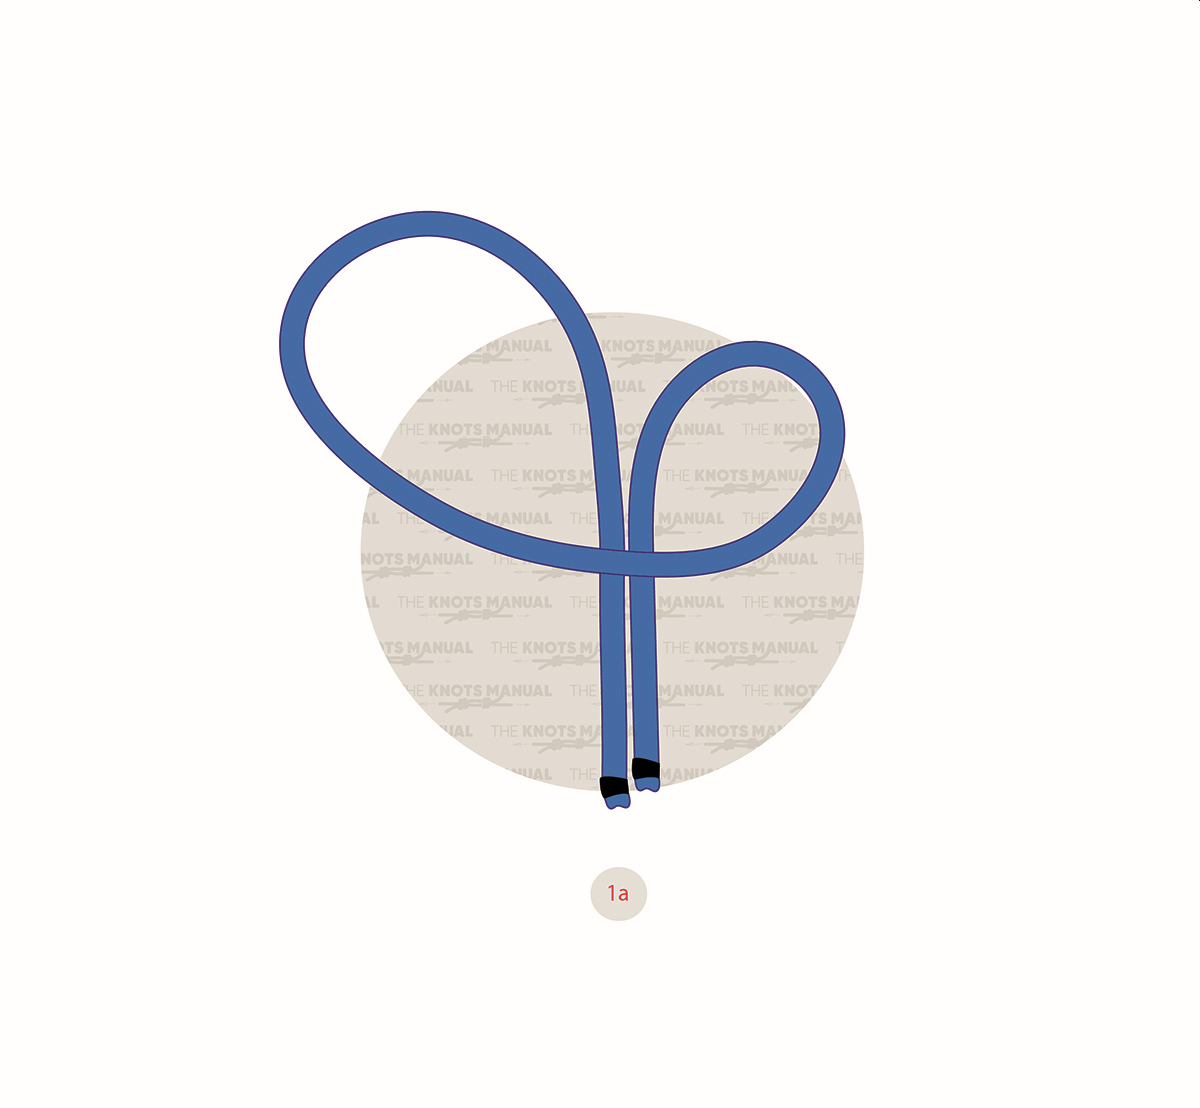
Fold the bight, forming two loops. The loop closer to the working end of the rope should be smaller compared to the loop next to the standing end.
Step 2:
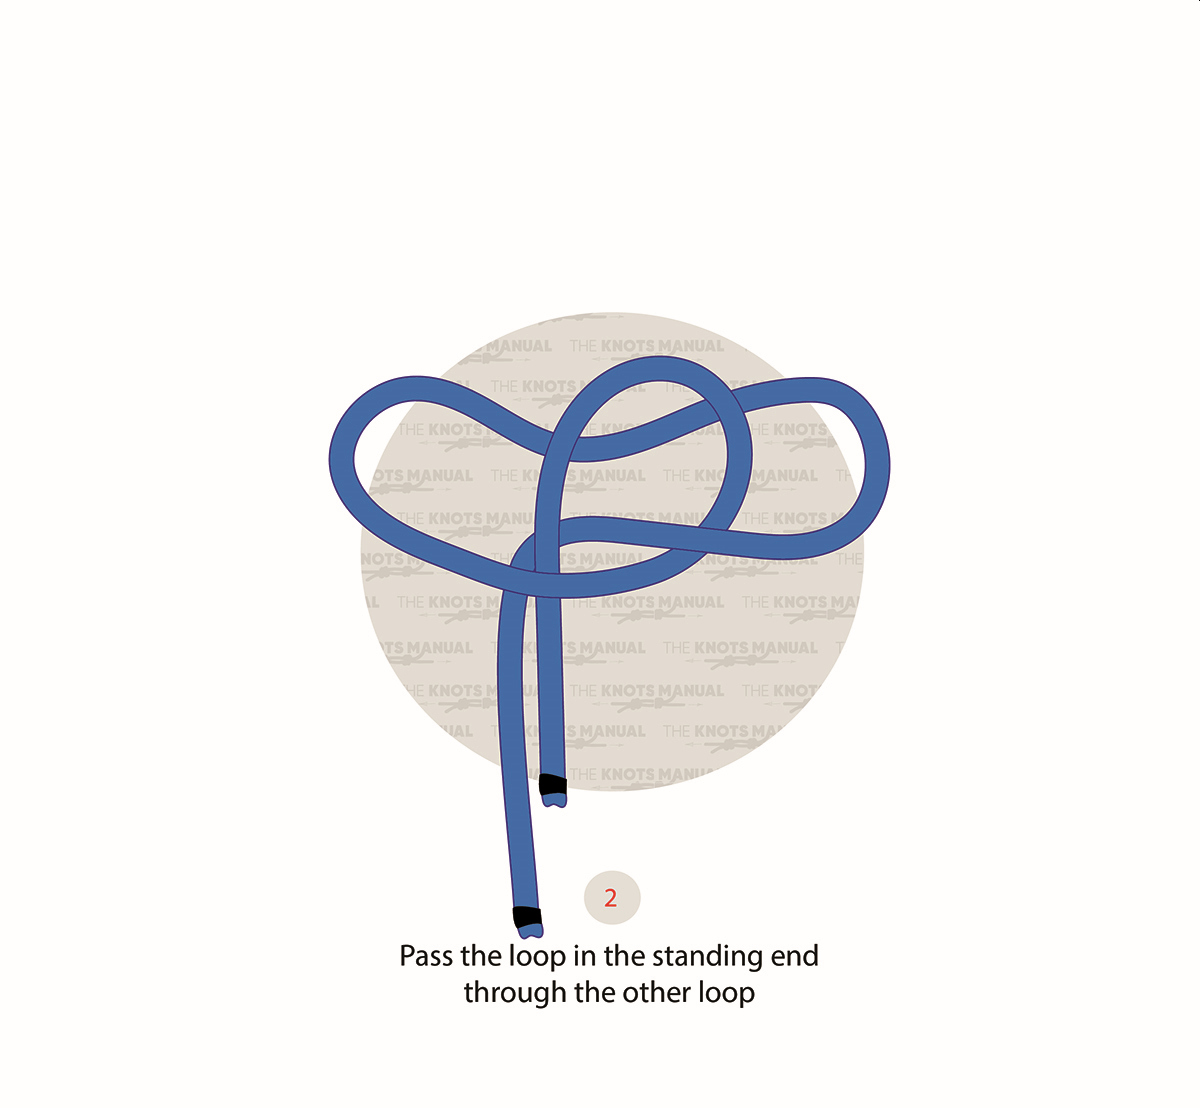
Pass the larger loop through the smaller one.
Step 2a:
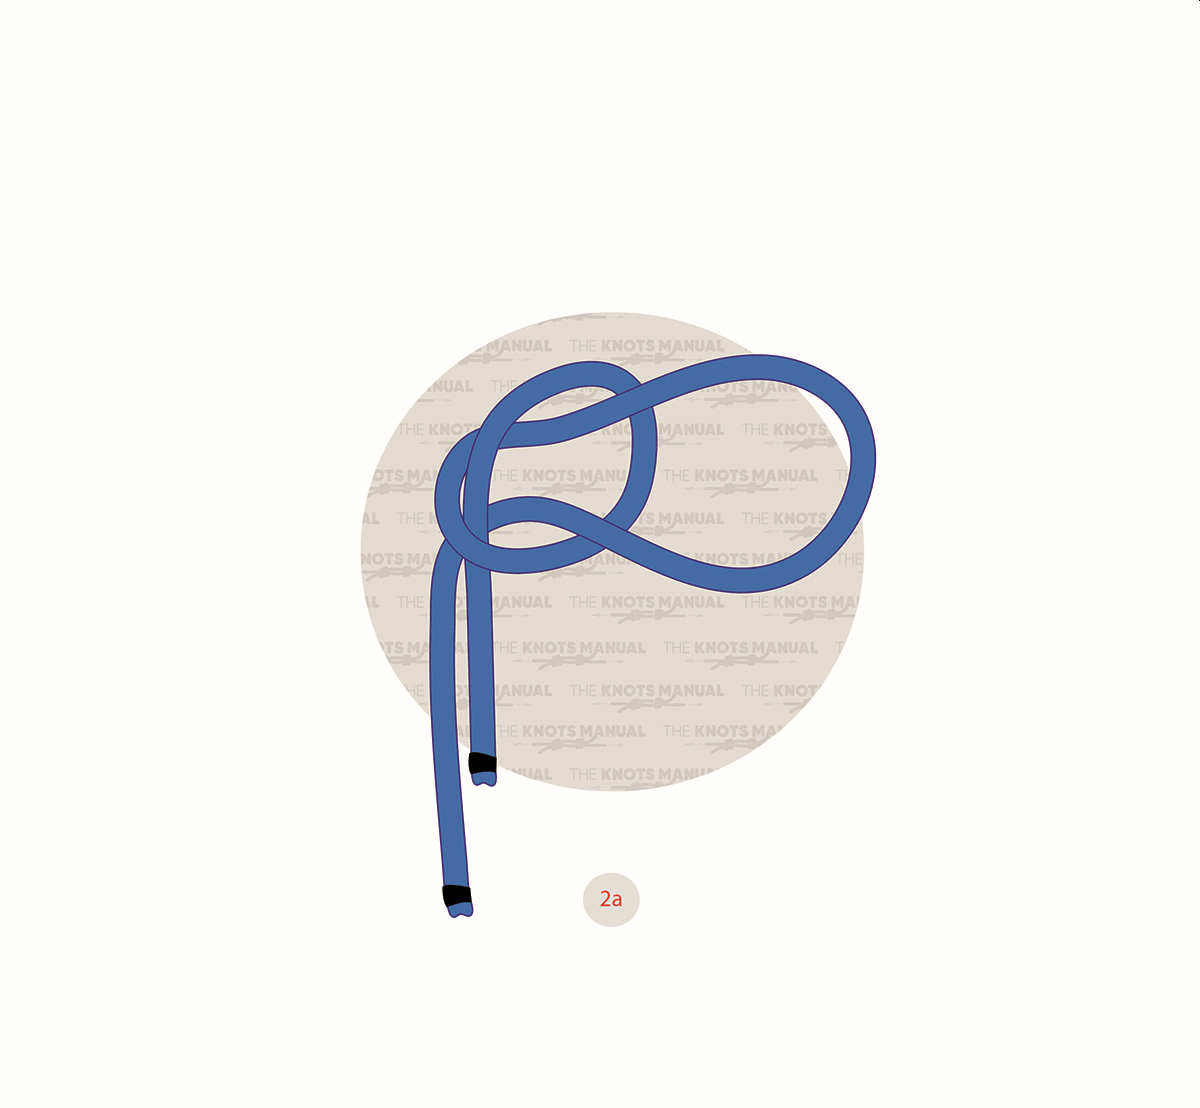
Finish passing the larger loop through the smaller one.
Step 3:
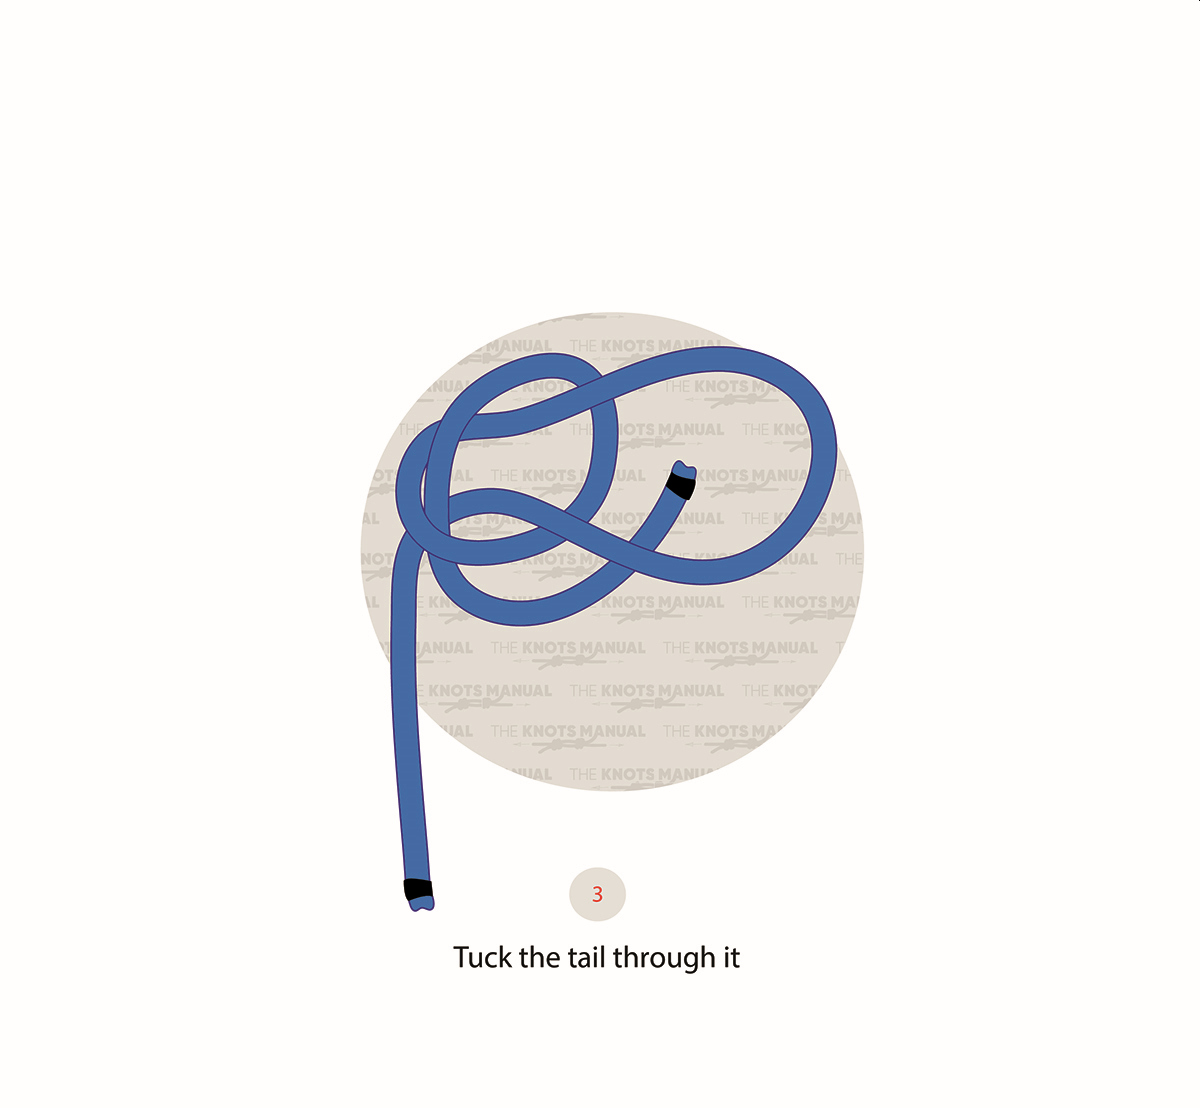
Pass the working end of the rope through the loop that you just formed.
Step 4:
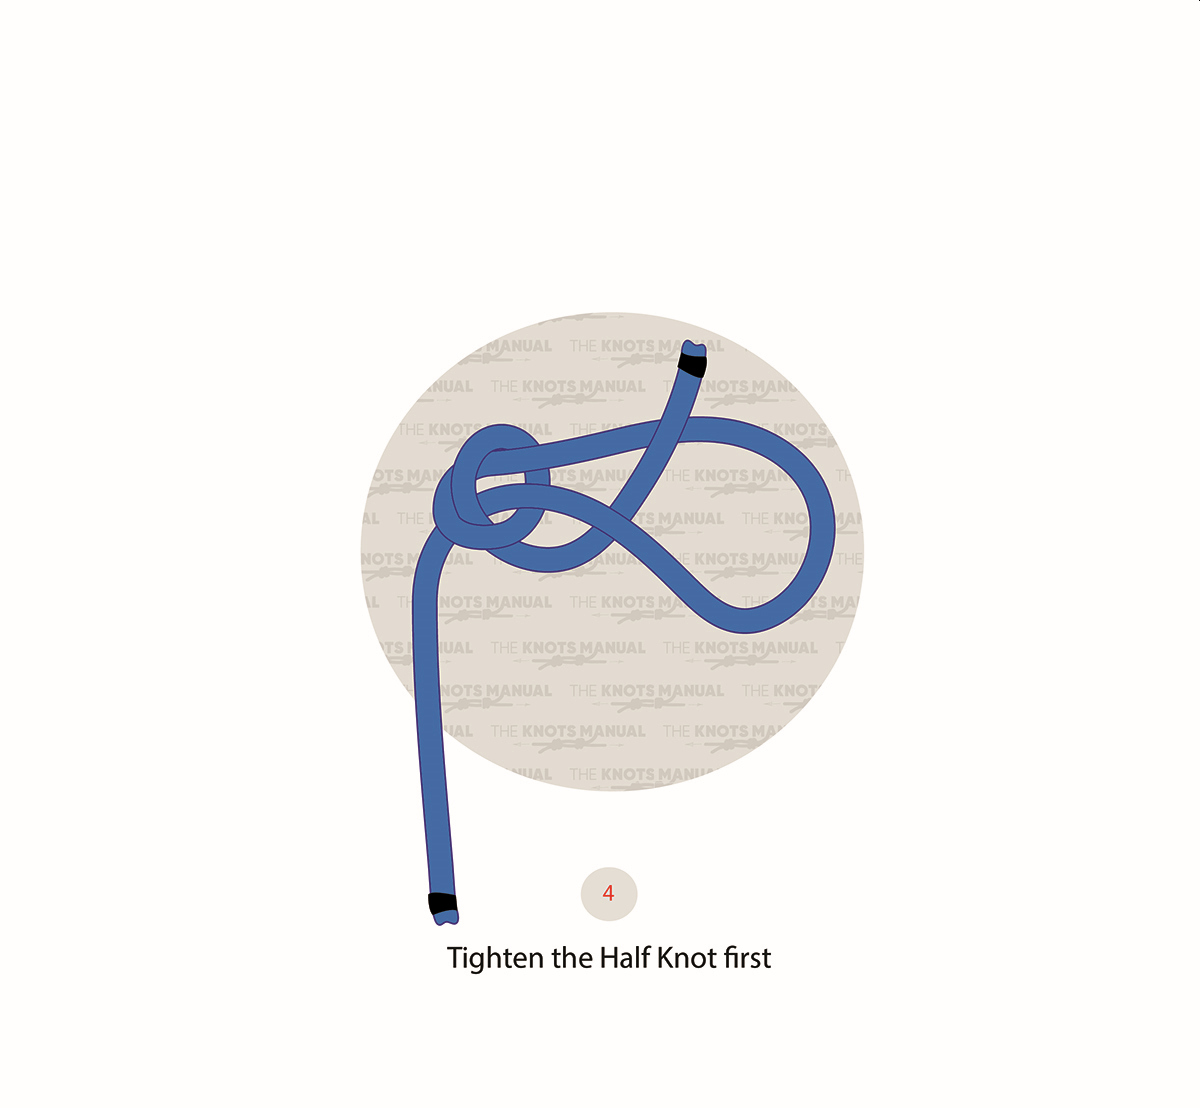
The tightening of the knot has to be done in three steps.
Step 4a:
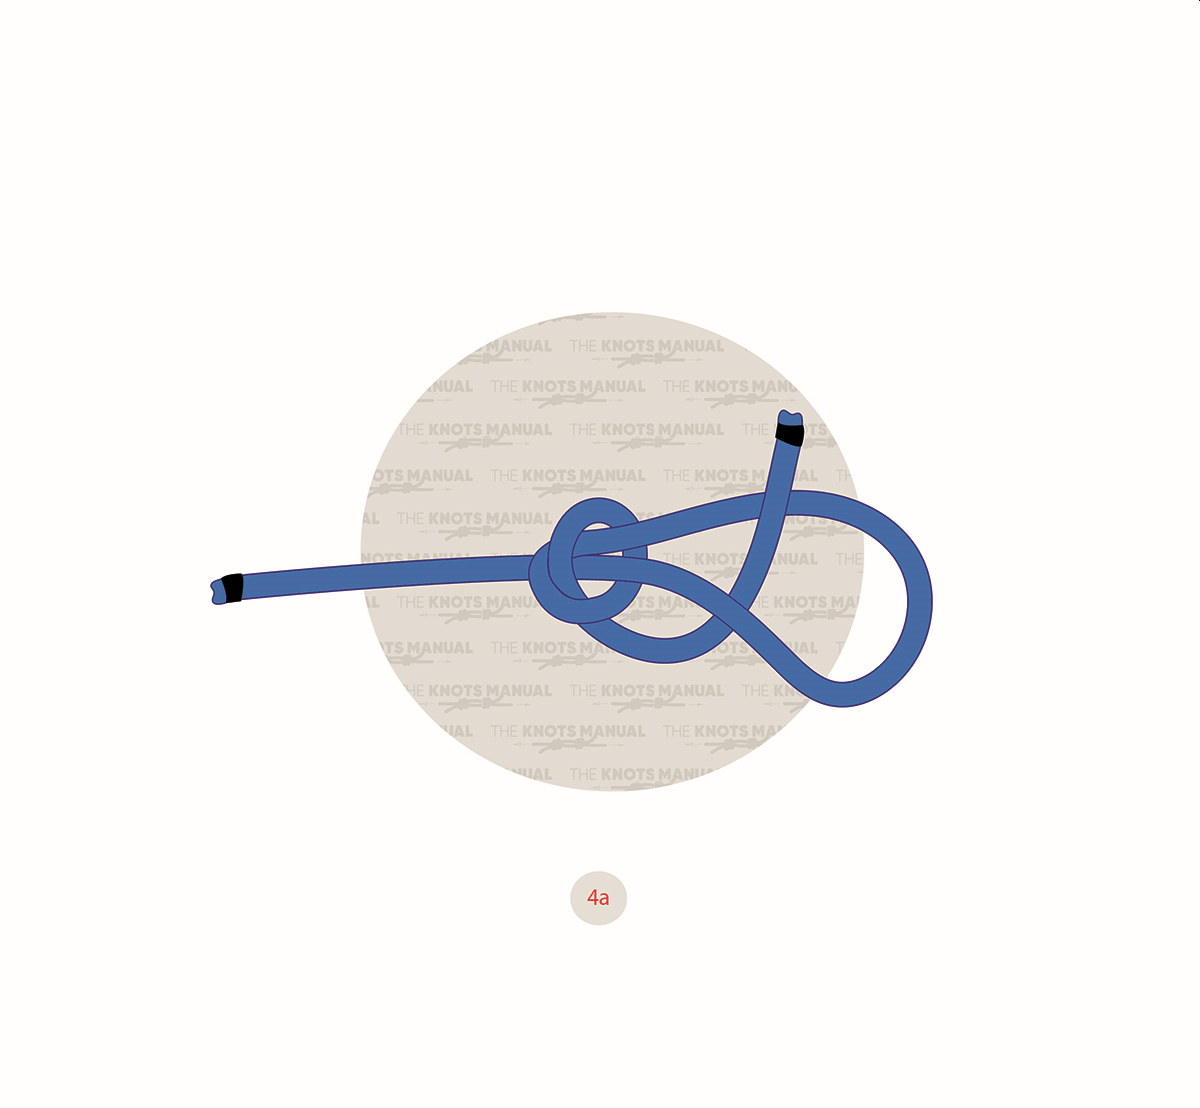
First, tighten the half knot on the left side.
Step 4b:
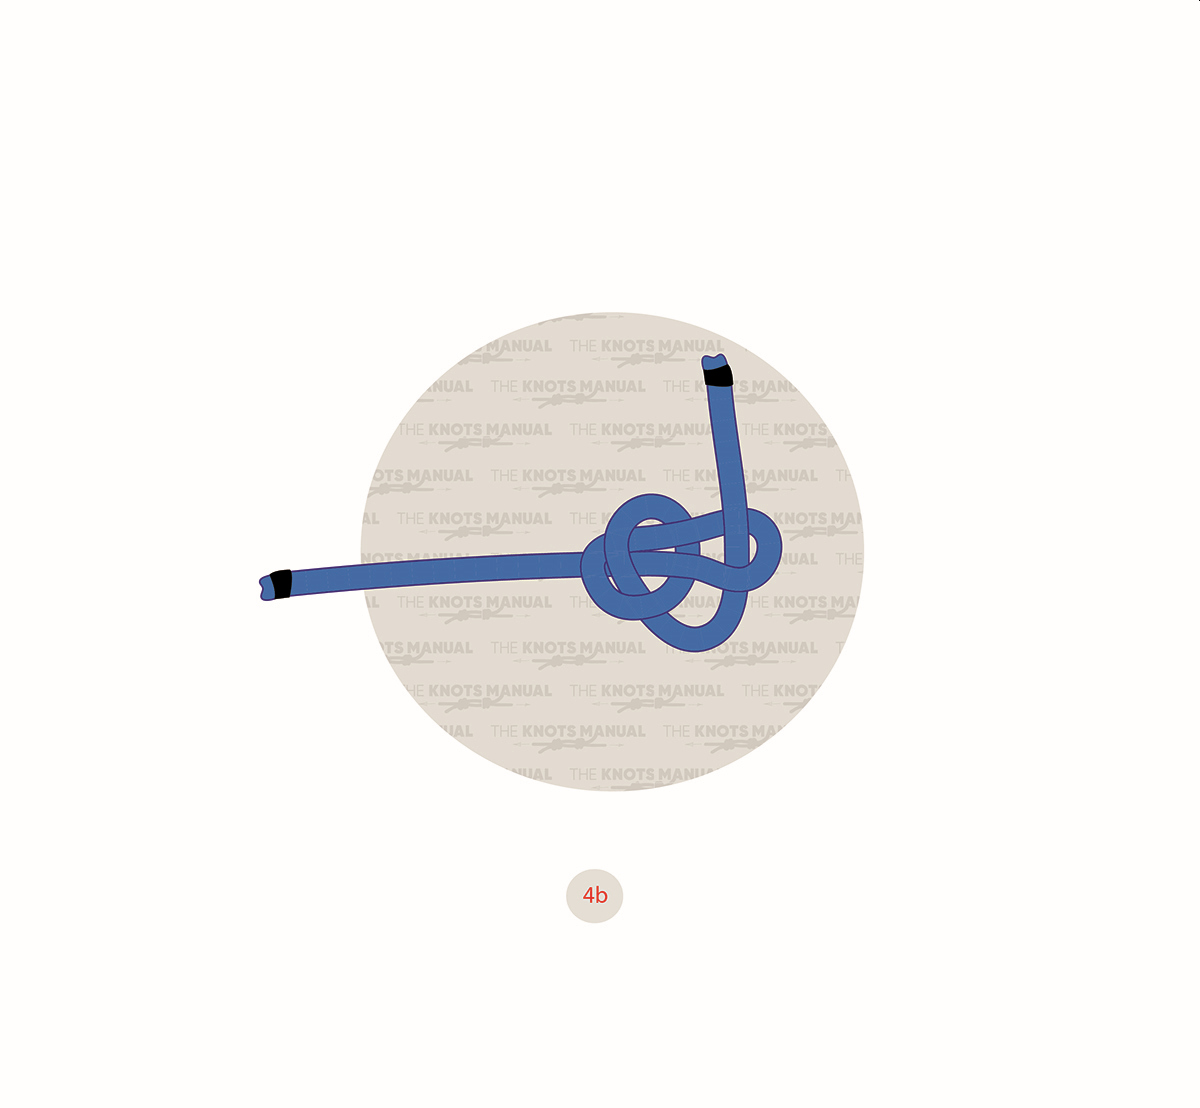
Then pull the standing end of the rope, which will tighten the larger loop around the working end.
Step 4c:
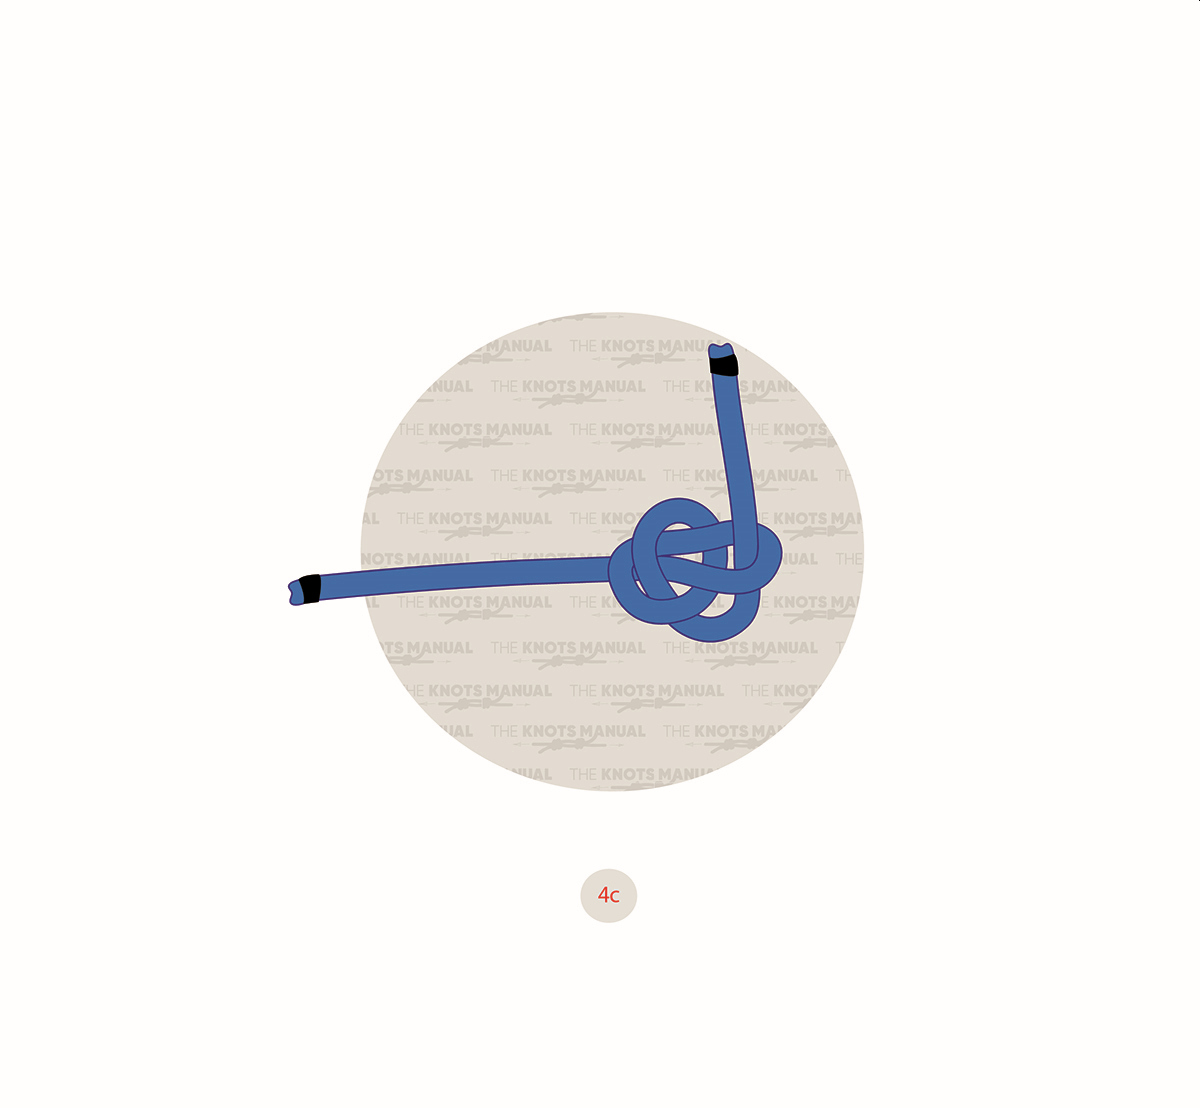
Continue pulling the standing end.
Step 5:
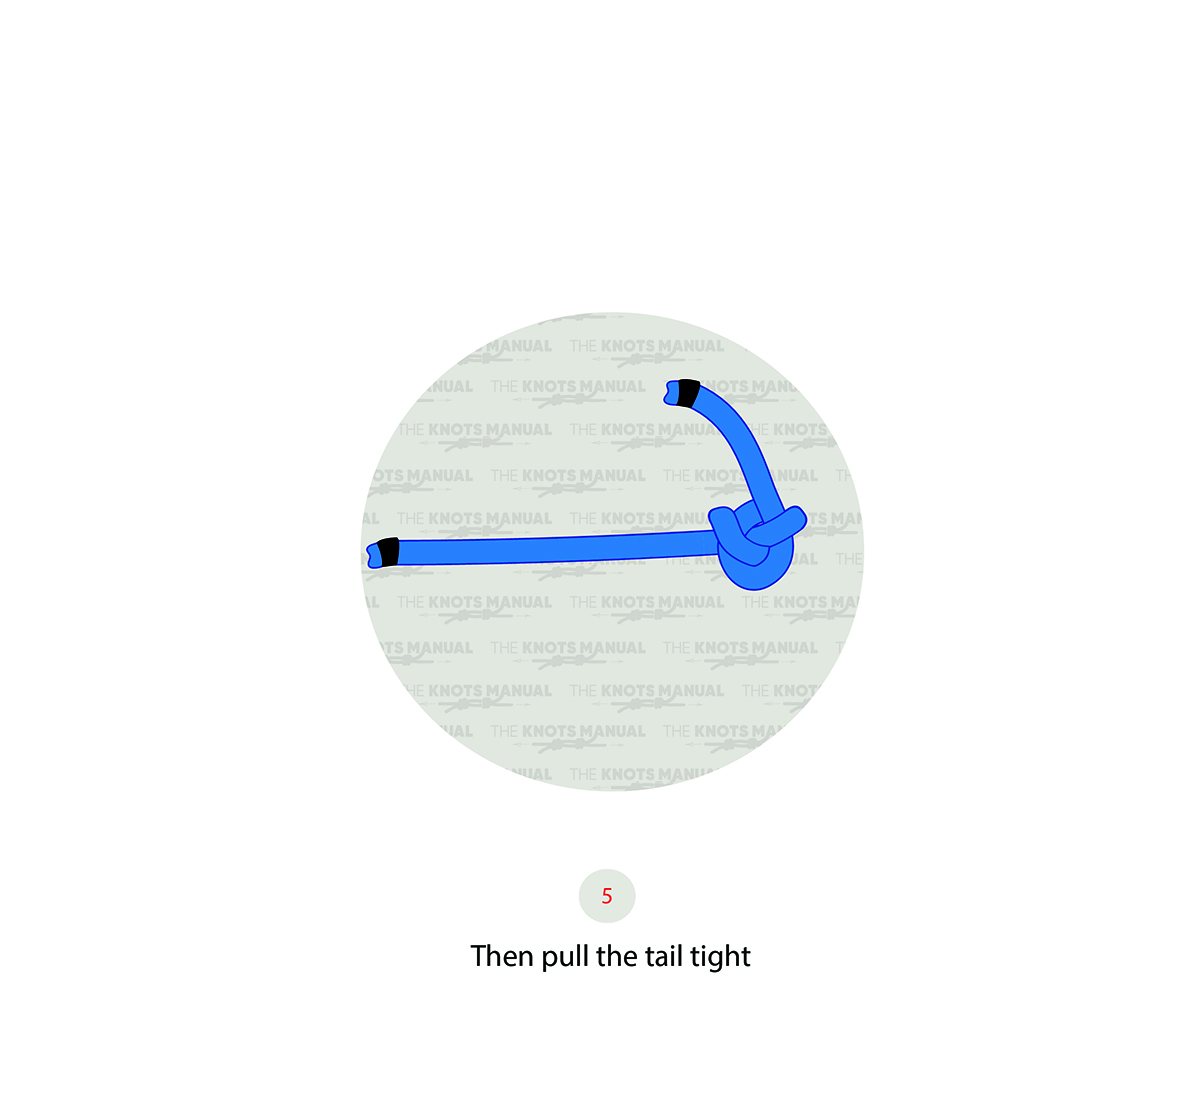
Continue pulling the standing end until it’s snug.
Step 5a
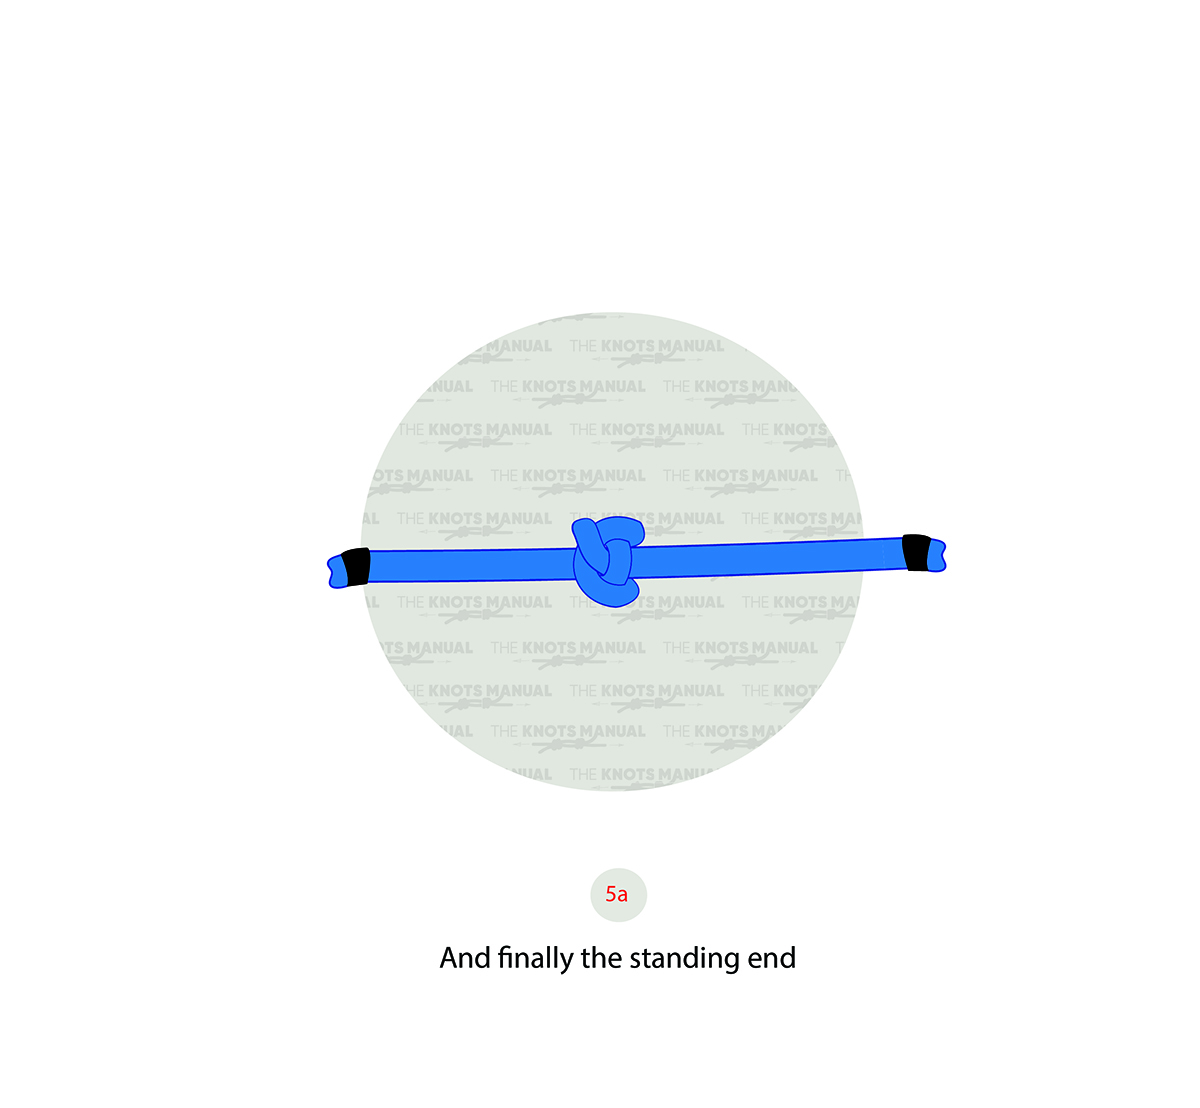
Finish the knot by pulling the working end.
Step 6:
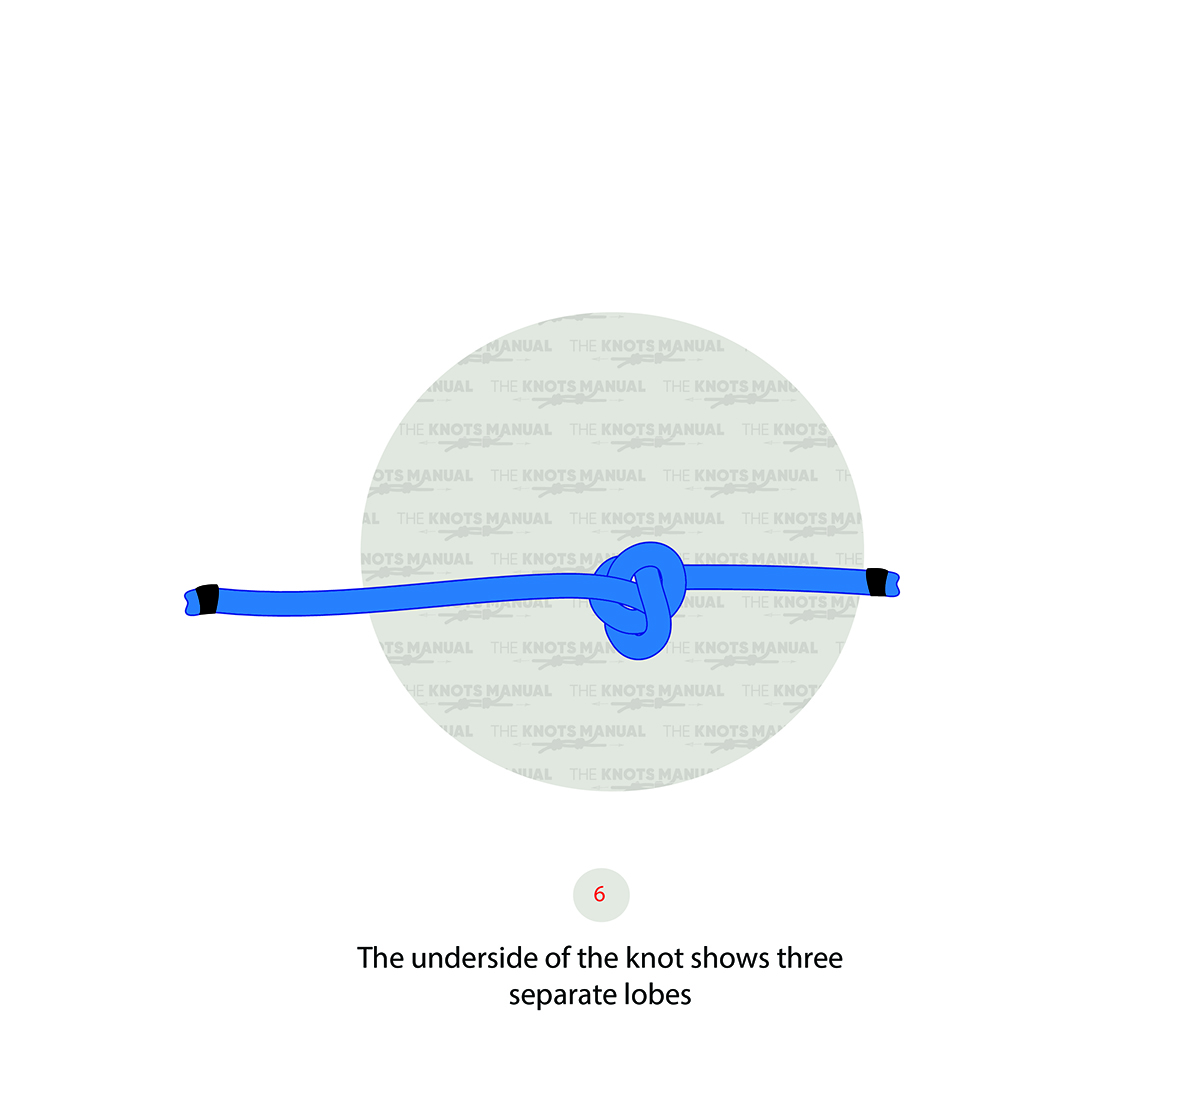
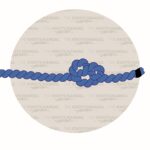
To check that the knot is tied correctly, observe its bottom. It should form three separate lobes.
Frequently Asked Questions
Is the Ashley Stopper Knot the Strongest Stopper Knot?
The Ashley Stopper Knot is indeed one of the strongest stopper knots, similar in strength to the Stevedore Stopper Knot. It’s very unlikely to slip if tightened correctly, and it doesn’t come loose. But for slippery ropes, the EStar Stopper Knot is a more secure choice.
Can the Ashley Stopper Knot Capsize?
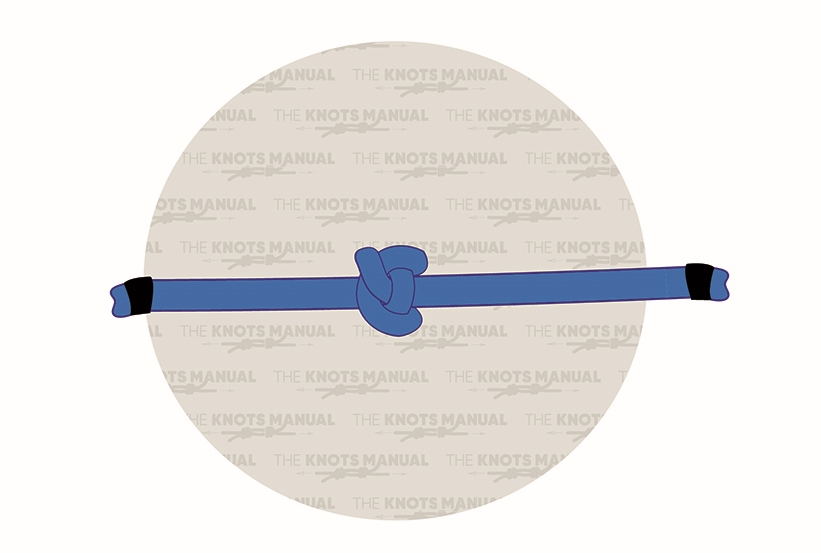
The Ashley Stopper Knot isn’t likely to capsize. Pulling the knot with a strong force and applying force to the sides of the knot doesn’t change its structure.
Is the Ashley Stopper Knot Easy to Untie?
When extreme force is applied to the Ashley Stopper Knot, it can indeed become hard to untie. But even in this scenario, it can still be untied rather easily by twisting and turning the knot until it becomes a bit looser,