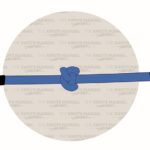
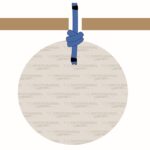
The EStar Stopper Knot creates a very bulky stopper knot at the end of the rope. It’s usually used with slippery Dyneema ropes because it’s very secure and won’t come undone by itself.
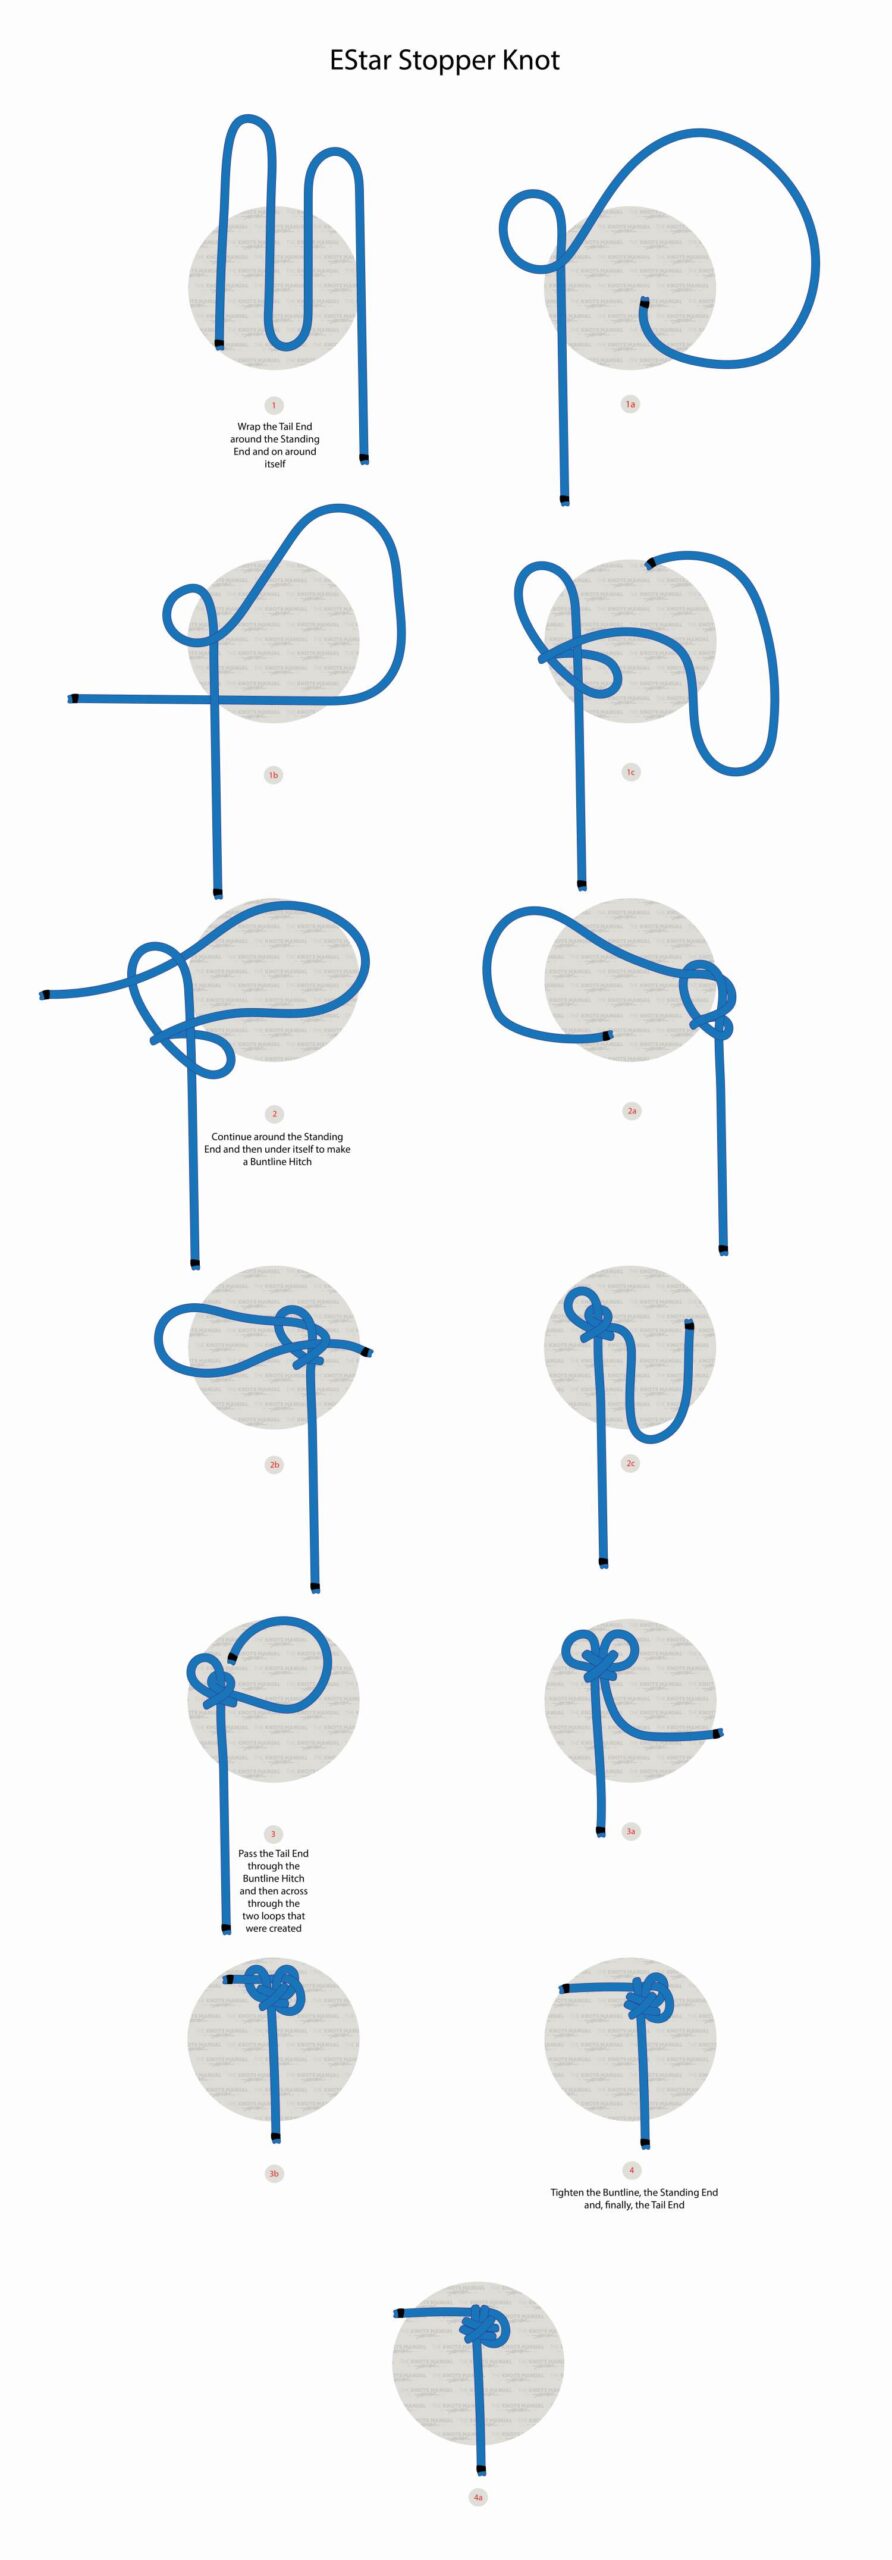
Quick Guide: Tying the EStar Stopper Knot
The EStar stopper knot is quite bulky, so you need a rather long section of rope to tie it. For thicker ropes, you’ll need close to 3 ft (1 meter) of rope, and for thinner ones 12-20 inches (30-50 cm).
To tie the EStar Stopper Knot, create a loop at the end of the rope and go around it once (steps 1a-1c). Then take the end through the top loop to create a Buntline Hitch (steps 2-2a). After that, pass the working end back through one of the vertical strands (steps 2b-2c). Now pass the working end from the top parallel to the standing end to create two top loops (steps 3-3a). Finally, pass the working end through both top loops to finish the knot (steps 3b-4).
You’ll notice that the EStar Stopper Knot is somewhat difficult to tighten. To make this task easier, tighten everything except the top two loops in step 3a. After passing the end through them, you’ll just need to tighten the two top loops and the knot will be finished.
Pros and Cons of the EStar Stopper Knot
One of the main advantages of the EStar Stopper Knot is that it is very bulky. In fact, it’s considered to be one of the bulkiest stopper knots, with a profile 2-3 times larger than the rope diameter.
It is also very secure and unlikely to slip. That’s why it’s often used as the preferred choice for slippery ropes. This is due to the way that it is tied, where the Buntline Hitch is essentially tightening the tag end as you pull it.
One major downside of the EStar Stopper is that it is difficult to learn. It involves multiple steps to tie, and it can be tied incorrectly, leaving a large room for error for beginners.
Once loaded with weight, it’s also almost impossible to untie because it’s a self-tightening stopper knot.
And the last downside is that it isn’t symmetrical. This makes it less than ideal for some situations where the stopper knot needs to stay centered.
Common Uses for the EStar Stopper Knot
Most commonly, the EStar Stopper Knot is used with ropes made from slippery materials, like Dyneema, Spectra, and Kevlar. In fact, it was originally developed exactly for this purpose by Evans Starzinger. While other stopper knots slip with these rope materials, the EStar Stopper Knot doesn’t.
The good news is that the EStar Stopper Knot can be used with any type of rope. You can use it anytime you need to create a bulky stopper knot to keep the rope from slipping through a ring or a hole.
Knots Like the EStar Stopper Knot
Double Matthew Walker Knot: One of the most secure and reliable stopper knots. It also has a very bulky profile, but not as large as the EStar stopper knot. Its main benefit is that it is perfectly symmetrical. Its largest disadvantage is that you need to unravel the rope to tie it. It also works only with twisted ropes.
Ashley Stopper Knot: A secure and reliable stopper knot with a less bulky profile than the EStar Stopper Knot.
Stevedore Stopper Knot: This stopper knot is tied very similarly to the EStar and Buntline Hitch Knots, except the working end is wrapped around one more half-turn. It’s often taught as the go-to stopper knot for beginners because it’s easy to tie, symmetrical, and secure.
Double Overhand Stopper Knot: A very secure and easy-to-tie stopper knot with a medium-sized profile. It’s often used to secure other knots because it can be tied around another parallel string.
Figure 8 Knot: A basic stopper knot, which is somewhat secure, but can slip through other knots due to the small profile.
Overhand Knot: The most basic stopper knot, which a lot of people know how to tie from tying their shoes.
Illustrated In-Depth Guide: How to Tie the EStar Stopper Knot
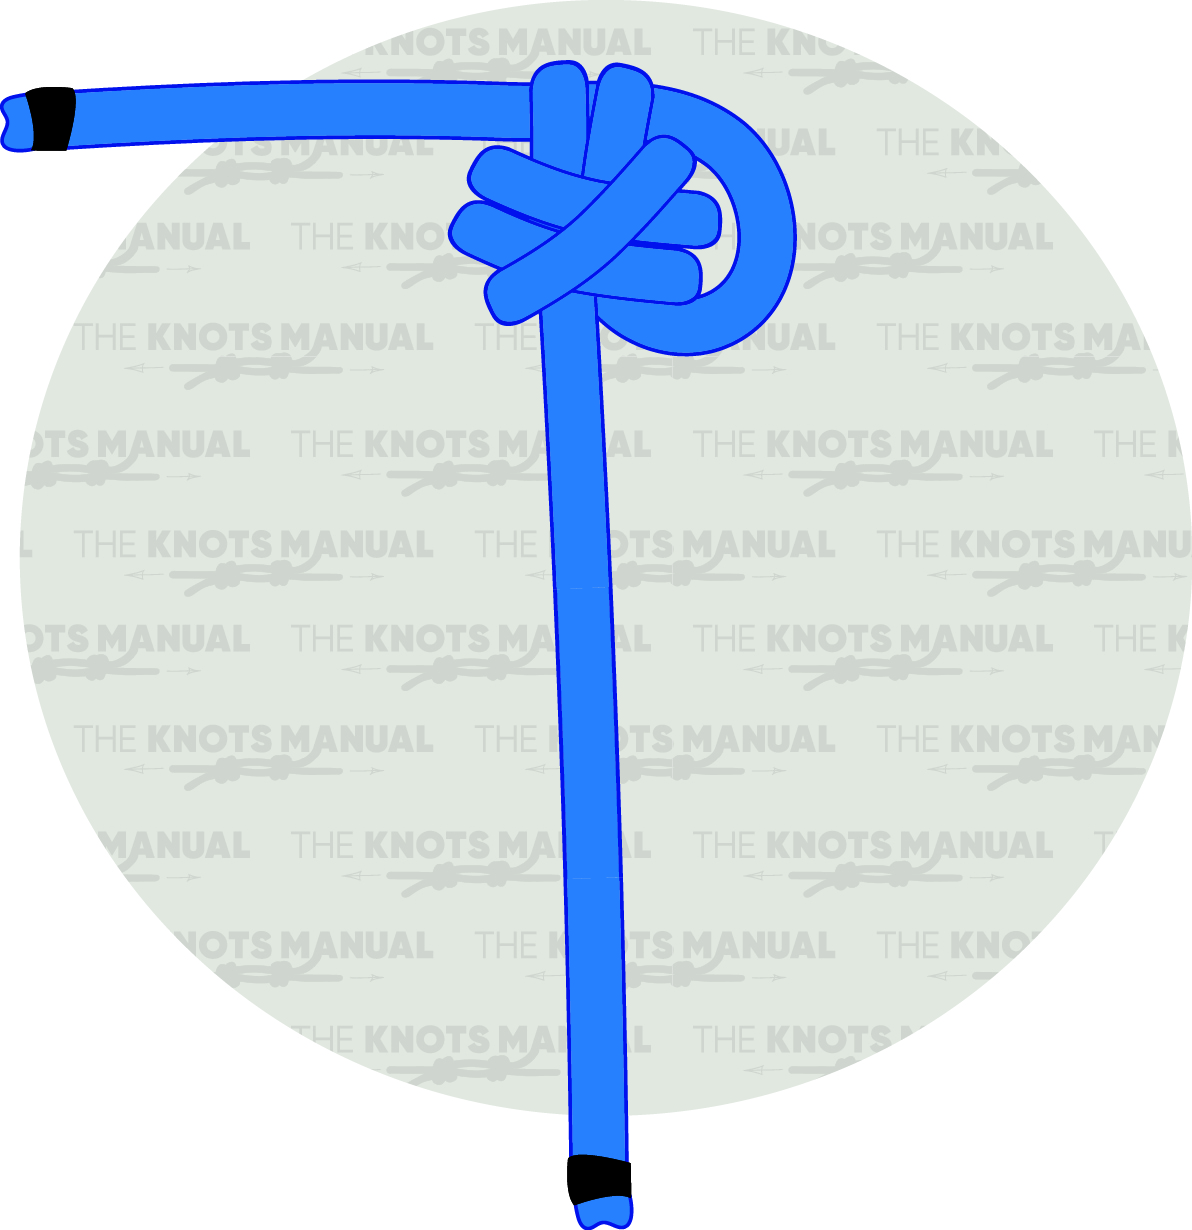
A step-by-step guide on tying the EStar Stopper Knot.
Step 1:
Start by freeing up a long section of rope, as illustrated above.
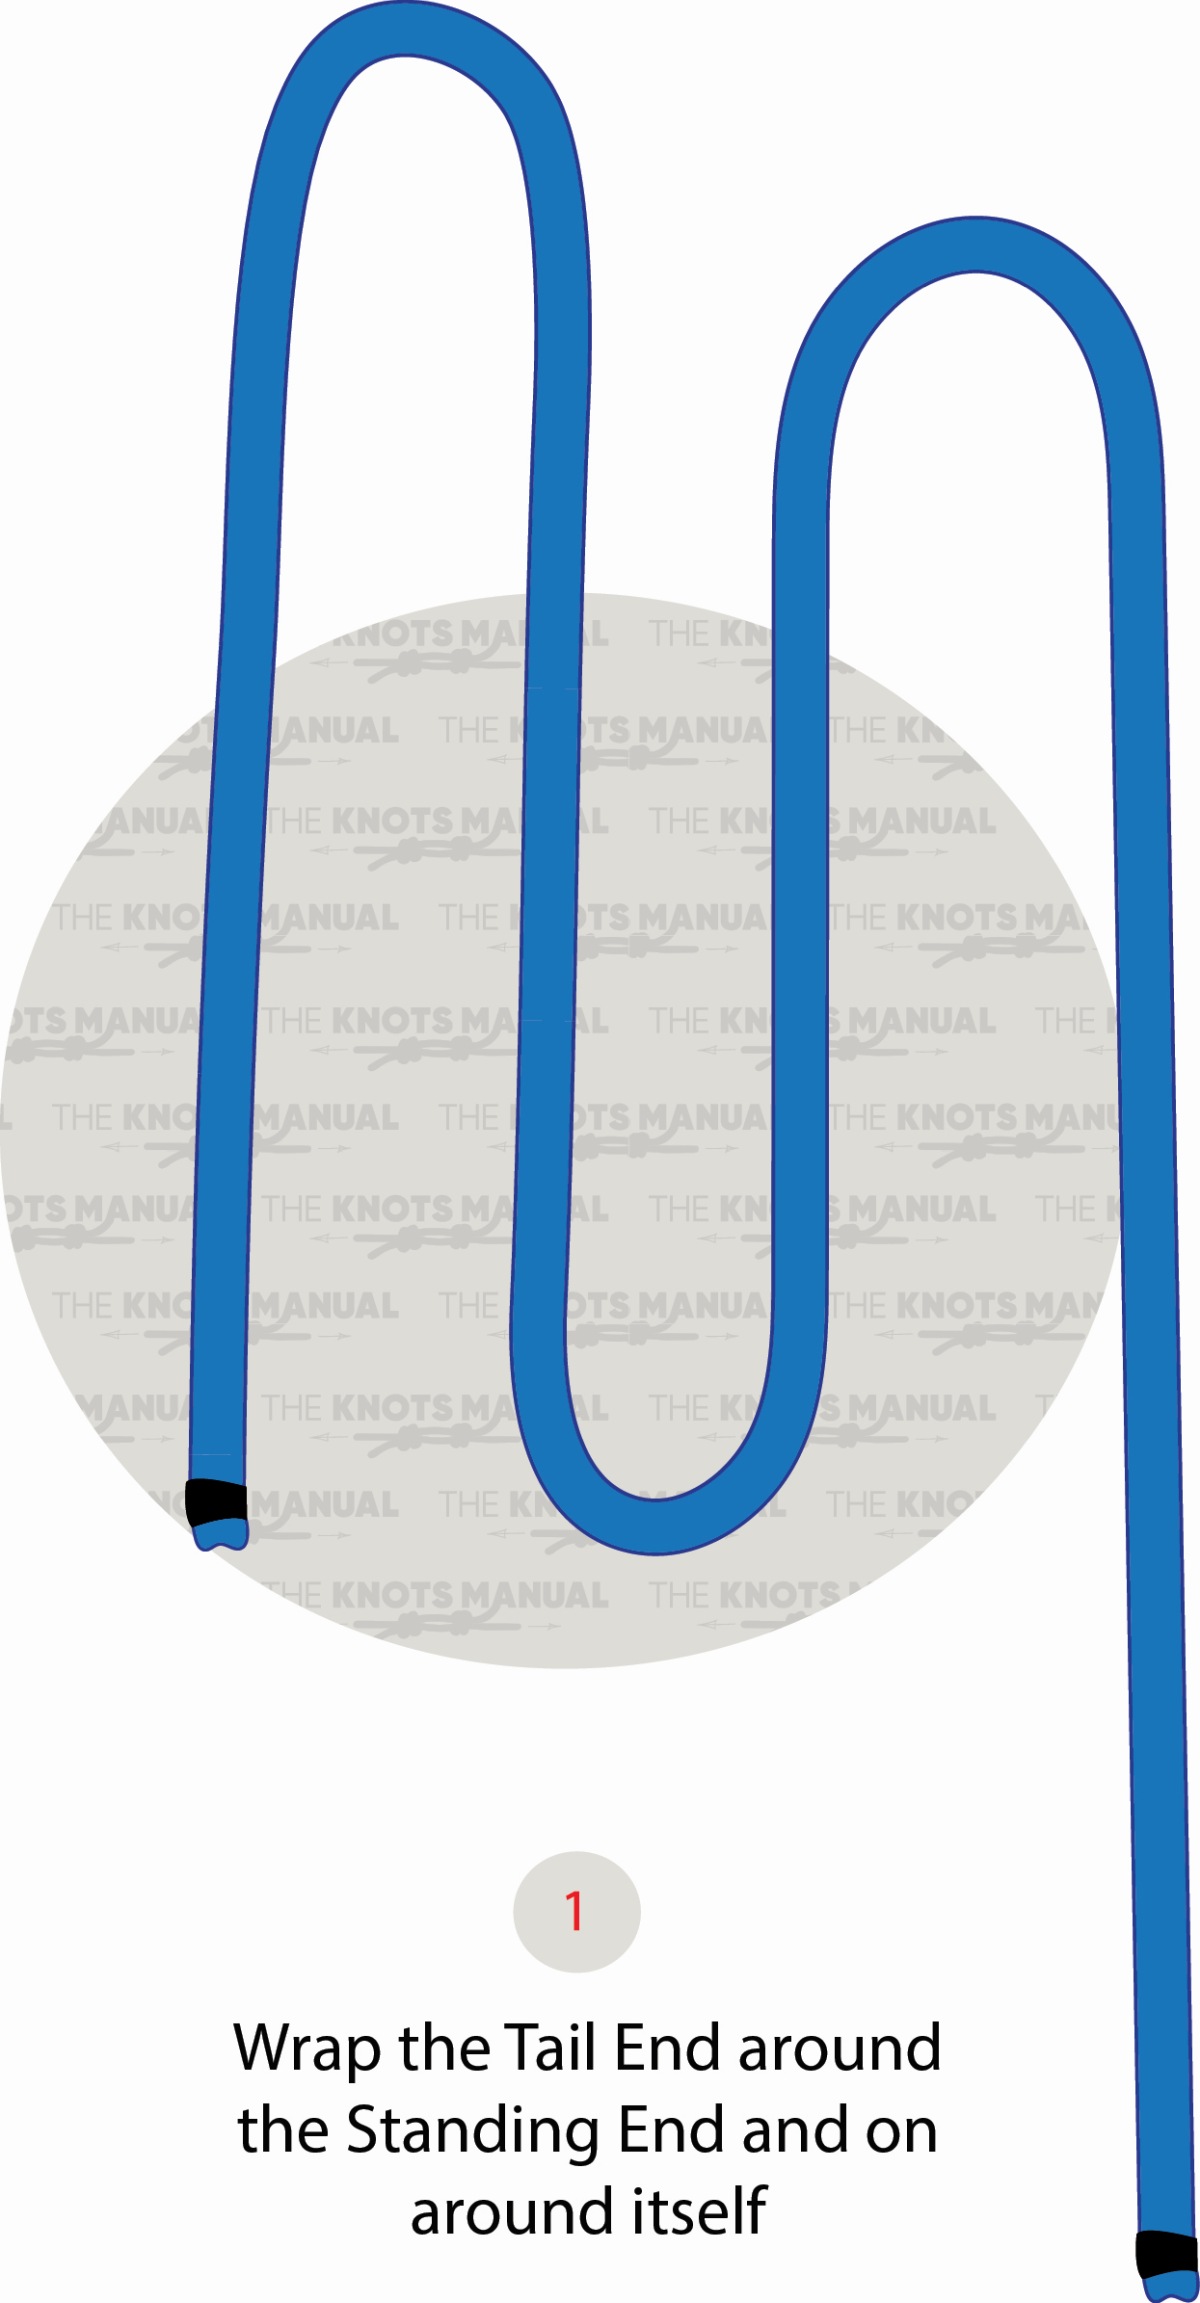
Step 1a:
Make a loop near the end of the rope, leaving a long piece of rope after it.
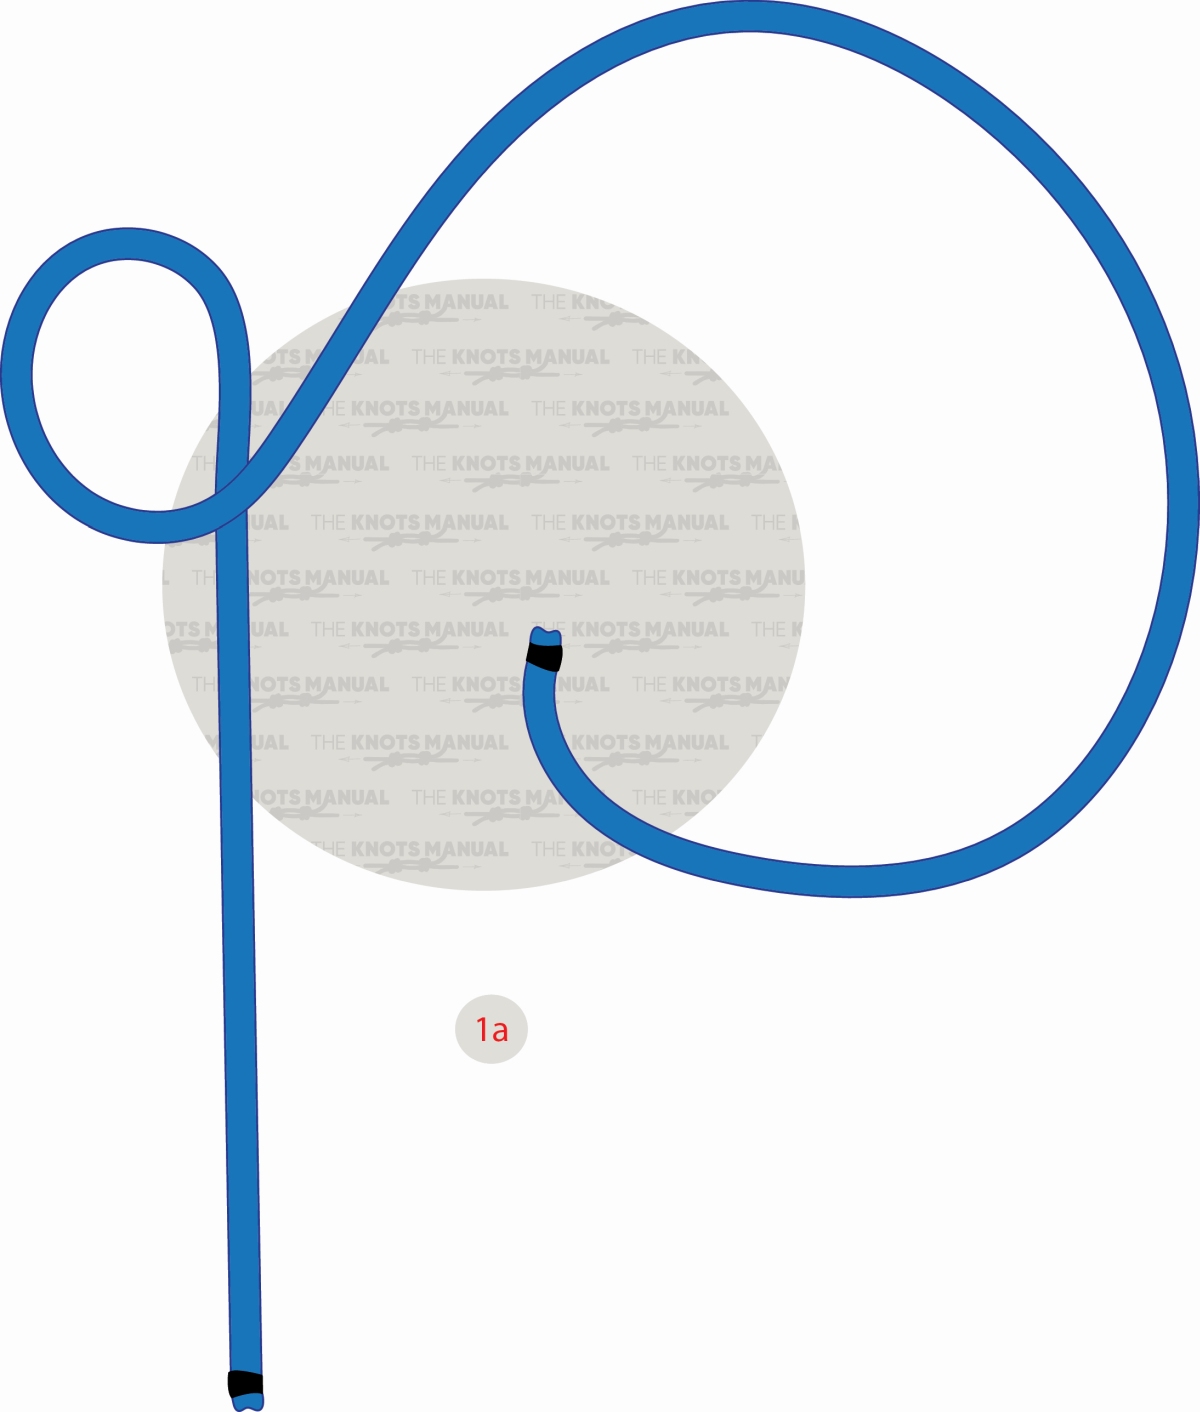
Step 1b:
Do another half-turn around the standing end.
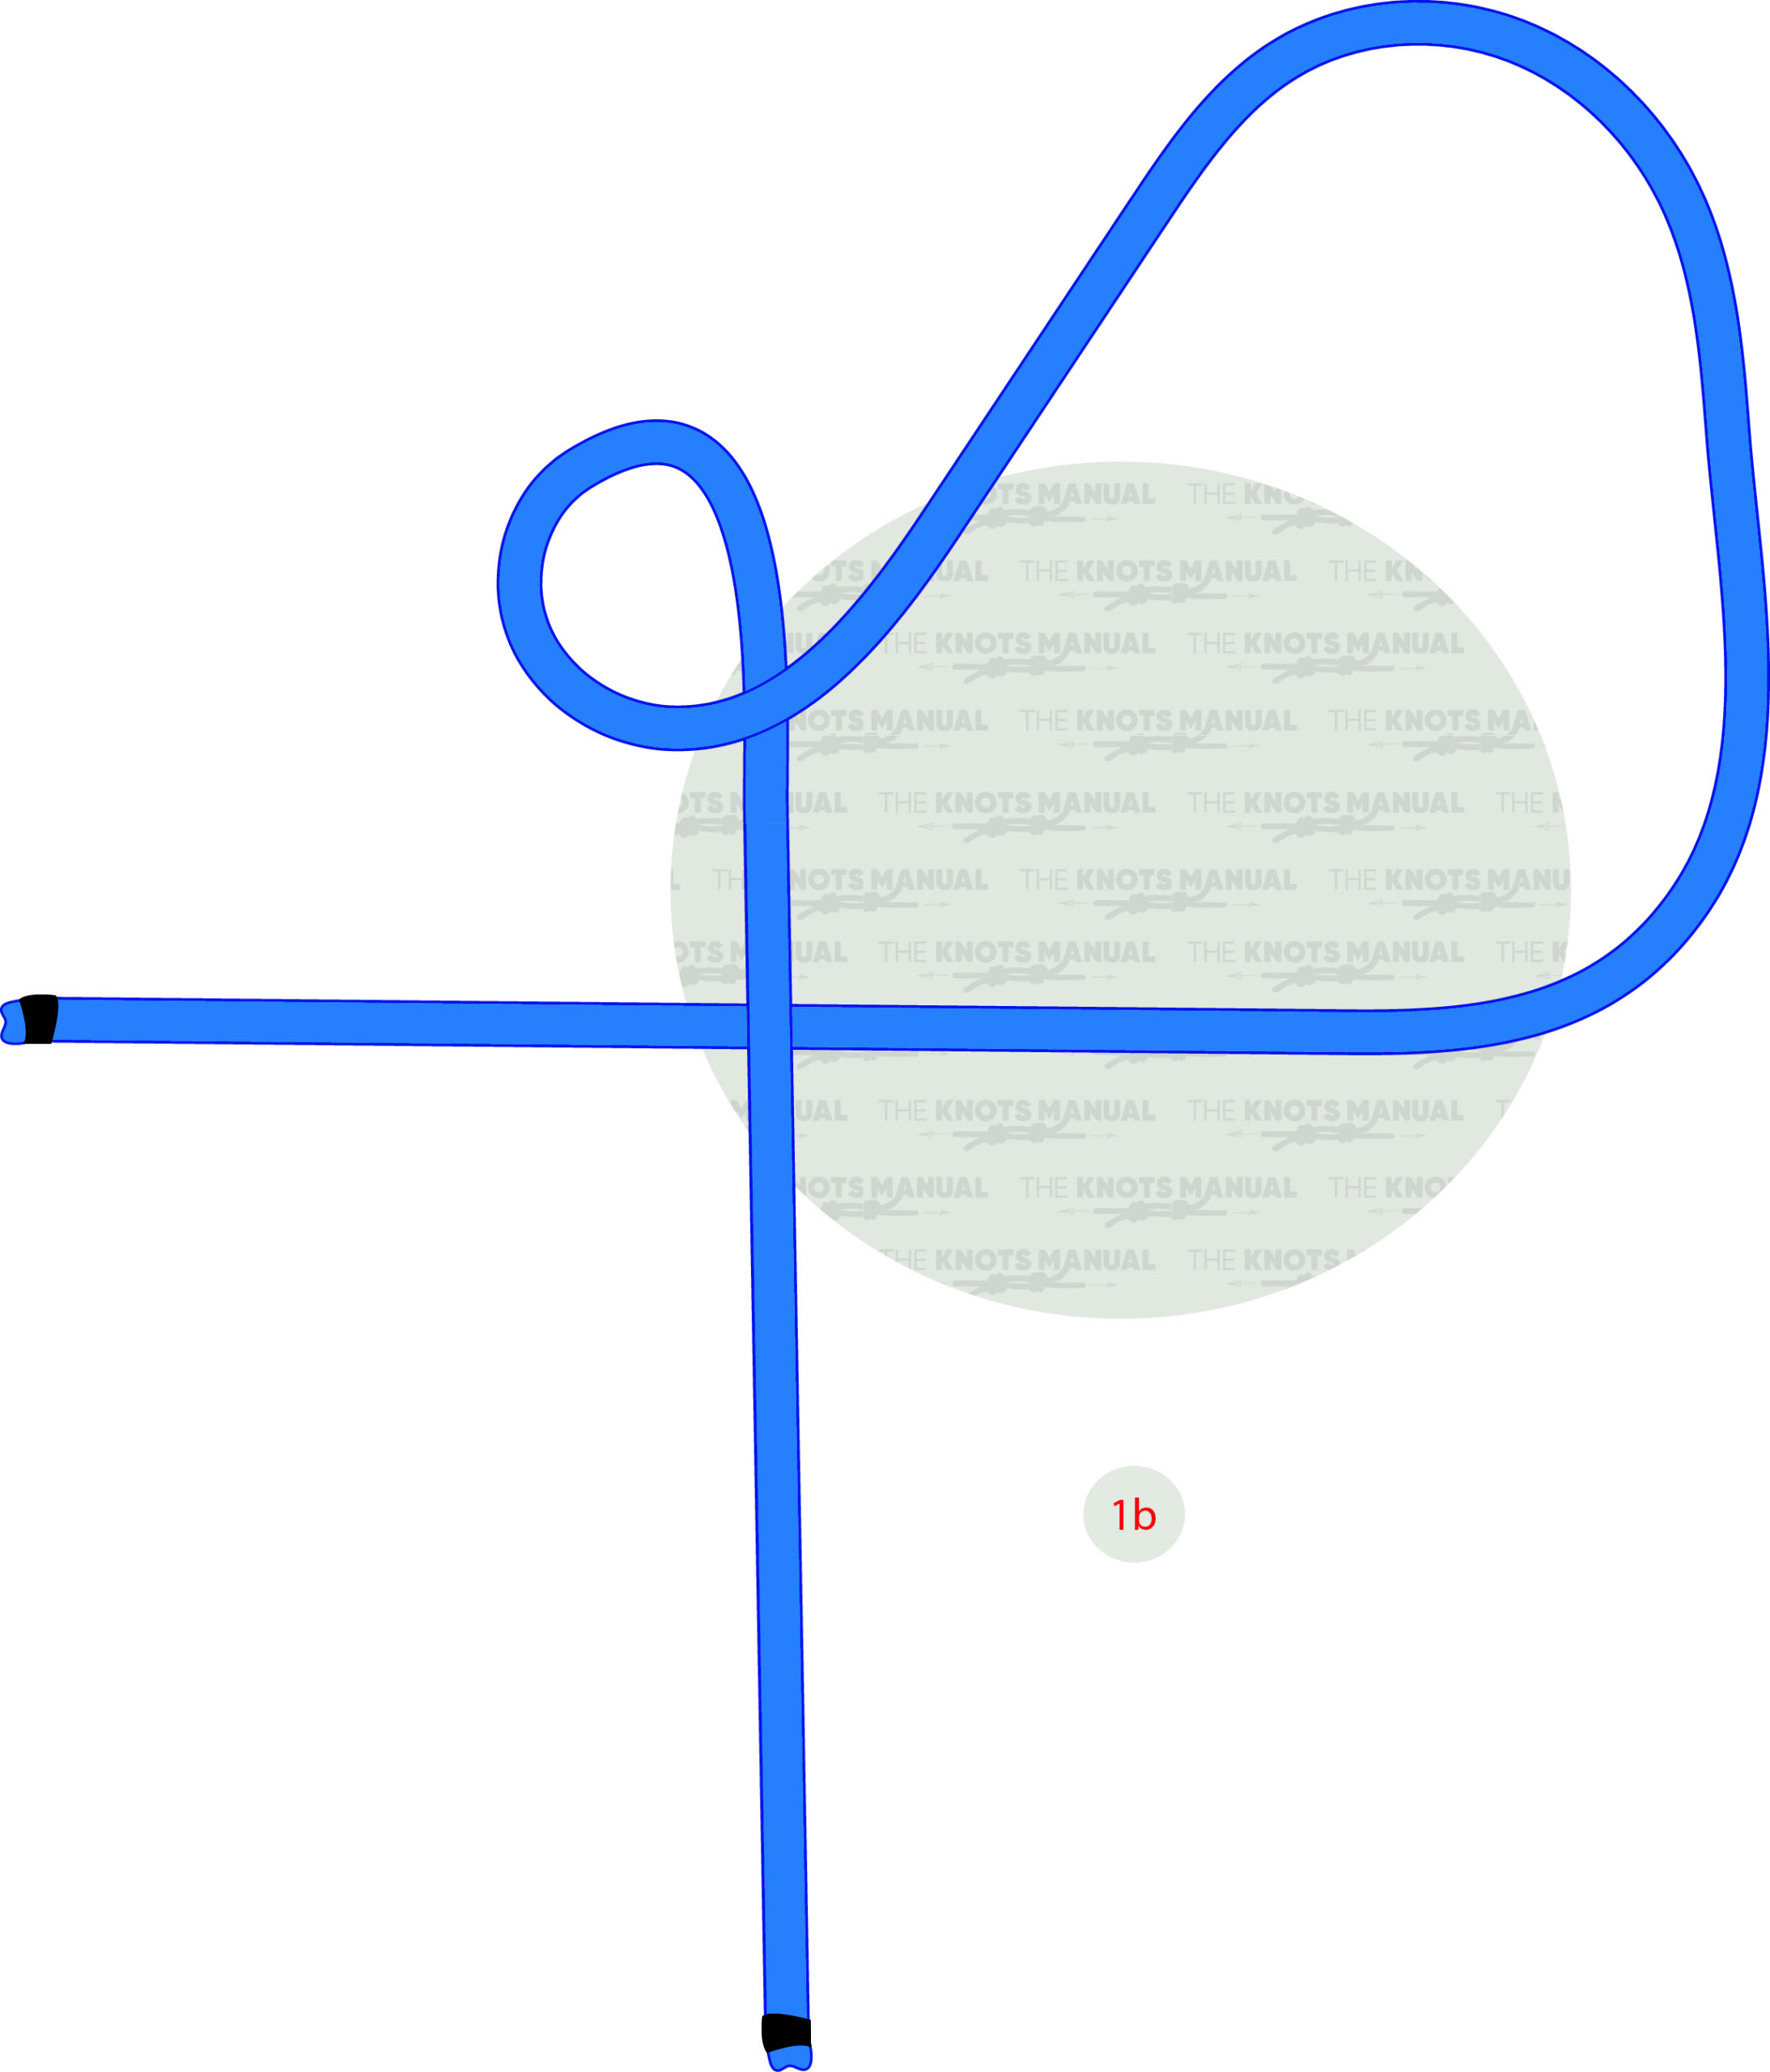
Step 1c:
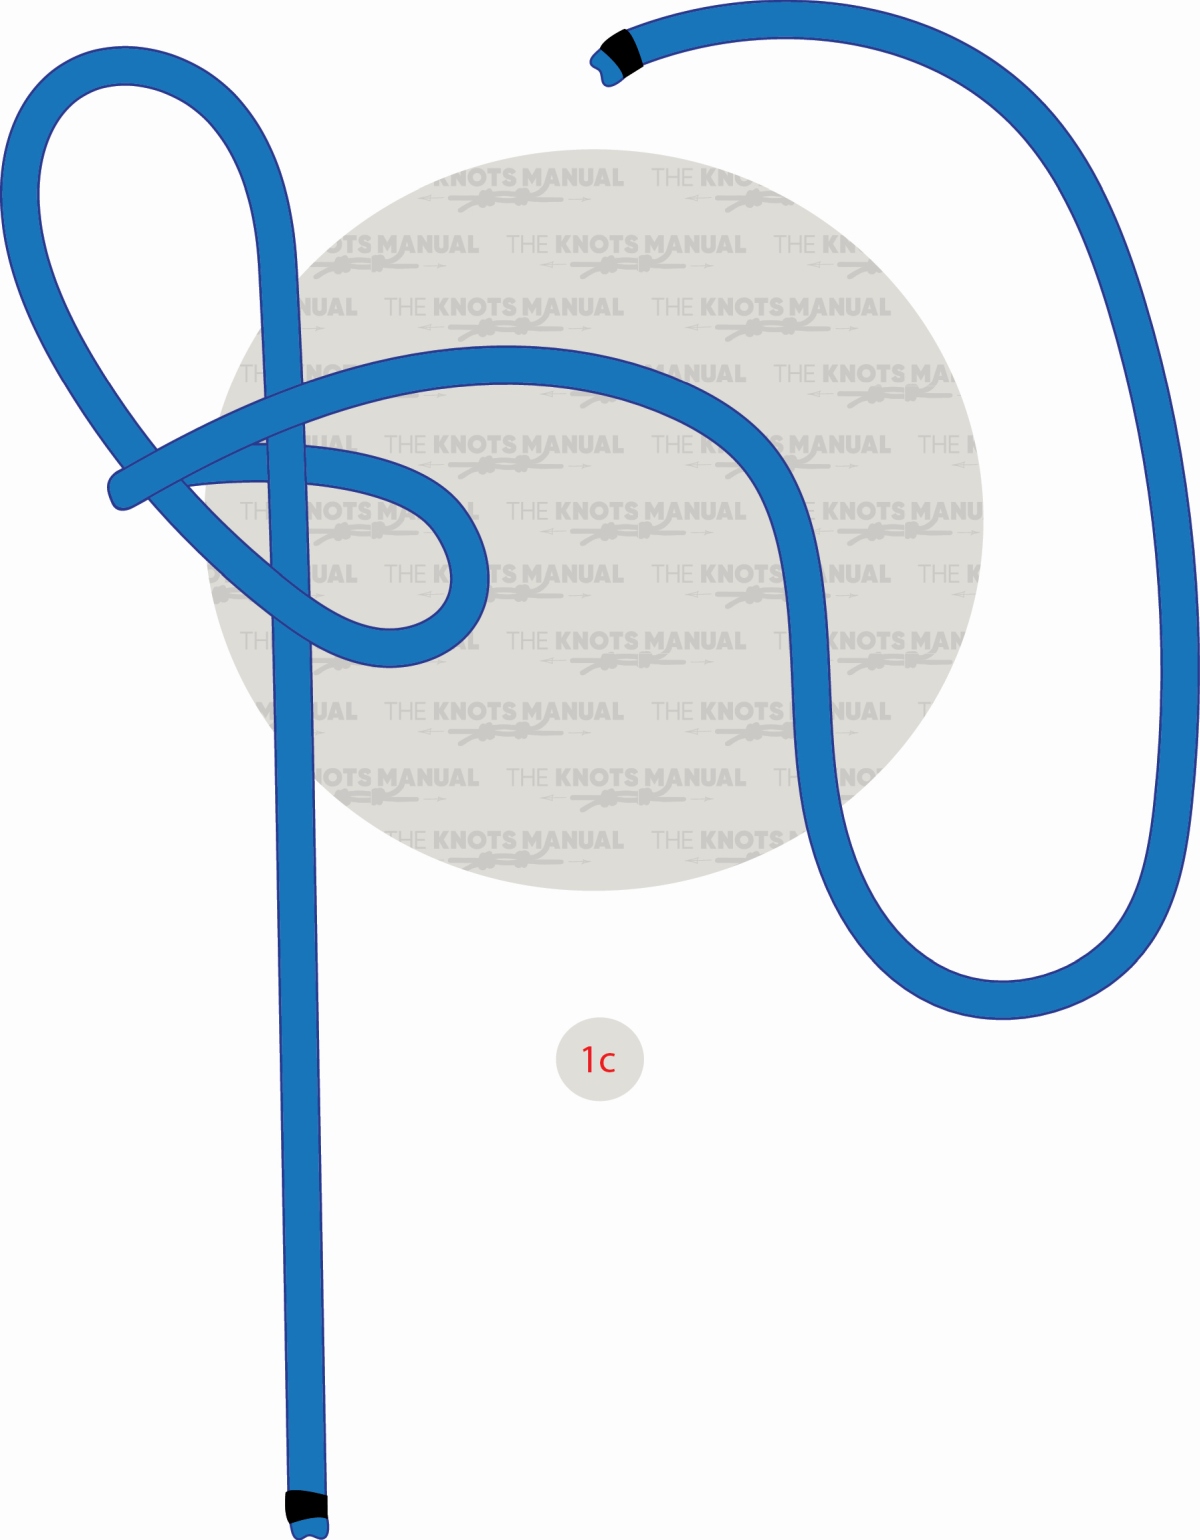
Make one full turn around the standing end.
Step 2:
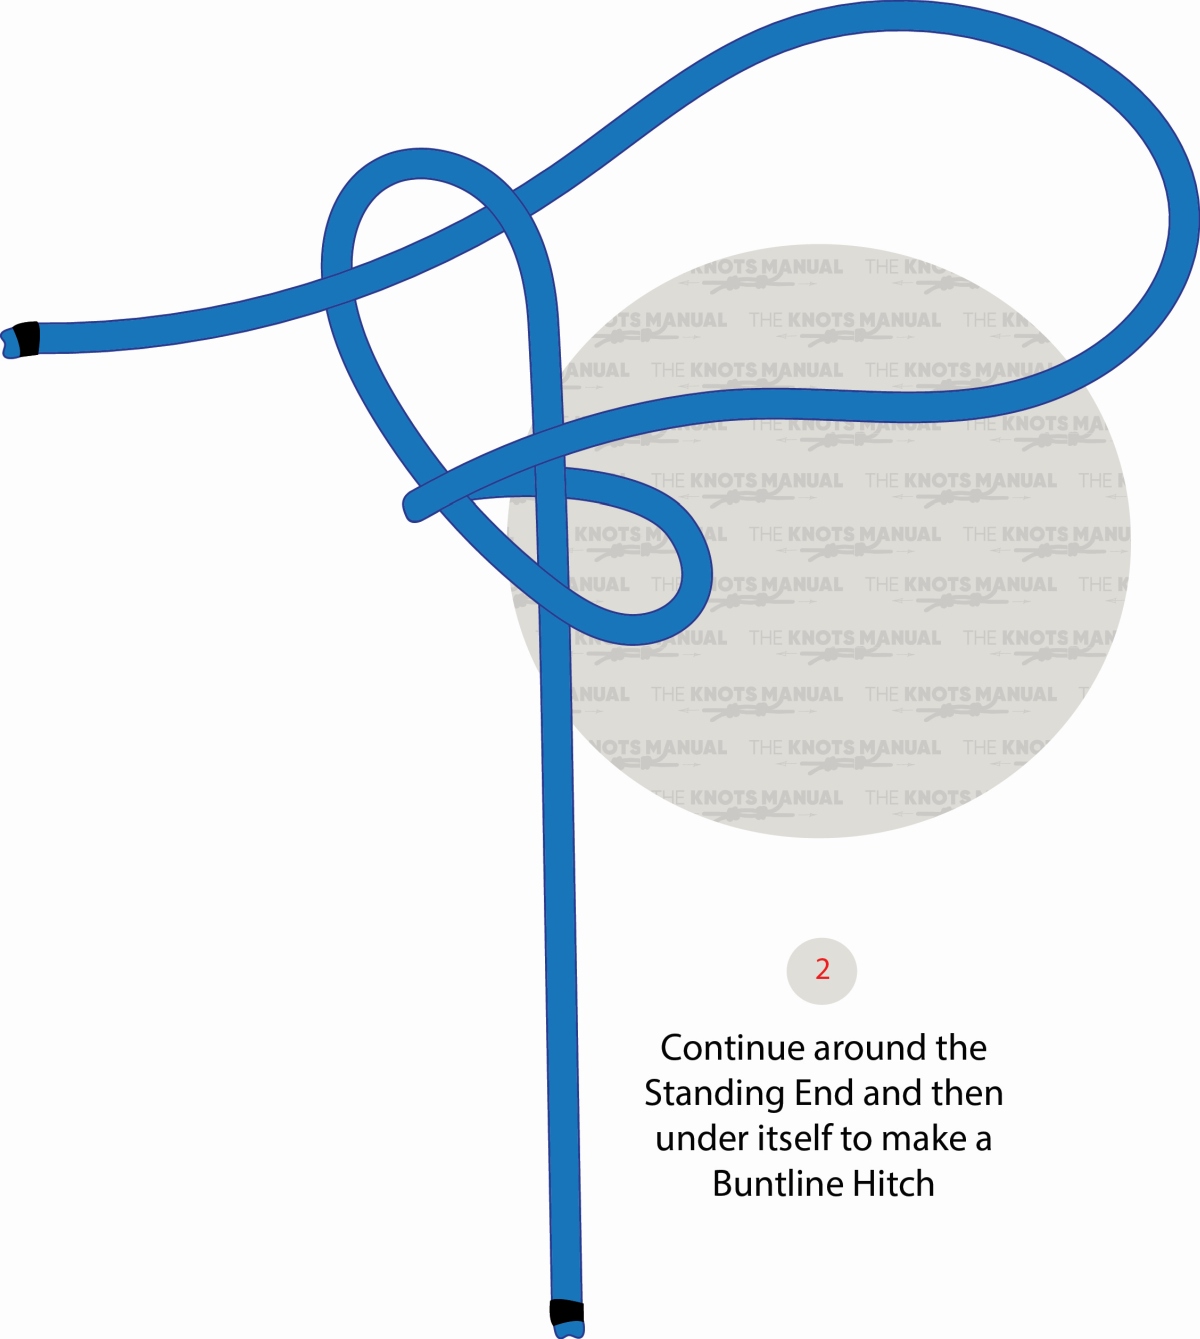
Pass the working end through the top loop to make a Buntline Hitch.
Step 2a:
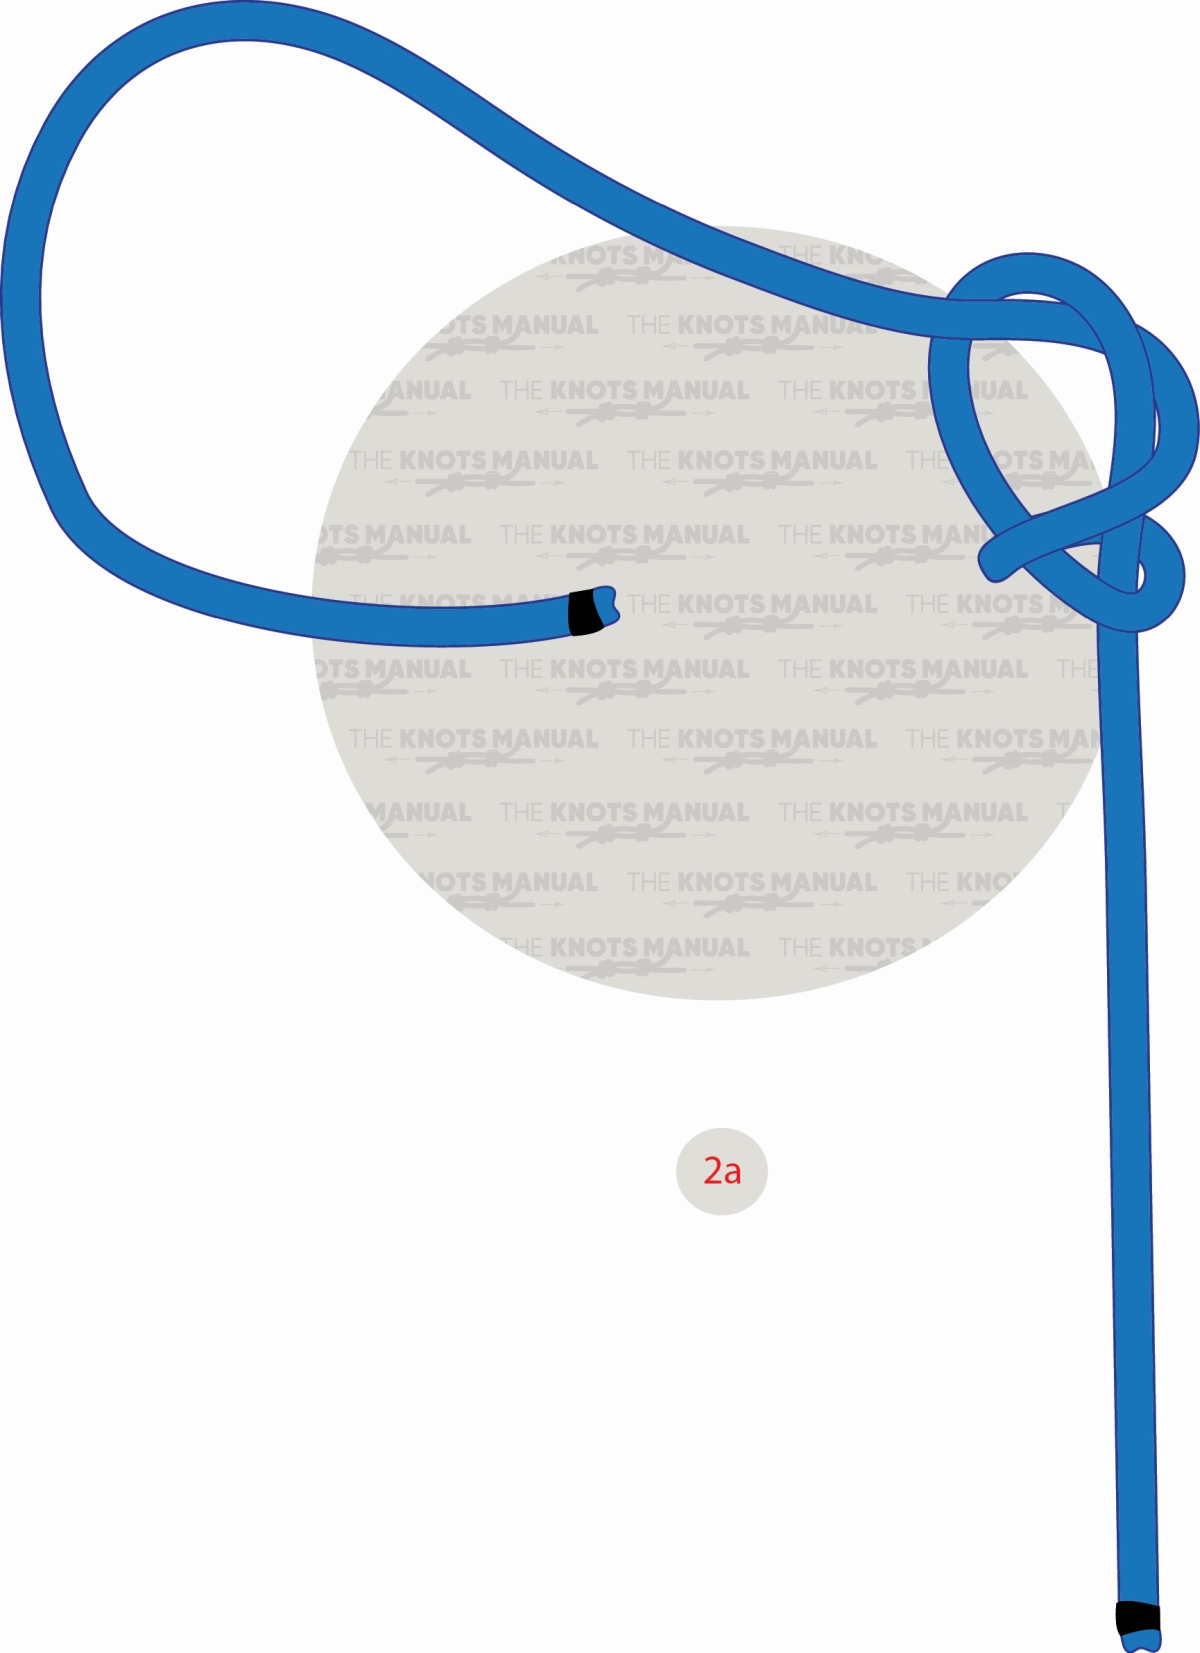
Tighten it, but not fully.
Step 2b:
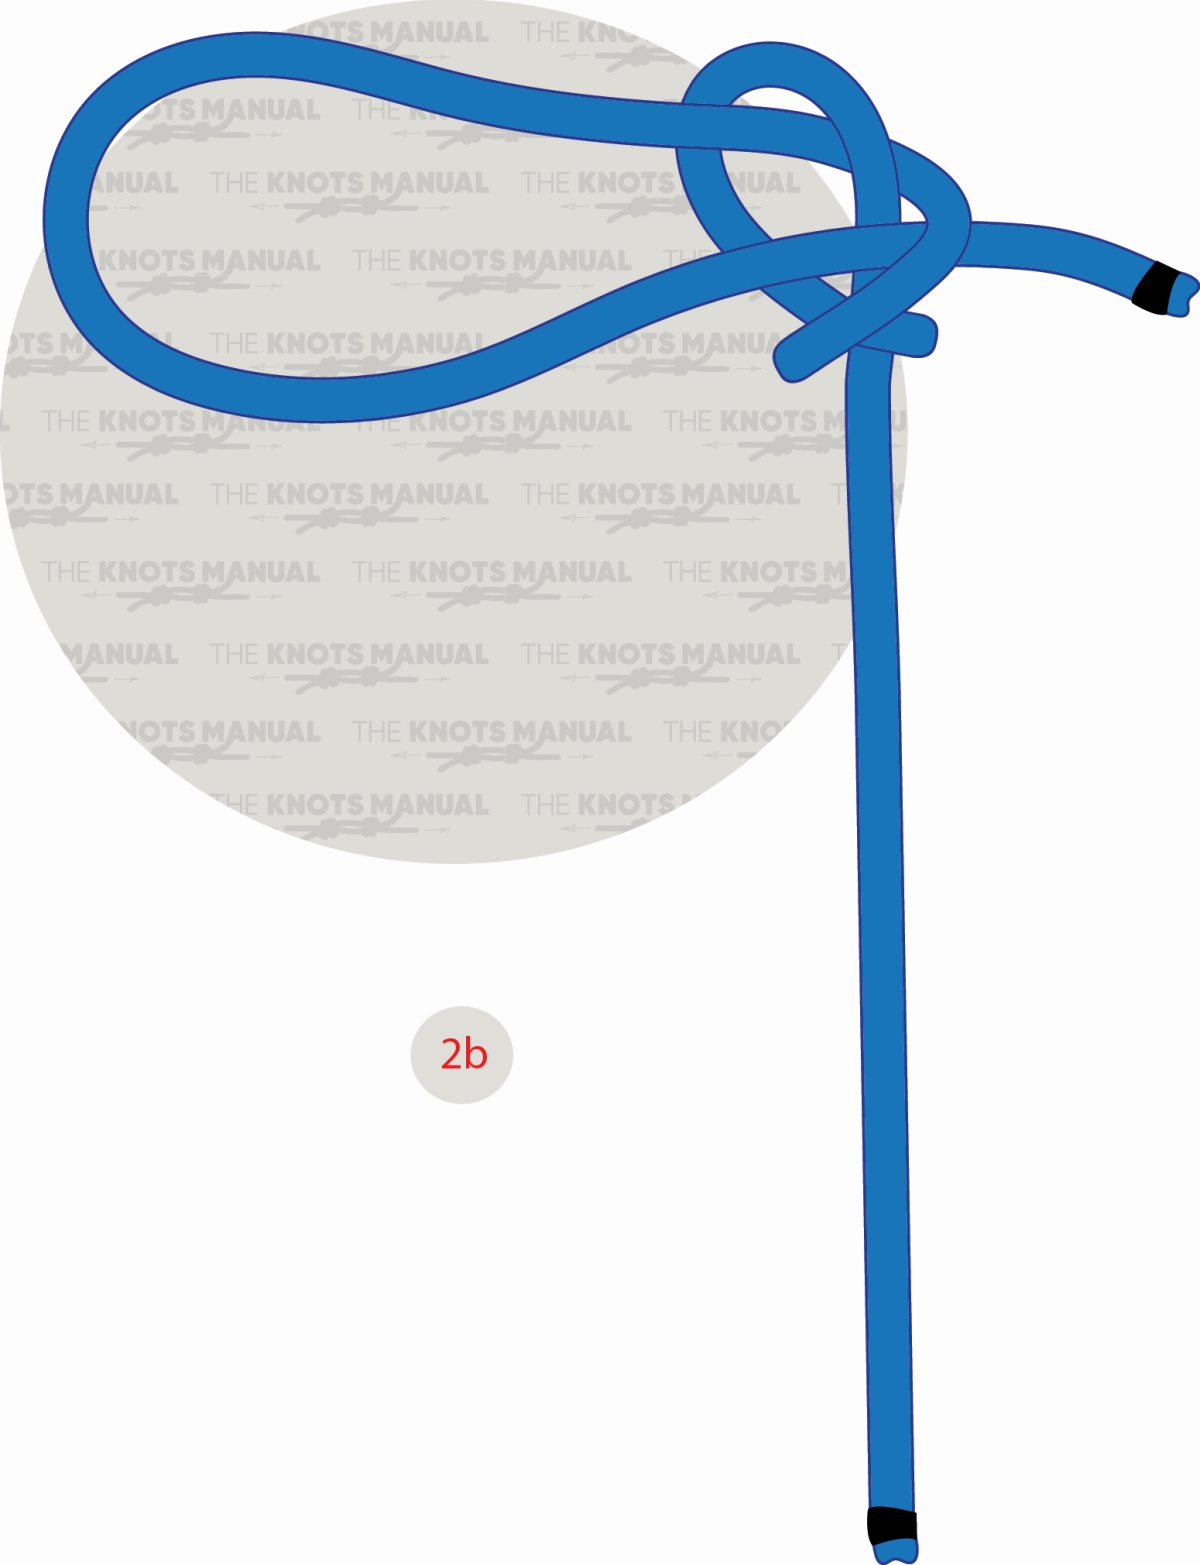
Pass the working end back under the vertical strand, as illustrated above.
Step 2c:
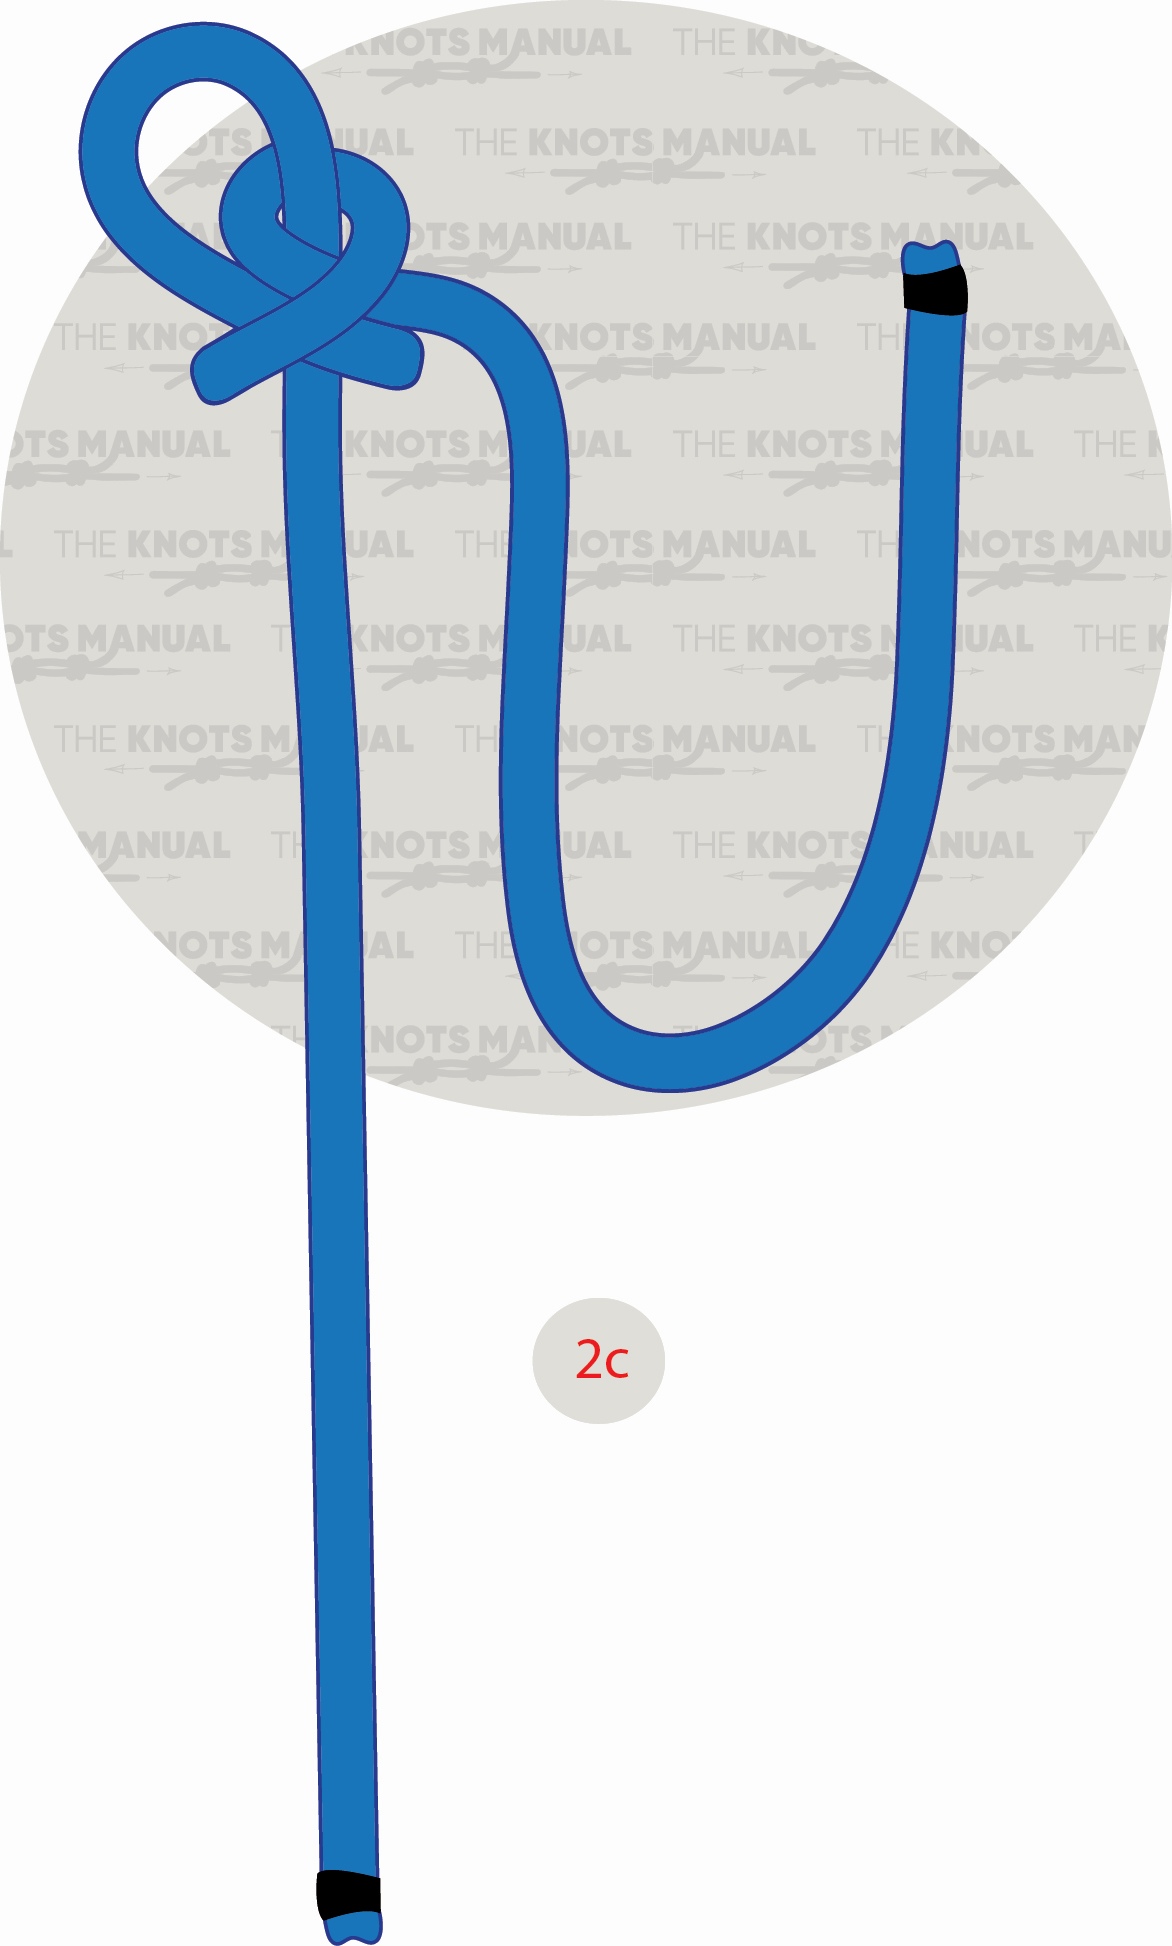
Tighten the formed loop, but not fully.
Step 3:
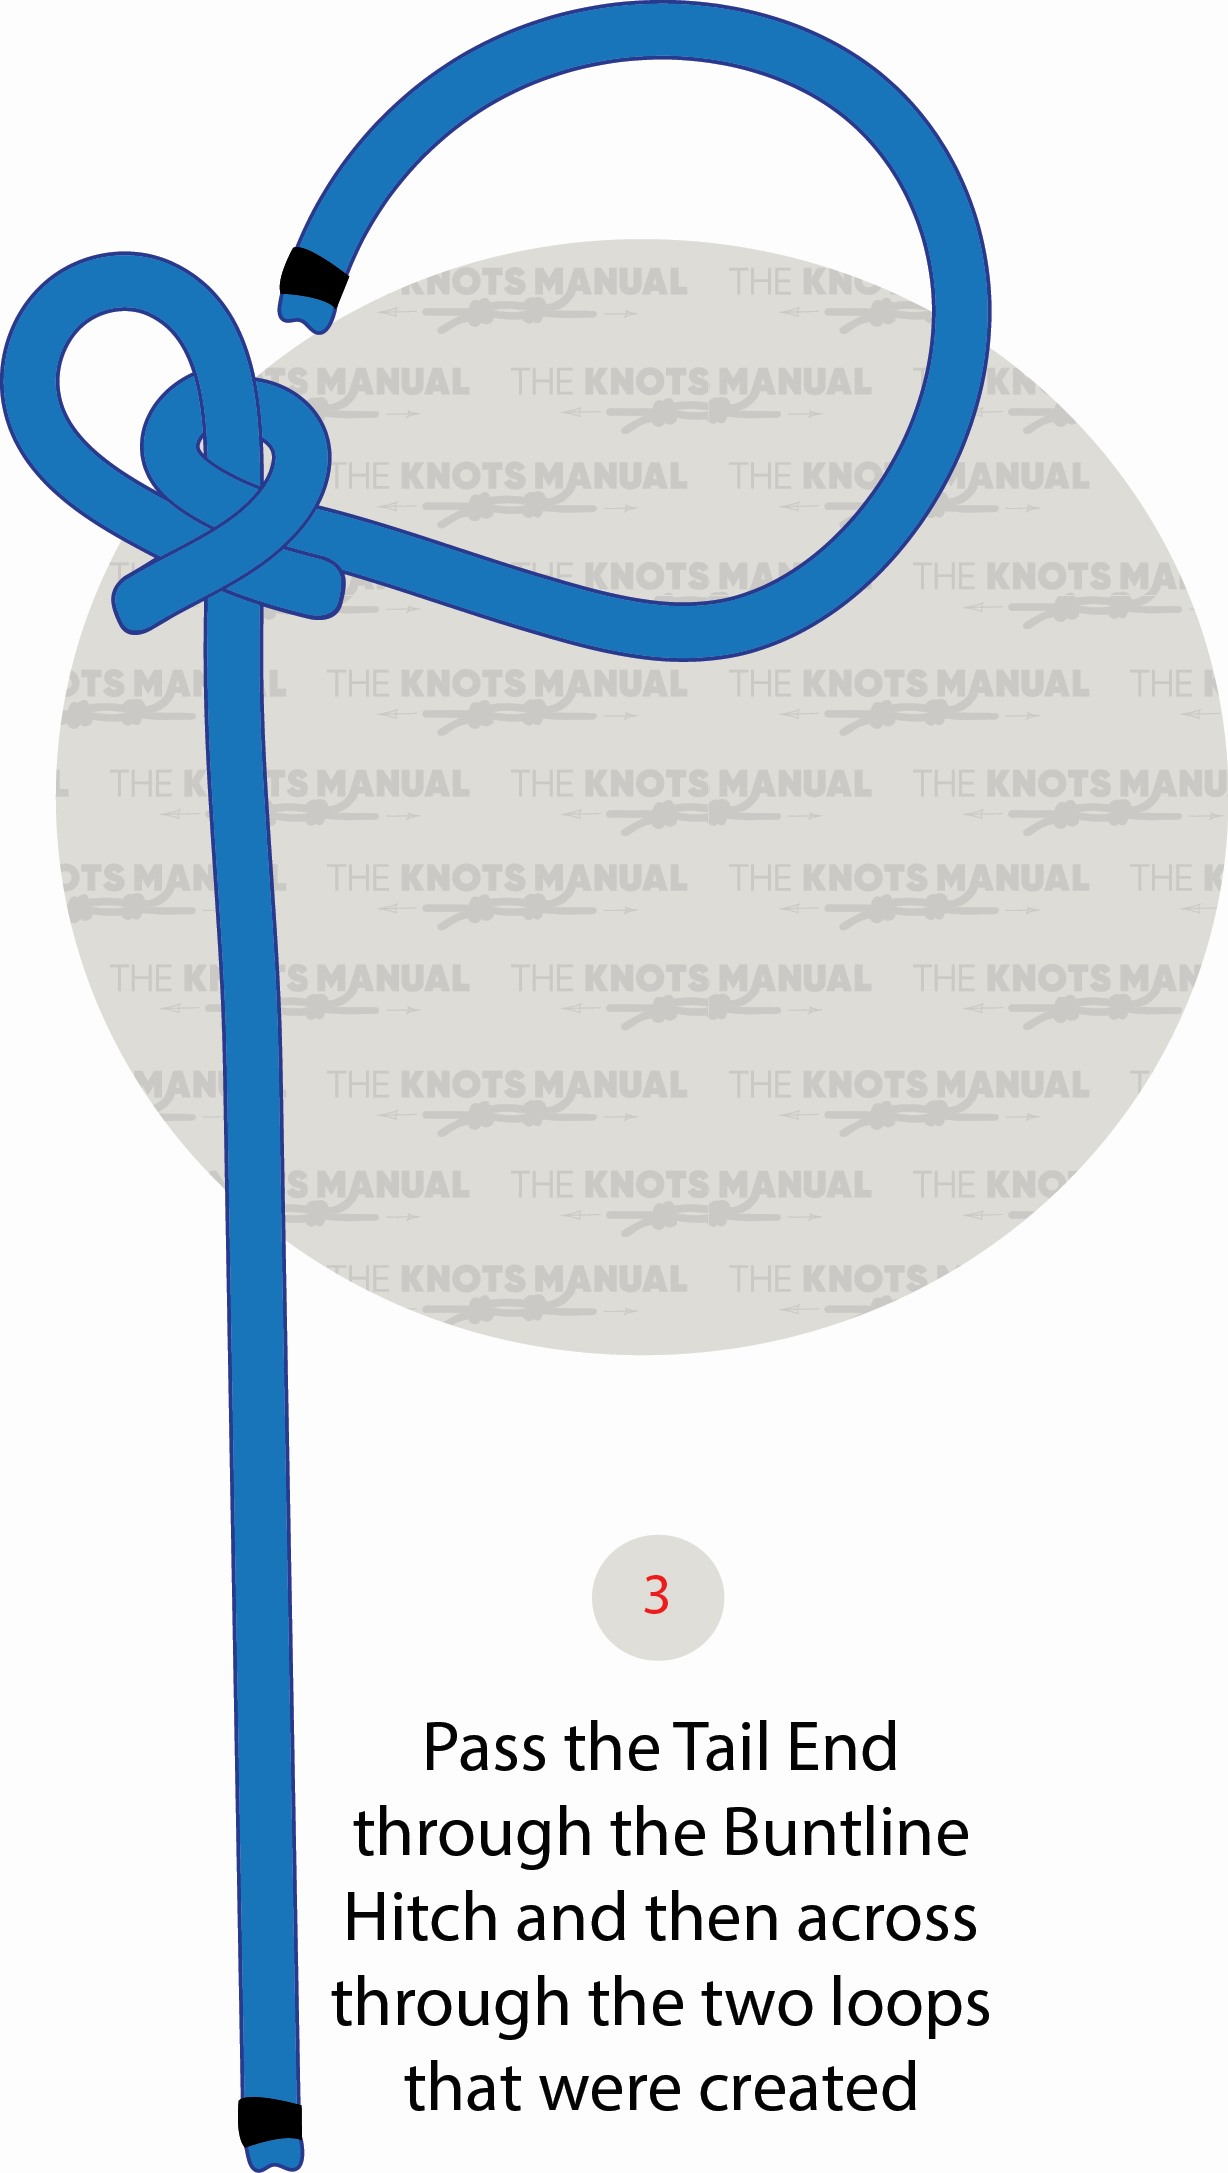
Pass the working end parallel to the standing end.
Step 3a:
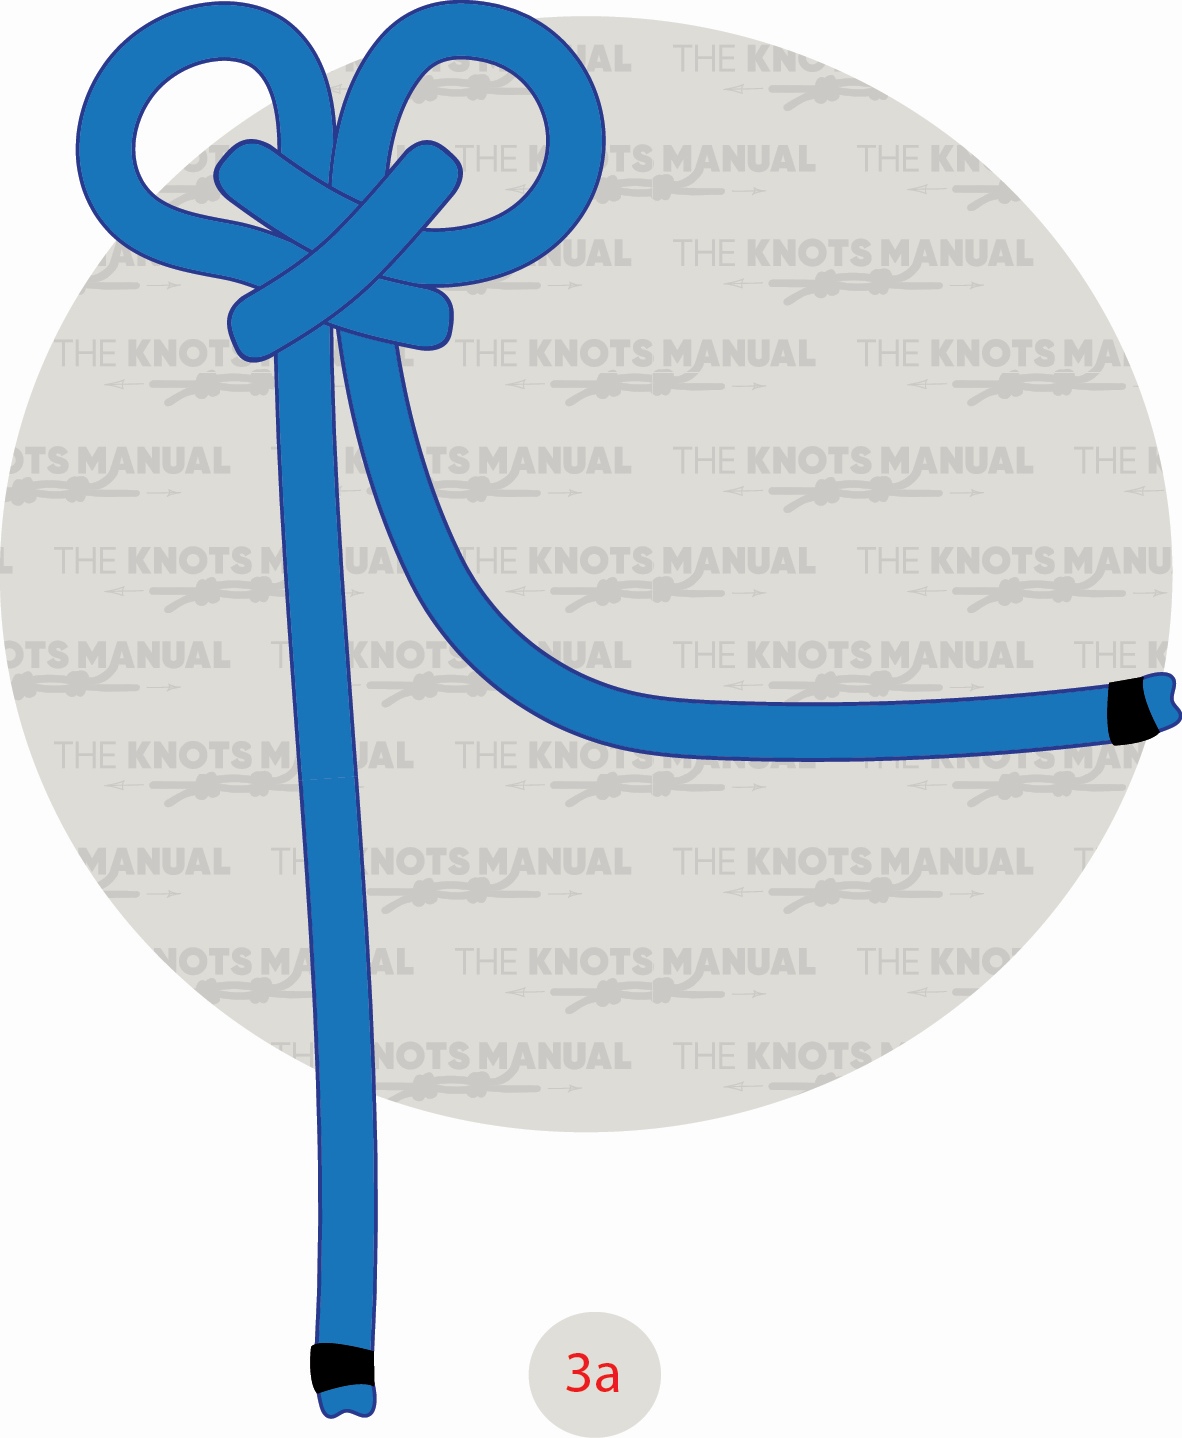
The working and standing ends should enter and exit parallel to one another.
Step 3b:
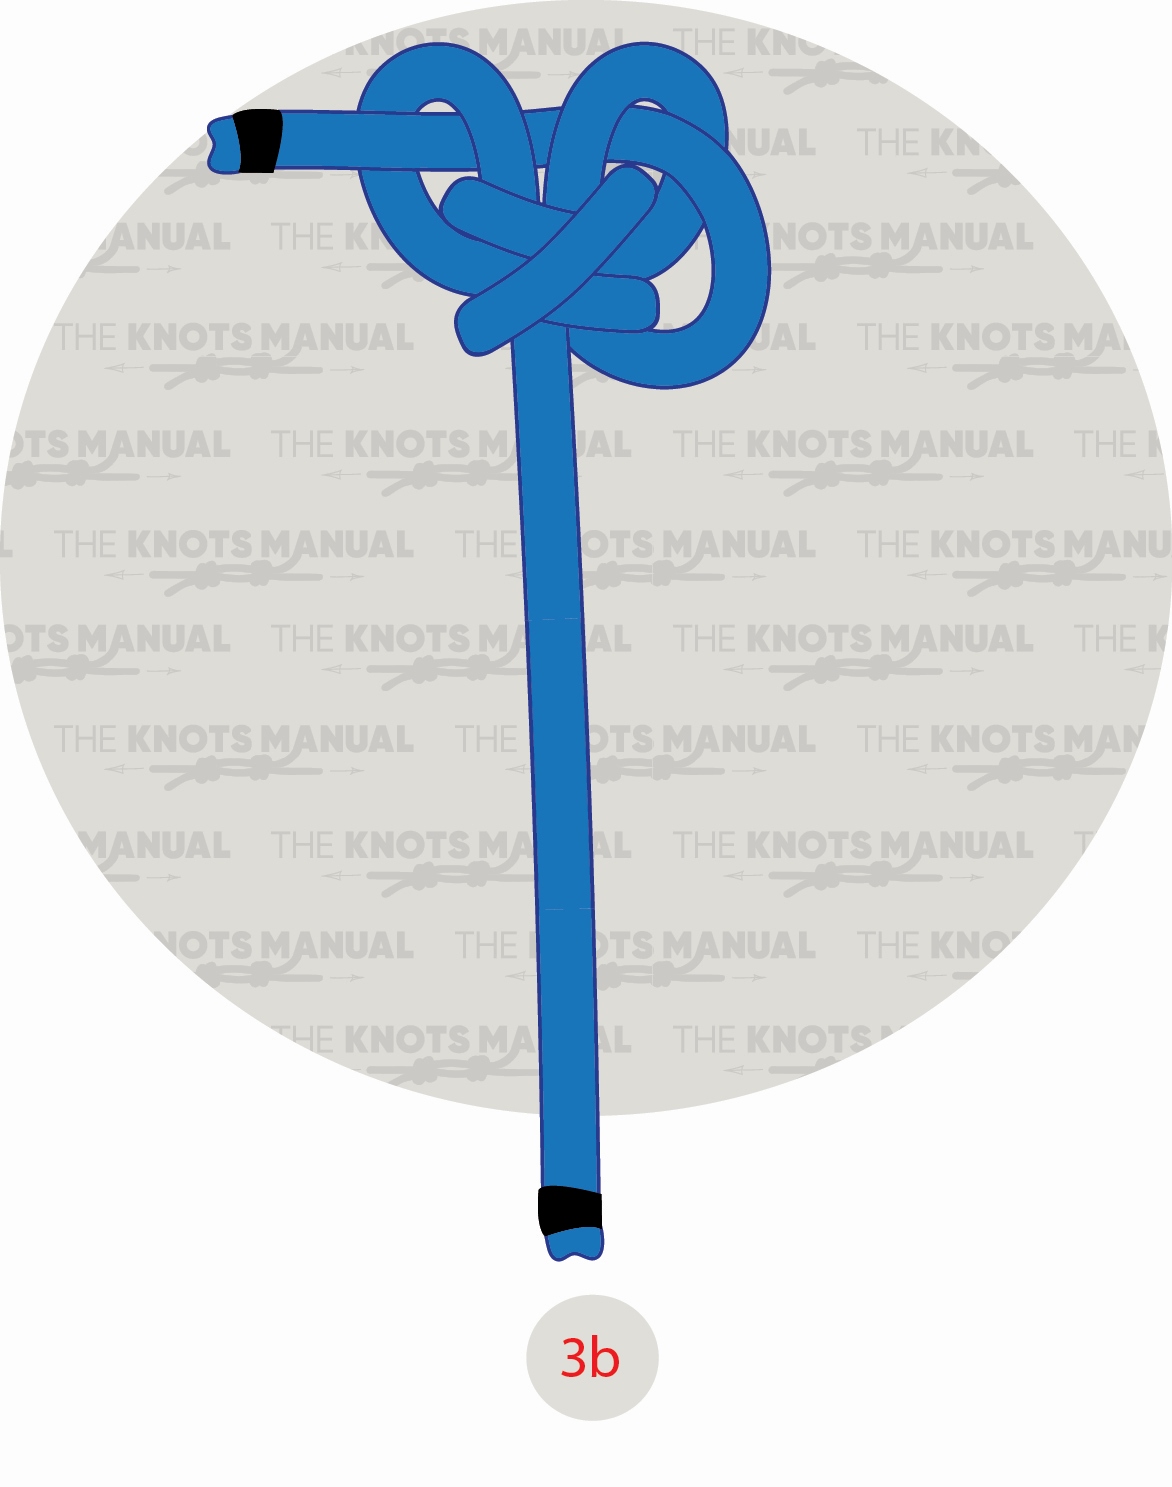
Pass the working end through both top loops.
Step 4:

Finally, carefully tighten the knot.
Step 4a:
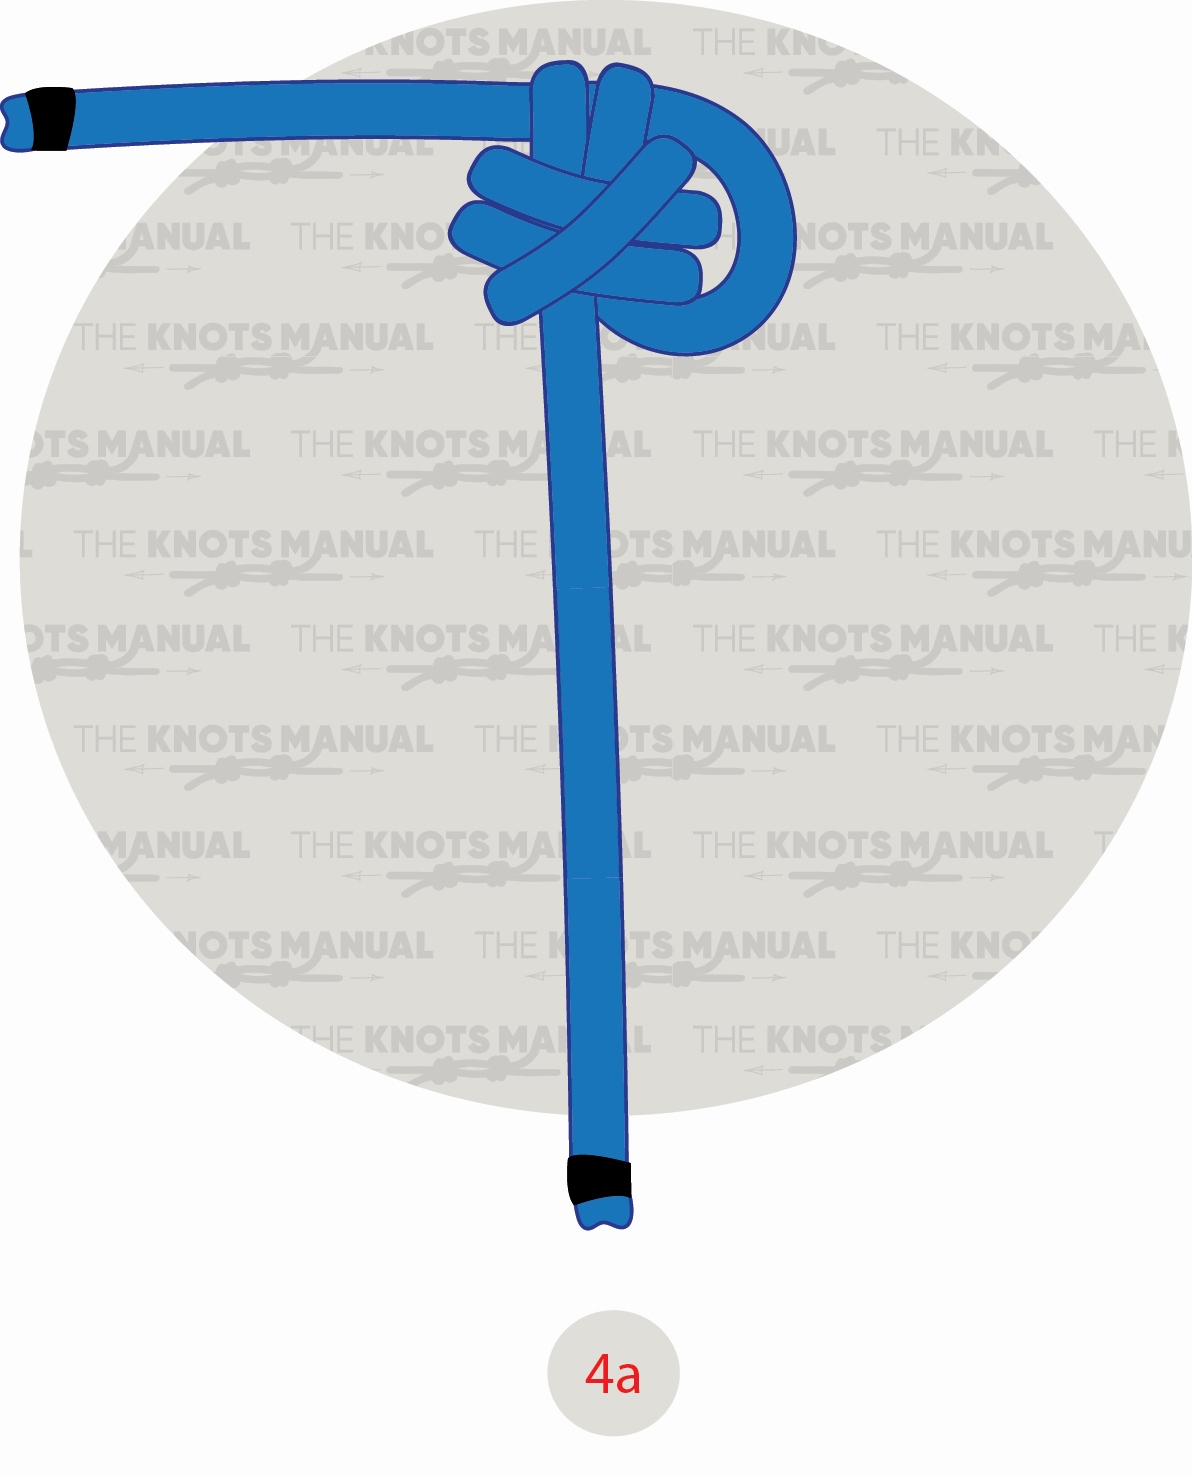
The EStar Stopper Knot is finished.