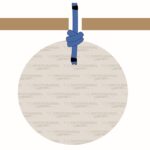
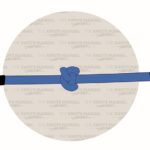
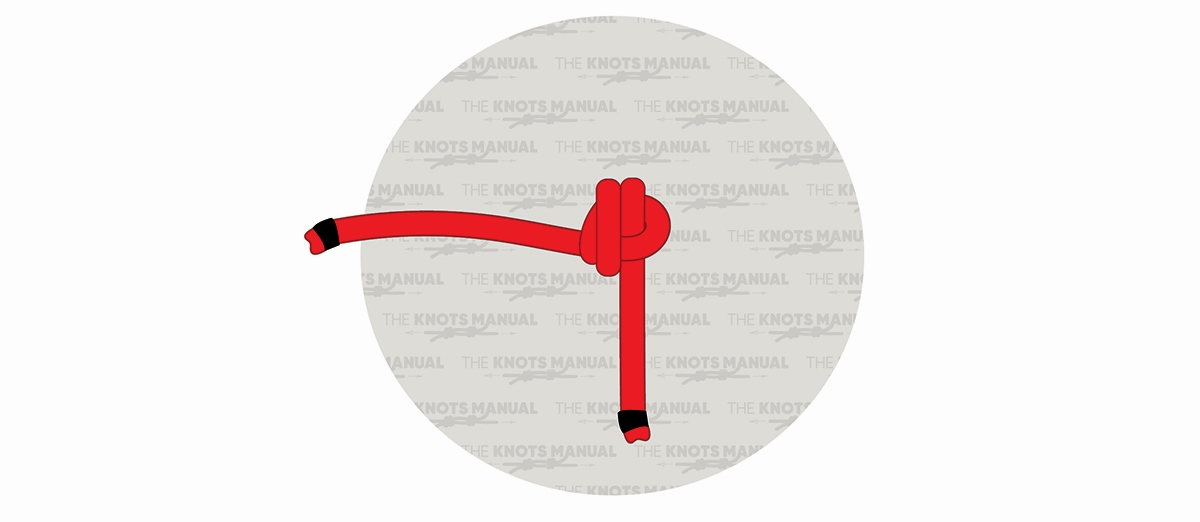
The Stevedore Knot is a stopper knot with a fairly large profile. It’s used in a wide range of applications when you need to keep a rope from slipping through an opening.
Quick Guide: How to Tie a Stevedore Stopper Knot
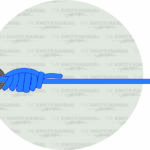
To tie a Stevedore Stopper Knot, make a loop in the rope. Then wrap the end of the rope two full times around it. Finally, pass the end of the rope through this loop. Pull on both ends to tighten the knot.
Keep the end after the knot at least a few inches long to account for slippage when the knot is loaded.
The Stevedore Stopper Knot is tied identically to the Figure 8 Knot, except with one more full turn. In fact, a half turn results in an Overhand Knot, one full turn in Figure 8 Knot, one and a half doesn’t have a name, and two full turns to a Stevedore Stopper Knot.
Pros and Cons of the Stevedore Stopper Knot
The Stevedore Stopper Knot is very easy to tie. That’s why it’s often taught to beginner knot makers and scouts as a universal stopper knot.
It has a somewhat bulky profile. This makes it ideal to use to keep the rope from slipping through an opening, like a grommet, a ring, or a hole.
The Stevedore Stopper Knot is also a very secure knot. It’s very unlikely to come undone once loaded.
But the best part about it is that it is somewhat easy to untie, even after shock loads. It still takes some effort to untie it, but it’s easier to untie than Double Figure 8 and Ashley Stopper Knots.
The main downside of this knot is that it can untie under cyclical loads. Over time, the knot can shake loose, which is why it usually isn’t used for critical, life-threatening situations, like climbing.
Common Uses for the Stevedore Knot
The Stevedore Stopper Knot is most commonly used for various purposes in survival, camping, sailing, boating, and other general applications.
Its most common use is to keep the rope from slipping through a ring, hole, grommet, or another opening. For example, you can use it in various DIY tarp setups, by tieing it after a grommet to keep it from slipping through.
You can also tie the Stevedore Stopper Knot after a freshly cut rope to keep it from unraveling.
It can also be used for securing other knots. Like the Double Overhand Stopper Knot, you can tie it around another rope right after a knot. This means that you can tie it after Figure 8 Follow Through Knot, Figure 8 Bend, Flat Overhand Bend, and other similar knots.
Knots Like the Stevedore Knot
Halyard Hitch: The Halyard Hitch is identical in structure to the Stevedore Stopper Knot. Its only difference is that it’s tied around an object, which results in a very strong, permanent hitch.
Figure 8 Knot: Another stopper knot that is tied just like the Stevedore Stopper Knot but with one less turn. It isn’t as secure and it’s also harder to untie.
Double Overhand Stopper Knot: A widely used stopper knot to keep other knots from unraveling. It’s also used in the formation of the Double Fisherman’s Knot. Its main benefit over the Stevedore Stopper Knot is that it’s less likely to come undone under cyclical loads. That’s why it’s more commonly used in climbing and other life-threatening applications.
Ashley Stopper Knot: Another popular stopper knot. It has a bulkier profile than the Stevedore Stopper Knot and is also marginally more secure. Its main downside is that it is more difficult to tie and harder to untie.
EStar Stopper Knot: One of the strongest and bulkiest stopper knots. It’s usually used with Dyneema rope because it’s much less likely to slip. Its main downsides are that it’s more difficult to tie and almost impossible to untie after loading.
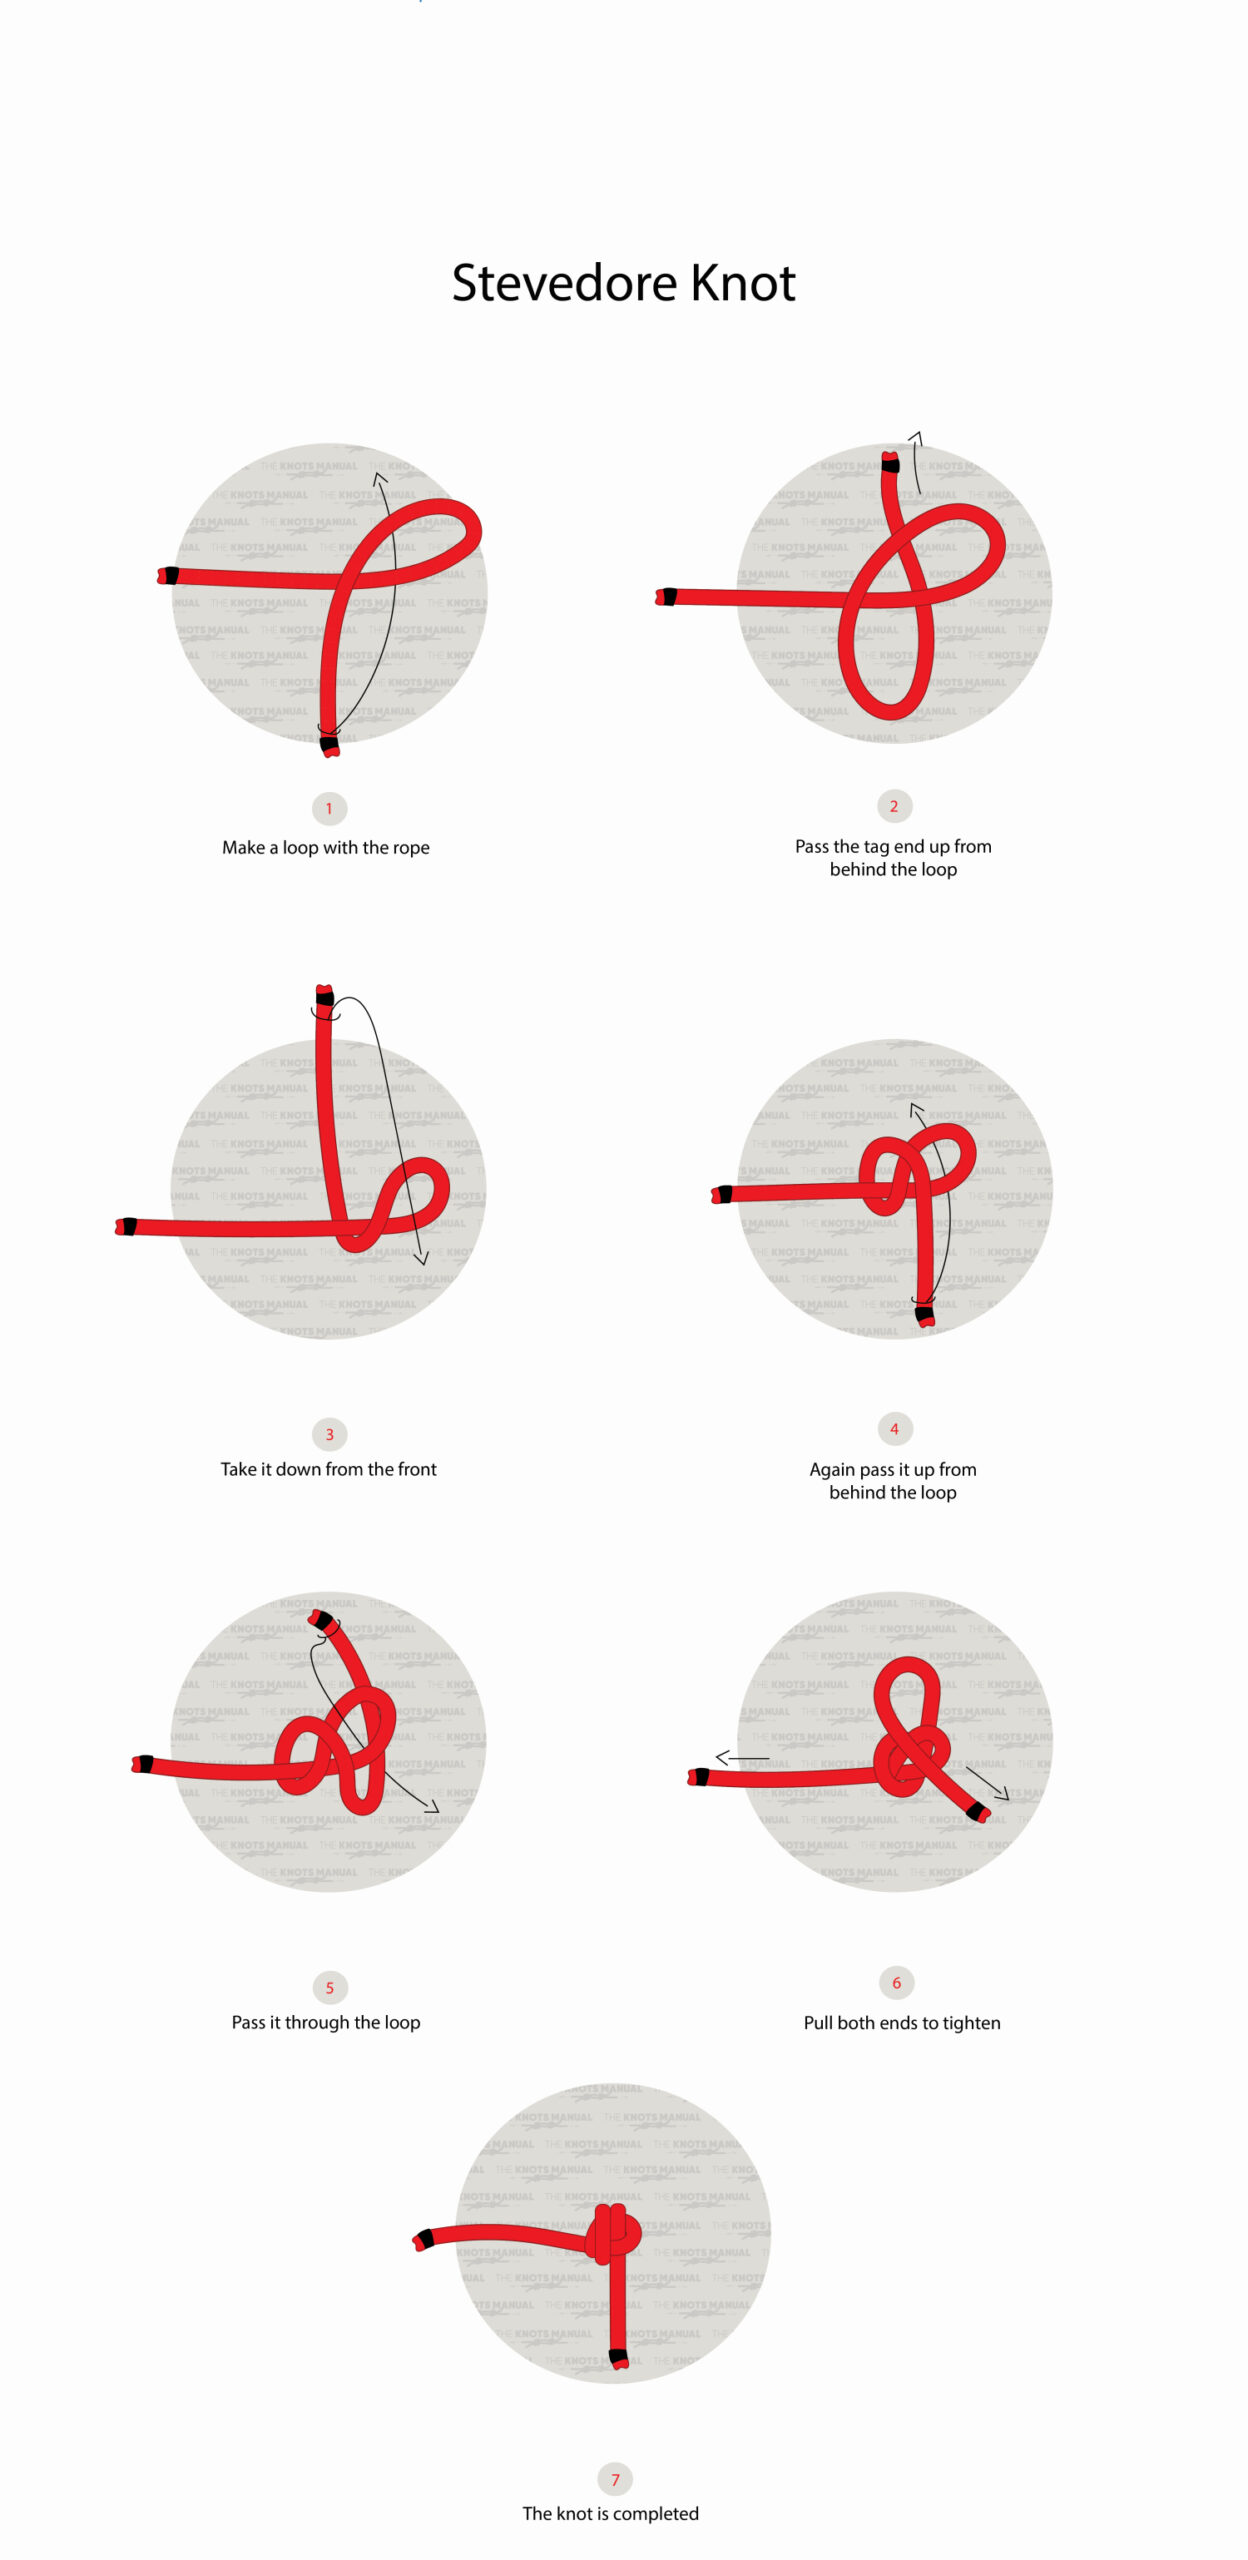
Step-By-Step Guide: How to Tie the Stevedore Stopper Knot
An Illustrated guide on how to tie a Stevedore Stopper Knot.
Step 1:
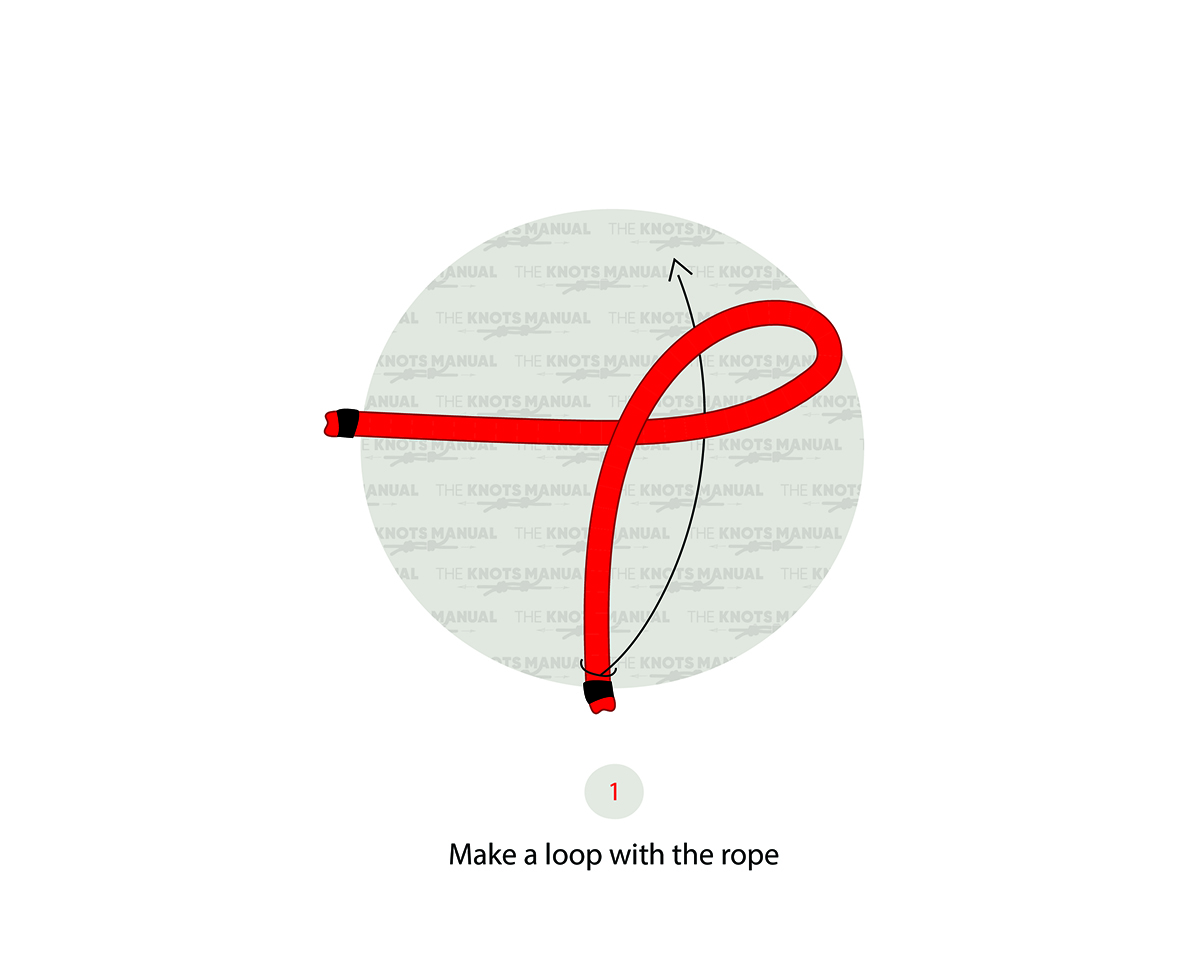
Create a loop near the end of the rope.
Step 2:
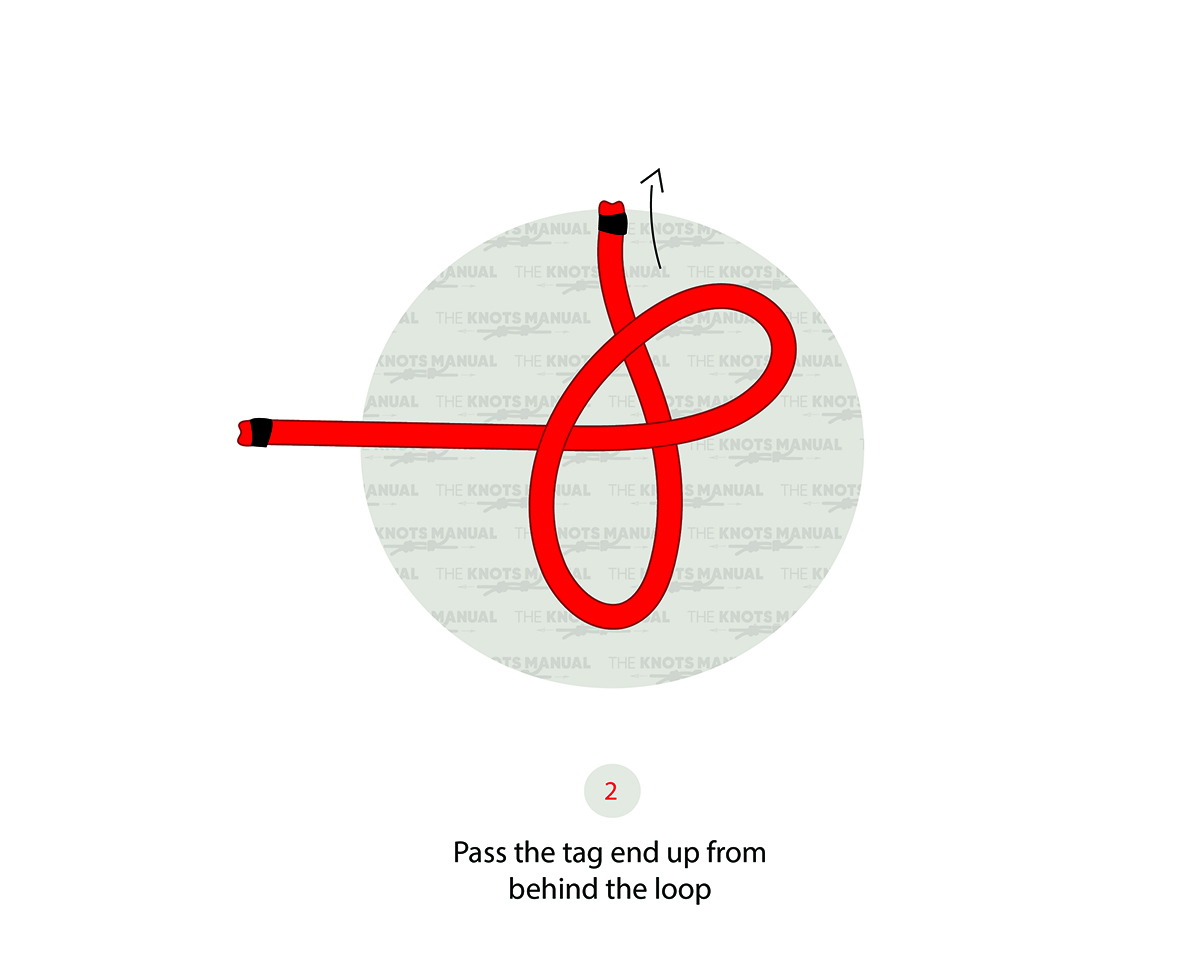
Go behind this loop from the backside with the working end.
Step 3:
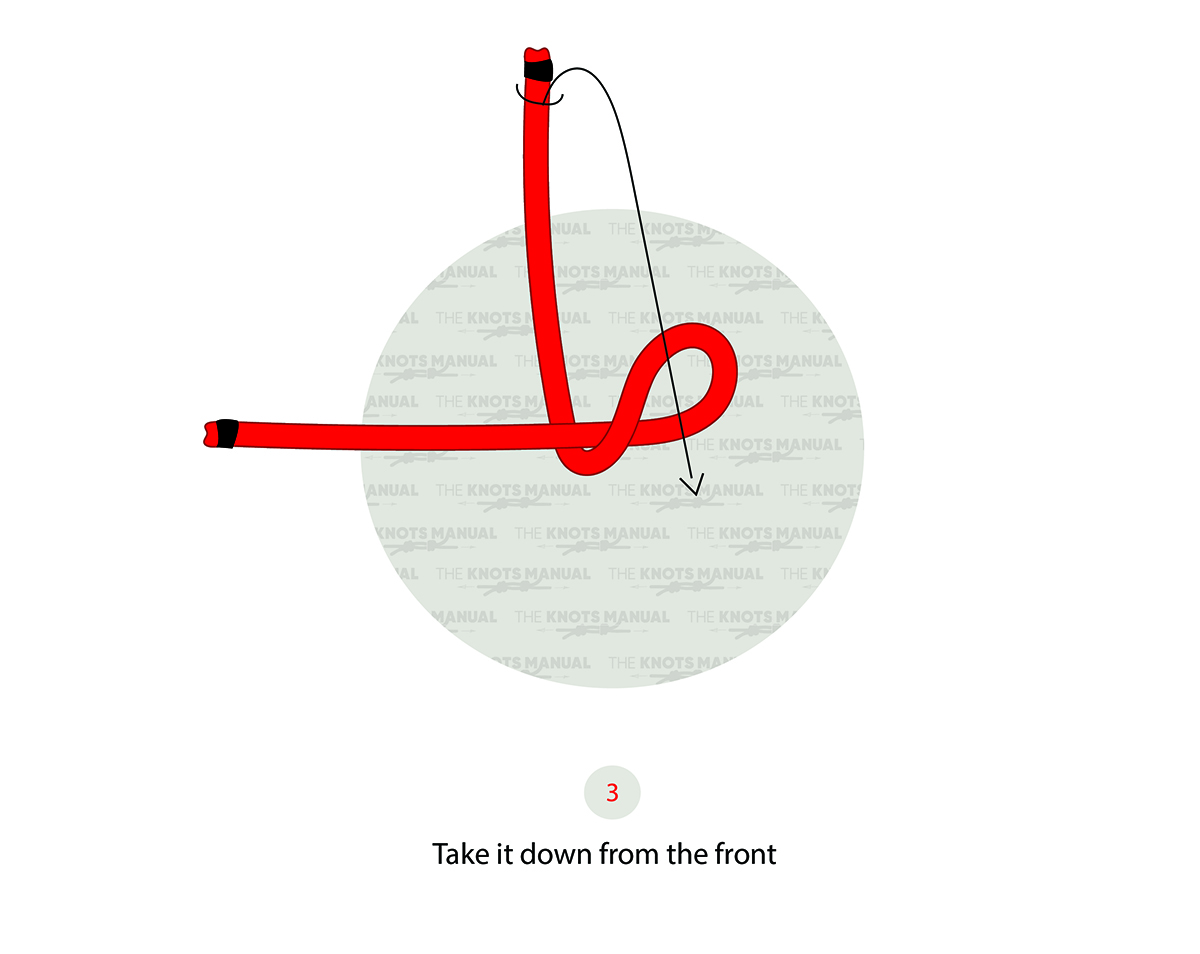
Go around the front side of the loop.
Step 4:
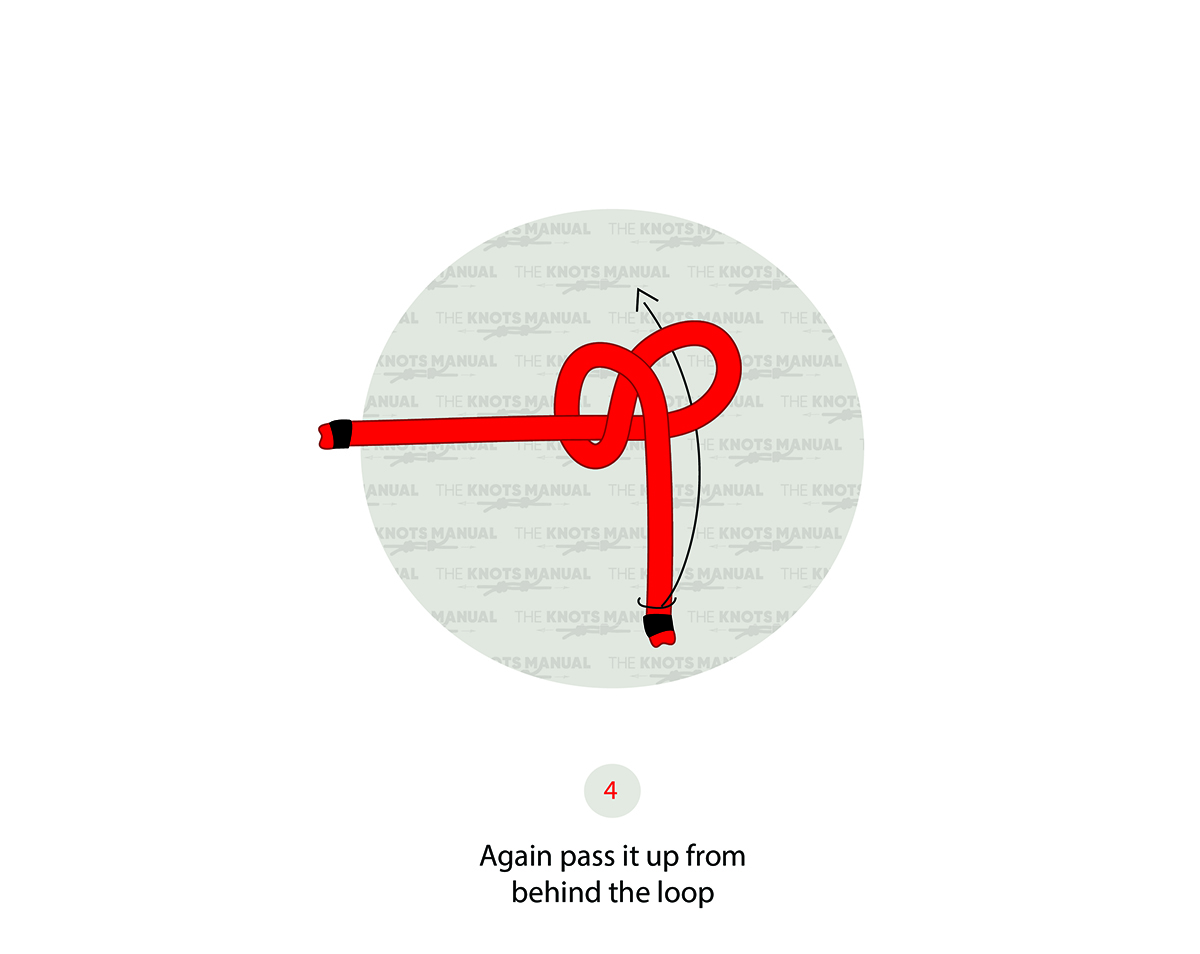
Again, go around the backside.
Step 5:
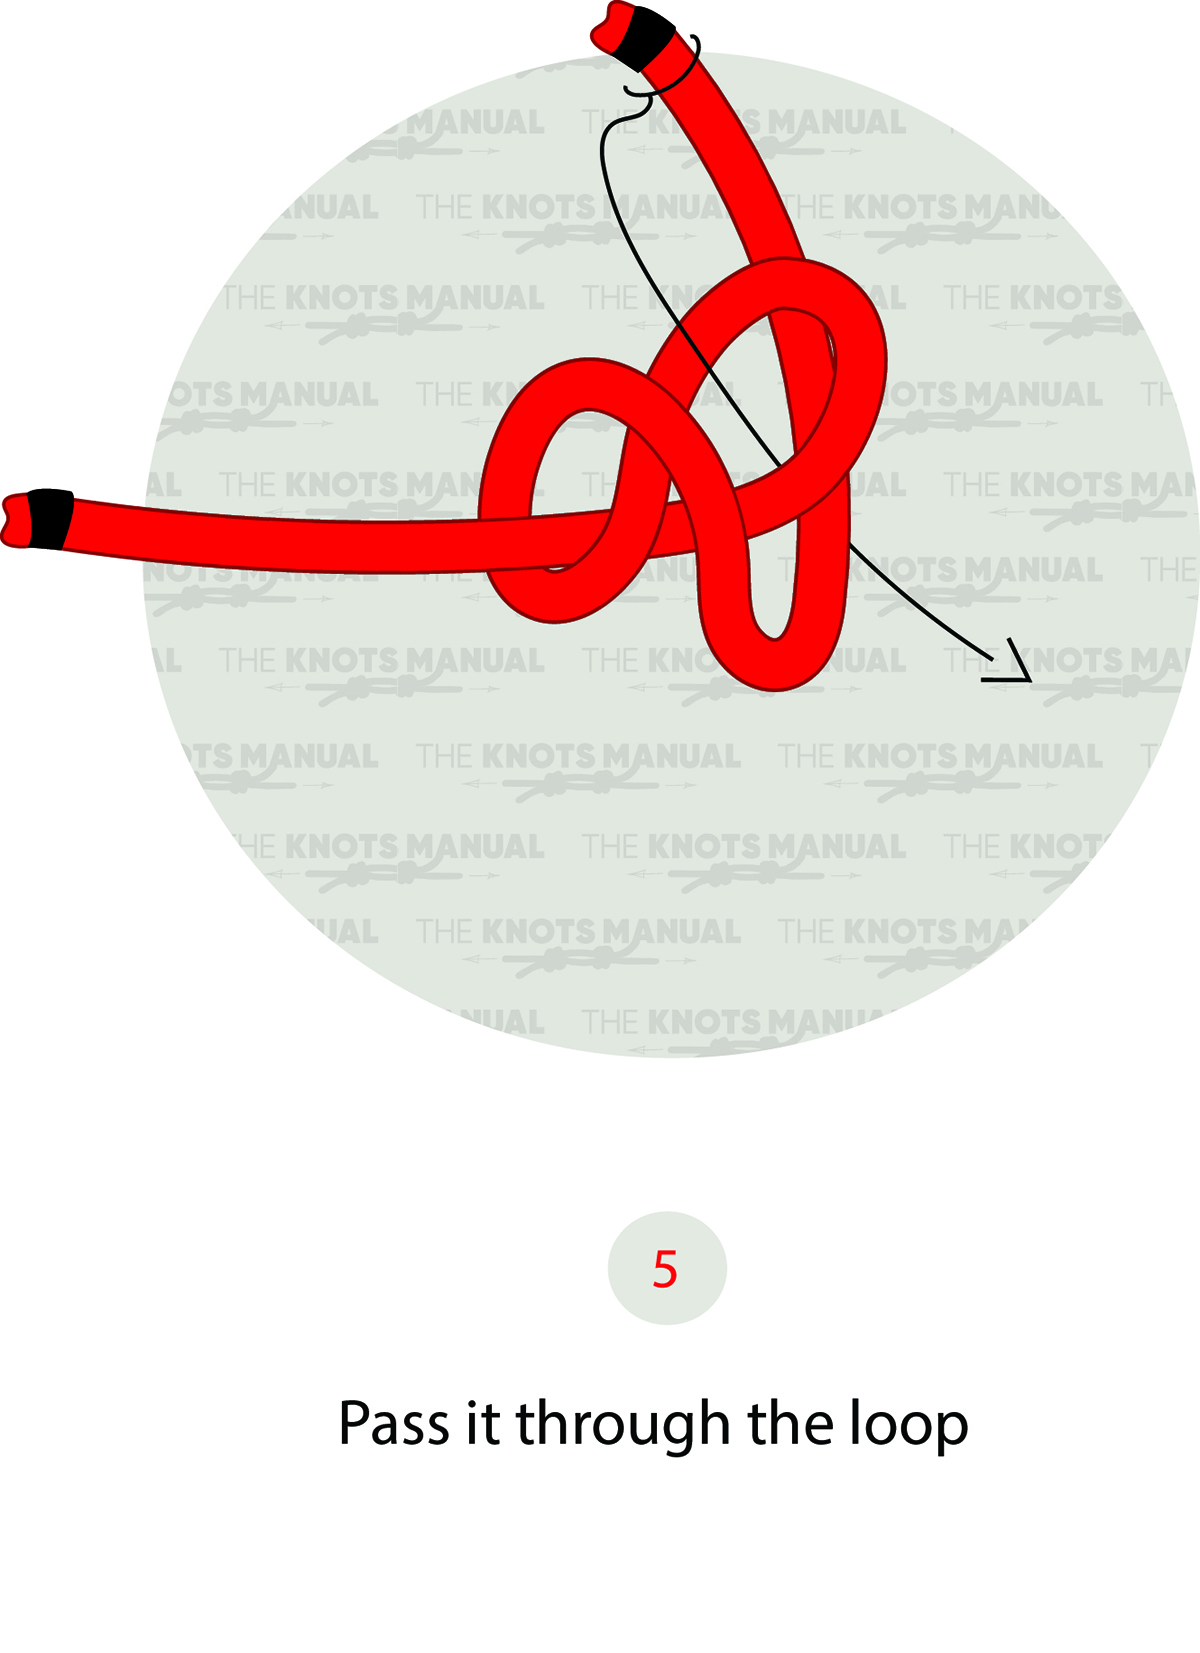
Pass the working end through the loop from the front side.
Step 6:
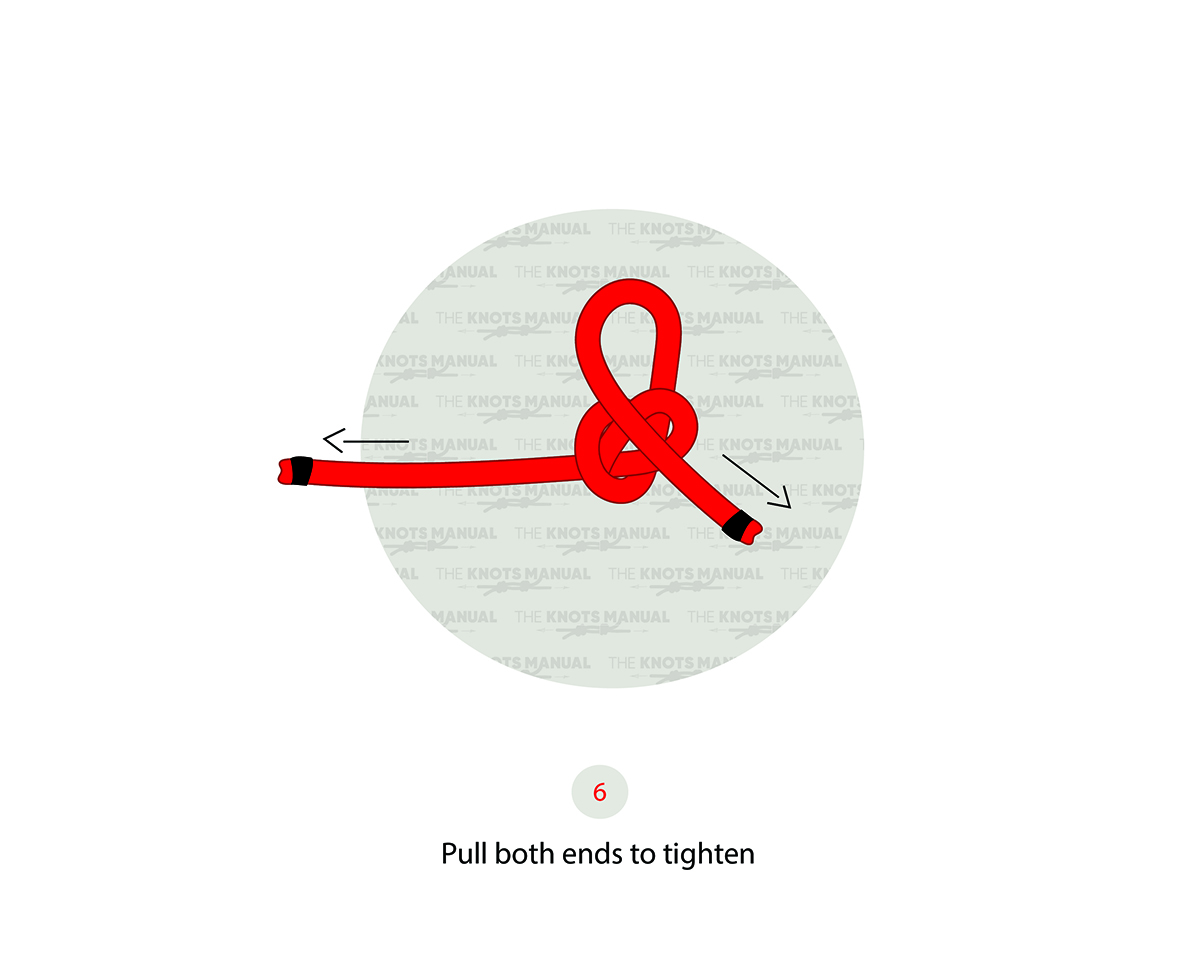
Pull both ends of the rope in opposite directions to tighten the knot.
Step 7:
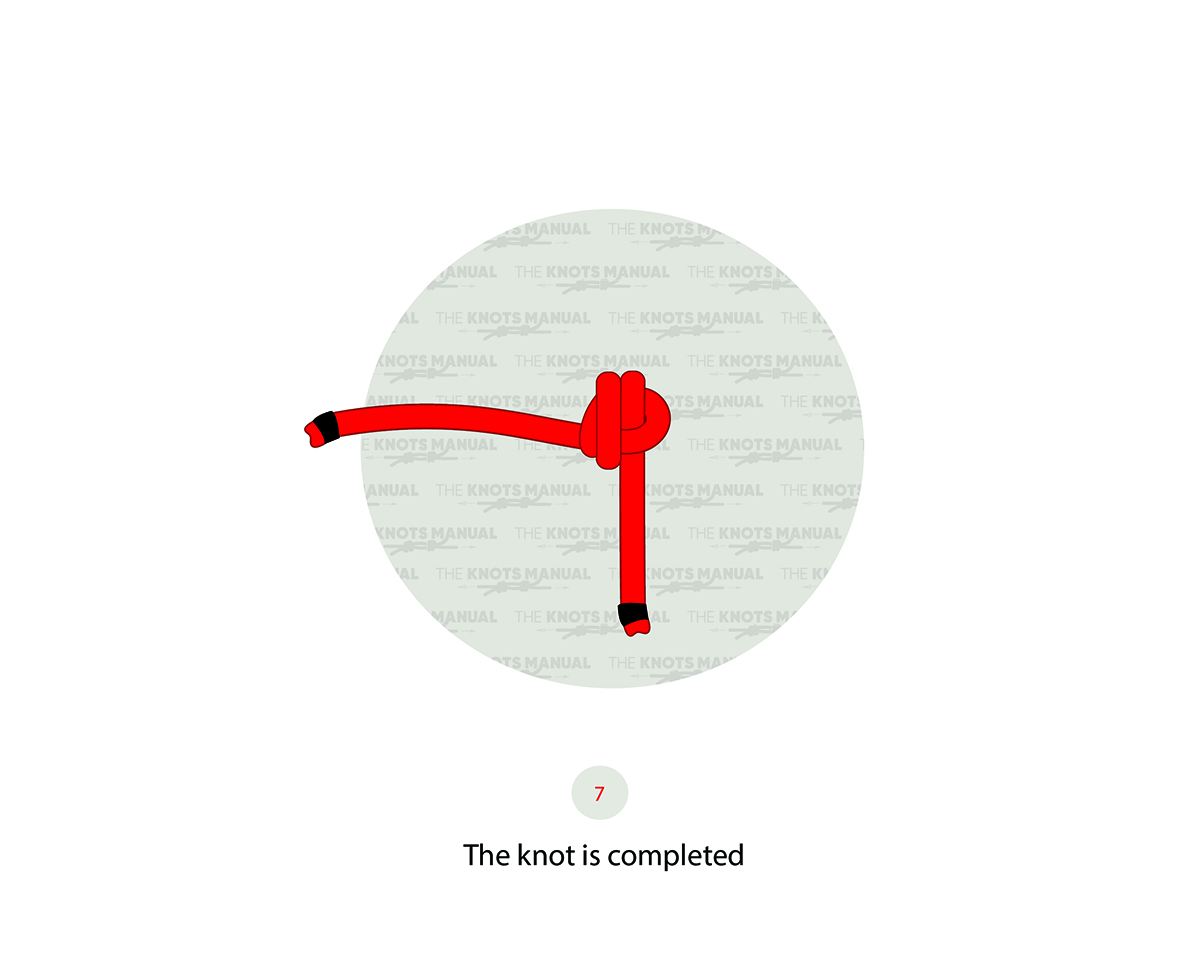
The Stevedore Stopper Knot is finished.