The Windsor Tie Knot is the most commonly used knot for tieing a tie. It has a very wide, triangular profile, and it stays symmetrically in the middle.
It’s also sometimes called the Full Windsor Tie Knot (as opposed to the Half Windsor Tie Knot). Some people also call it the Double Windsor Knot, but in reality, that’s a different knot.
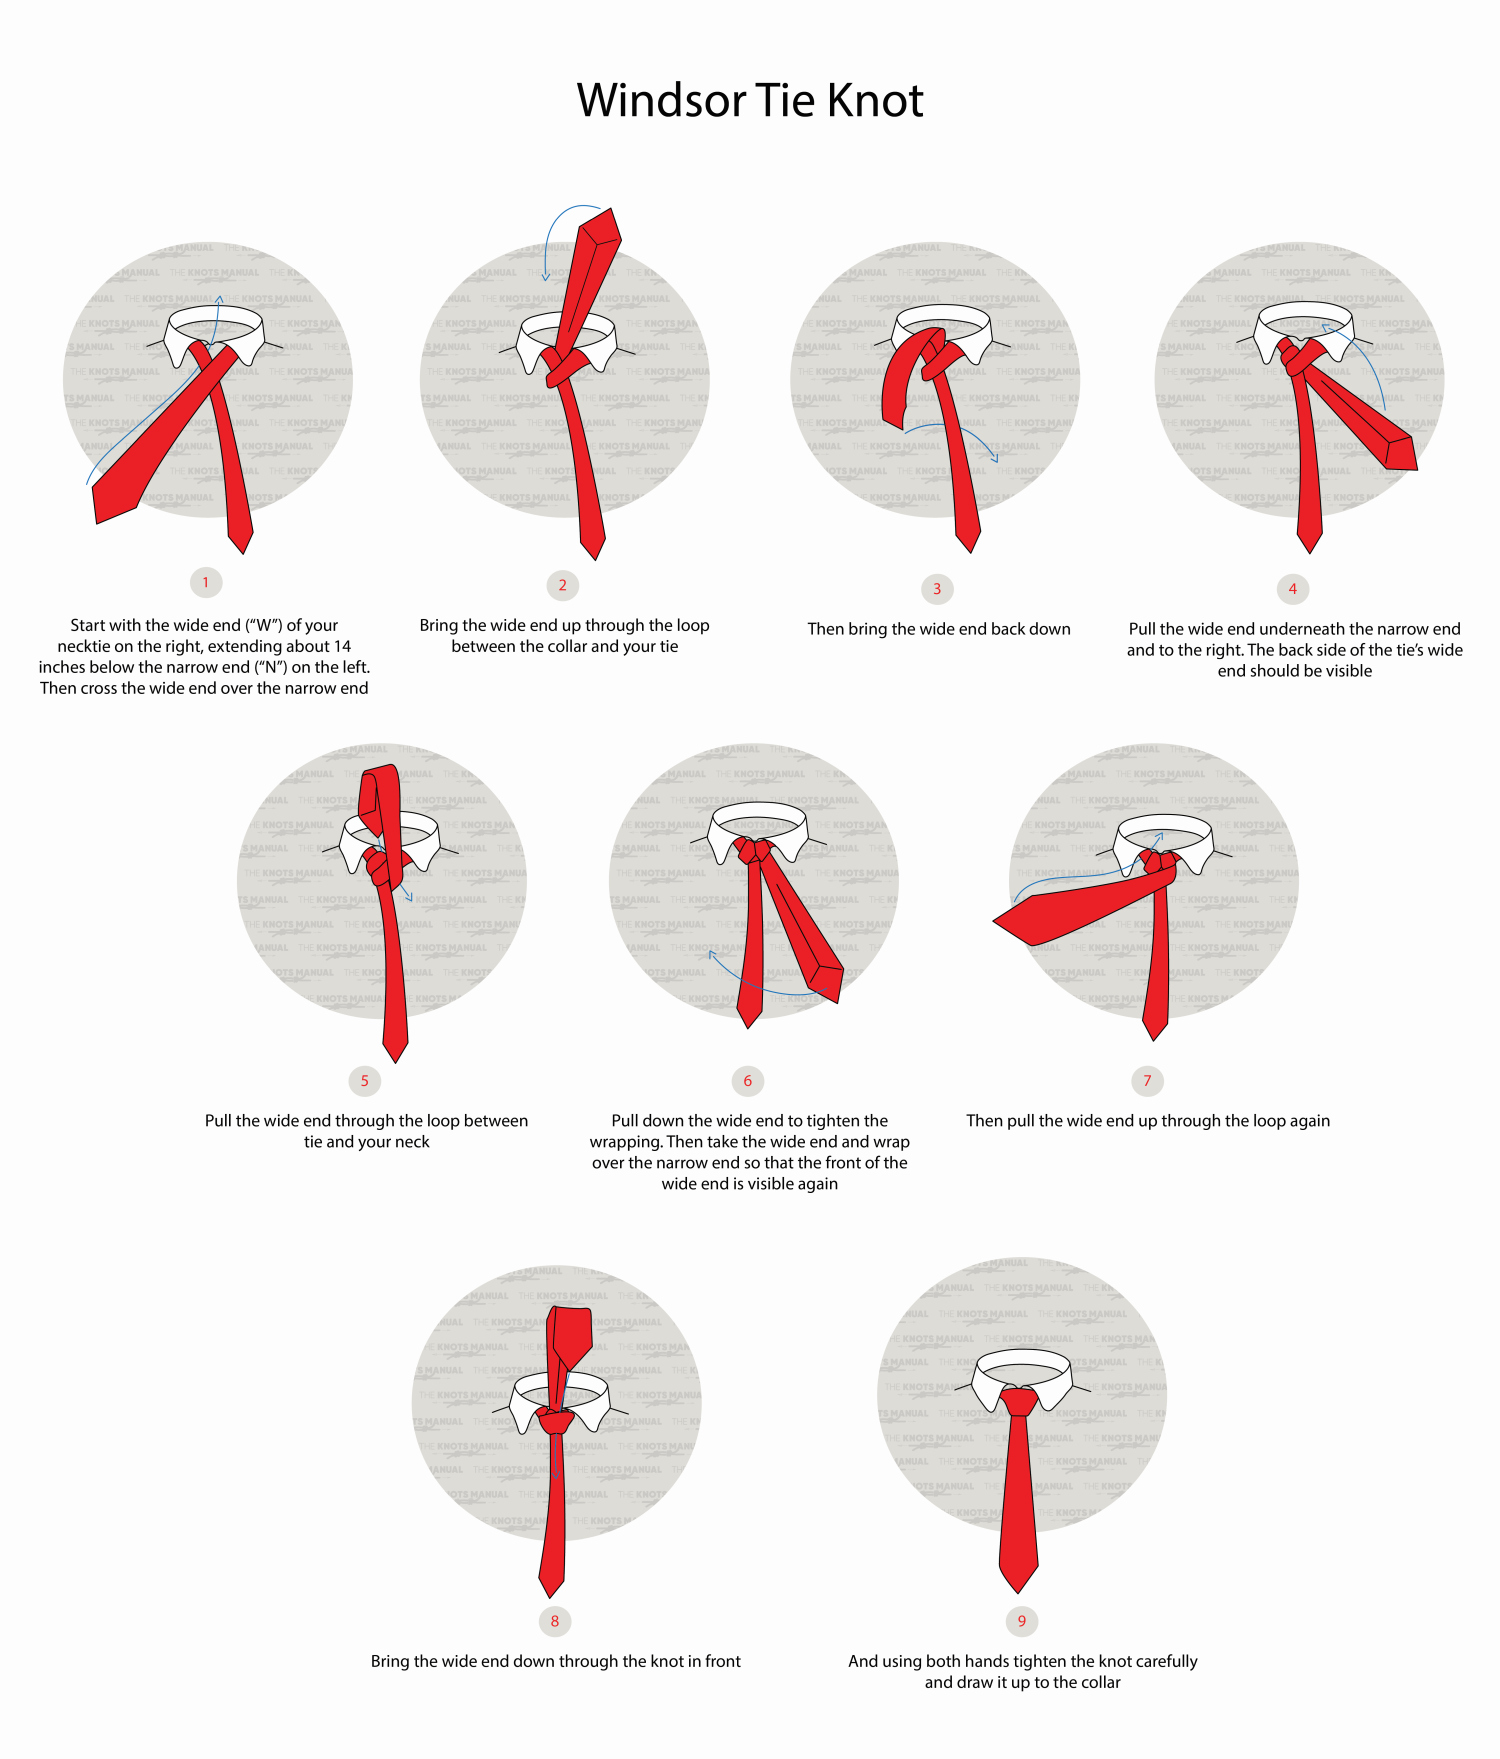
Quick Guide: How to Tie the Windsor Tie Knot
To tie The Windsor Tie Knot, start placing the long end of your tie 14 inches (35 cm) below the narrow end.
Then wrap the wide end around the narrow end (steps 1-2). After that, go behind the knot (step 3) and wrap the wide end around itself (steps 4-5). Finally, go in front of the knot sideways (steps 6-7), then through the middle (step 7), and behind the final loop (step 8).
Tighten the Windsor Tie Knot by pulling the wide end of the tie opposite to the loop around your neck. Dress it by tucking the side ends underneath the front until it looks as shown in step 9.
The narrow end of the tie should be 1-2 inches (2-5 cm) above the wide end so that it stays hidden behind it.
About the Windsor Tie Knot
One of the main benefits of the Windsor Tie Knot is that it has a very thick and wide profile. This makes it look very classic and professional. It’s ideal to use for formal occasions, like public presentations, job applications, and official events.
It works best with spread (wide) collar shirts. It’s also perfect for people with longer necks because it makes the neck look slightly wider.
The Windsor Tie Knot is also really easy to tie and remember – go around the left side, then the right, then sideways, and then through the front. That’s why it’s the most commonly used tie knot.
Another benefit is that you can take off and put back on the Windsor Tie Knot without untying it. This makes it ideal if you use it for work (for example, if you work in a bank) because you won’t need to tie it every morning.
The only downside of this knot is that over time, both sides may start to creep up and show. You’ll have to tuck them back in every once in a while to continue looking professional.
Knots Like the Windsor Tie Knot
Half Windsor Tie Knot: A similar knot to the Full Windsor Tie Knot, except with one less turn. This makes it less symmetrical, but also less bulky.
Four-in-Hand Tie Knot: One of the easiest tie knots. It’s smaller than the Full Windsor, easier to tie, and also less symmetrical. It’s usually used by people who are new to using ties or with thicker ties.
Prince Albert Tie Knot: A very similar knot to the Four-in-Hand Tie Knot, except with two side wraps. It’s slightly bulkier, but not as bulky as the Windsor. It’s also a good option for beginners.
Balthus Tie Knot: The Balthus Tie Knot is one of the bulkiest tie knots out there. It’s even bulkier than the Windsor and results in a much shorter tie. It isn’t used very commonly but it can create a very interesting and polished look.
Pratt (Shelby) Tie Knot: A knot that’s sized somewhere between the Four-in-Hand and Half Windsor Tie Knots. It’s also relatively easy to tie but is less symmetrical than the Full Windsor.
Kelvin Tie Knot: Another easy tie knot, similar in size to the Four-In-Hand Tie Knot. It’s very easy to tie and has a symmetrical, conical structure.
Step-By-Step Guide: Tying the Windsor Tie Knot
A step-by-step guide on how to tie the Windsor Tie Knot.
Step 1:
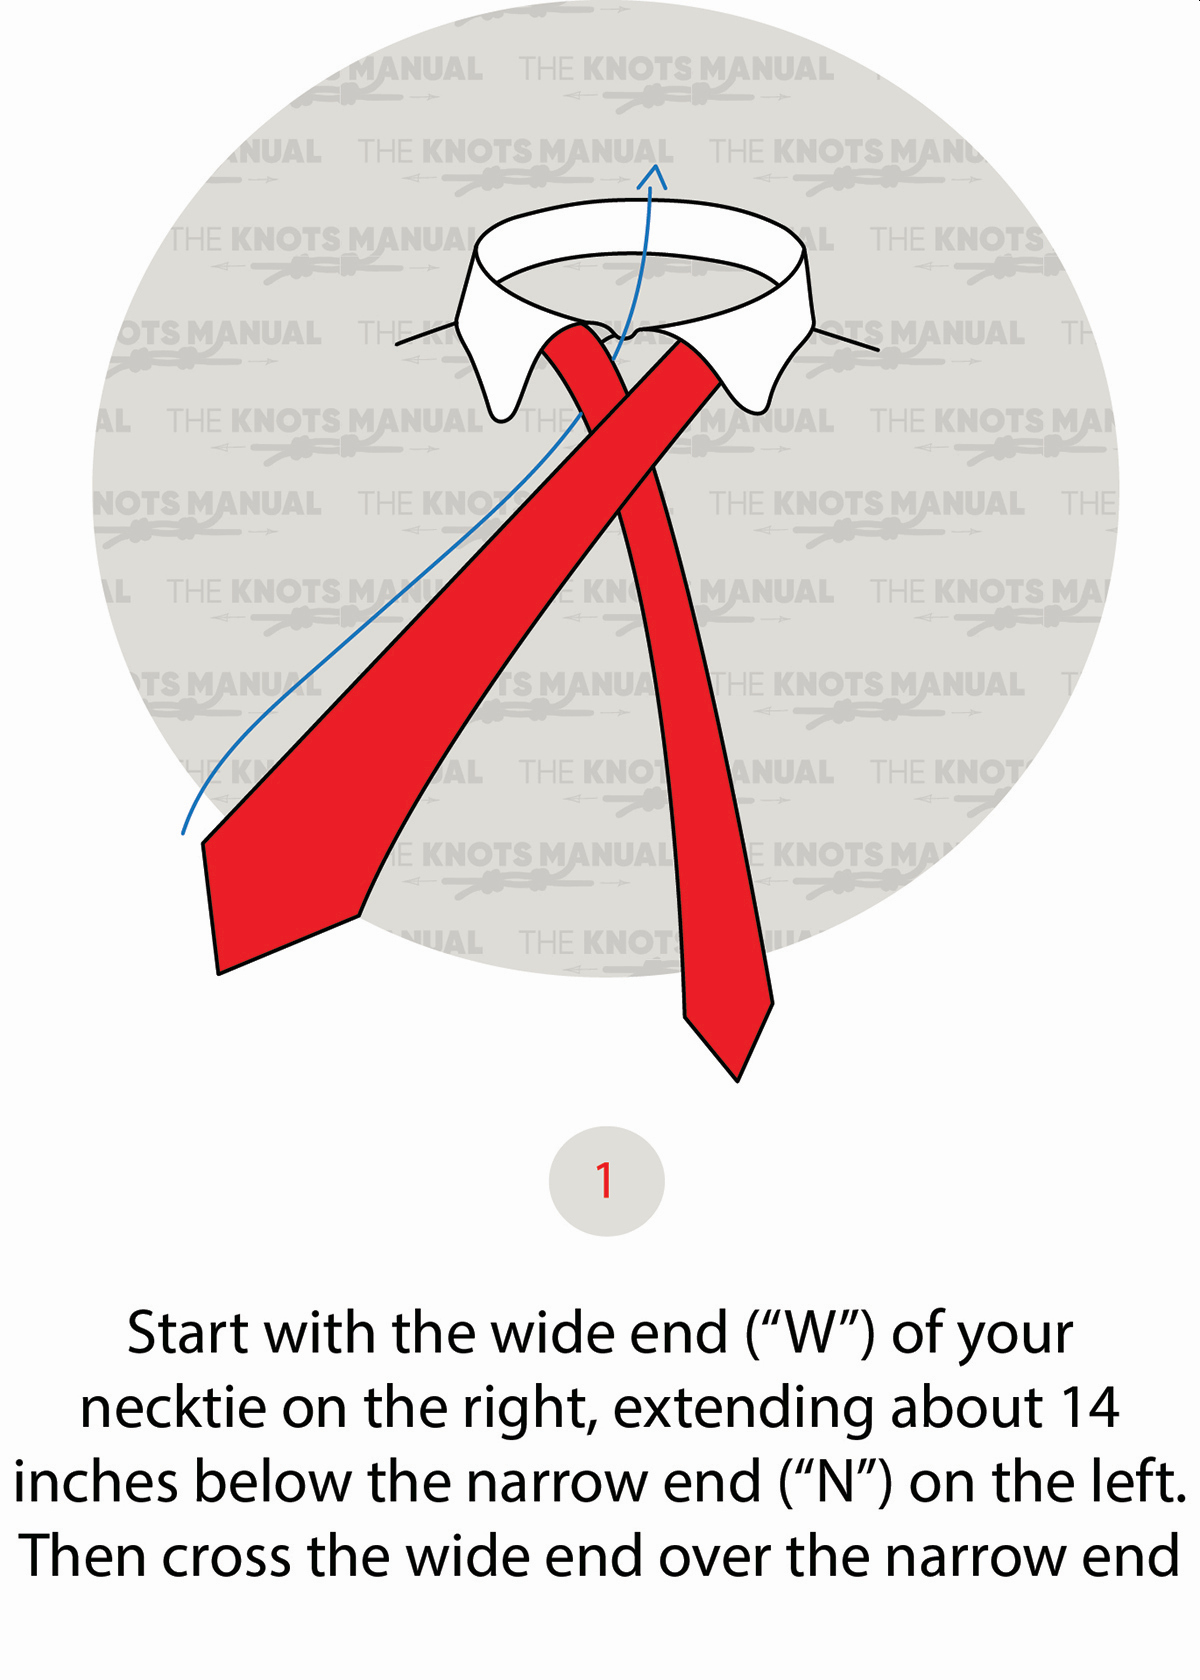
Place the tie as illustrated above, with the wide end 14 inches (35 cm) longer. Then cross it over the narrow end.
Step 2:
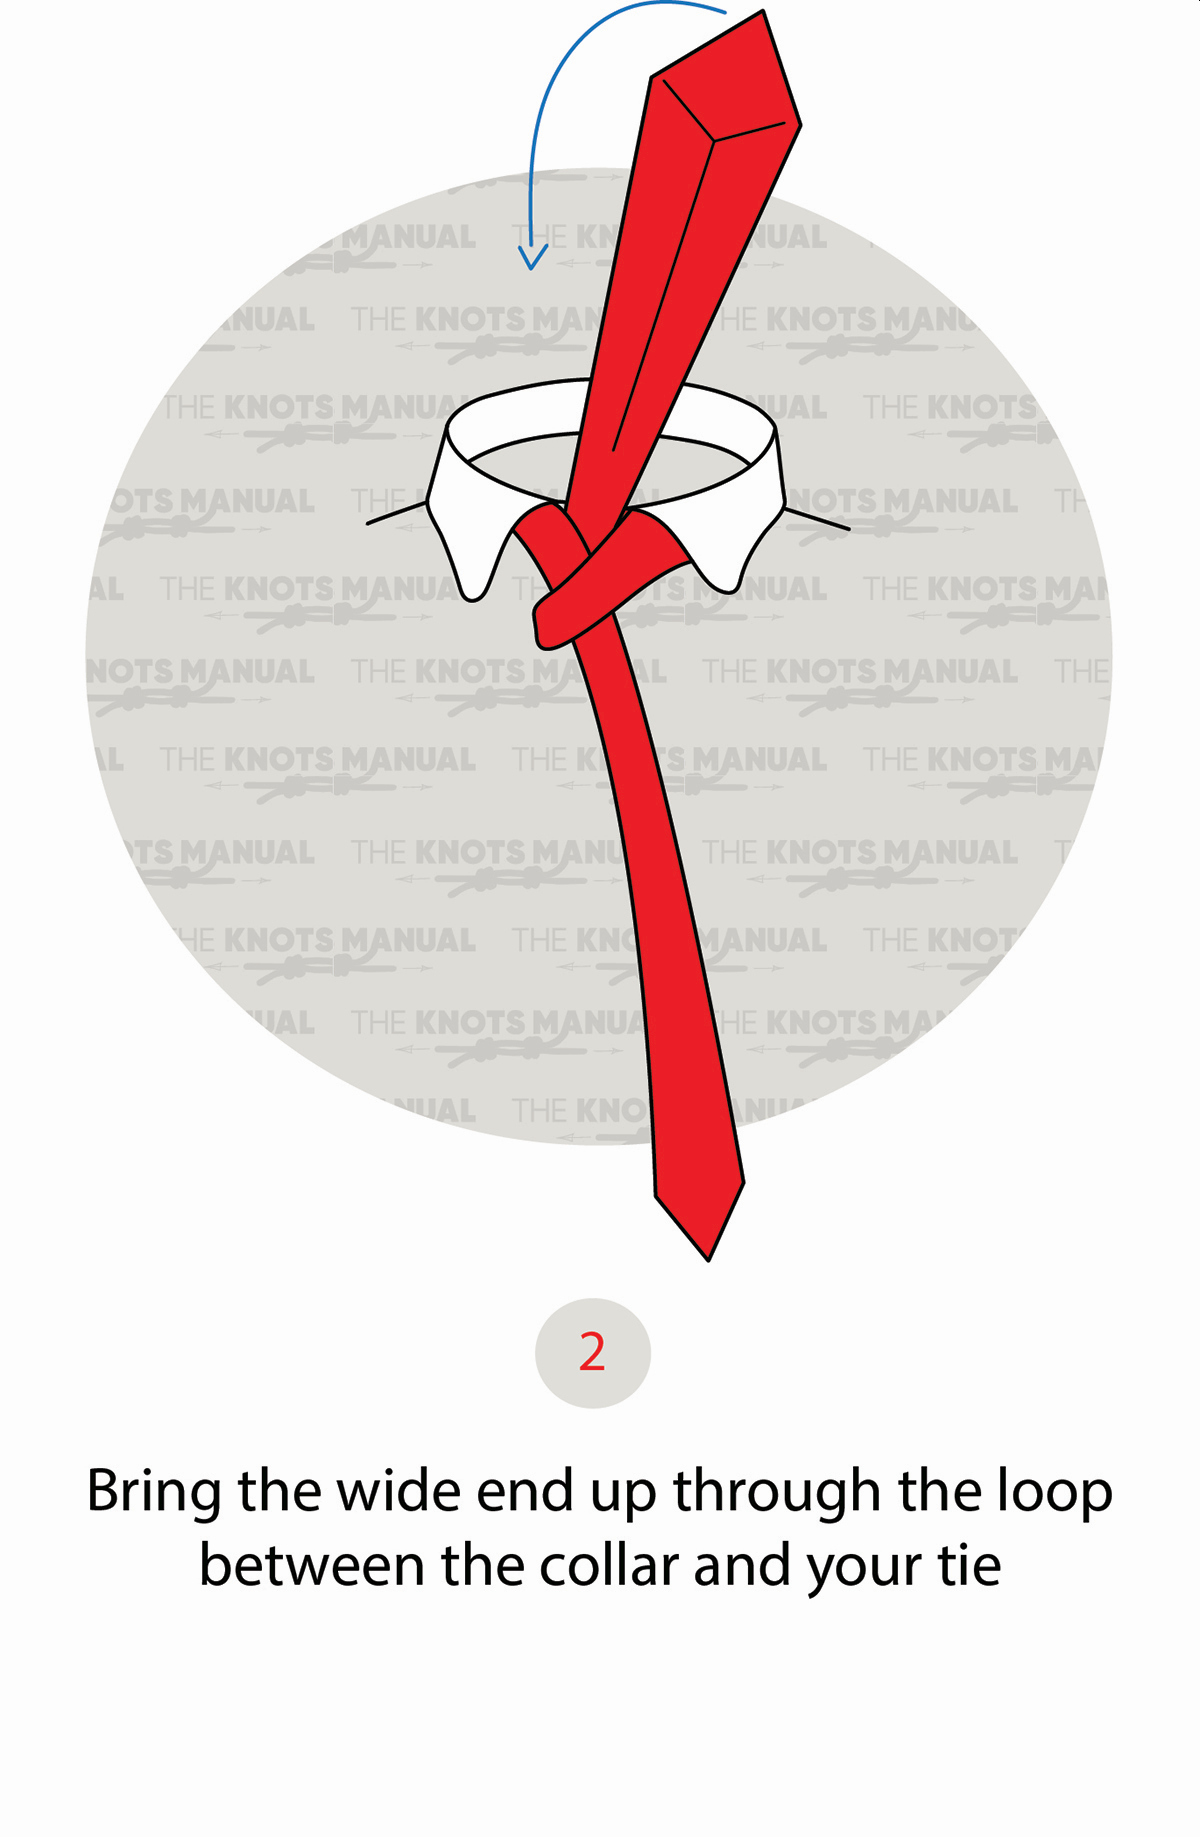
Pass the wide end behind the narrow end and up through the middle.
Step 3:
Then pass the wide end behind the knot.
Step 4:
Pass the wide end up from the other side.
Step 5:
Pass the wide end through the middle of the knot (this time from the front).
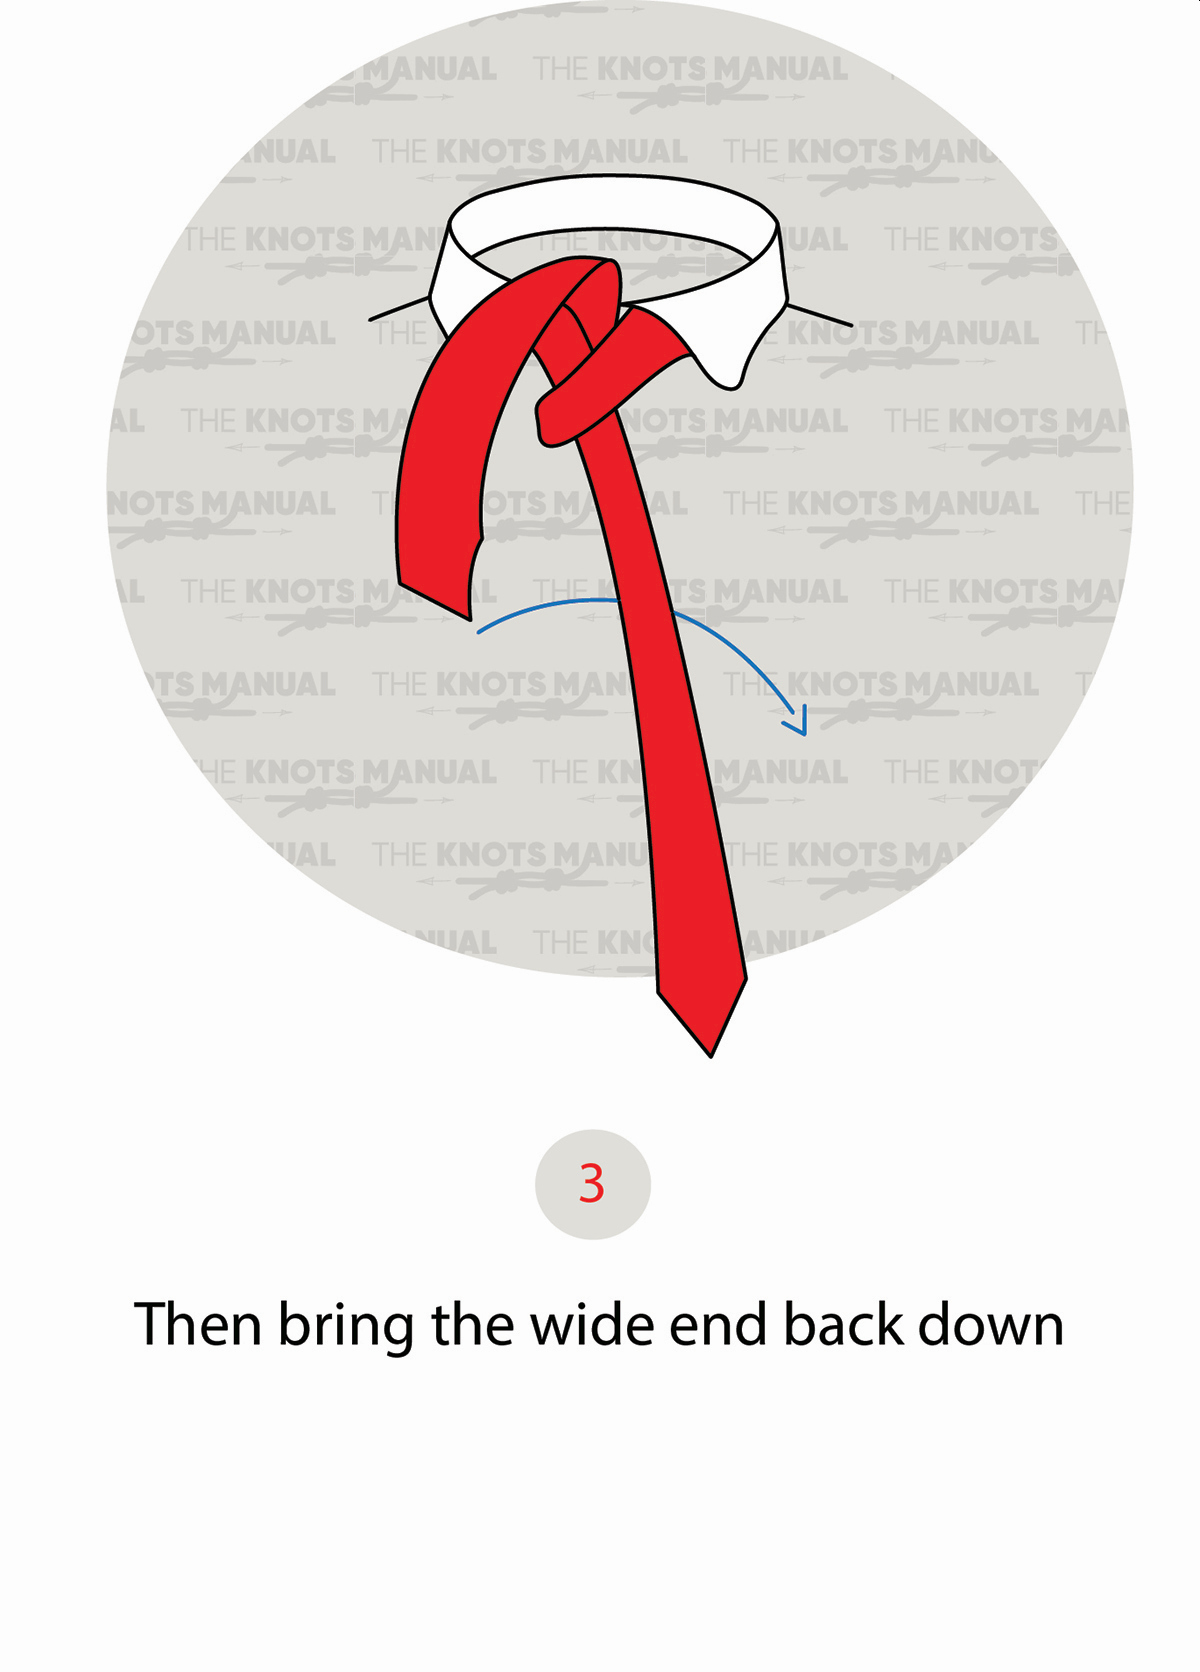
Step 6:
Pass the wide end sideways across the knot.
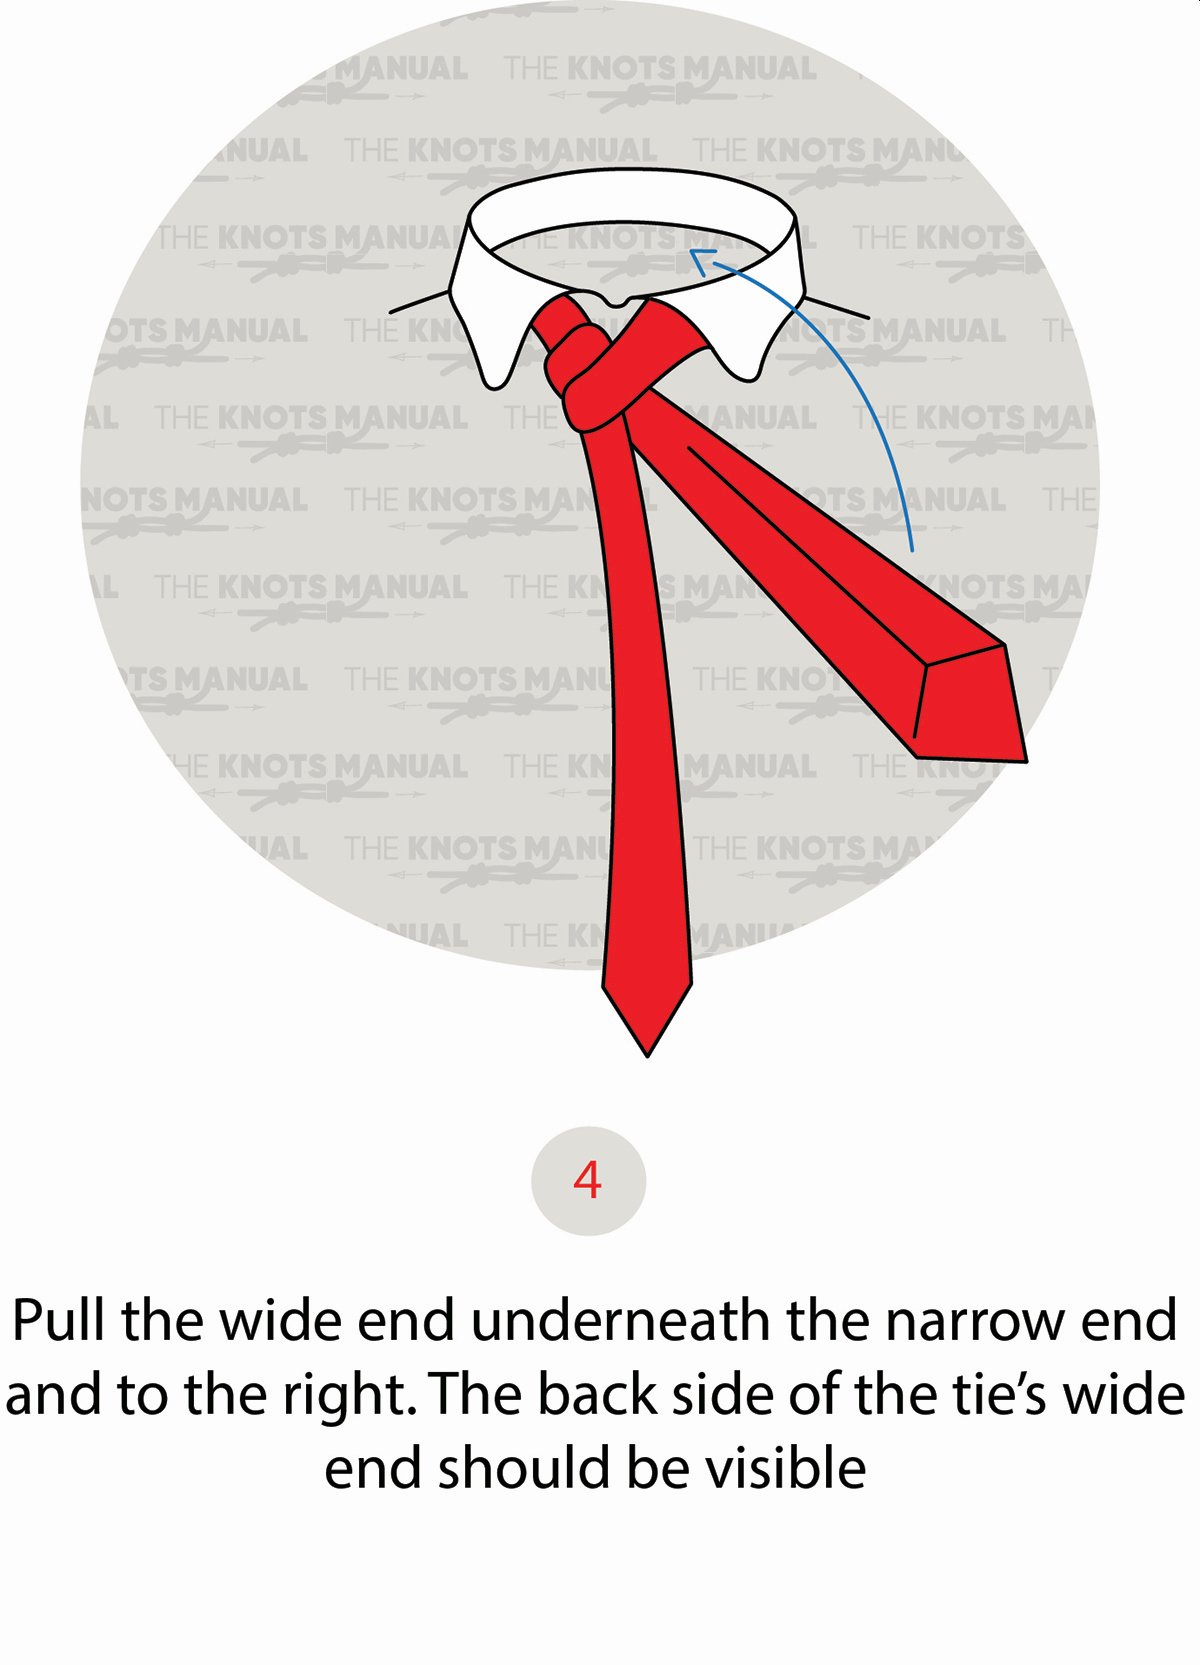
Step 7:
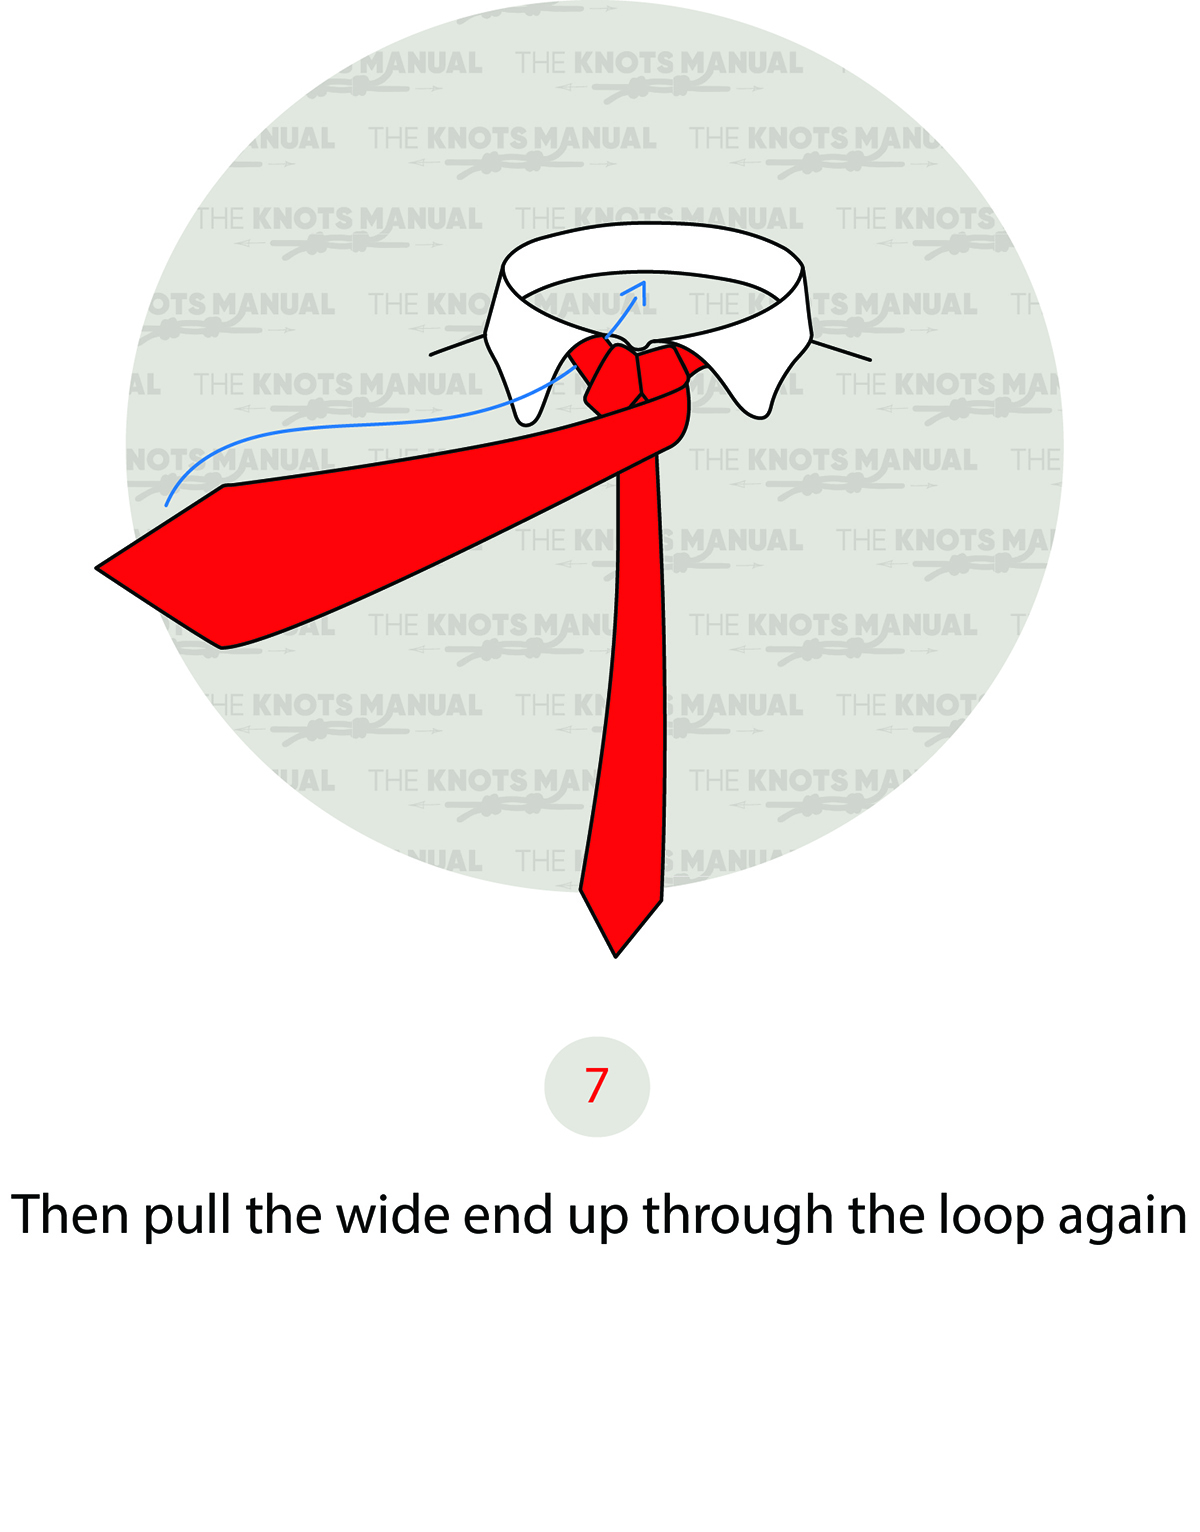
Pass the wide end behind and up through the middle of the knot.
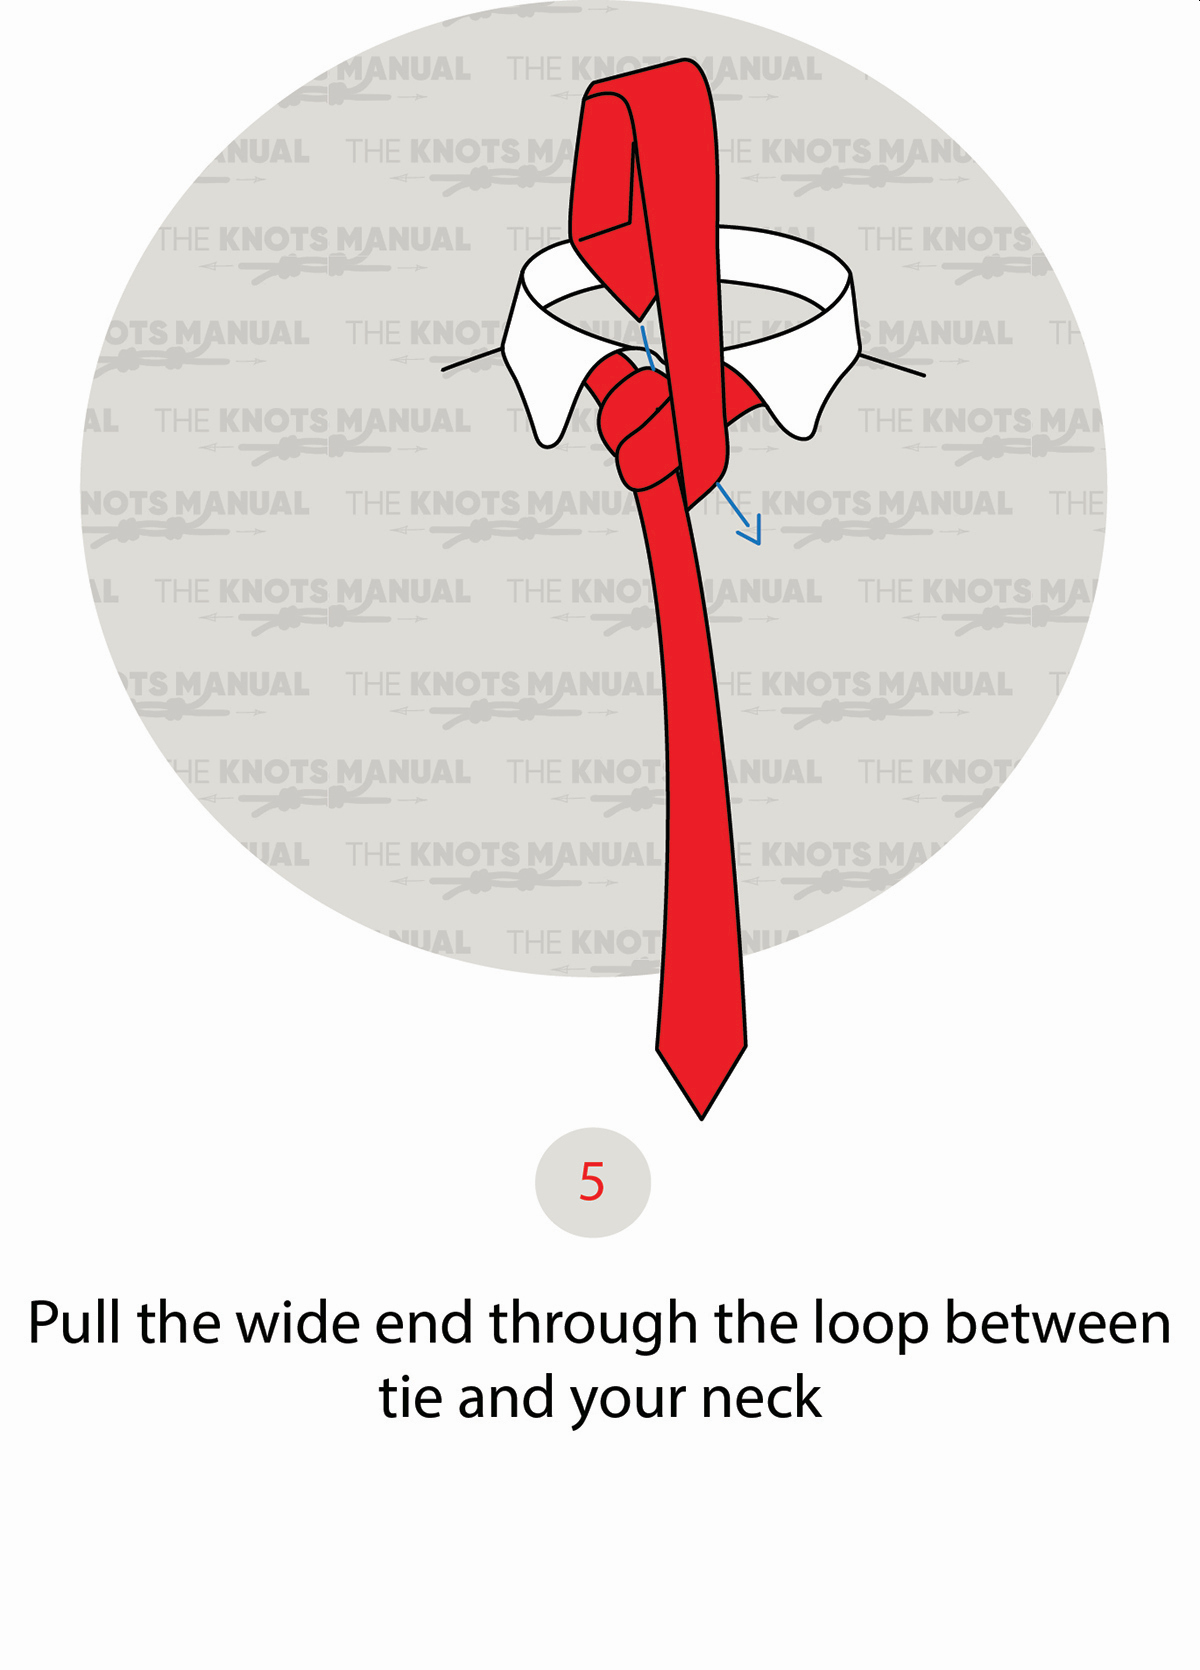
Step 8:
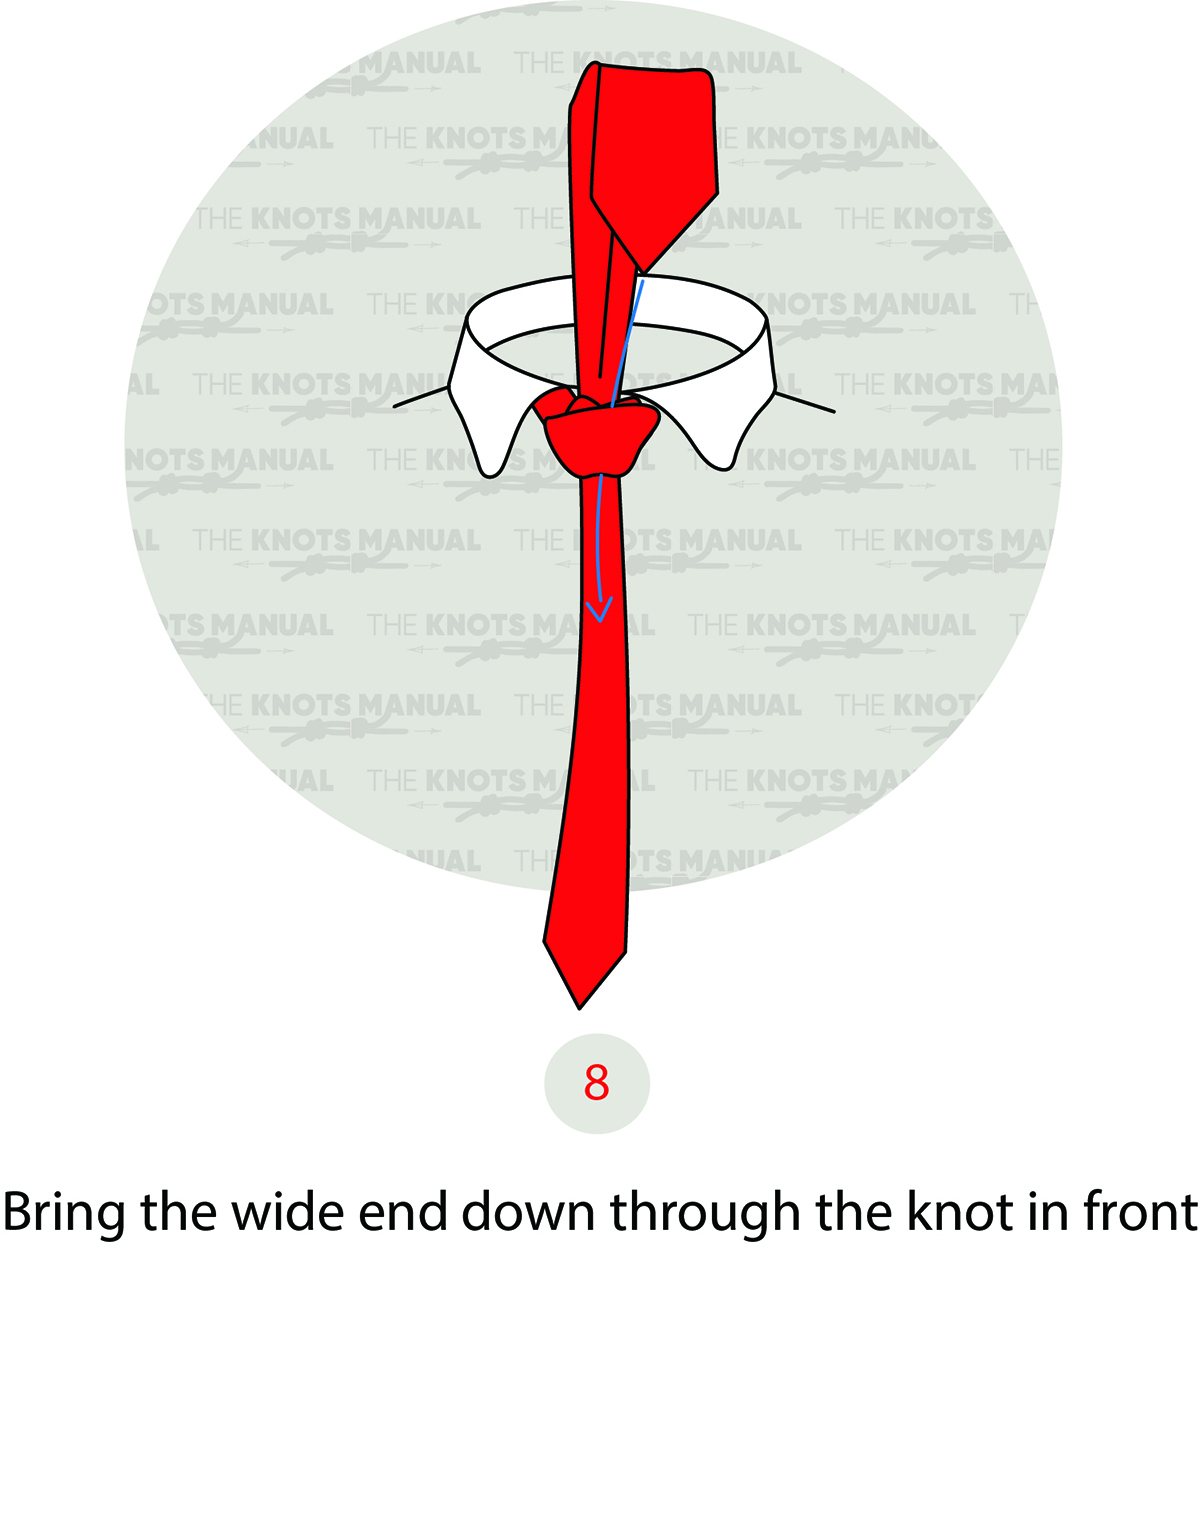
Now pass the wide end through the final front loop,
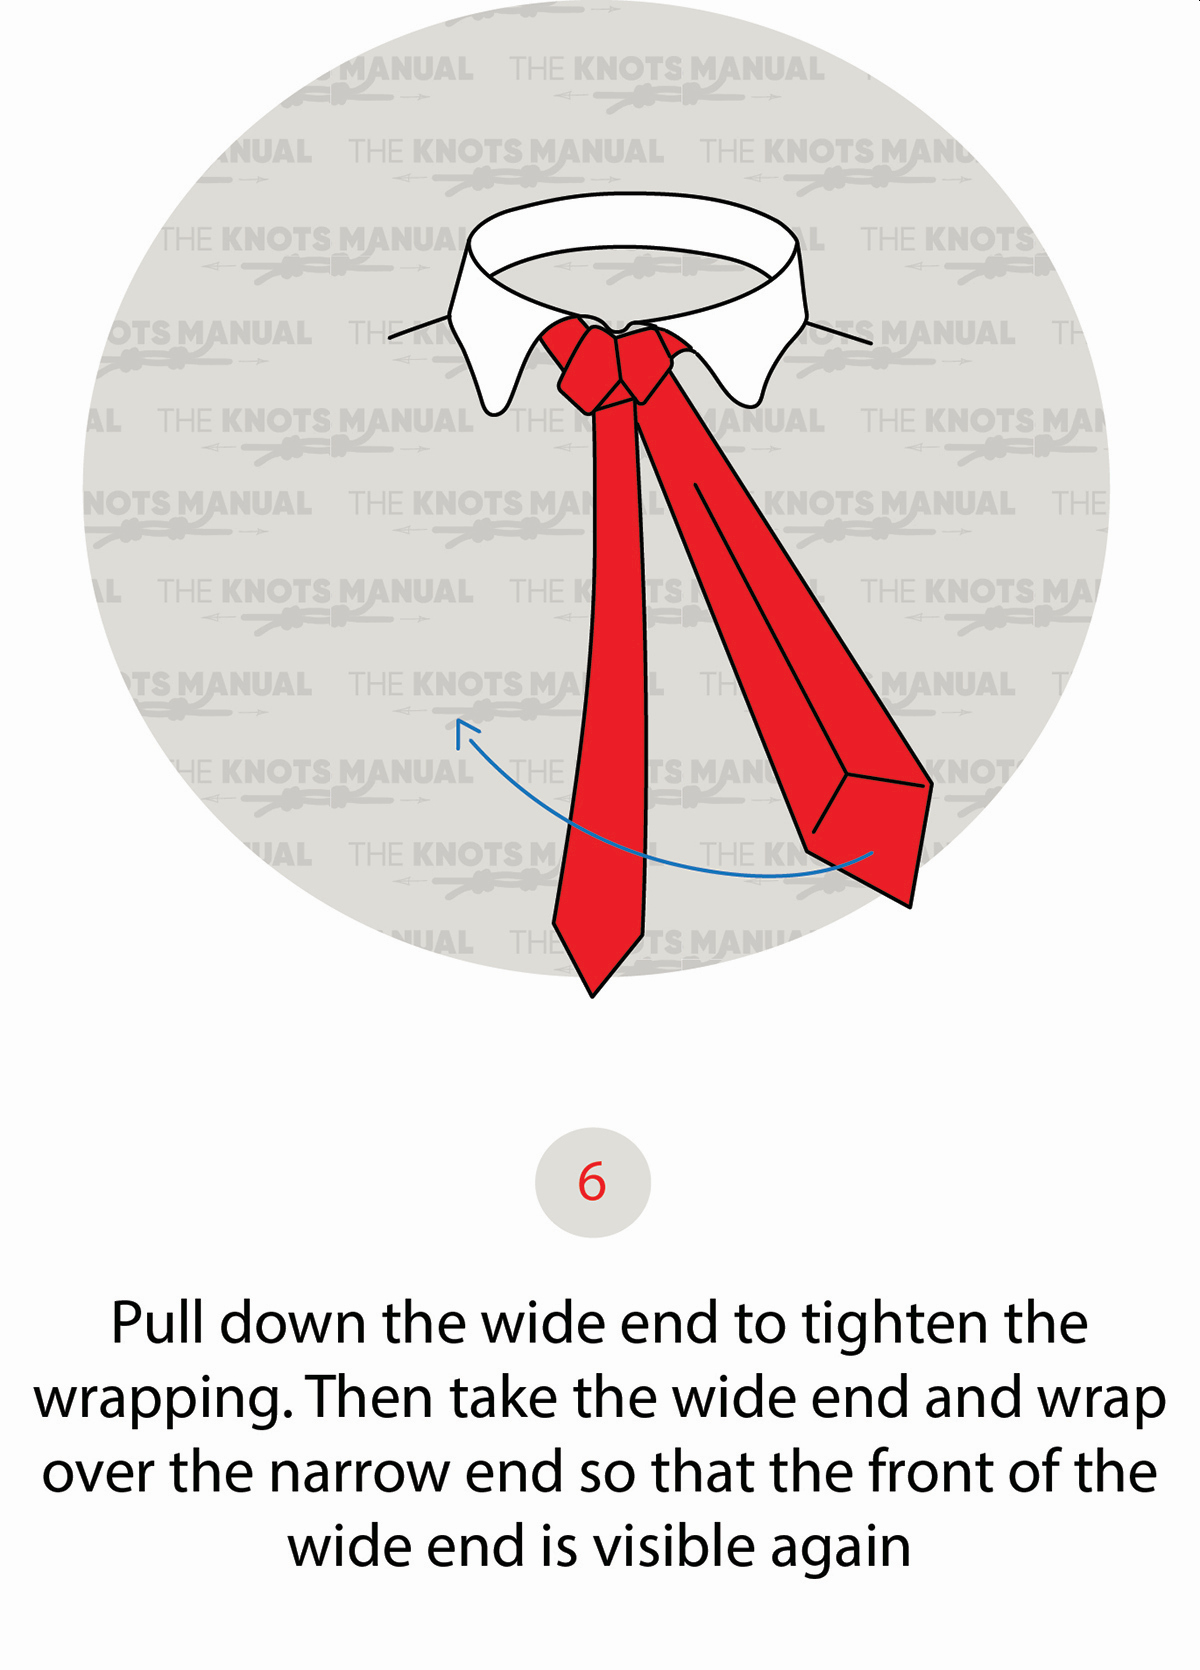
Step 9:
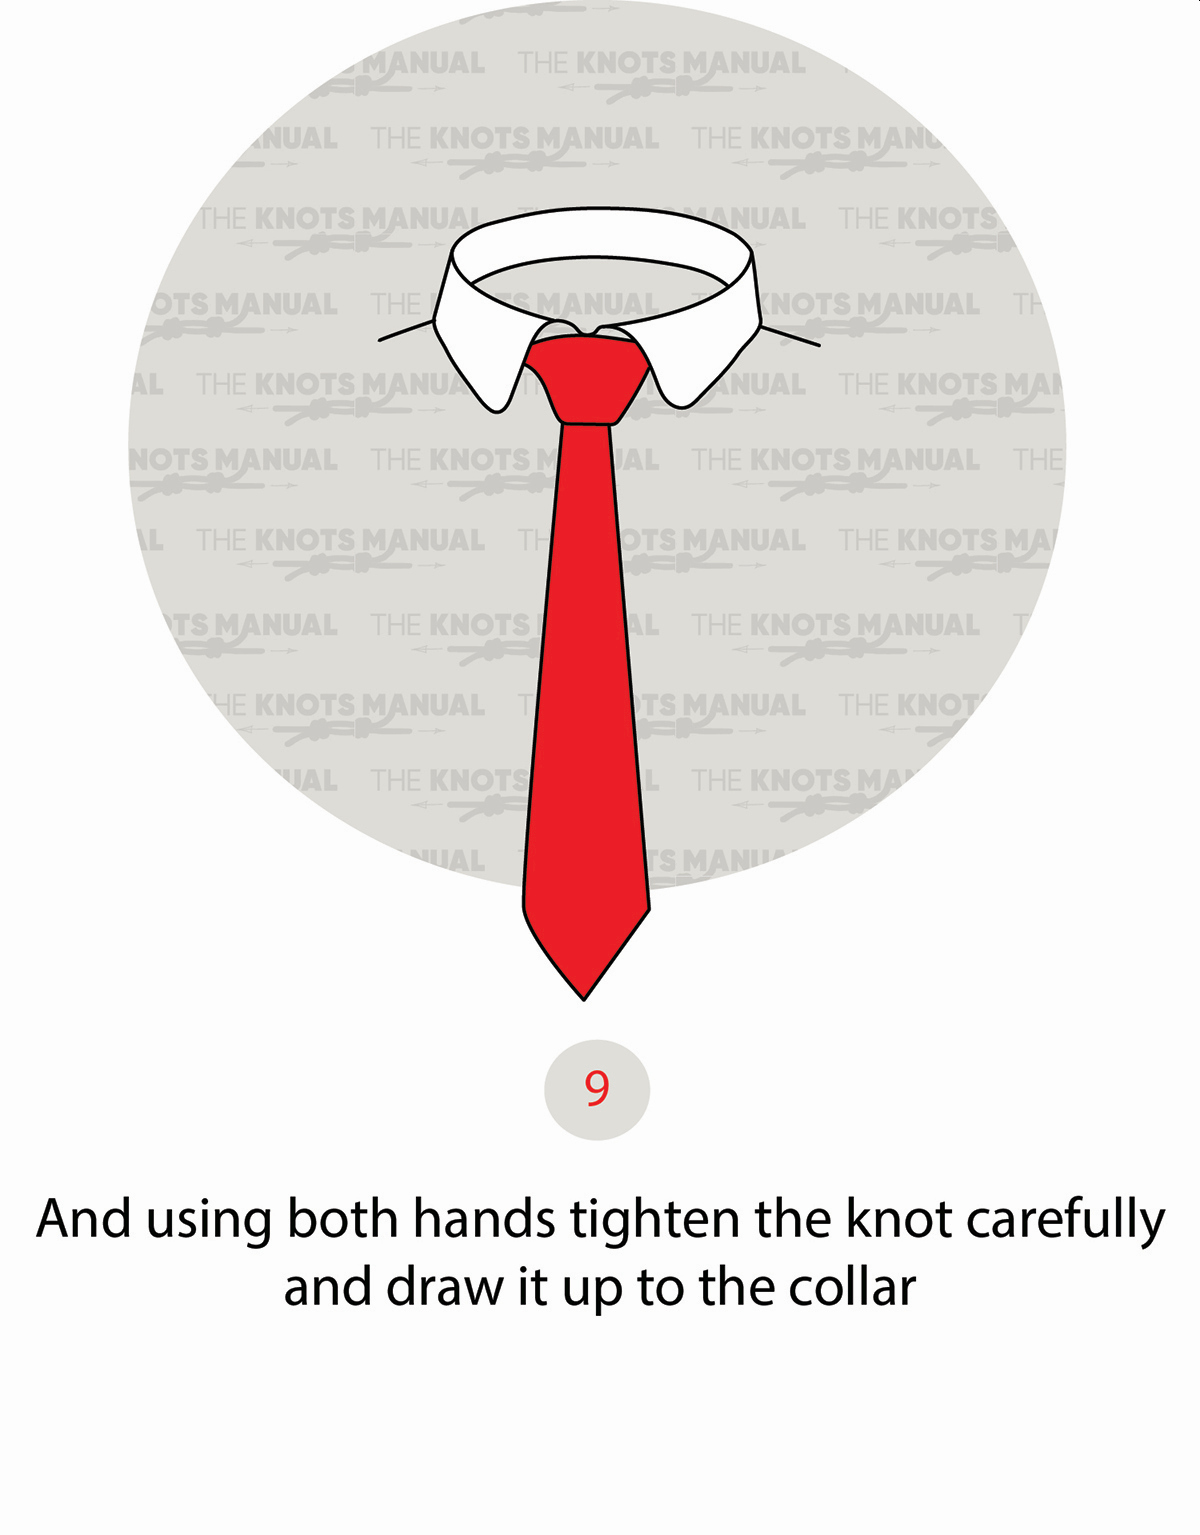
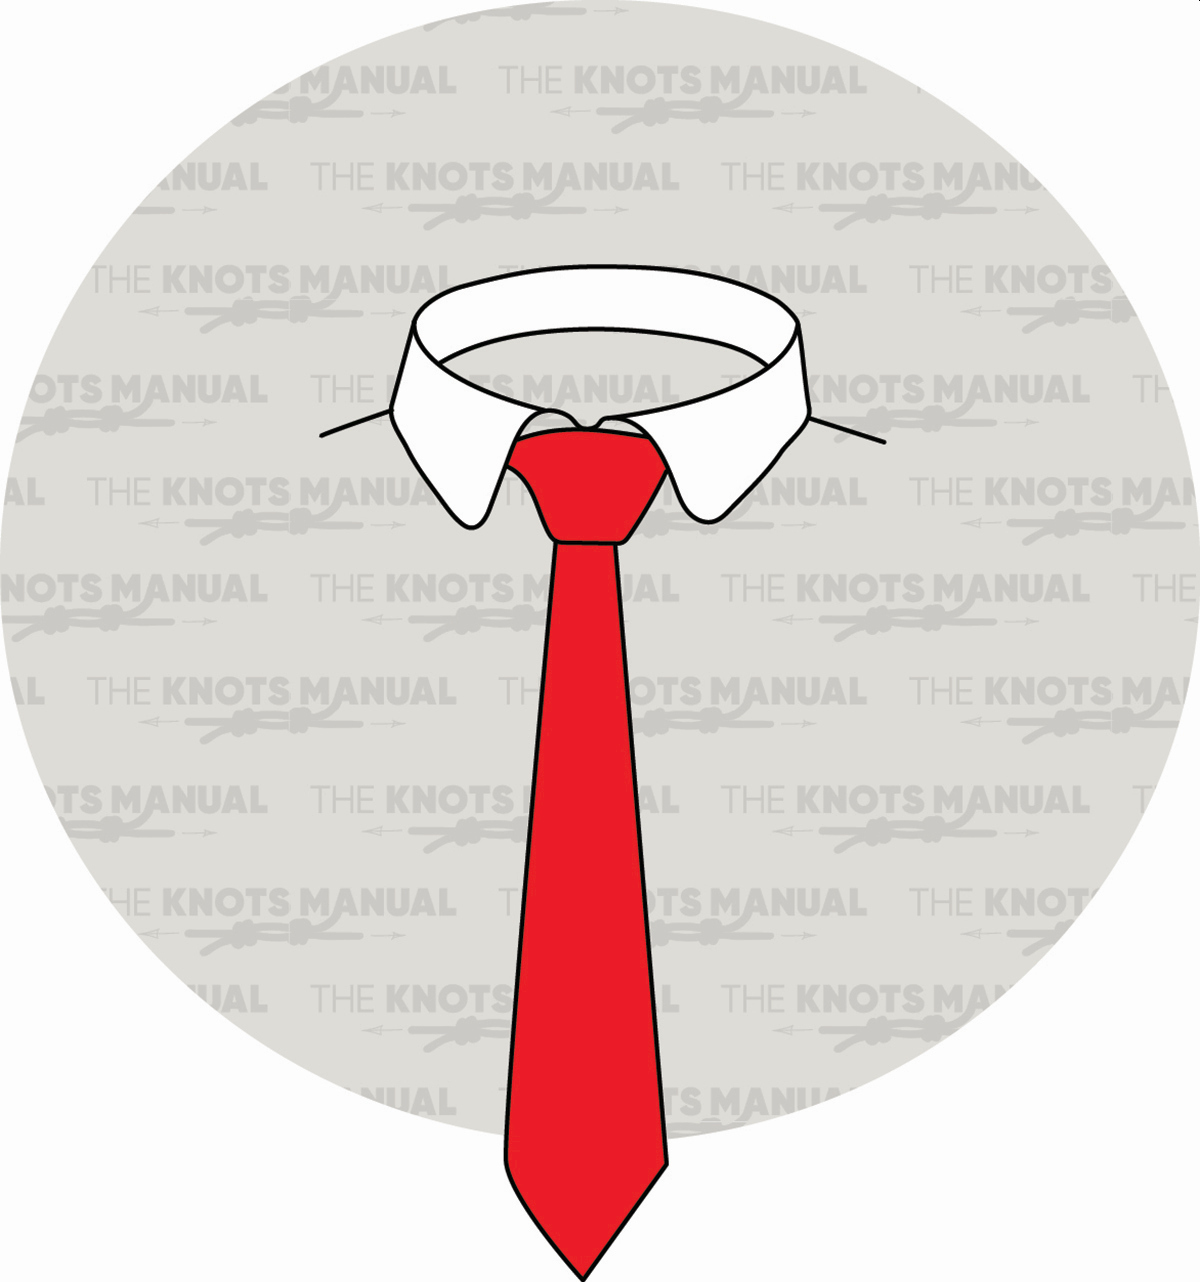
Tighten and dress the Windsor Tie Knot until it looks like in the picture illustrated above.