A Half Windsor Tie Knot is a very commonly used knot for tieing a tie. It creates a medium-sized, triangular knot with almost perfect symmetry.
Referring to this tie as the Windsor Knot would be incorrect because it would refer to the full version of this knot. This is a simplified version of it with one less turn.
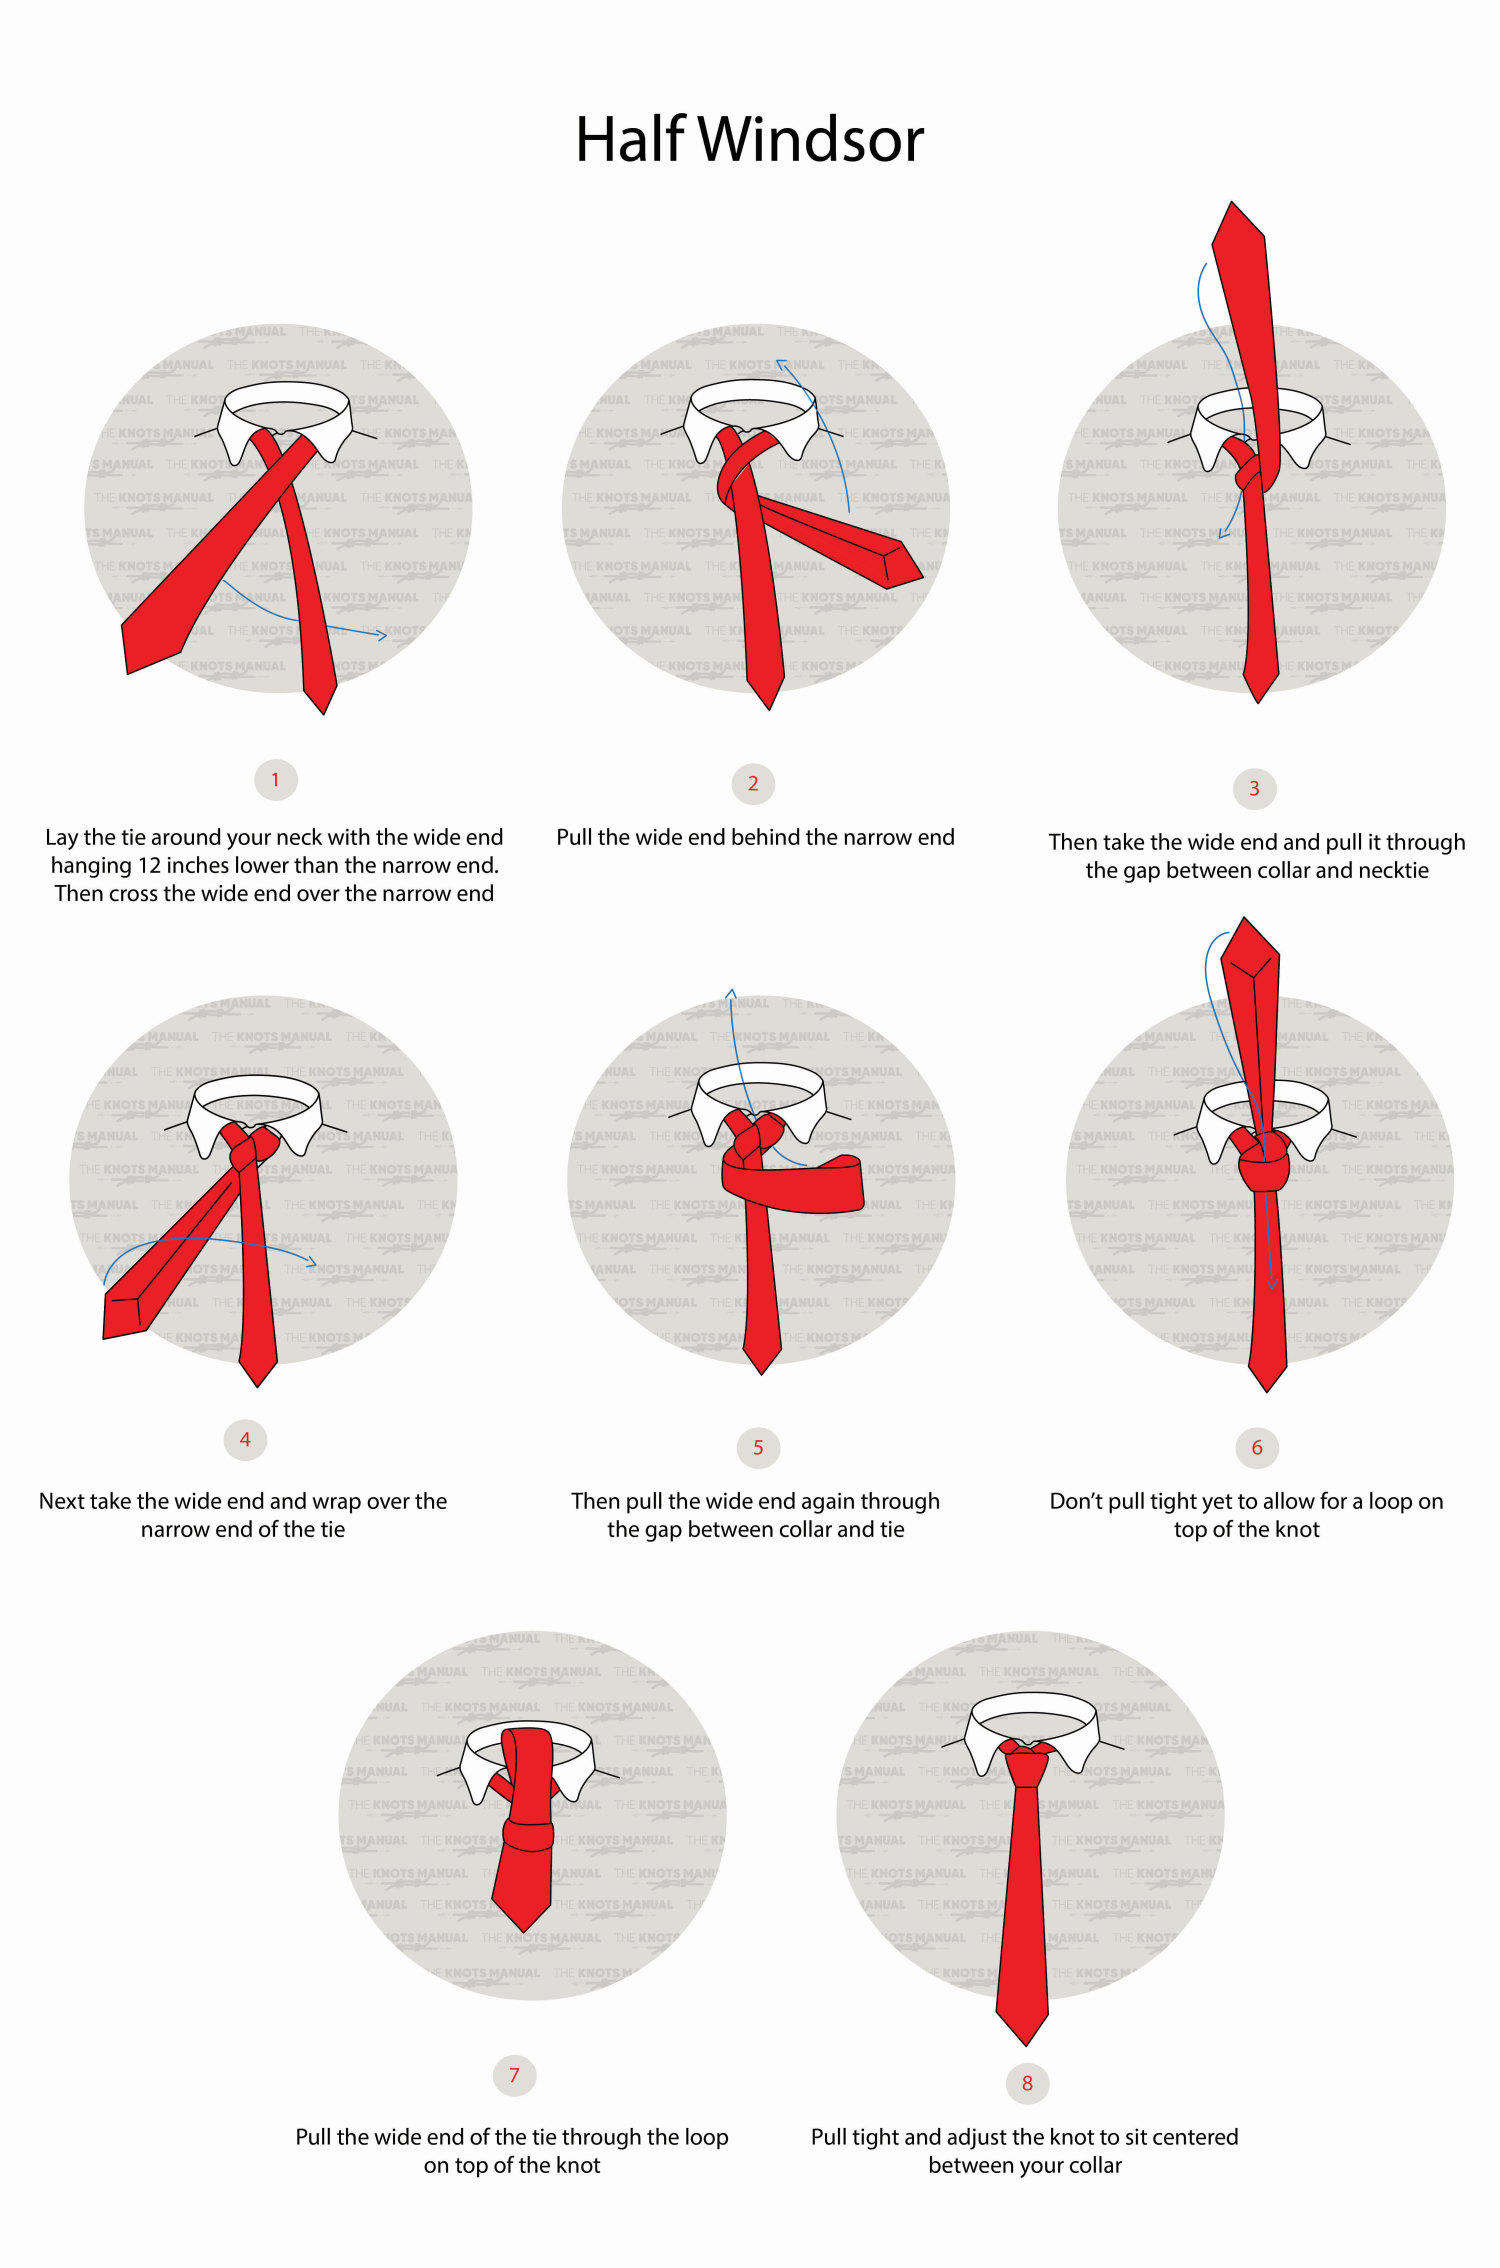
Quick Guide: Tying the Half Windsor Tie Knot
To tie the Half Windsor Tie knot, place the tie over your neck with both ends in front of you. The wide end should be 12 inches (30 cm) longer than the narrow one.
Wrap the wide end of the tie around the narrow one (steps 1-2). Then pass it over the top from the front side (step 3). After that, pass it sideways (step 4) and back through the top, this time from the backside (step 5). Finally, pass the wide end through the front loop (steps 6-7).
Tighten the knot by pulling the wide end of the tie while holding the knot with your free hand. Make sure to dress it neatly so that it sits perfectly symmetrical and that only the front loop is visible.
About the Half Windsor Tie Knot
The main benefit of the Half Windsor Tie Knot is that it is very easy to tie. It requires one less turn than the Full Windsor Tie Knot, which makes it easier to remember and easier to teach to beginners.
It creates a medium-sized, triangular knot. It looks professional and classic, which makes it ideal to use for most types of official occasions. A lot of people use the Half Windsor as a regular, everyday knot.
It works well with most types of collars and with ties of various thicknesses because it isn’t too small or too large.
The main downside of the Half Windsor Tie Knot is that it’s non-symmetrical. Because the tie is tied only around one side, it can slide over to one side over time. This means that you’ll have to correct and dress it quite often when wearing it for longer periods.
Knots Like the Half Windsor Tie Knot
Full Windsor Tie Knot: A thicker, wider version of the Half Windsor Tie Knot. It’s created by wrapping an extra turn around the wide end of the tie.
Four-In-Hand Knot: An even easier knot to tie compared to the Half Windsor Knot. It’s often taught to people who are new to wearing ties. It has an even smaller profile than the Half Windsor Tie Knot.
Kelvin Tie Knot: Another easy tie knot that’s more symmetrical in shape to the Four-In-Hand and Half Windsor tie knots.
Pratt Tie Knot: A medium-sized tie knot that is tied very similarly to the Half Windsor.
Prince Albert Tie Knot: An easy tie knot that is symmetrical and bulkier compared to the Half Windsor. It’s tied by making two side wraps around the knot.
Balthus Tie Knot: Considered to be one of the widest and bulkiest tie knots. It’s only used for special occasions and is more difficult to tie than the Half Windsor Tie Knot.
Step-By-Step Guide: How to Tie the Half Windsor Tie Knot
A step-by-step guide on tying the Half Windsor Tie Knot.
Step 1:
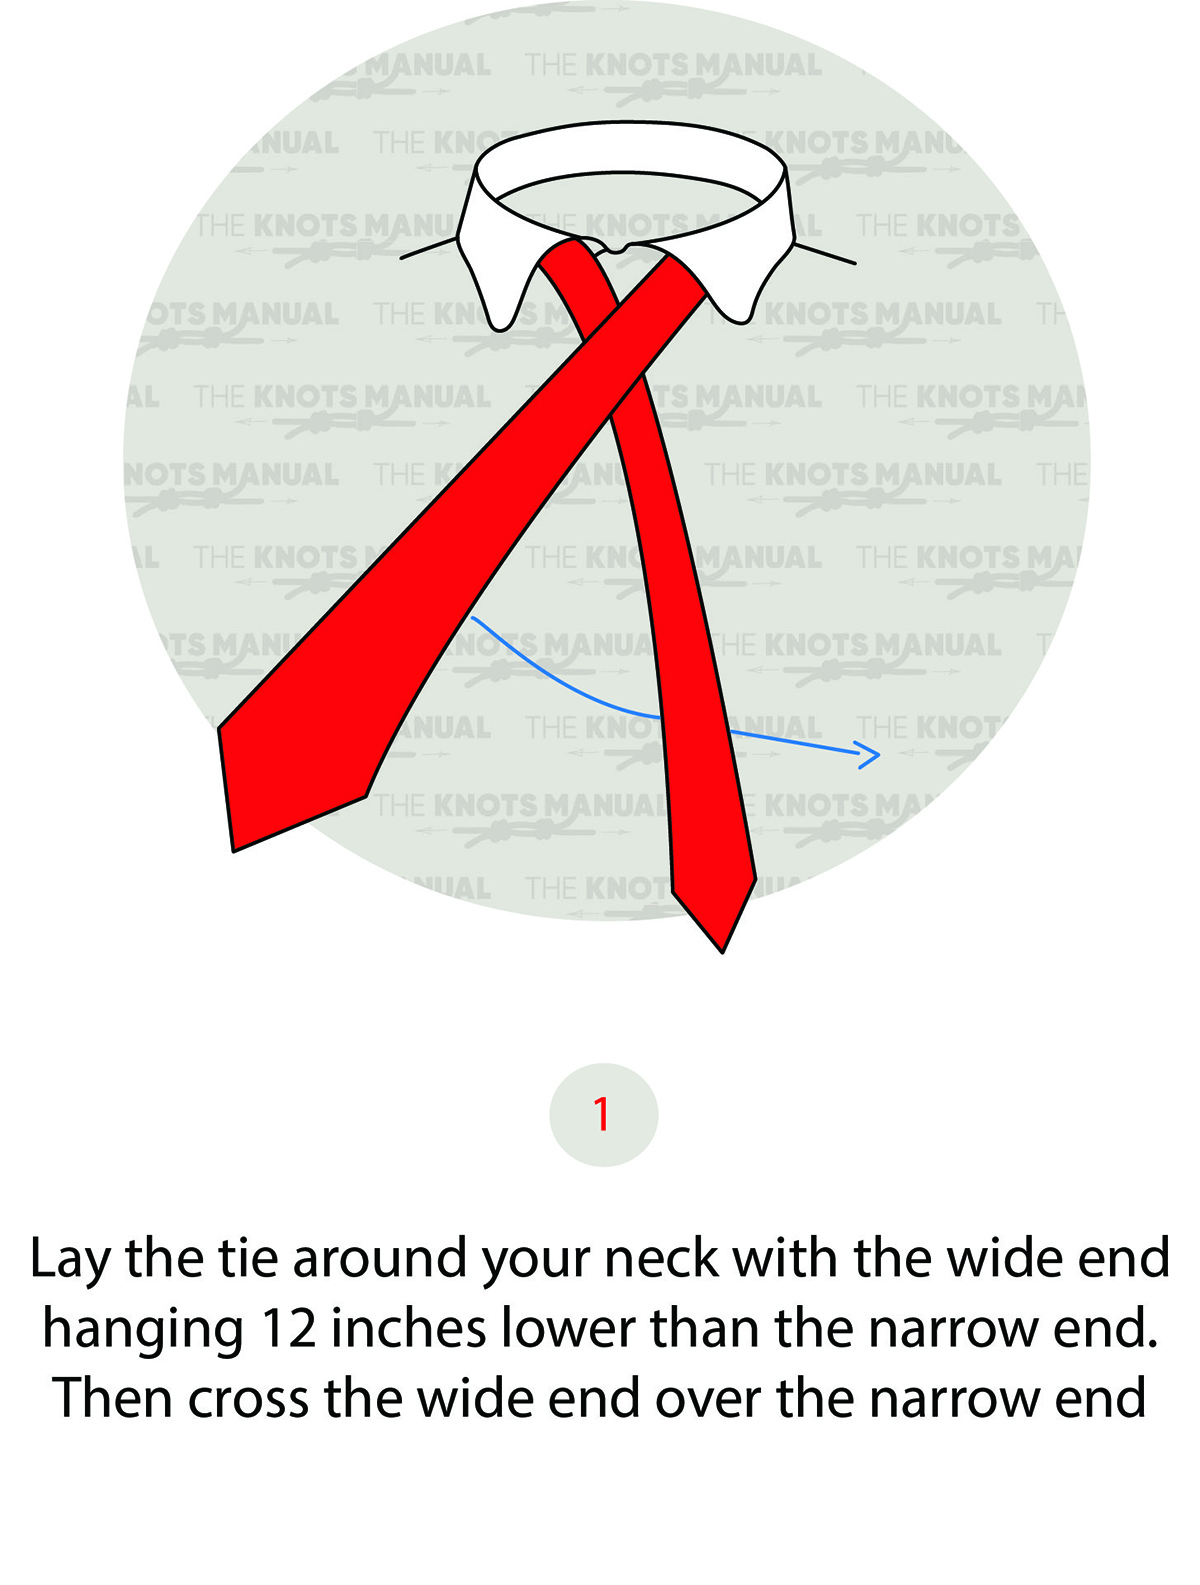
Place the tie as illustrated above, with the wide end 12 inches (30 cm) longer than the narrow one and crossed over it.
Step 2:
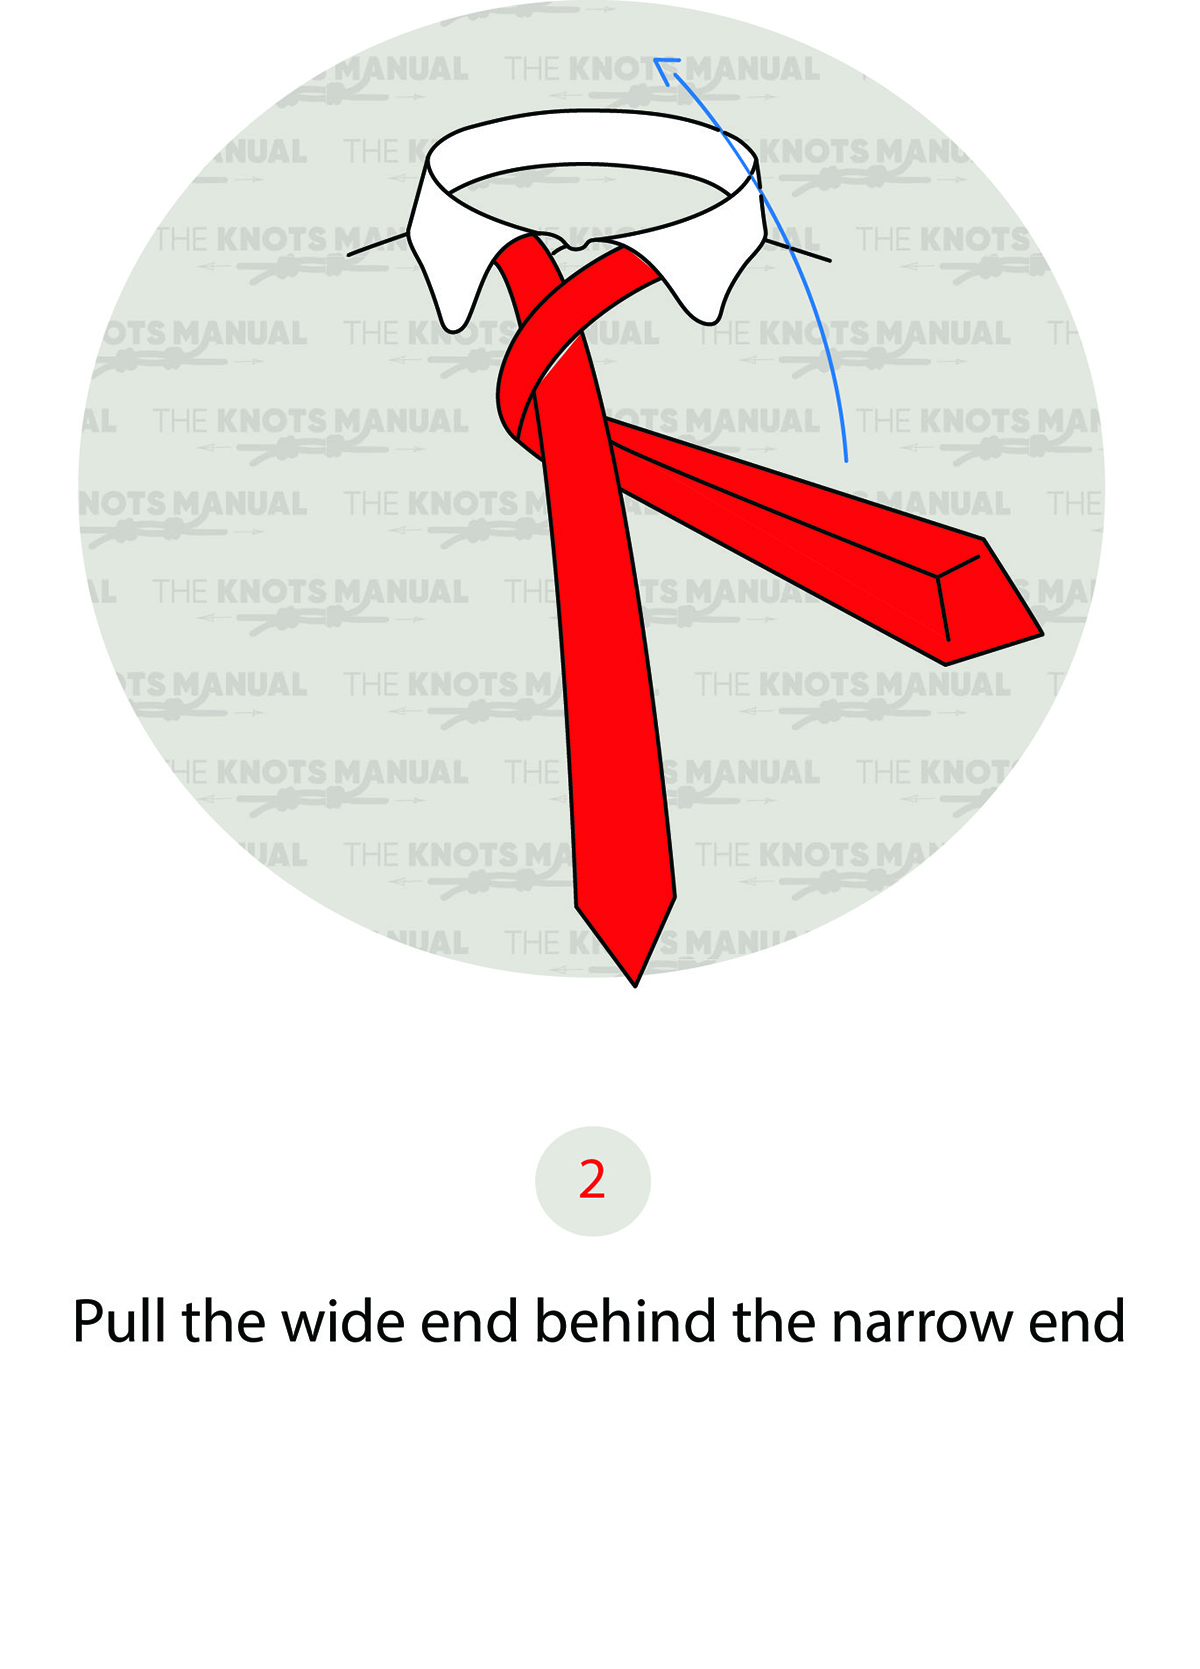
Pass the wide end of the tie behind the narrow one.
Step 3:
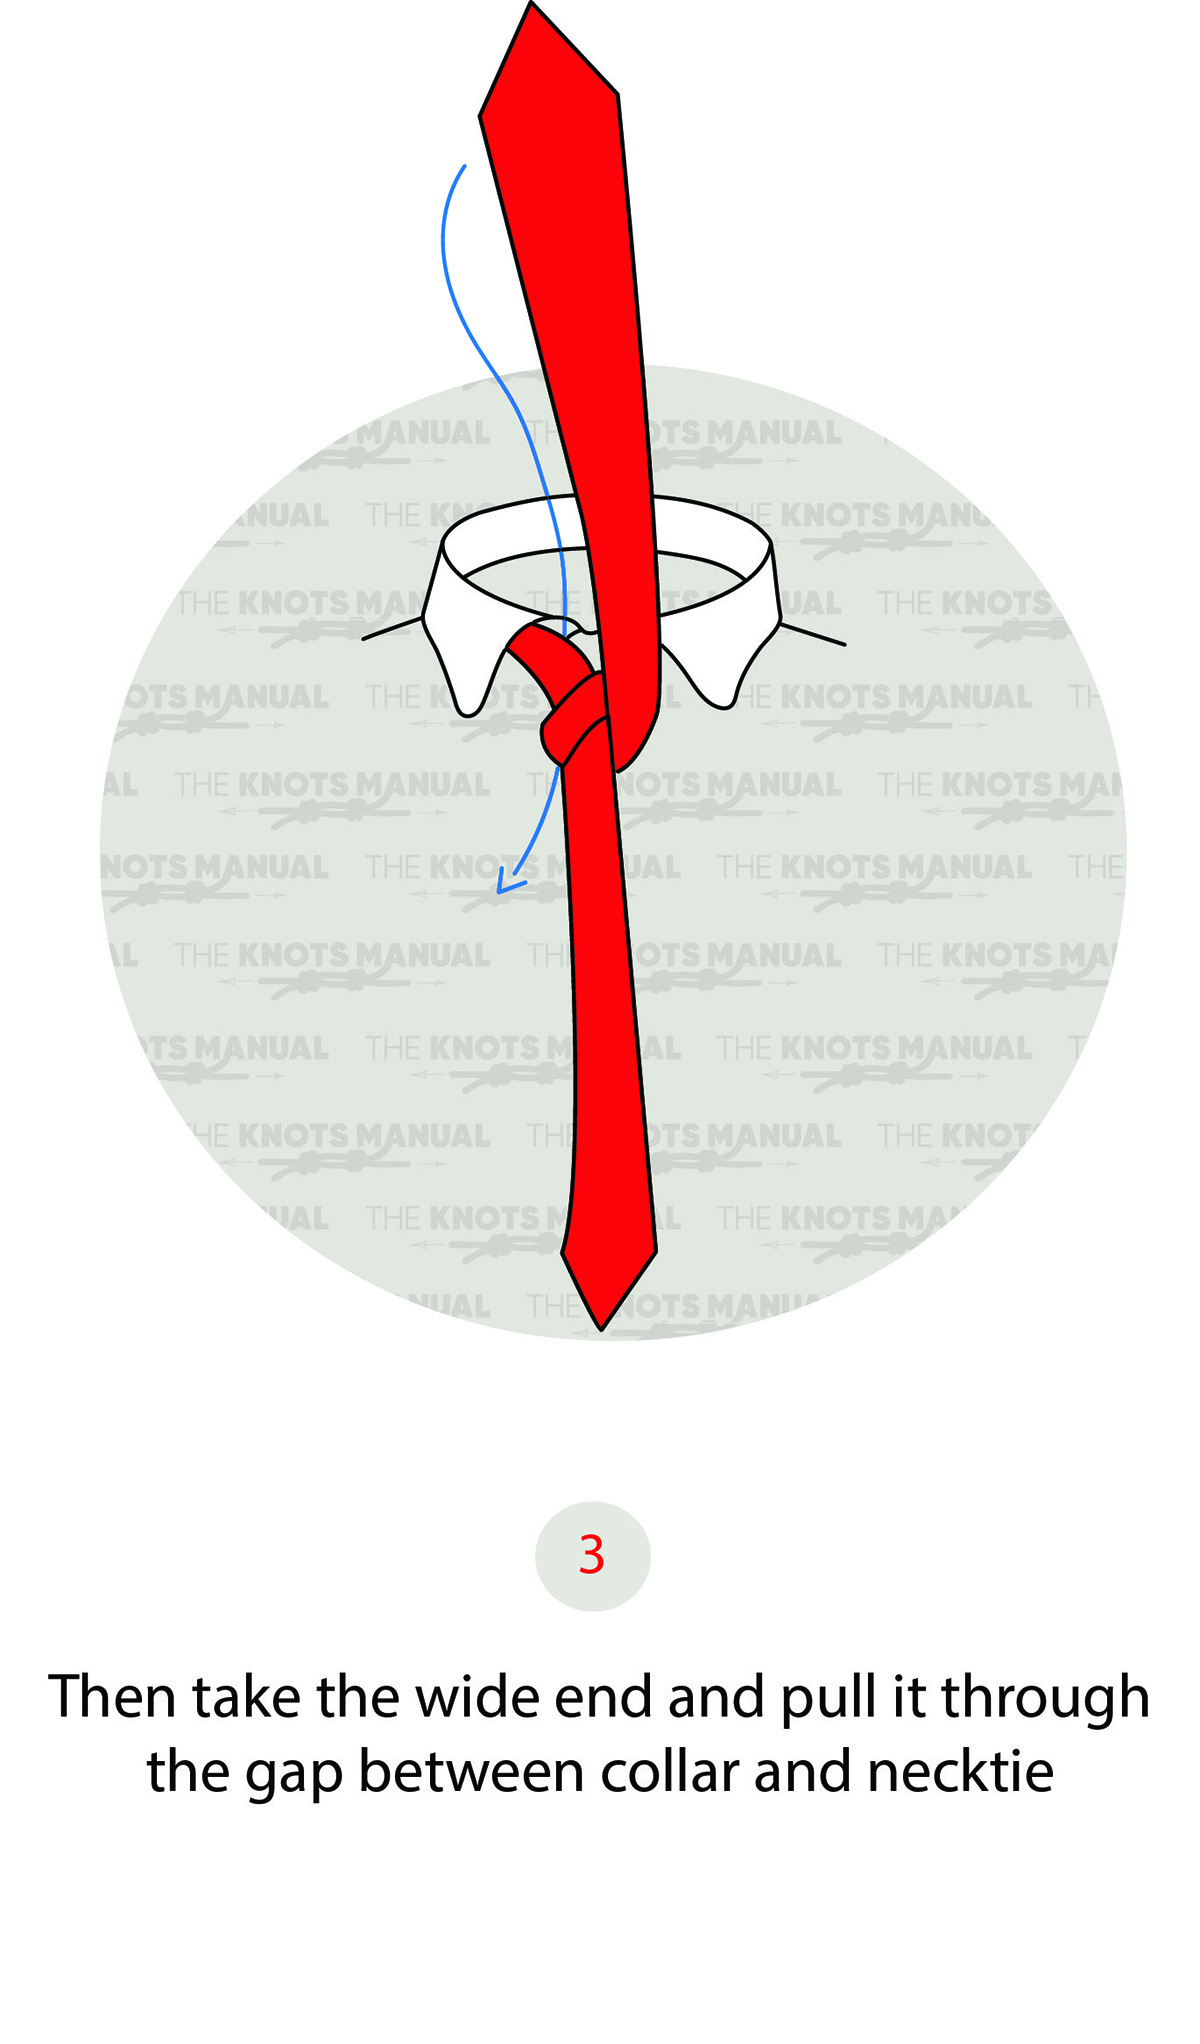
Pass the wide end through the top of the knot from the front side.
Step 4:
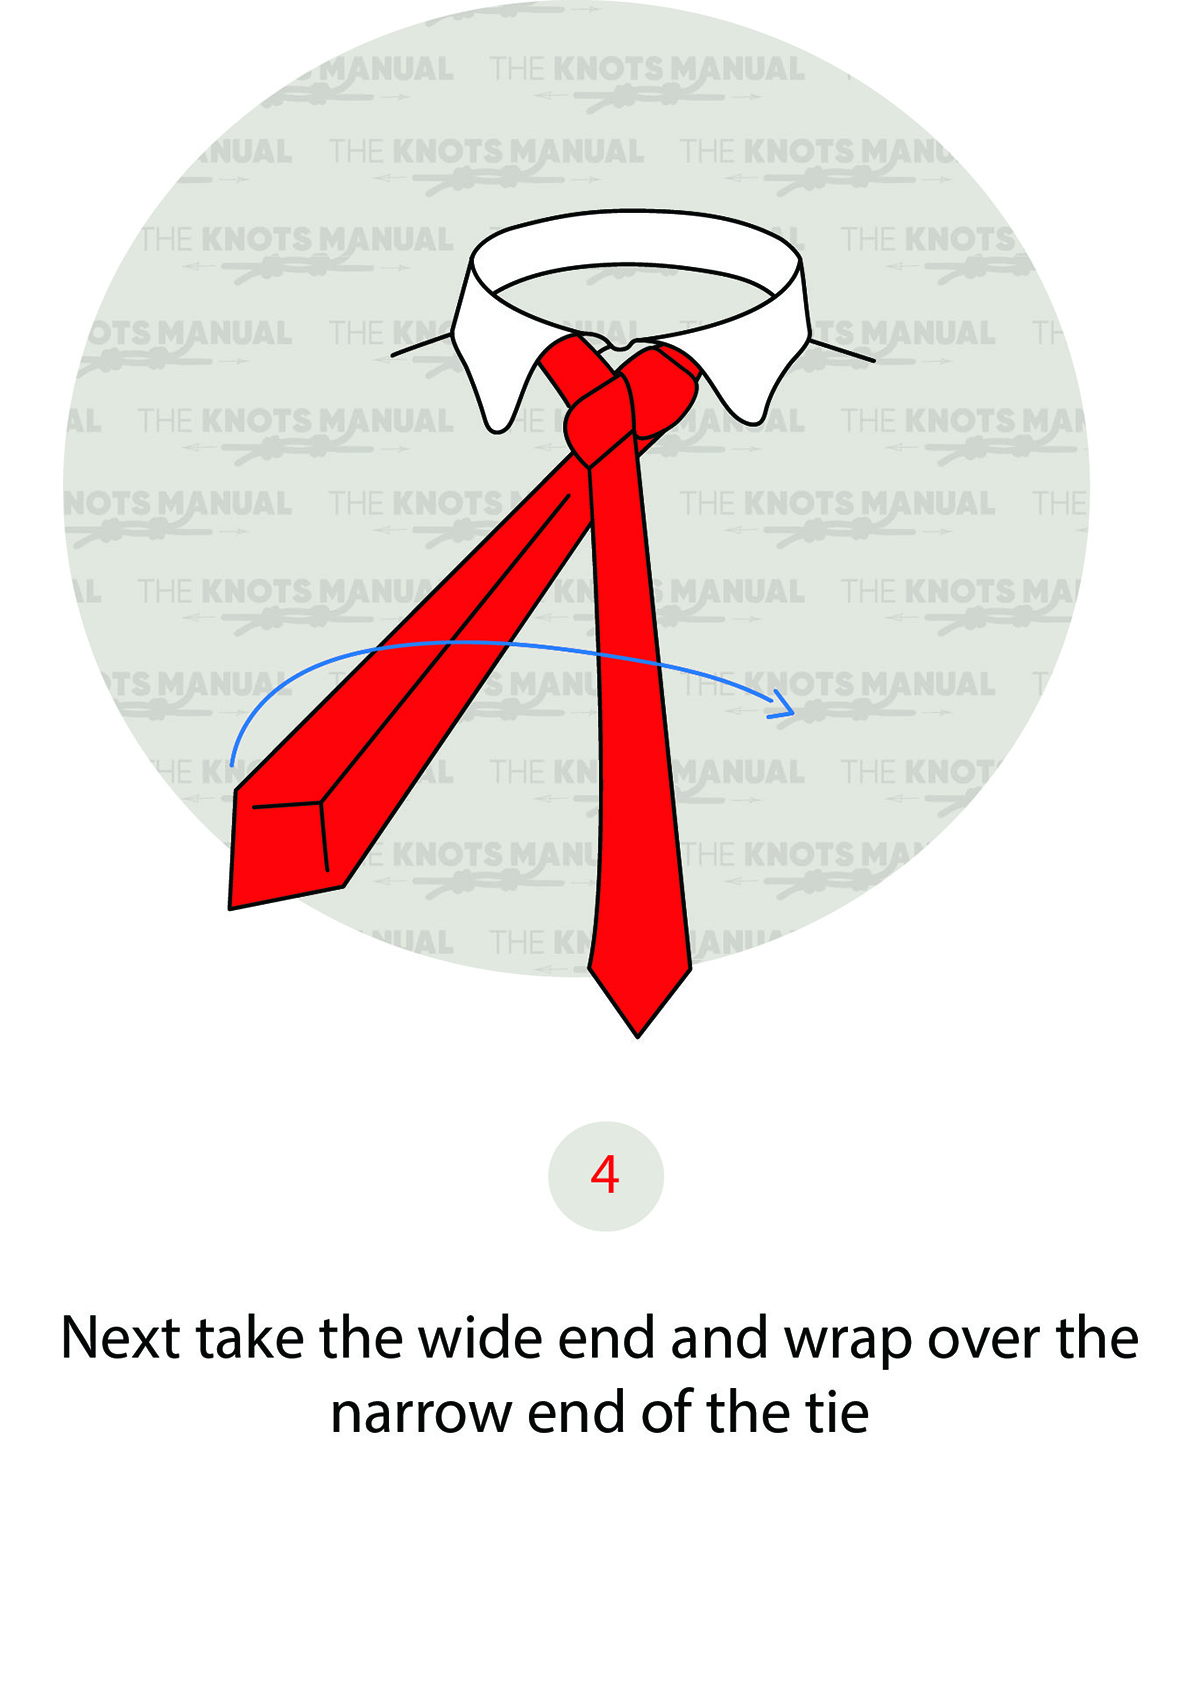
Wrap the wide end around the knot sideways.
Step 5:
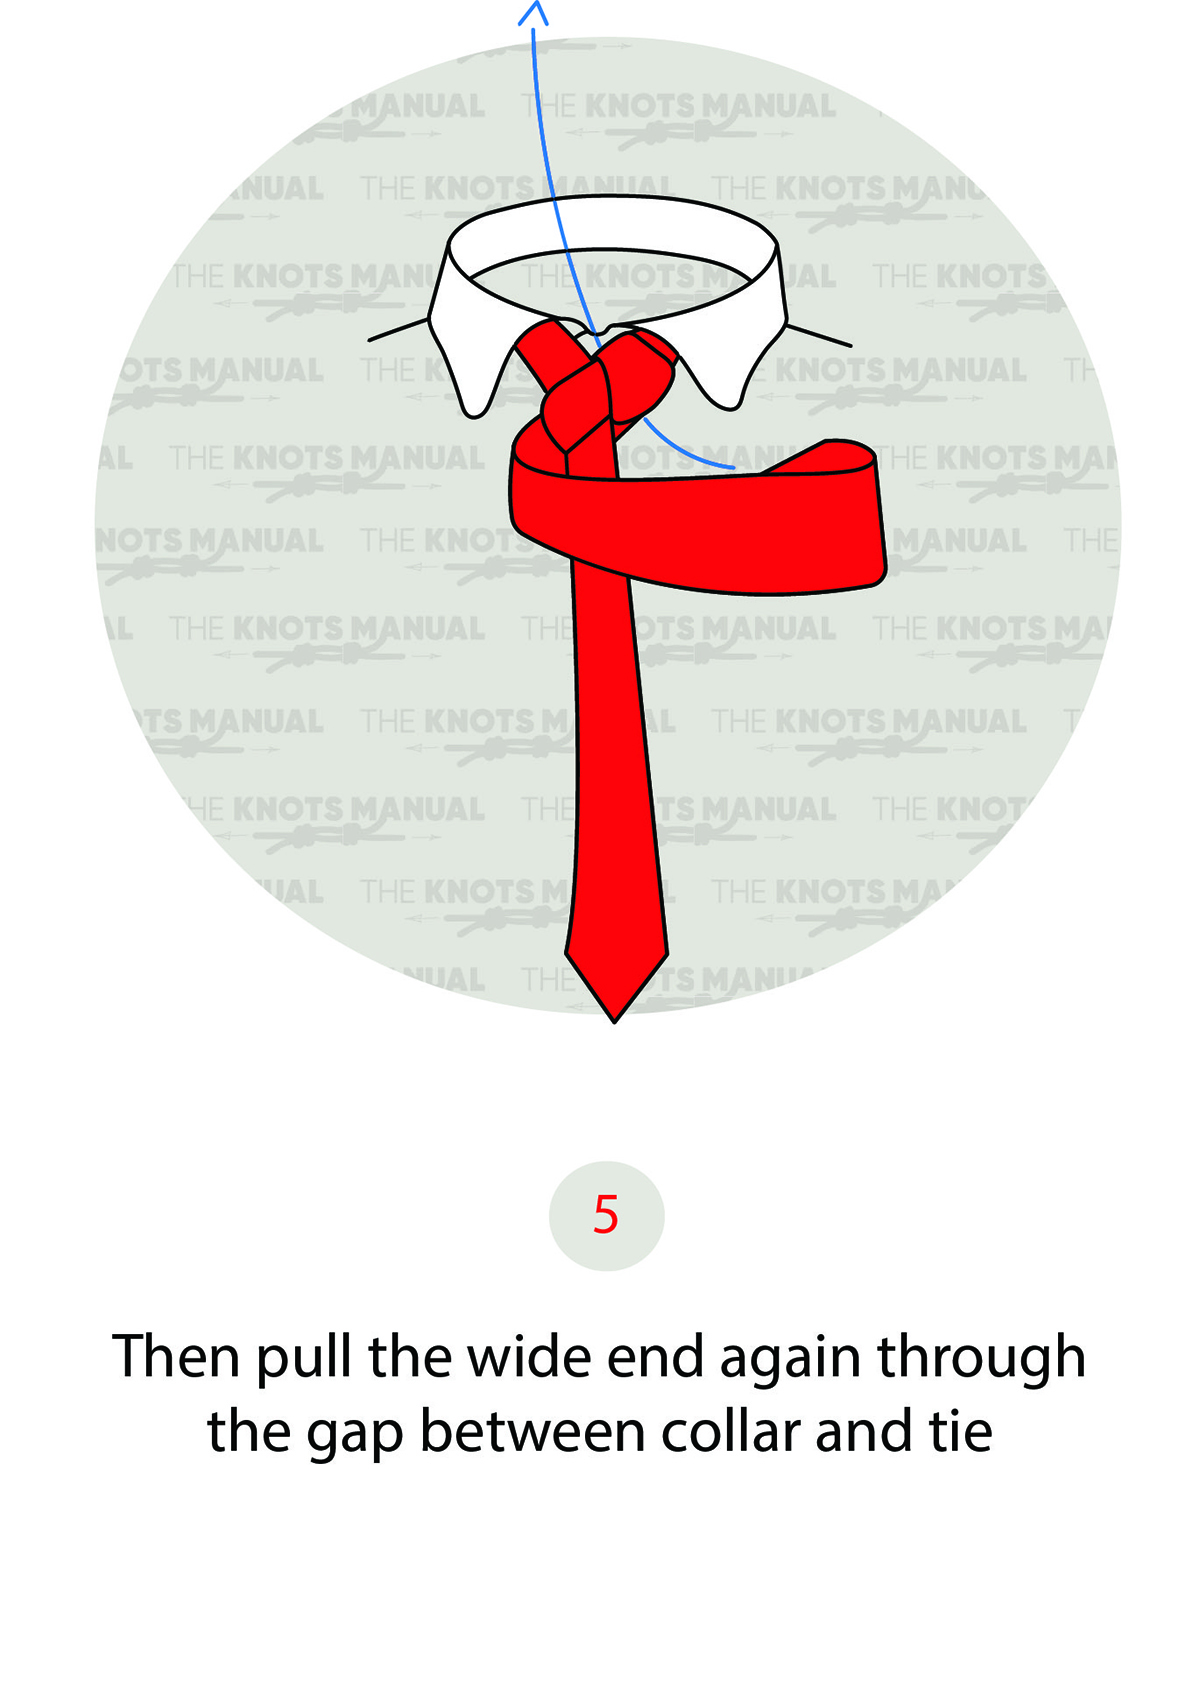
Go behind and over the knot.
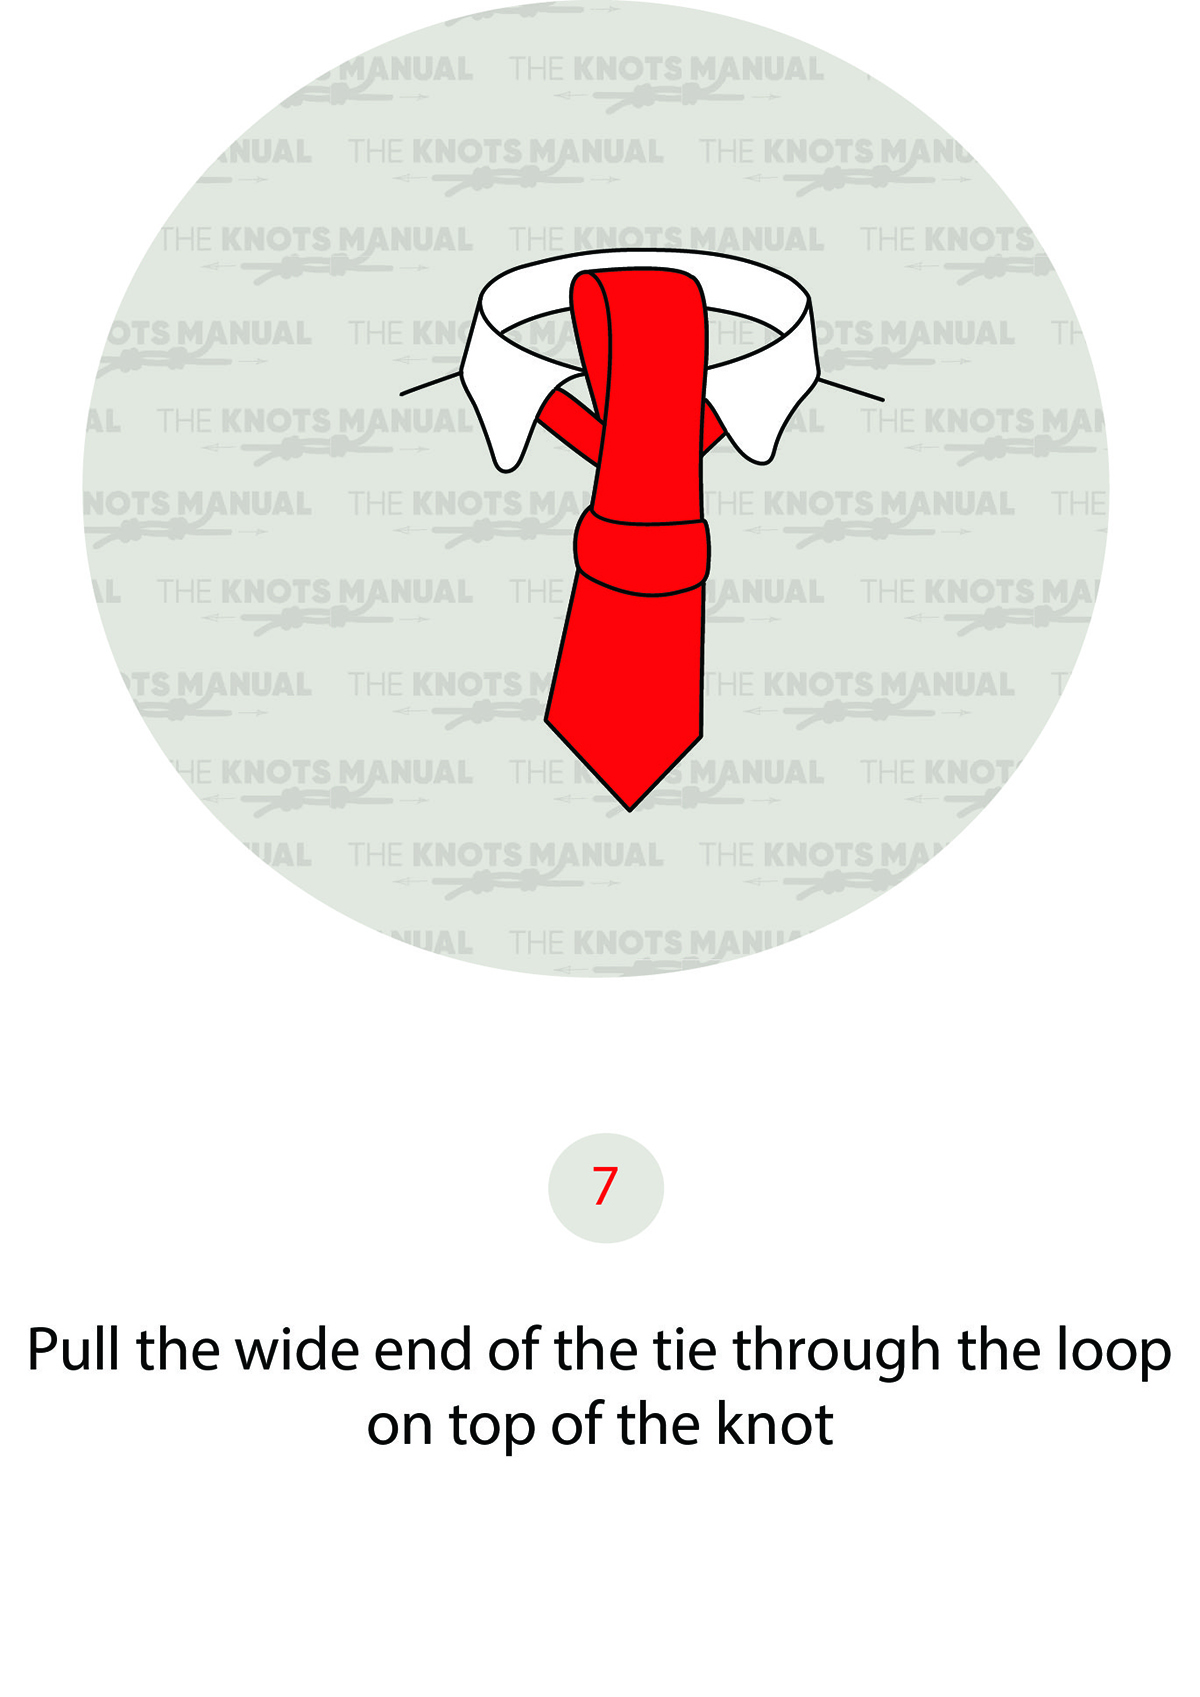
Step 6:
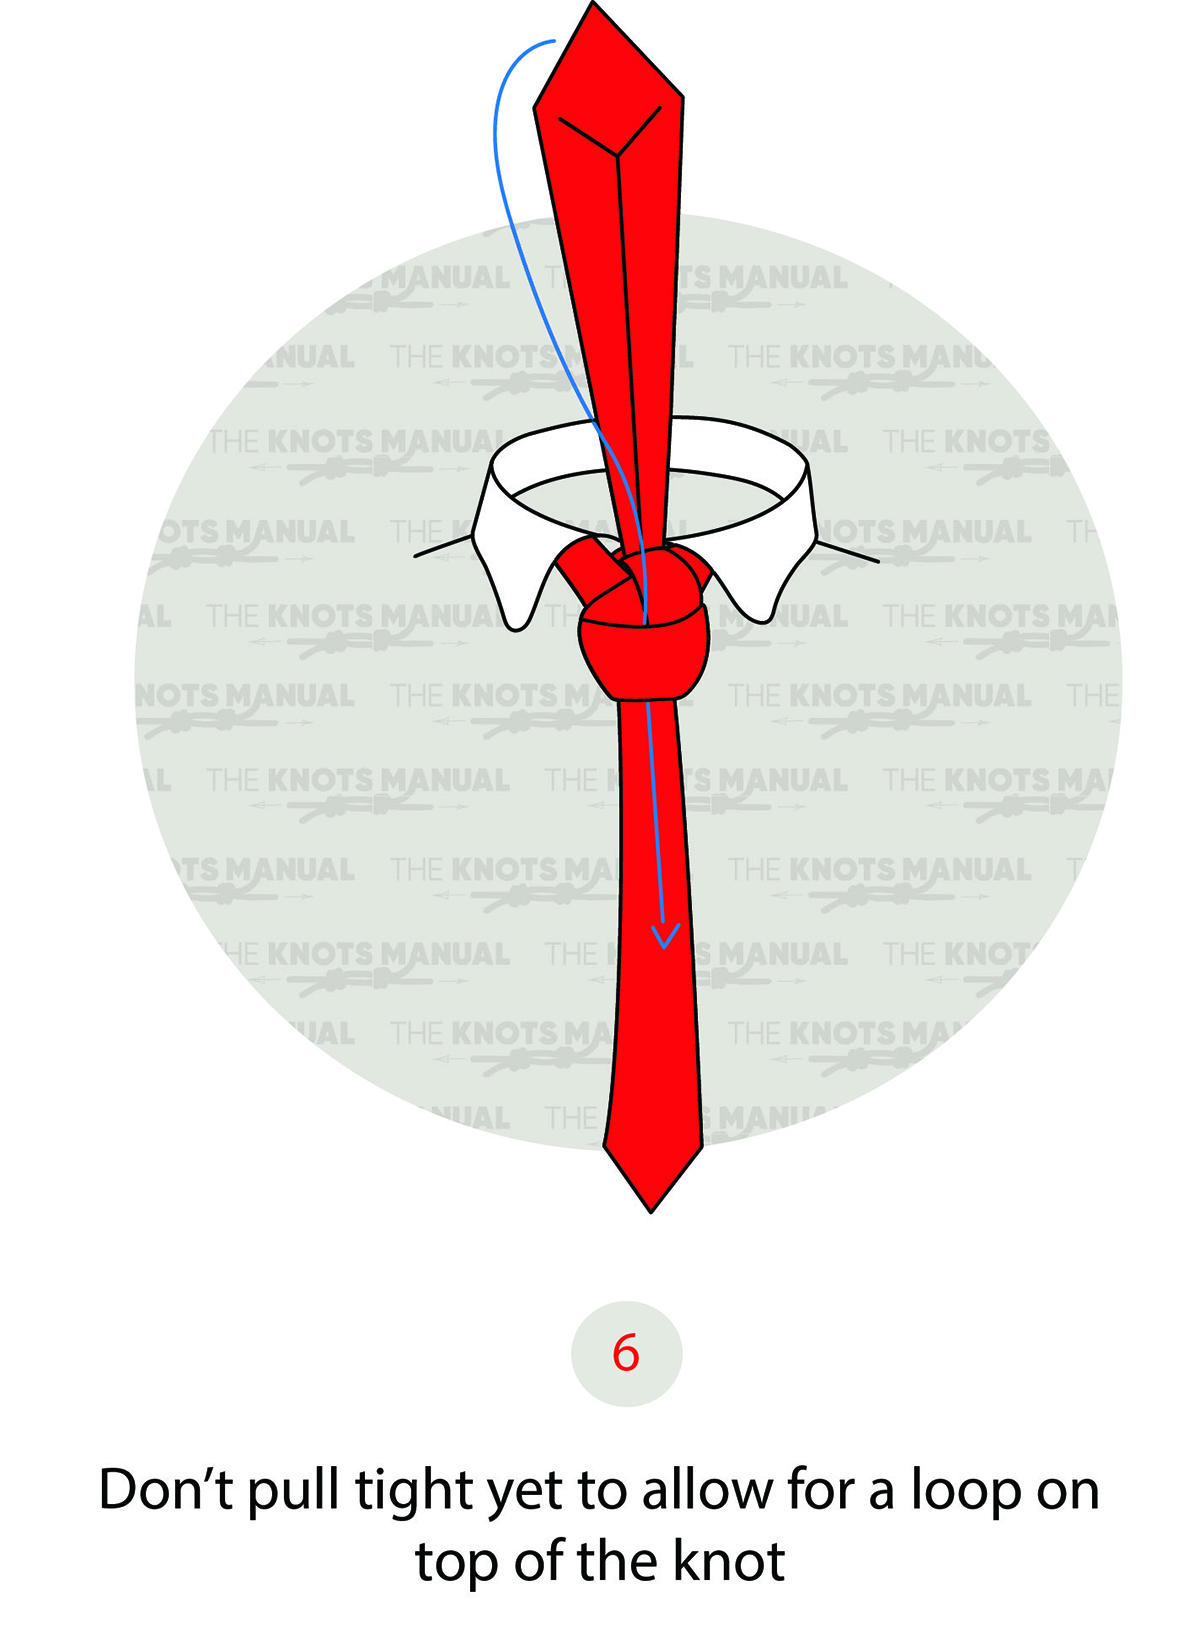
Pass the wide end through the front loop.
Step 7:
Dress the knot so that it looks neat and presentable.
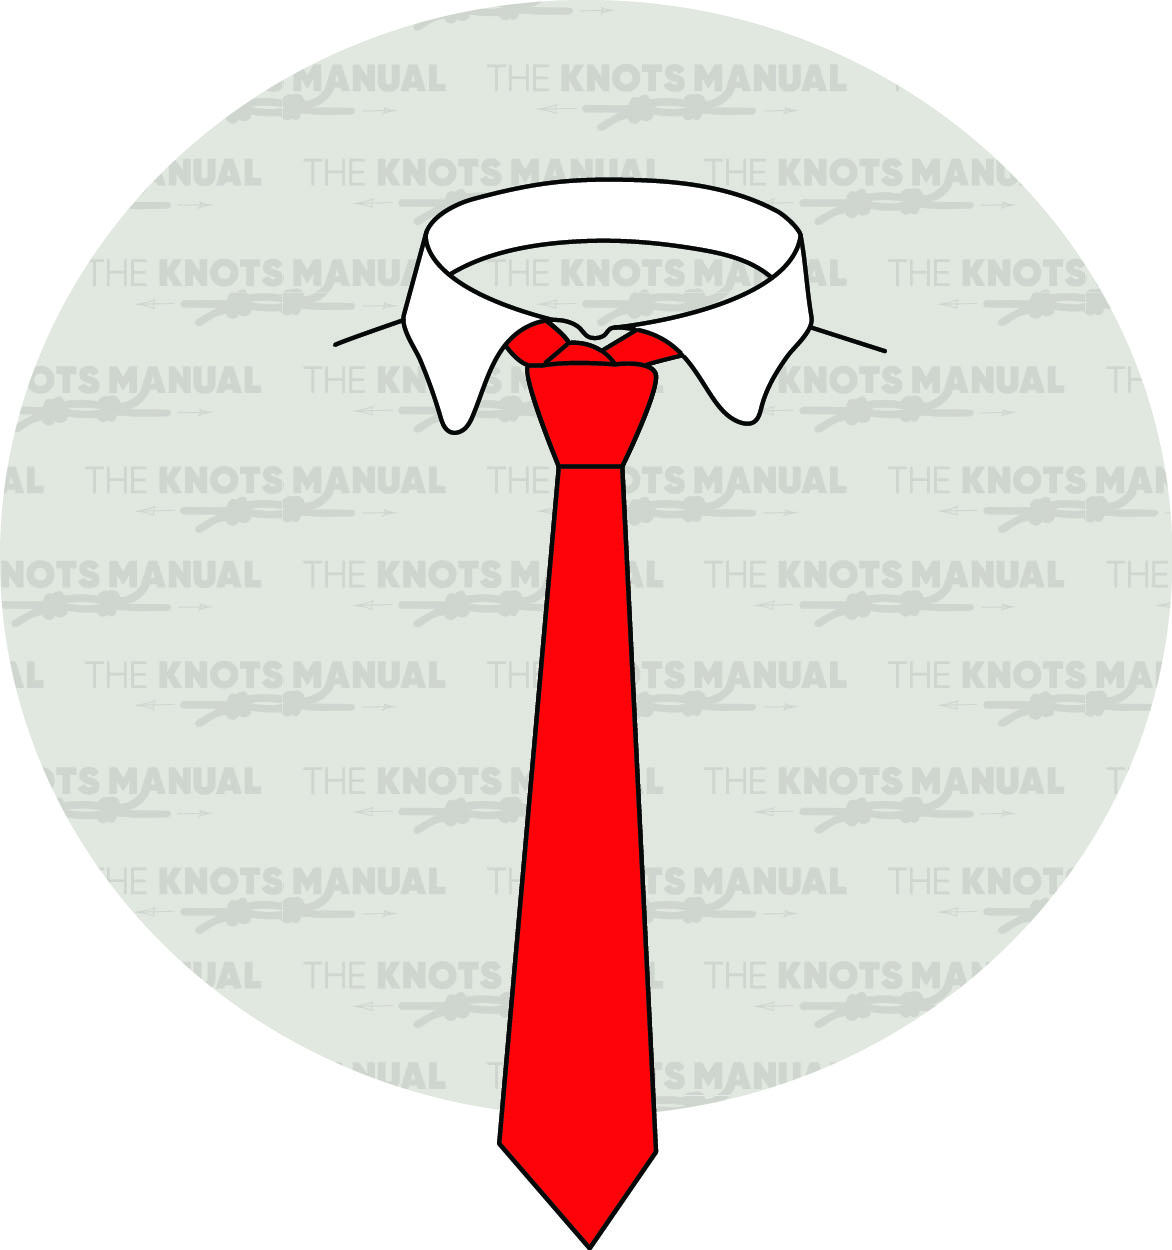
Step 8:
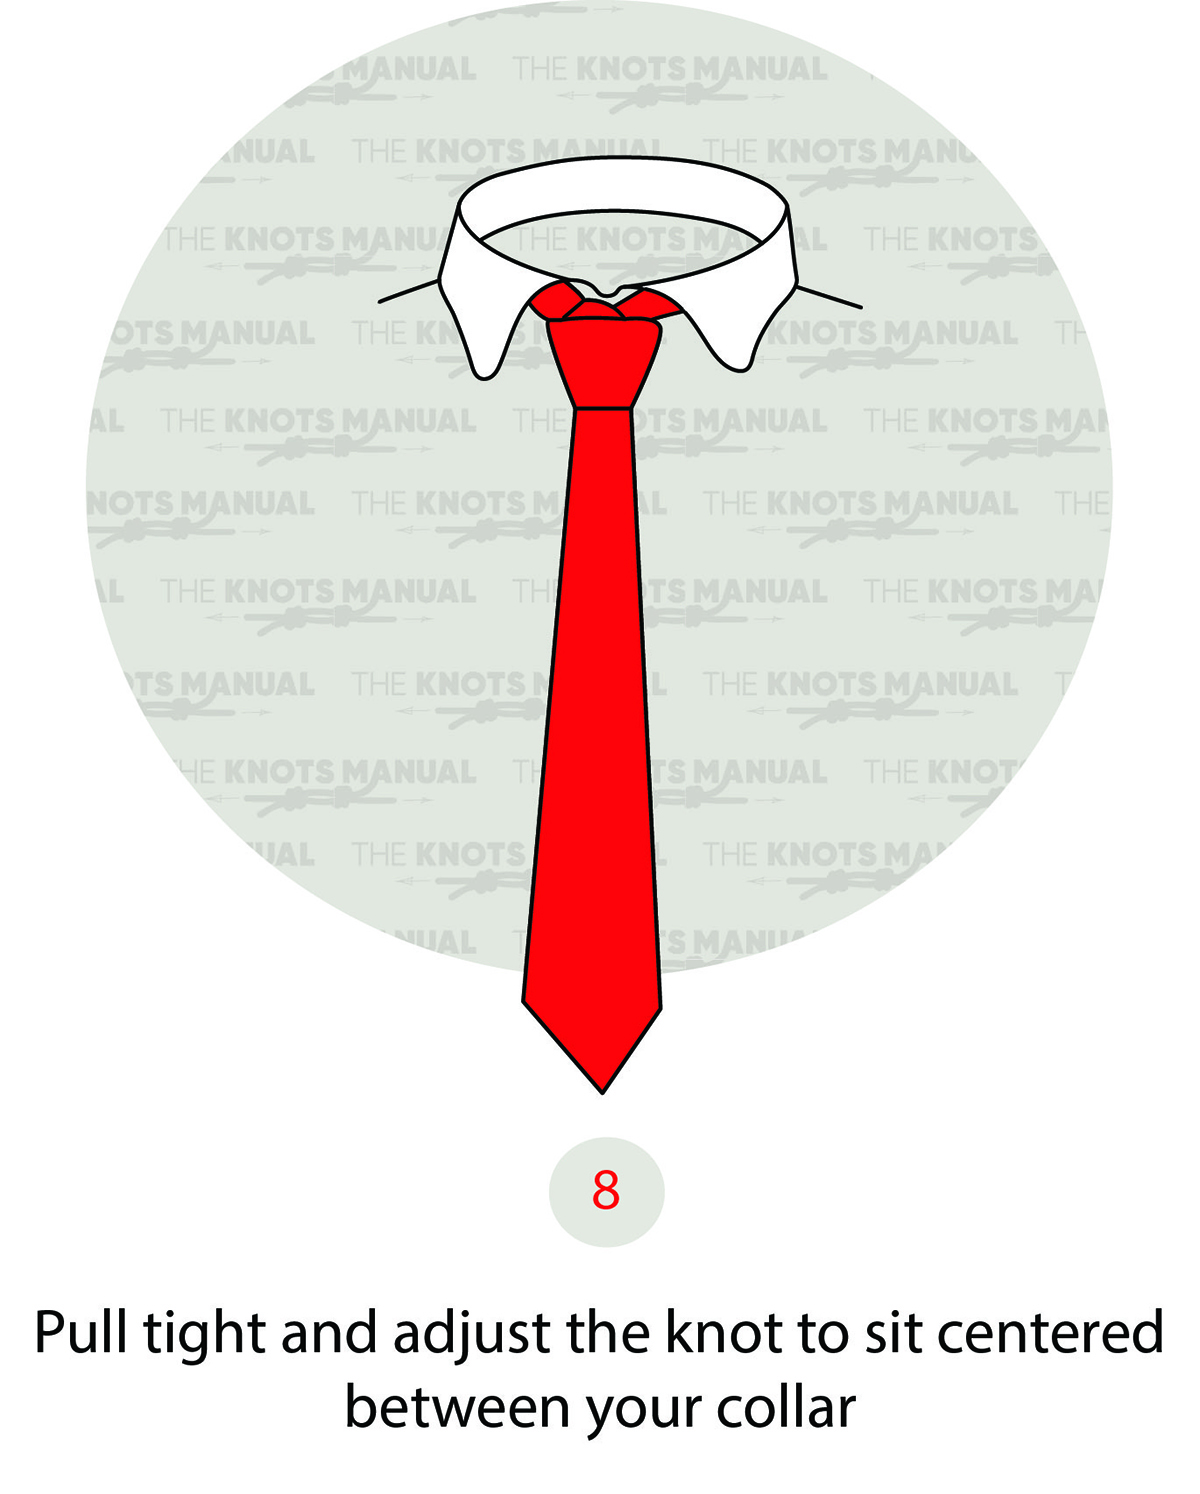
The Half Windsor Tie Knot is finished.