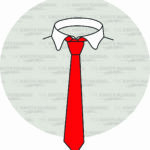
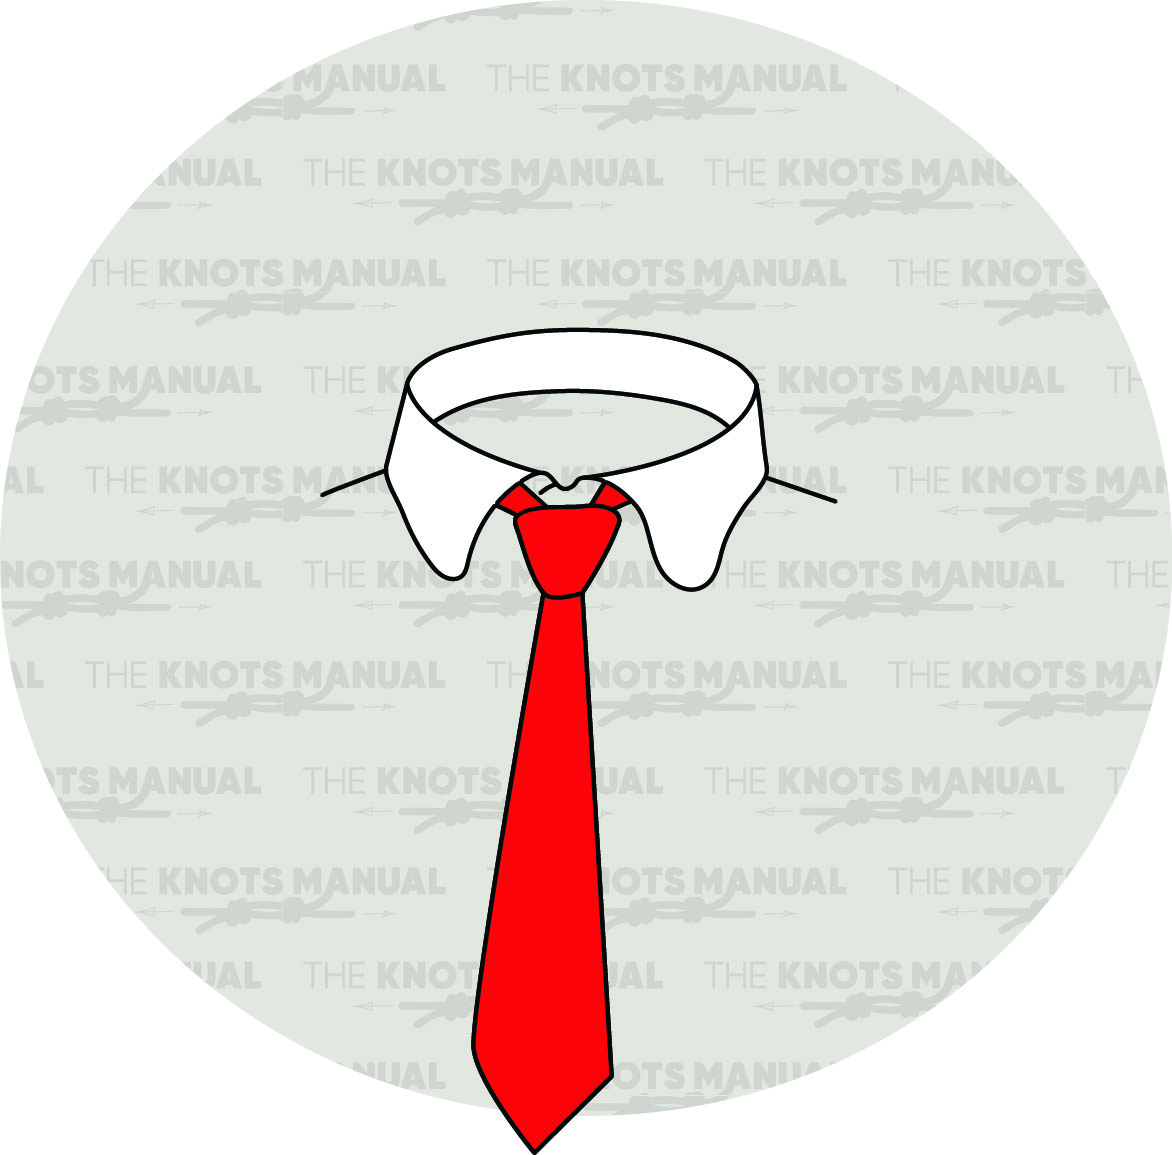
The Pratt Tie knot is a less commonly known knot used for tying a tie. It creates a medium-sized knot that looks tasteful and is of a triangular shape.
In other sources, this knot is also sometimes called the Shelby Tie Knot or the Pratt-Shelby Tie Knot. It’s named after its inventor – Jerry Pratt, and the man who made it famous – Don Shelby.
Quick Guide: Tying the Pratt Tie Knot
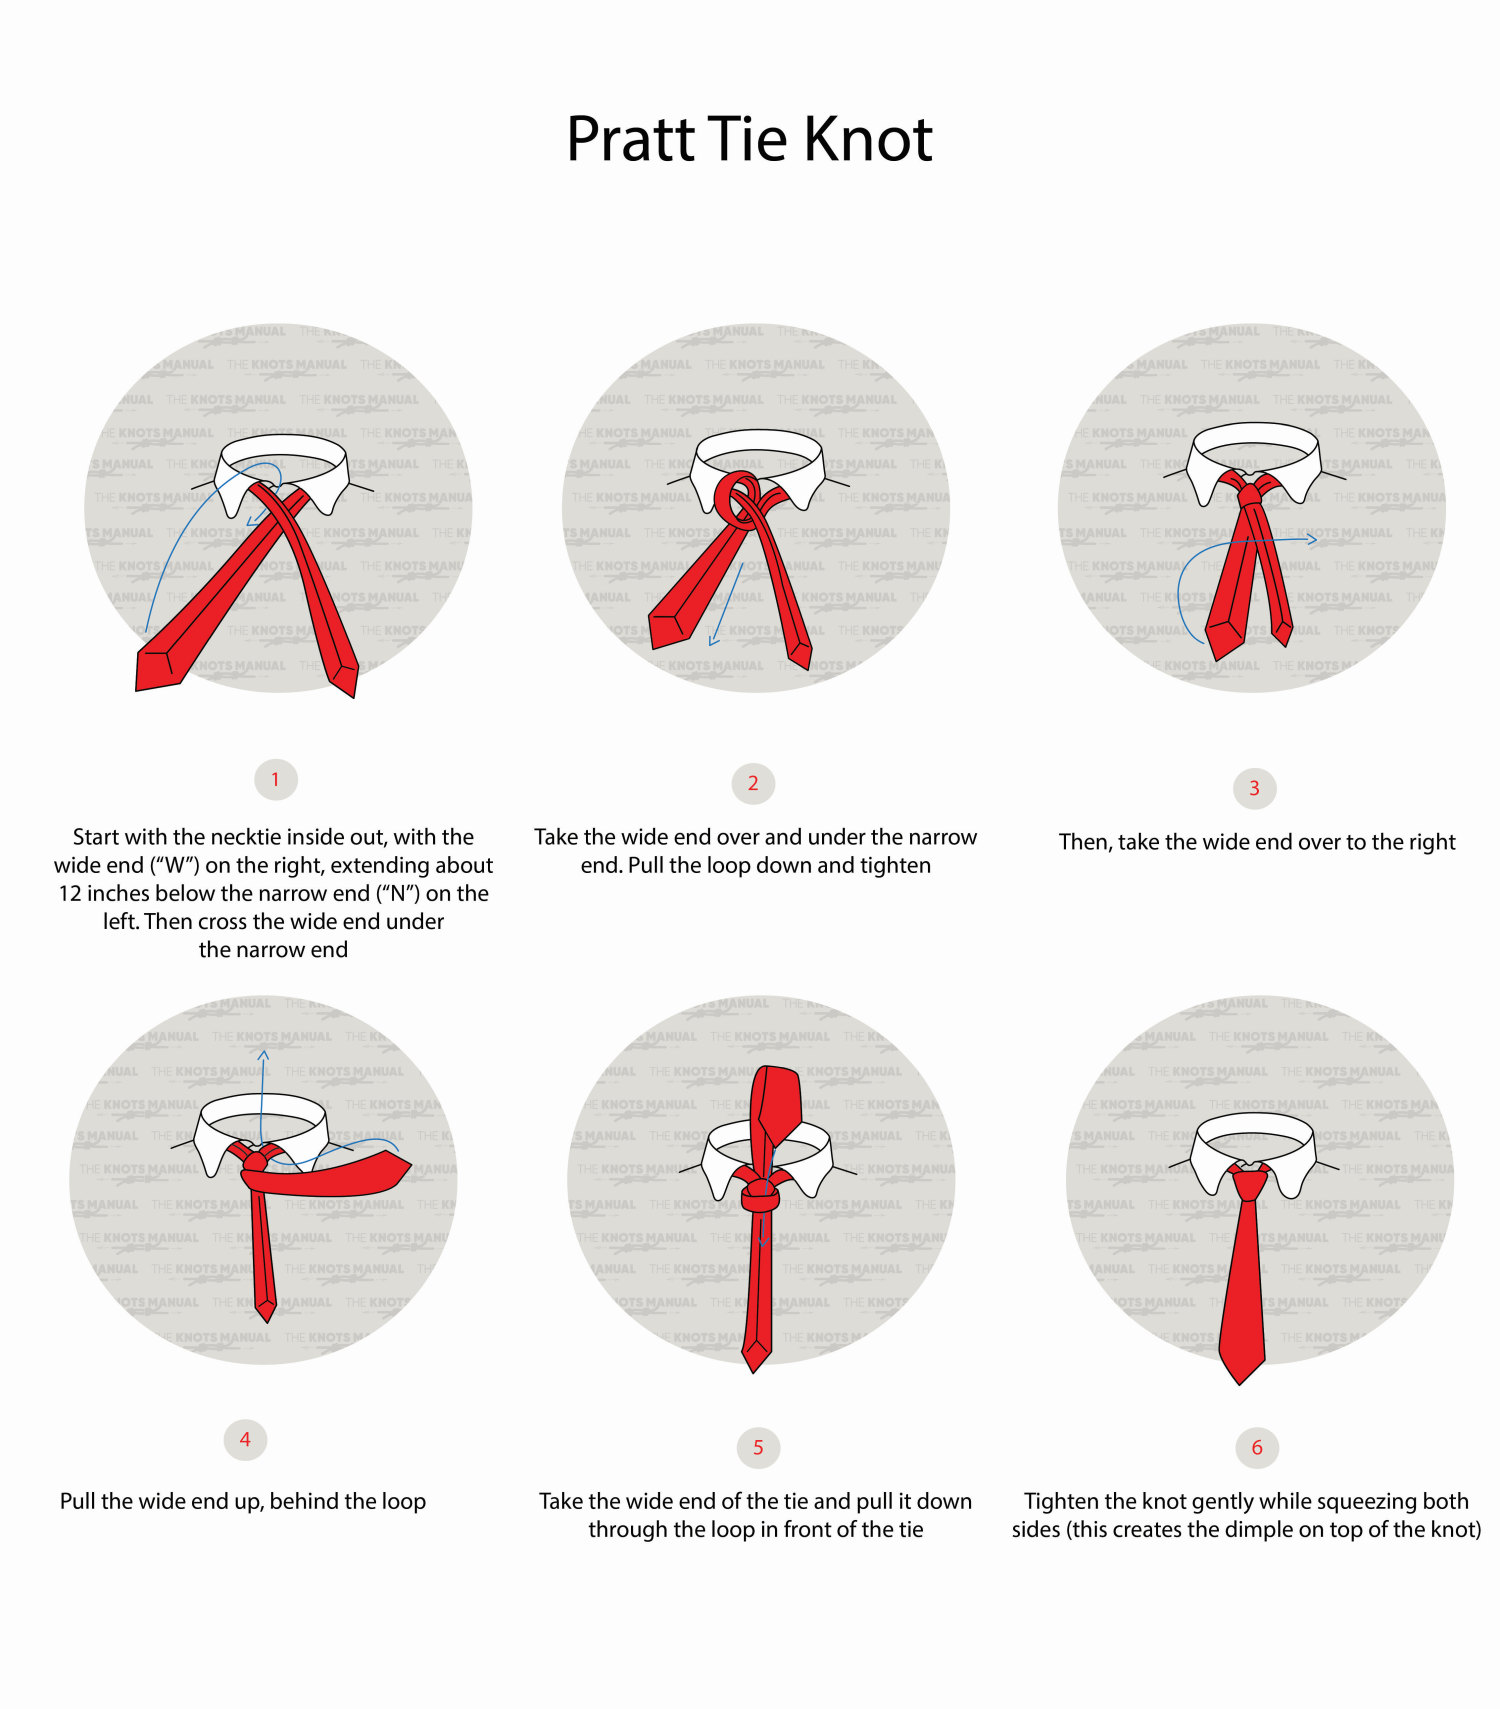
To tie the Pratt Tie Knot, wrap the tie around your neck. The stitches on the tie should be visible. Align the tie in a way where the wide end is 12 inches (30 cm) below the shorter one.
Place the wide end below the narrow one (step 1). Now do one full turn around the narrow end of the tie (step 2). Pass the wide end sideways across the knot (step 3) and over it from the backside (step 4). Now pass it through the front loop (step 5).
The knot is finished, but you still need to dress it. Hold the left end of the loop with one hand and the wide end with your other hand to tighten it. Then correct and align it until it looks tidy.
About the Pratt Tie Knot
The Pratt Tie Knot results in a classic, triangular knot. It looks very similar to the Half Windsor Knot, only smaller. People choose to tie this knot because it looks neat and tidy, with almost no visible turns coming out of the knot.
It goes together very well with medium and wide-collar shirts. It’s perfect to use for formal occasions, presentations, and job interviews due to its formal appearance.
Another benefit is that this knot is very easy to tie. It’s harder than a Four-In-Hand Knot but not as difficult as the Half Windsor.
It also is relatively symmetrical when properly tightened and dressed.
The main downside of the Pratt Tie Knot is that it can slide loose over time. That’s because this knot doesn’t create a lot of friction on the narrow end of the tie. This means that you’ll need to re-adjust it over time
Knots Like the Pratt Tie Knot
Kelvin Tie Knot: The Kelvin Tie Knot is tied very similarly to the Pratt Tie Knot. In step 2, the wide end is wrapped around the narrow end on the bottom side. This results in a more square-shaped knot but with a similarly-large profile.
Half Windsor Tie Knot: A slightly more complicated knot that results in a bulkier shape. It’s also triangular and it holds its tension much better. That’s why it’s also much more widely used.
Full Windsor Tie Knot: The most popular tie knot. It involves one more turn than the Half Windsor Knot. It results in a knot that is even more symmetrical than the Pratt Tie Knot. It looks best when worn with wide-collar shirts, just like the Pratt Knot. Due to its complexity, it’s also much bulkier.
Prince Albert Tie Knot: A knot that’s similar in size and complexity to the Pratt Tie Knot. It’s more square-shaped and it’s looped through two front loops instead of one.
Four-In-Hand Tie Knot: The simplest tie knot, which is often taught to kids. It’s smaller in profile than the Pratt Knot and also not as symmetrical.
Balthus Tie Knot: One of the largest tie knots. It involves even more steps than the Full Windsor Knot. It goes together very well with wide-collar shirts.
Step-By-Step Guide: How to Tie the Pratt Tie Knot
A step-by-step guide on how to tie the Pratt Tie Knot.
Step 1:
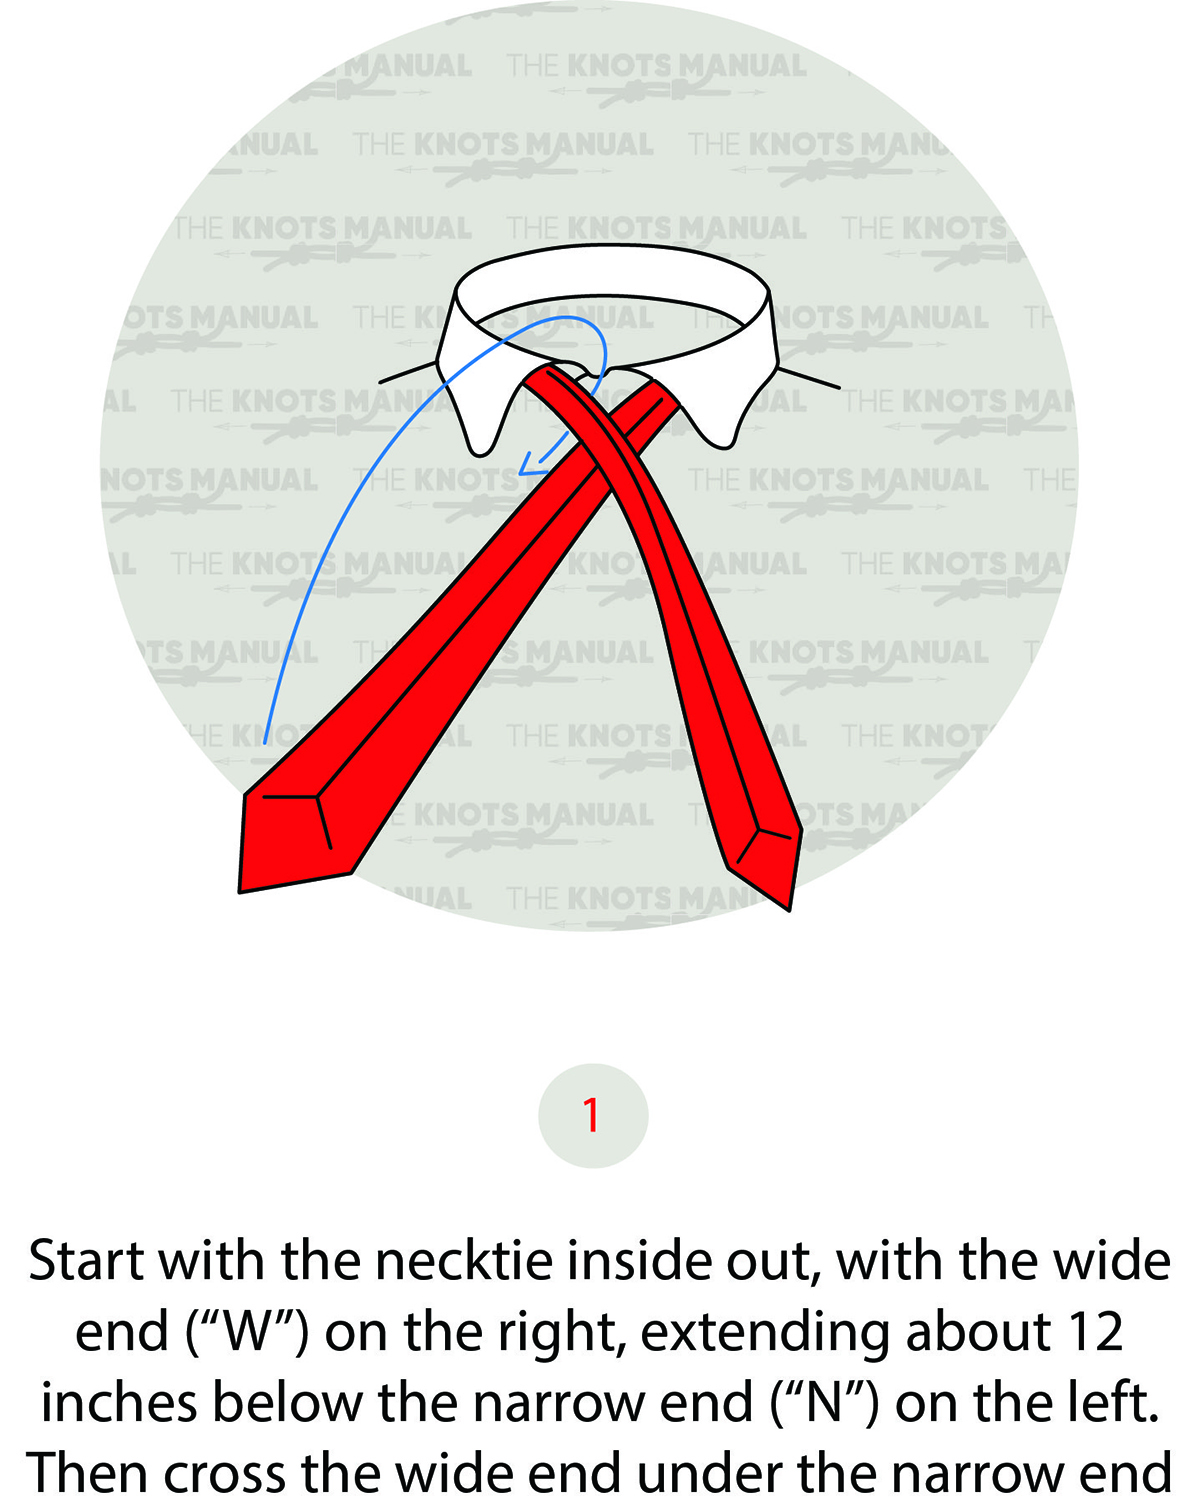
Wrap the tie around your neck and place the wide end below the narrow one. The tie should be laid out with the stitches visible and the narrow end 12 inches (30 cm) shorter than the wide end.
Step 2:
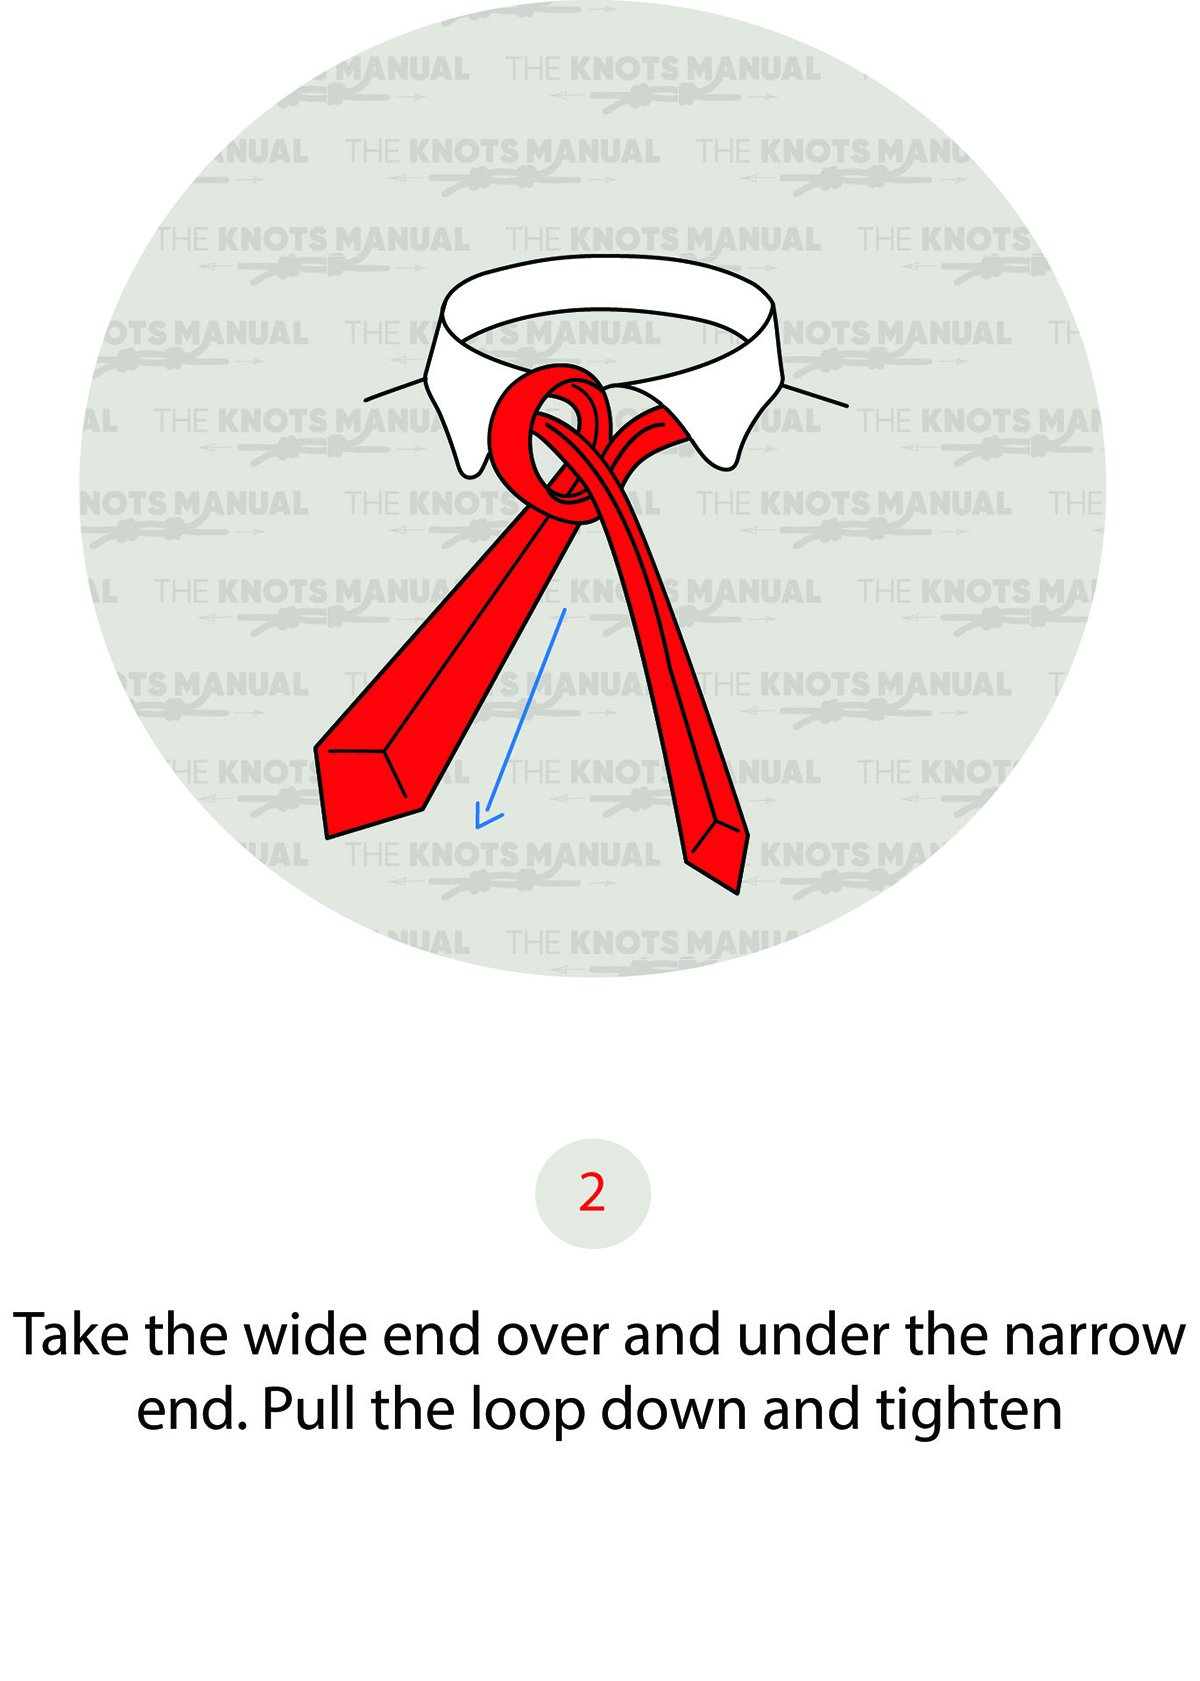
Wrap the wide end around the narrow end one full turn from the top direction.
Step 3:
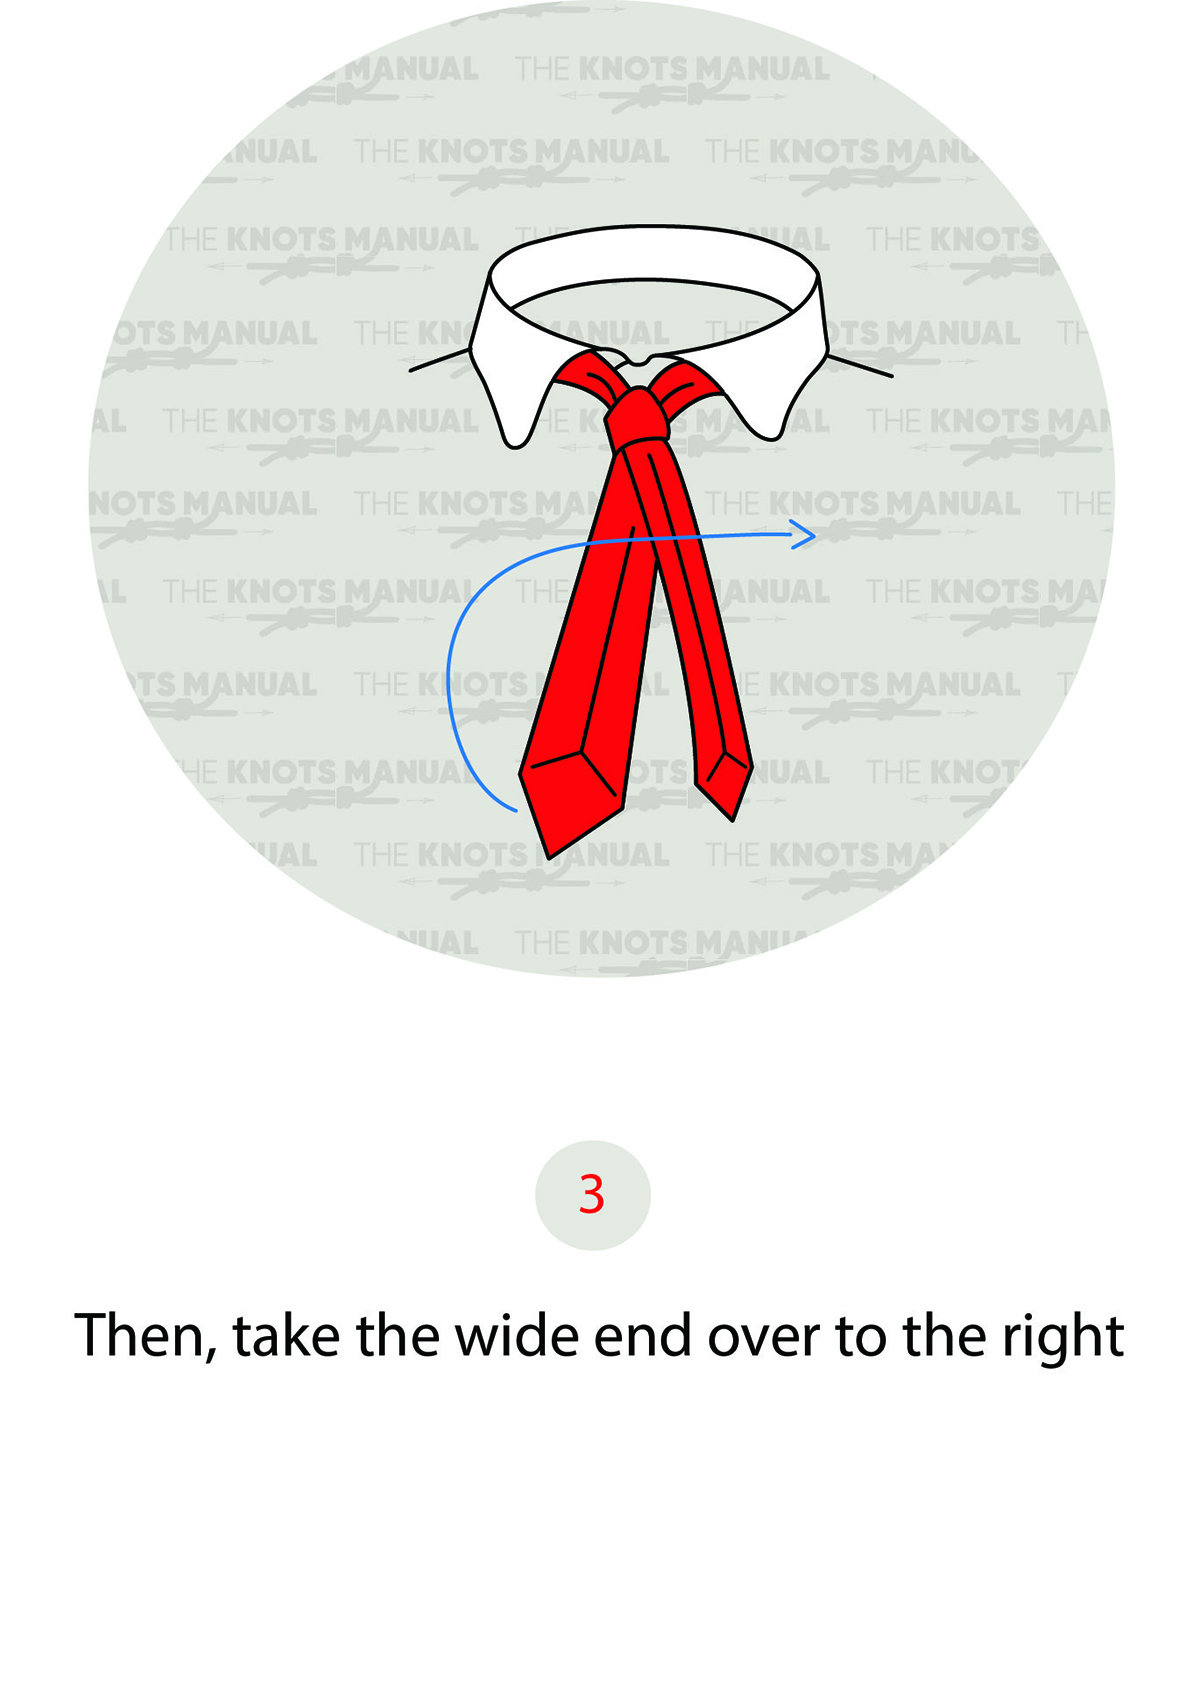
Pass the wide end sideways across the knot.
Step 4:
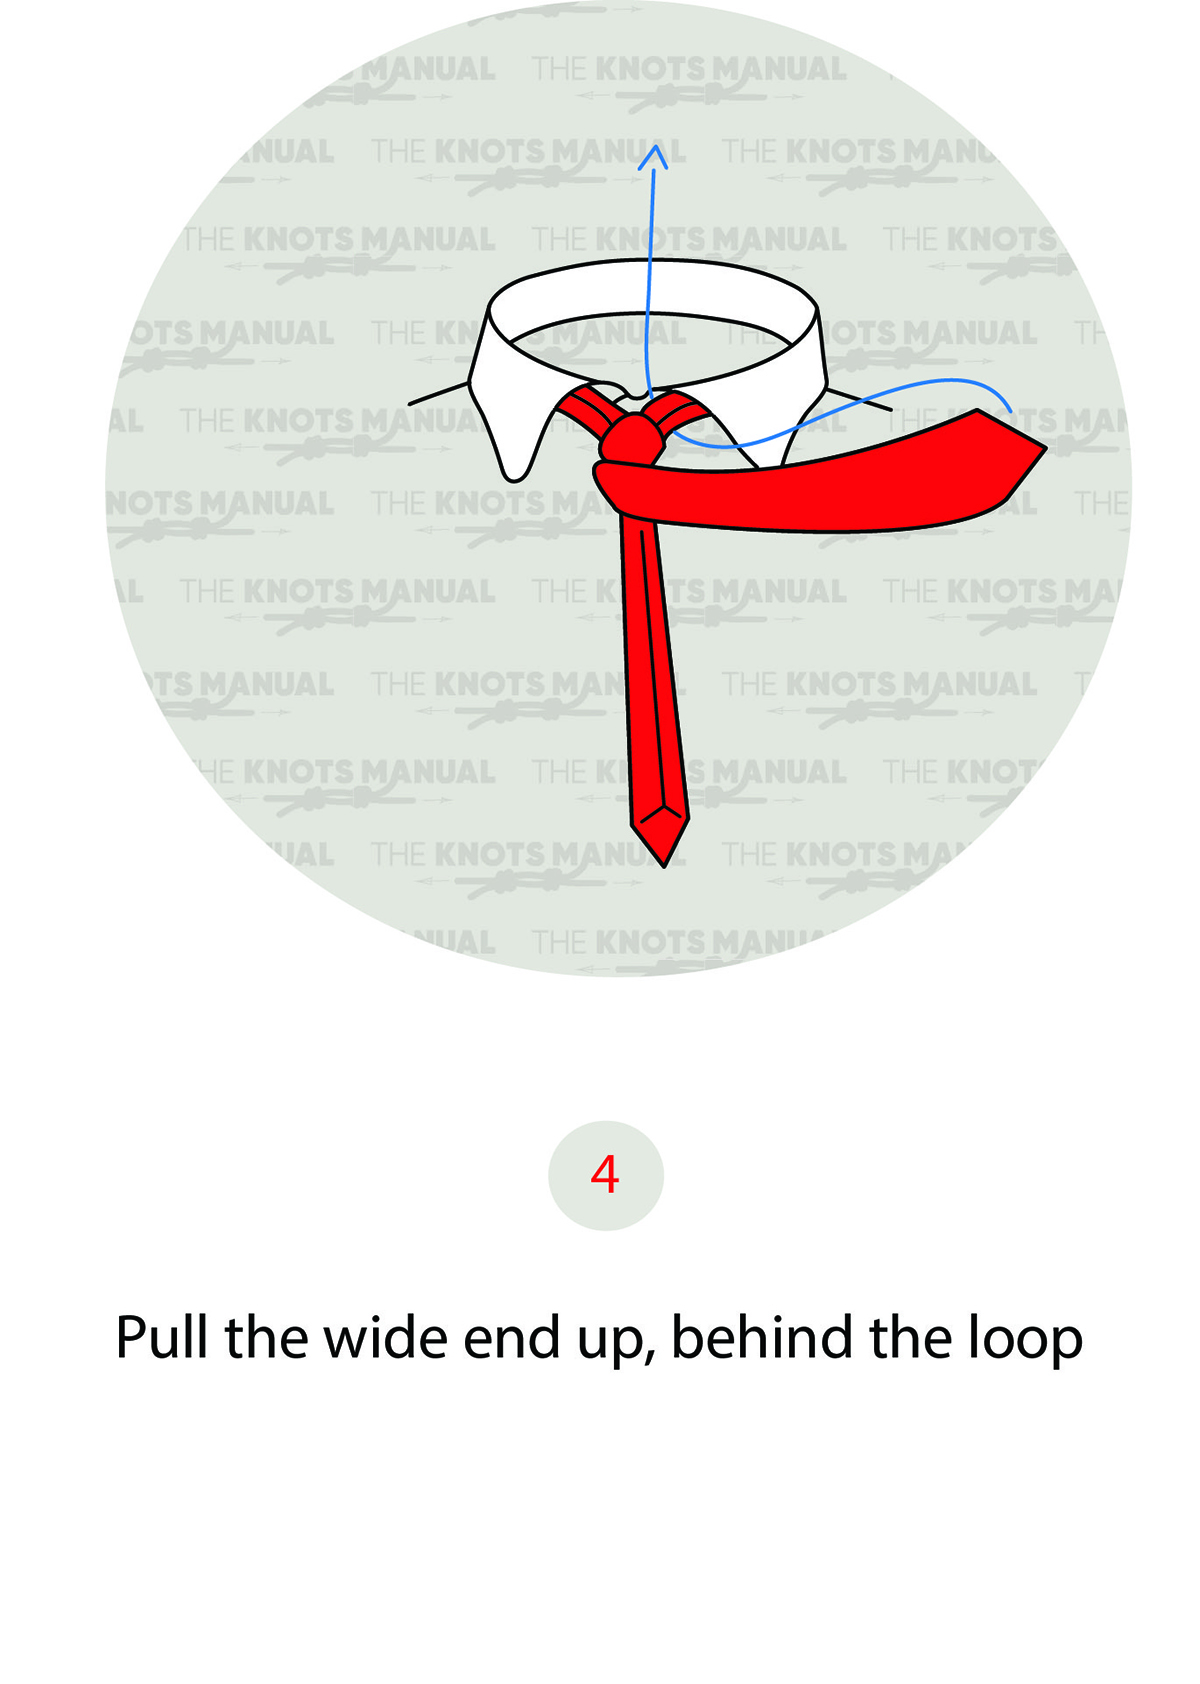
Now pass it over the knot from the back.
Step 5:
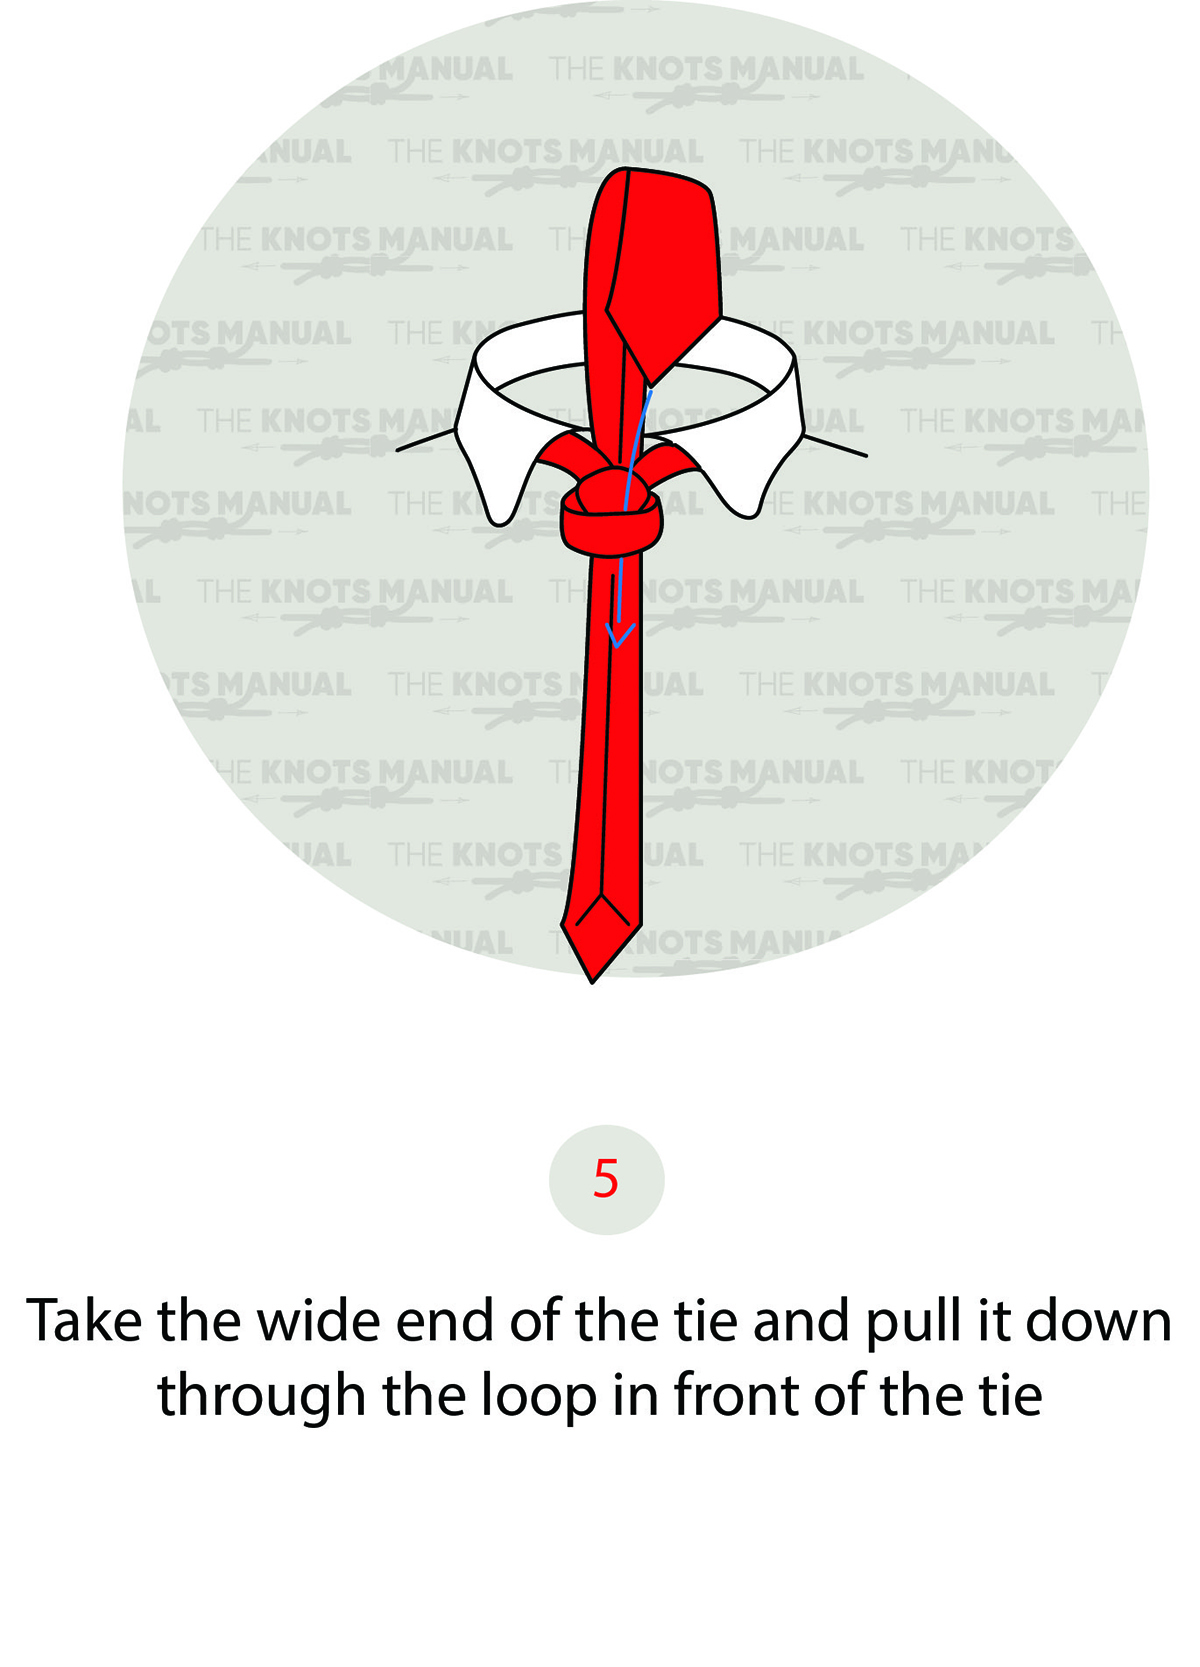
Pass the wide end through the front loop.
Step 6:
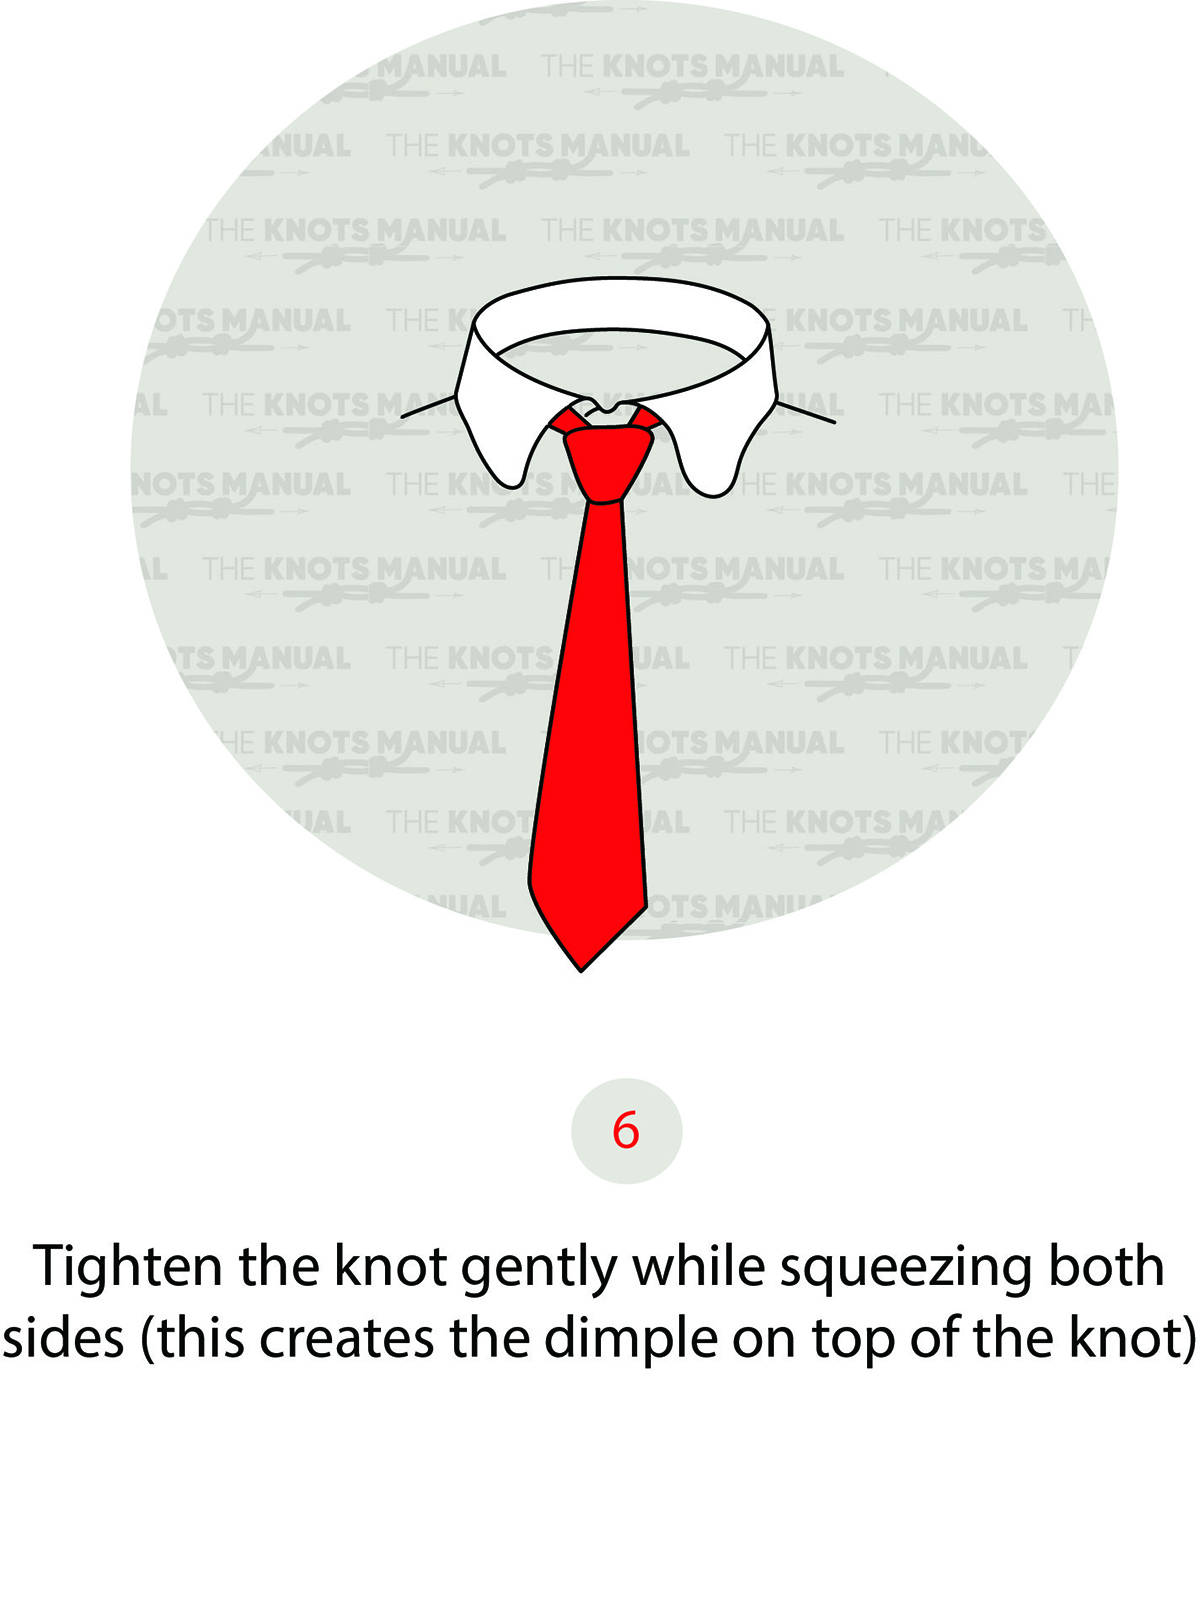
Tighten and dress to finish the Pratt Tie Knot.