The Trinity Tie Knot is used to create a triangular, bulky, and symmetrical tie knot. It has a very distinct look, which you can use to your advantage to stand out.
Quick Guide: Tying the Trinity Tie Knot
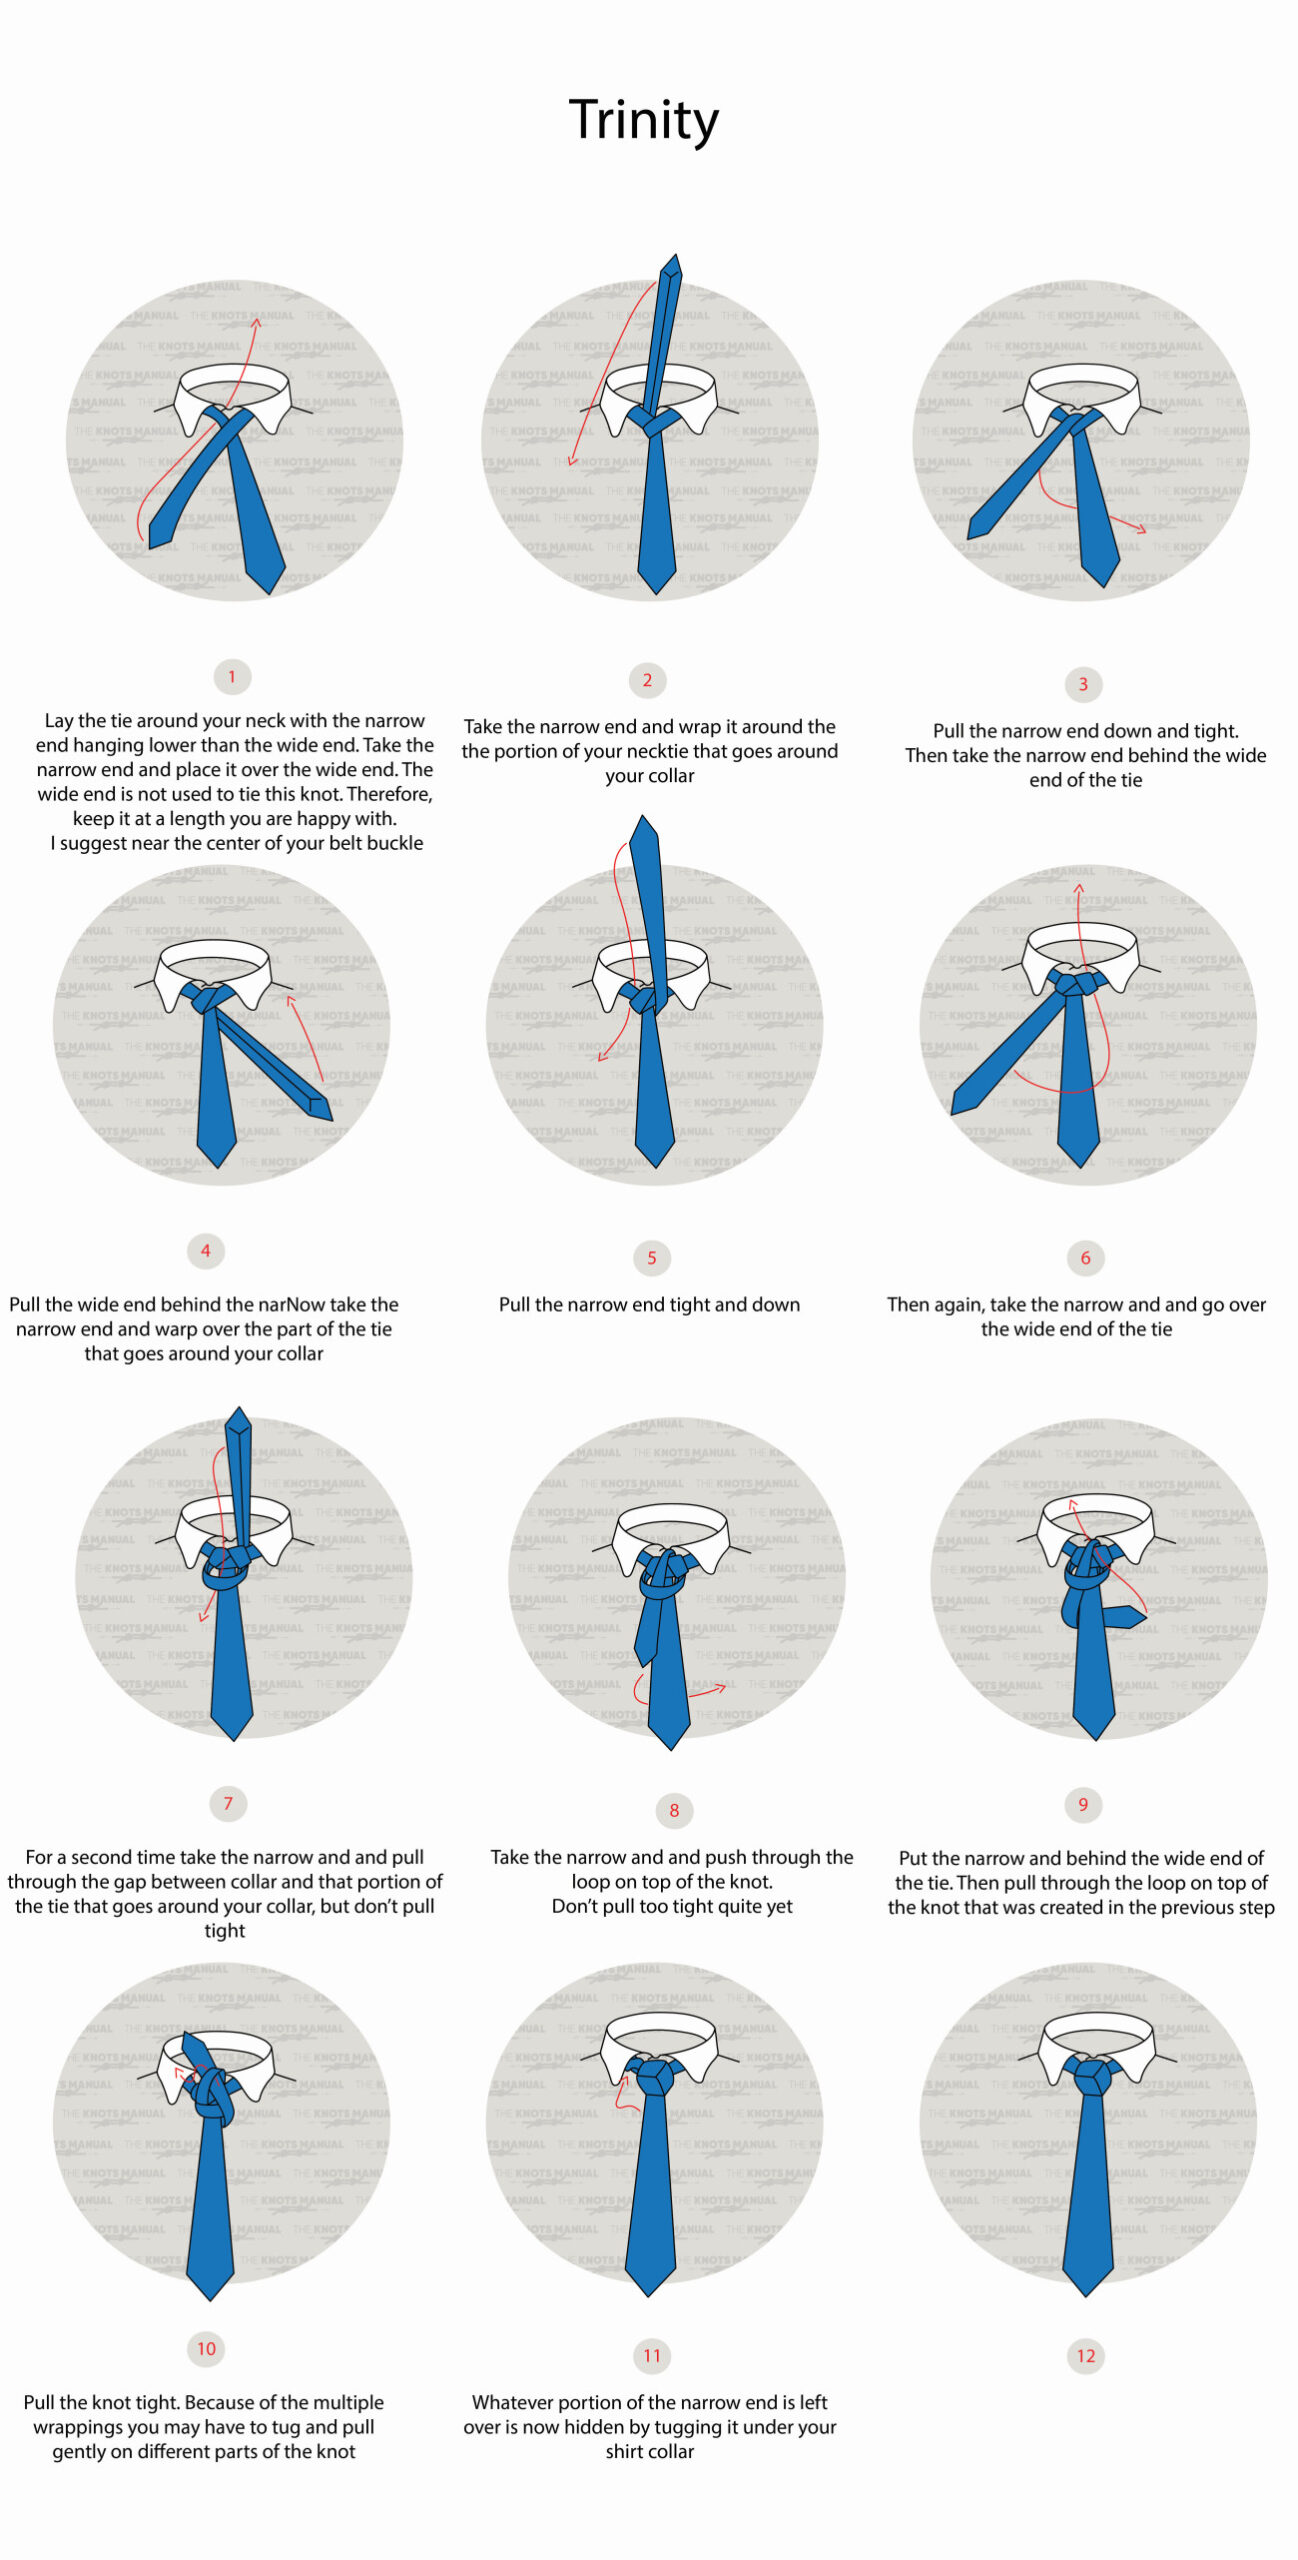
To tie the Trinity Tie knot, lay out the tie around your neck. Adjust the wide end so that it sits at the desired length. When tying this tie knot, you’ll be working with the narrow end and the wide end will remain in place.
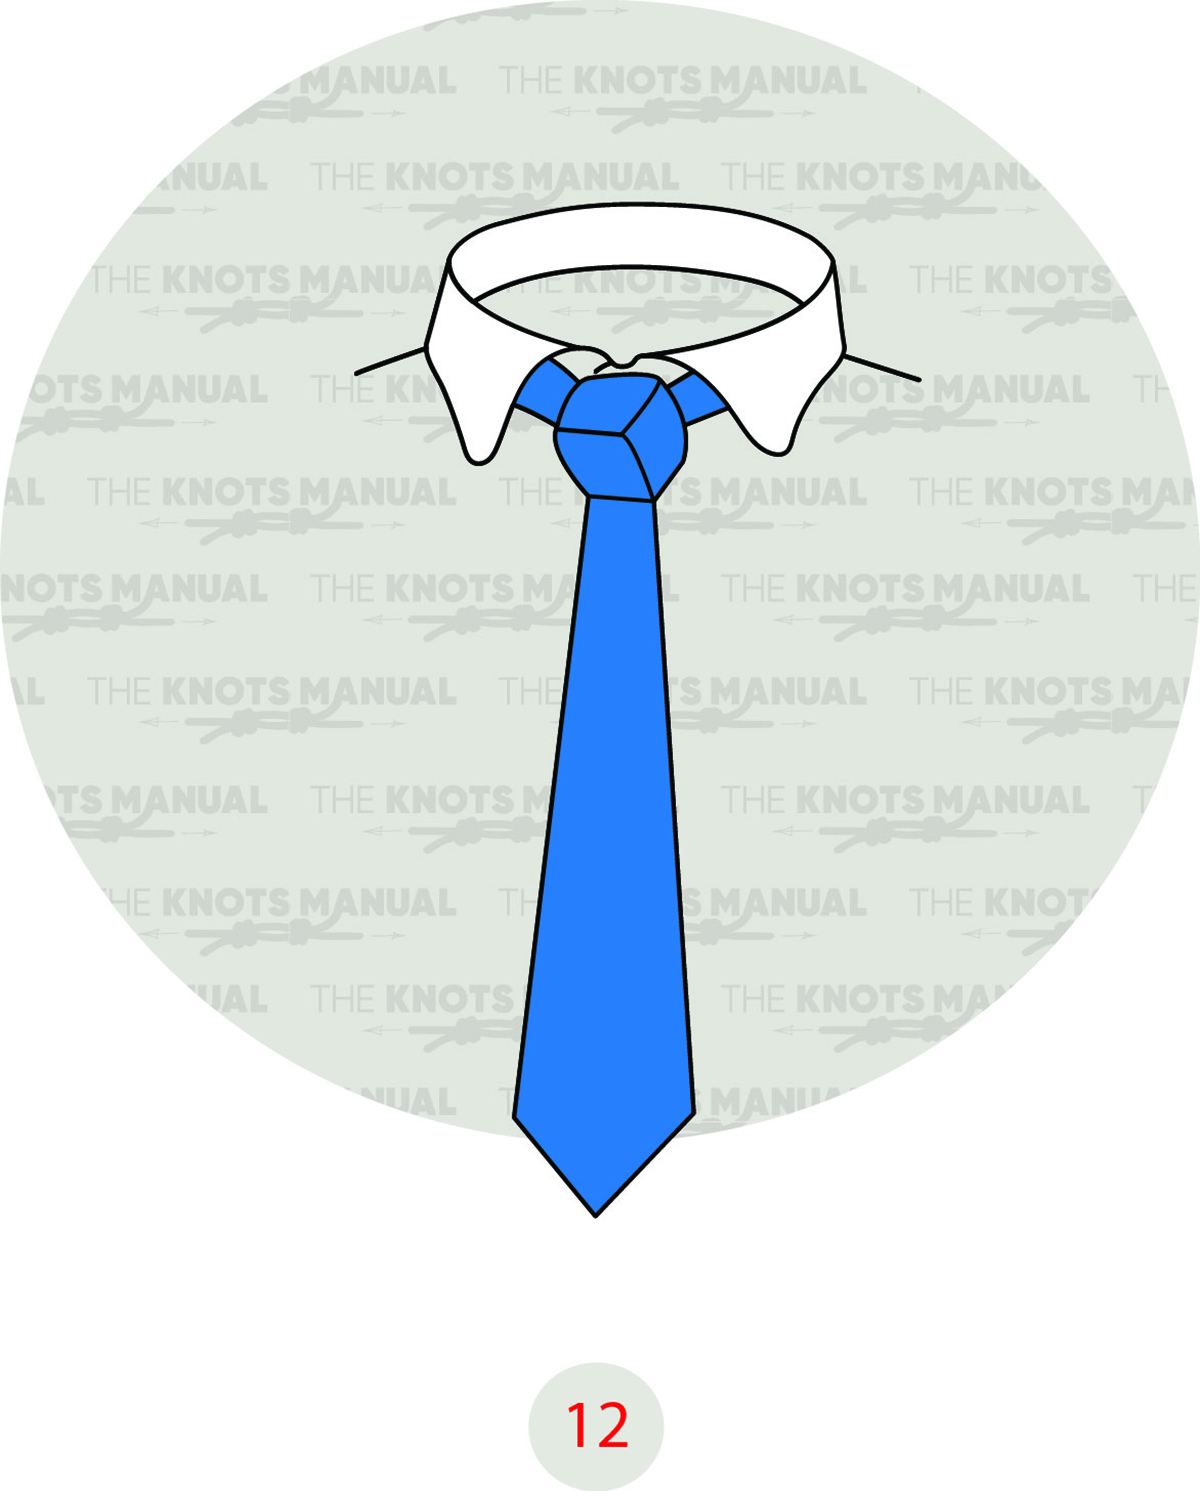
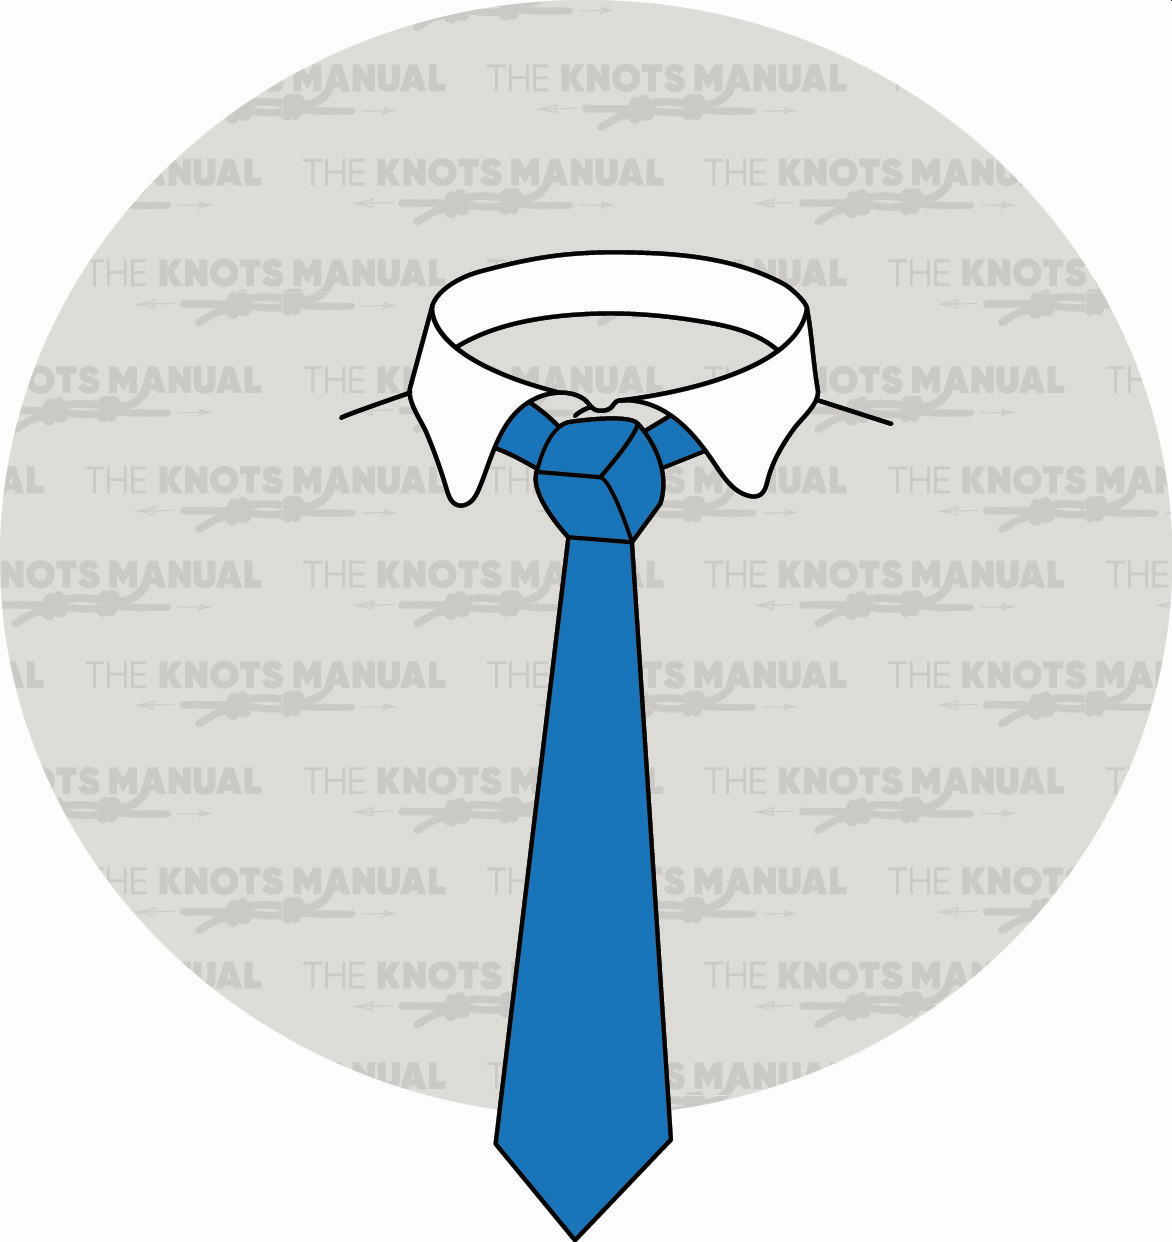
Pass the narrow end over the wide end and around it from the top side (steps 1-2). Now pass it behind and over the right side, exiting on the left side (steps 3-5). Pass it sideways across the front side of the wide end and around the right side (steps 6-7). Now go through the front loop, but don’t tighten it fully (step 8). Go behind the wide end and through the vertical loop on the front side of the knot (steps 9-10). Finally, tighten and dress the knot and hide the narrow end underneath the left side of the shirt collar (steps 11-12).
Tip: Tighten the knot as you go until step 5. After that, keep the rest of the strands loose until you reach the last step.
About the Trinity Tie Knot
The Trinity Tie Knot is a recent tie knot that looks similar in appearance to the Celtic Trinity Knot (other called Triquetra). It creates a very distinct-looking, symmetrical knot with three equal parts that meet in the center.
It’s one of the few tie knots that are tied with the narrow end. Most of it is consumed while tying the knot and the remaining end is hidden underneath the collar. It’s tied using many turns, which makes the resulting knot quite bulky.
The main disadvantage of the Trinity Tie Knot is that it is complicated to tie. You need to learn and remember 12 different steps, making it one of the most difficult tie knots.
When and How to Wear the Trinity Tie Knot
The Trinity Tie Knot is very bulky, which means that you should wear it with wide-collar shirts. To make it less bulky, you can use a thinner and narrower tie. But a lot of people choose to tie it with a wide and thick tie to make it stand out even more.
It’s best paired with simple outfits because the knot itself sits at the center of attention. Wear it at informal parties, weddings, and on occasions where you want to impress other people. Just be careful to not overdo it because some people think that the Trinity Tie Knot is just too much.
Knots Like the Trinity Tie Knot
Eldredge Tie Knot: A similar knot to the Trinity Tie Knot, which is even harder to tie and results in an even bulkier knot. It isn’t as symmetrical as the Trinity Tie Knot and is also used as a statement piece to stand out.
Murrell Tie Knot: Another interesting tie knot. In it, the narrow end exits in front of the wide end, resulting in a very unique look. It has a medium-sized, triangular profile.
Windsor Tie Knot: A wide, classical tie knot that is best used for very formal events. It’s one of the most classic tie knots, used to achieve an elegant look. It’s symmetrical and shaped like a triangle.
Balthus Tie Knot: One of the bulkiest tie knots, resulting in a similar size to the Trinity Tie Knot. It also requires a lot of steps to tie, but it looks more classical, with a symmetrical, triangular shape.
Step-By-Step Guide: How to Tie the Trinity Tie Knot
A step-by-step guide on how to tie the Trinity Tie Knot.
Step 1:
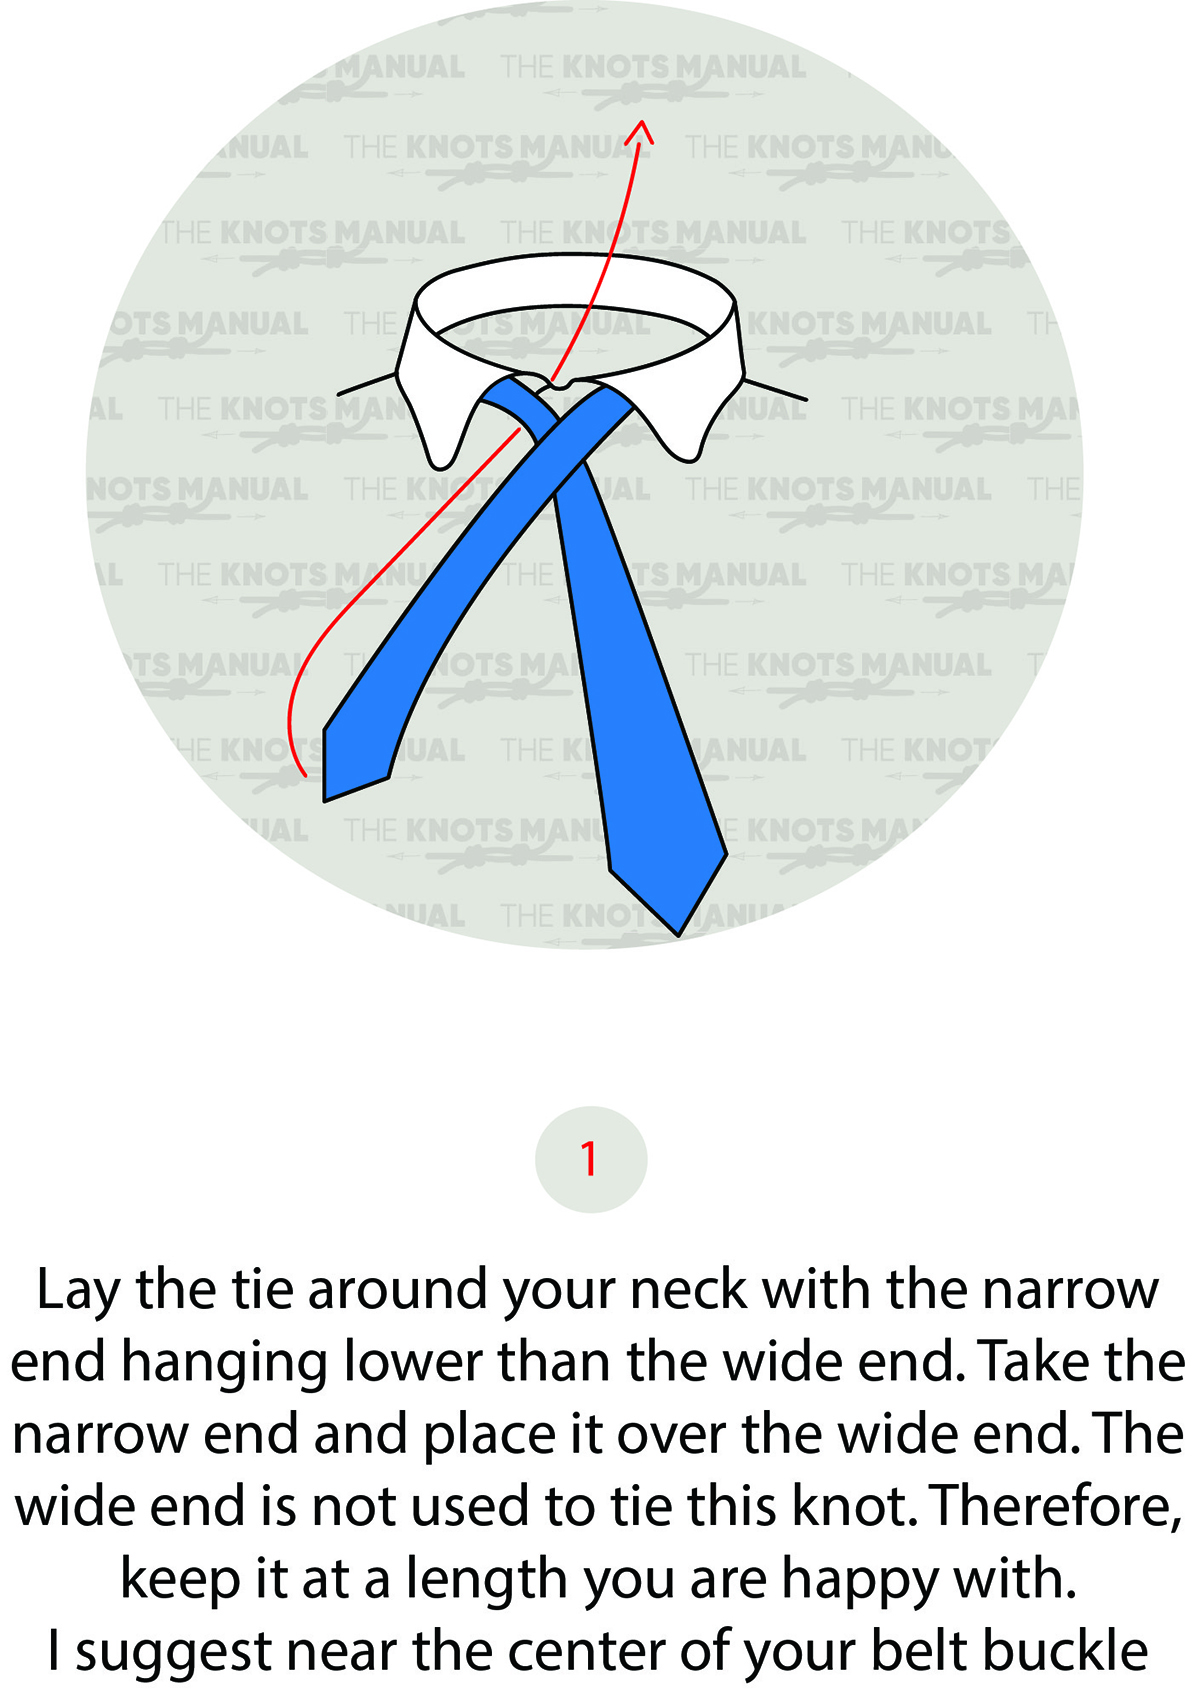
Lay the tie around your neck with the wide end sitting at the desired length. Cross the narrow end over it and then go around it from the top side.
Step 2:
Pass the narrow end down so that it sits parallel to the wide end.
Step 3:
Pass the narrow end behind the wide end.
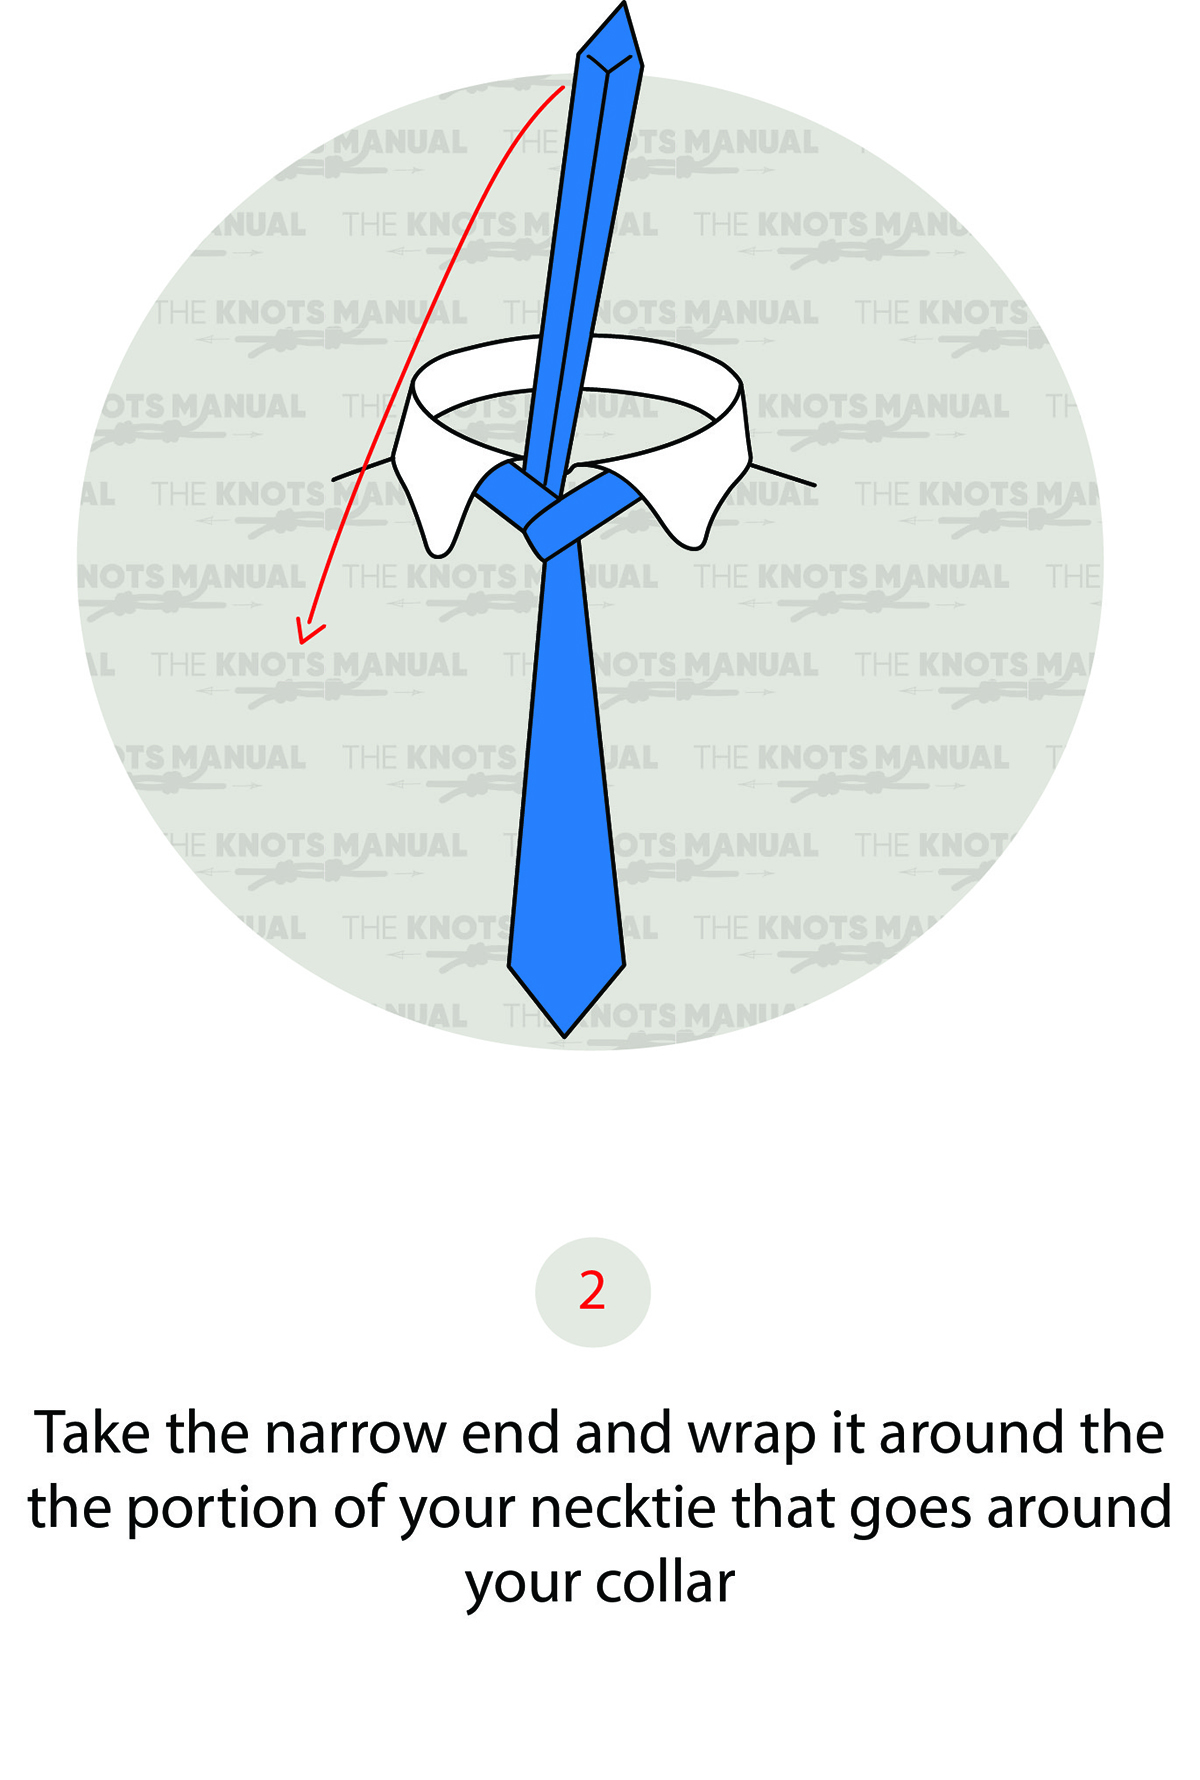
Step 4:
Cross the narrow end over the right side of the knot from the top.
Step 5:
Exit on the left side of the knot.
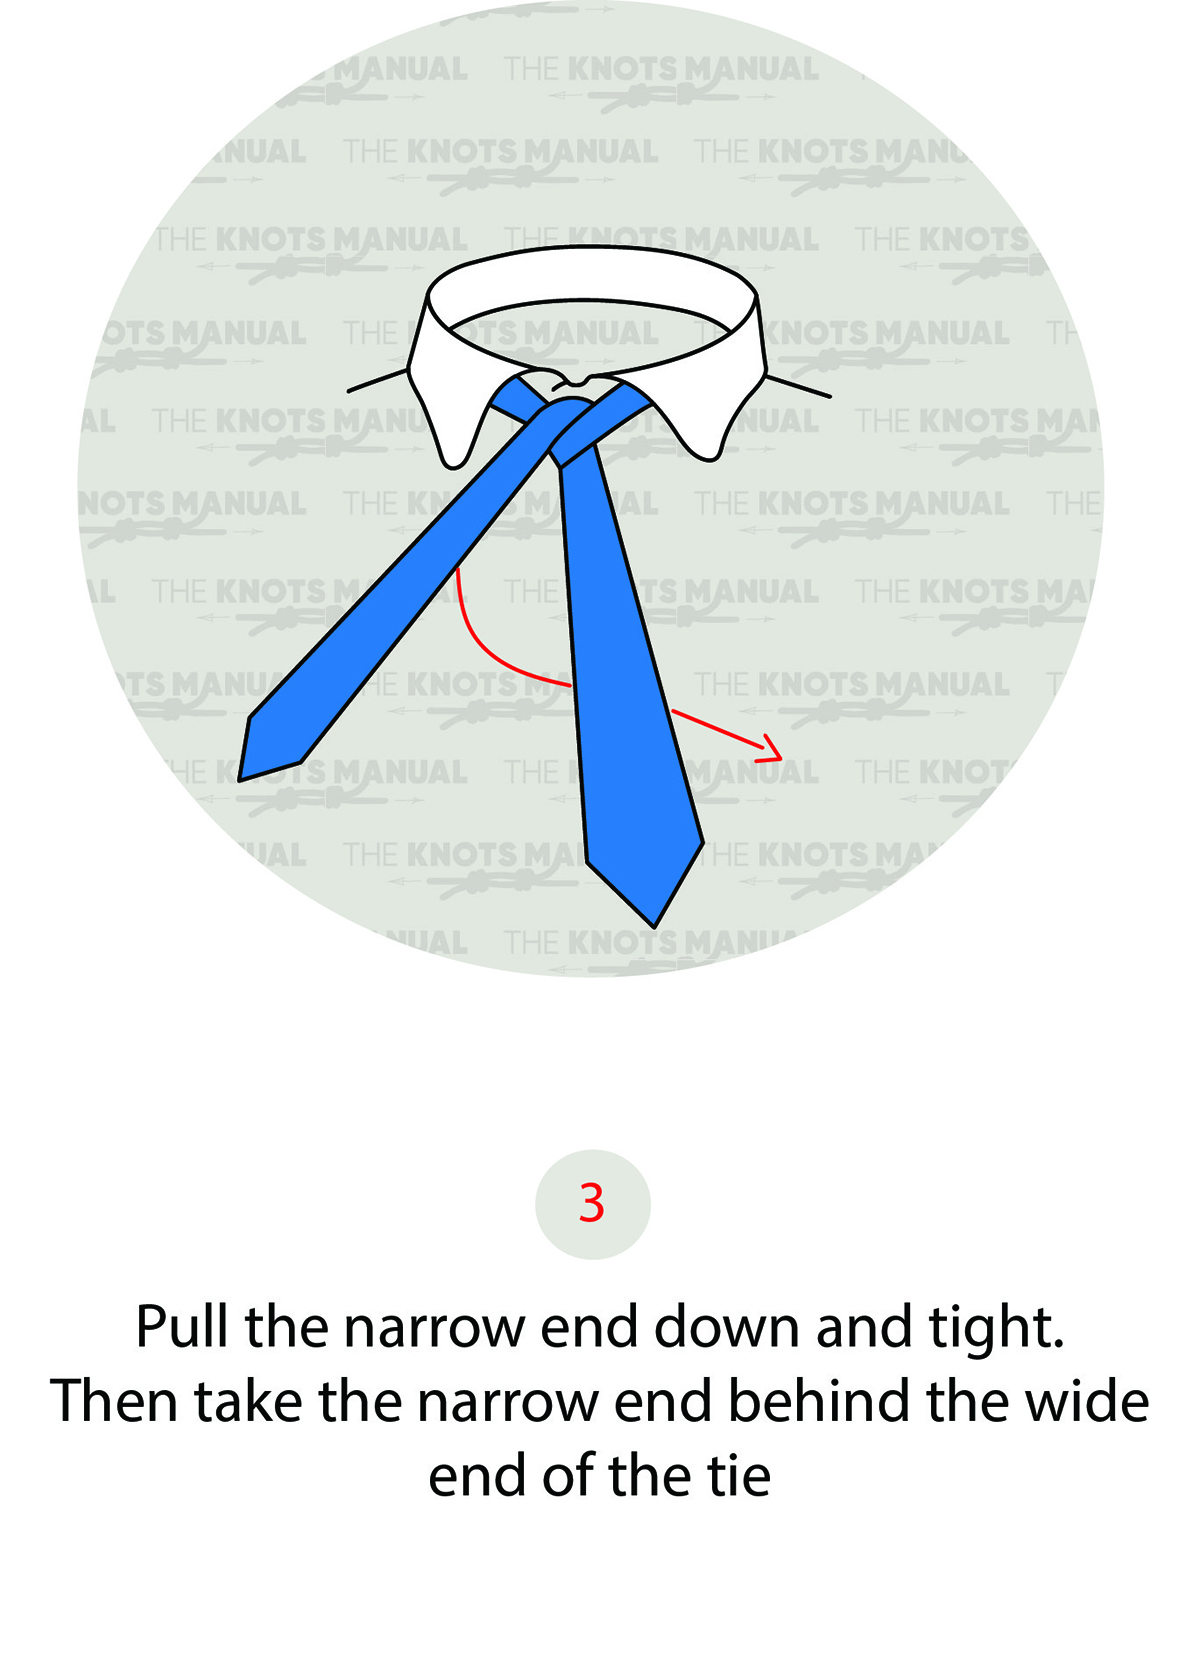
Step 6:
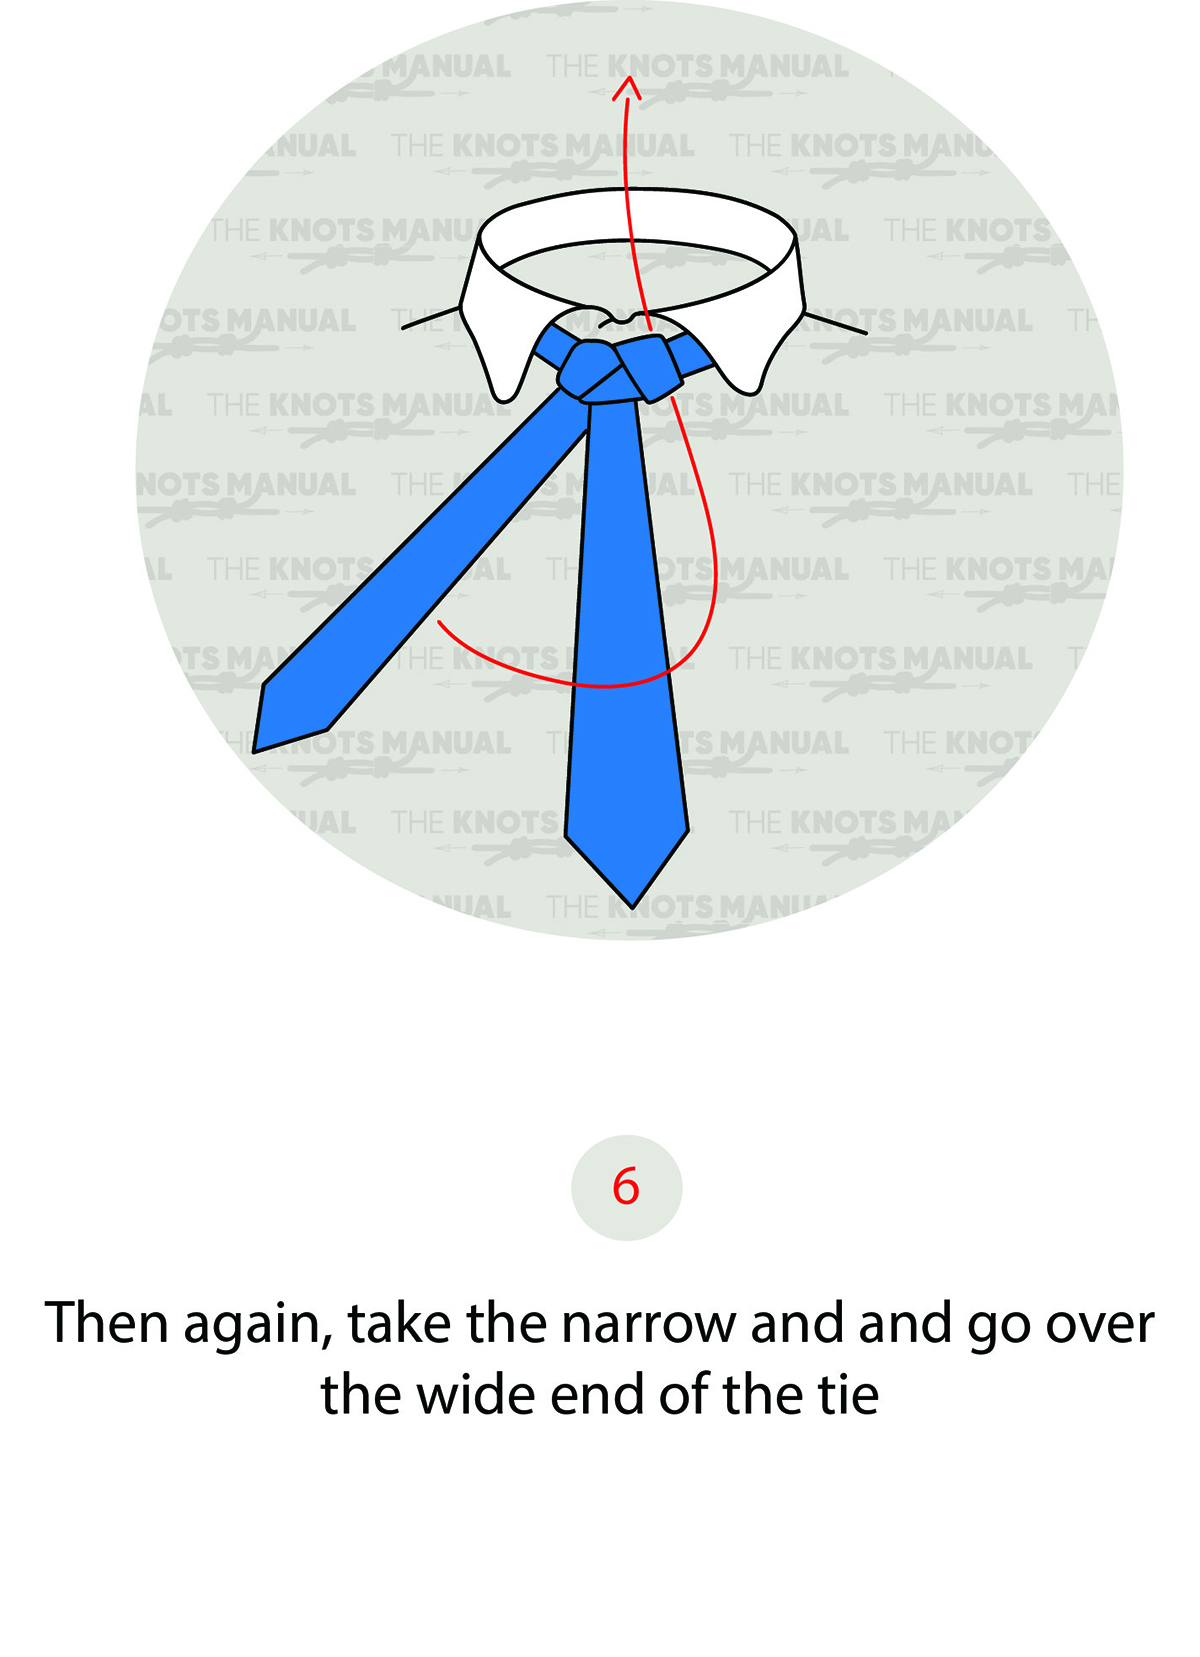
Go around the wide end from the front side and then behind the right side of the knot, exiting on the top.
Step 7:
Pass the narrow end behind the loop formed in the front, without fully tightening the knot.
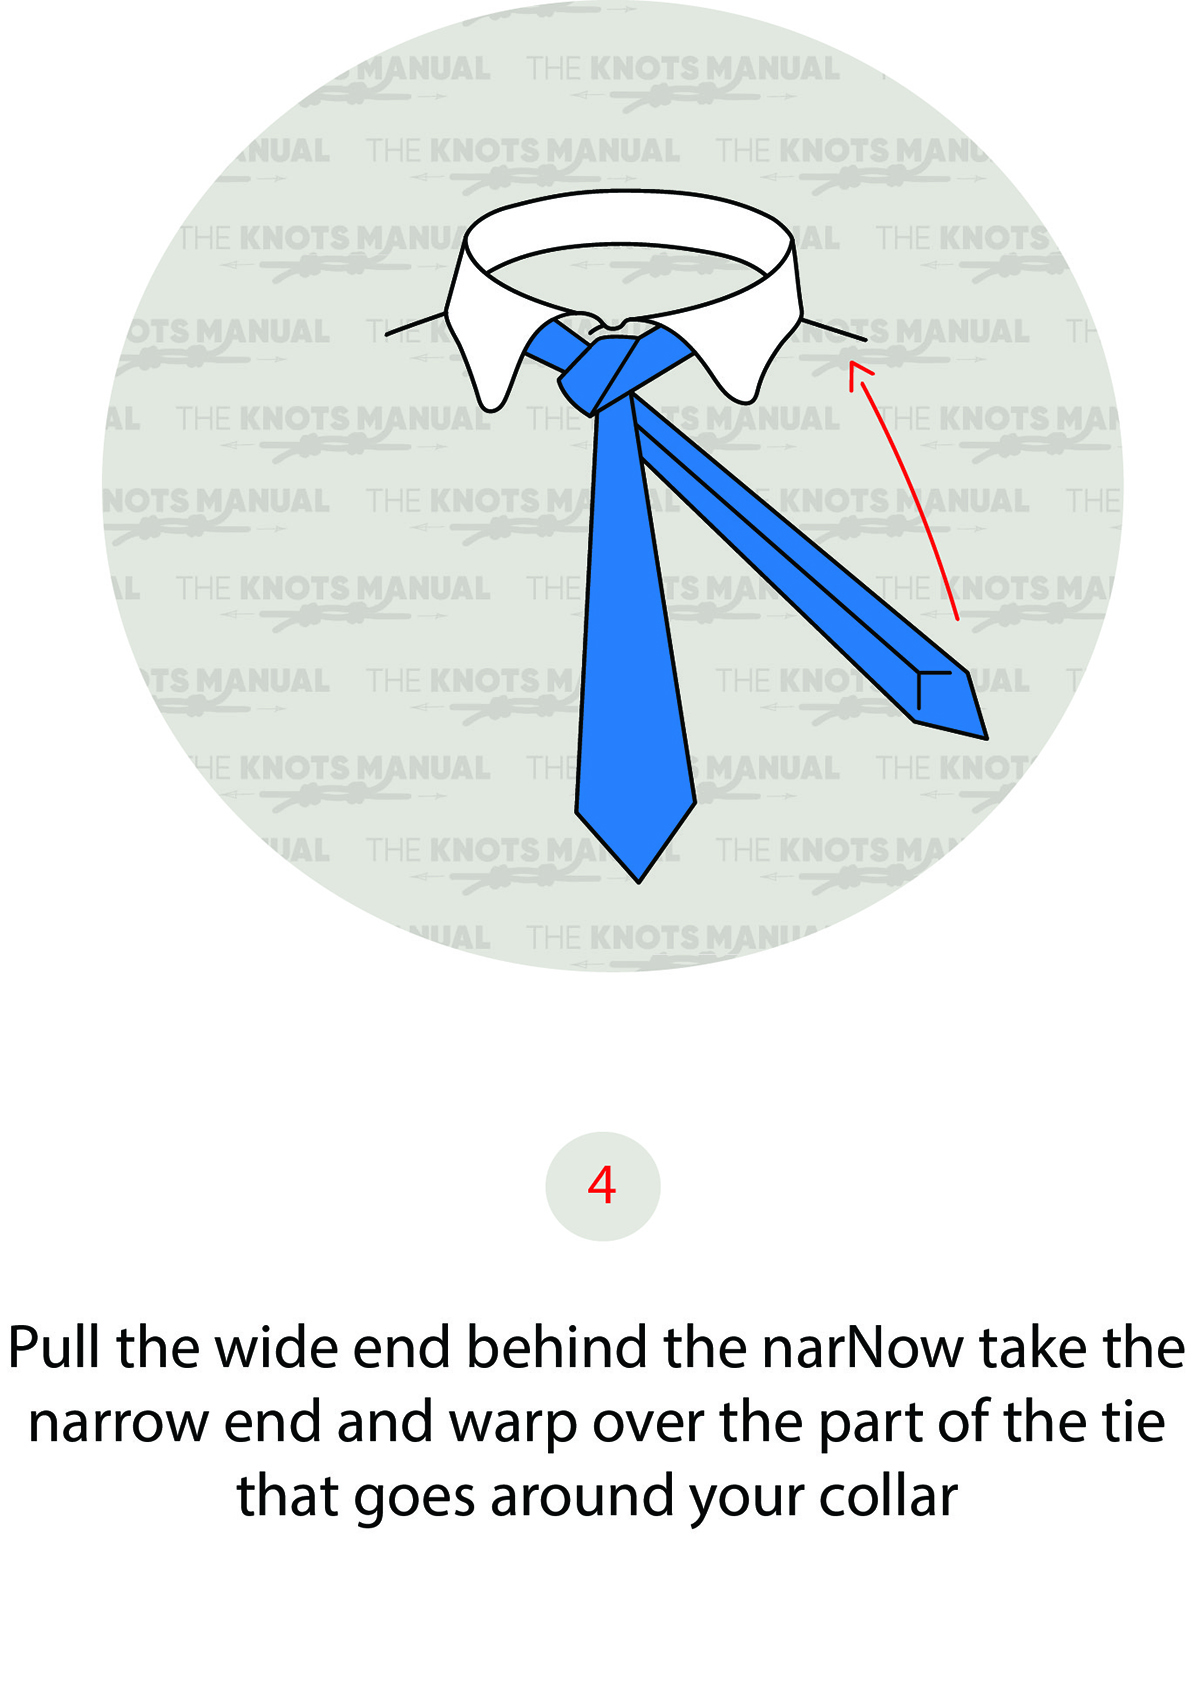
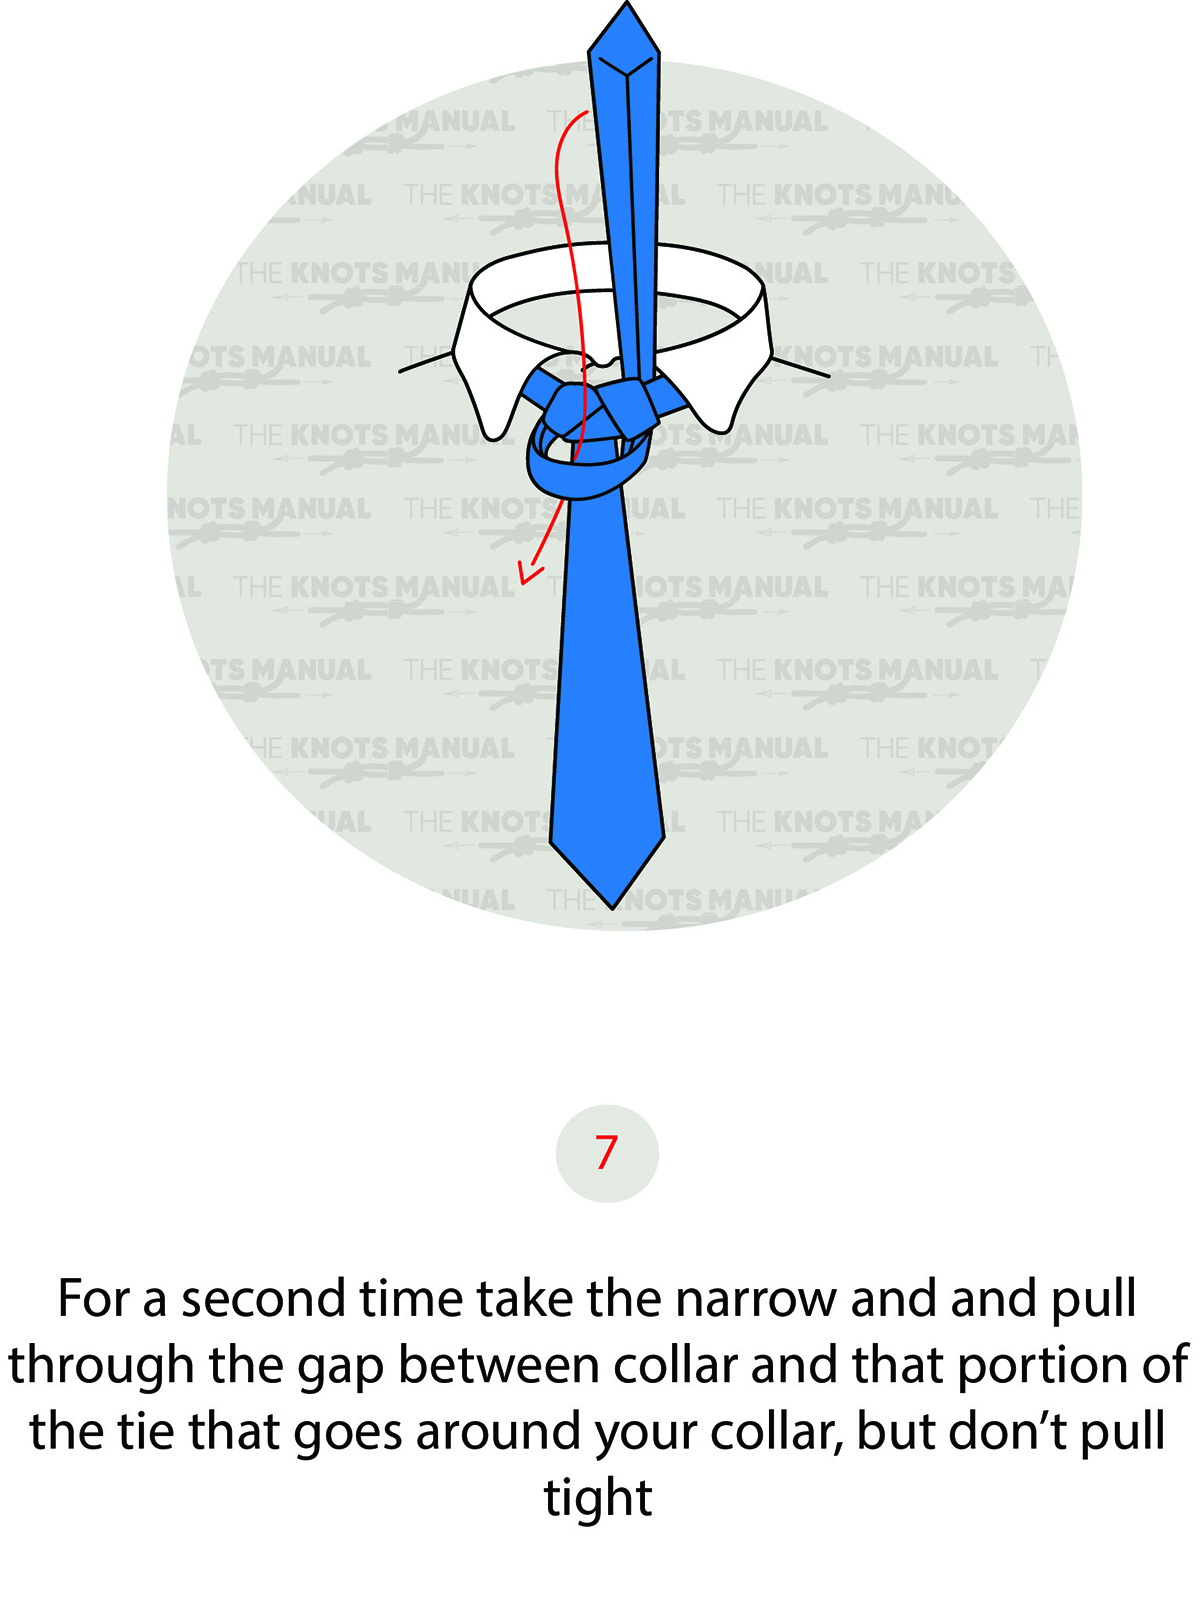
Step 8:
Go behind the wide end.
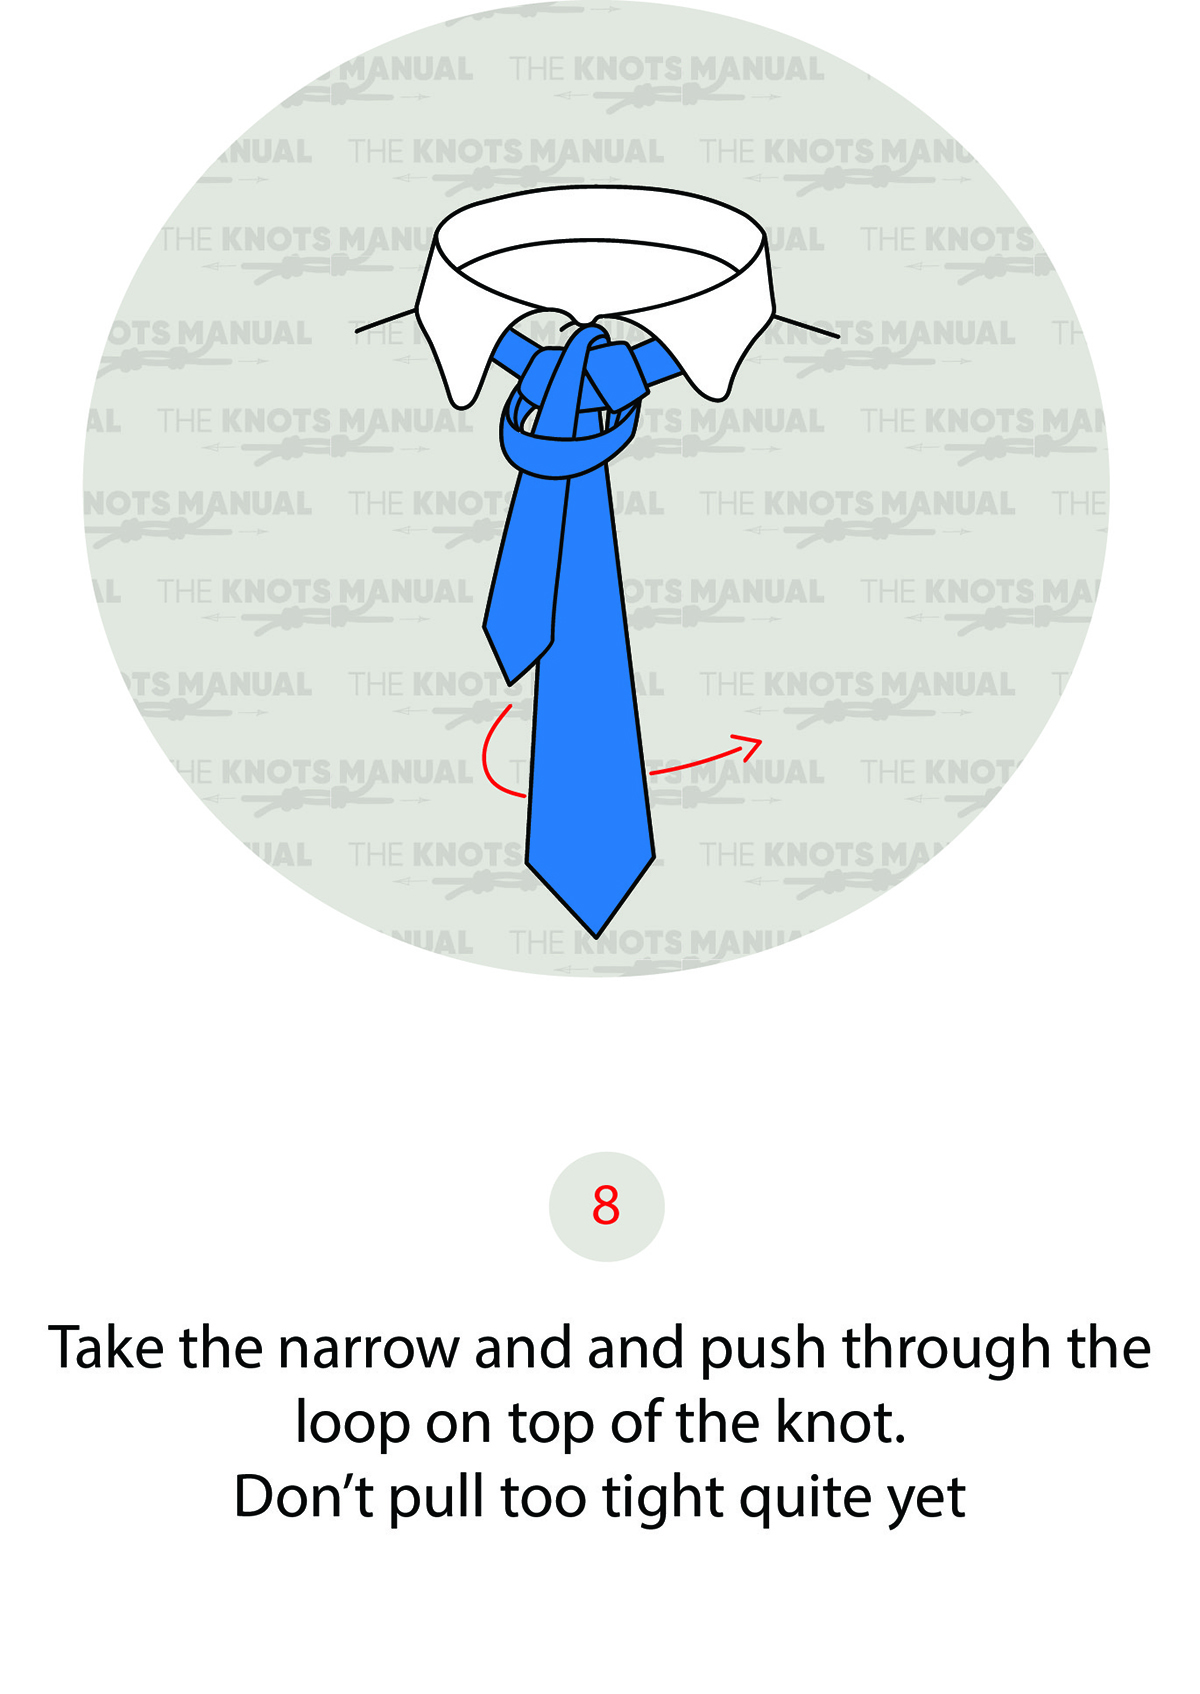
Step 9:
Now go through the vertical loop on the top side, as illustrated above.
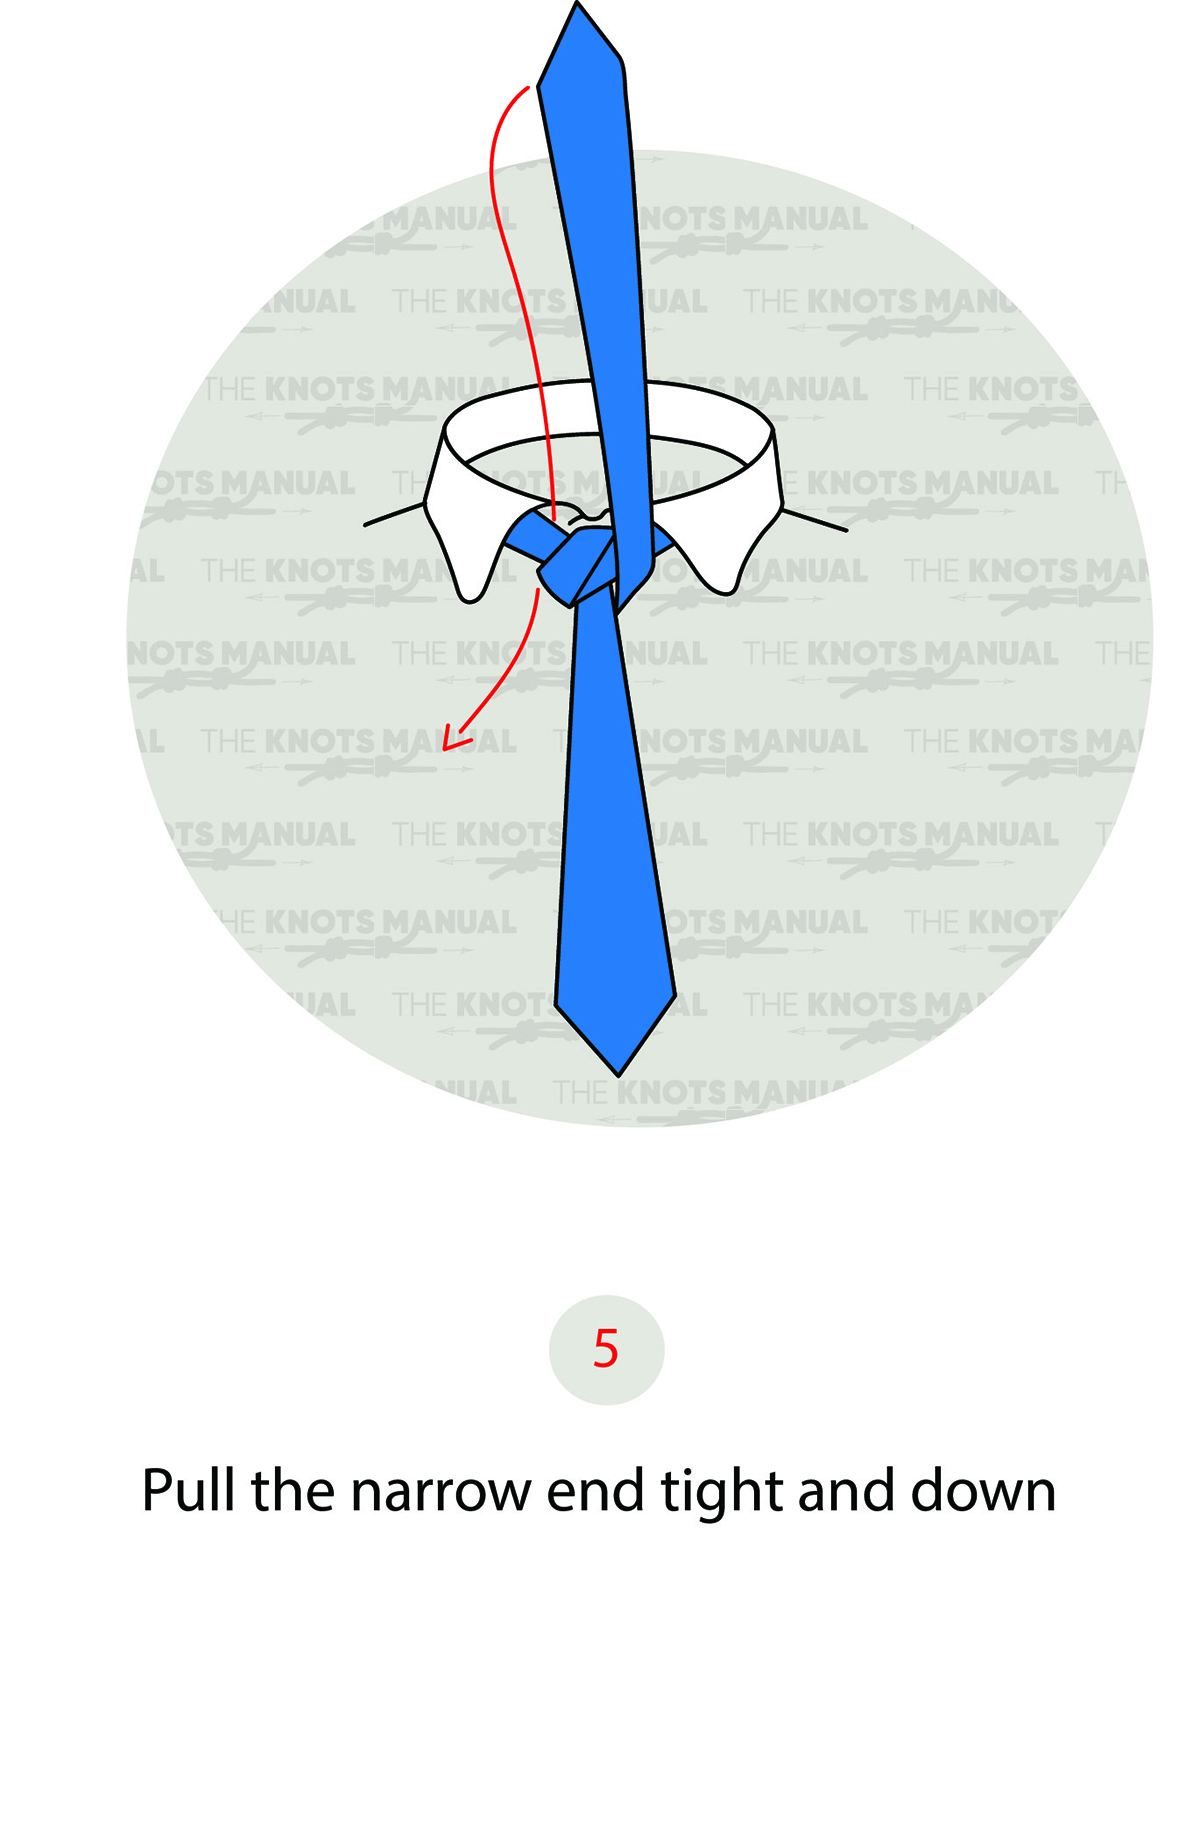
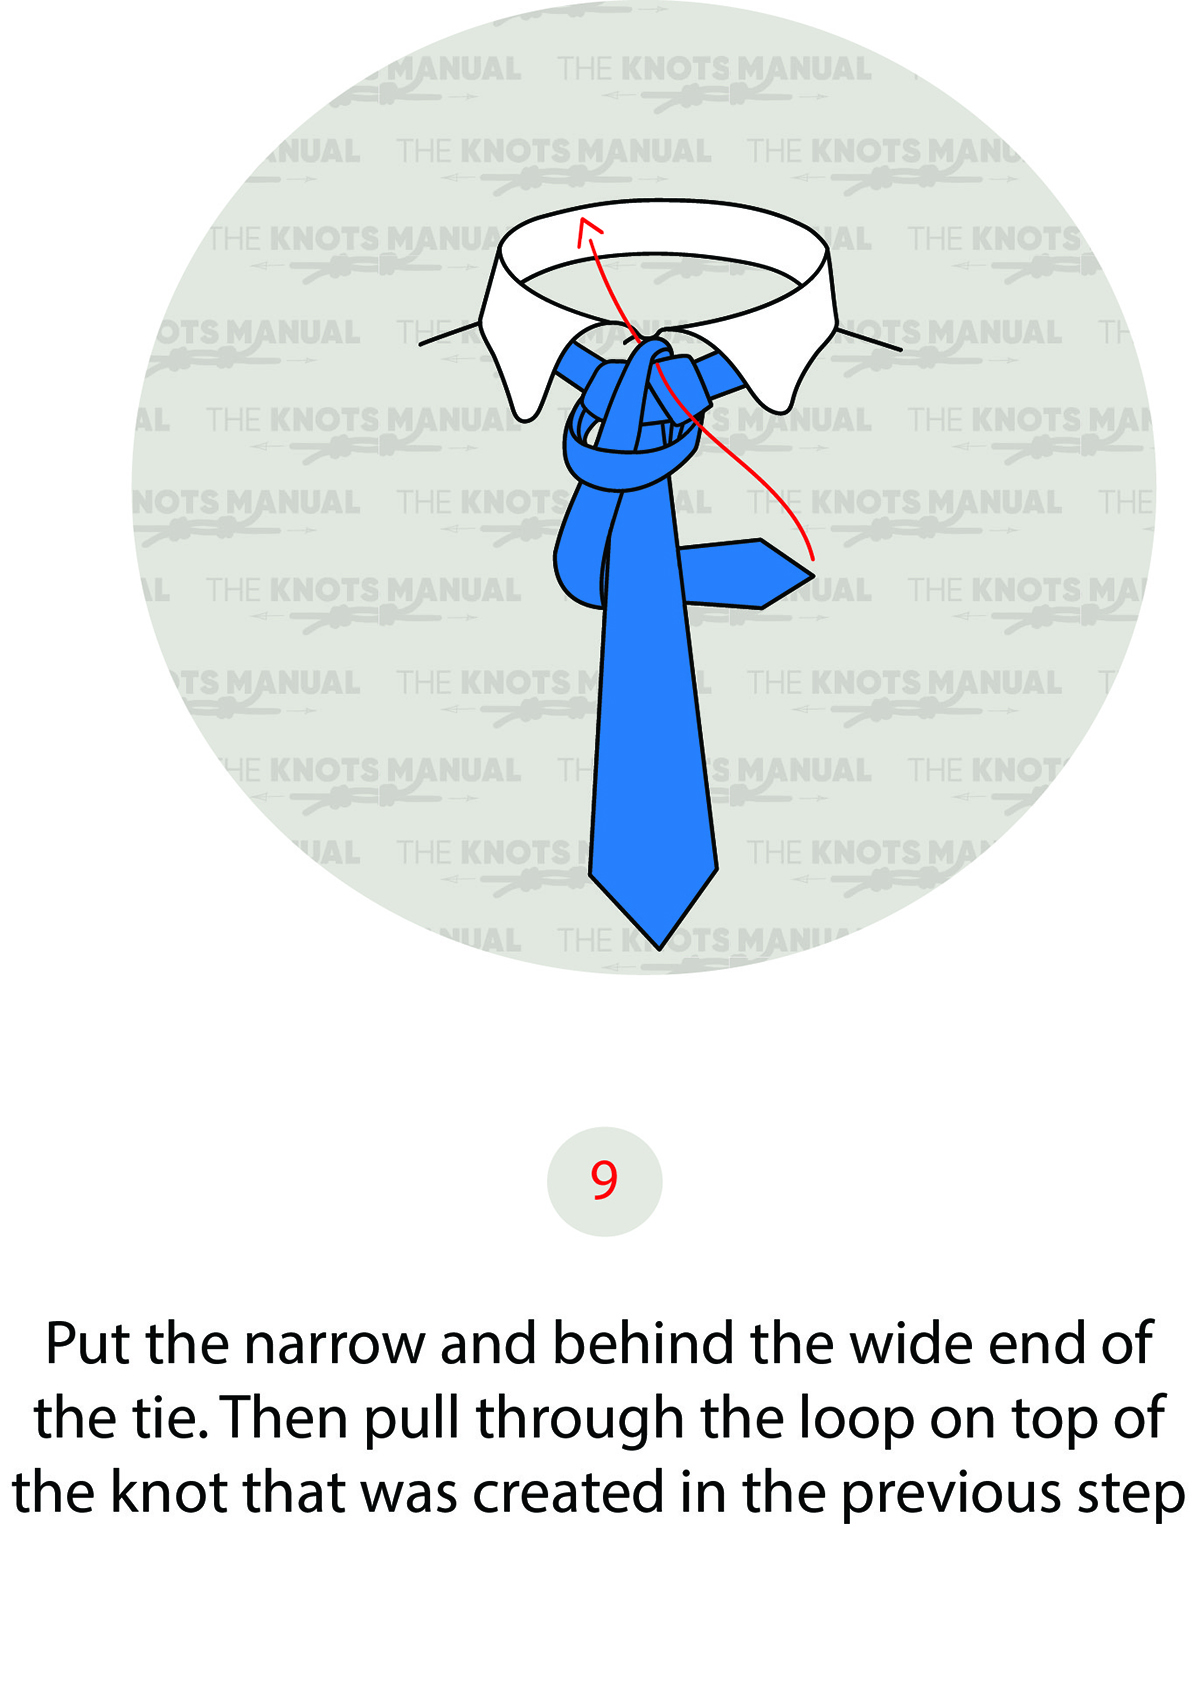
Step 10:
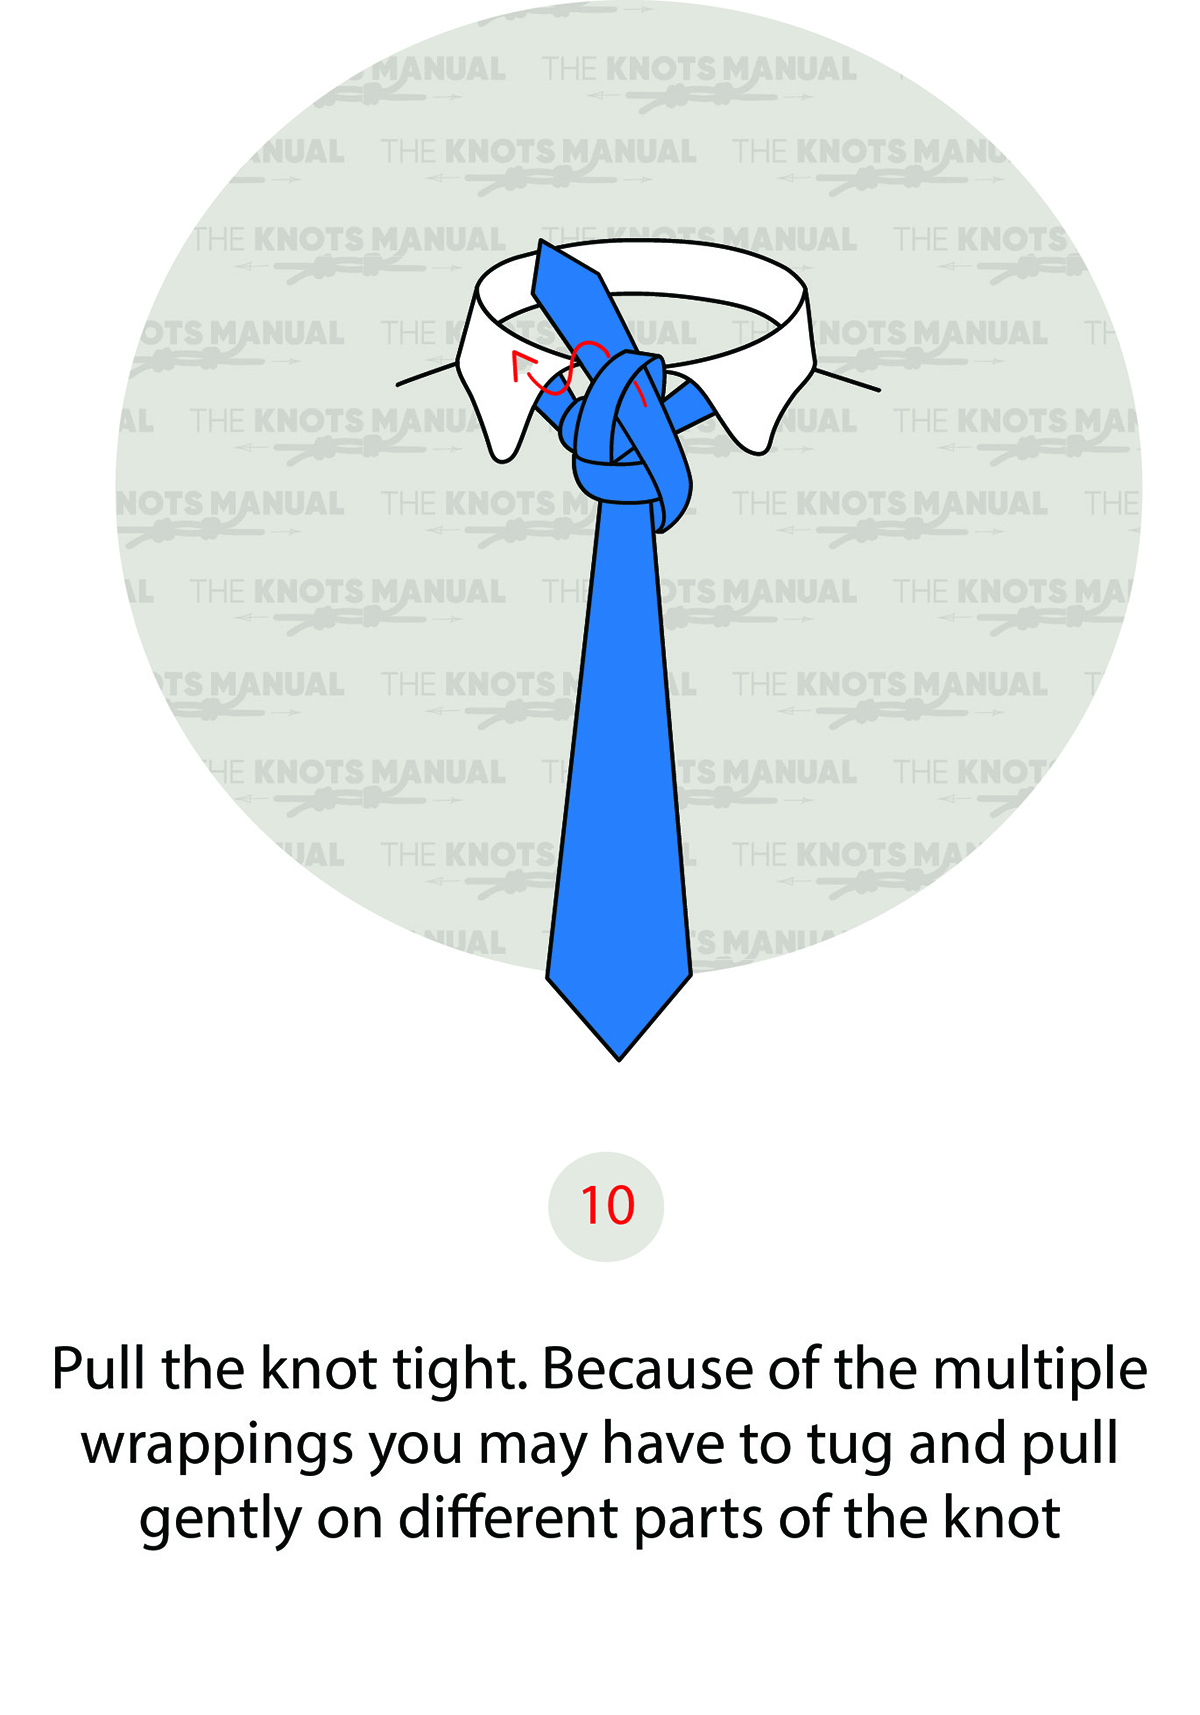
Finally, tighten the knot and hide the narrow end underneath the collar.