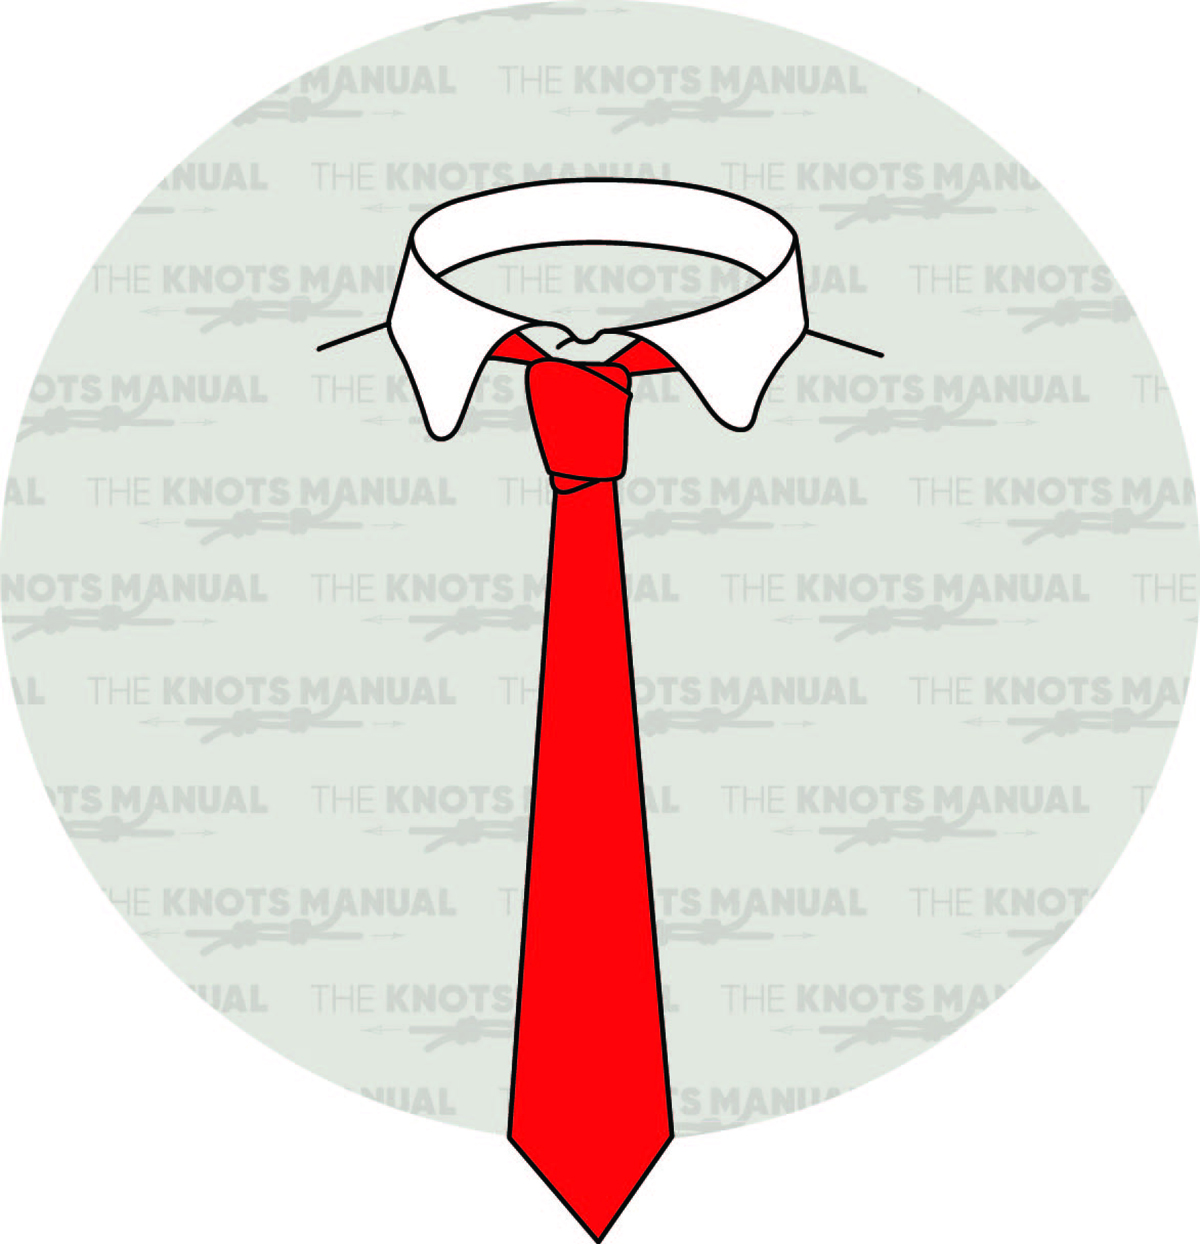
The Christensen Tie Knot creates a square-shaped, long, and narrow tie knot. Its most notable feature is the subtle x-shape of the two final loops.
It’s also sometimes referred to as the Cross Tie Knot.
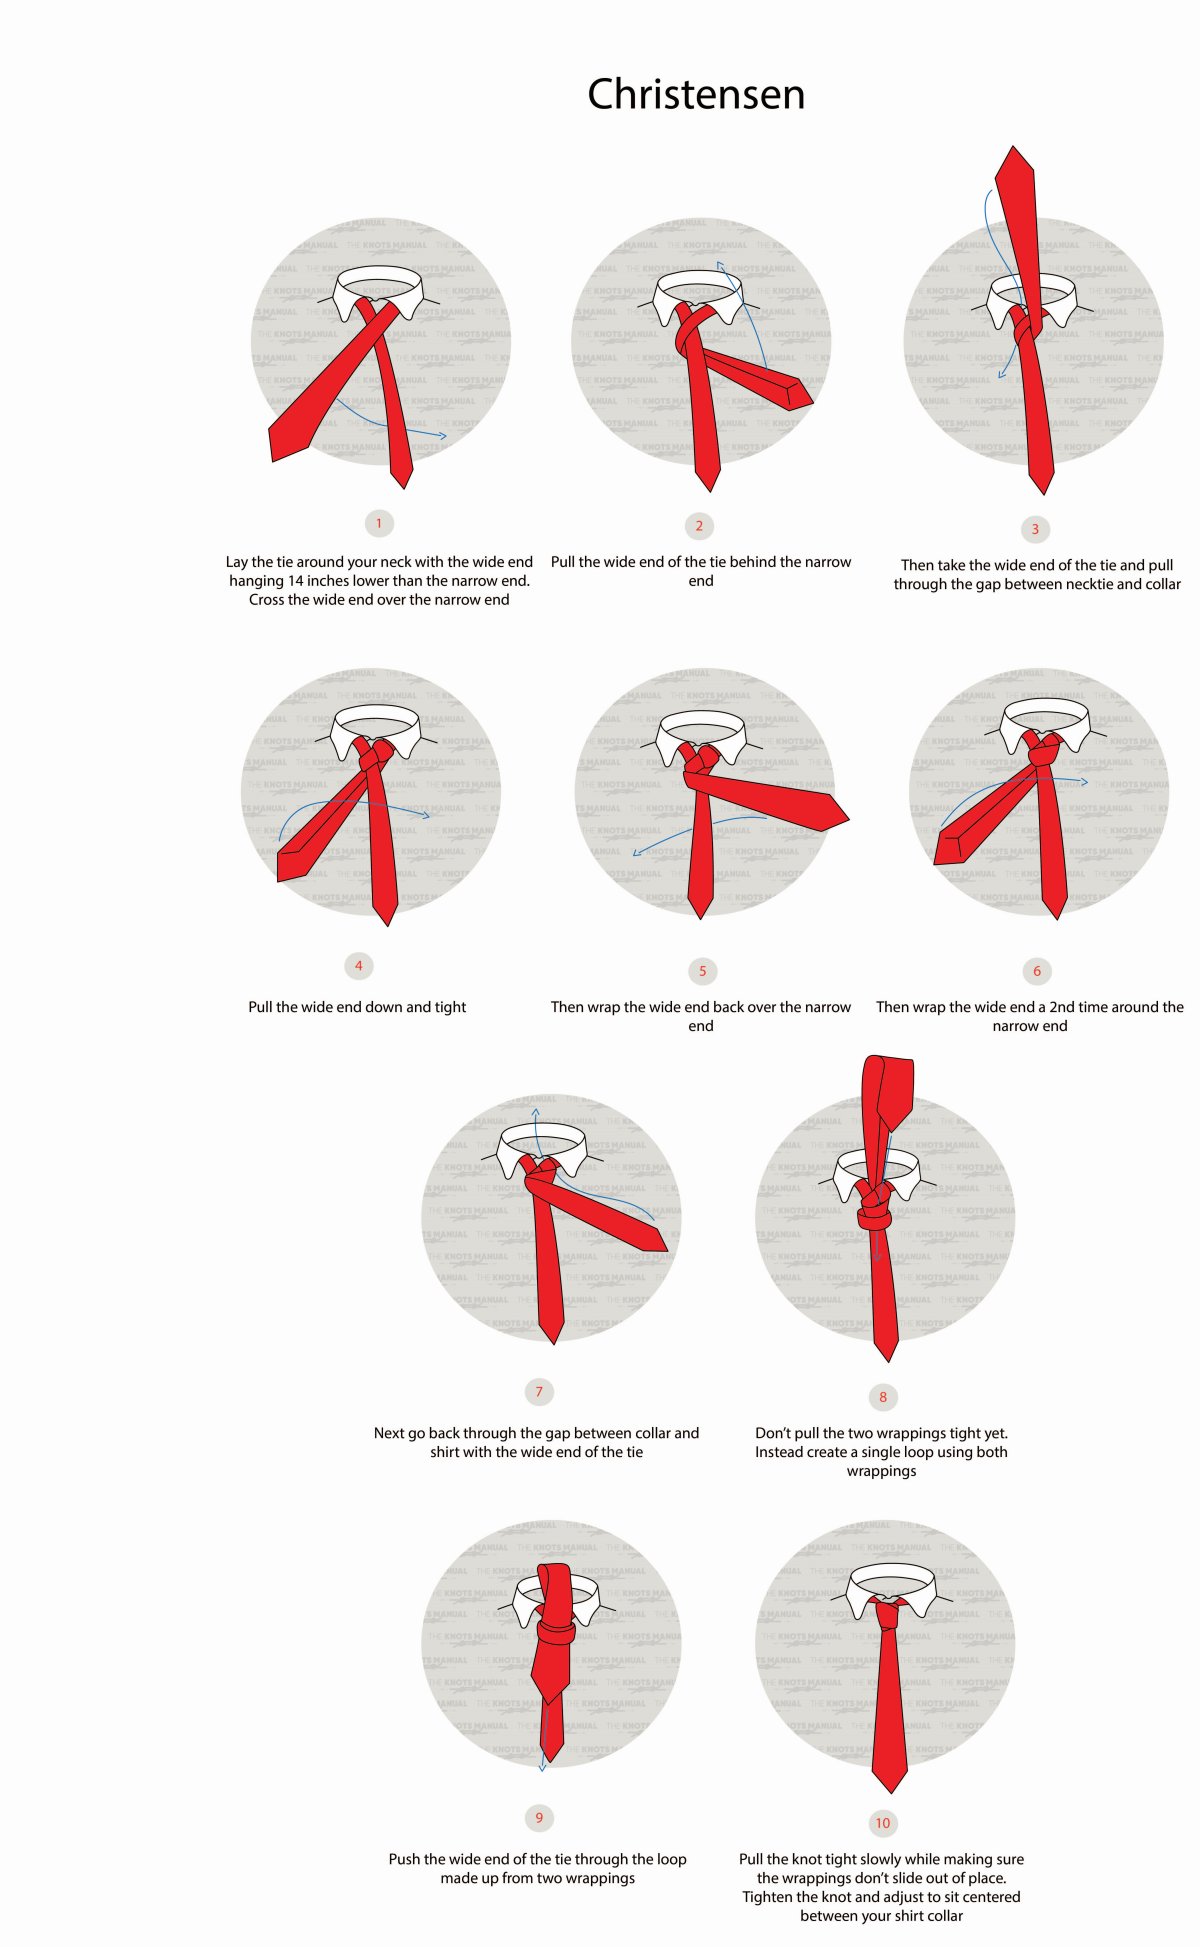
Quick Guide: Tying the Christensen Tie Knot
To tie the Christensen Tie Knot, lay the tie around your neck (stitch-side hidden) with the wide end 14 inches (35 cm) below the narrow end. You’ll be tying it with the wide end while the narrow end remains in place. To reach the starting position, cross the wide end over the narrow one.
Pass the wide end behind the narrow end and over the top side of the knot (steps 1-2). Now pass it underneath the left side of the knot (step 3). Do one-and-a-half-full turns around the narrow end (steps 4-6) and go behind the right side of the knot (step 7). Finally, pass the wide end underneath the two front loops to finish the knot.
Tip: When tying the knot, keep the two sideways loops made in steps 4-6 loose because you will need to pass the wide end behind them.
About the Christensen Tie Knot
The Christensen Tie Knot is named after the popular Swedish Tie brand Amanda Christensen.
It creates a medium-sized knot that’s shaped like a square instead of a more typical, triangular appearance. The Christensen Tie Knot is slightly larger than other square-shaped knots, but at the same time, it still has a long and narrow appearance.
Although it requires 10 steps, it’s relatively easy to tie. It’s tied similarly to the Prince Albert Tie Knot, except with one more turn.
When and How to Wear the Christensen Tie Knot
There is a subtle elegance to the Christensen Tie Knot due to the x-shape formed by the two horizontal front loops. It isn’t too flashy but will attract second looks to people who pay attention. Wear it to formal events, business meetings, and job interviews.
It works well both with narrow-collar and wide-collar shirts. It’s typically worn with narrow and medium-width ties instead of wide ones.
Knots Like the Christensen Tie Knot
Prince Albert Tie Knot: Tied just like the Christensen Tie Knot if you’d skip steps 1-3, where the wide end is taken through the top of the knot. This makes it have a smaller profile while still having a square-like appearance.
Kelvin Tie Knot: A slightly less square-shaped knot than the Christensen and Prince Albert Tie Knots. It’s tied just like the Prince Albert Tie Knot, only in the end, the wide end is passed through one loop, not two.
Oriental Tie Knot: The simplest tie knot out there, very commonly worn in Asia. It has a simple square-like appearance.
Four In Hand Tie Knot: Another easy tie knot with a square-like appearance, only with one more turn compared to the Oriental Tie Knot. It’s one of the most popular tie knots in the Western world.
Manhattan Tie Knot: A medium-sized tie knot with a long and narrow appearance. It looks good on people with round-shaped chins and for people who want to appear taller.
Step-By-Step Guide: How to Tie the Christensen Tie Knot
A step-by-step guide on how to tie the Christensen Tie Knot.
Step 1:

Lay the tie around your neck with the stitch side hidden. You’ll be working with the wide end while the narrow end remains static, so adjust it 14 inches (35) cm lower than the narrow end. Then pass it over the narrow end.
Step 2:
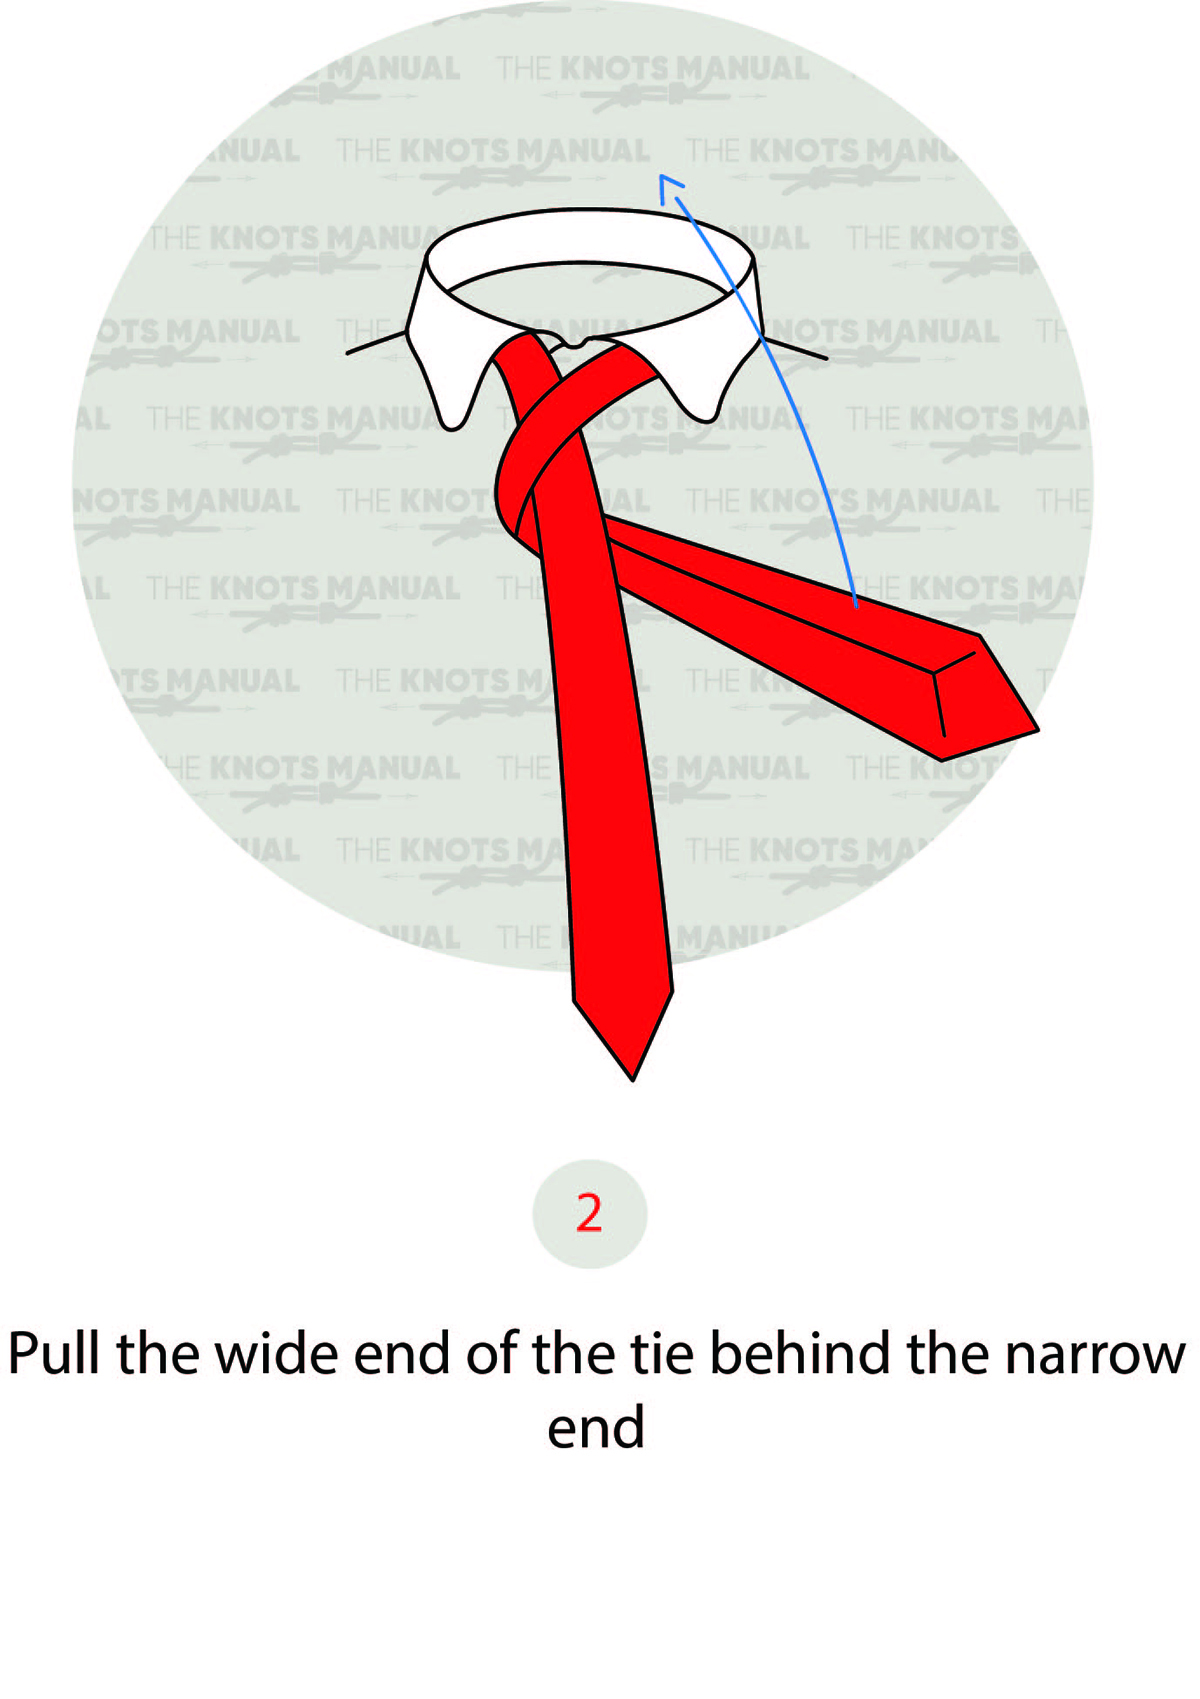
Pass the wide end behind the narrow end and up over the right side of the knot.
Step 3:
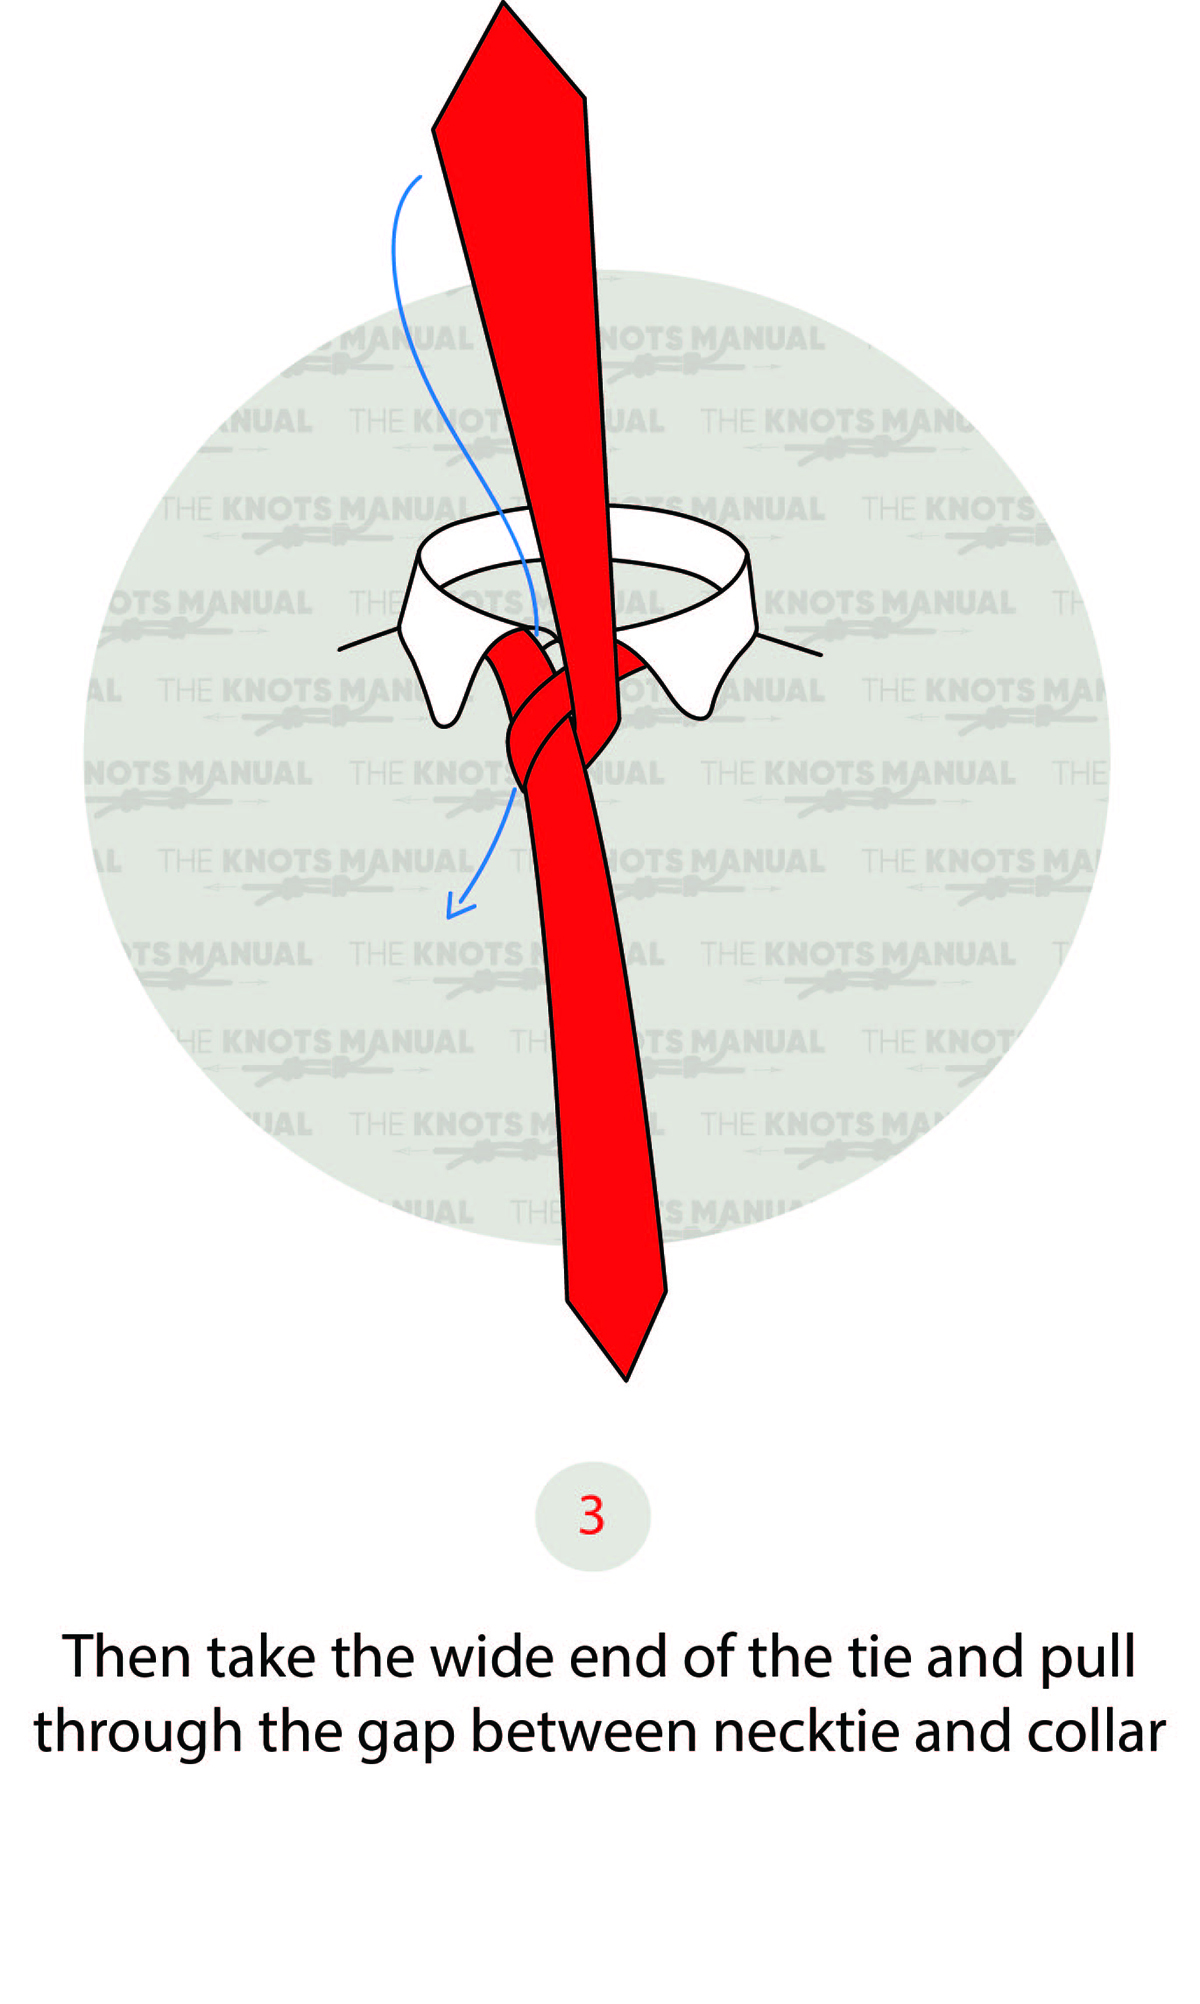
Pass the wide end underneath the top side of the knot, exiting on the left side.
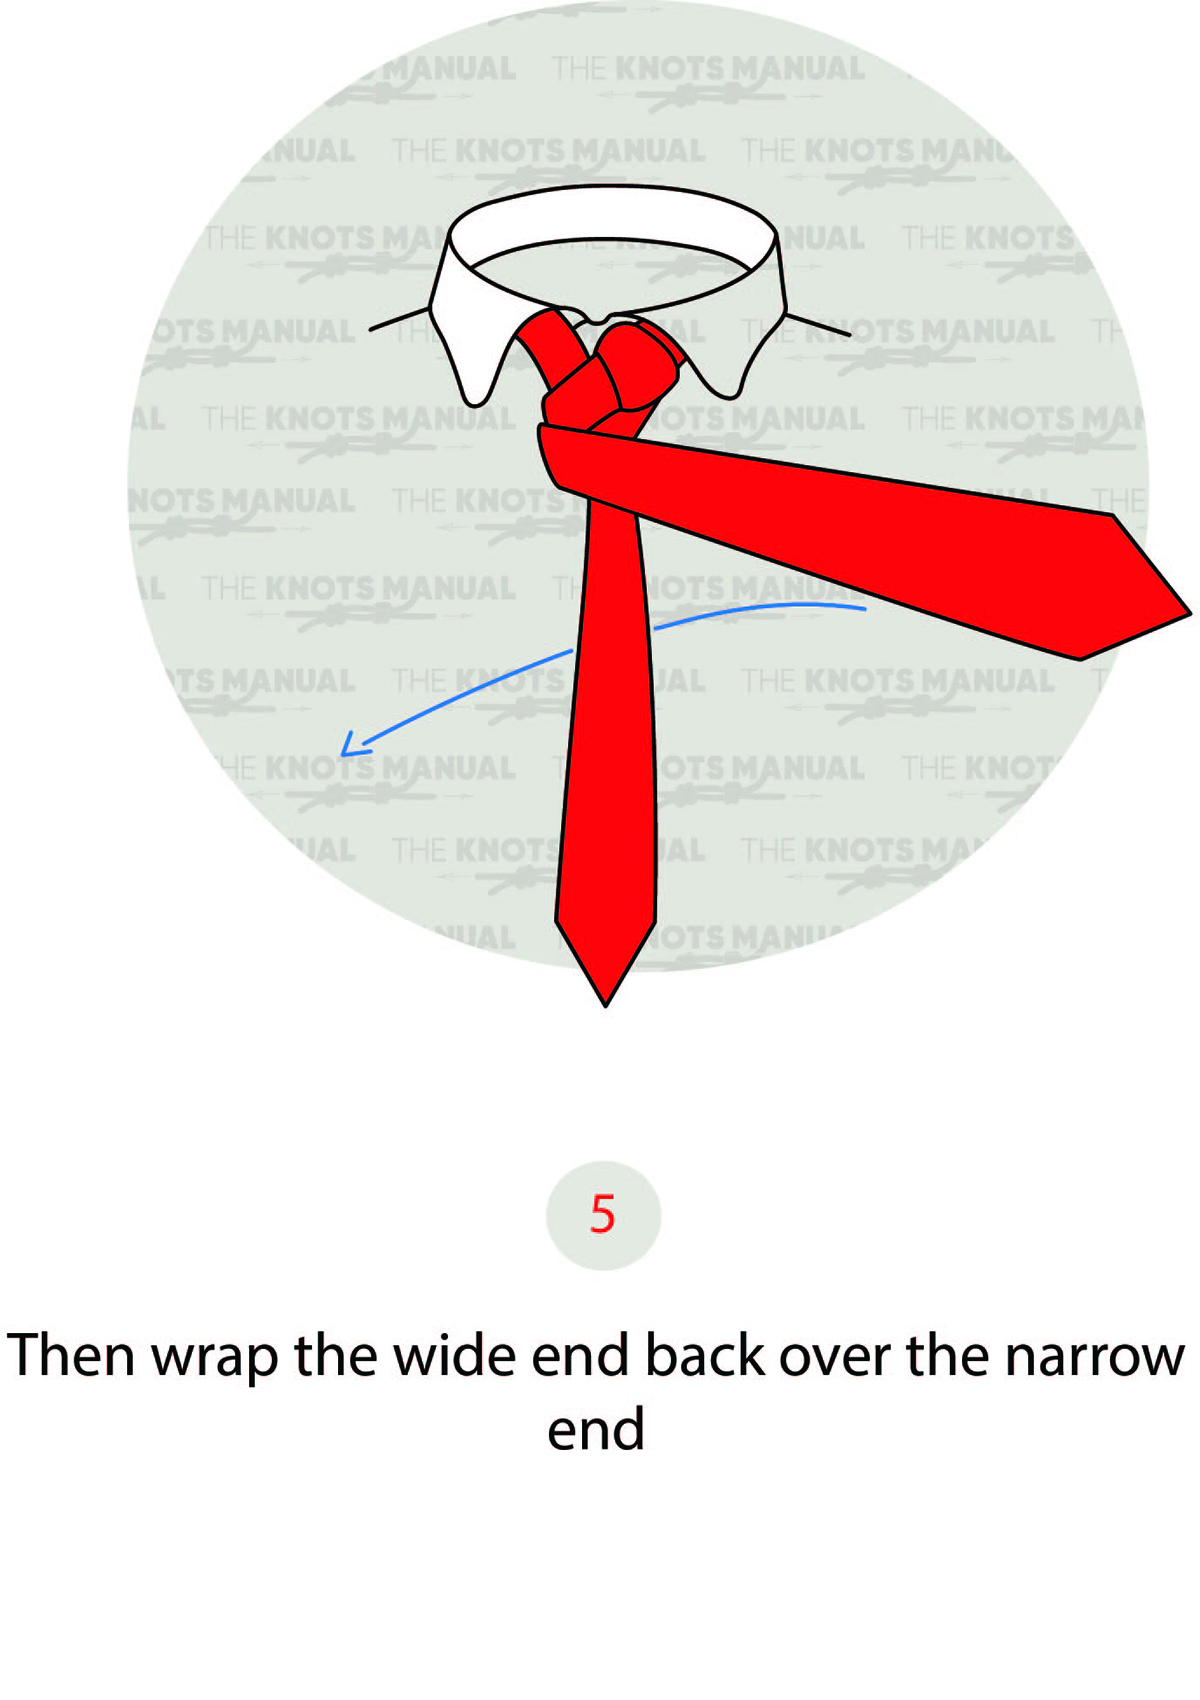
Step 4:
Pass the wide end sideways over the narrow end.
Step 5:
Now pass it back behind the narrow end.
Step 6:
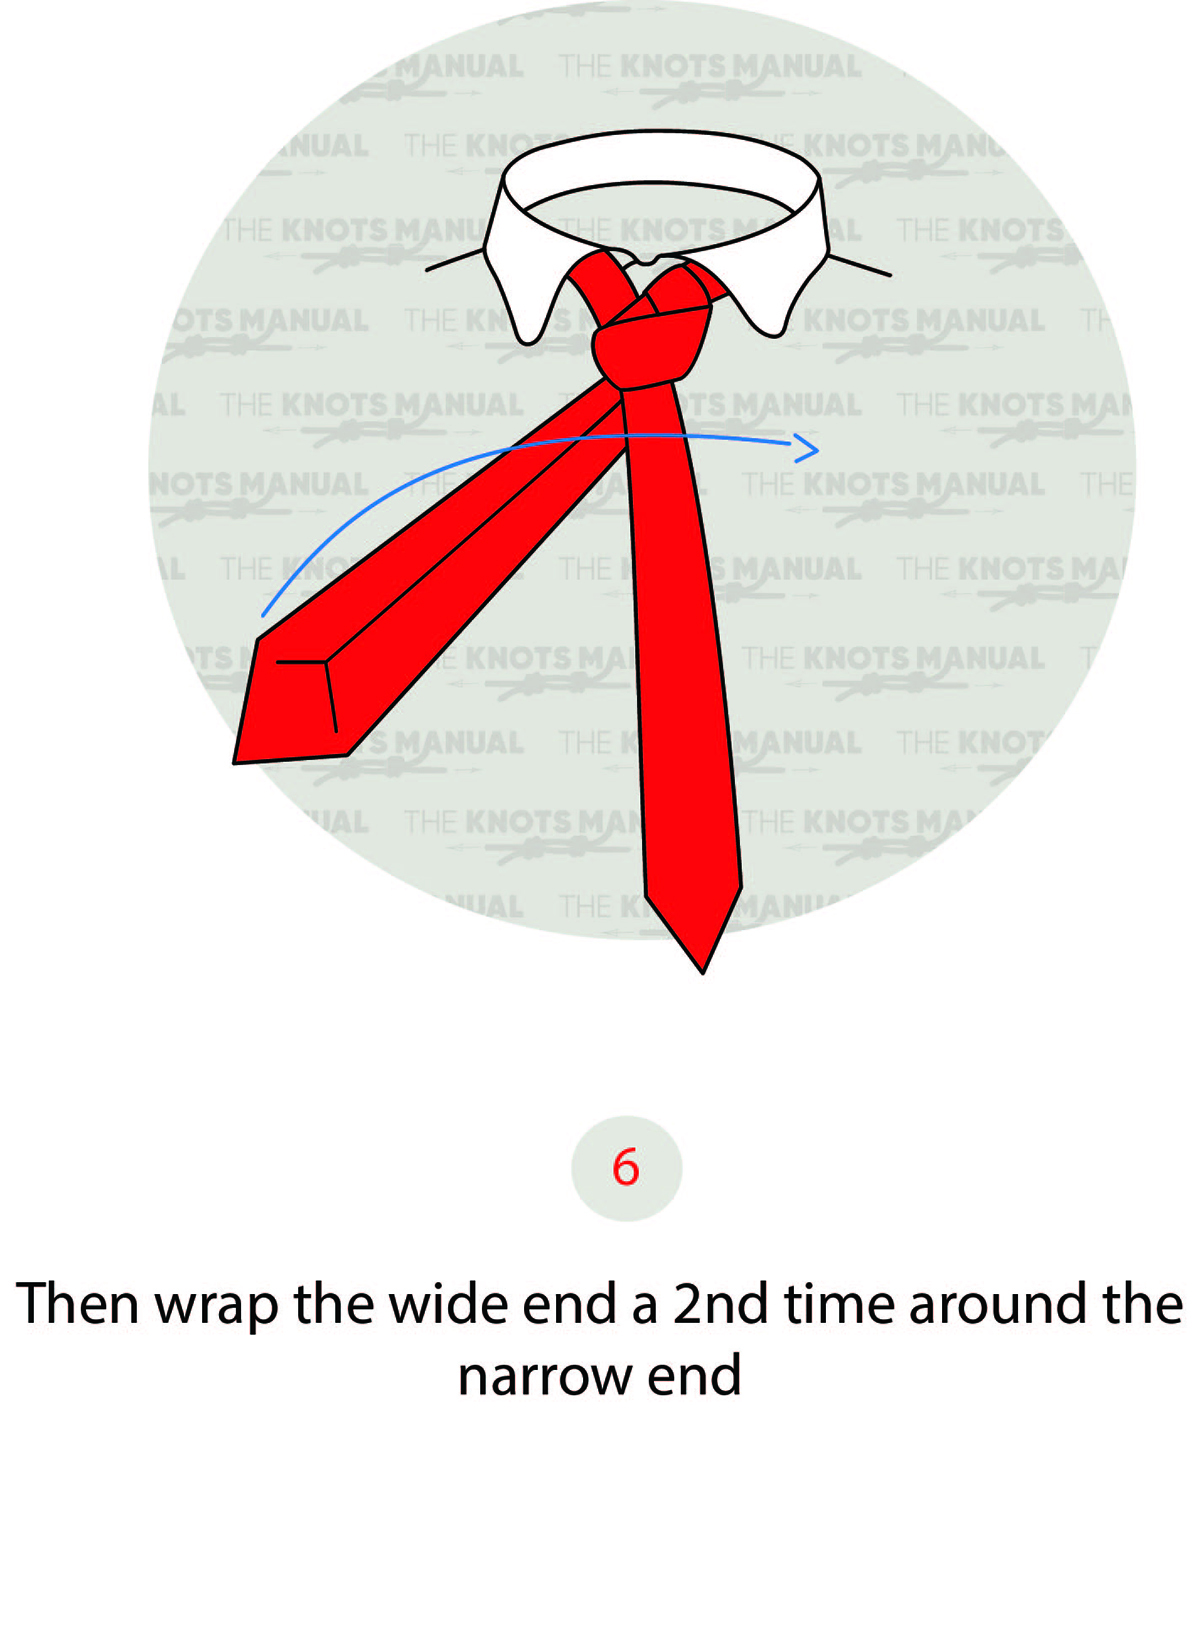
Again, pass the wide end sideways in front of the narrow end.
Step 7:
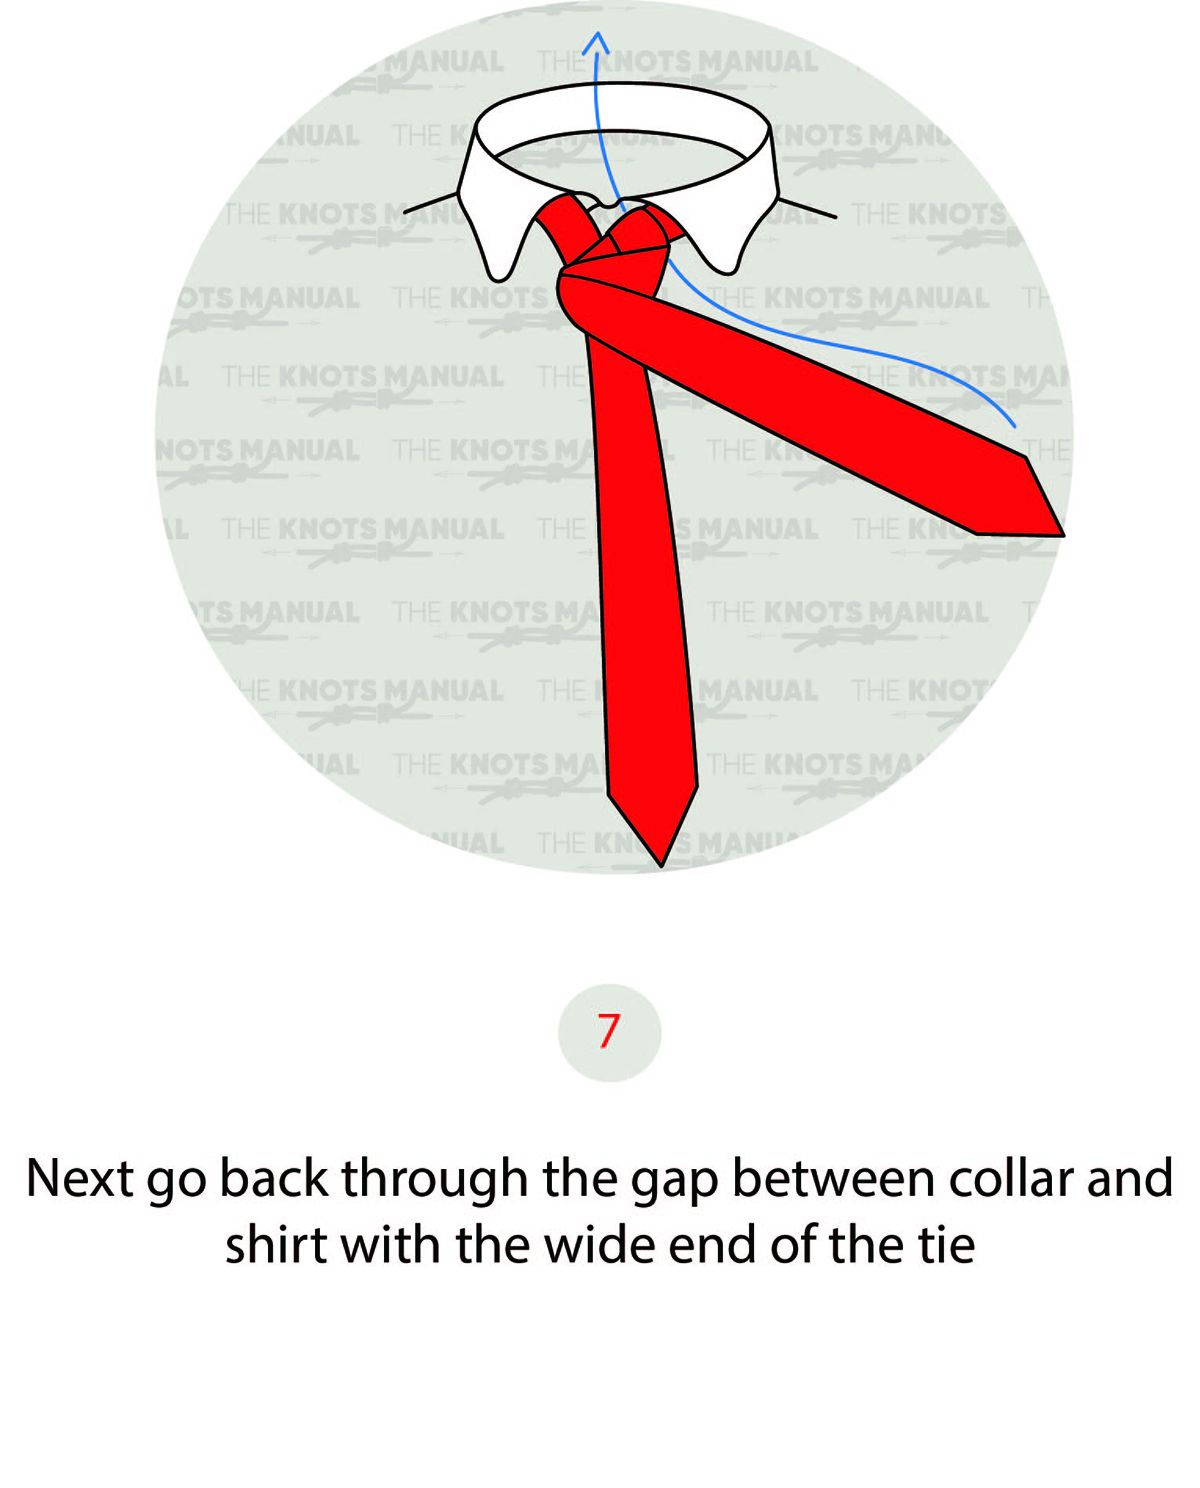
Now take it behind the top side of the knot.
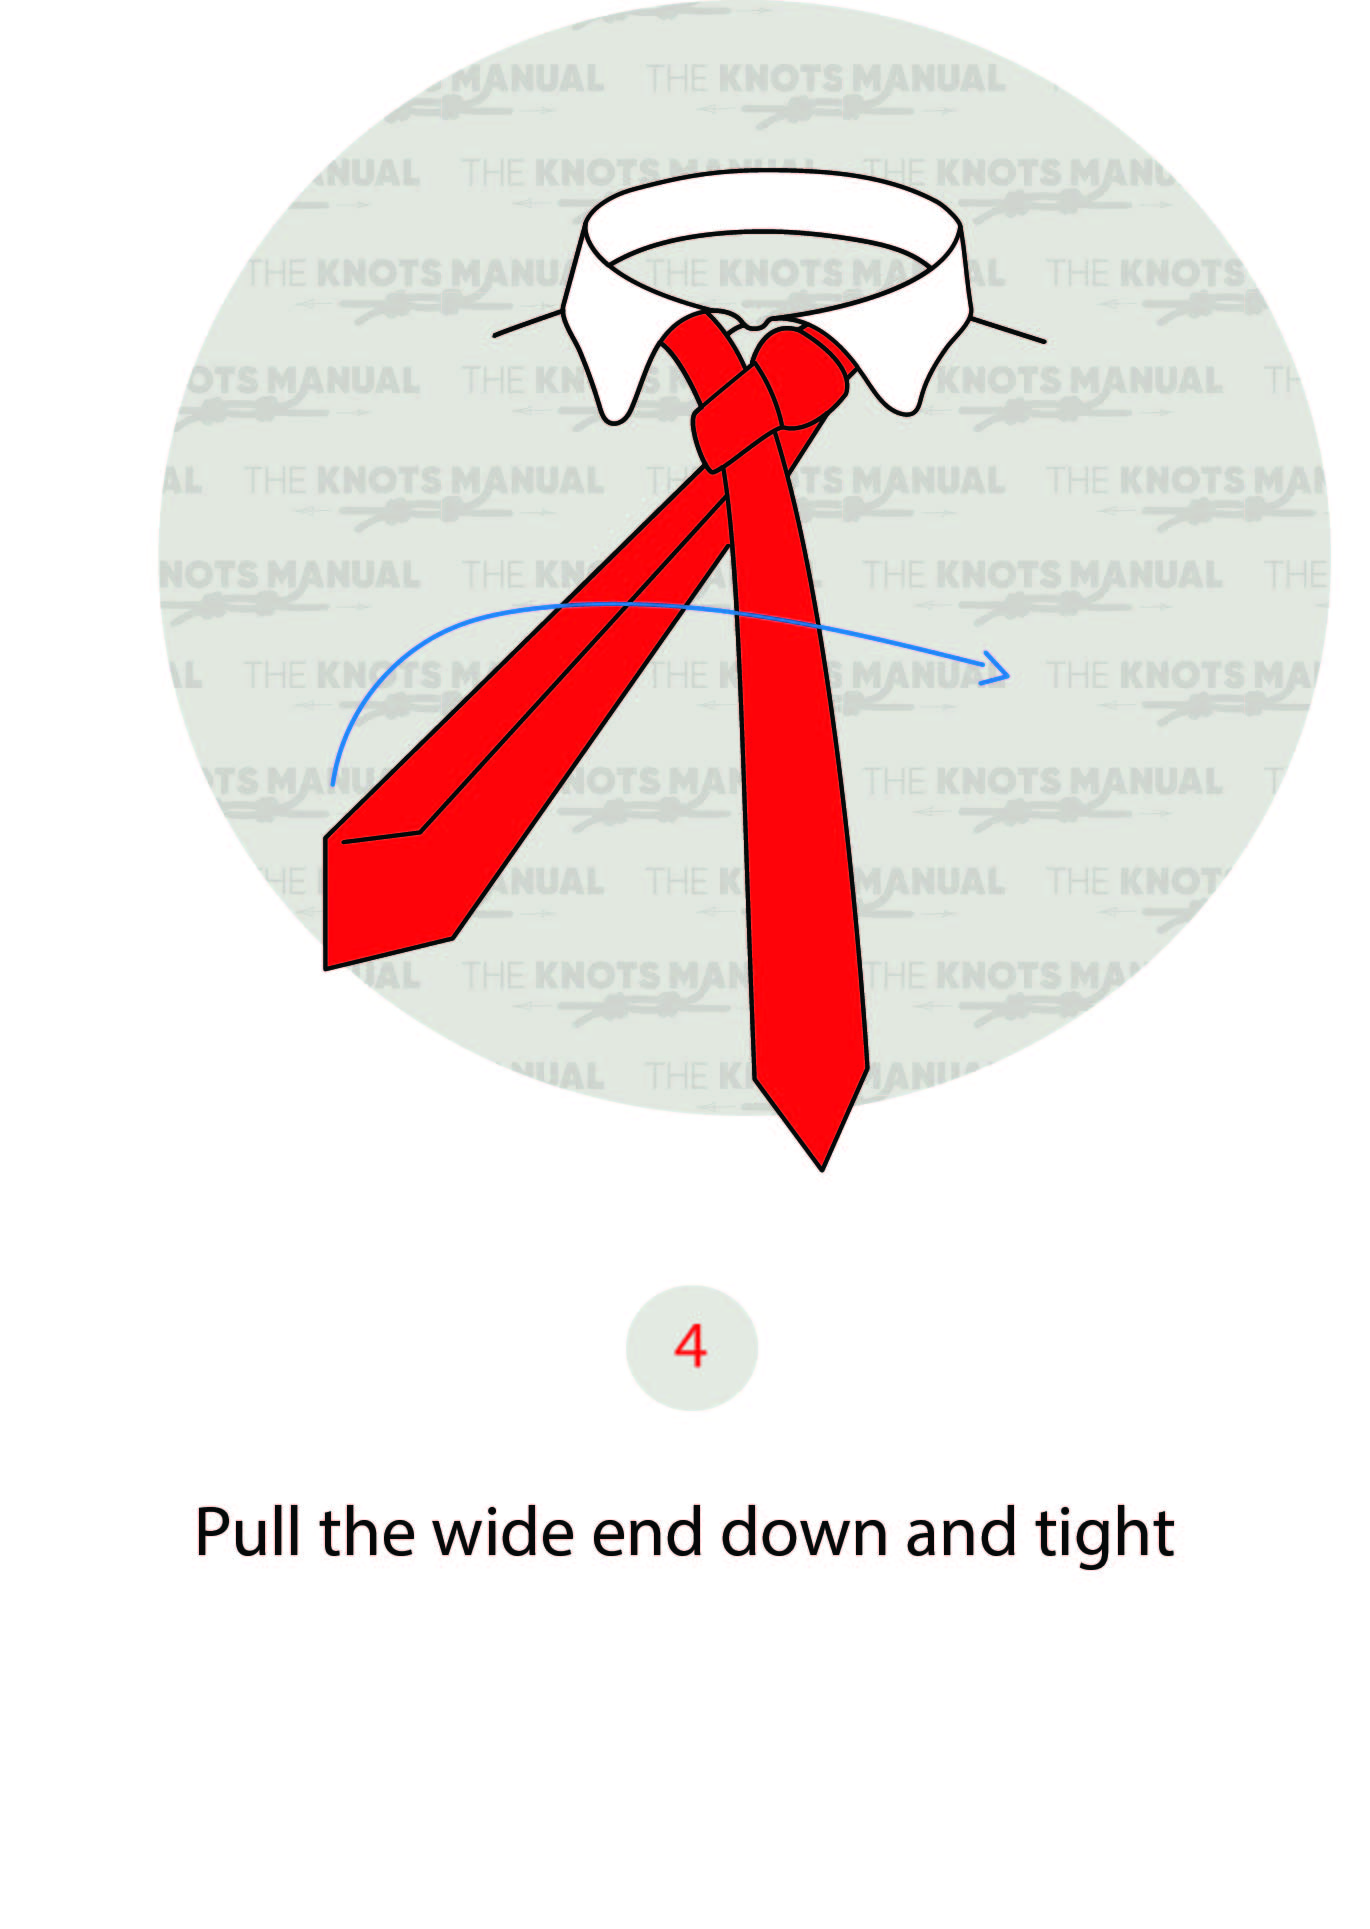
Step 8:
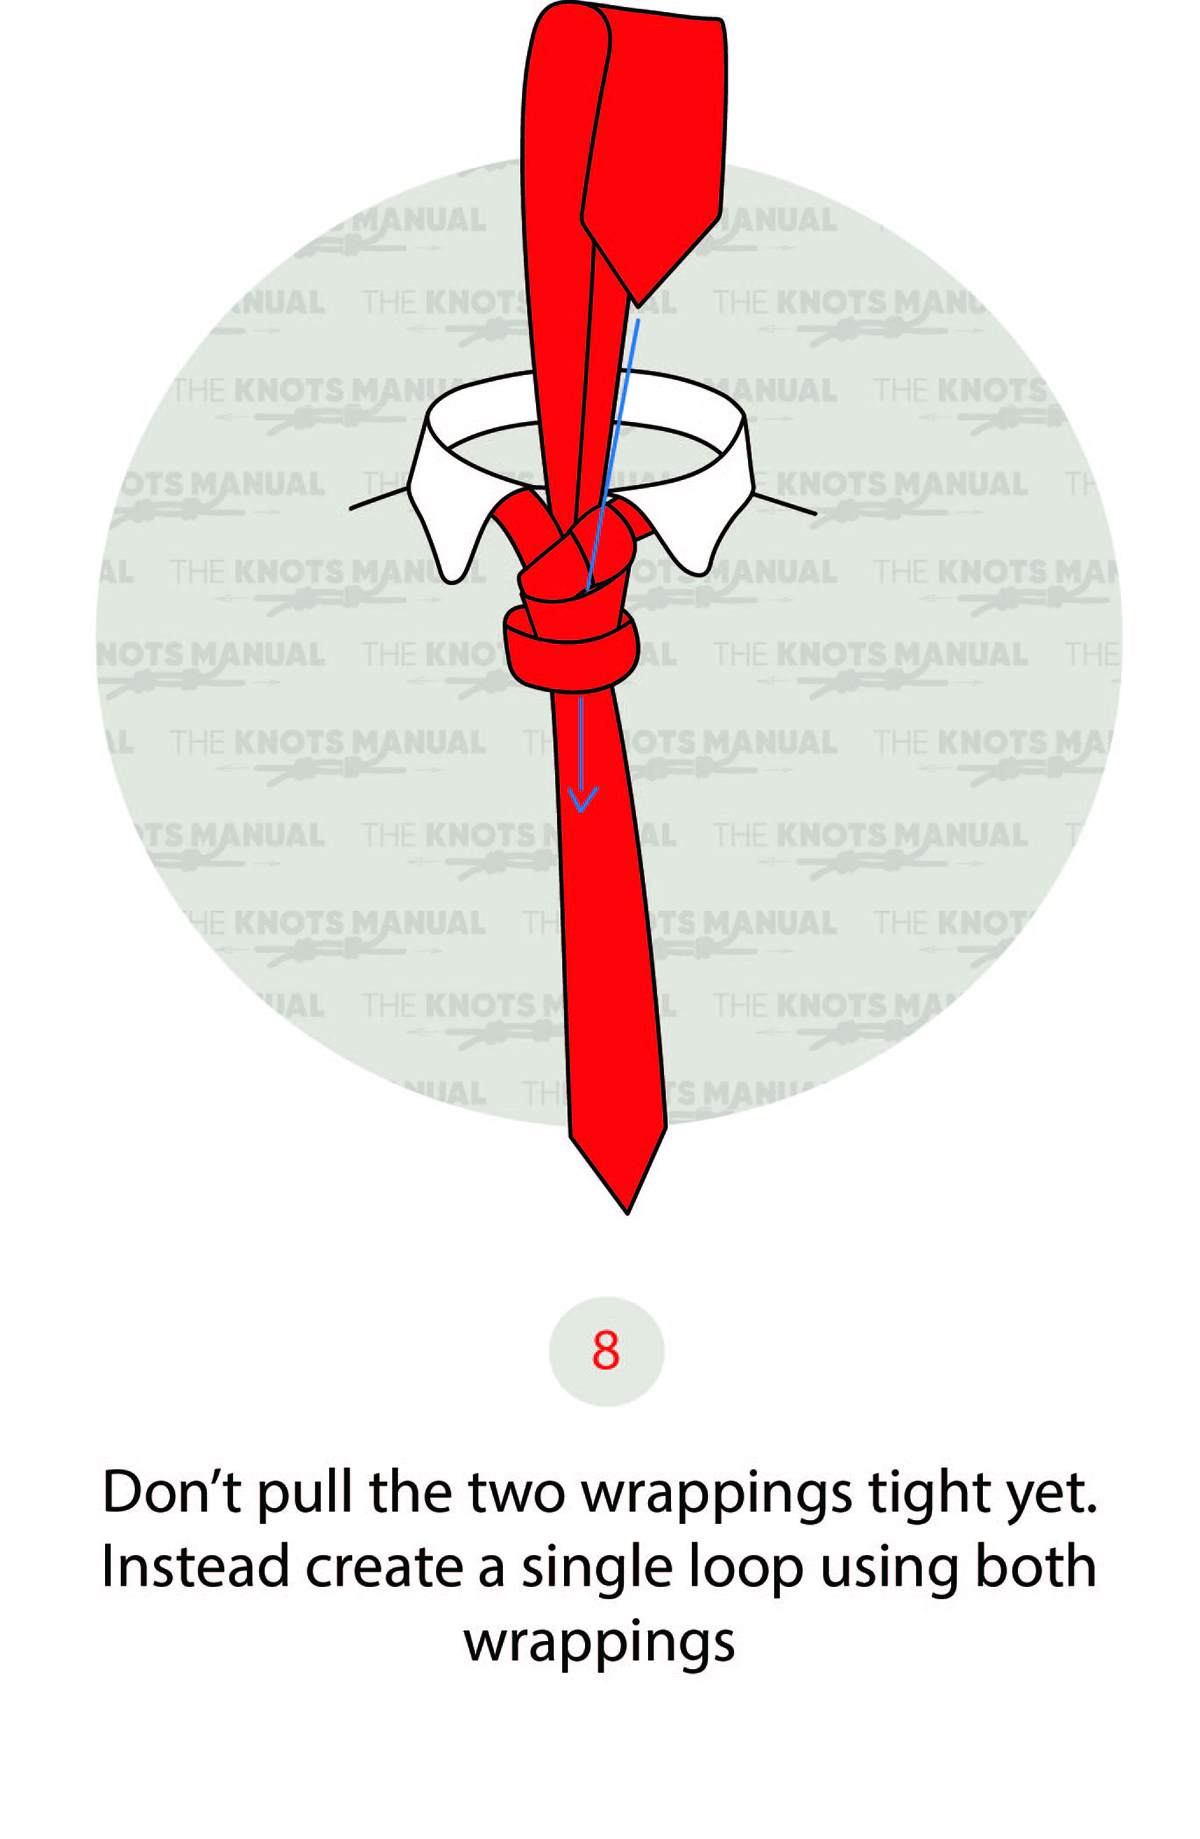
Pass the wide end through the two horizontal loops in front of the knot.
Step 9:
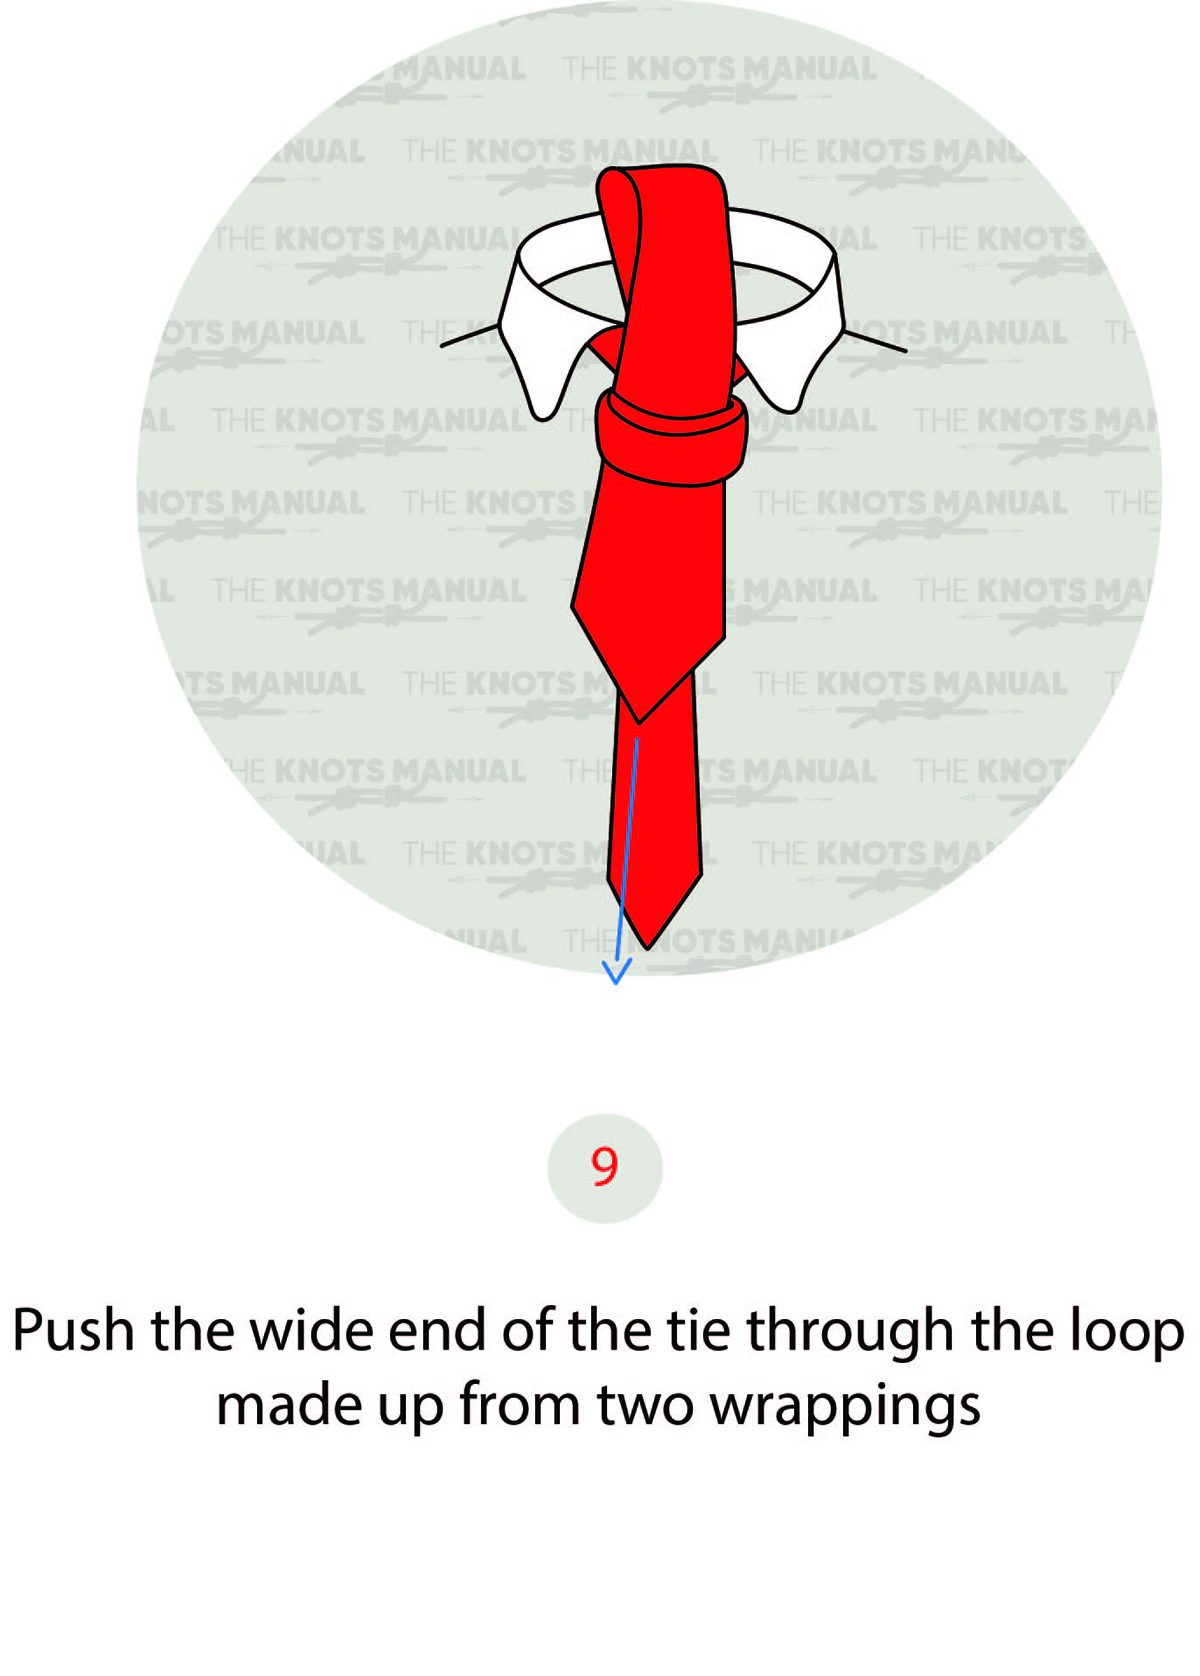
You need to pass through two loops instead of just one.
Step 10:
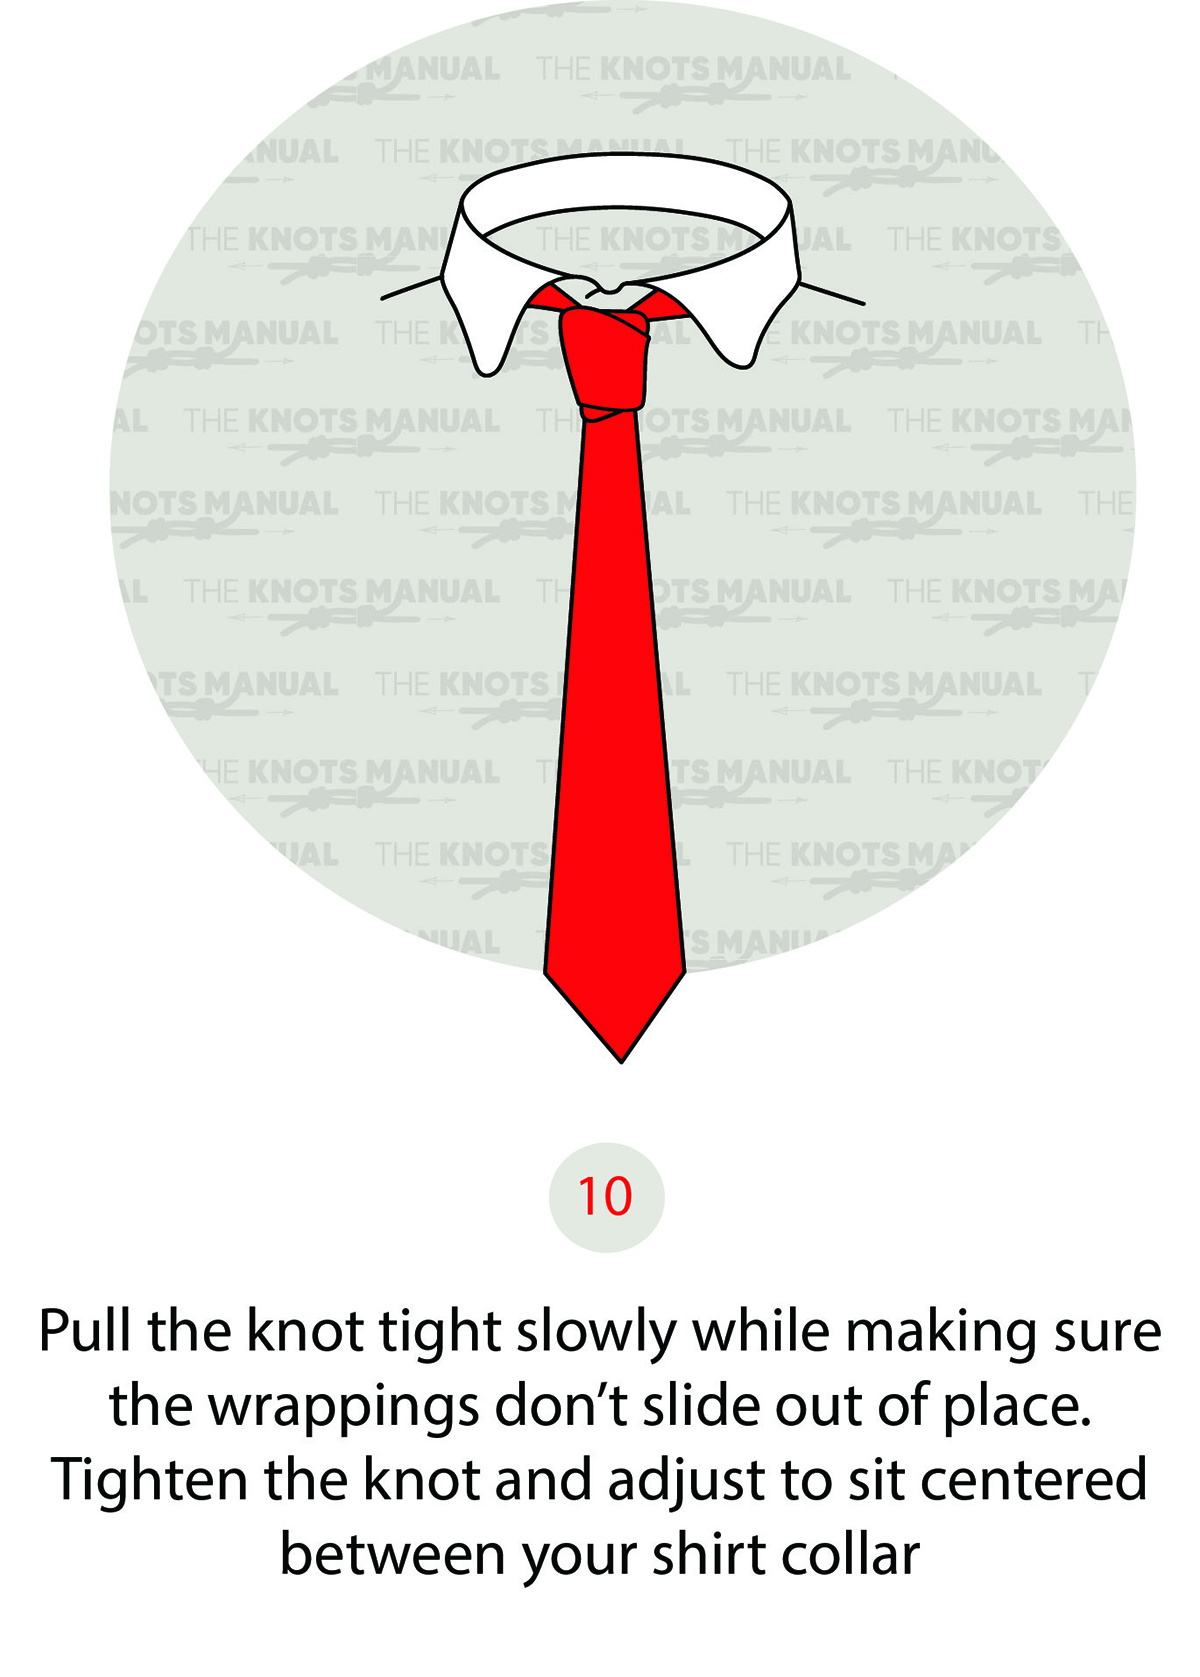
Tighten and dress to finish the Christensen Tie Knot.