The Bow Tie Knot ties a perfectly symmetrical, classic bow tie. Use it whenever you want to impress other guests at formal events. Sometimes it’s also referred to as the Basic Bow Tie Knot or the Classic Bow Tie Knot
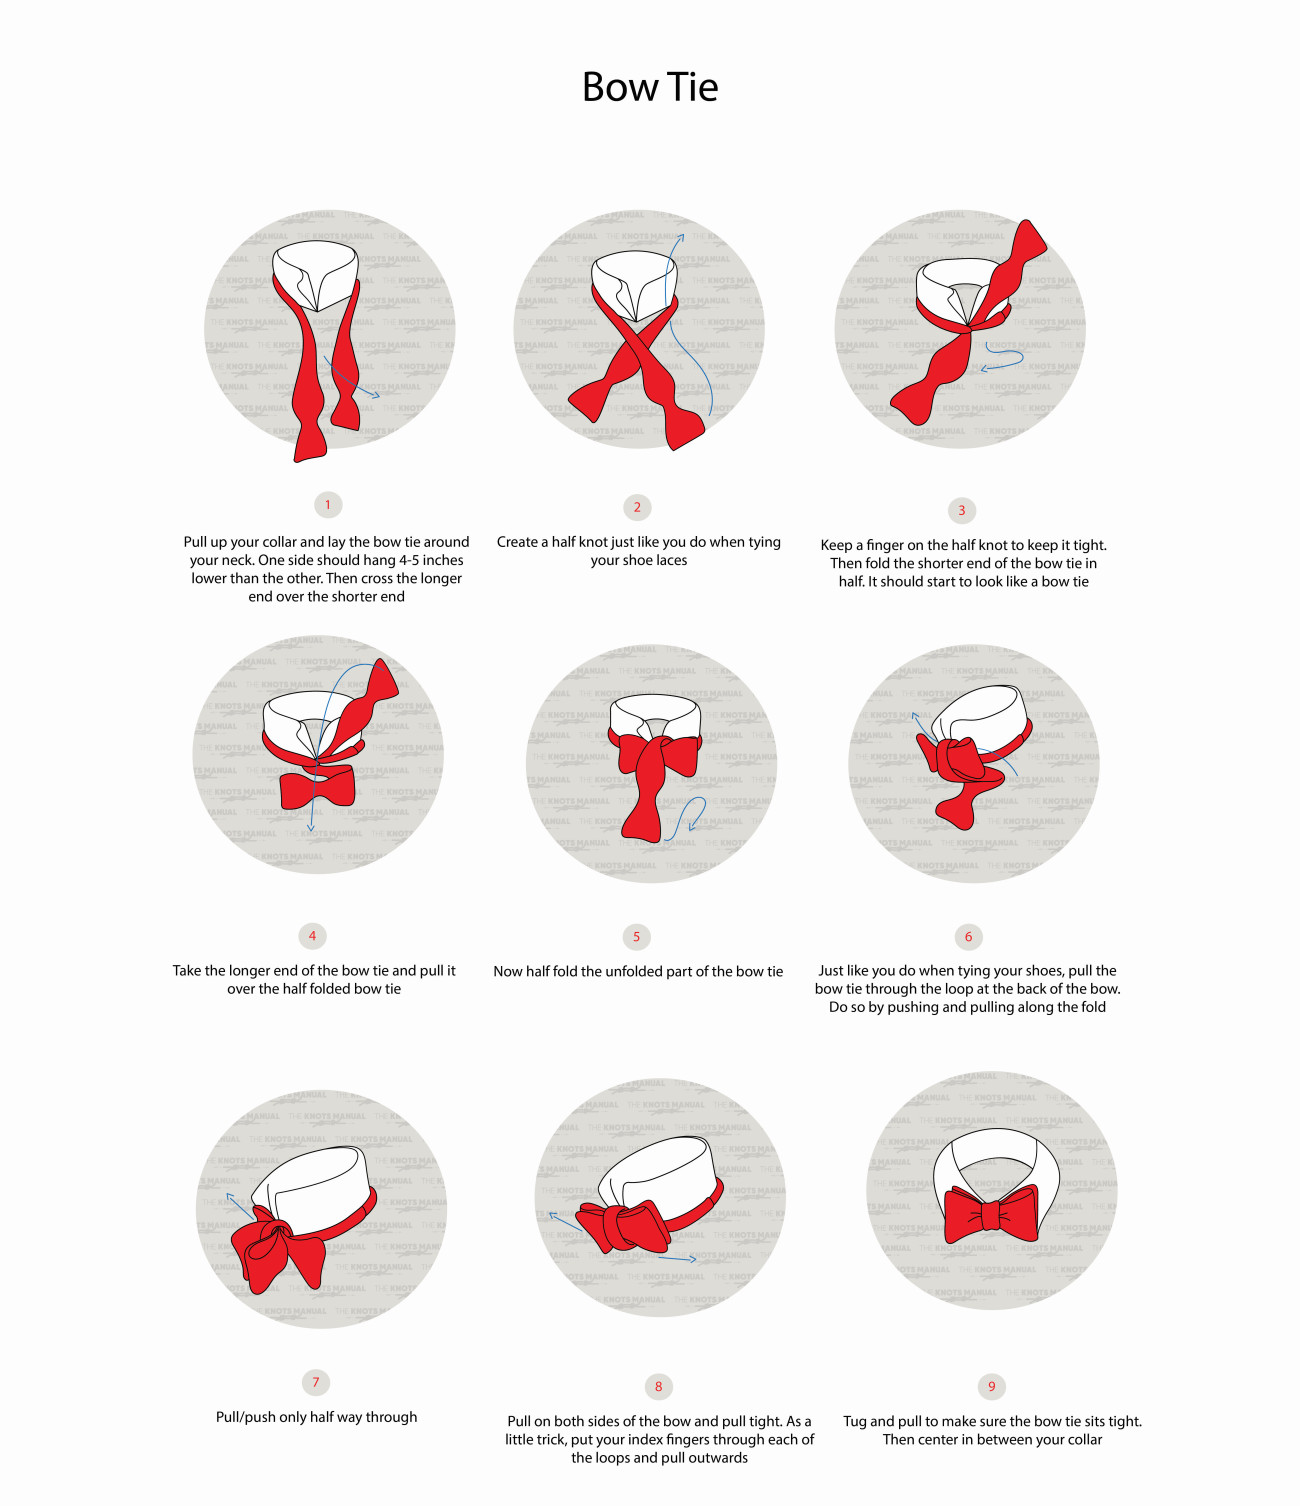
Quick Guide: Tying the Bow Tie Knot
Lay out the Bow Tie around your neck with the collar spread open. Adjust it so that one end sits 5 inches (10 cm) lower than the other one (step 1).
Now cross the longer end over the shorter one (step 2). Pass it behind the shorter one and tighten the knot (step 3). Fold the shorter end (so that it starts to look like a bowtie) and pass the longer end over it in the middle (step 4). Now fold the longer end and pass it behind the shorter end, so that both bow tie layers sit right next to one another (steps 5-7).
To tighten your bowtie, pull on each of its ends by the part that’s folded in half. Finally, adjust and dress your bow tie so that it sits straight and symmetrical.
About the Bow Tie Knot
The Bow Tie Knot is the most classical Bow Tie knot, used in the vast majority of occasions. Most modern bow ties are shaped in a way to be tied with this knot.
It’s harder to tie and adjust compared to wearing a necktie or a pre-tied bowtie, but achieves a more elegant look. It’s perfect to use on very formal occasions, both with wide and narrow-collar shirts.
Other Bow Tie Knots
Small Bow Tie Knot: Tied identically to the regular Bow Tie Knot, except with a shorter Bow Tie. The resulting bowtie should be 1-2 inches (2-5 cm) shorter compared to a regular one. It achieves an interesting look. Most notably, Winston Churchill preferred to wear a small Bow Tie Knot.
Parallel Bow Tie Knot: Also tied identically to the regular Bow Tie Knot. The only difference is that the middle part of the bow tie isn’t adjusted too tight. This results in a rectangular appearance of the bow tie.
Cross Bow Tie Knot: This knot is also tied the same way, but dressed differently. Each bow is tilted in the opposite direction. This achieves an x-shaped look for the bow tie, which can be useful for some occasions.
Step-By-Step Guide: How to Tie the Bow Tie Knot
A step-by-step guide on how to tie a Bow Tie Knot.
Step 1:
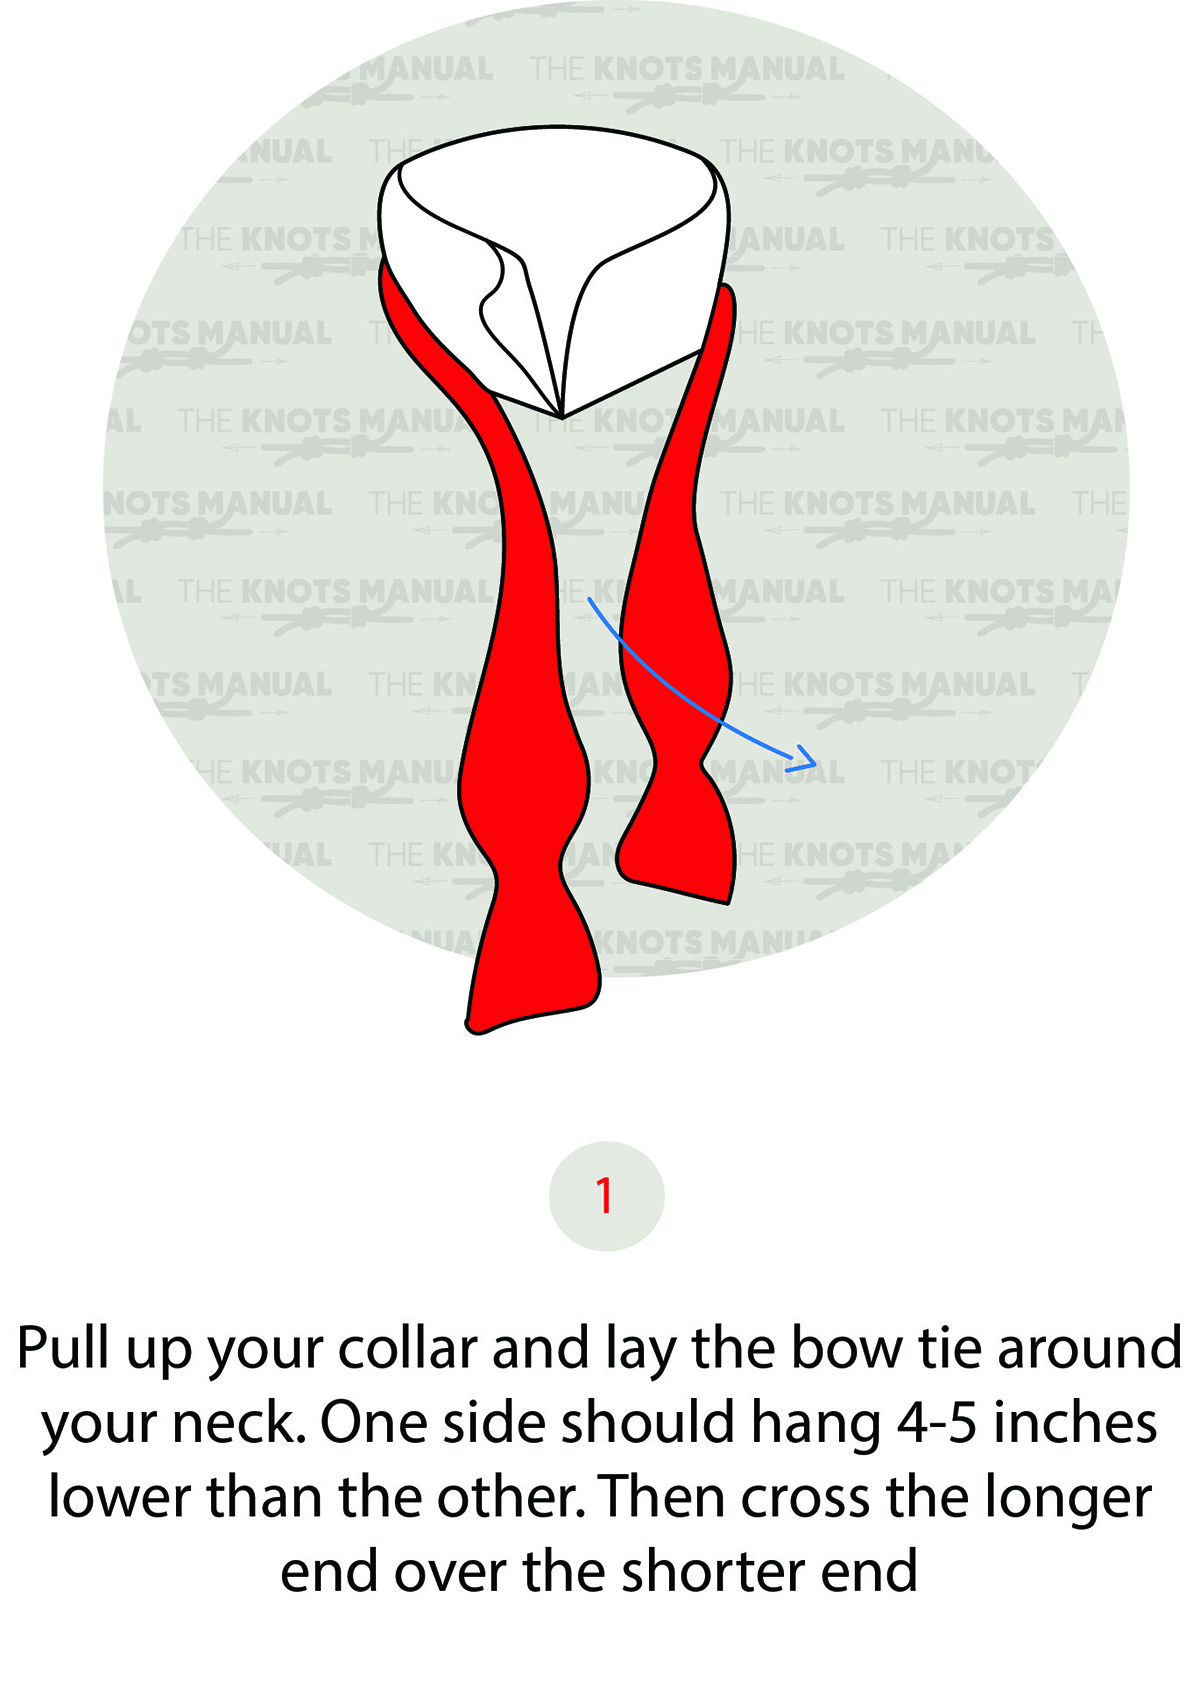
Lay out the bow tie around your neck with the collar extended and one end 4 inches (10 cm) lower than the other one. Place the longer end over the shorter one.
Step 2:
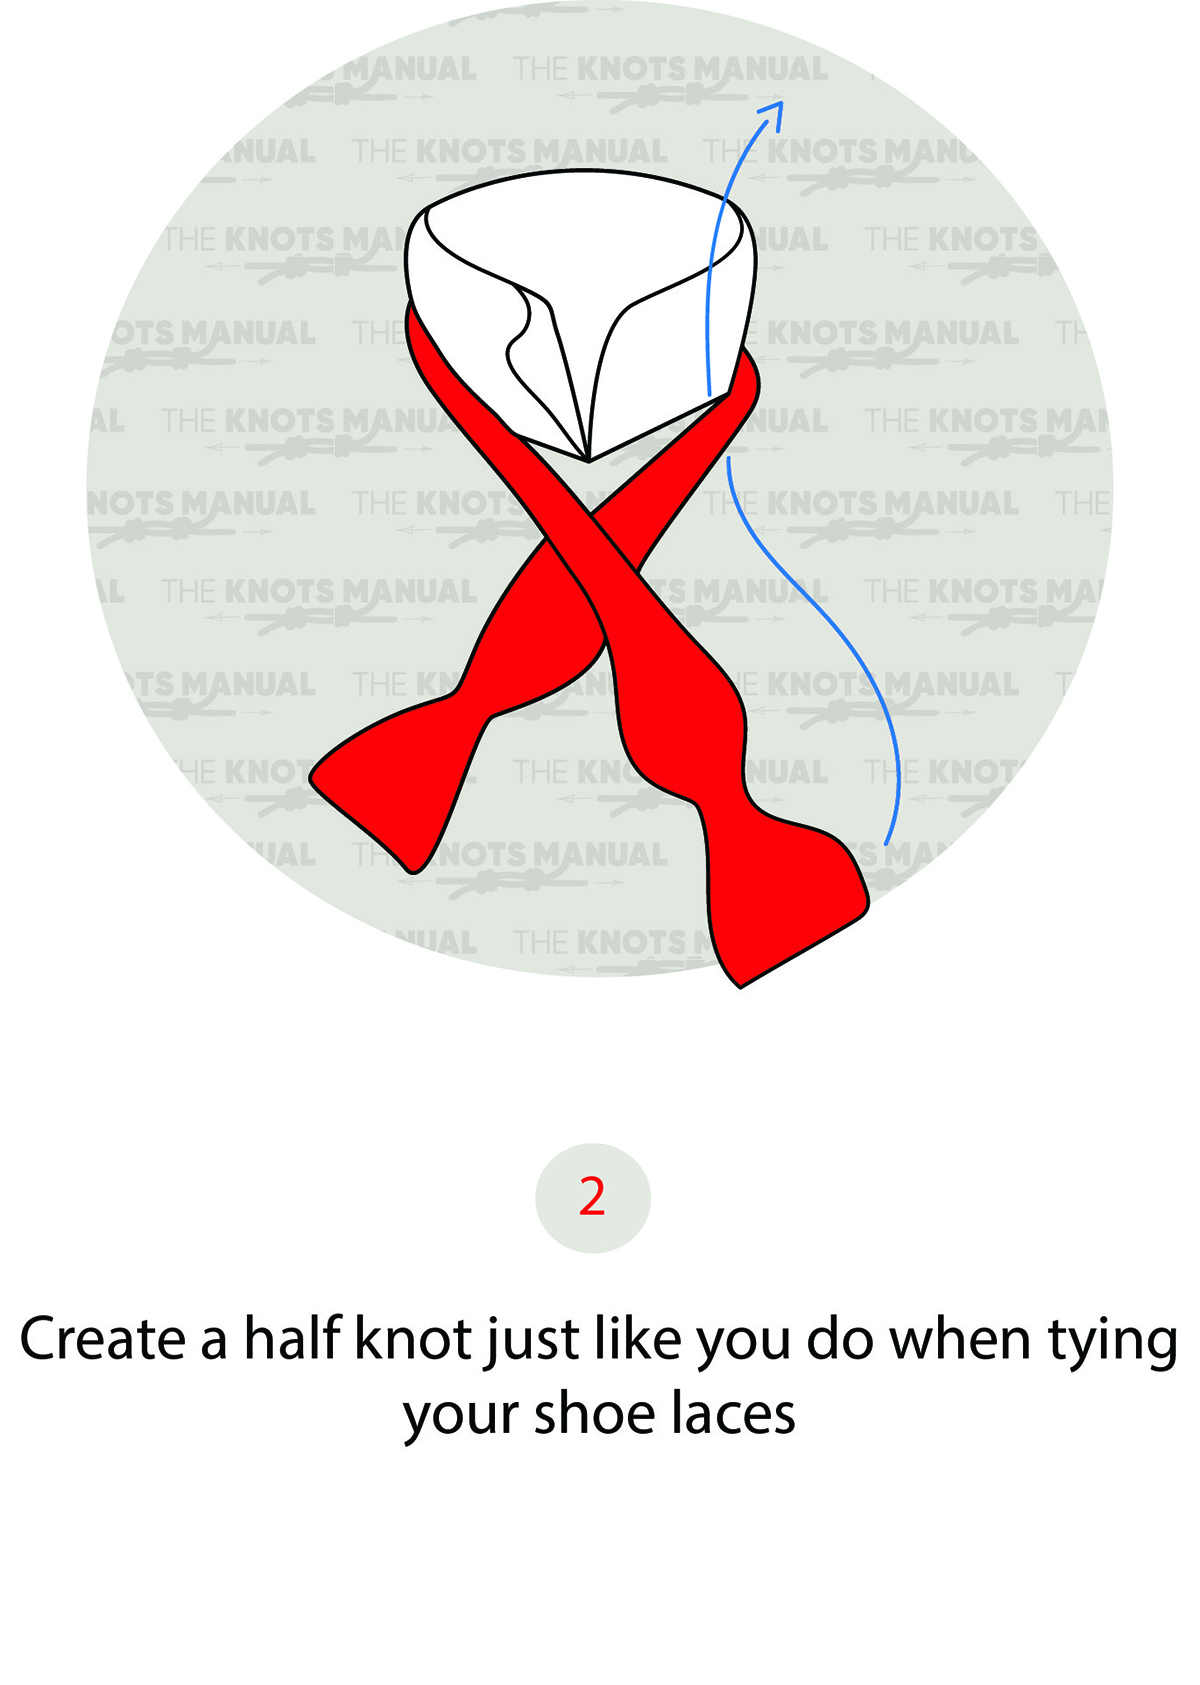
Go around the shorter end with the longer one and tighten the knot.
Step 3:
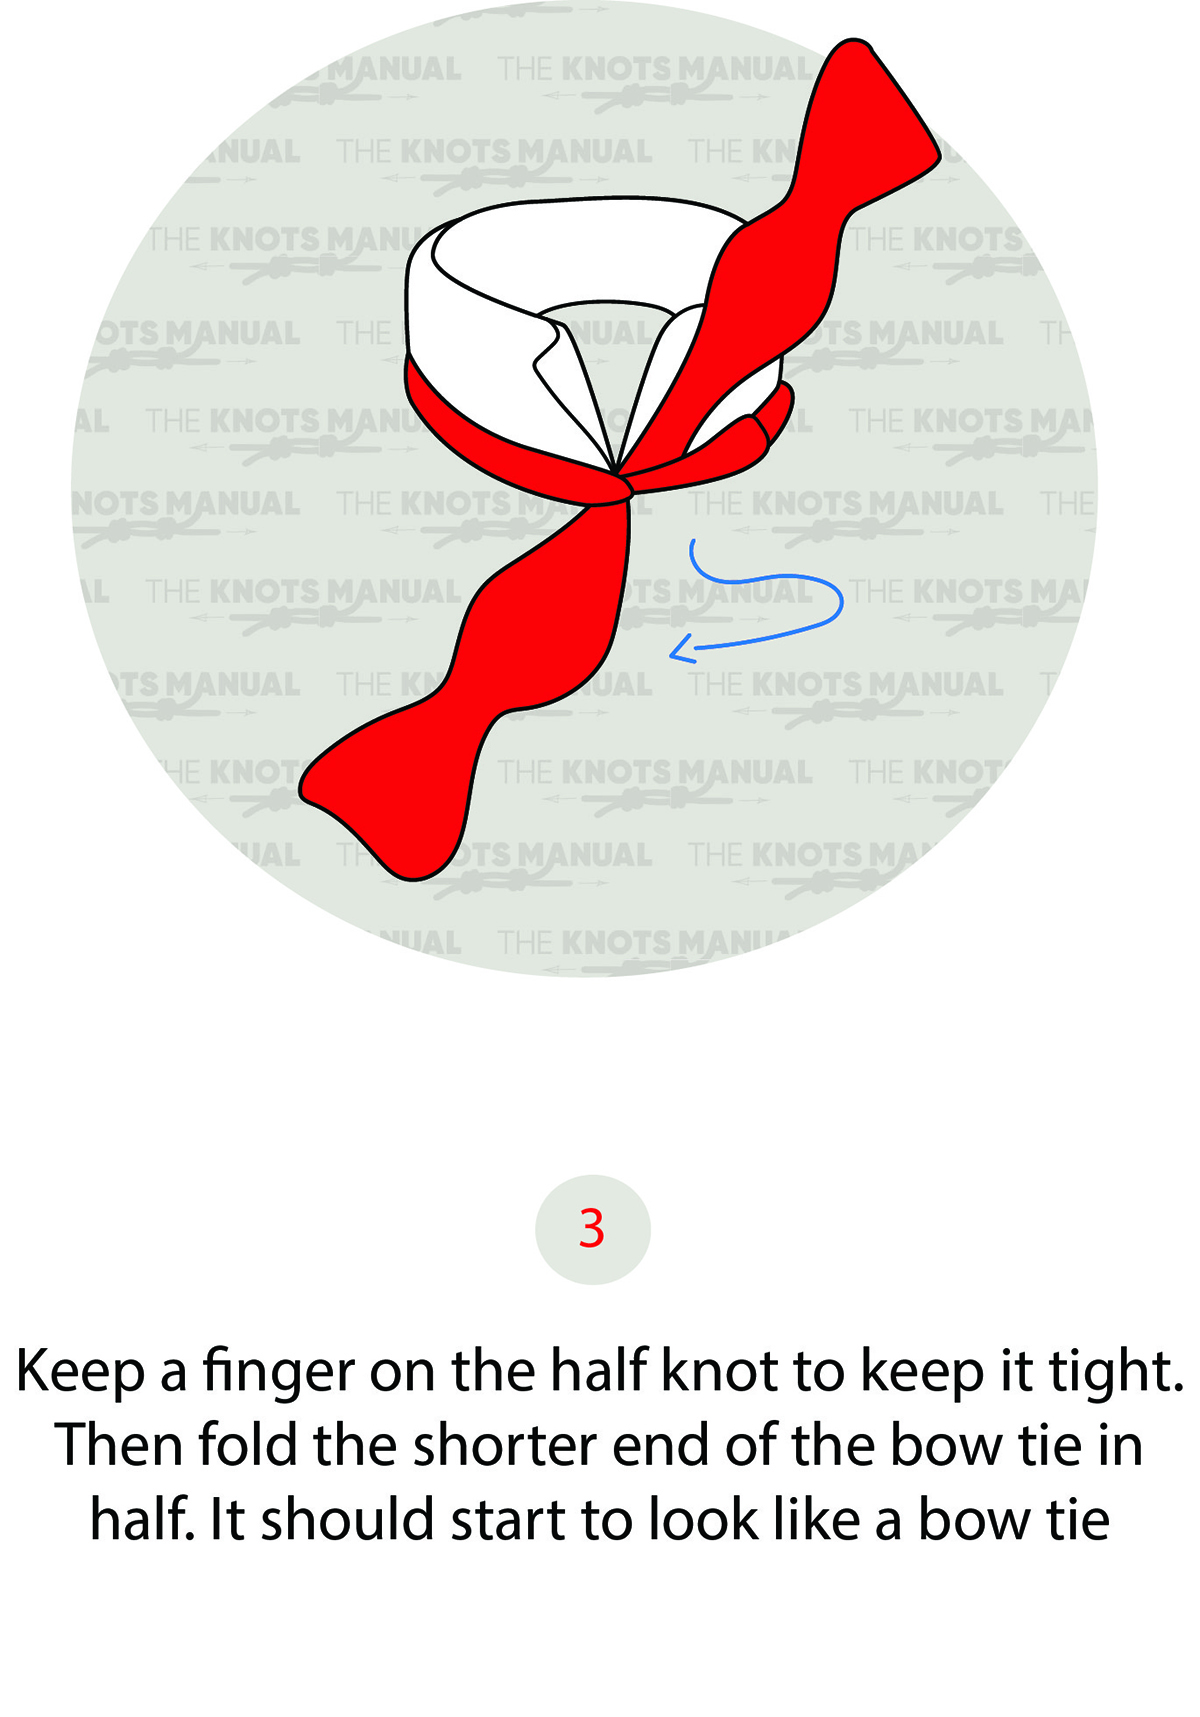
Fold the shorted end (so that it starts looking like a bow tie), while keeping the rest of the knot pressed down with your other hand.
Step 4:
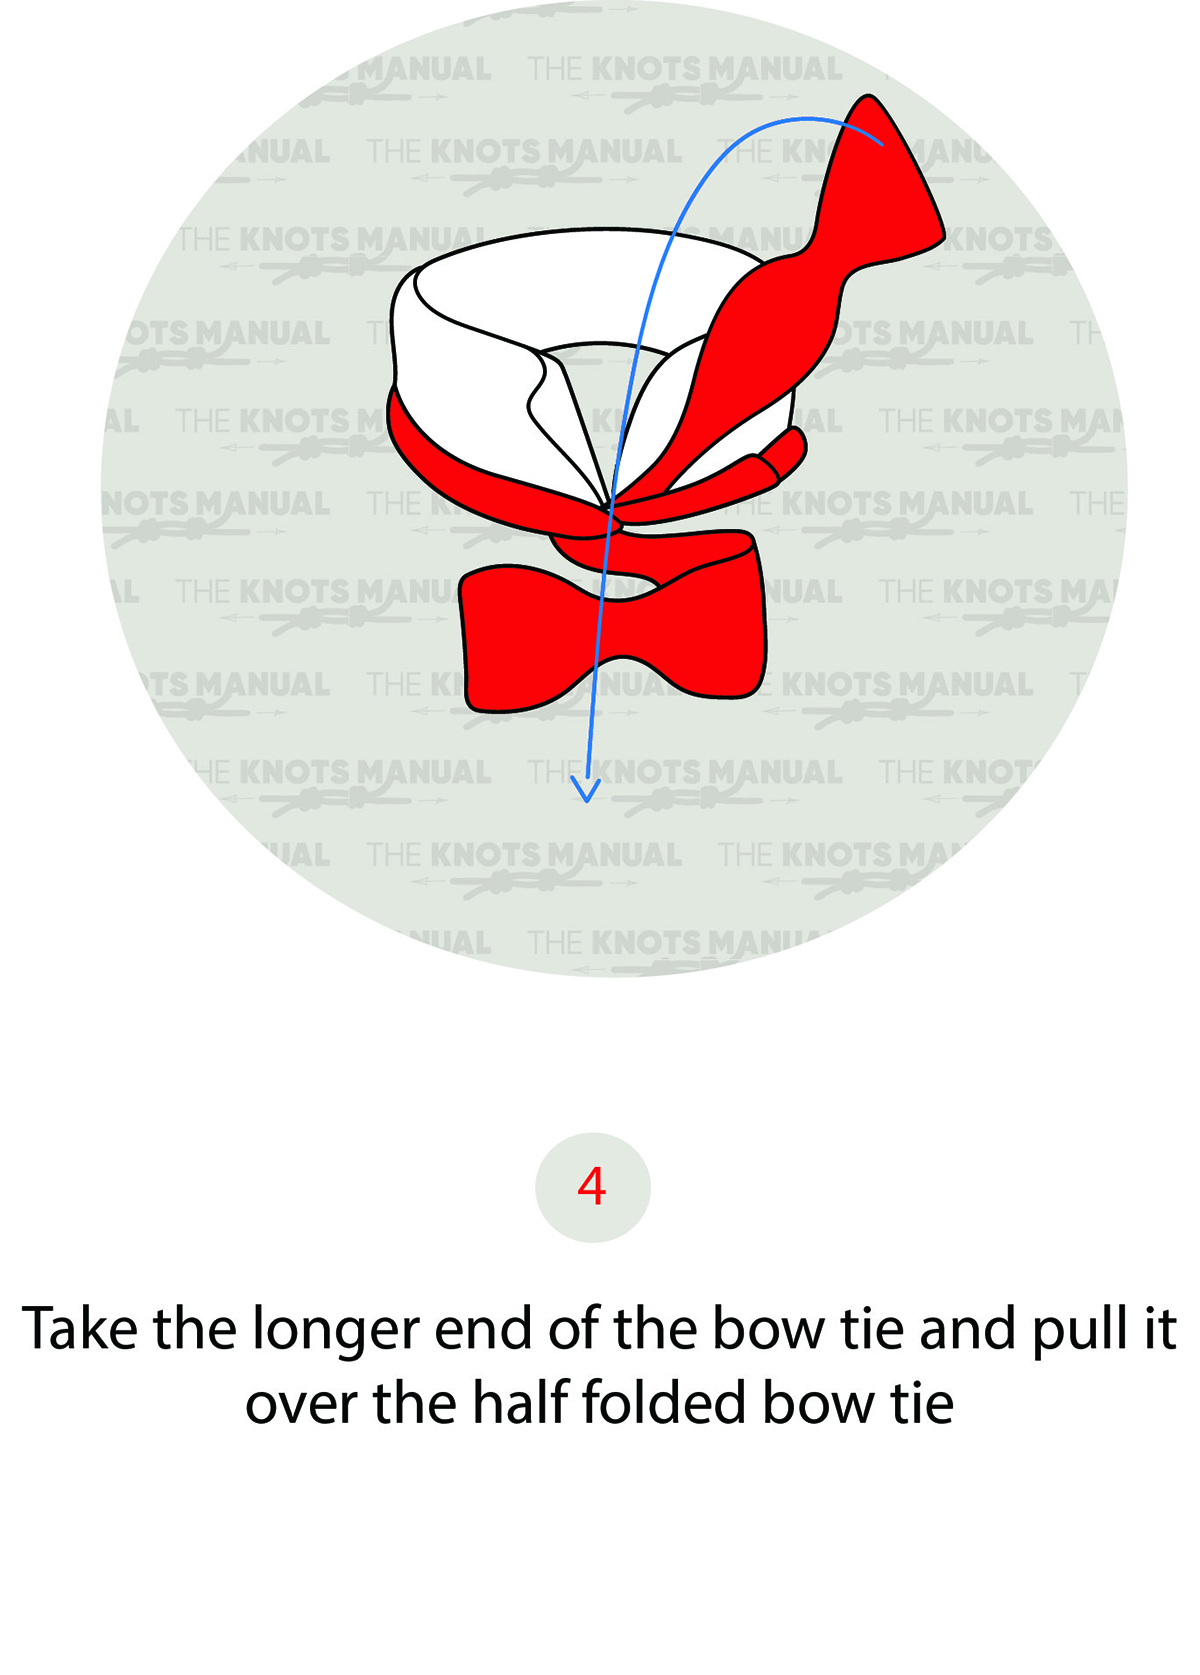
Pass the longer end over the folded shorter end in the middle of the bow tie.
Step 5:
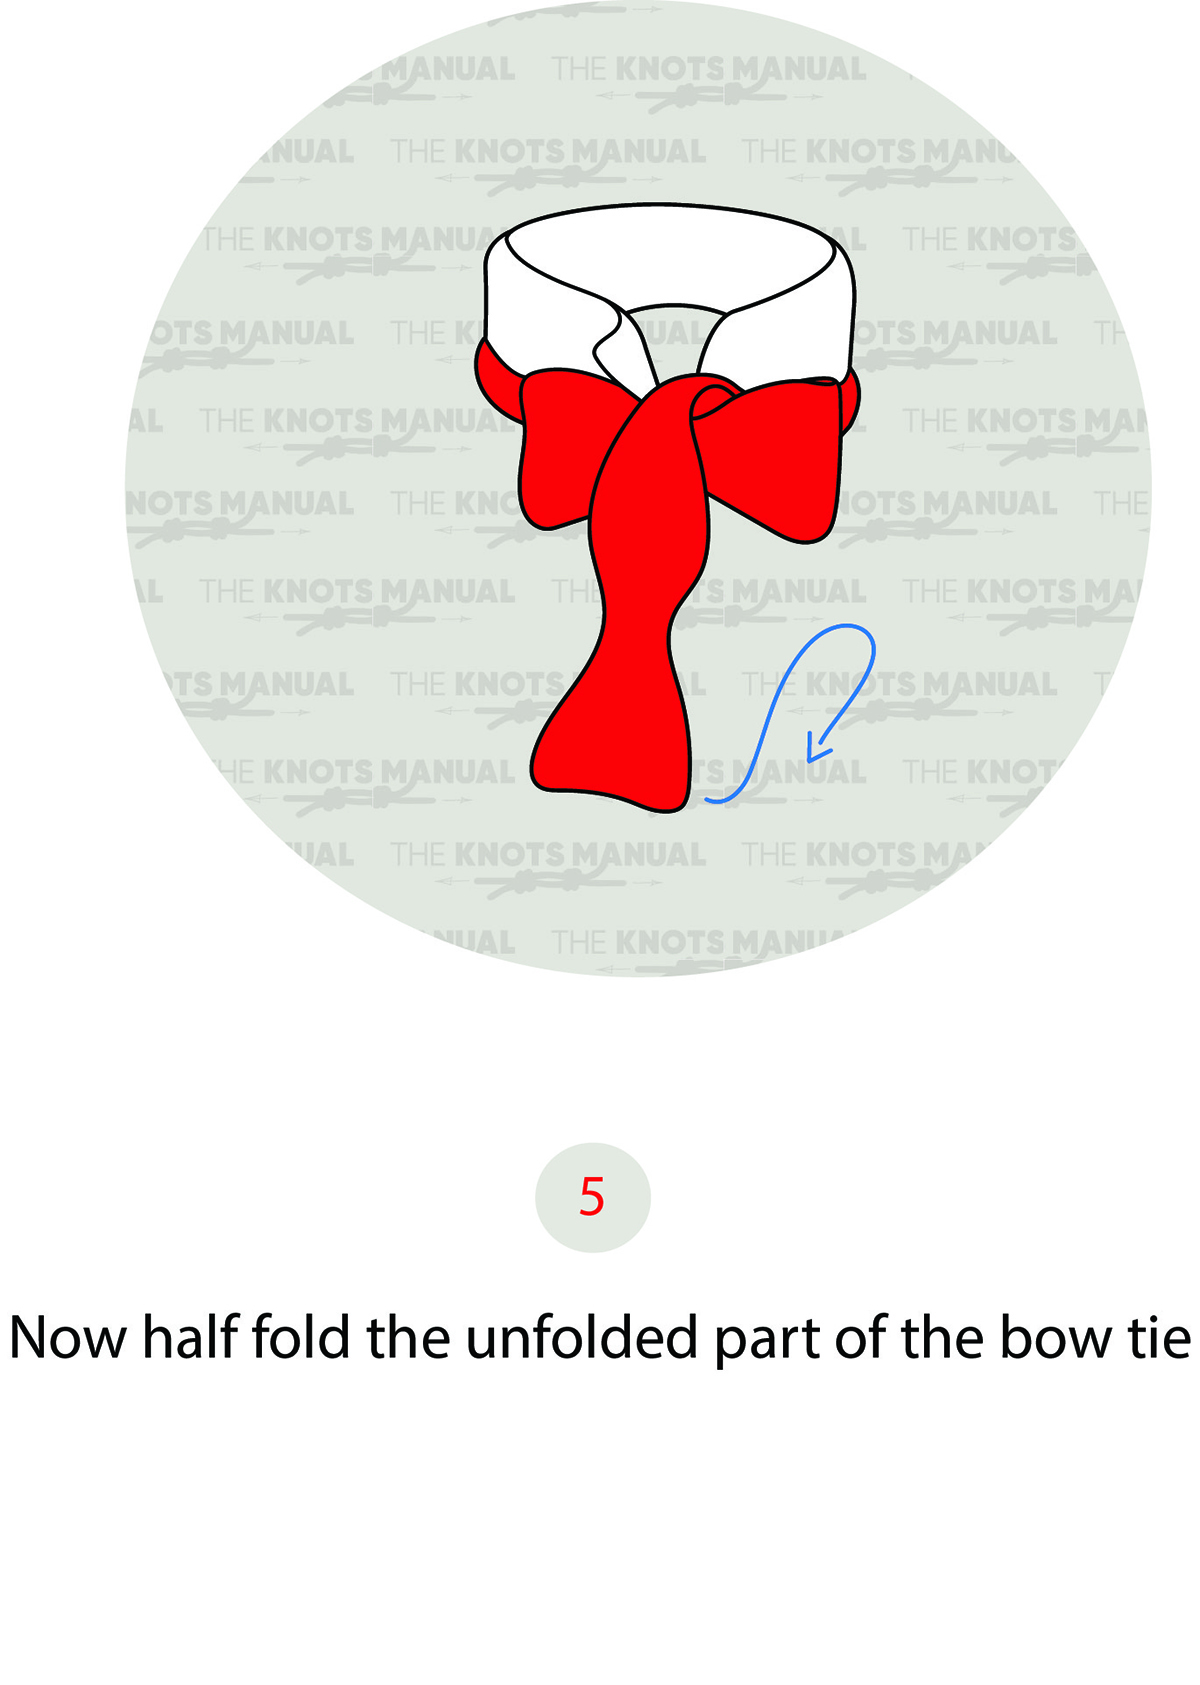
Fold the longer end, so that it also starts to look like a bow tie.
Step 6:
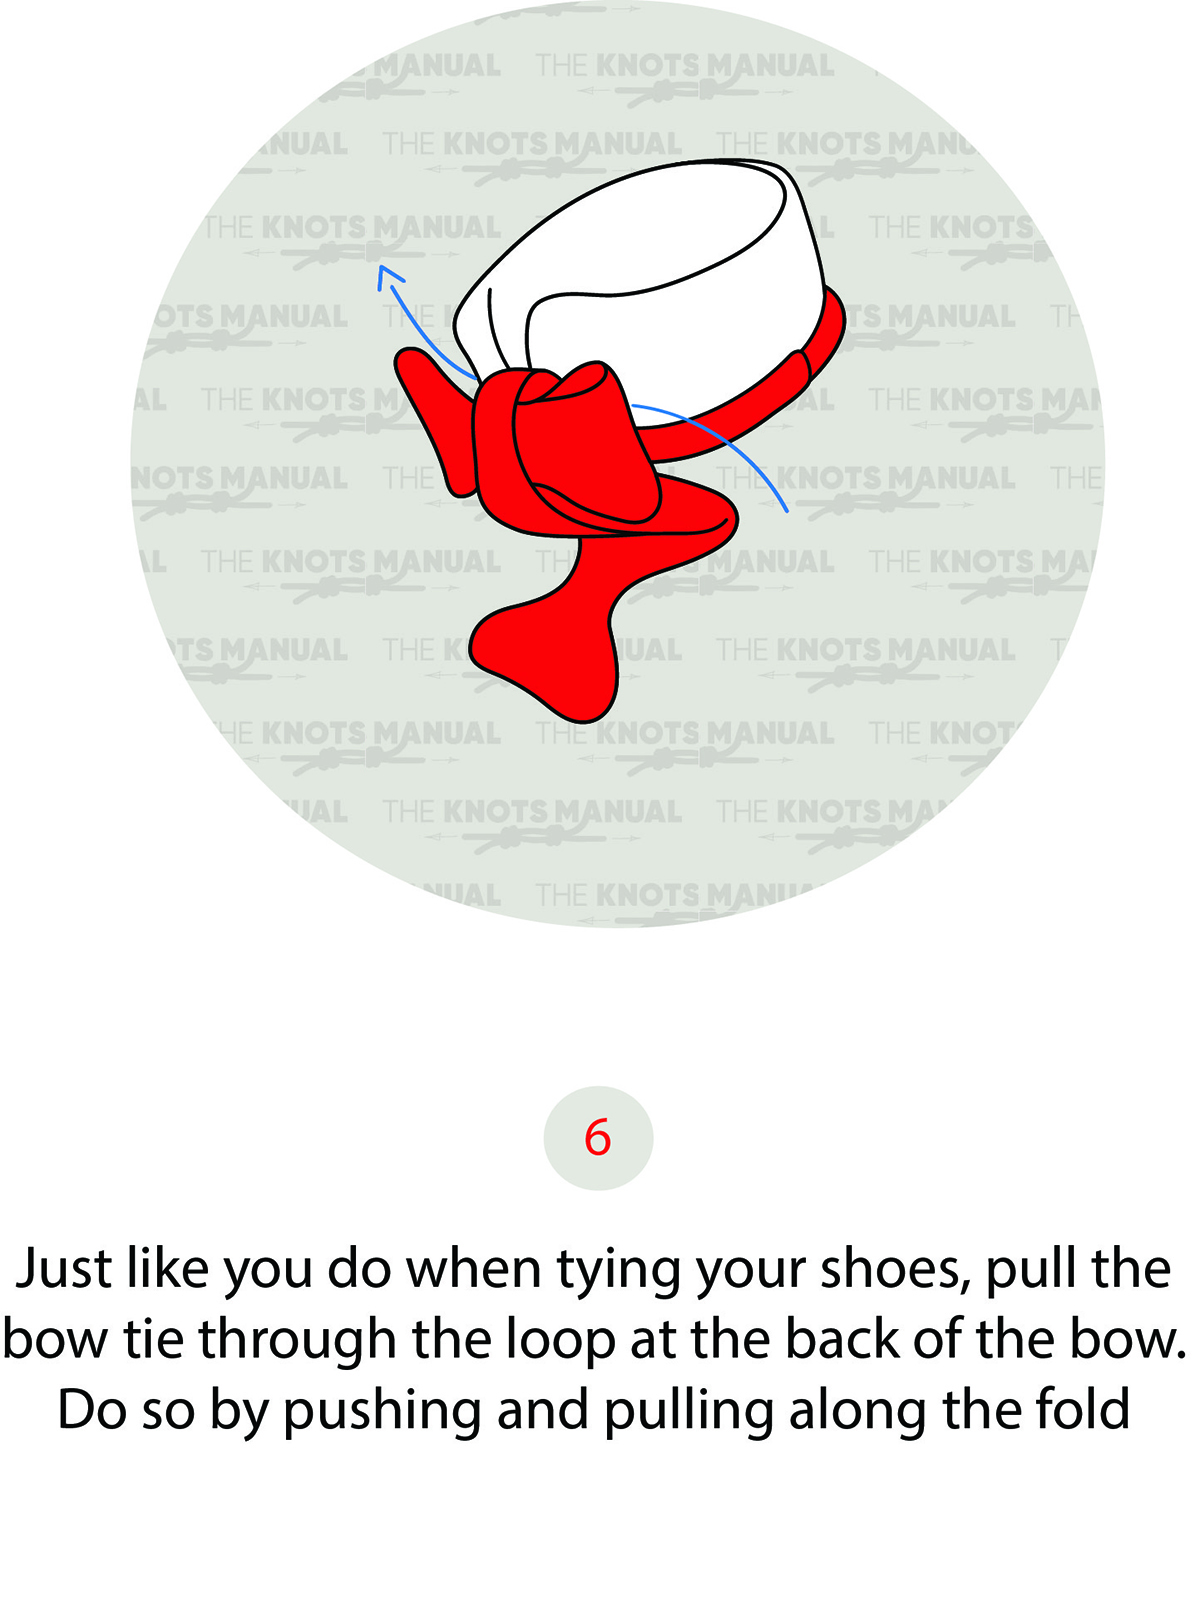
Pass it down and behind the shorter end, as illustrated above.
Step 7:
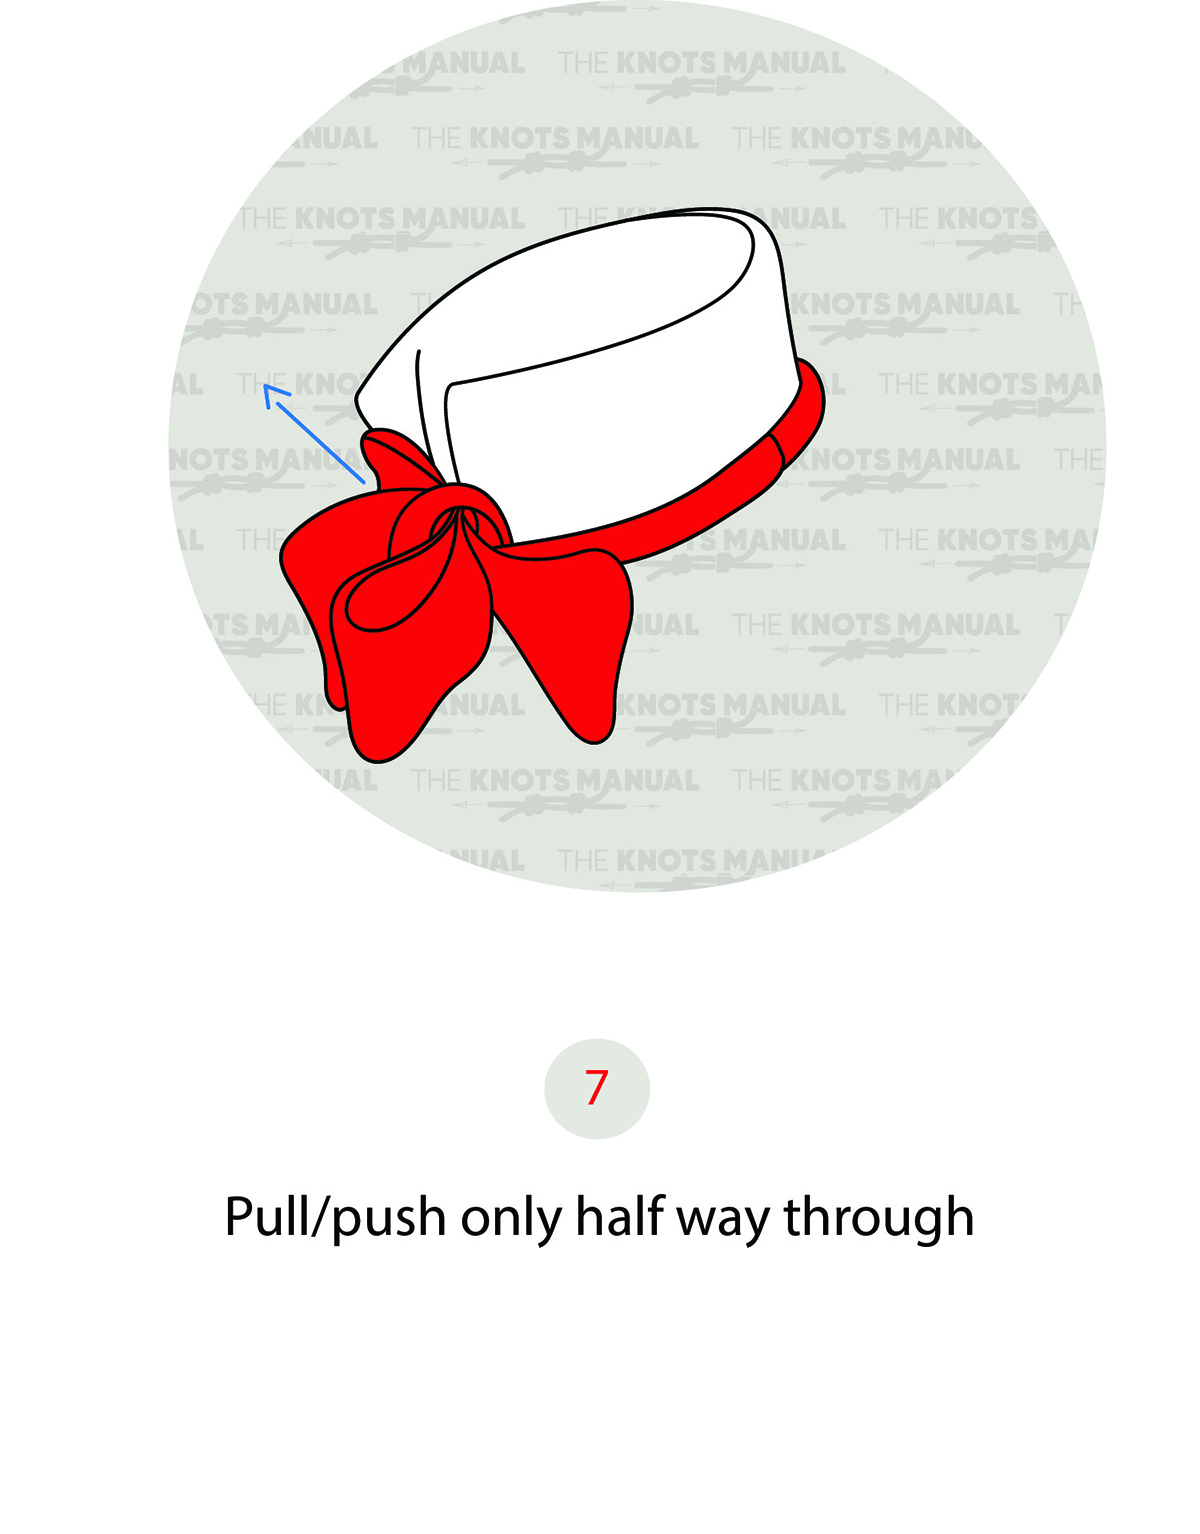
Pass it halfway through, so that it sits right behind the shorter end of the bow tie in the front.
Step 8:
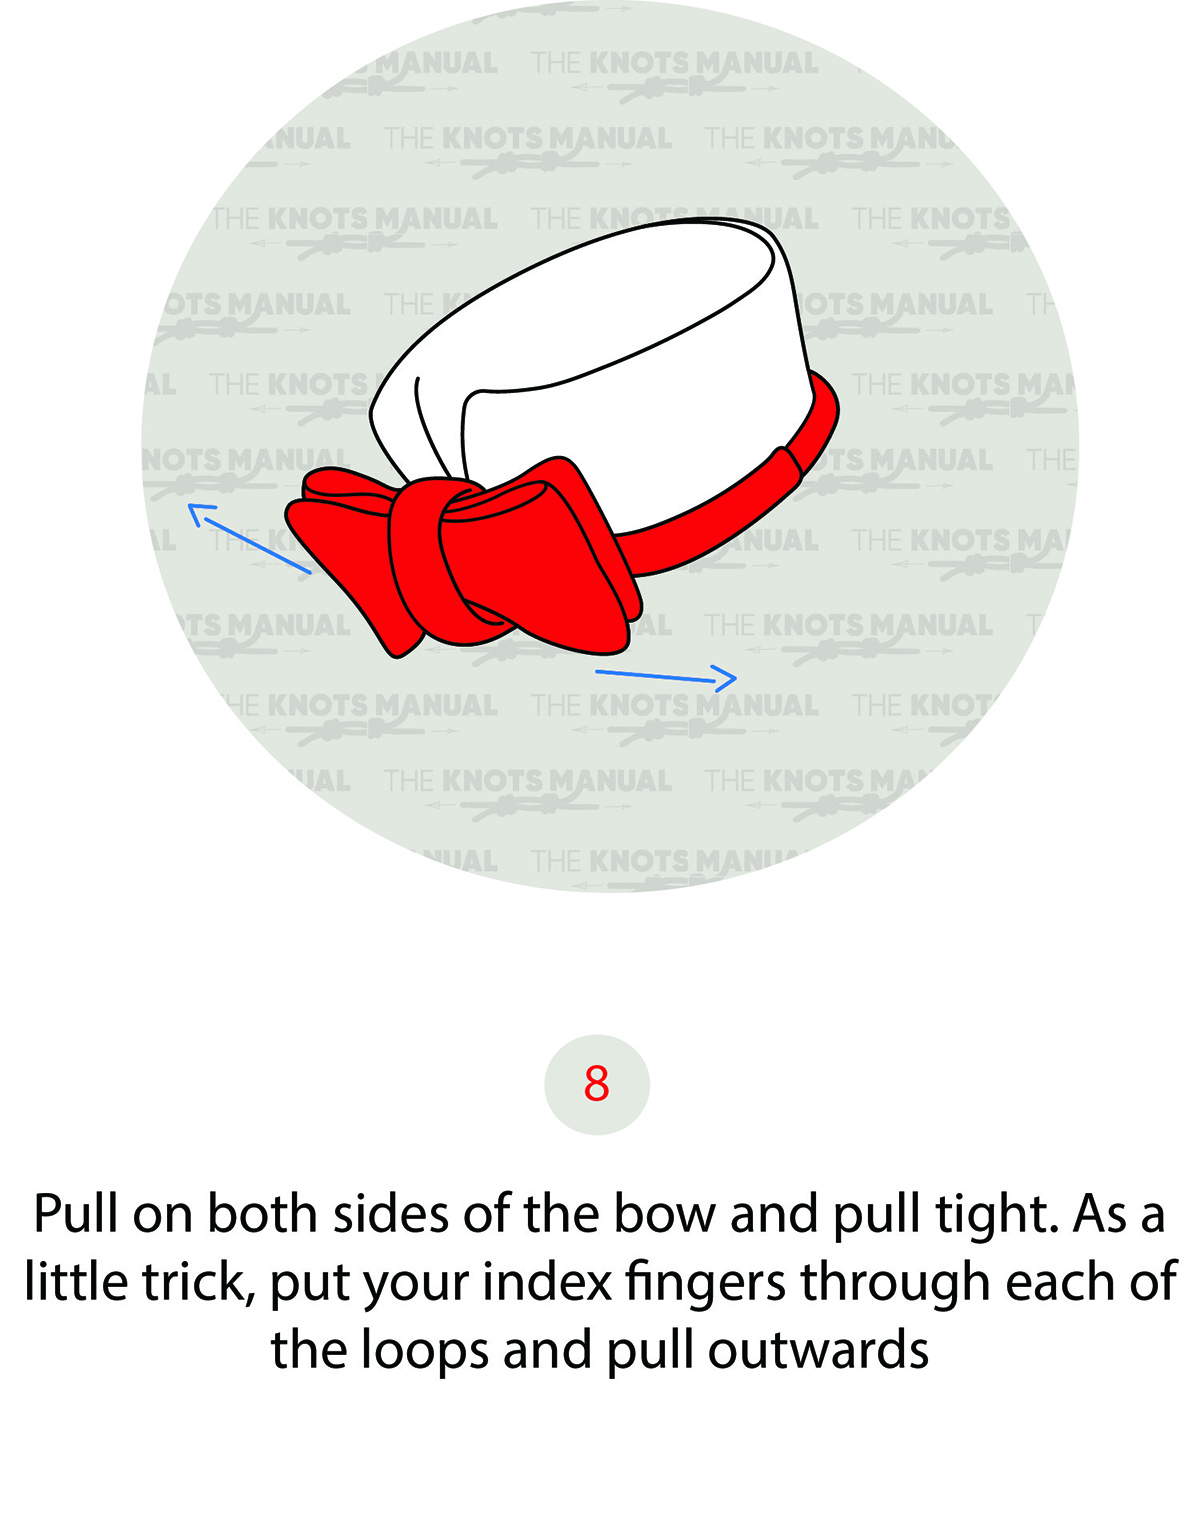
Pull each end of the bow tie outwards by the sections where you folded them to tighten it.
Step 9:
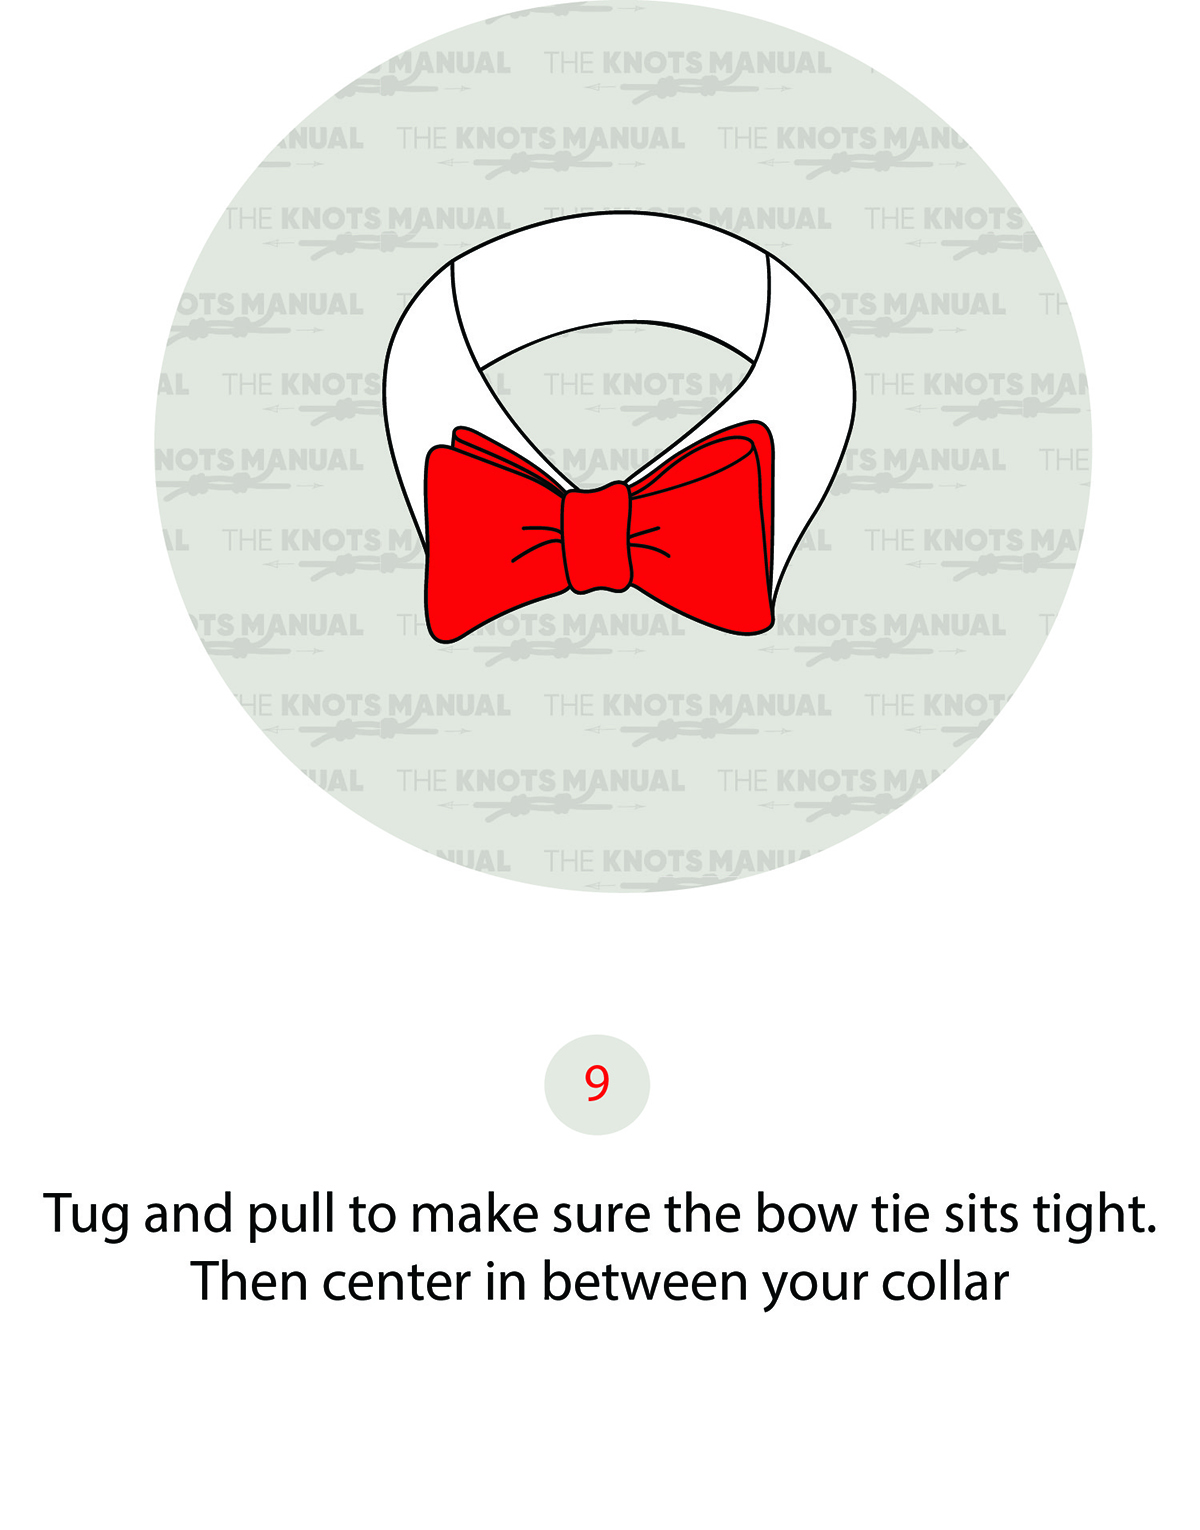
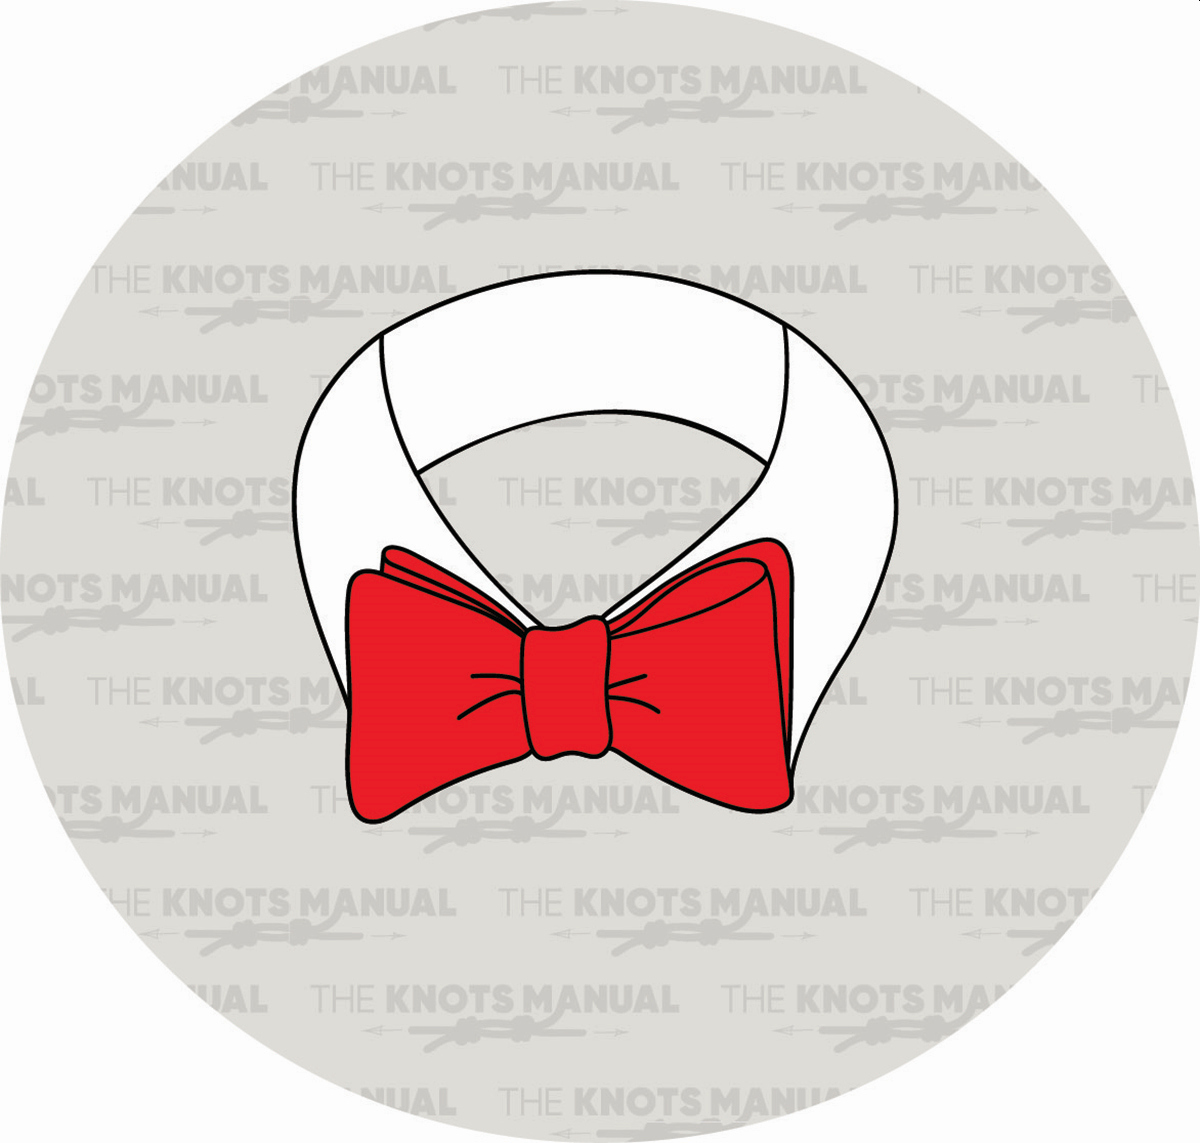
Adjust and dress your bow tie so that it sits right.