Check out our free step-by-step guide to learn how to make your own Macrame Plant Hanger. You don’t need to download, buy, or sign up for anything – simply look at the instructions below.
About This Macrame Plant Hanger Pattern
This DIY Macrame Plant Hanger design is very simple and beginner-friendly. It involves only two Macrame knots – the Square Knot and the Gathering Knot, which both are very easy to learn. To make it, you don’t need to be a Macrame expert. You can do it at your home without any complicated tools.
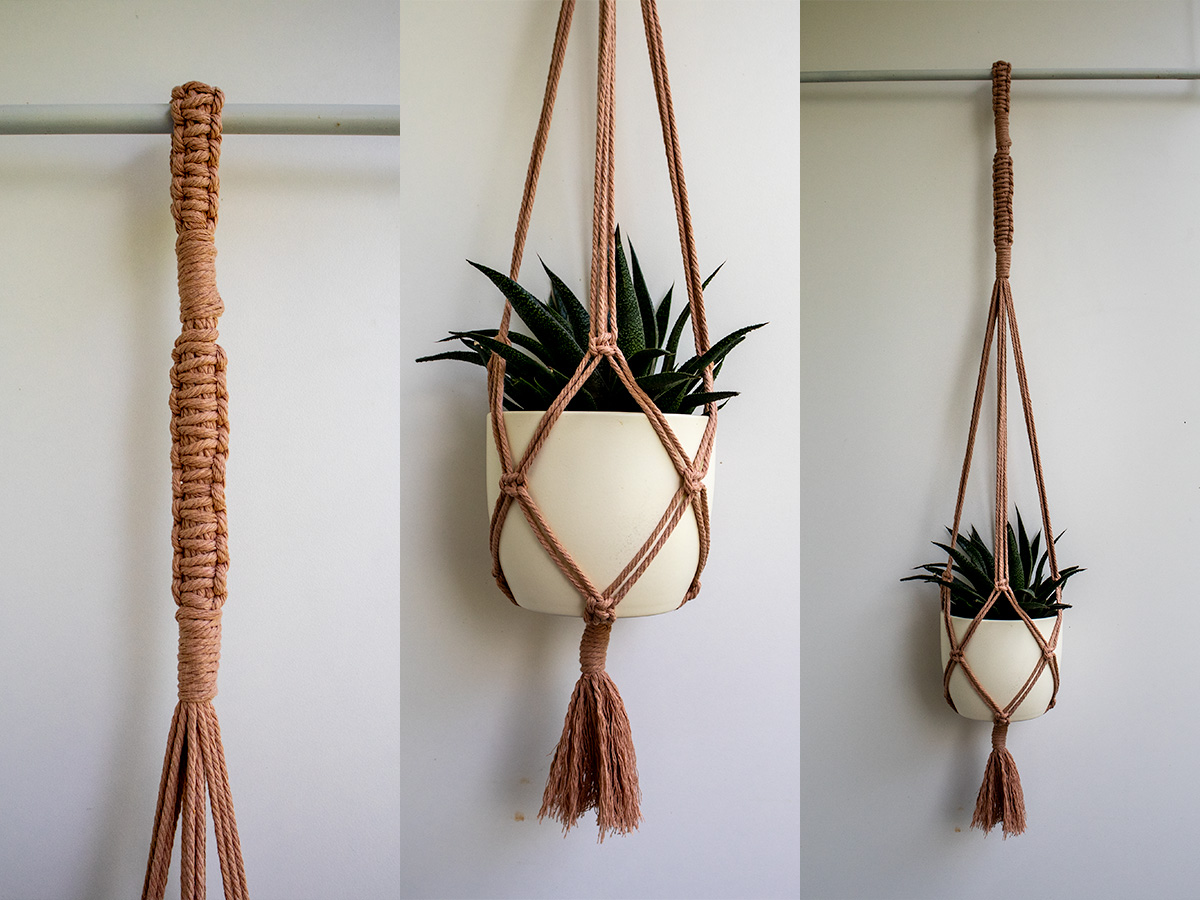
It includes a ring at the top (which you can then hang with a hook), a braided top section, a 3-part zig-zag net for holding the pot, and a loose bottom tail. You can tailor it to your needs by making each section longer or shorter or adding in extra netting for complexity. Here, we only included the bare minimum.
In it, you can hang plant pots in 10-30 cm (4-12 inch) diameters. But you can also hang larger or smaller pots by tying them with a smaller/larger thread and adjusting the measurements between the knots.
Requirements for Making This Macrame Plant Hanger
To tie this macrame plant pot hanger, you will need to gather the following supplies:
- Scissors.
- Tape measure.
- Masking Tape (or any other tape that can hold the thread in place).
- Thread in any color and thickness. We used a natural cotton 3mm twisted thread in a rose-beige color. You’ll need 27m (89 ft) of it in total.
Step-By-Step Instruction: How to Make a DIY Macrame Plant Pot Hanger
You can tie this macrame plant pot hanger in only 30 minutes. Follow our step-by-step guide down below, where we explain each step in detail.
Step 1: Cutting the Threads to Length
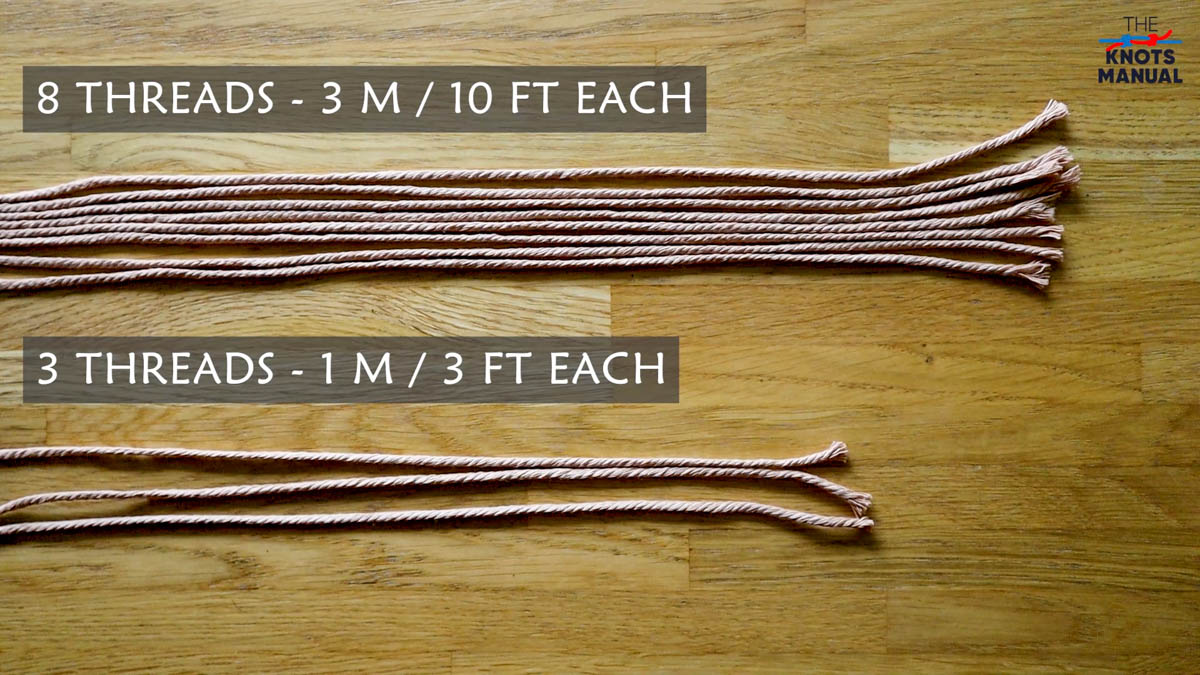
To make this Plant Pot Hanger, you will need to cut your thread into the following pieces:
- 8 threads in 3m (10 ft) length each
- 3 threads in 1m (3 ft) length each
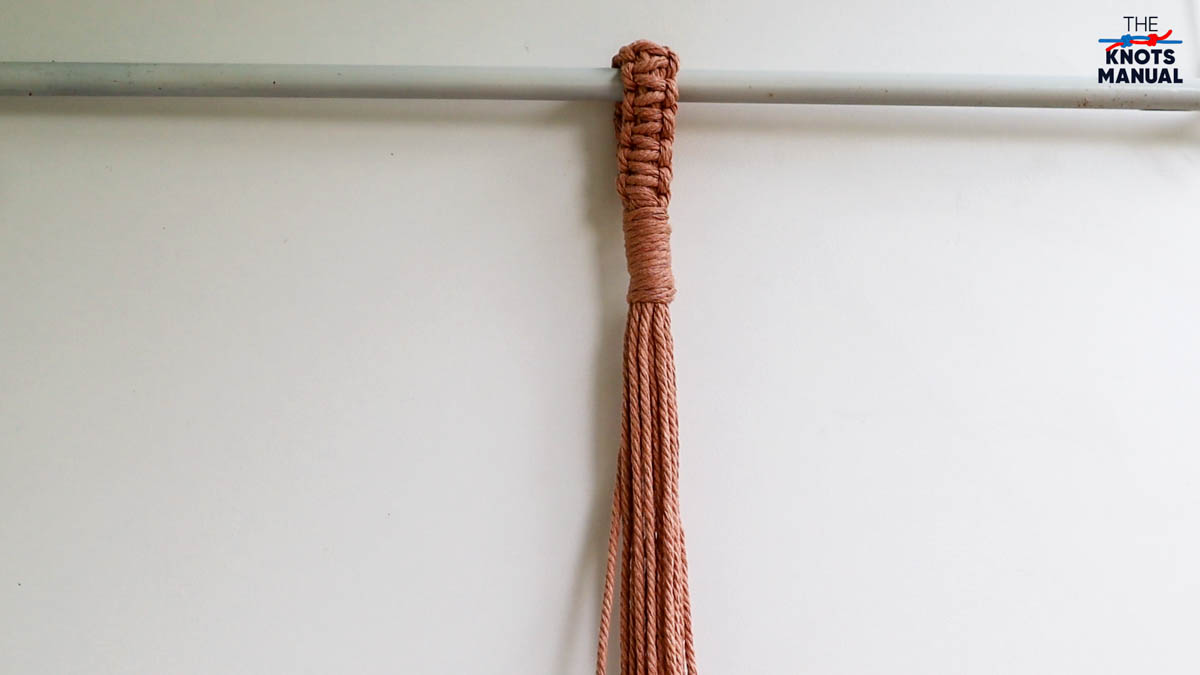
Step 2: Tieing the Upper Ring
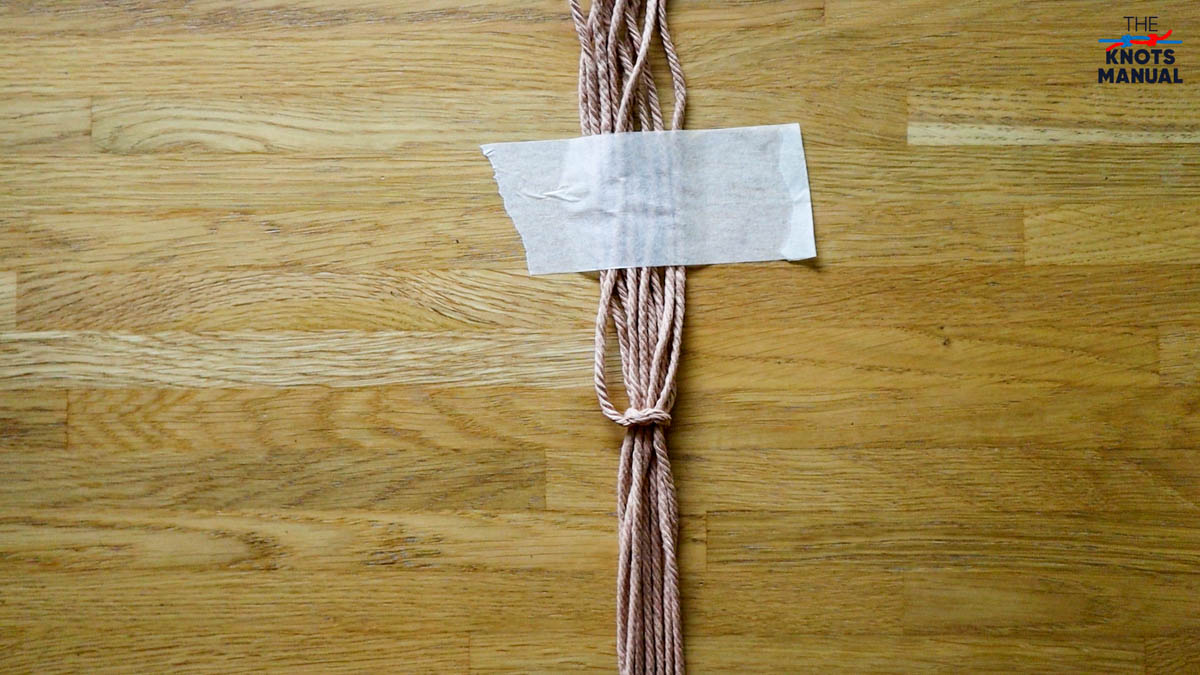
Place the eight 3m (10 ft) long threads parallel to each other in a bundle, and fold it in half. Tie a temporary knot in the middle to hold it in place with a piece of string. Finally, put some tape over it on the top side to make it easier to work with the bottom threads.
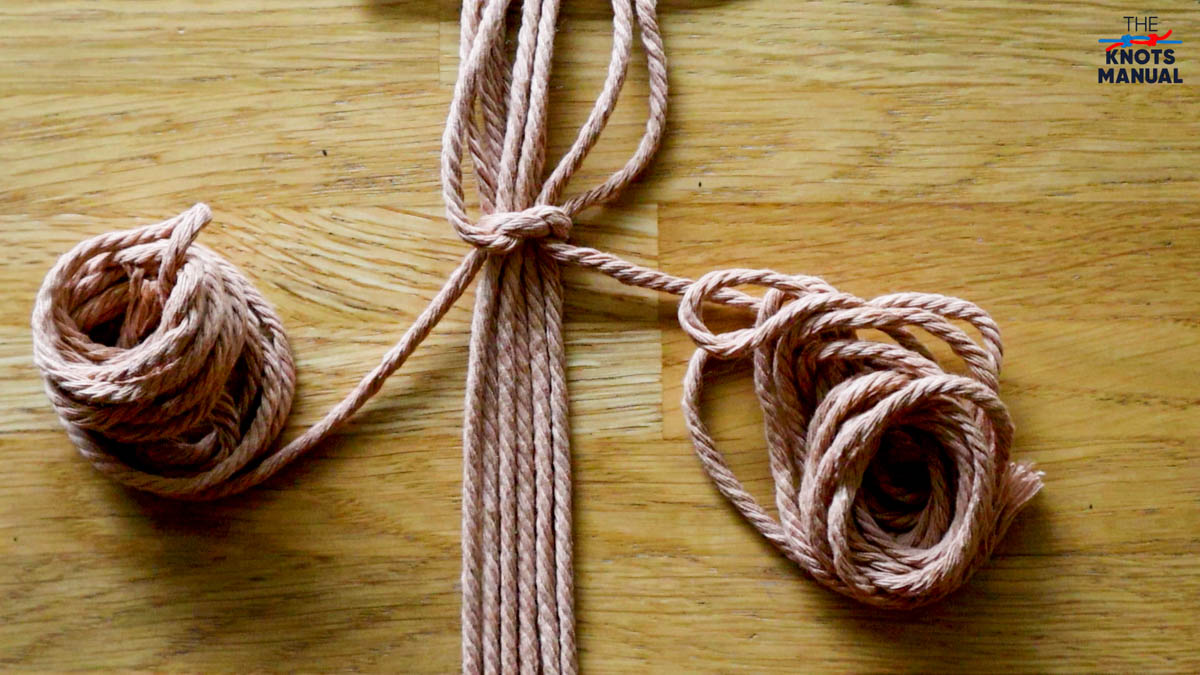
Separate each outer thread from the bottom 6 pieces. You can roll them into a ball and fix the ball with tape to make it easier to work with them later on.
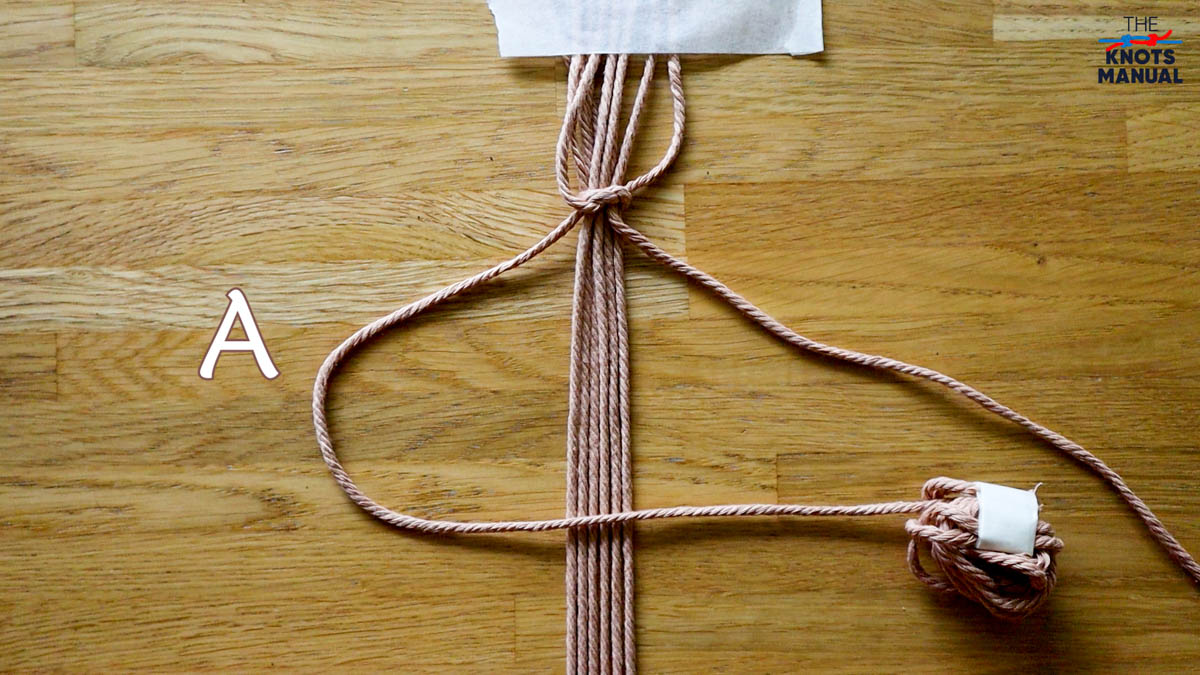
Pass the left thread (let’s call it thread A) over the 6 middle ones.
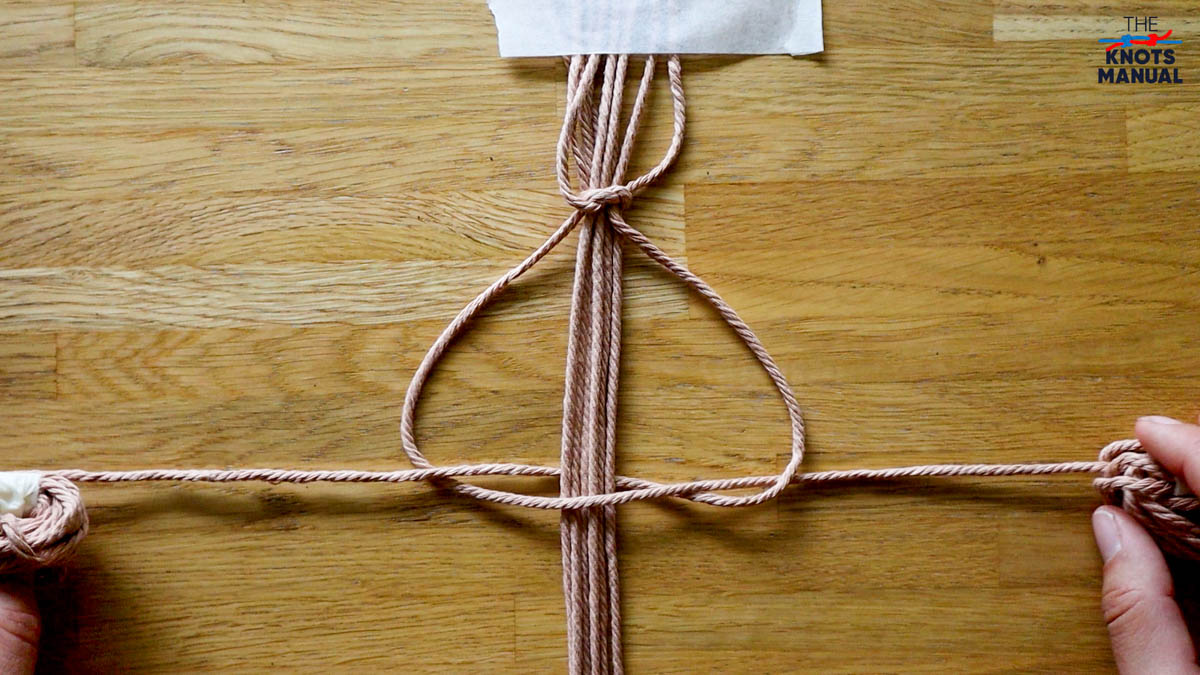
Pass the right thread (let’s call it thread B) over thread A, under the 6 middle ones, and through the loop formed with thread A.
Tighten the formed knot.
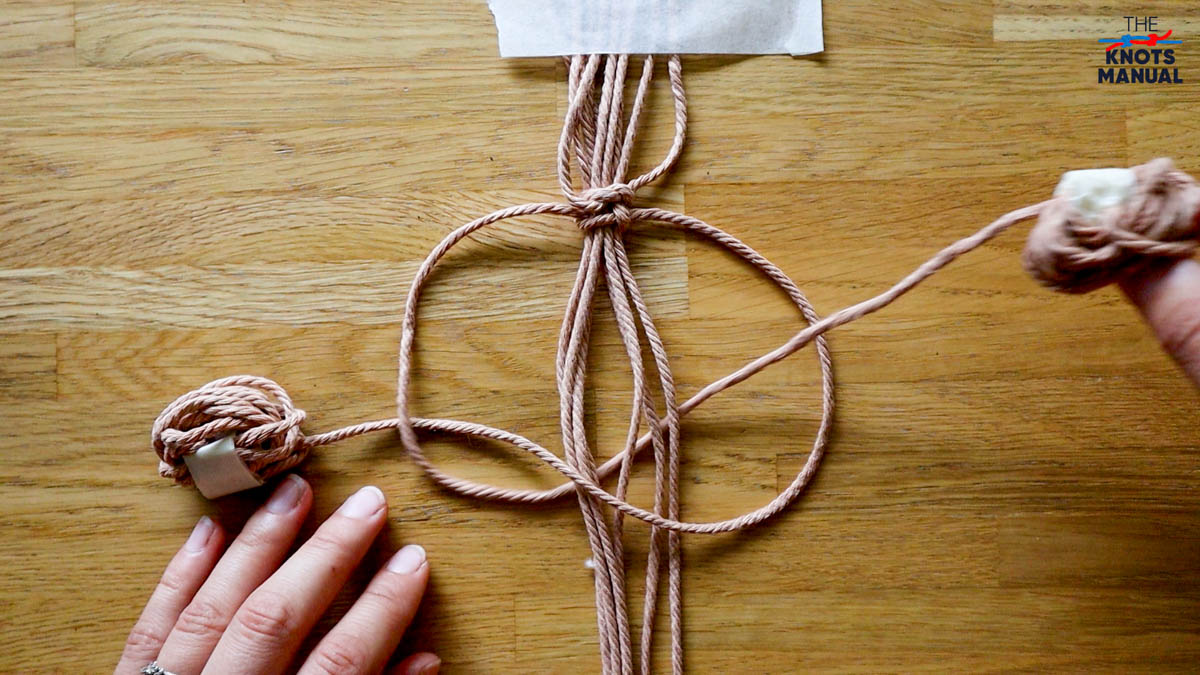
Repeat these steps, only in the other direction. Pass thread A over the 6 middle ones. Then pass thread B over thread A, under 6 middle ones, and through the right loop.
Tighten to finish the formed knot. By tying these two knots (one from the left side and one from the right side), you’ve now completed the first full Square Knot.
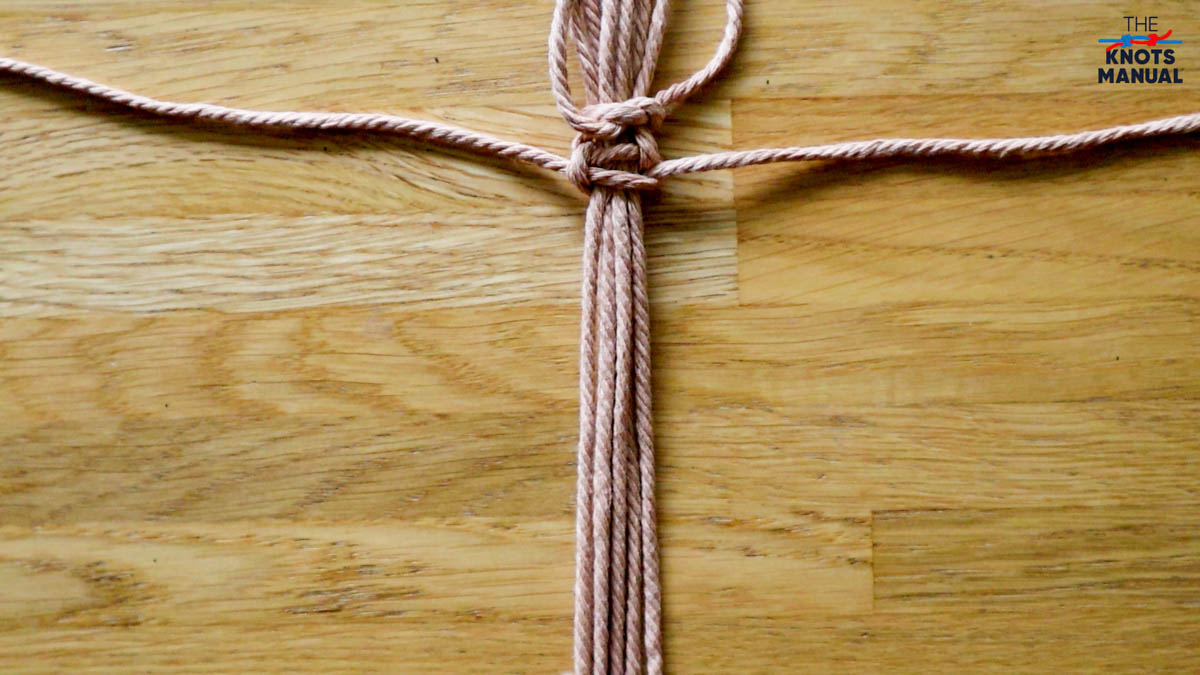
Now tie another 5 Square Knots to form 6 Square Knots in total. The left side of the top loop is now finished.
Remove the tape holding the top 8 pieces of thread, untie the piece of string holding them in the middle, and turn it all upside down.
Now you need to form 6 more Square Knots to form the other half of the loop. This time, start from the right side.
When finished, there should be 12 Square Knots in total – 6 for each side.
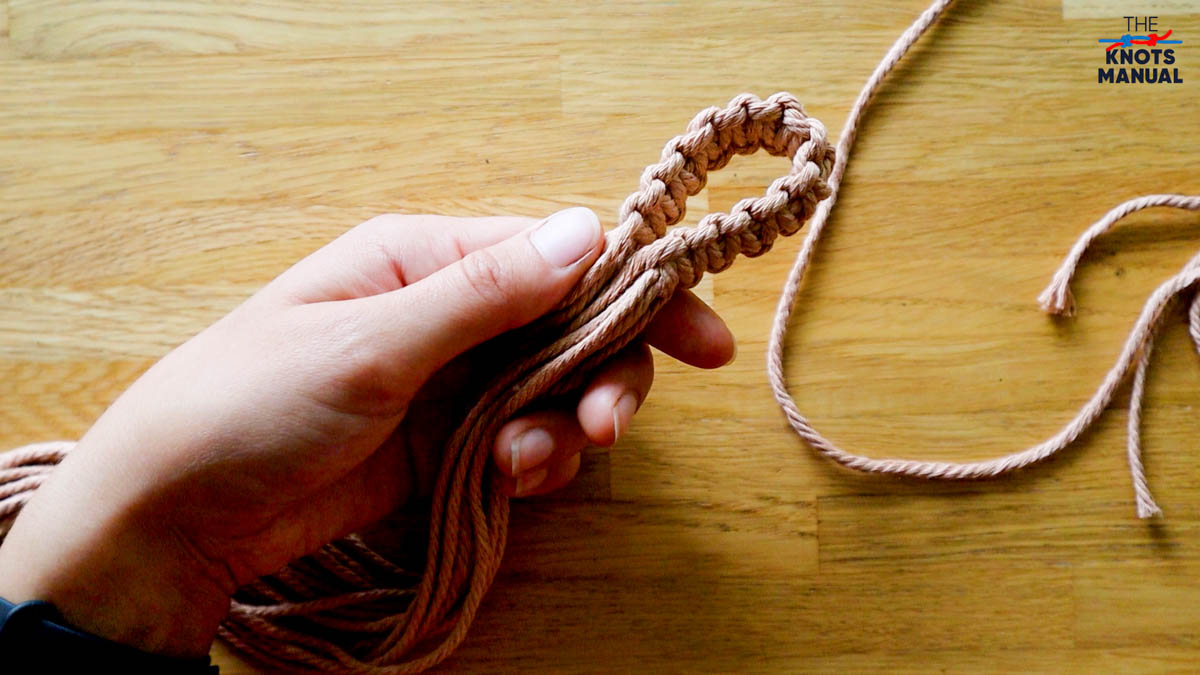
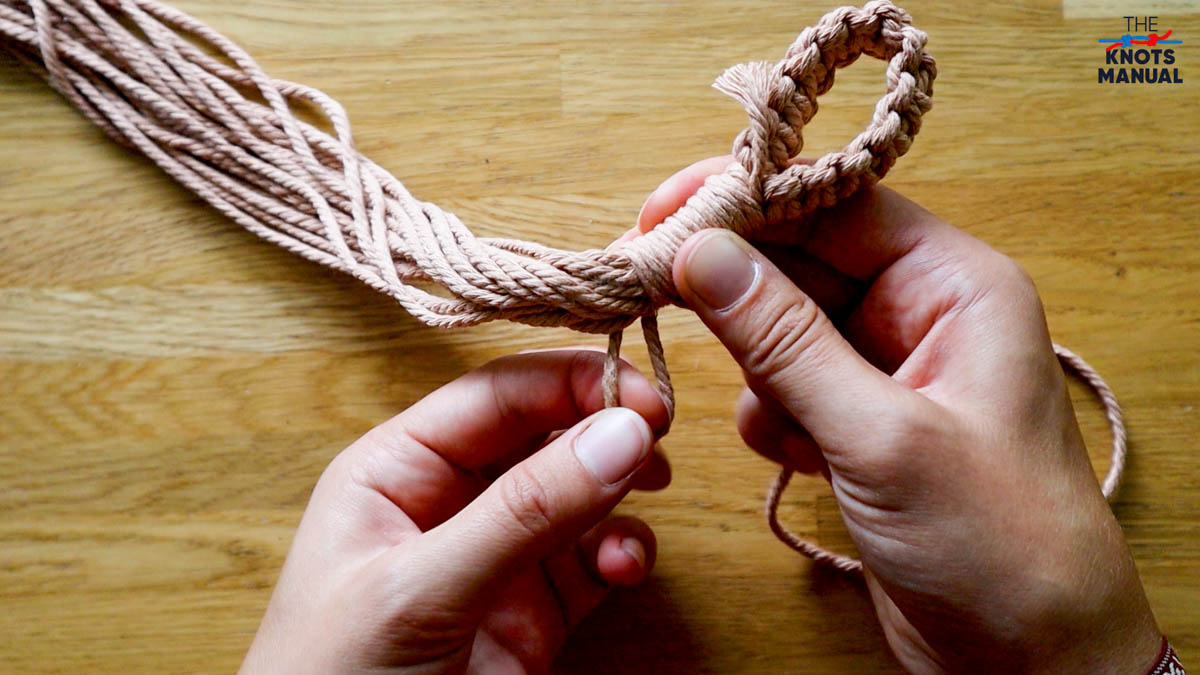
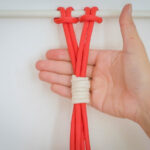
Take the formed Square Knots in your left hand and fold them in half.
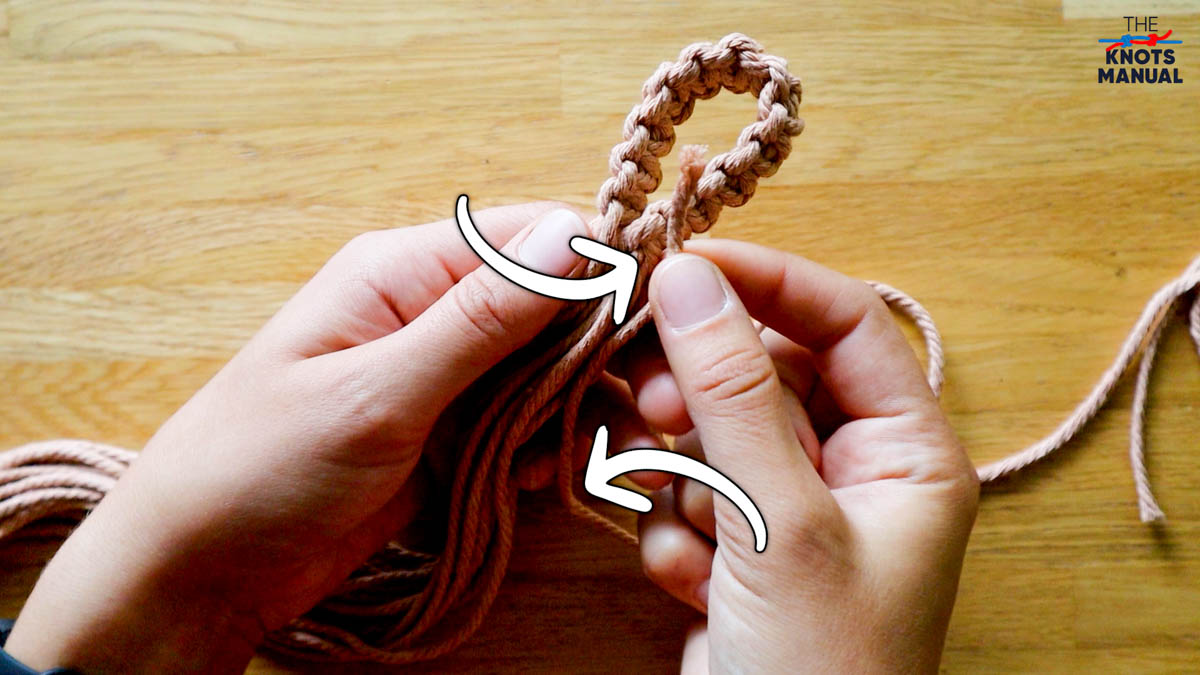
Take one 1m (3 ft) string and place a 10 cm (3 inches) section near its end next to the loose strands, as shown in the picture above.
Now fold the end of the 1m (3 ft) string in half, forming a 10 cm (3 inch) long bight.
Now start tightly wrapping the 1m (3 ft) string around the loose strands until you reach the desired length.
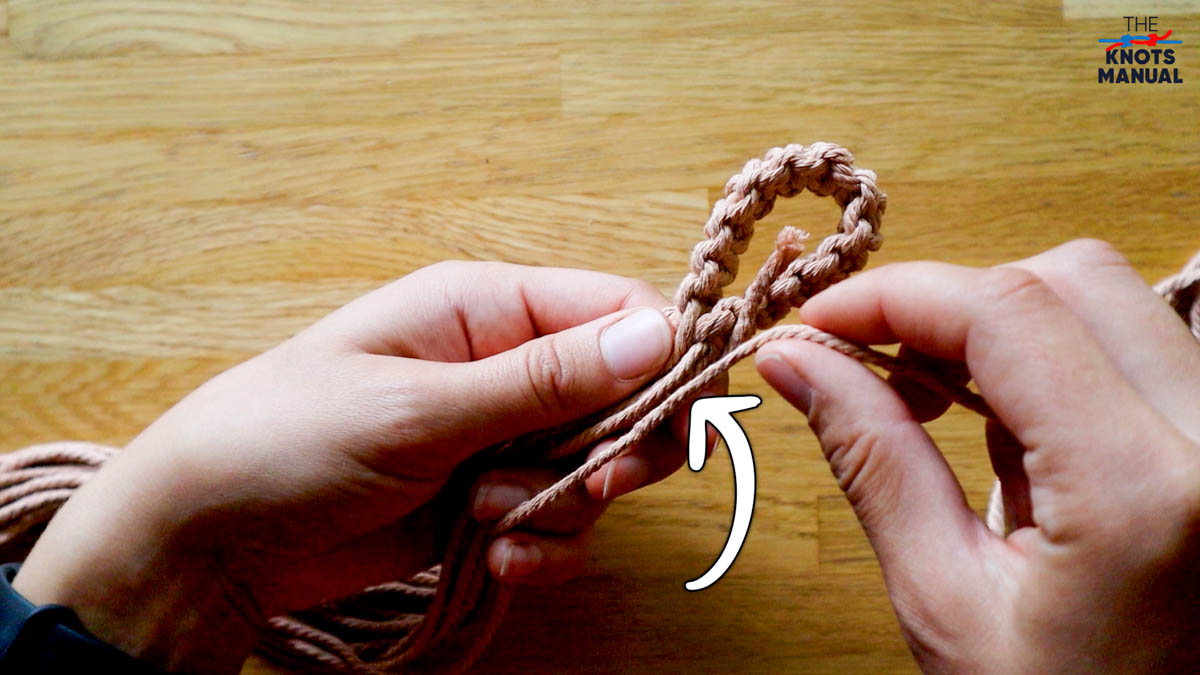
In this case, we did 10 turns. When finished, the end of the bight should be visible.
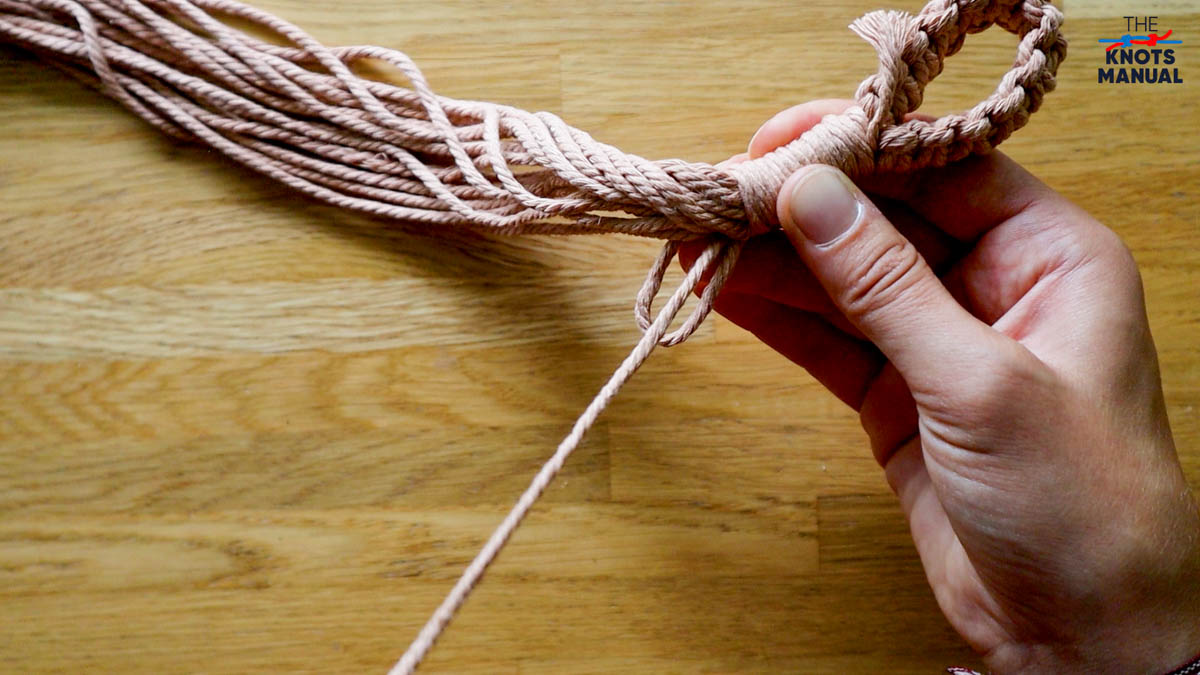
Pass the end of the 1m (3 ft) string through this loop.
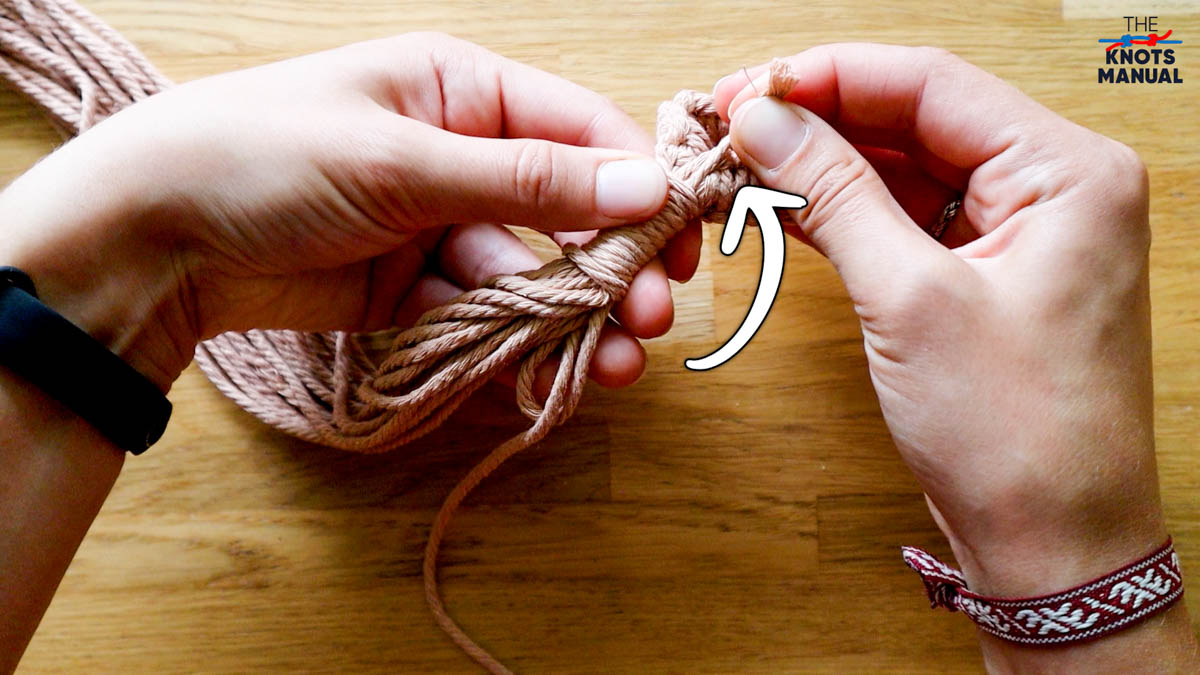
Now pull the top string until the bottom loop disappears under the 10 wraps that we did earlier. Now you’ve finished what’s called a Gathering Knot. This knot essentially keeps the rest of the strands and knots from unraveling.
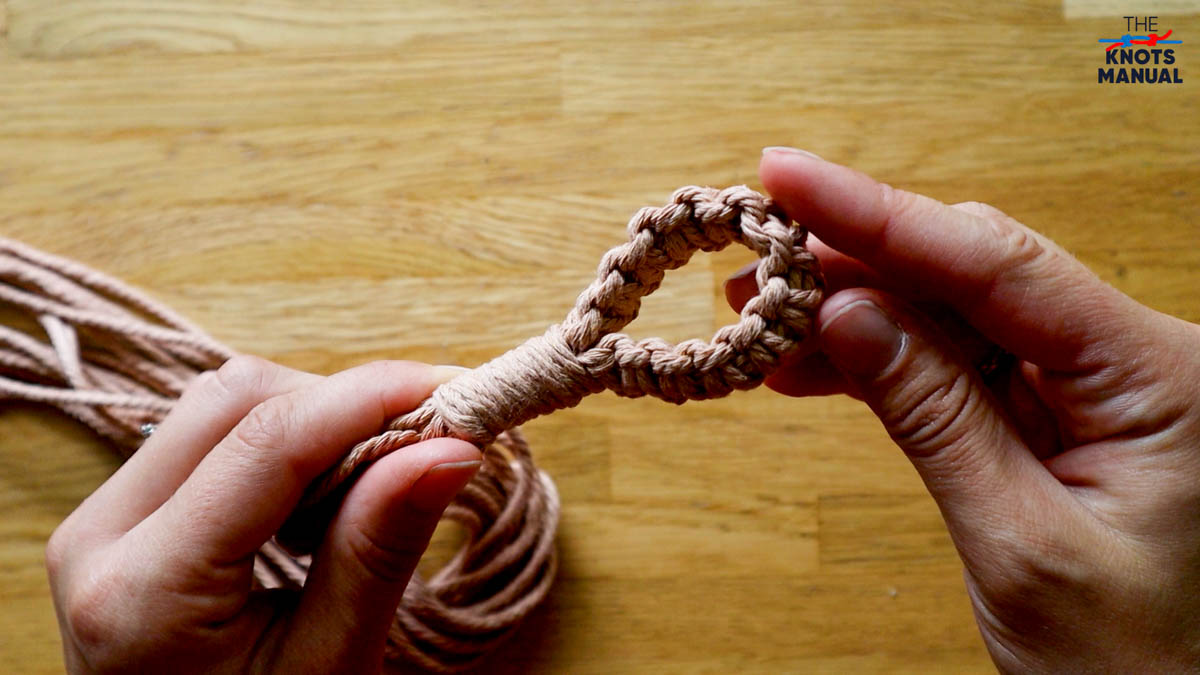
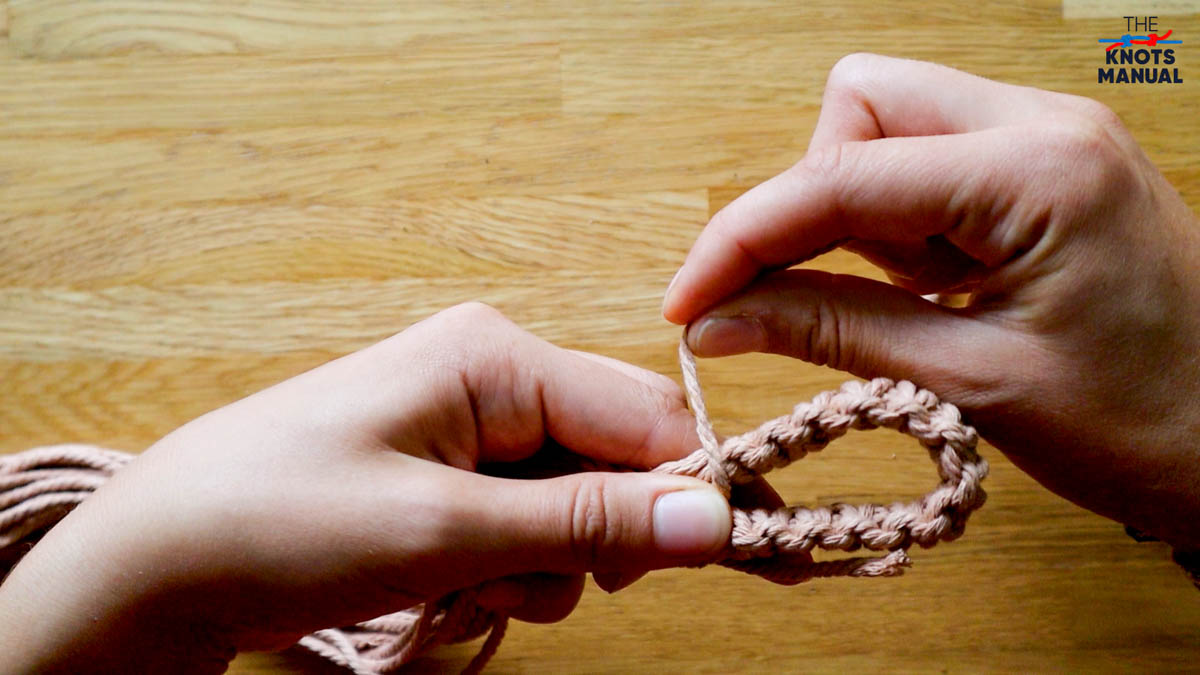
Cut off the top and bottom excess ends from the Gathering Knot and push the ends underneath the 10 wraps to hide them from sight. Now the upper ring of the Plant Hanger is finished.
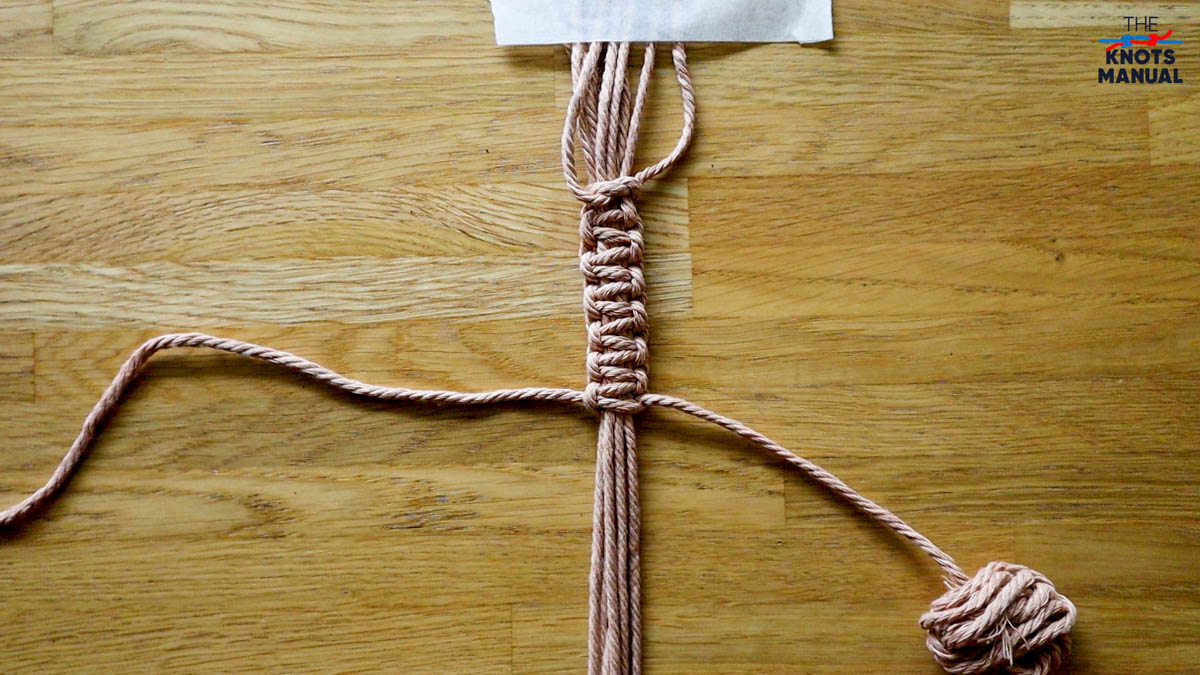
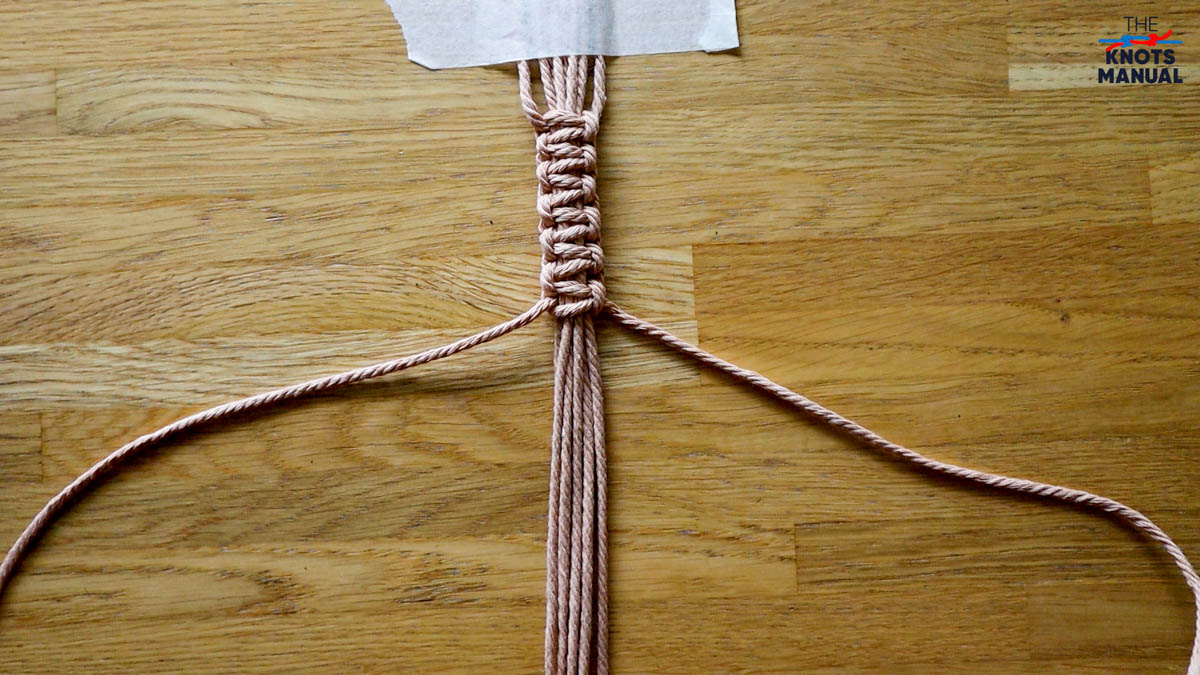
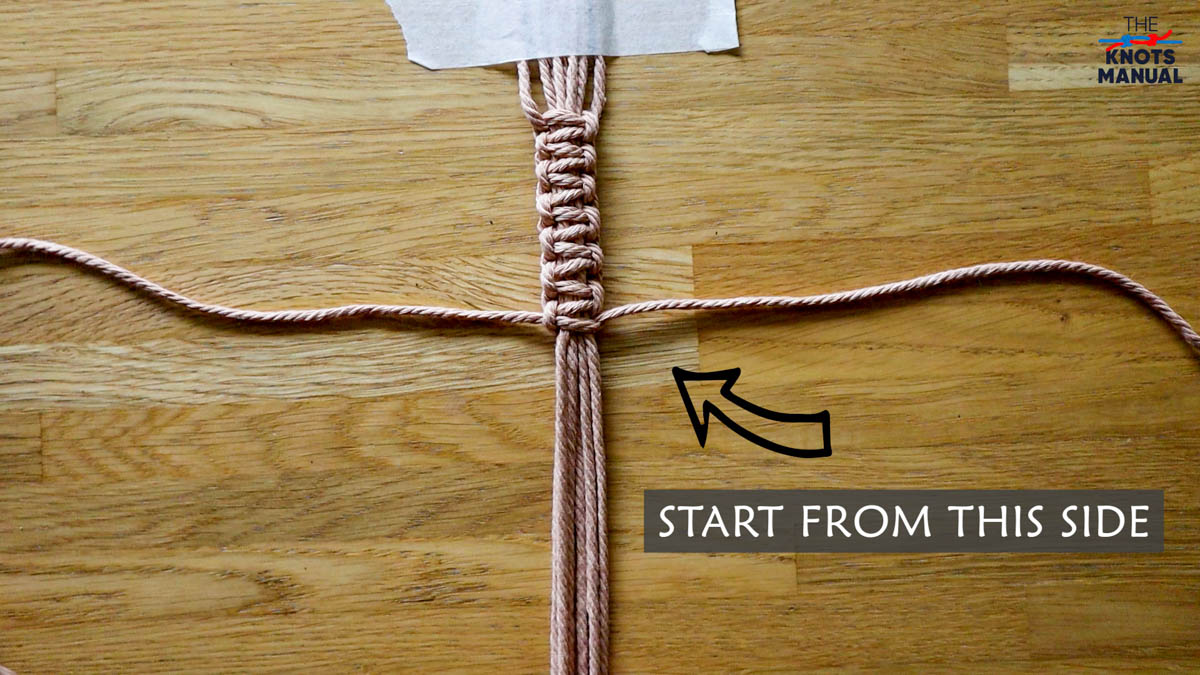
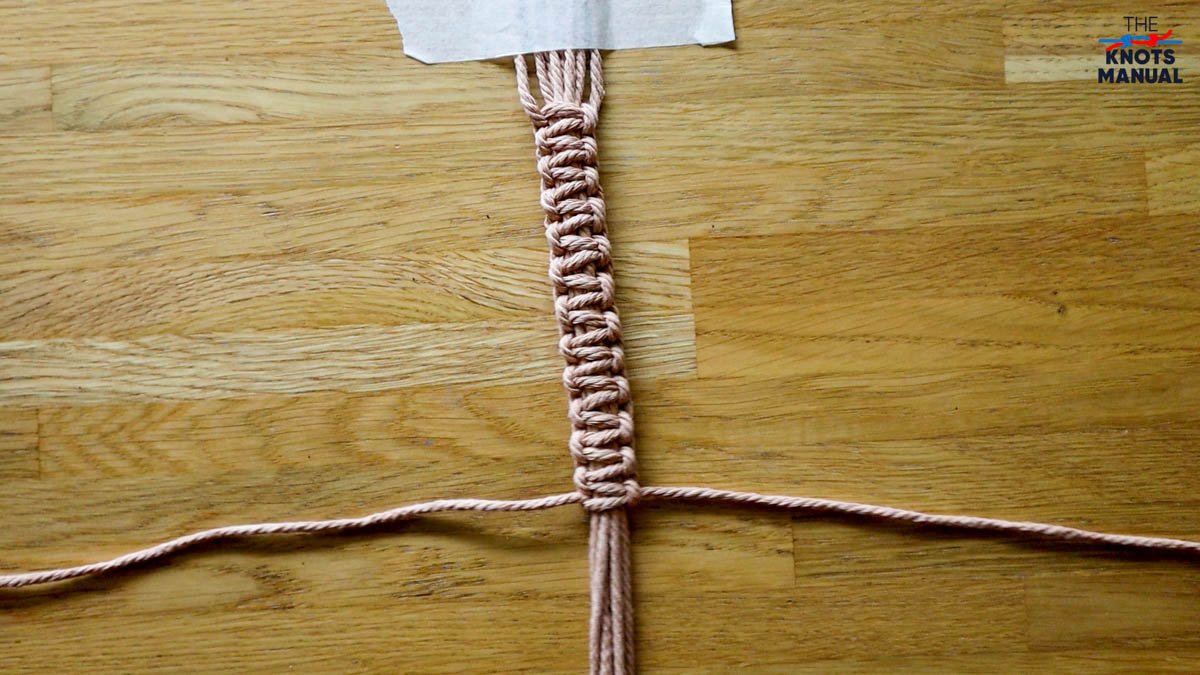
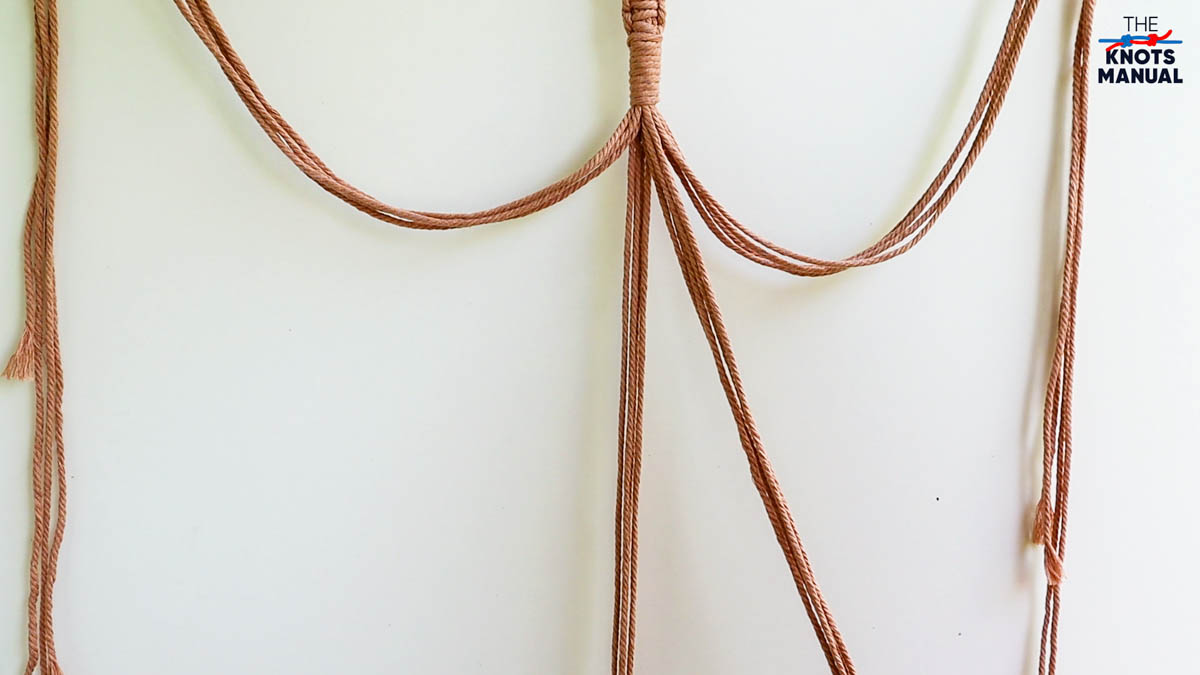
Step 3: Tieing the Part Between the Top Ring and the Pot Hanger
Hang your plant hanger at shoulder height by the top ring that you just formed. This will make it easier to work with.
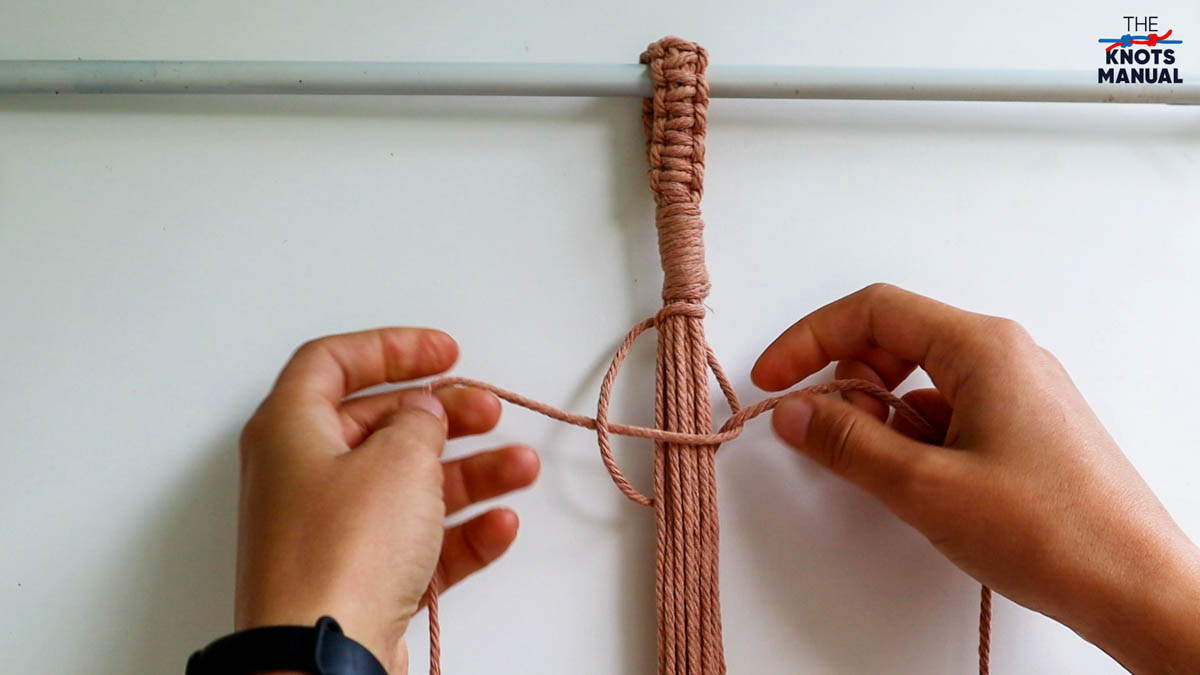
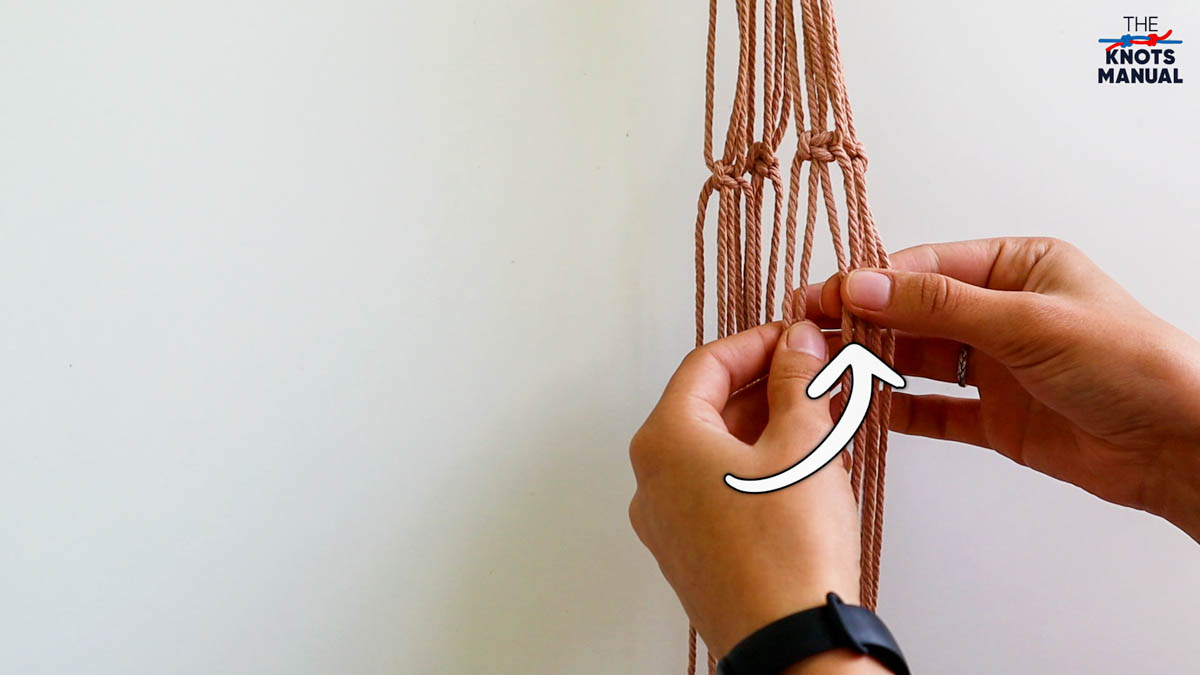
Start tying many Square Knots in a row, like we did in step 2.
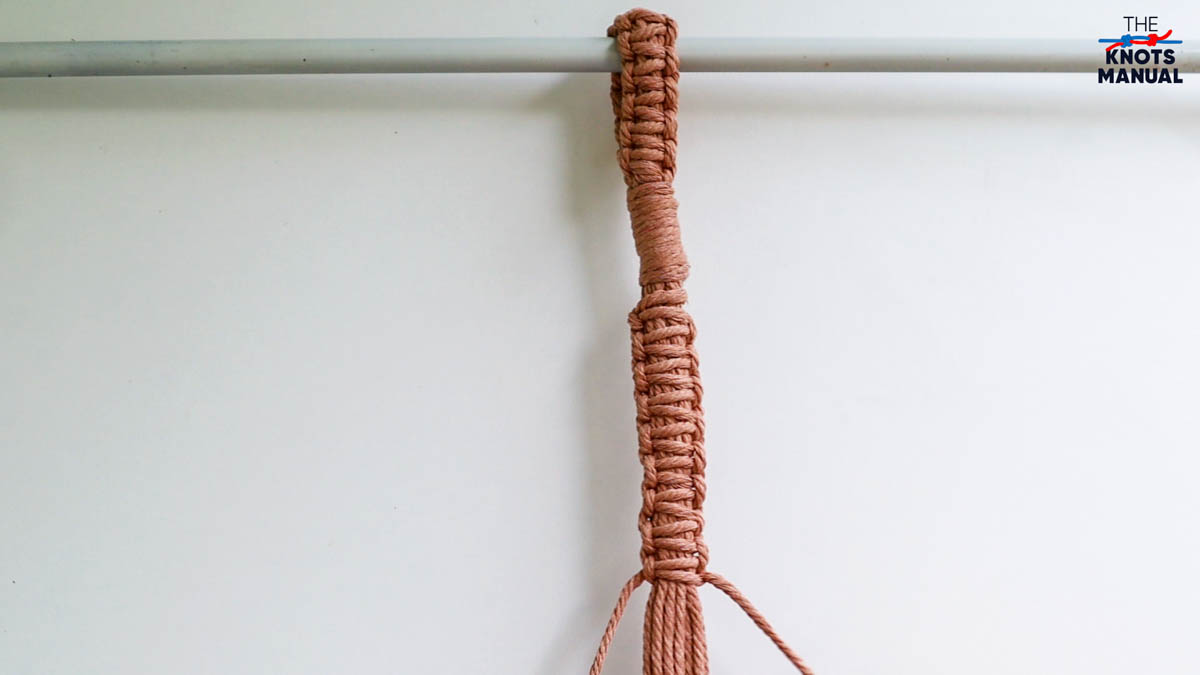
In this case, we did 12 Square Knots in total.
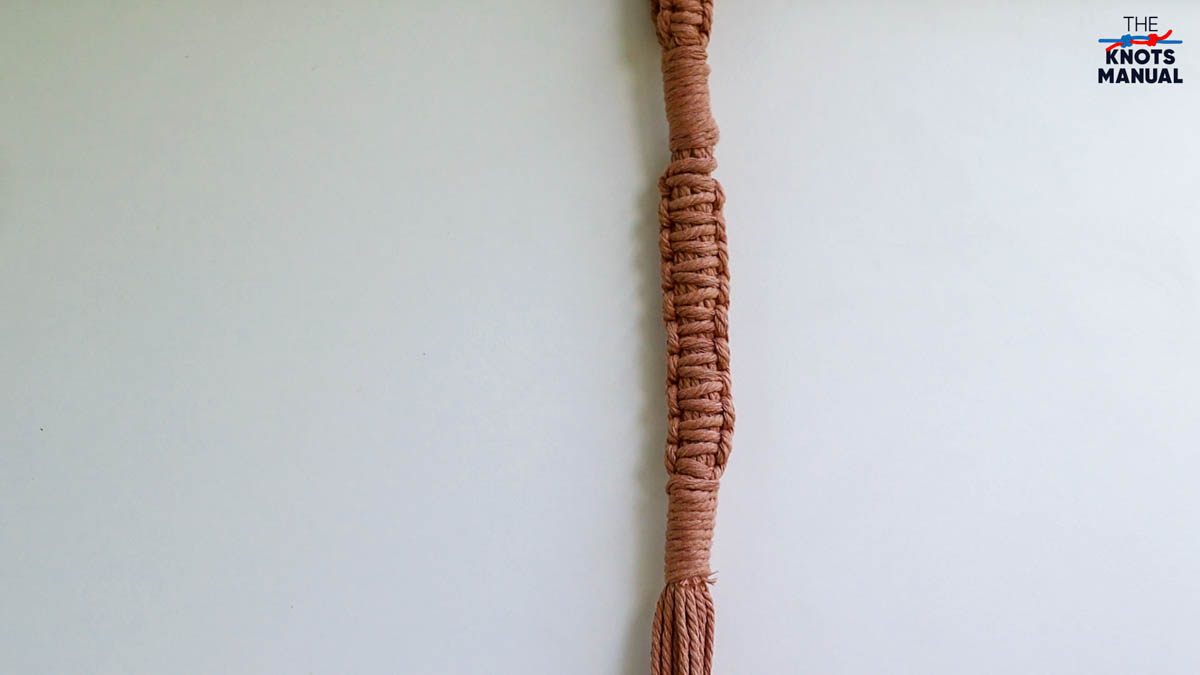
Now using your second 1m (3 ft) string, tie another Gathering Knot with 10 turns to finish this section.
Step 4: Tying the Plant Pot Hanger Section

Split the loose 16 bottom threads into four parts. Each part should contain 4 threads.
Fasten three groups to the wall with masking tape to keep them separated.
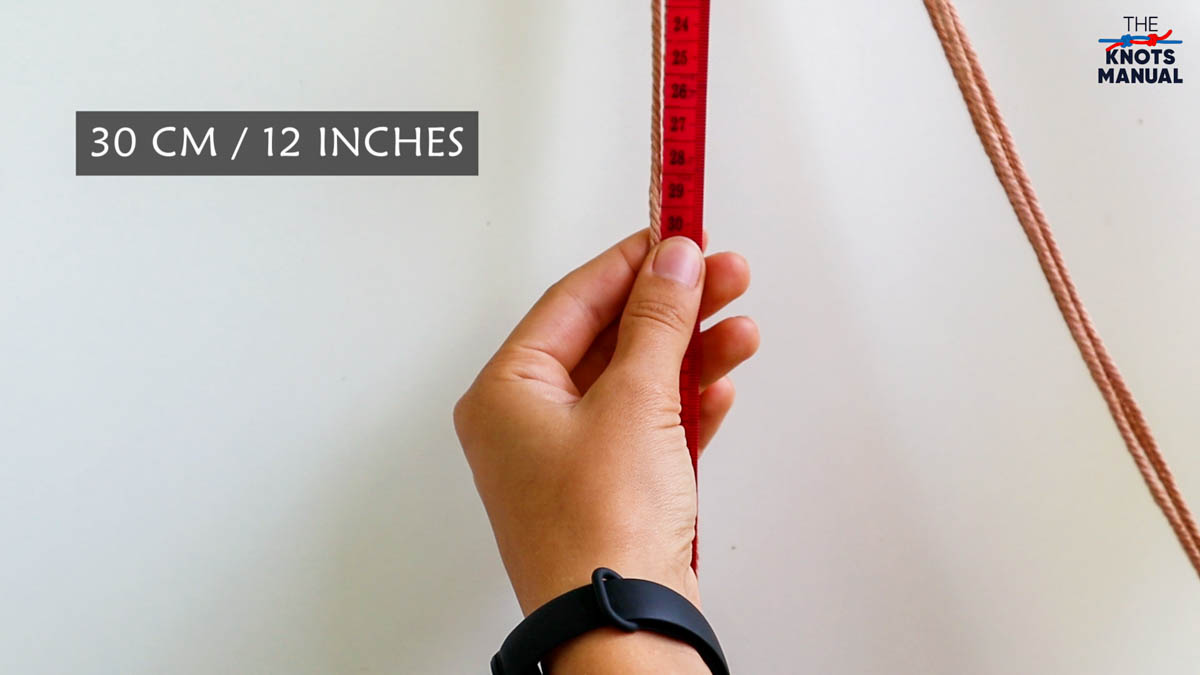
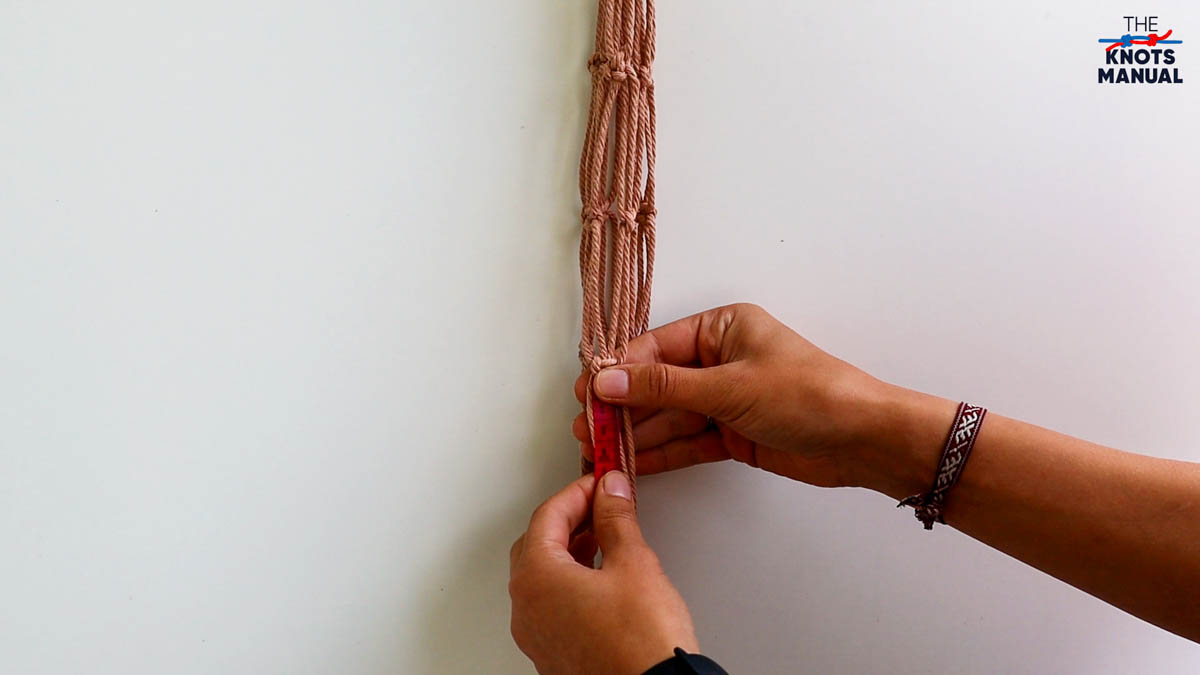
Take the free group and measure 30 cm (12 inches) from the last section formed in Step 3.
Tie a Square Knot there.
Repeat this with the three remaining groups.
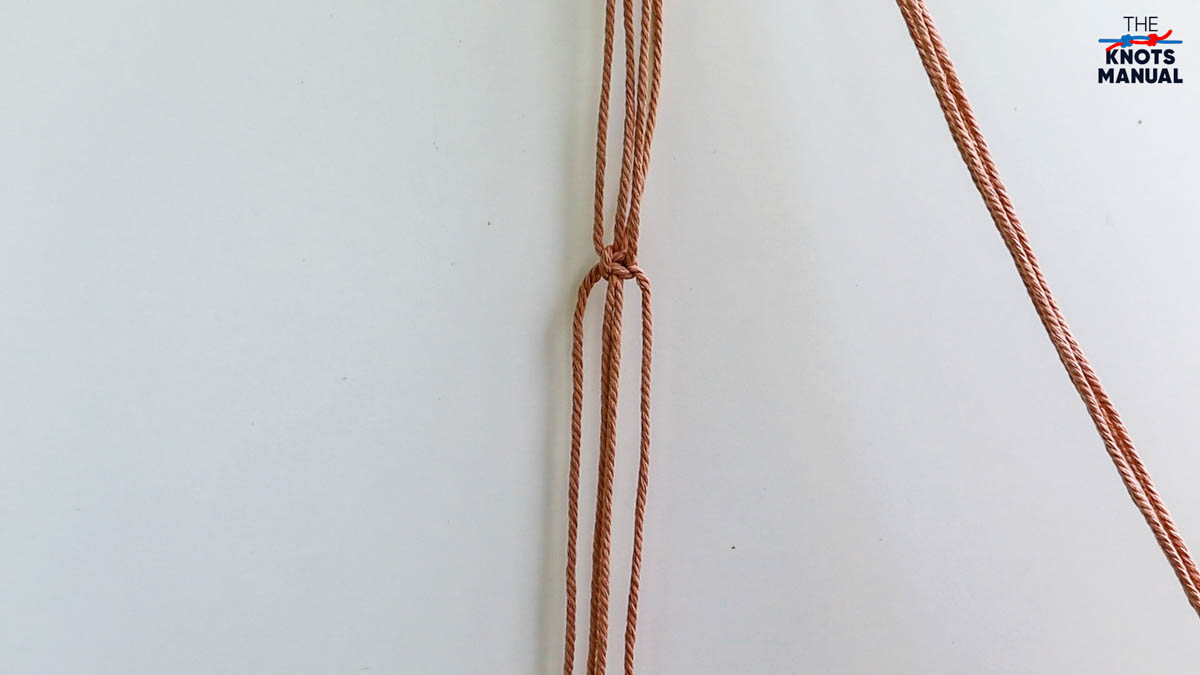
Take 2 threads from one group and 2 threads from the group next to it.
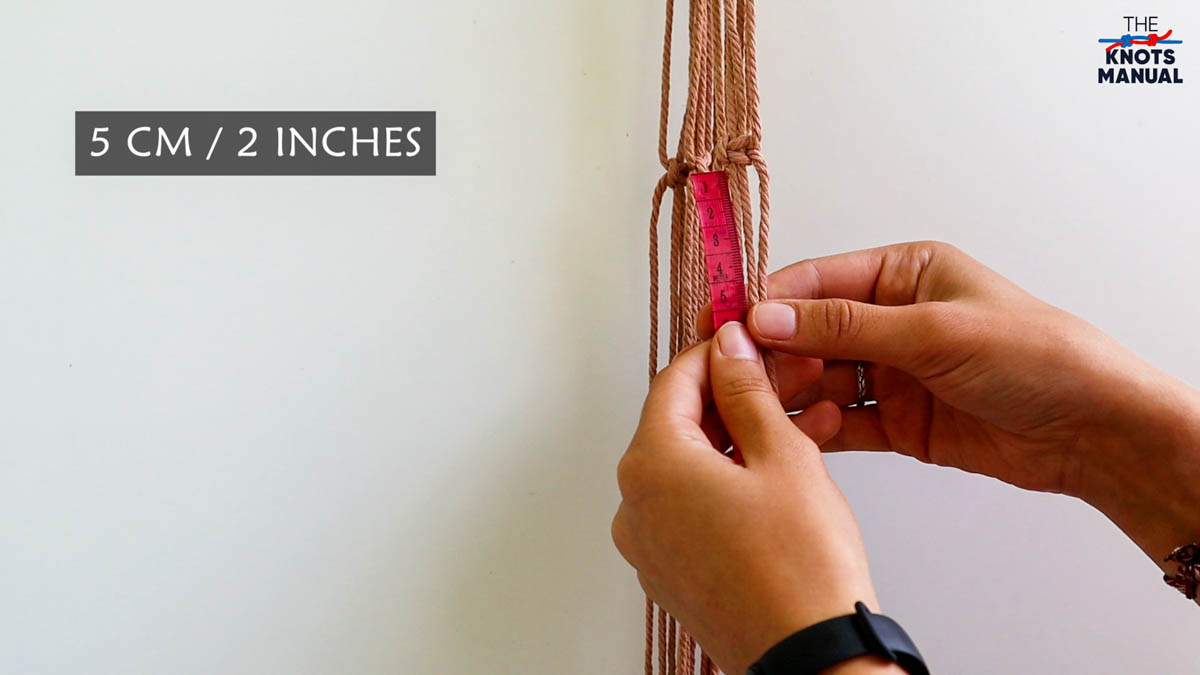
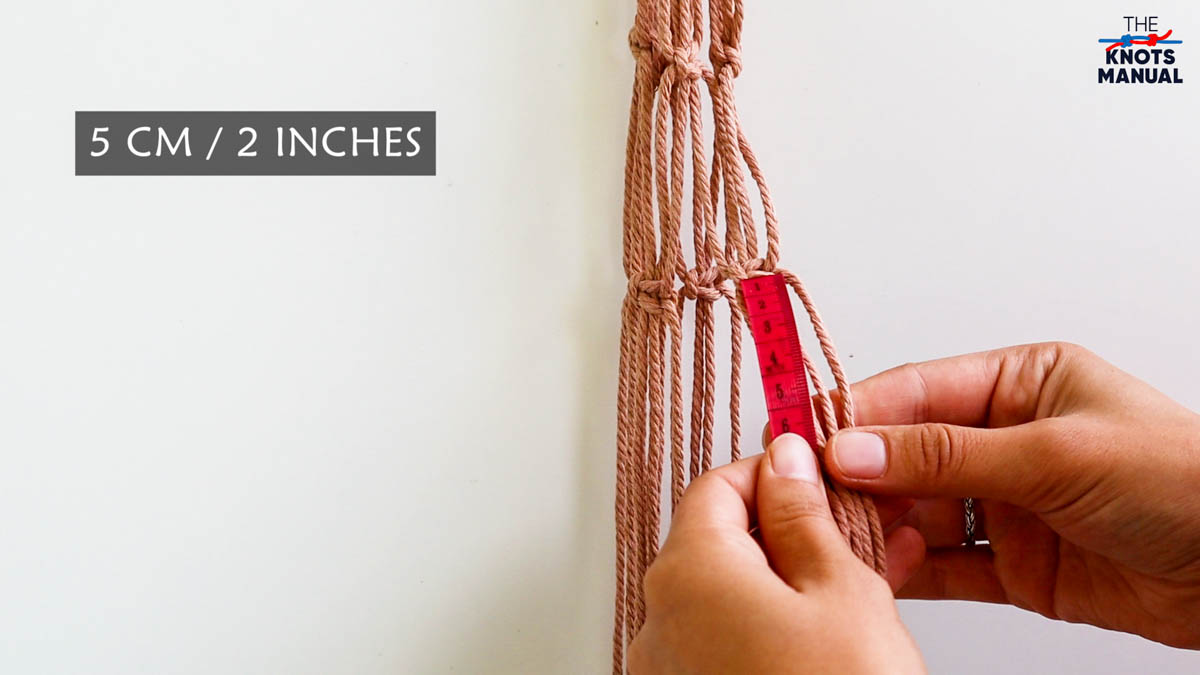
Measure 5 cm (2 inches) from the last Square Knot.
Tie another Square Knot there.
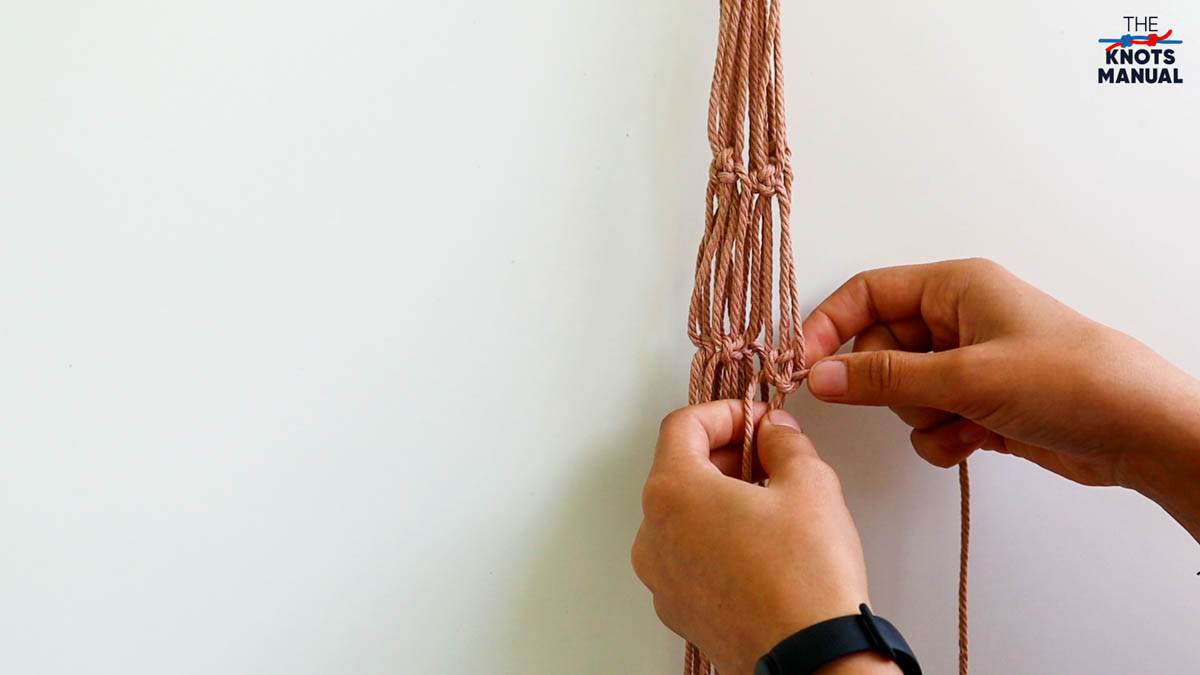
Now repeat this step with the three remaining groups.
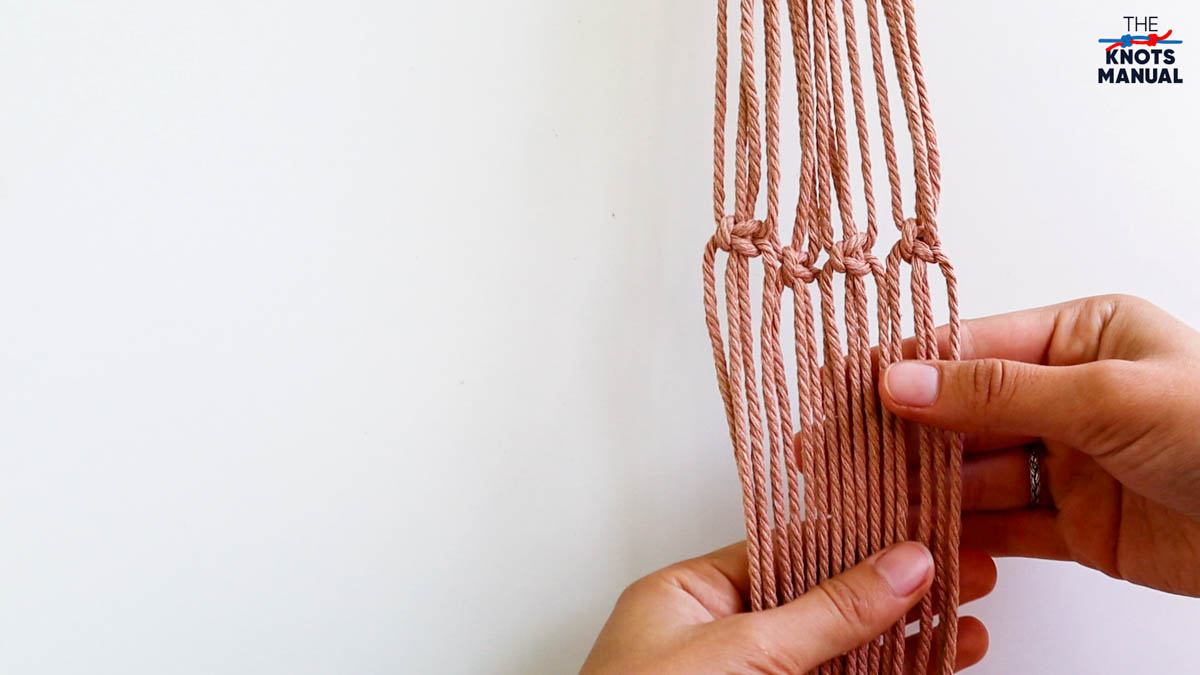
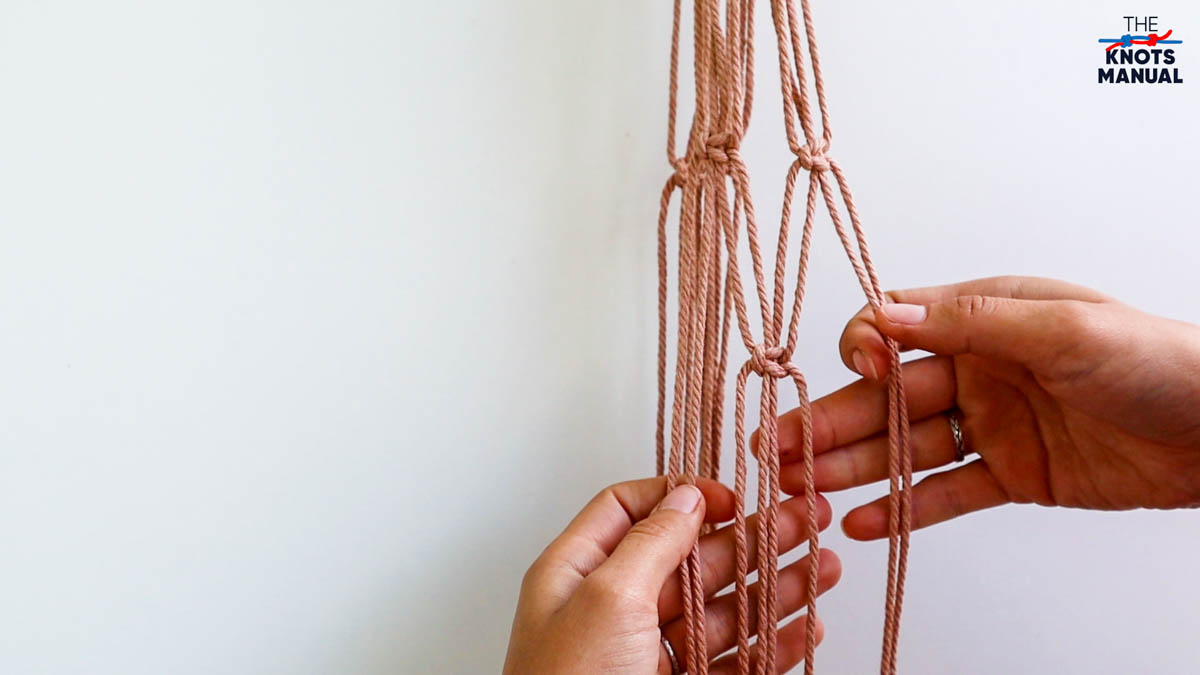
Following the same steps, tie 4 more Square Knots 5 cm (2 inches) lower, by taking 2 strands from one group and 2 from the other one.
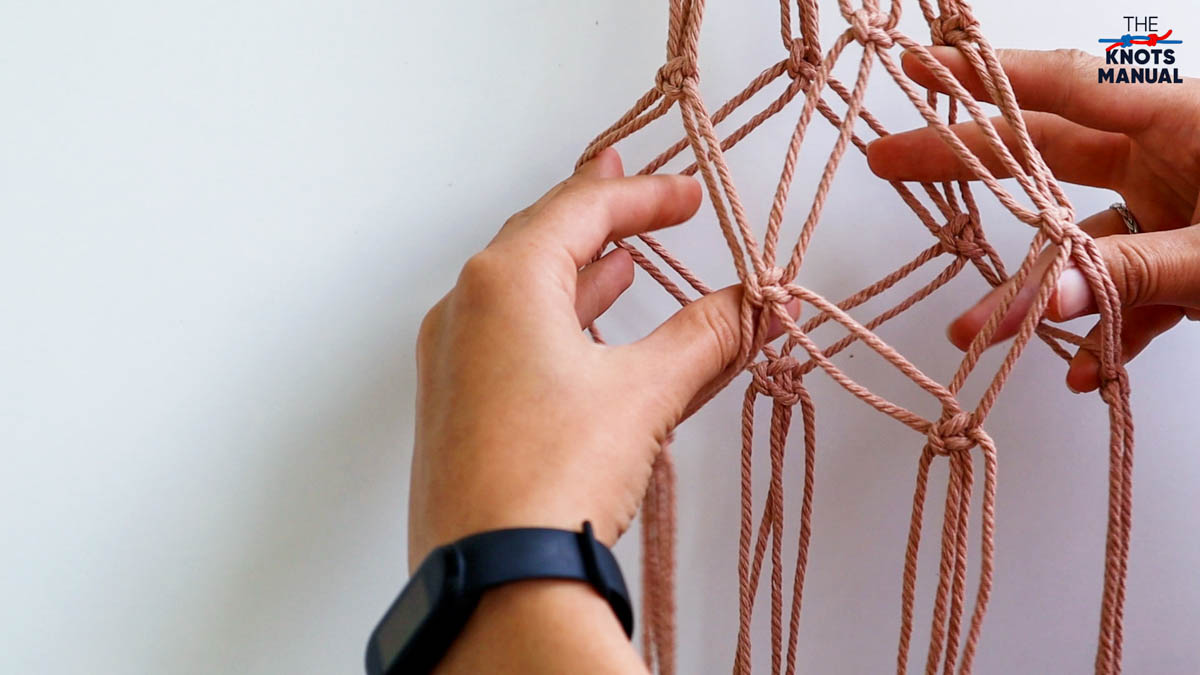
When finished, a zig-zag pattern should emerge with three sections of Square Knots.
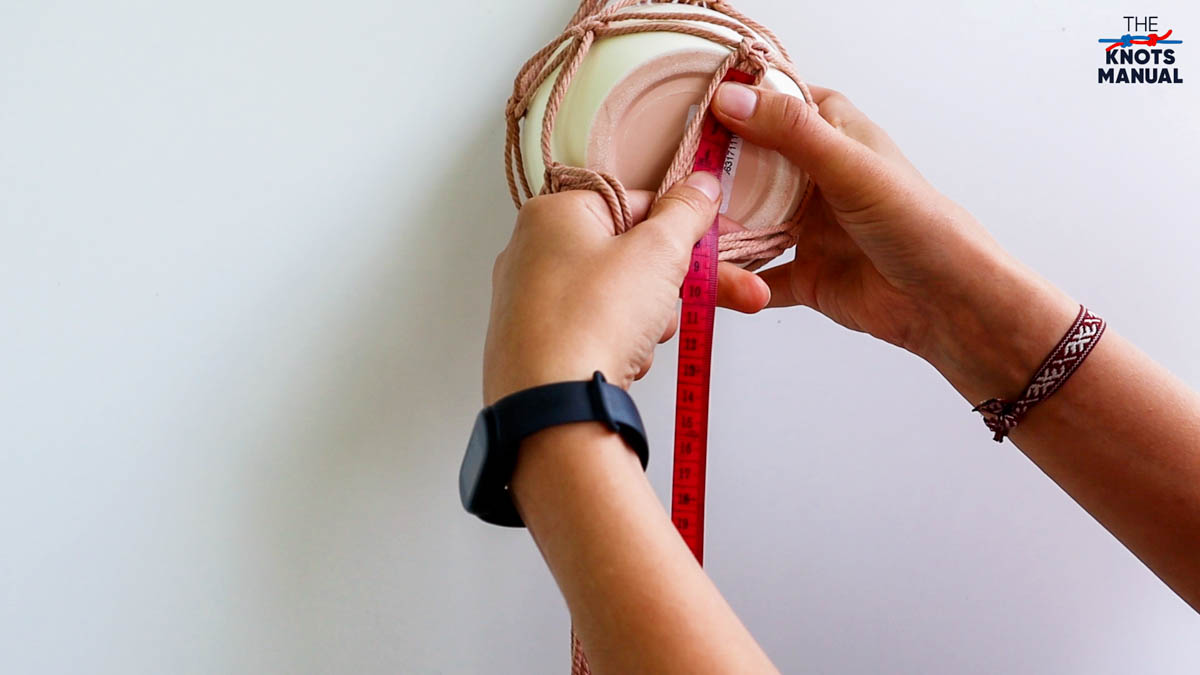
Place your pot inside this zig-zag pattern and measure the distance from the last square knot to the center of the pot. In our case, it was 4 cm (1.5 inches).
Put all parts together and measure the length that you just came up with, depending on the diameter of your pot.
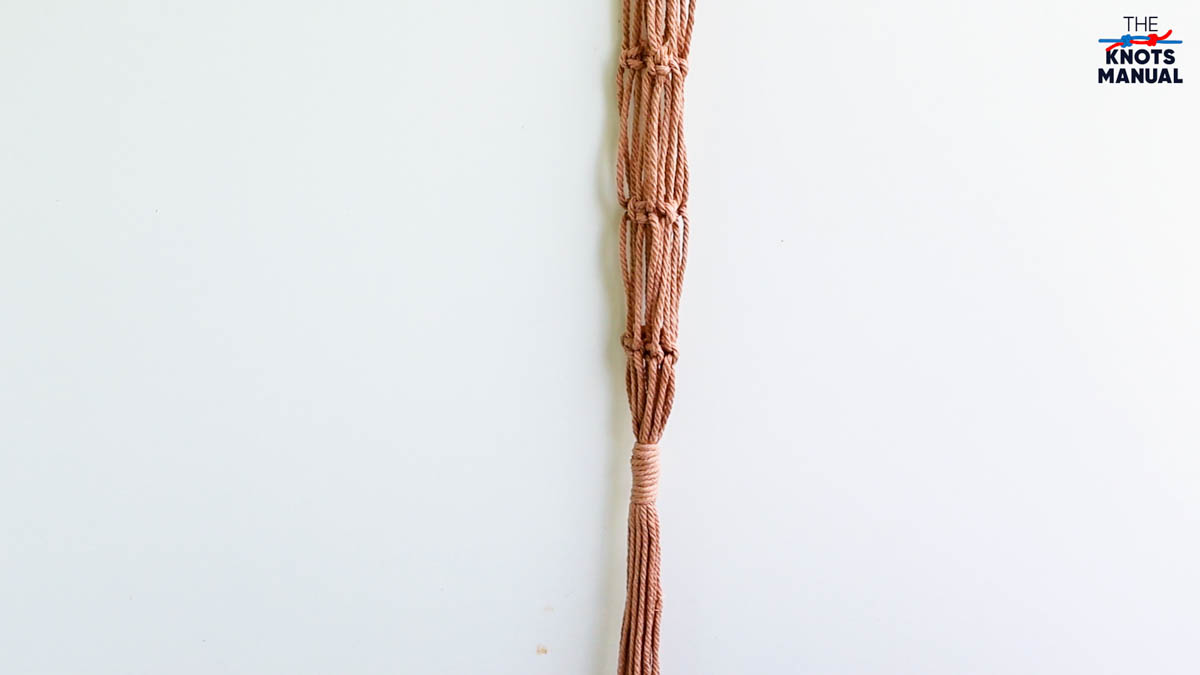
With your last 1m (3 ft) string, tie another Gathering Knot there.
Step 5: Making the Bottom Section
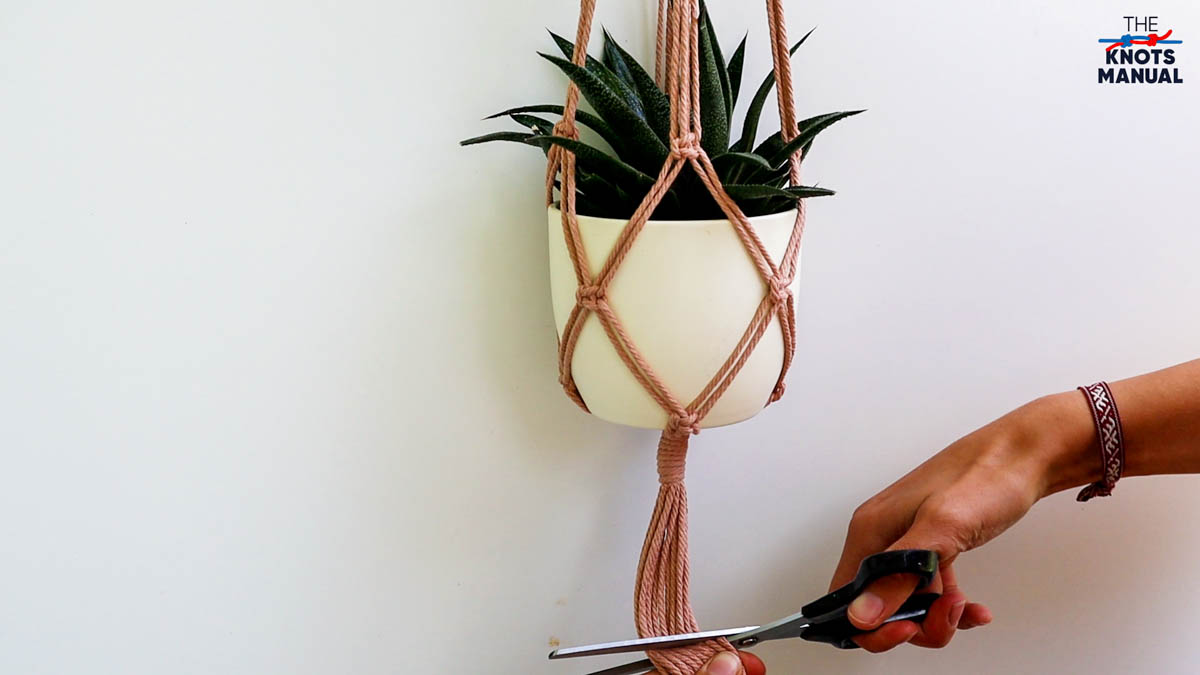
Place your plant pot inside the hanger and cut the length of the bottom threads to the desired length. In our case, we left a 10 cm (4 inches) section.
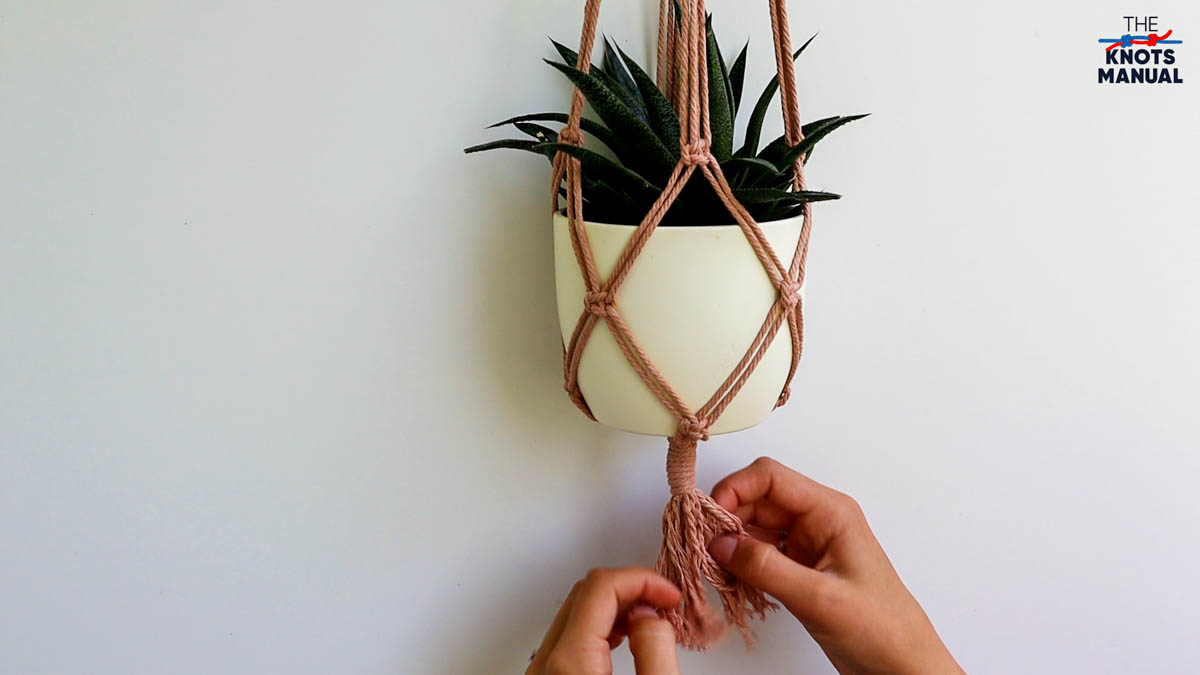
Unravel each twisted thread one by one.
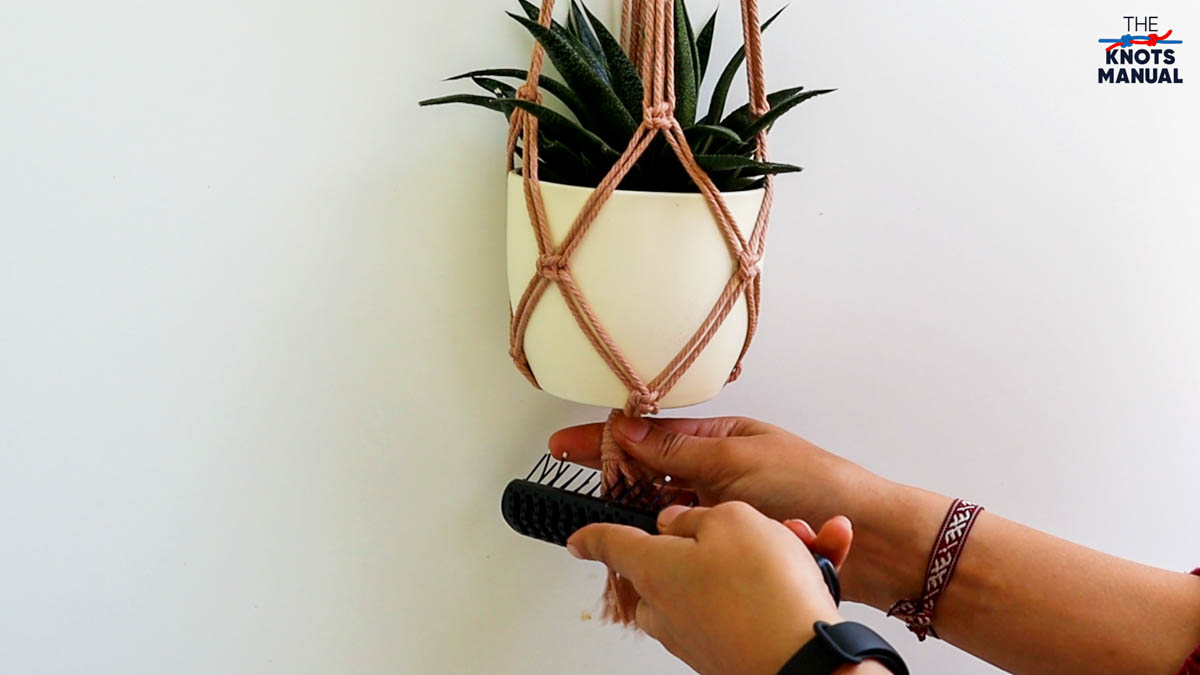
Using a comb, brush the bottom threads to make them look better.
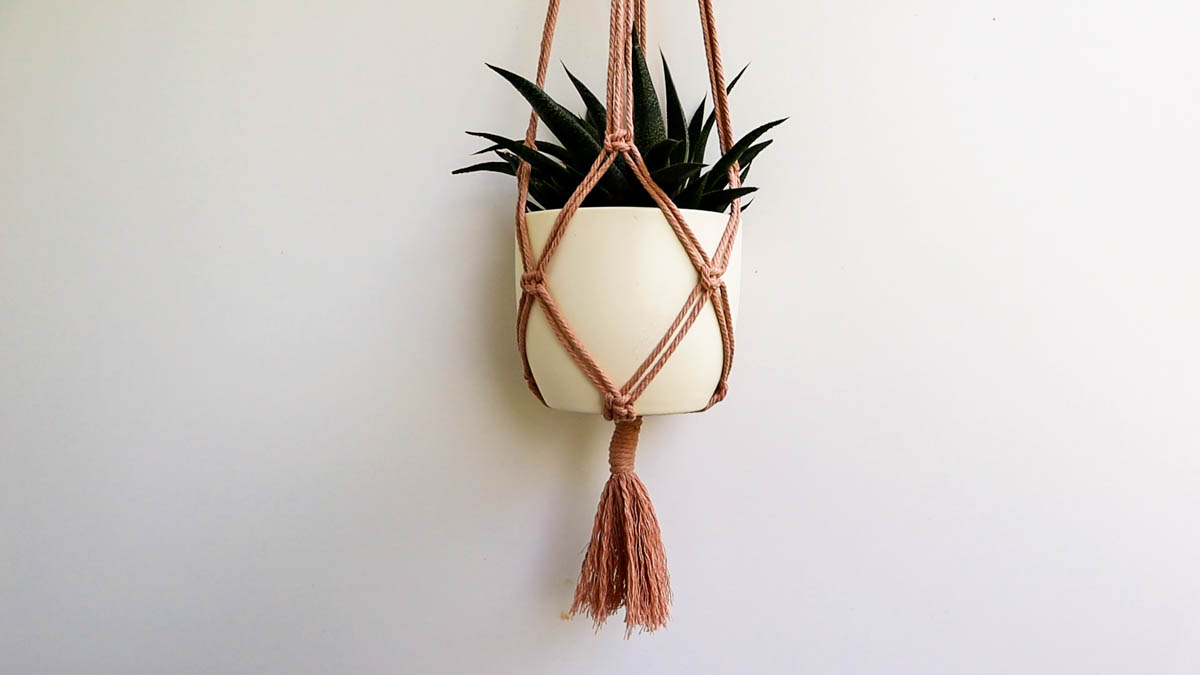
Your Macrame Plant Pot Hanger is now finished.
Tips for Hanging a Macrame Plant Pot Hanger
Now that your Macrame Plant Pot Hanger is finished, you’ll need to hang it. Here are some basic guidelines to follow:
- Use a hook that’s bolted directly into the ceiling.
- Make sure to use the correct type of anchor for it (drywall, concrete, etc.) Also, check its supported weight and make sure not to exceed it.
- Choose a plant without a lot of leaves. Some good options are succulents, ferns, and orchids. If you choose a plant with long leaves, it will be difficult to take it out of the pot hanger if needed.
- Depending on the type of plant, place it in a shady or sunny location.
- Hang it in an unused spot where you won’t be walking passing it by a lot.
- It’s easier to water hanging plants by taking them out of the plant hanger and soaking them for a few hours in a bathtub.


your tutorial is complicated
Macrame is complicated.
Thank you! Exactly what I wanted and you made this easy to follow for a beginner.
I keep ending up with some of my threads being too short by the time I get to step 4. Am I supposed to be alternating somehow to keep that from happening?
I thought it was a very easy-to-follow tutorial. And it was free!
My plant hanger turned out beautiful. Thank you so much!
Great instructions, very easy to understand.
My issue starts when I fold in half and make square knots on the one side then the other side is not connected. Four times I tried to make it and every time I have rope that is just loose. What am I doing wrong? Hope you understand what I mean.