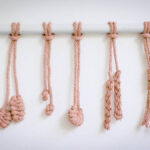
You only need to learn a few basic macrame knots to tackle most macrame projects – regardless of how complex they seem at first glance. That’s because most macrame patterns are made using the same basic knots, only in slight variations.
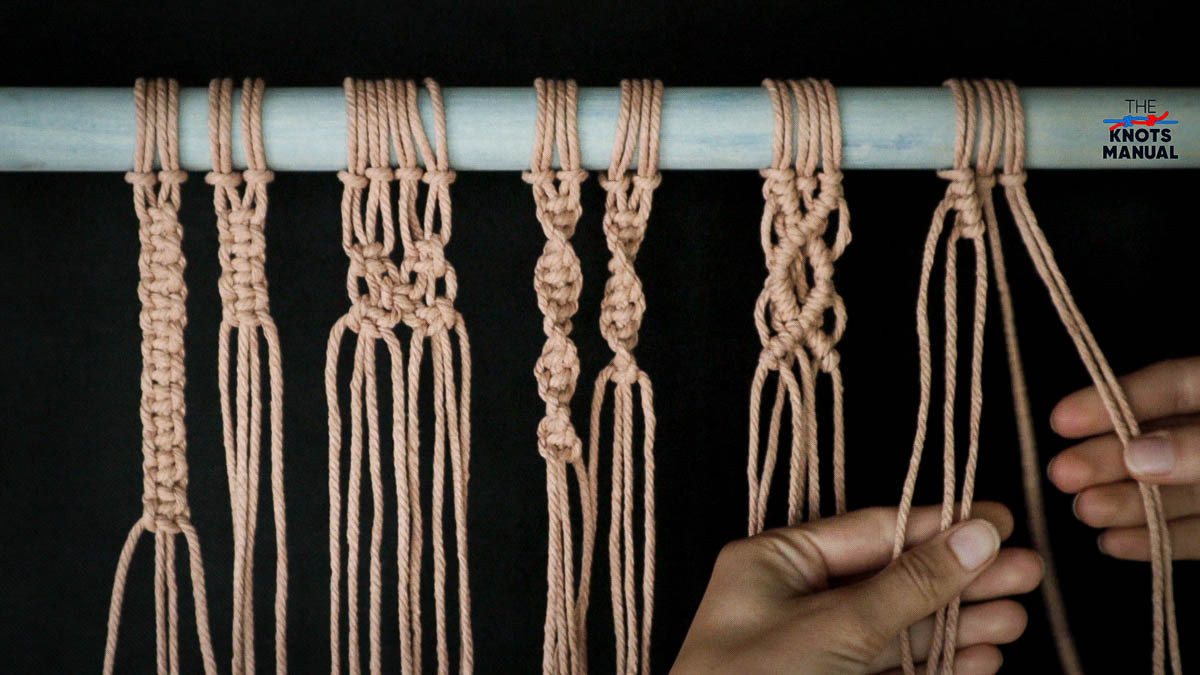
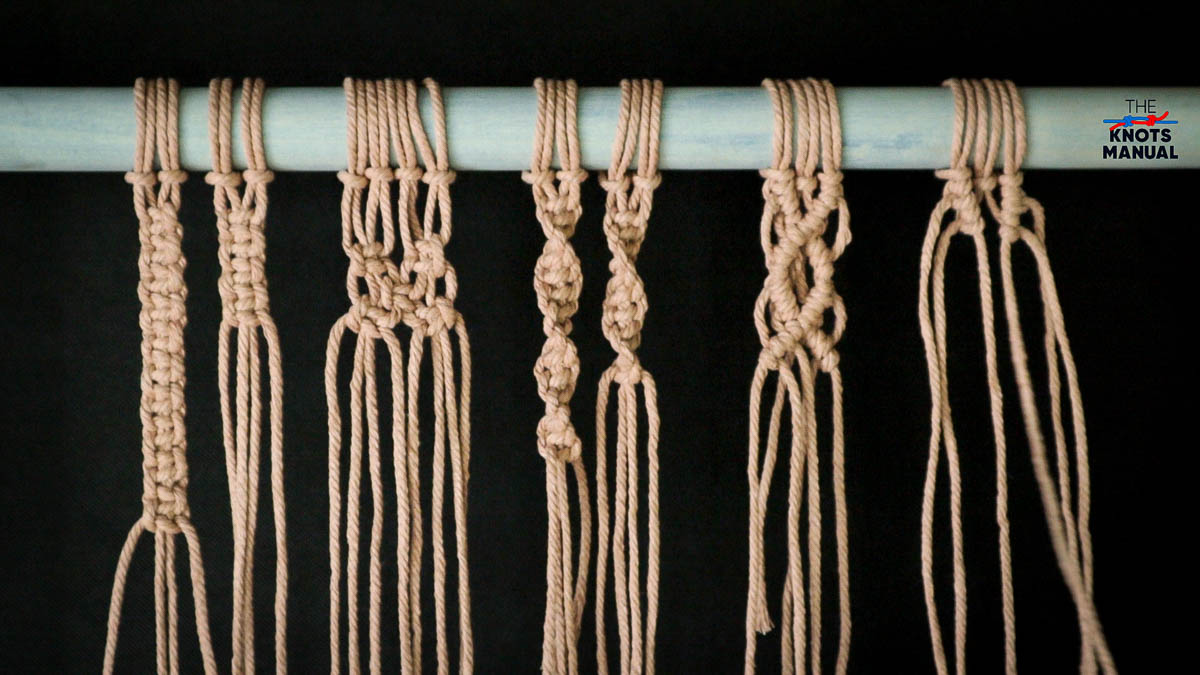
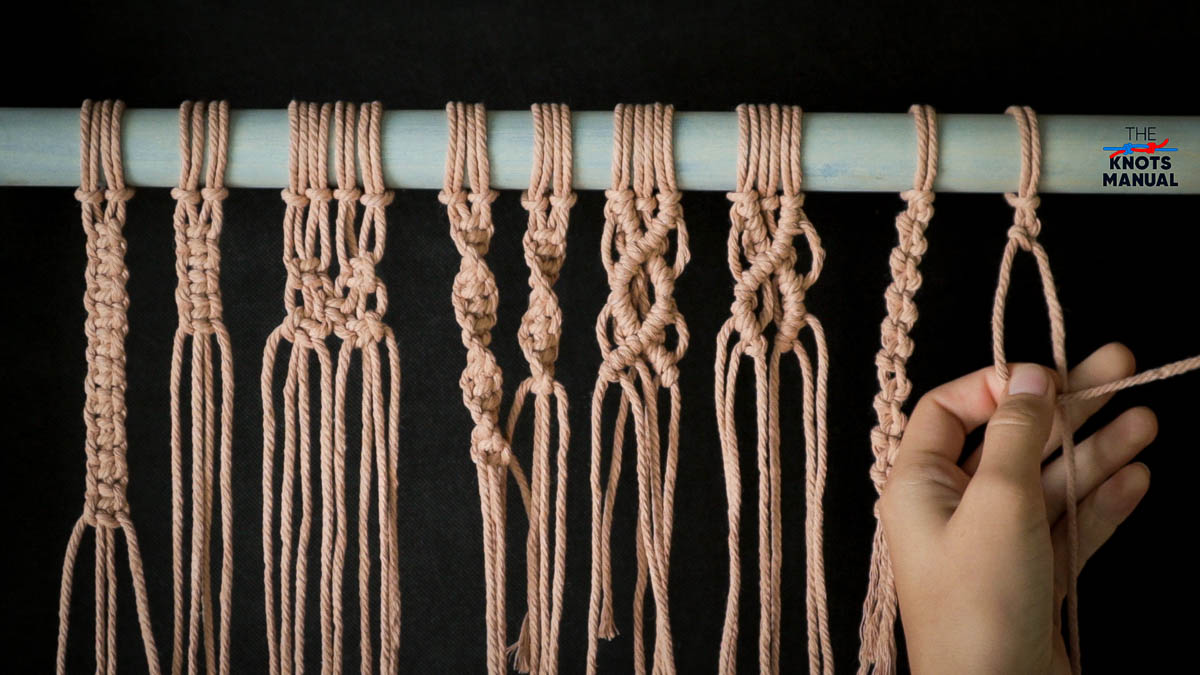
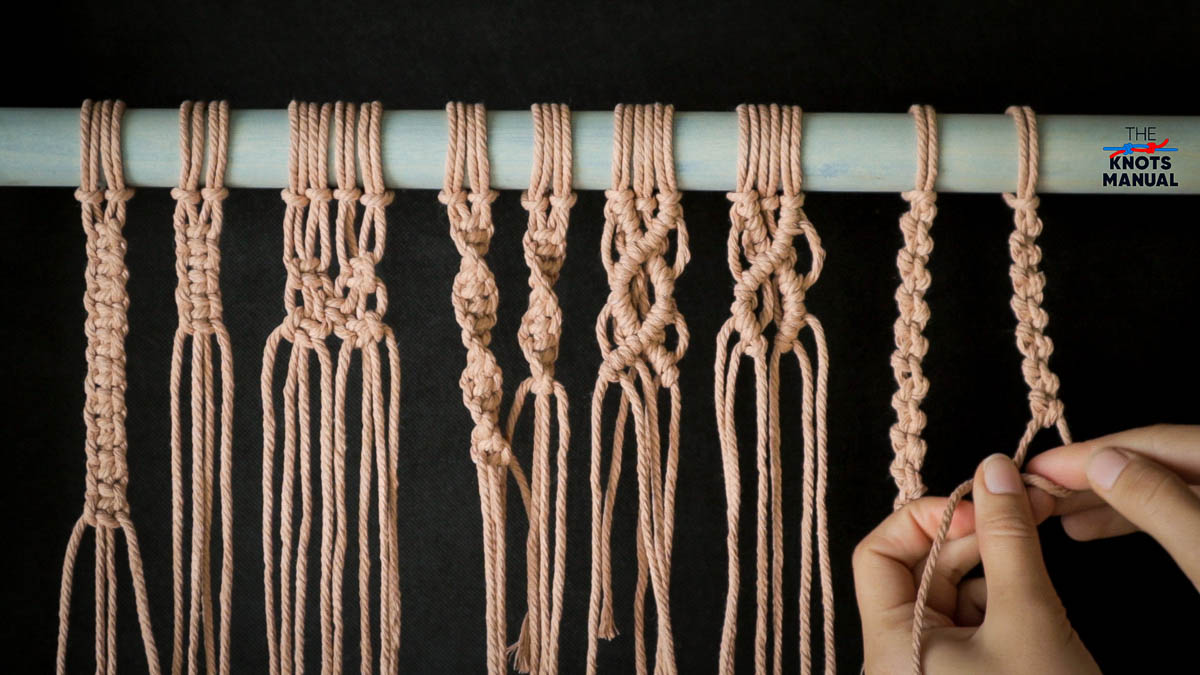
About These 6 Basic Macrame Knots

Most macrame patterns are based on a simple Overhand Knot. It’s the same knot that you use to tie your shoes. In fact, all knots covered in this article (except Lark’s Head Knot) are based on it as well. So if you know how to tie your shoes, then learning these 6 basic macrame knots shouldn’t be much of an issue.
Chances are that at least one of these essential knots will be used in any macrame project that you’ll find. So it’s important for any beginner (or novice) to learn how to tie them.
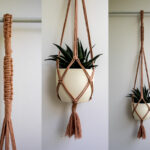
These 6 knots are commonly used to create necklaces, bracelets, wall hangings, plant pot hangers, handles, rings, table coverings, and other macrame projects.
Tools and Materials Needed:
To tie these essential macrame knots, you’ll need:
- Piece of string (cord). I like to use a 3-5 mm (3/32 – 3/16 inch) natural-fiber twisted cord. But you can also use synthetic braided string if you prefer.
- Scissors to cut the string to length.
- A wooden pole (optional). This will provide a vertical attachment point, which will allow you to practice more easily.
- Piece of tape (optional). You can also practice these knots on a table if you don’t want to use a wooden pole. But you’ll need a piece of tape to secure the top to the table so that it’s easier to work with.
1. Lark’s Head Knot
The first knot in this list is the Lark’s Head Knot, other called the Cow Hitch. In macrame, it’s usually used in wall-hanging projects to mount the top to a pole, ring, rope, or similar object.
To tie the Lark’s Head Knot, create a bight in the rope by folding it in half. Then place it in front of the pole.
Take the end of the bight and go around the pole from the backside, as illustrated above.
Finally, pass both free ends through the end of the bight to finish the Lark’s Head Knot. It can also be tied the other way by wrapping it around the pole in the other direction.
2. Square Knot
One of the most popular macrame knots is the Square Knot. When many Square Knots are tied after one another, a flat, weaved section is created. It can be used to create handles, rings, or straight sections in any macrame project.
In our illustration, we show how to tie it with four strings. But you can also tie it with six, eight, or more strings. The process is identical, except the side strings are wrapped around more cords in the center.
To tie a Square Knot, isolate the outermost string on each side.
Pass the left string in front of the two center ones and behind the right one.
Now take the right string, and pass it behind the two center ones and in front of the left one.
This creates an interlocking Overhand Knot that wraps around the two center strings. Tighten it to finish the first half of the Square Knot.
Now you will need to tie another knot like the one you just made, except from the other direction. Take the right string and place it in front of the two center strings and behind the left one.
Now take the left string and pass it behind the two center ones and in front of the right one.
Tighten to finish the second half of the knot. Now the Square Knot is finished.
Continue tying more Square Knots in a row until a pattern as illustrated above emerges.
3. Alternating Square Knot
Another popular and easy macrame knot is the Alternating Square Knot. It creates a zig-zag pattern, which is used to create an interesting flat section in a lot of macrame projects.
The Alternating Square Knot is based on simple Square Knots intertwining each other (just like bricks laid out in a brick wall). In our example, we’ve tied it using 8 strings, but it can also be tied with 12, 16, 20, or more strings following the same principle.
To tie the Alternating Square Knot, start by tying a simple Square Knot with the first four strings from the left side.
Now tie another Square Knot with the next four strings from the right side.

To tie the next row, isolate the middle four strings (two from the left Square Knot and two from the right one), and tie another Square Knot with them.
Tie the third row identically to the first one, with a Square Knot on each side. Continue as far as you want following the same pattern.
4. Spiral Stitch Knot

The Spiral Stitch Knot creates an interesting DNA-like pattern. It’s often used in wall hangings, plant pot hangers, and other hanging macrame projects to create a distinct look.
It’s an extremely simple macrame knot, formed by tying many Half-Square Knots in a row.
To tie it, isolate the left and right strings, leaving two loose strings in the center.
Pass the left string in front of the two center ones and behind the right one.
Take the right string and pass it behind the two center strings and in front of the left one.
Tighten to finish a Half Square Knot.
In a regular Square Knot, you would proceed by tying another Half Square Knot in the other direction. But here, you need to continue tying another identical Half Square Knot from the same direction (left to right).
Continue tying many Half Square Knots in the same direction, until a spiral starts to form.
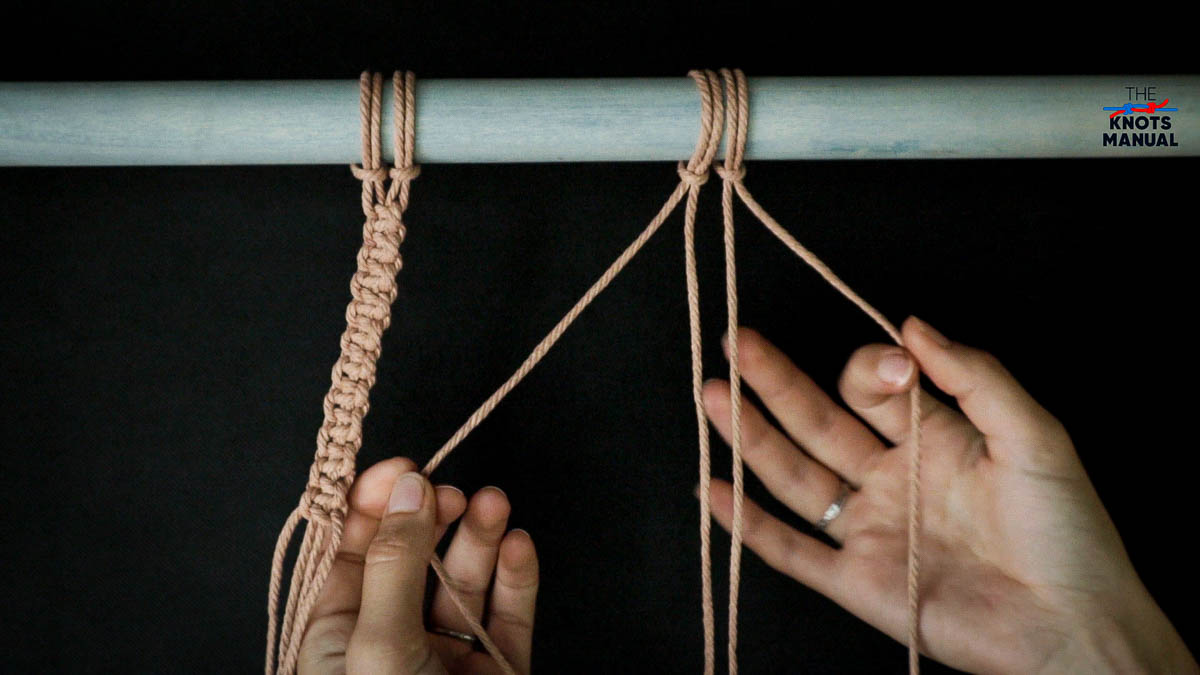
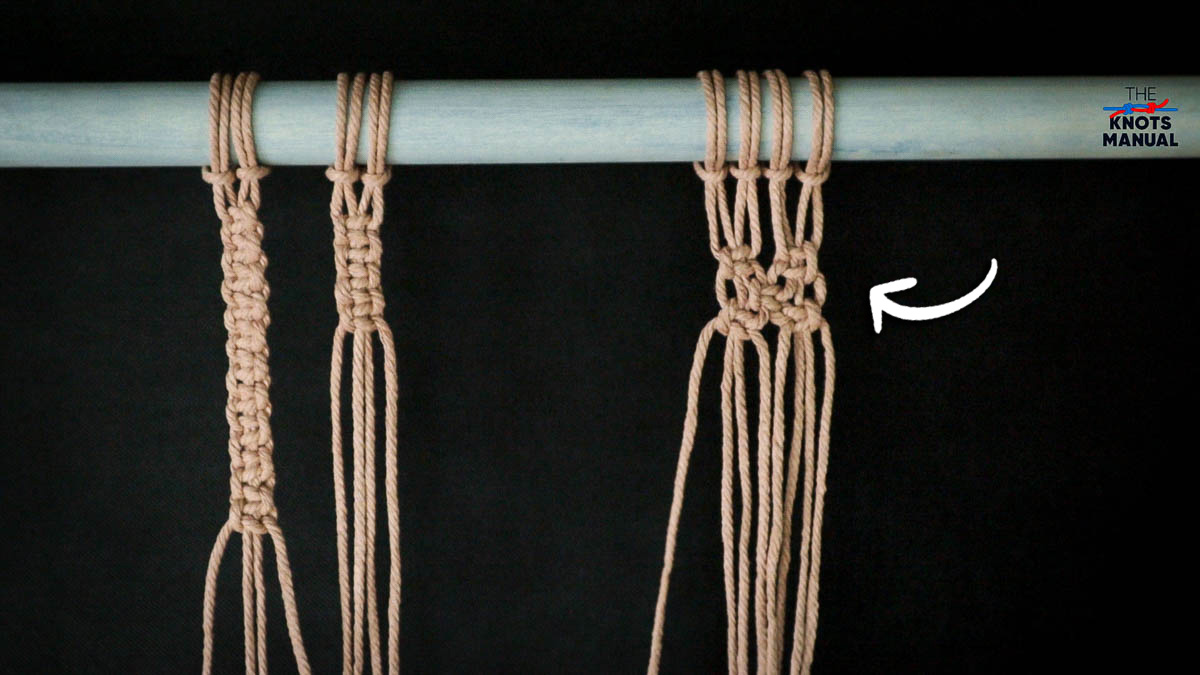
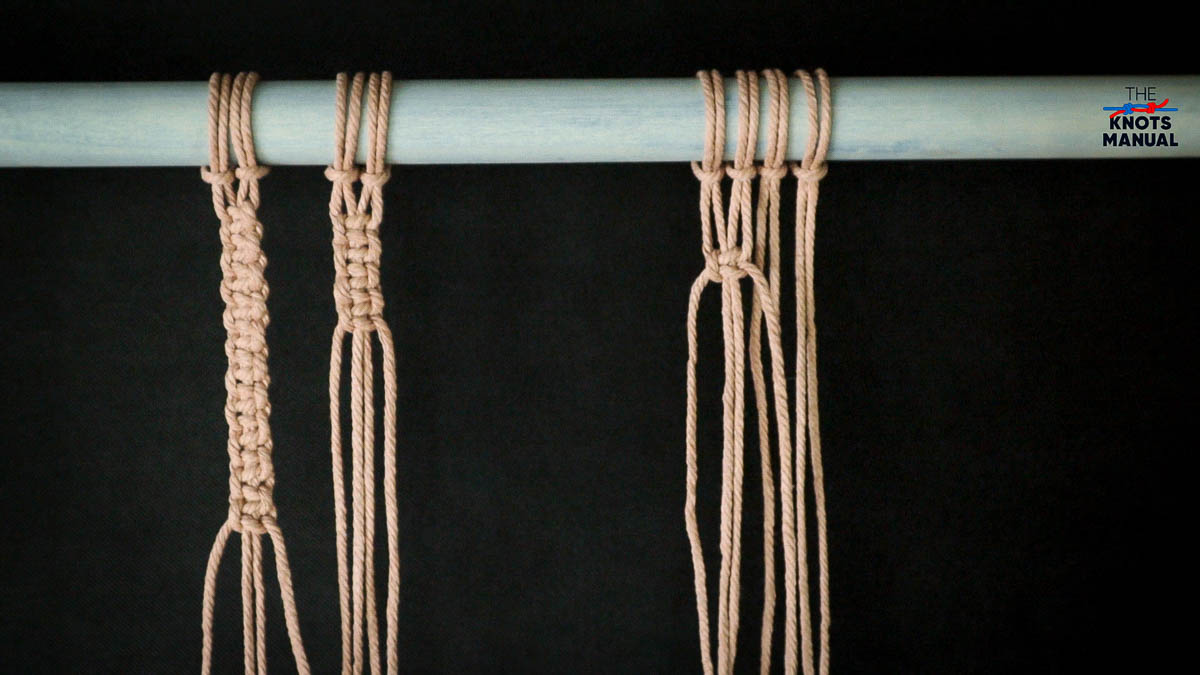
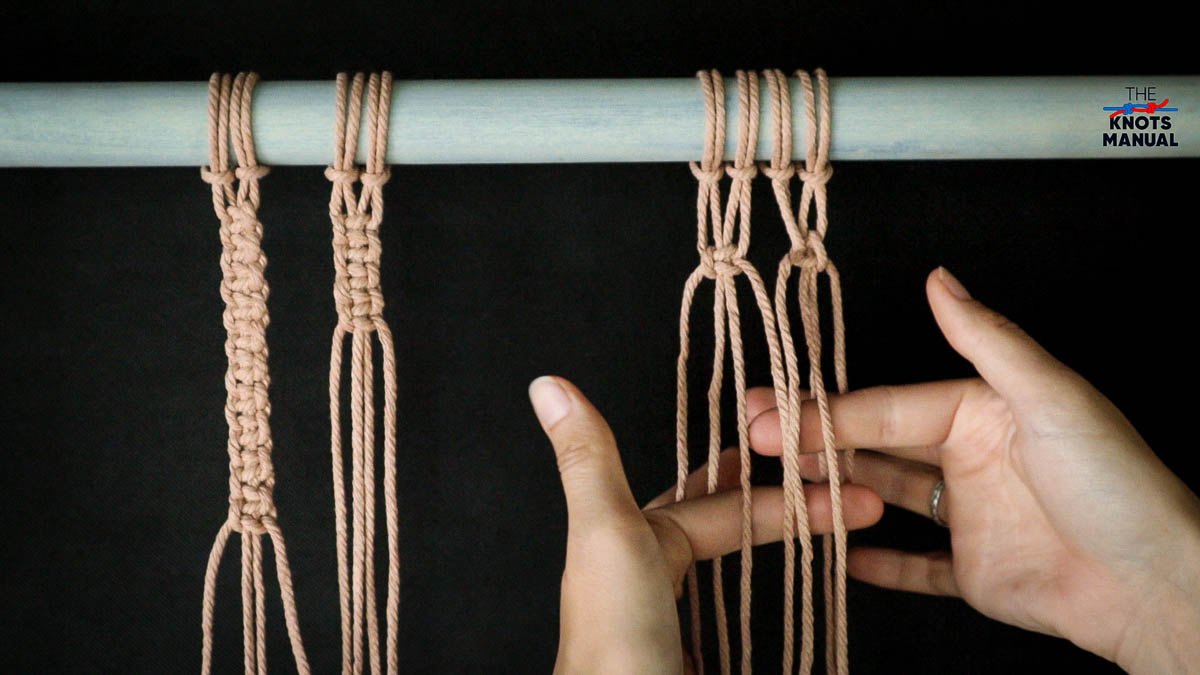
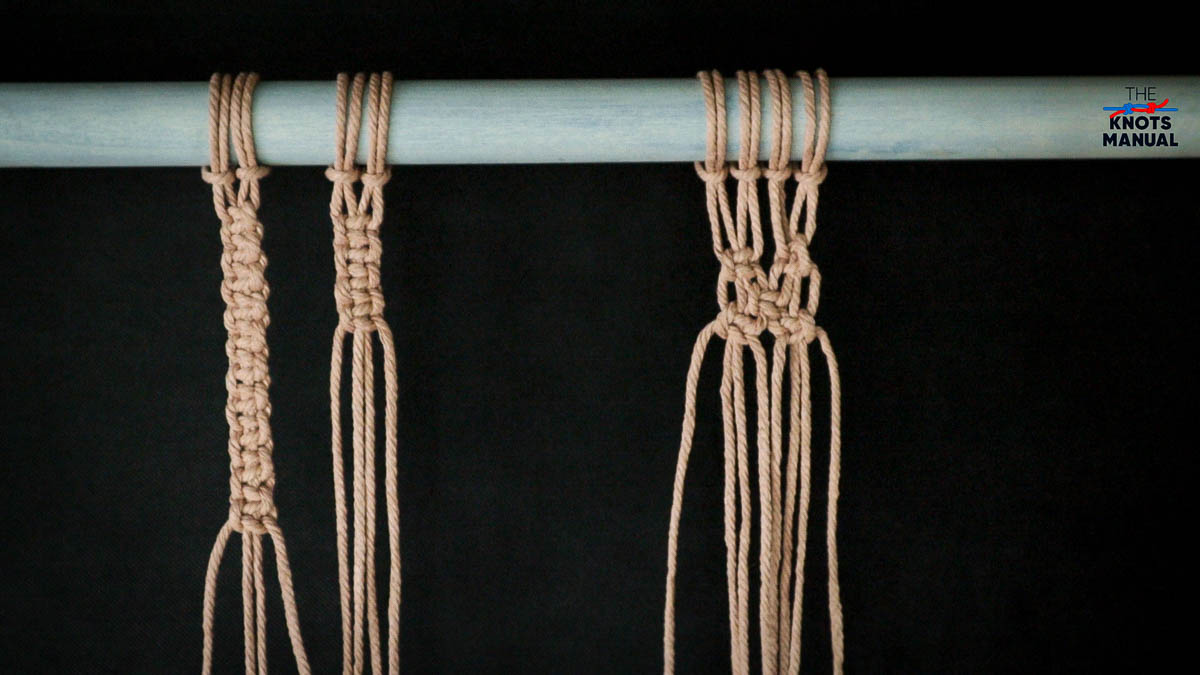
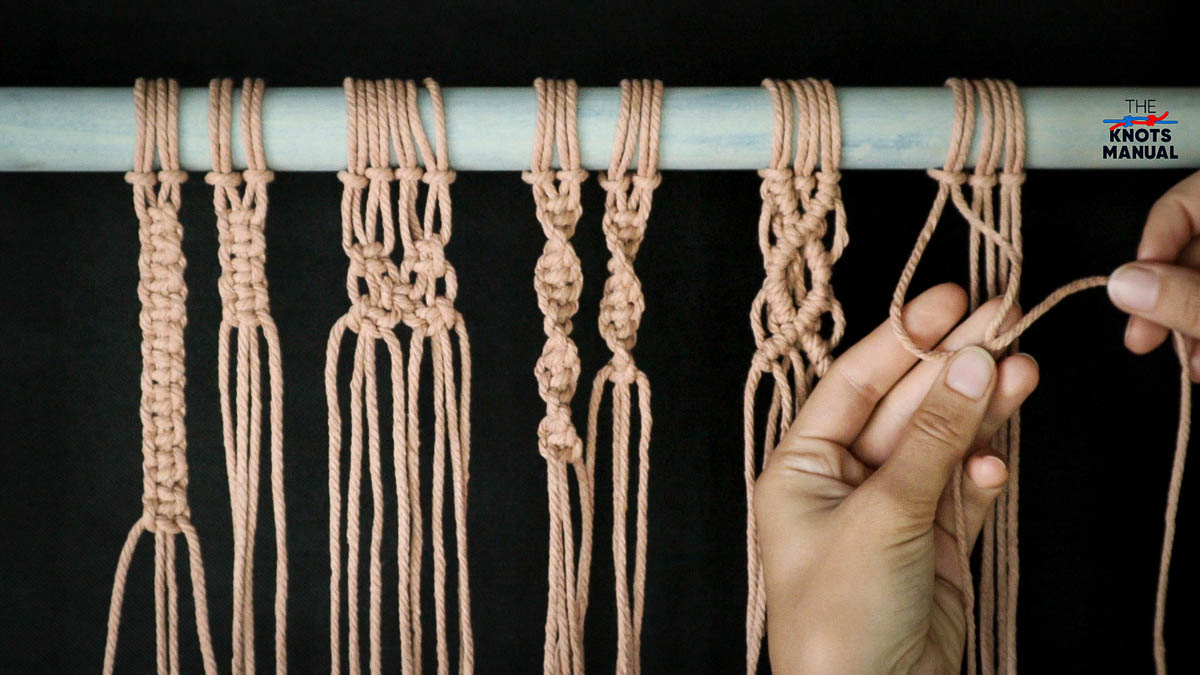
5. Double Half Hitch Knot
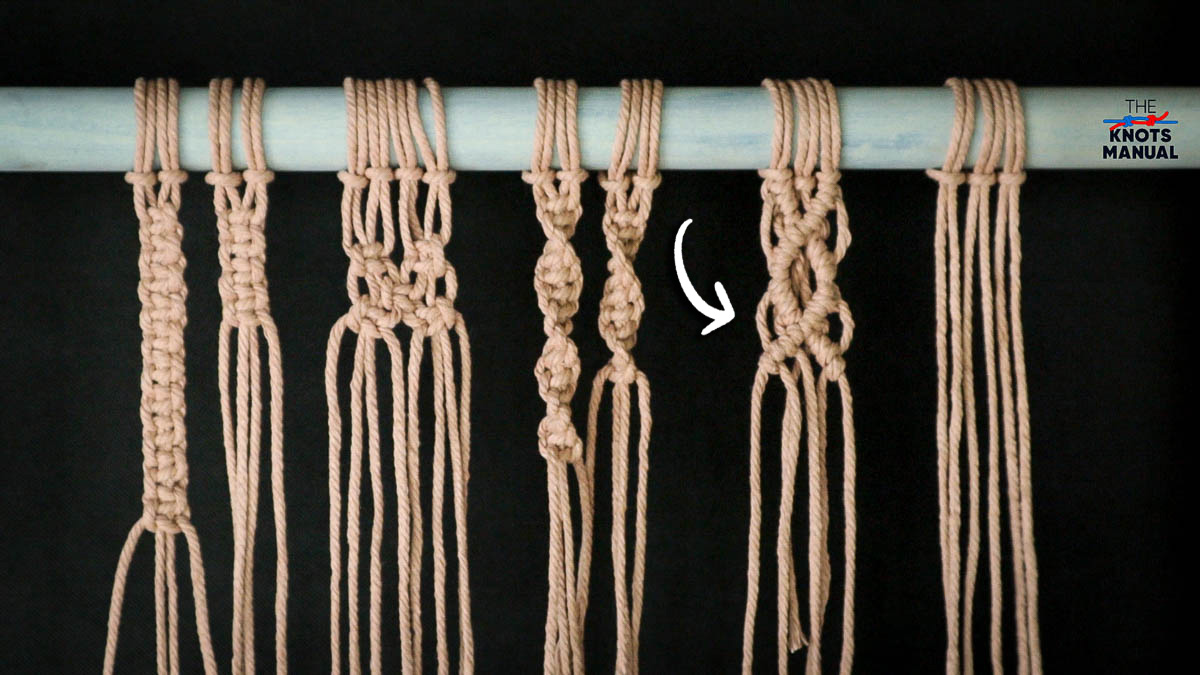
The Double Half Hitch Knot is a very advanced-looking macrame knot that in reality is very easy to tie. It creates an intertwined flat section, often used in wall hangings. It’s based on many Overhand Knots tied in a row, in alternating sequences.
To tie it, you’ll need six free strings. But you can also tie it with 8, 10, 12, or more strings.
Start by taking the left string and placing it in front of the string right next to it.
Next, pass it through the formed loop to create an Overhand Knot.
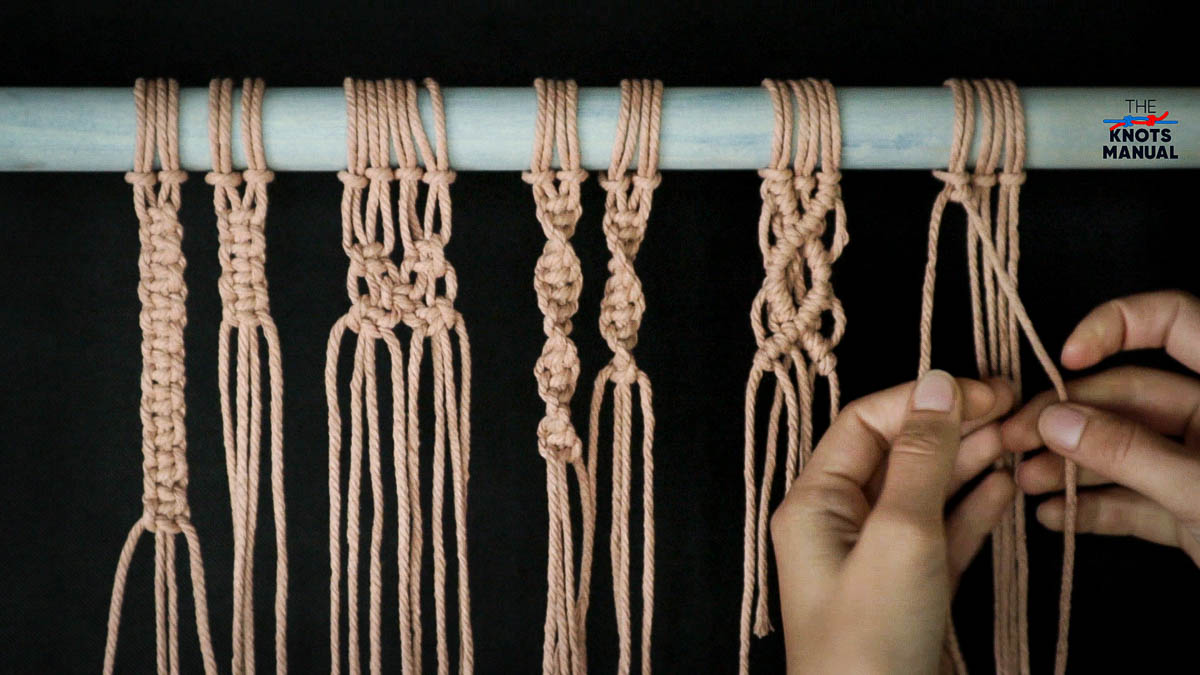
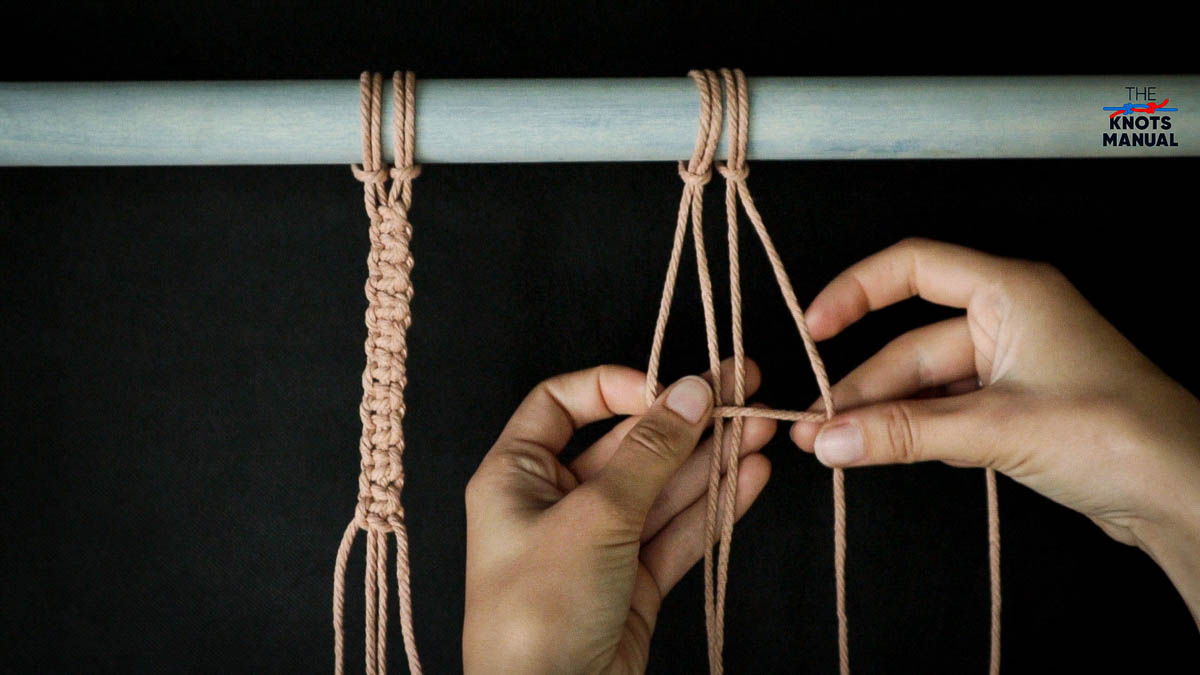
Tighten it to finish the first Overhand Knot.
Now tie another identical Overhand Knot with the same two strings.
After that, tie an identical Overhand Knot, except with the second and third string from the left side.
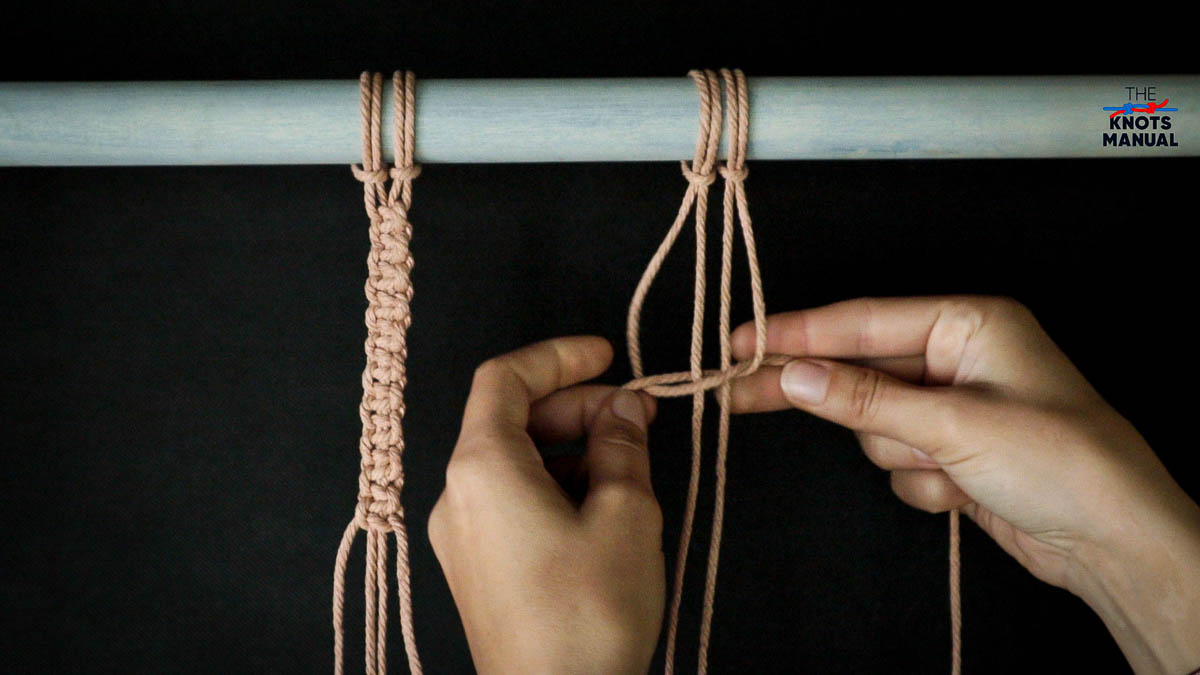
Tie another identical Overhand Knot right after it with the same strings.
Now you should have formed four Overhand Knots with the first three strings from the left side (two with the first two strings and two with the second and third strings).
Tie another four overhand knots, only from the left side, and in the opposite direction.
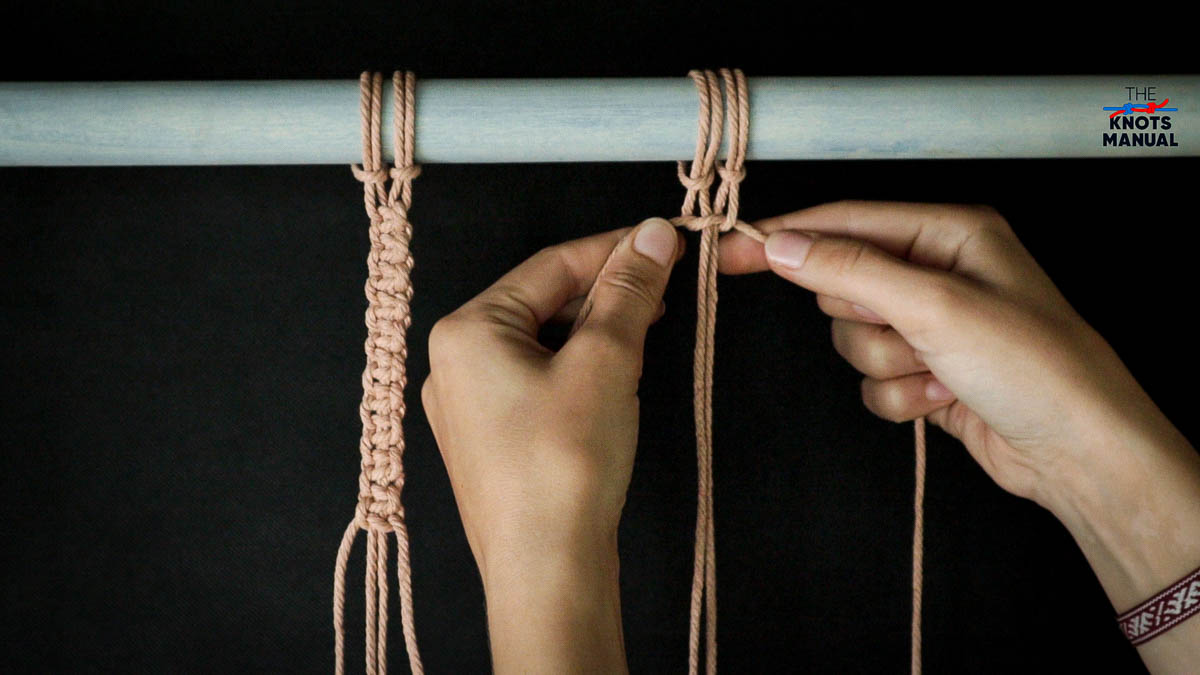
Continue tying Overhand Knots from the right side (in pairs of two) until you reach the left side.
From the center, continue tying overhand knots from the left side until you reach the right side. Then reverse the direction.

In the end, you will form a pattern like shown above, with two larger knotted formations intertwining each other.
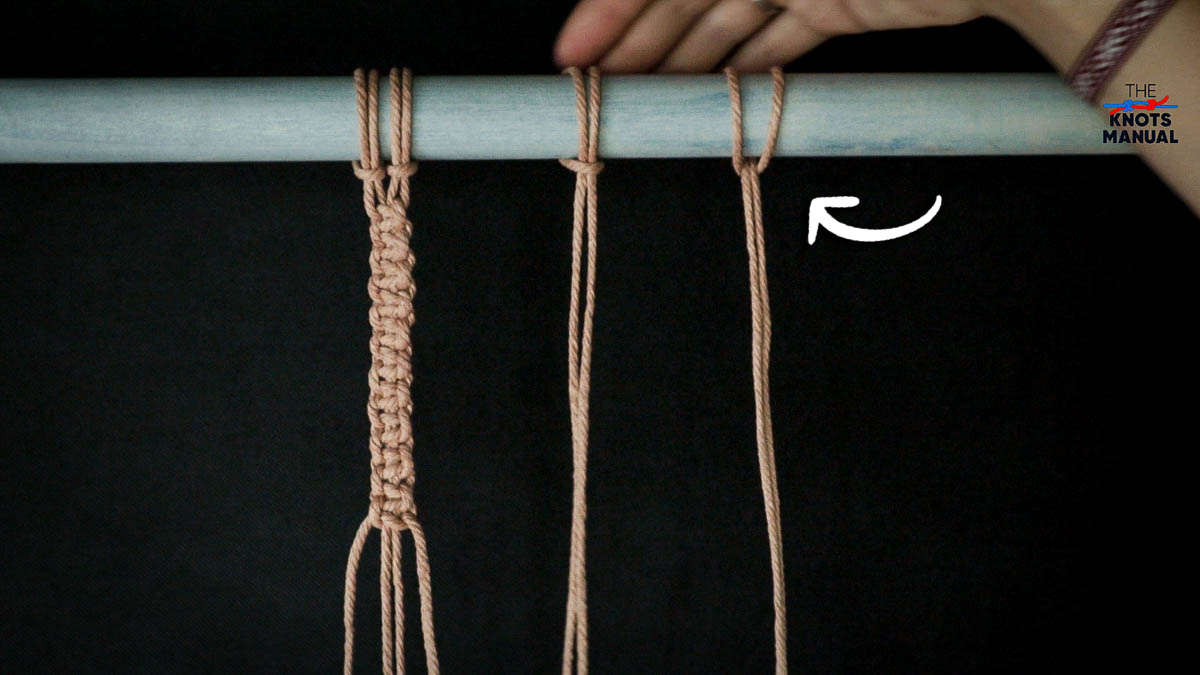
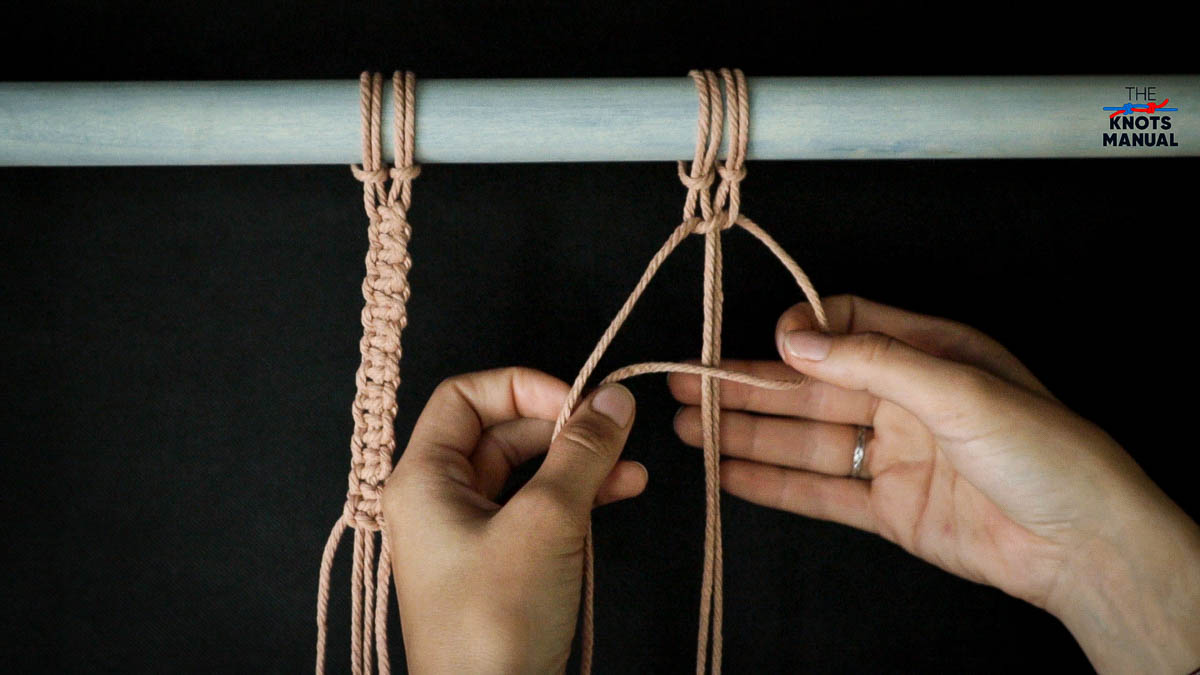
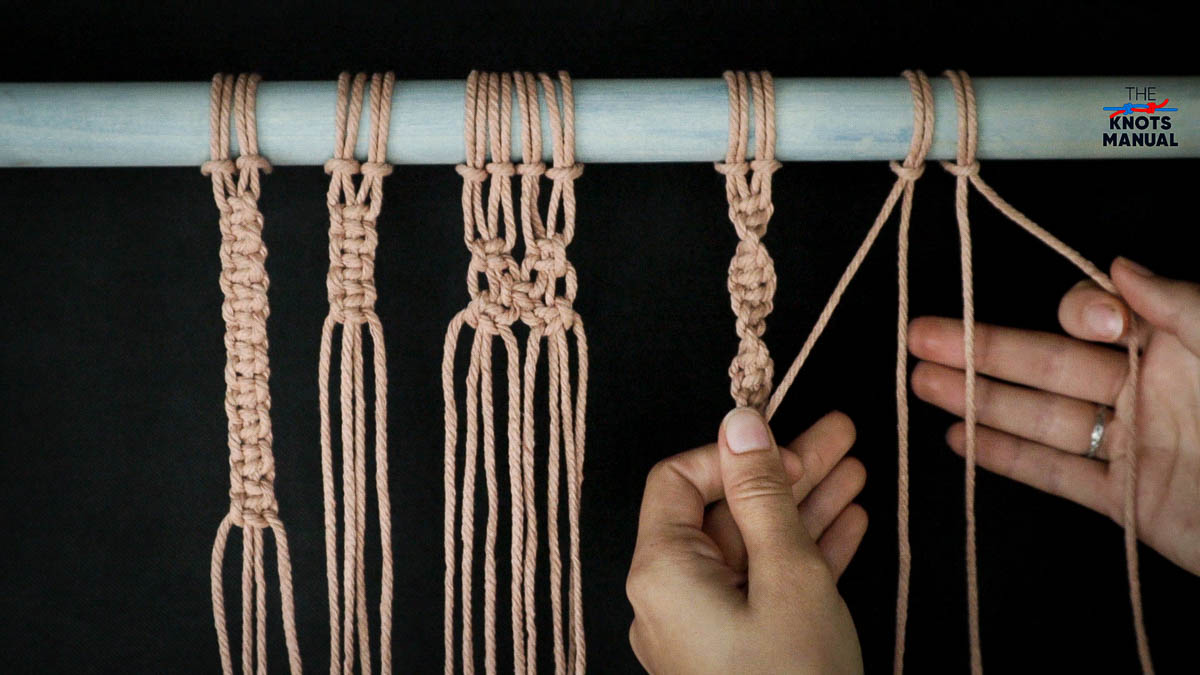
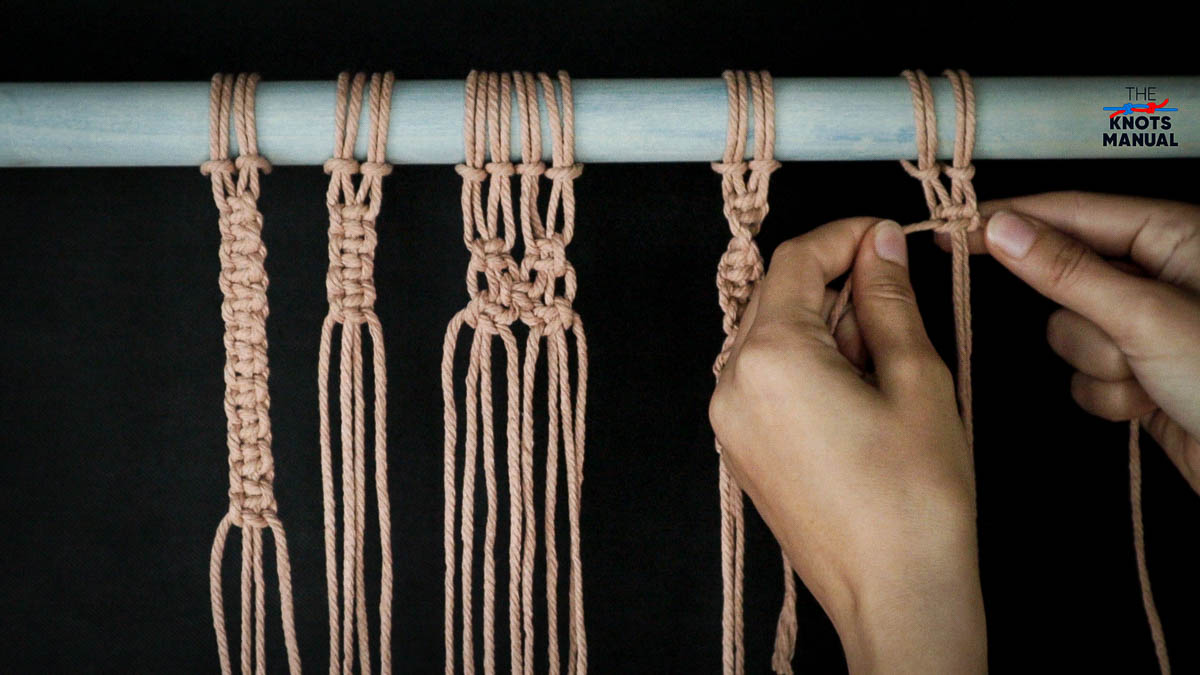
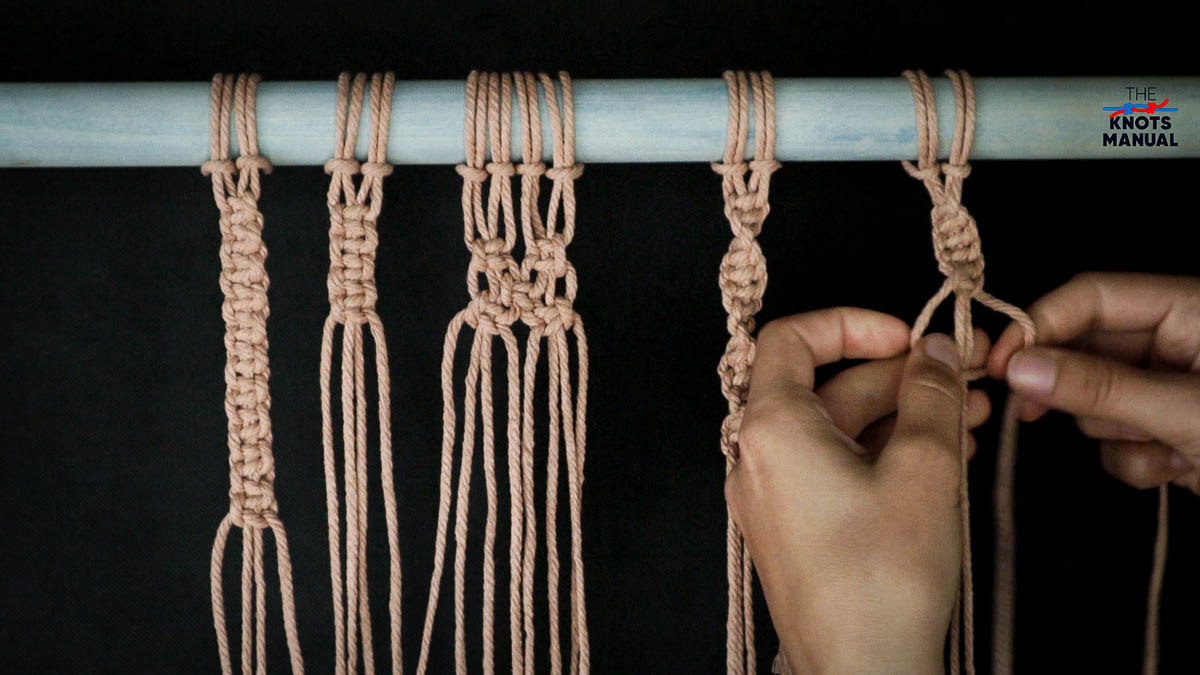
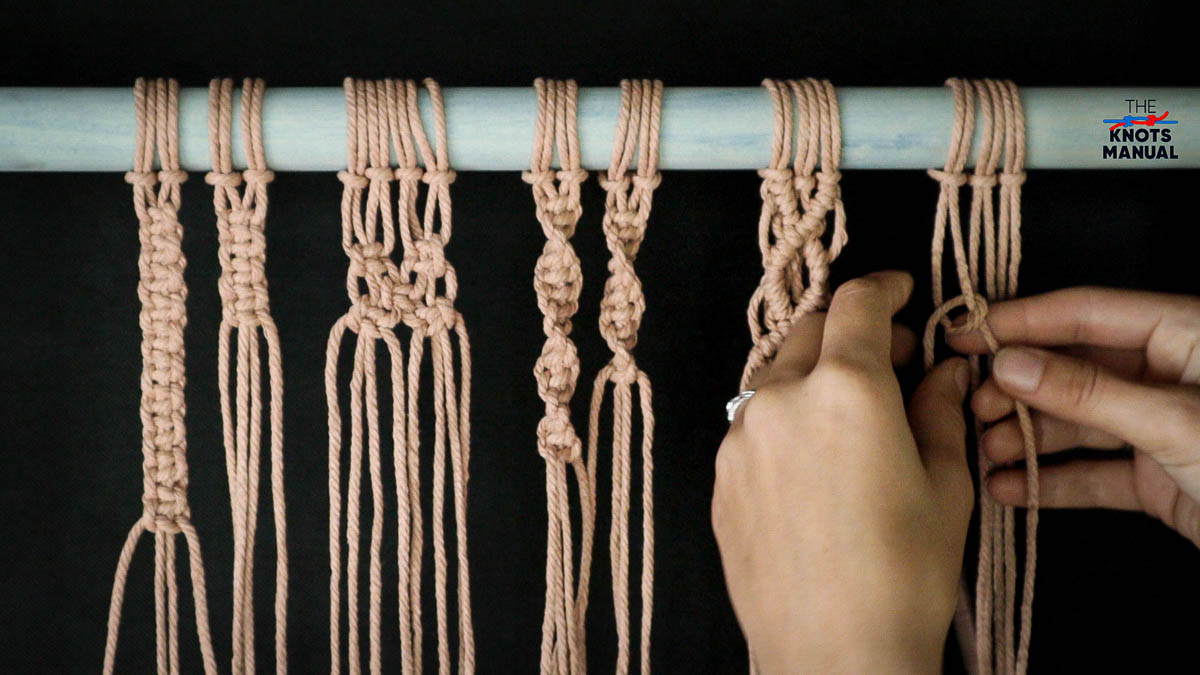
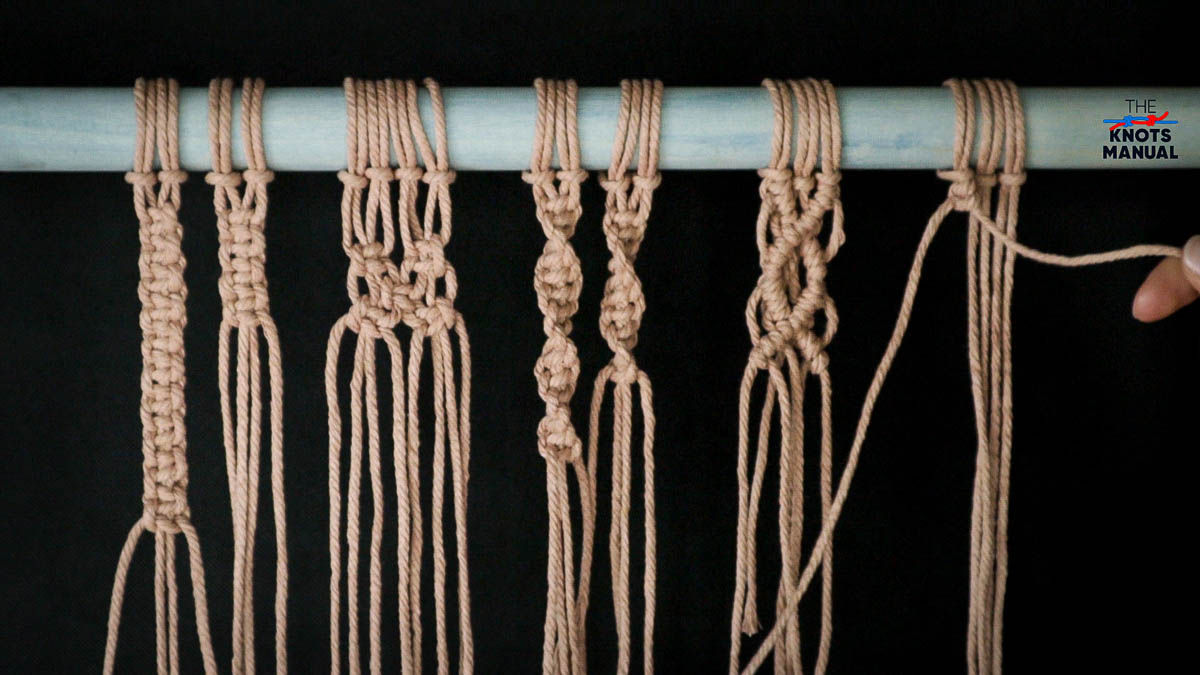
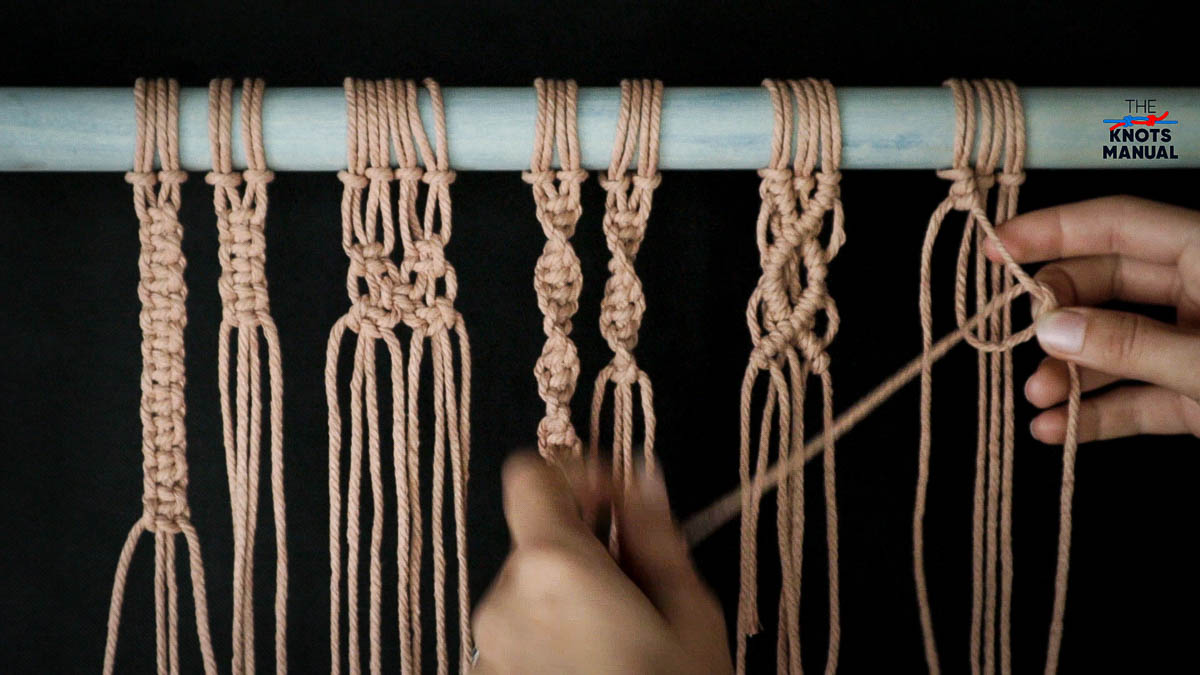
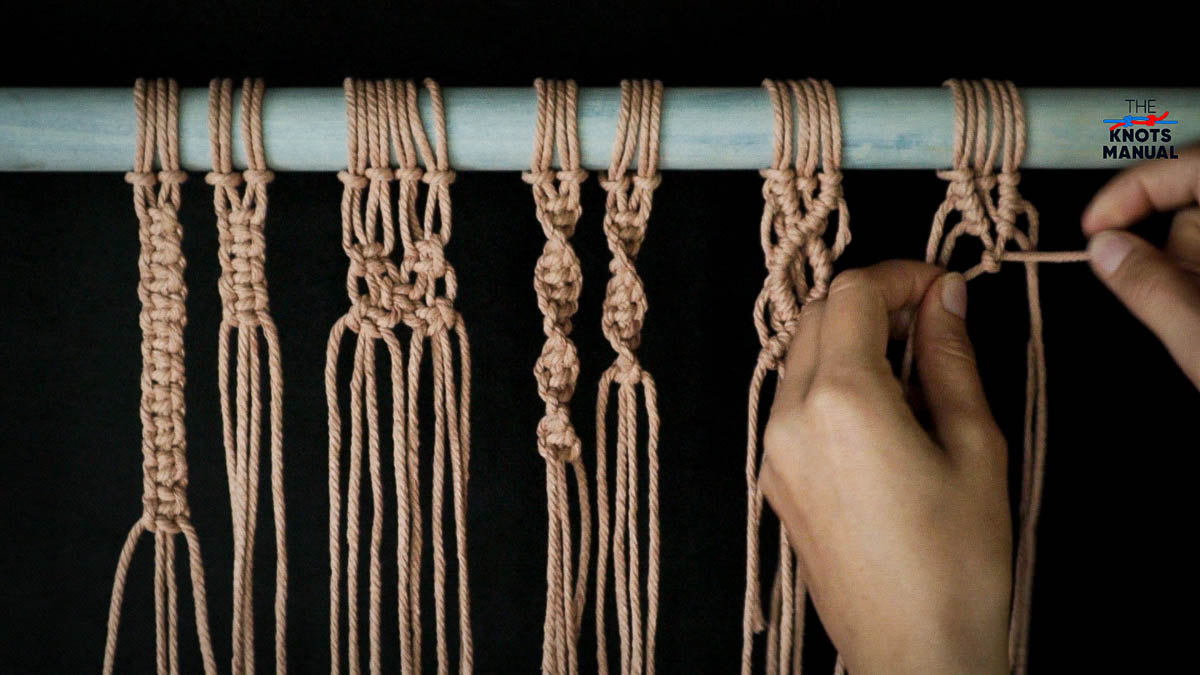
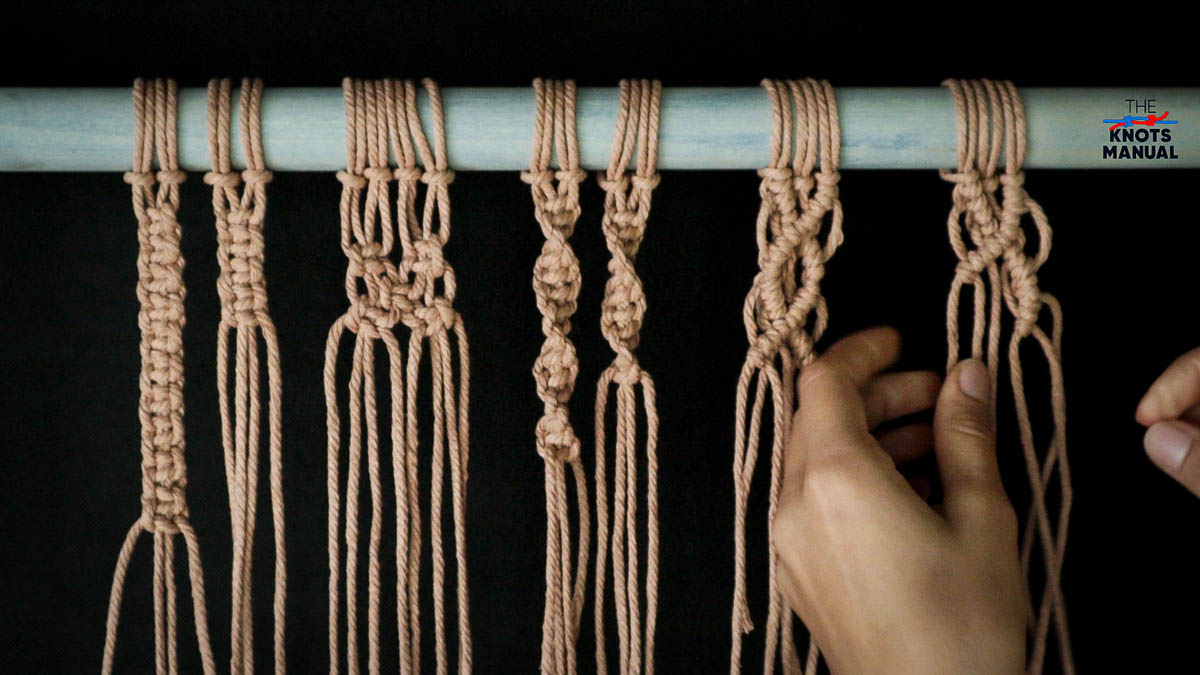
6. Alternating Half Hitch Knot
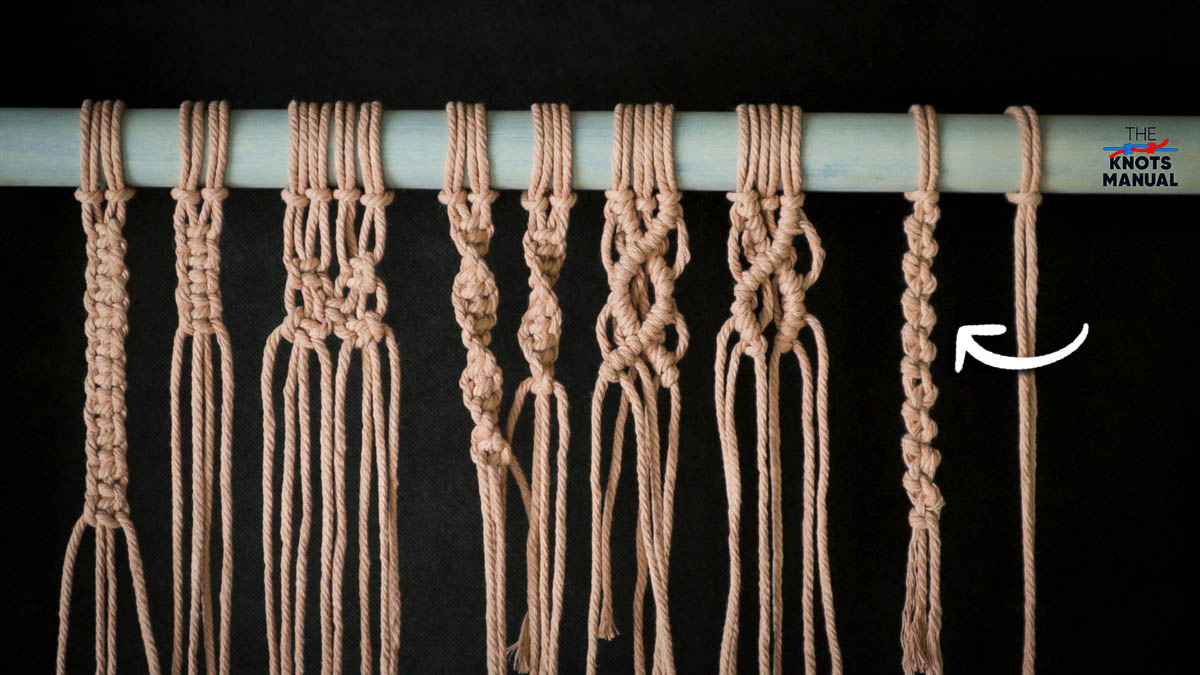
The Alternating Half Hitch Knot is another simple and widely used macrame knot. It creates a symmetrical pattern from two strings, which can be incorporated into many macrame wall-hanging projects. It can also be used to tie bracelets or make an interesting-looking braided rope.
It consists of many Overhand Knots tied after one another. In fact, it’s tied almost identically to the Spiral Stitch Macrame Knot, except in alternating directions, and with only two strings instead of four.
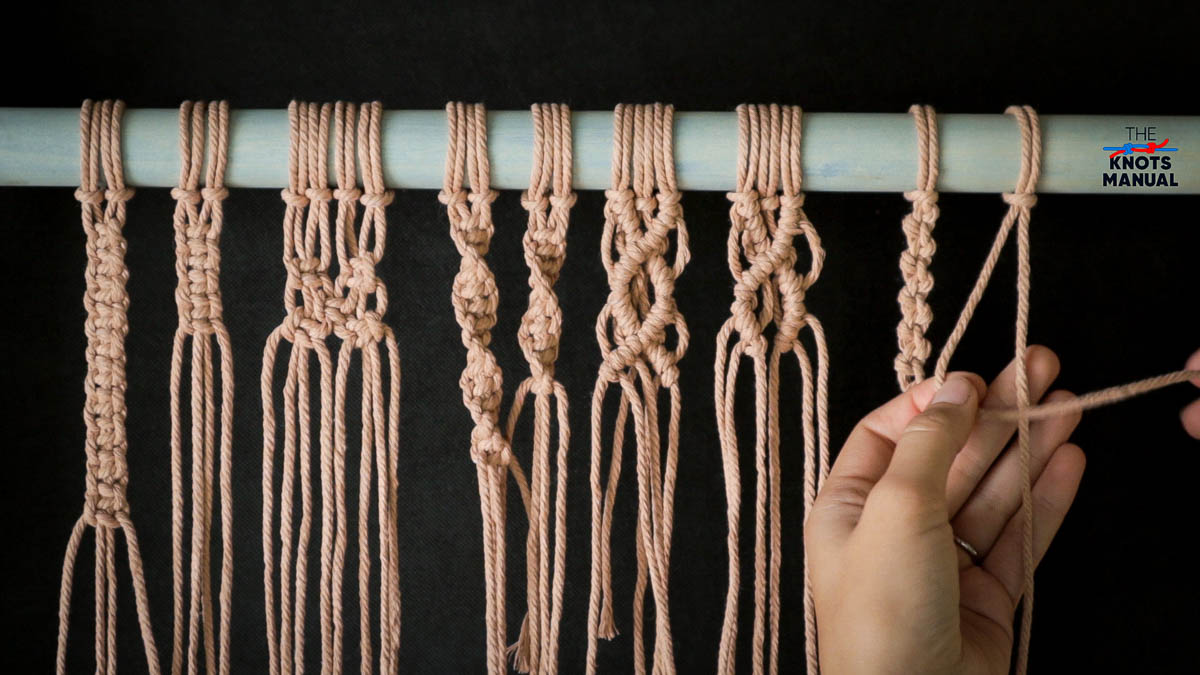
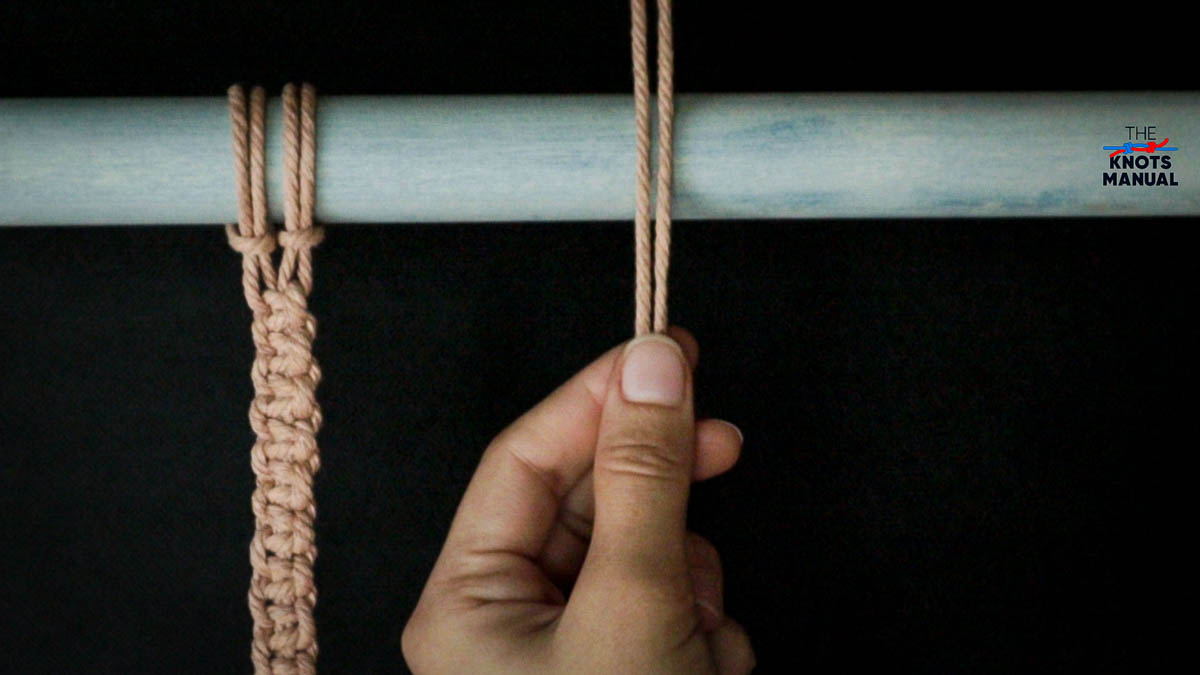
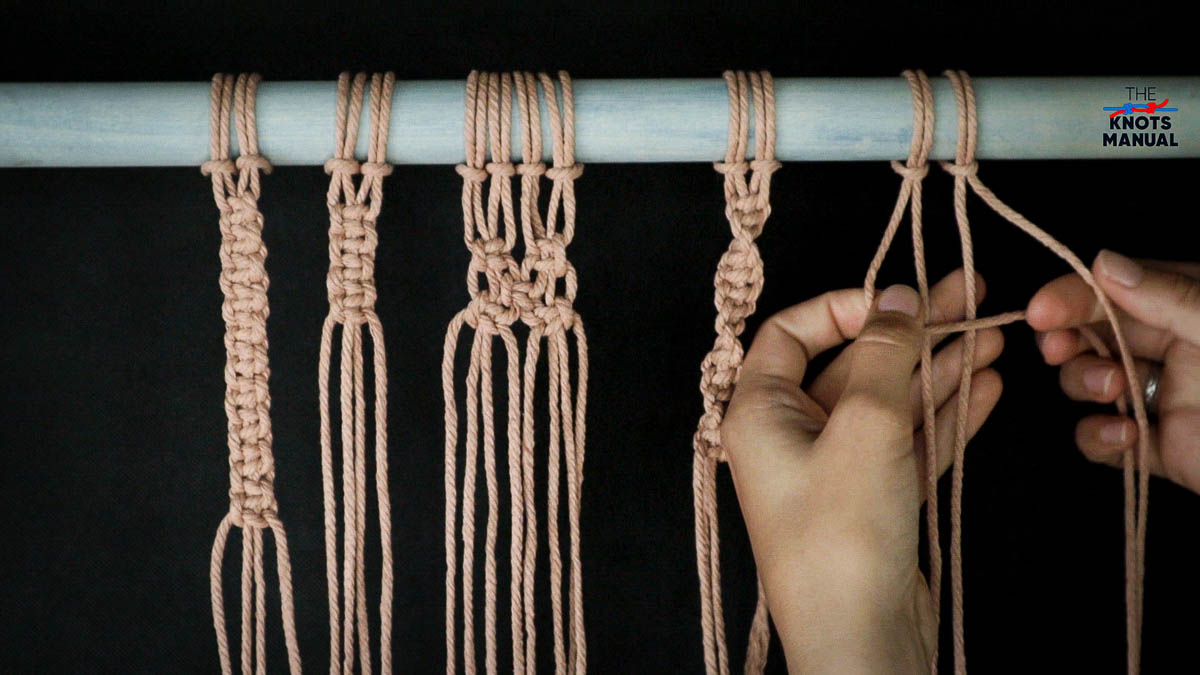
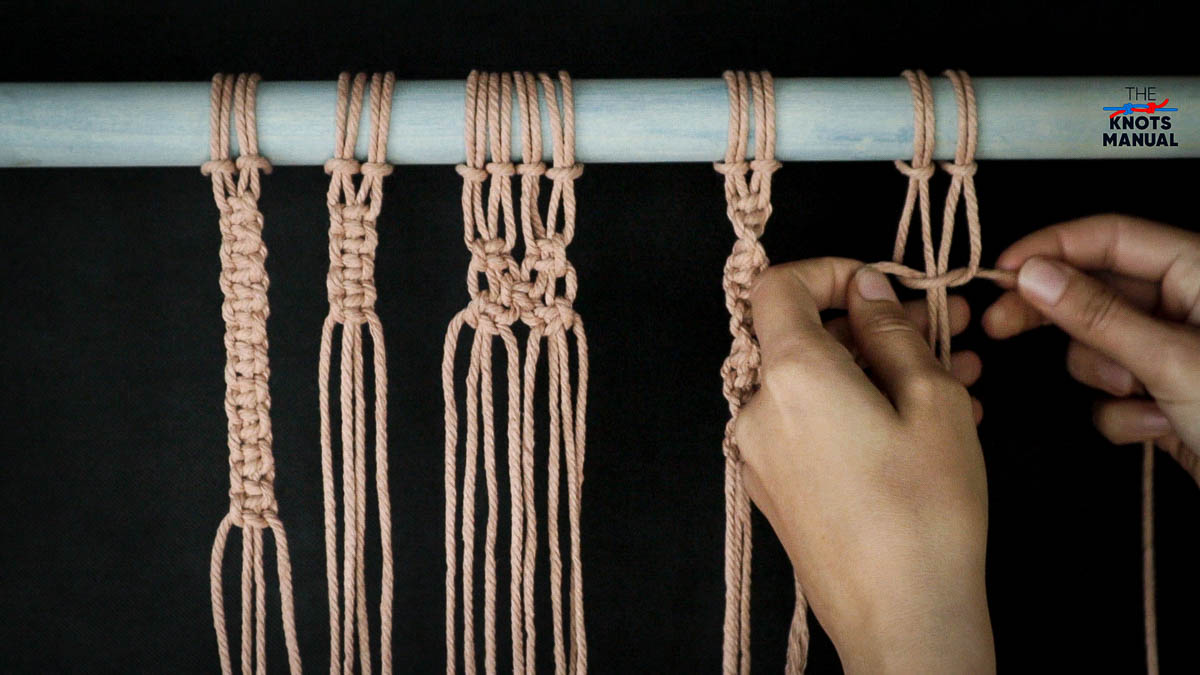
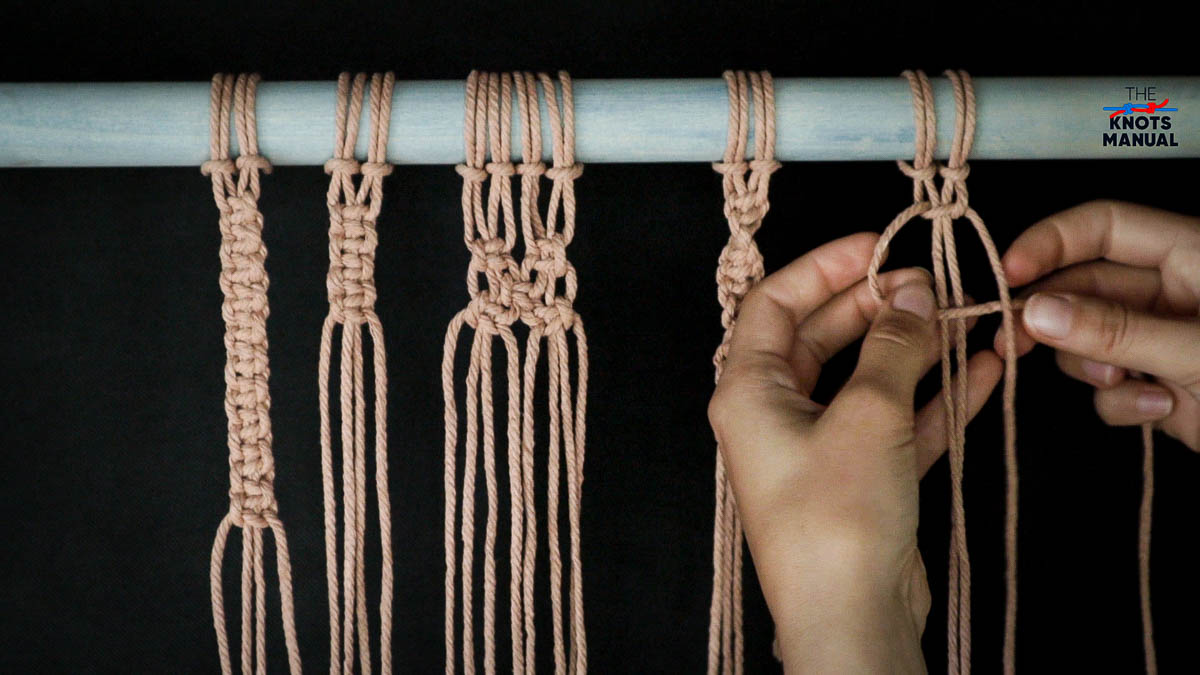
Take the left string and place it in front of the right one.
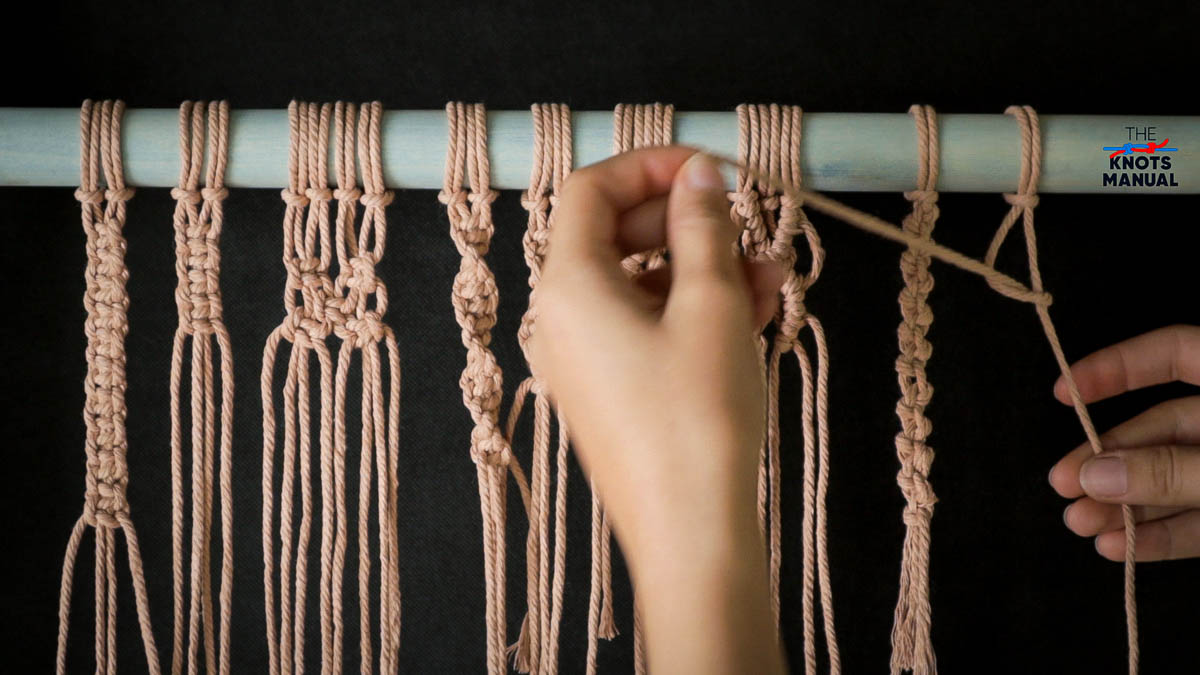
Now go around it and through the top to form an Overhand Knot.
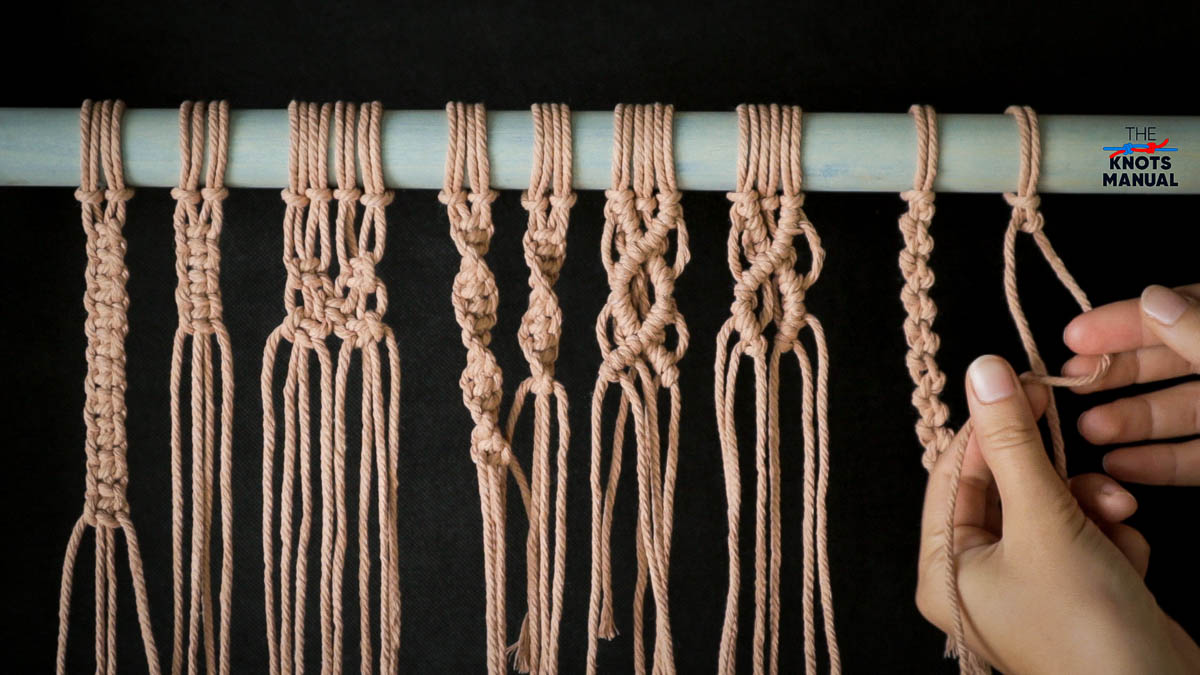
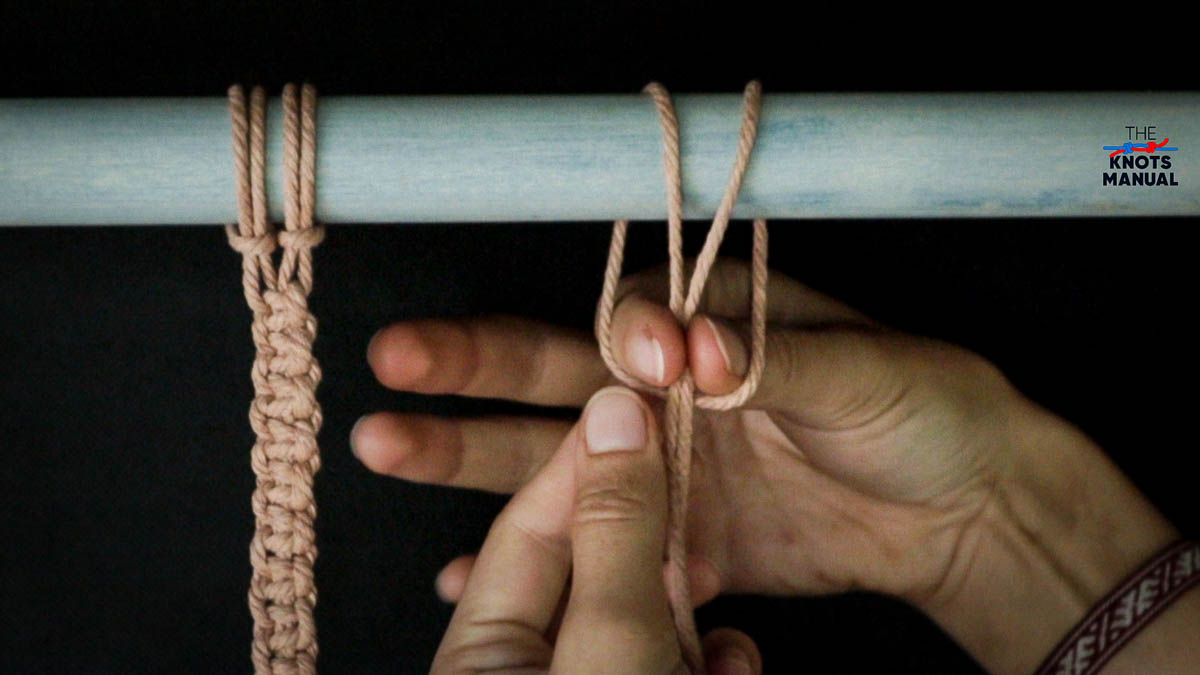
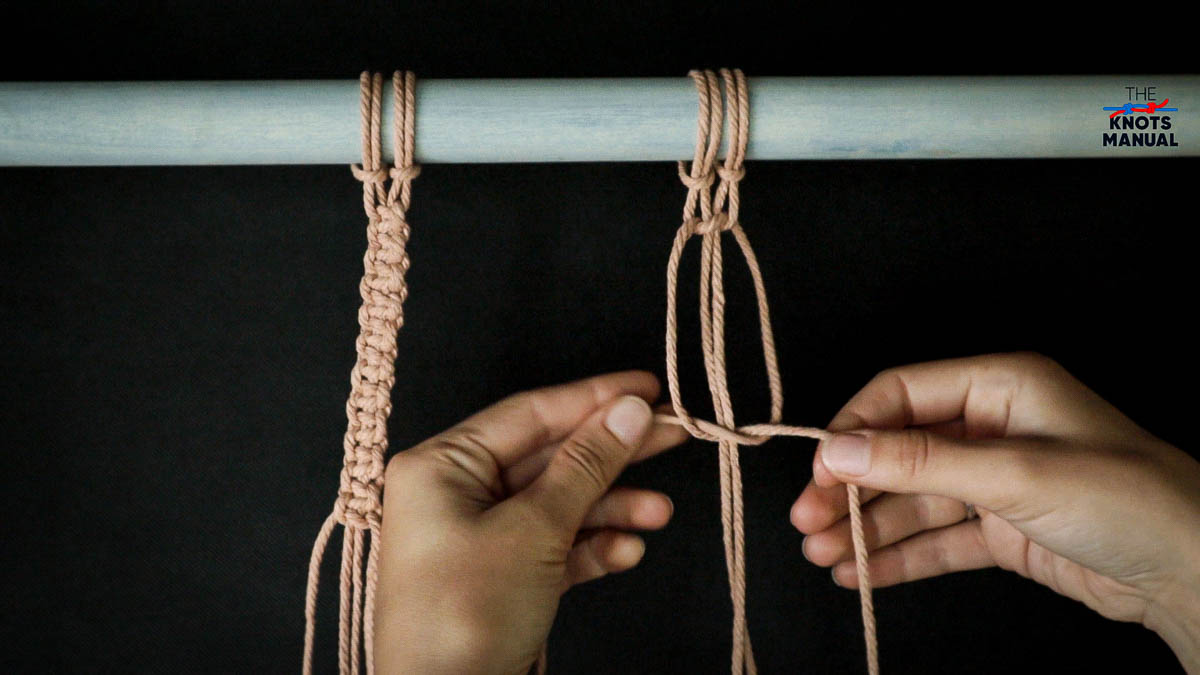
Tighten it and start tying another Overhand Knot in the opposite direction. Take the right string and place it in front of the right one.
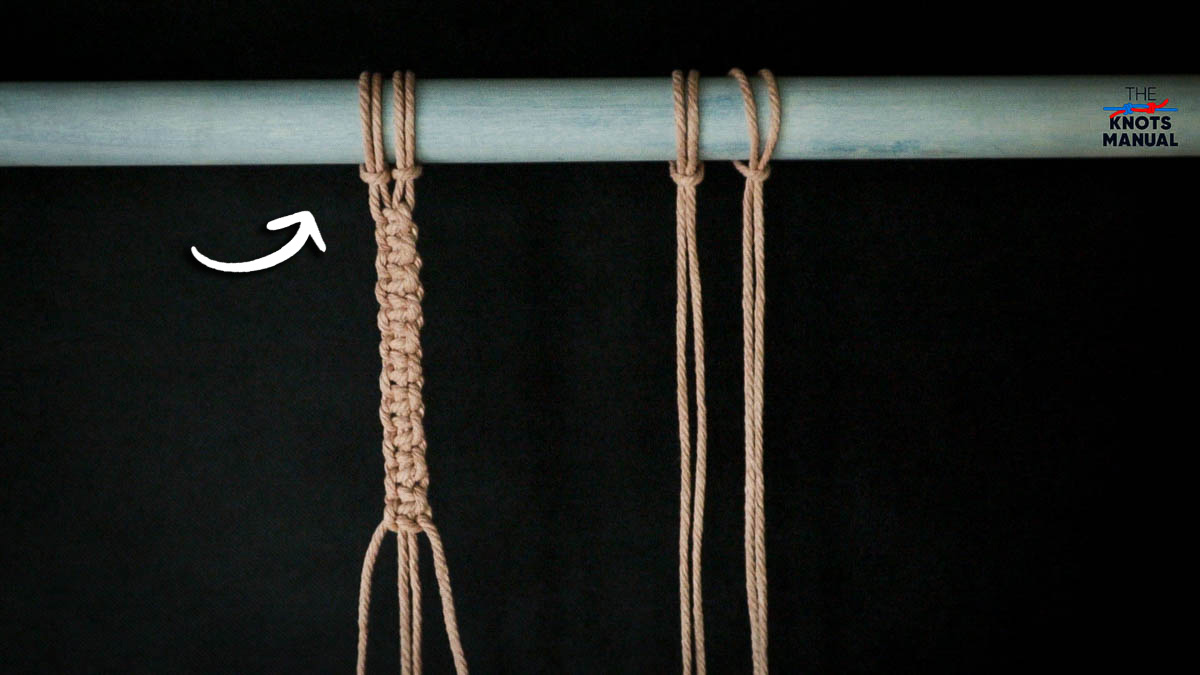
Pass the right string around the left one, through the loop, and tighten to finish forming two Overhand Knots in alternating directions.
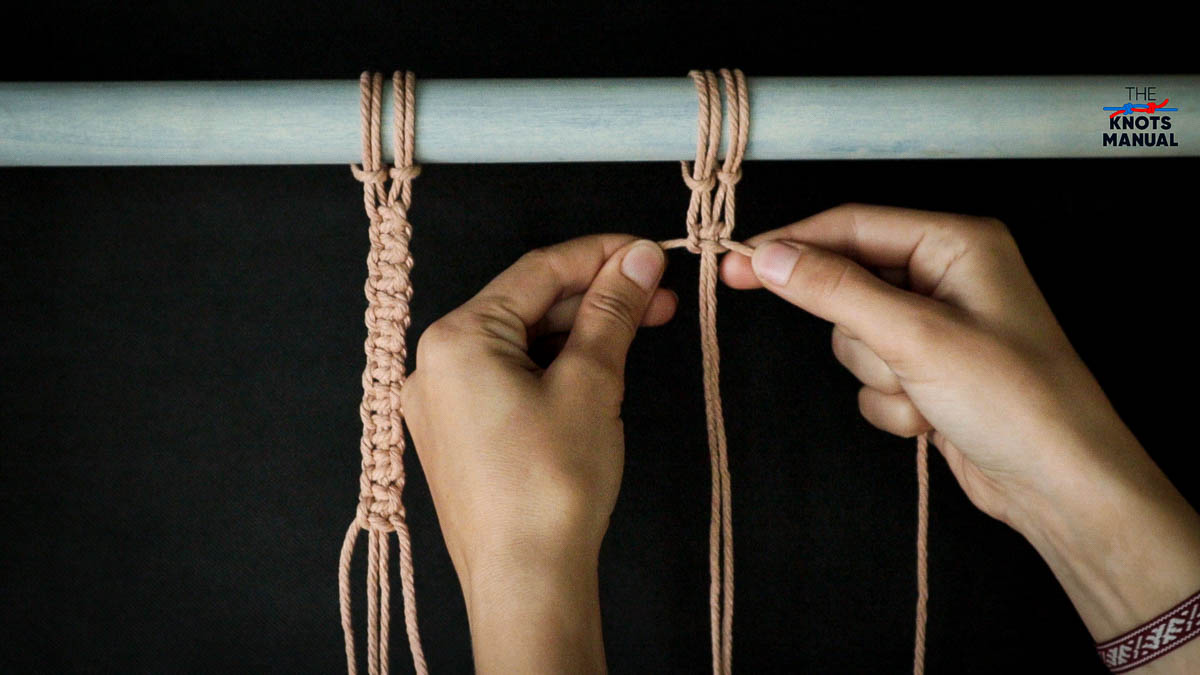
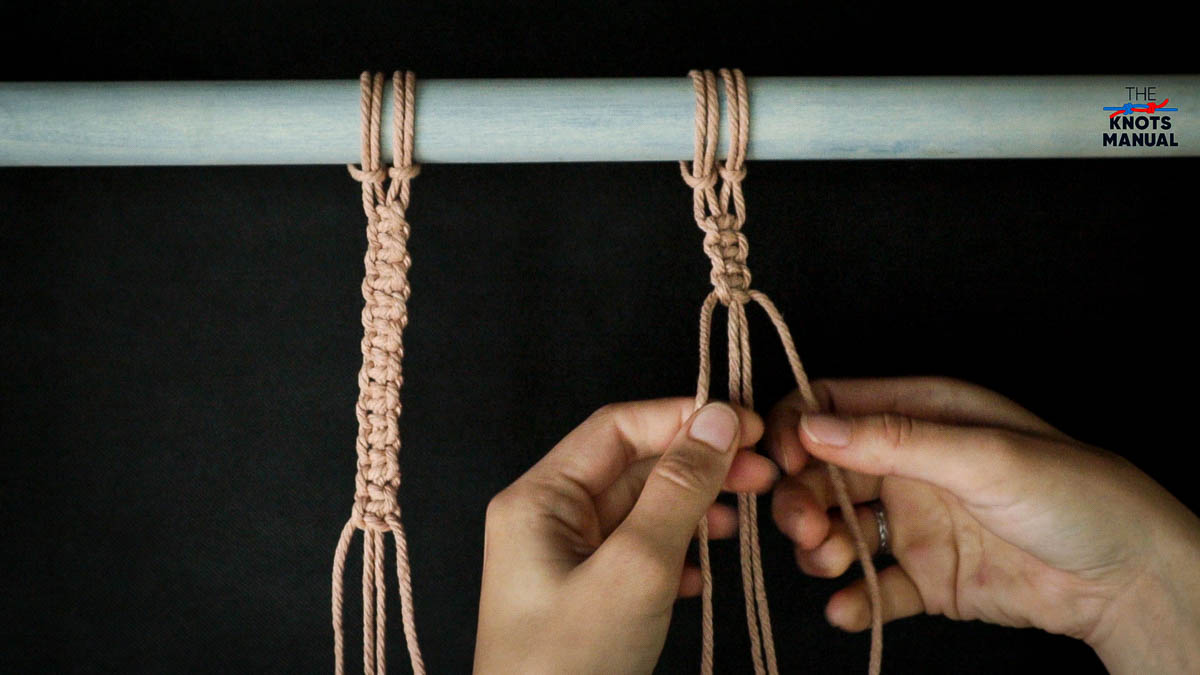
Continue doing this as long as you want until you reach the desired length.

Thank you. I use to macrame years ago and totally forgot how. Your instructions with pics are great. It brought back memories of all the things I use to make. Im 75 and made many macrame gifts in my 20’s. You have inspired me to start being creative again. Thanks again. Linda