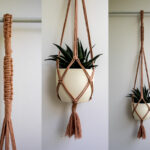
To make your macrame project stand out, instead of using a simple Overhand Knot to tie off the end, you can (and should) use something a bit more advanced. This will not only keep the ends from unraveling but also add a professional touch to your project.
These 6 Macrame End Finishing Knots outlined below are easy to learn and can be tied with single or many strands. Use them to tie off plant pot hangers, wall hangings, dream catchers, and other macrame projects. This isn’t an extensive list of macrame end knots but rather a list of easy macrame knots that beginners should learn first.
Types of Macrame End Knots

A Macrame End Knot is a knot that you tie on the end of the strand to keep it from unraveling or fraying. Some people call them “end knots” and others “finishing knots”. In reality, it means the same thing.
Macrame Finishing Knots are usually split into two groups – single-stand and multiple-strand end knots. If your project has many strands that need to be finished off, it’s always easier to tie a single knot on all of them. But you could also tie a smaller end knot on each of the strands to achieve a different look.
In this list, we’ve included four single-strand end knots, one two-strand end knot, and one multi-strand end knot. This means that you can apply them to almost any macrame project.
If you’re making your project from a synthetic rope, then alternatively, you could also melt the end of the rope to keep it from unraveling. But tying a finishing knot will almost always achieve a more professional look.
Required Tools and Materials
To make these end knots you’ll need:
- Rope (other called cord, string, or strand). Preferably, use a natural twisted rope that’s 3/32-3/16 inches (3-5 mm) in diameter. But you can also use synthetic braided ropes in different sizes if you prefer.
- Scissors to cut off excess ends.
- Tape measure (optional). This will help you measure the length needed, but you can also eyeball it.
- Somewhere to hang or hold the project (optional). It’s easier to work once the project is secured to something. You could lay it out on a table and secure it with some tape. Or you can hang it on a hook or pole vertically, which offers even more convenience.
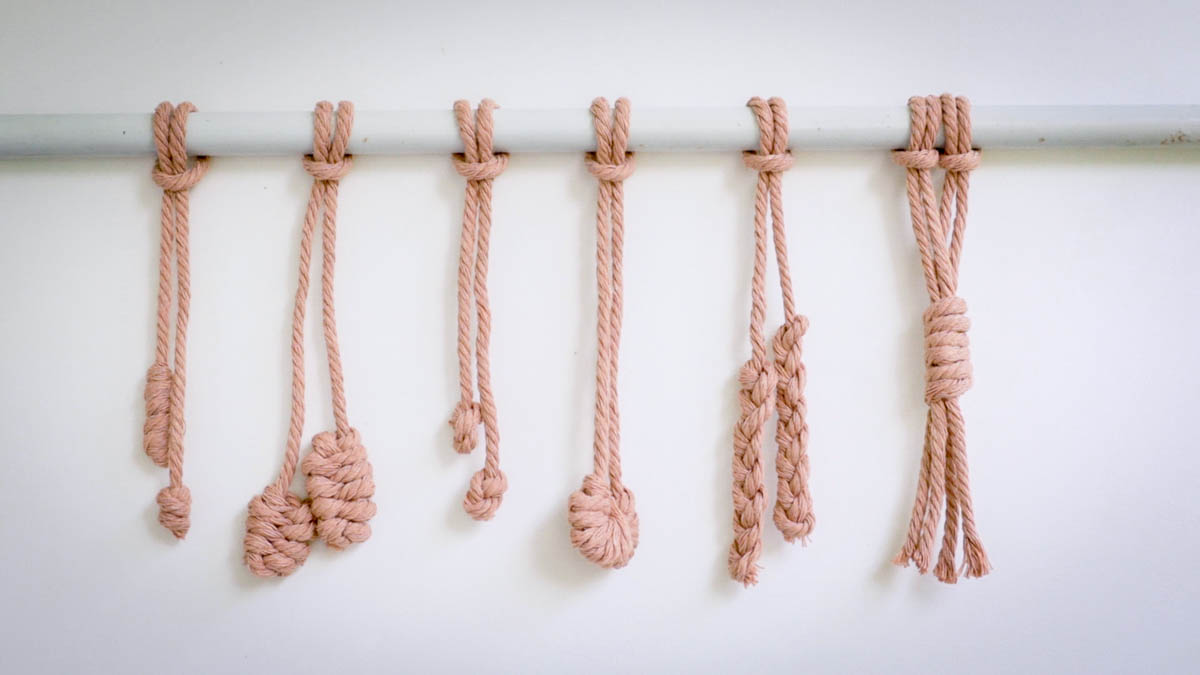
1. Barrel Knot
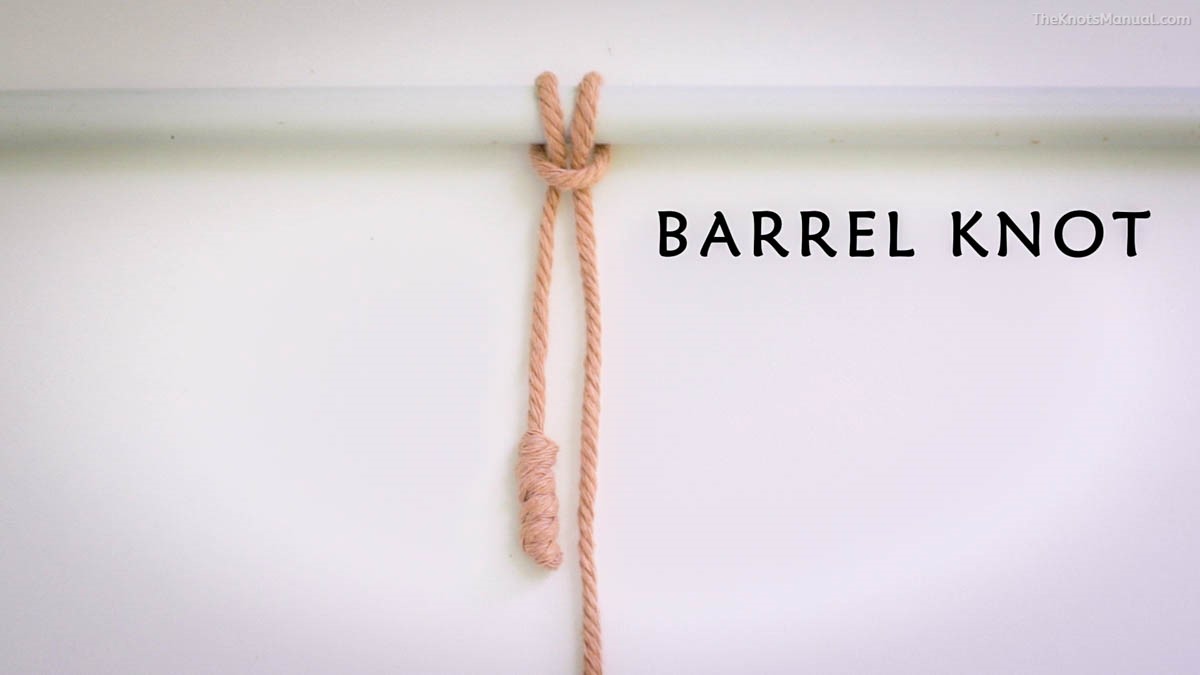
The Barrel End Knot is easy to tie, good-looking, and functional – keeping twisted rope from untangling. It’s used to finish single strands, so if you have many strands next to each other, you can tie a Barrel Knot on each one. You can also make it as long or as short as you want to.
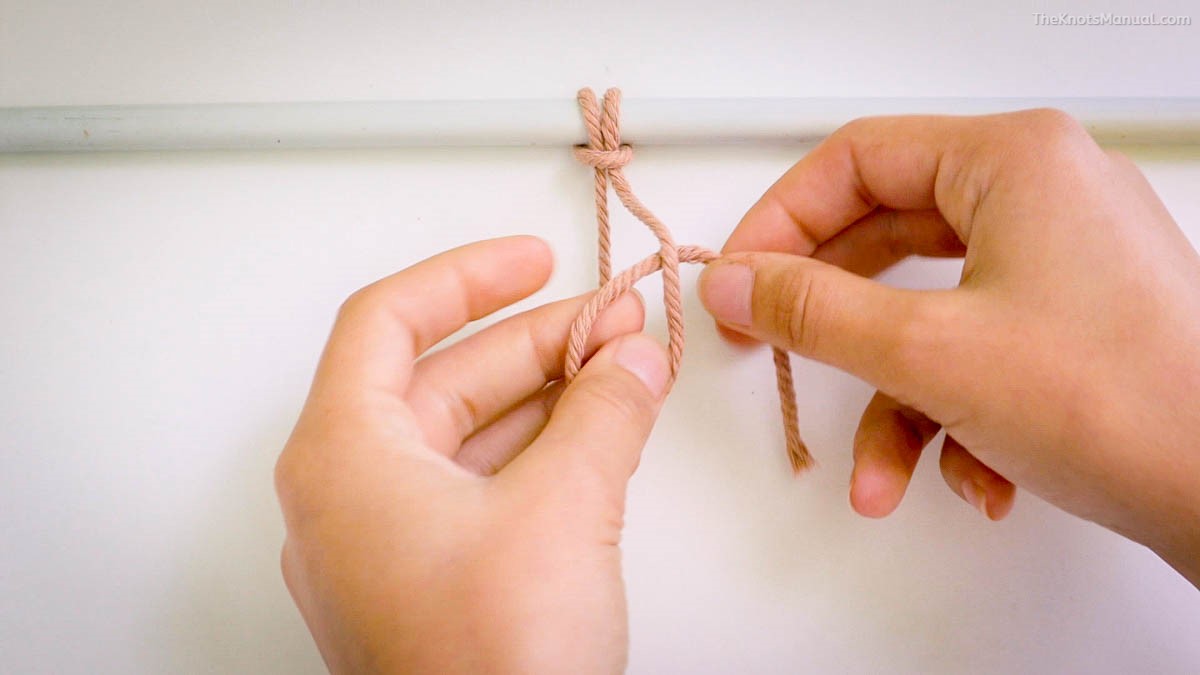
To tie it, take the end of the string and put it behind the standing end, making a loop in the process.

Wrap the end around the loop as many times as you want. To achieve a knot similar in length to the first picture, do 5-8 turns.
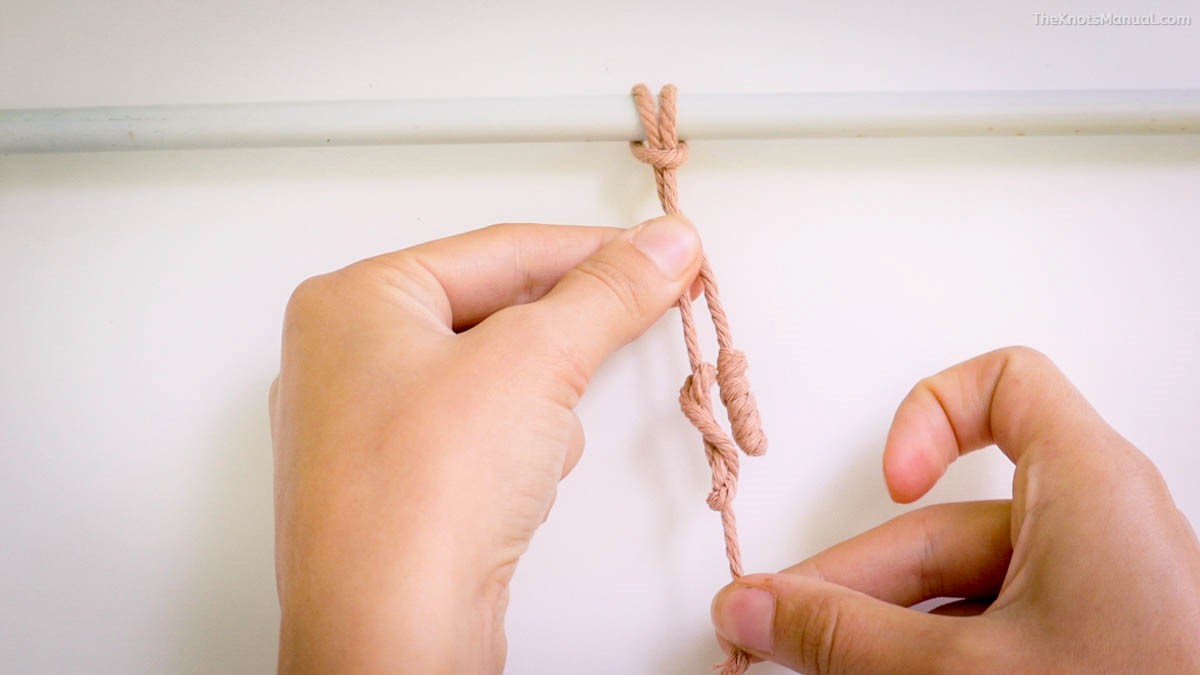
Tighten everything to finish the Barrel Knot.
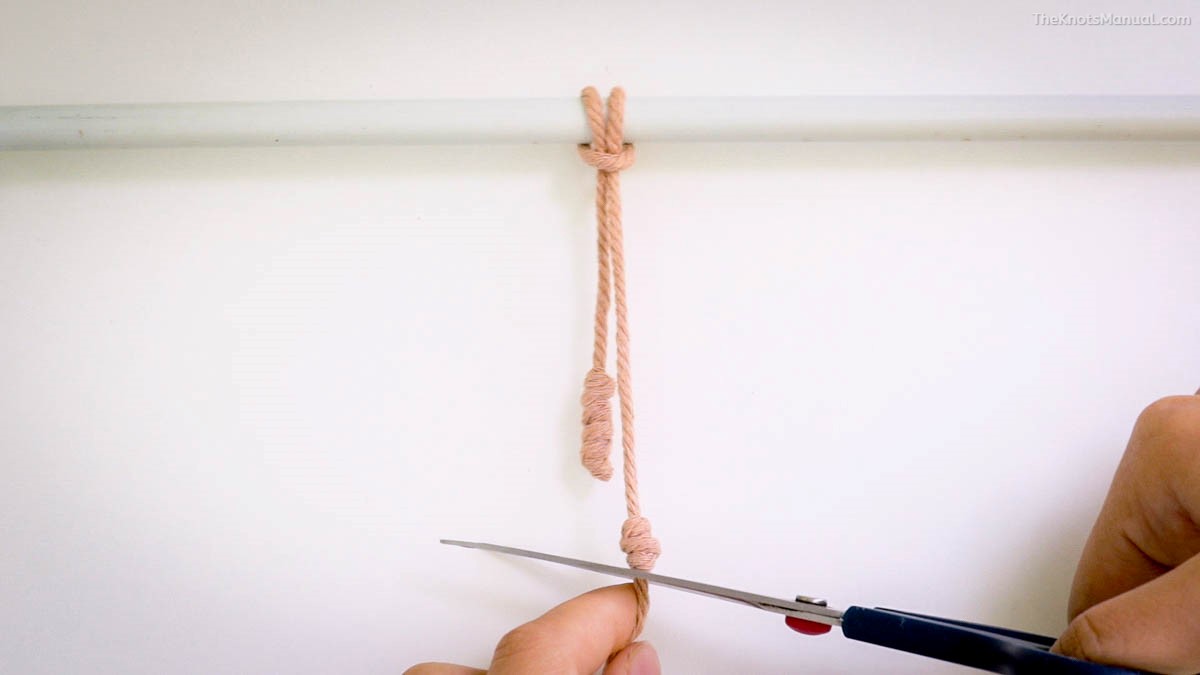
To achieve a clean look, cut off the excess ends.
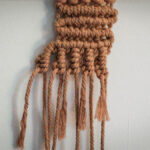
2. Leaf Knot
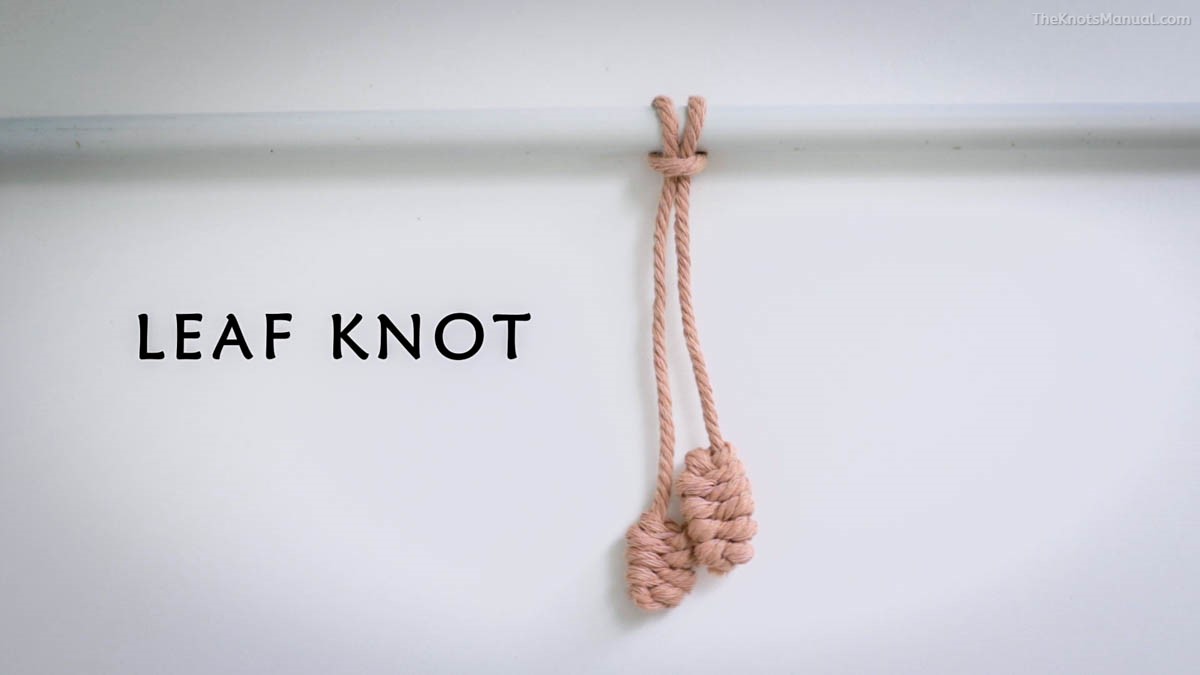
The Leaf End Knot creates a bulky, flat knot on a single strand that resembles a leaf. They can be used in any project where you need to finish a single strand, but they look especially good in macrame plant pot hangers. You can also make them as long as you prefer.
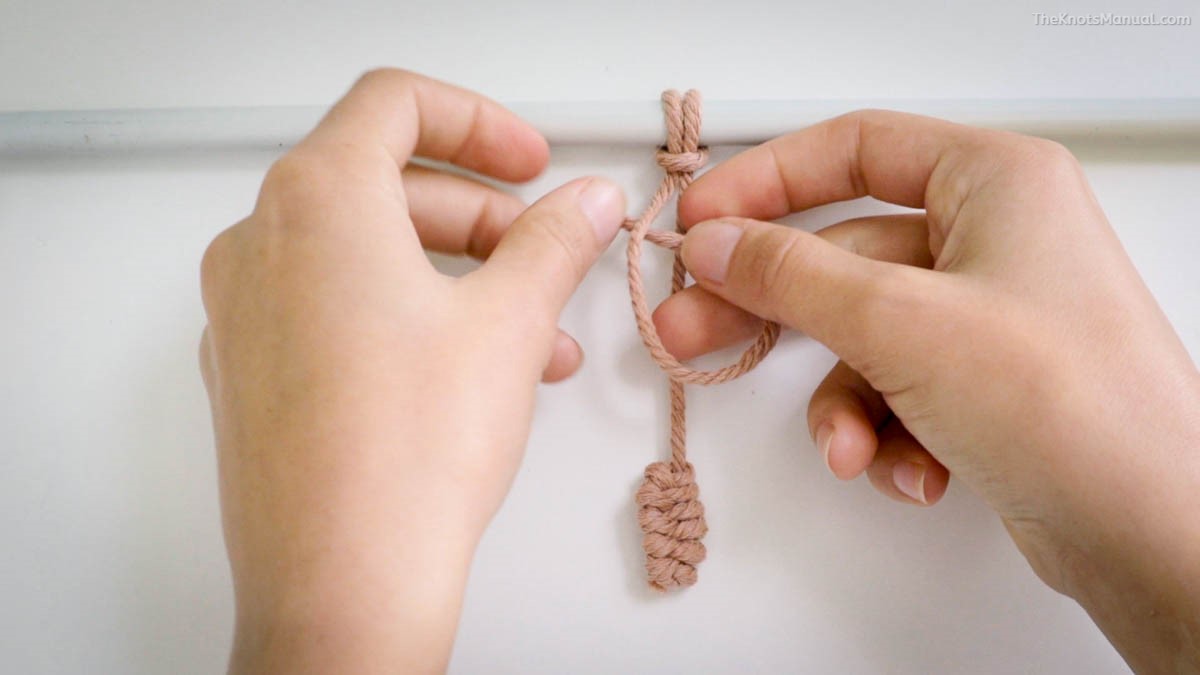
Start by taking the end of the strand and putting it behind the standing end, creating a loop. Make this loop as large as you want the end knot to be.
Pass the end over and through the loop, making one full turn around the left strand.
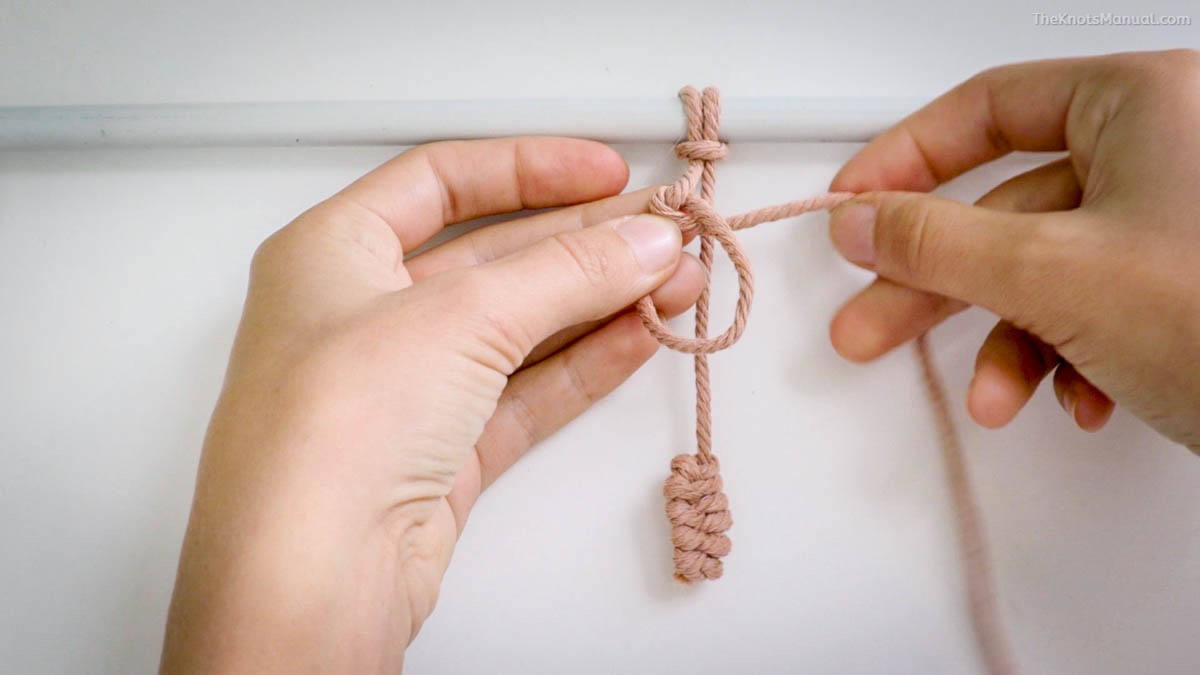
Do another full turn around the right strand.
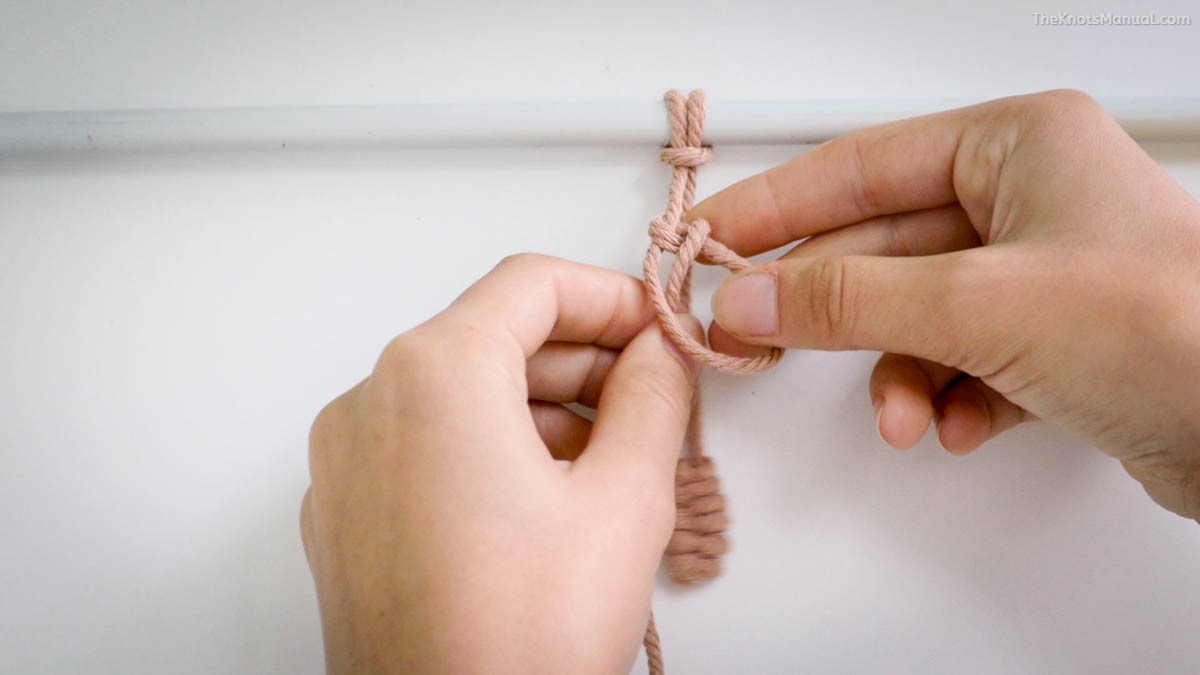
Continue doing left-and-right turns until you’ve completed the full loop. Make sure to tighten each turn before you continue with the next one.
Tighten and cut off the tag end to finish the Leaf Knot.
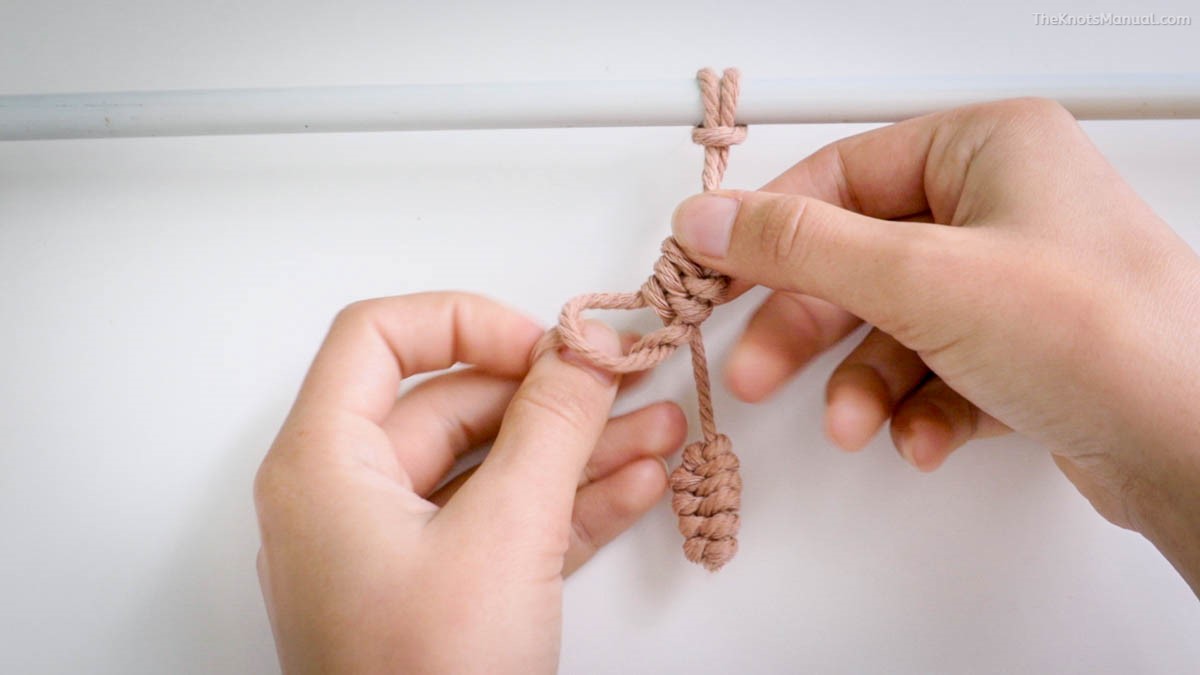
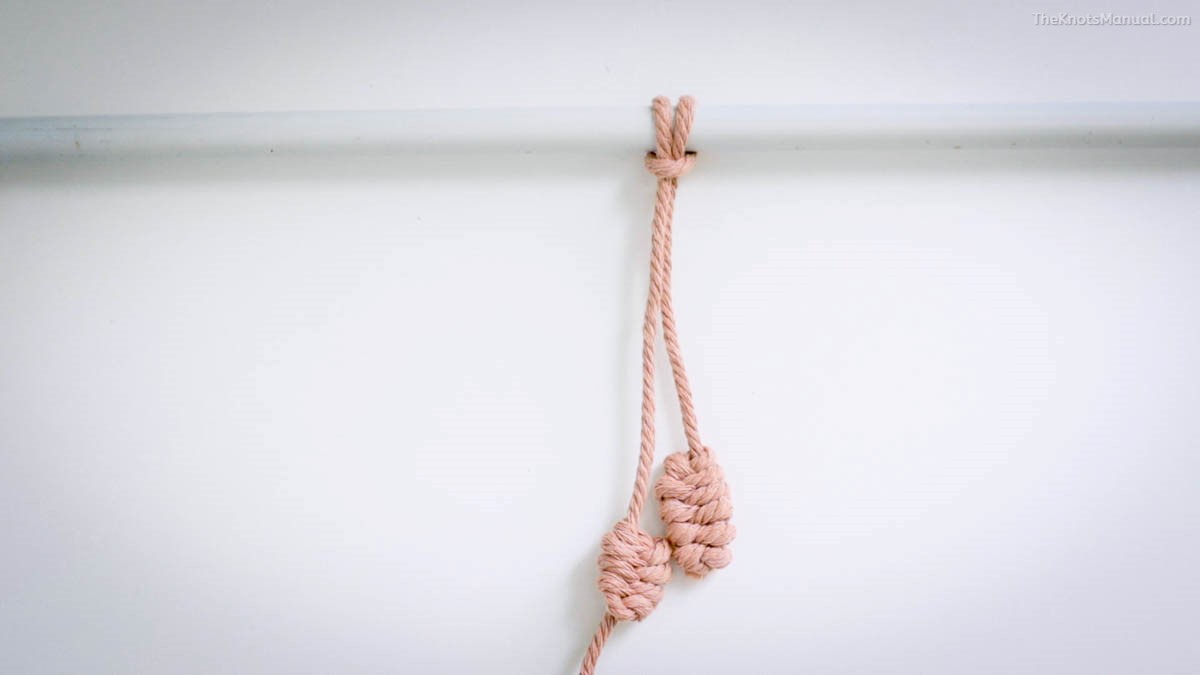
3. Figure 8 Knot
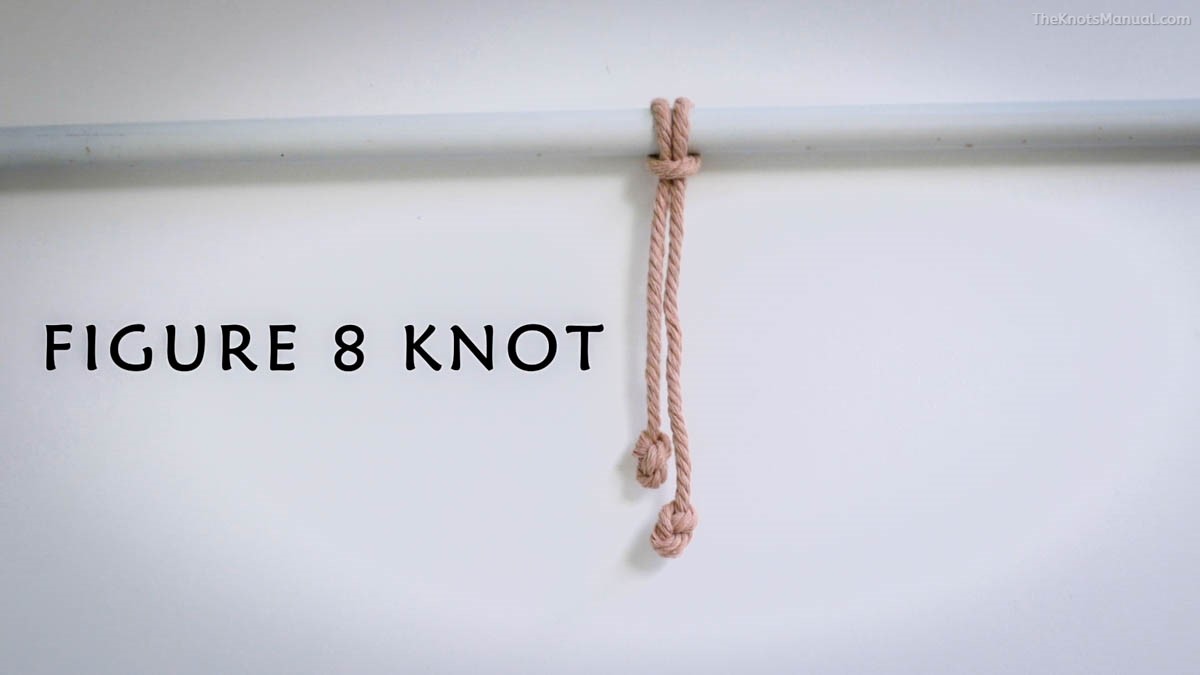
One of the simplest Macrame single-strand end knots. It creates a small knot at the end of the strand which keeps it from unraveling.
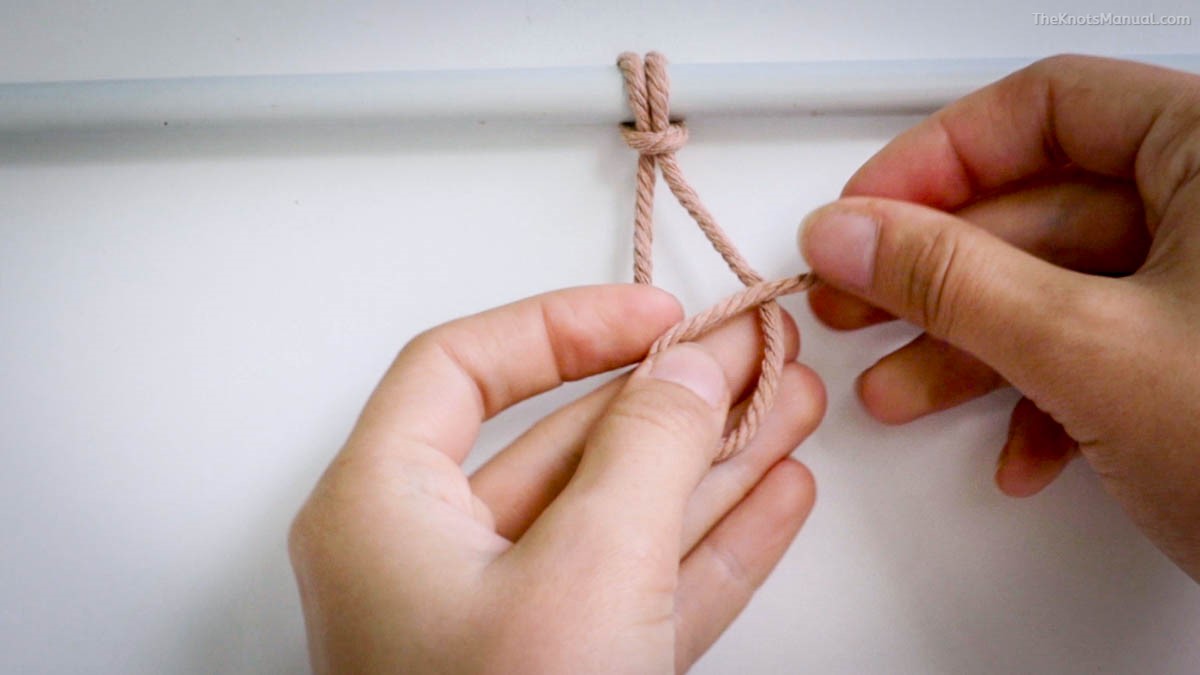
Create a loop near the end of the strand, this time putting the tag end in front of the standing end.
Pass the tag end behind the standing end.
Pass the end through the bottom loop from the front side. It should form a knot that resembles the number 8, which is where its name comes from.
Tighten and cut off excess ends to finish the Figure 8 Knot.
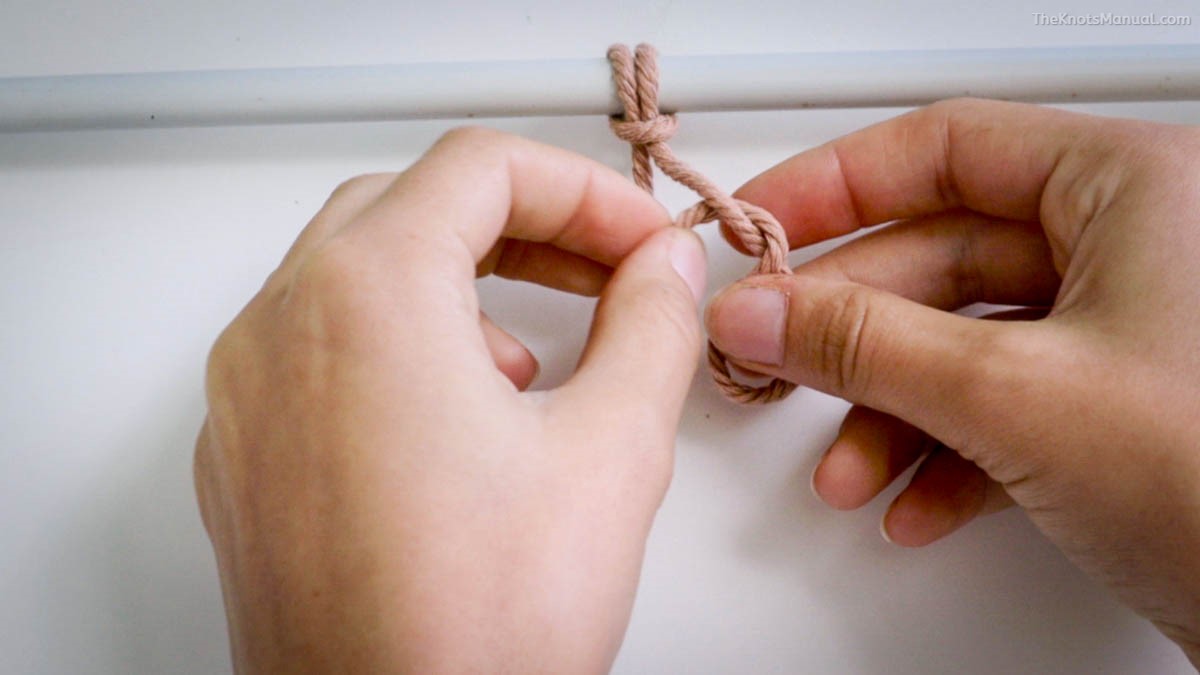
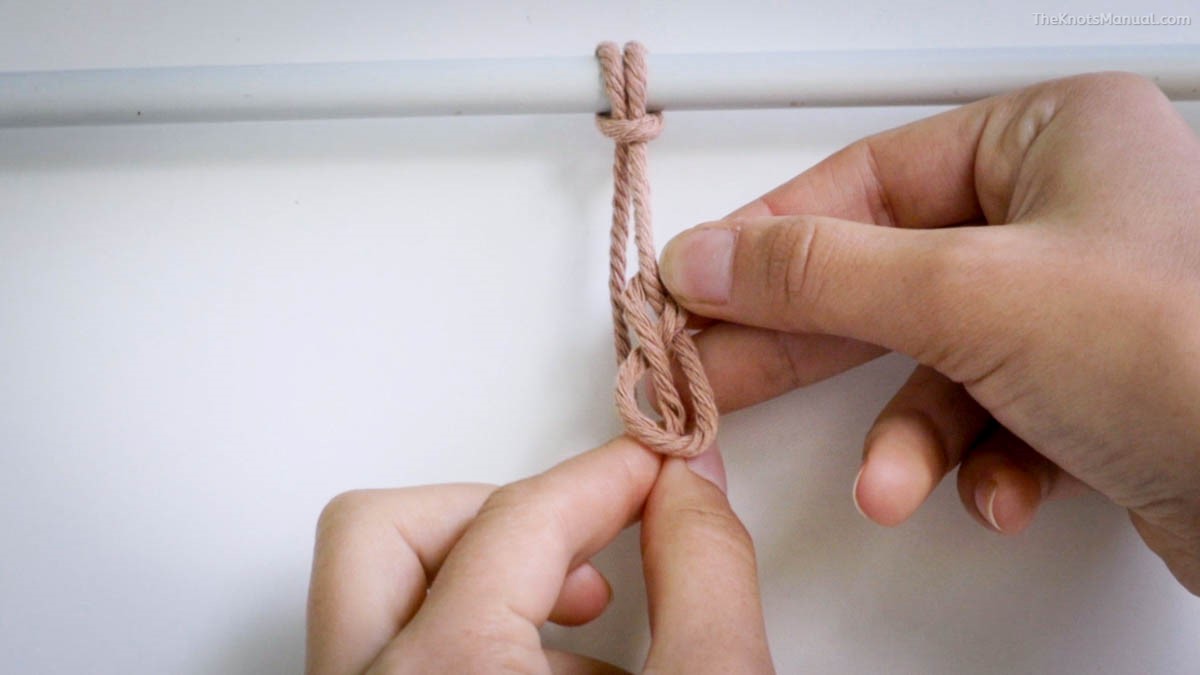
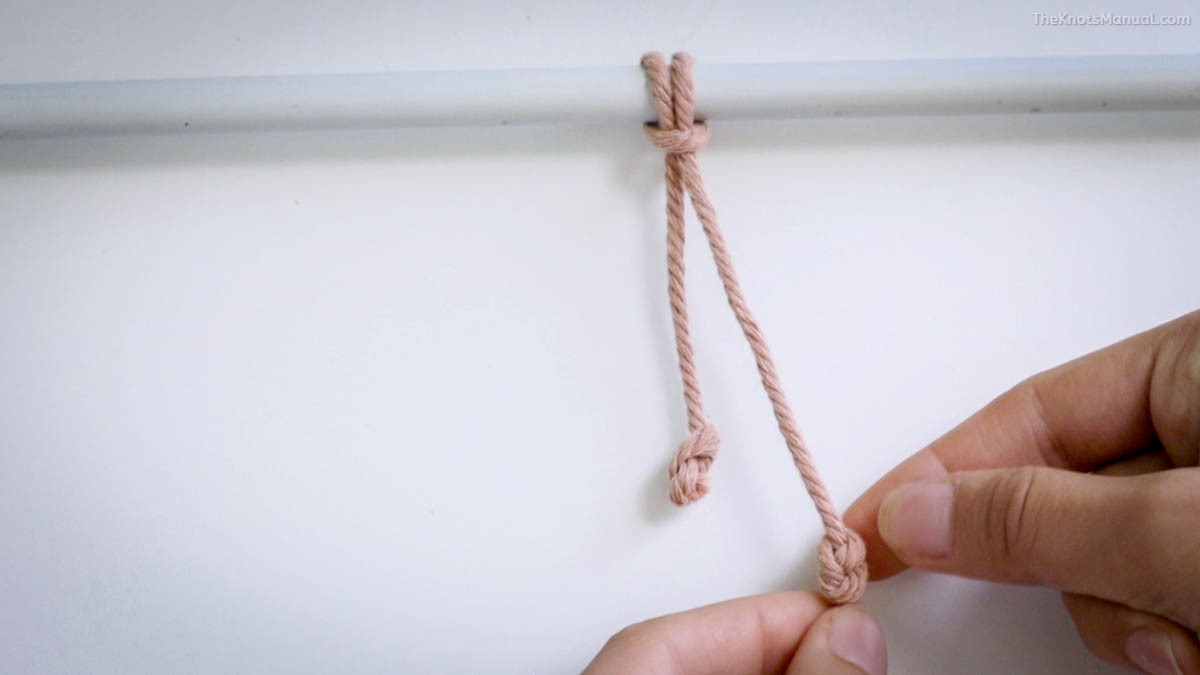
4. Coil Knot
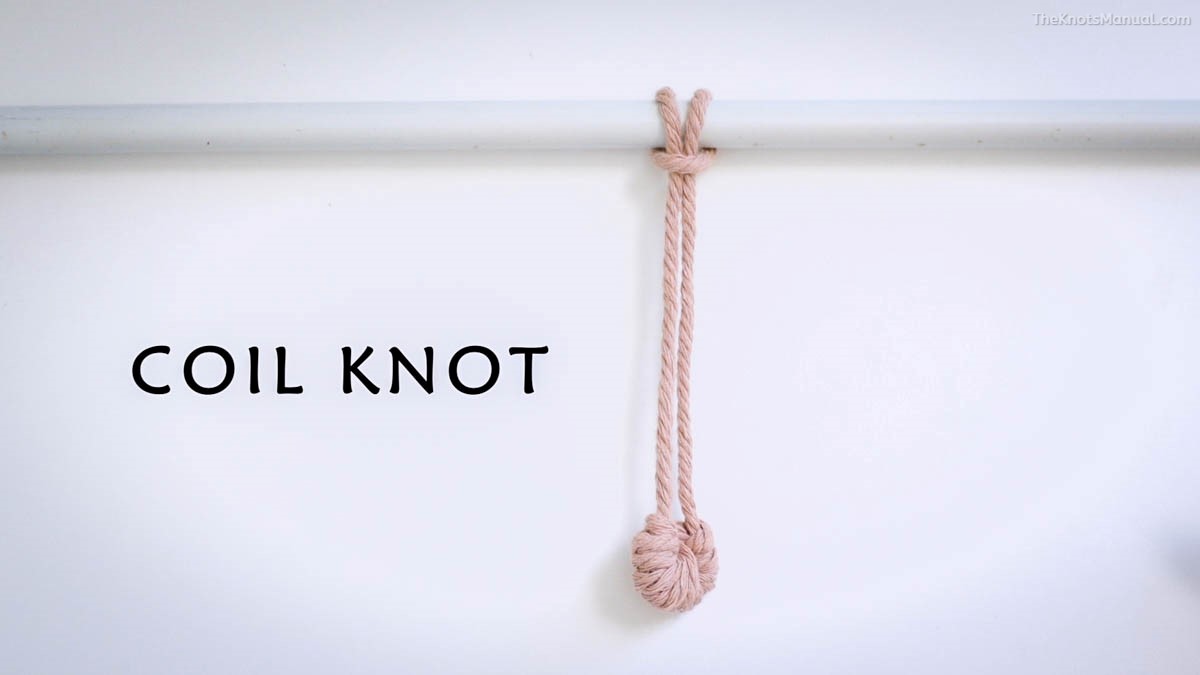
A two-strand finishing knot that creates a bulky coil at the end of the strand. You can make it larger or smaller, depending on your preferences.
Create a loop with each of the strands. Note that each of the loops should be formed in opposite directions, with the working ends exiting on the outer sides.
Place the left loop in front of the right one, creating on single loop with two parallel strands in the process.
Wrap the working end around the loop from the left side until you reach the bottom.
Do the same thing on the other side.
To finish the Coil Knot, tighten it and cut off the excess ends.
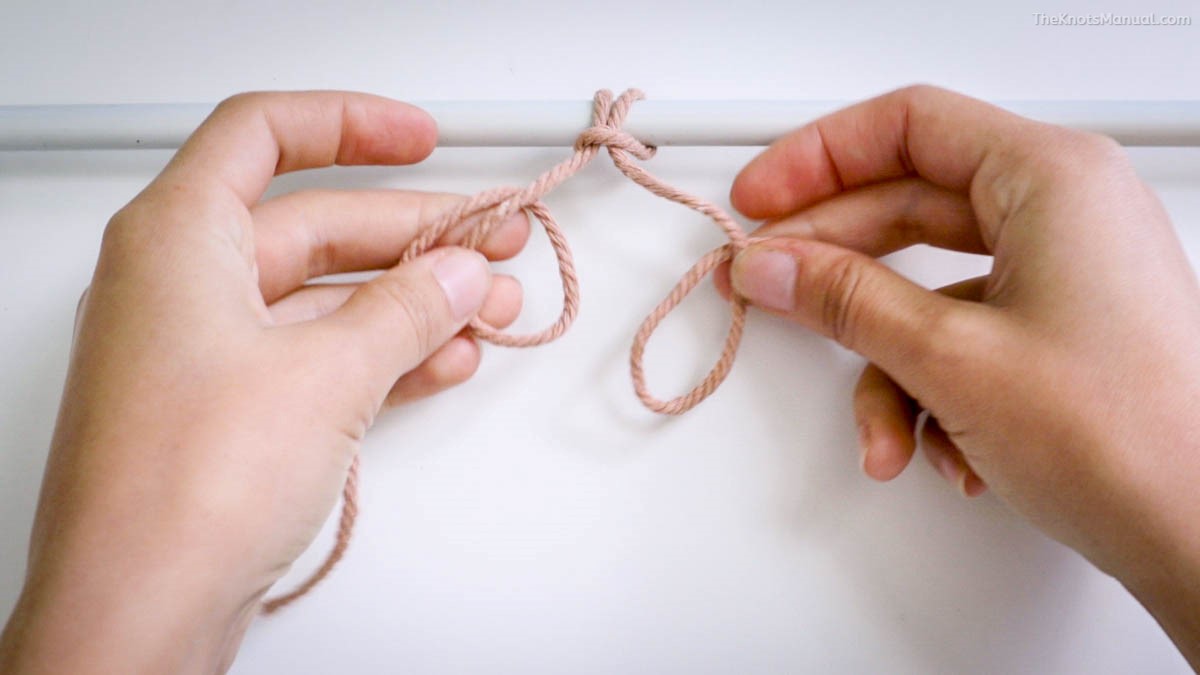
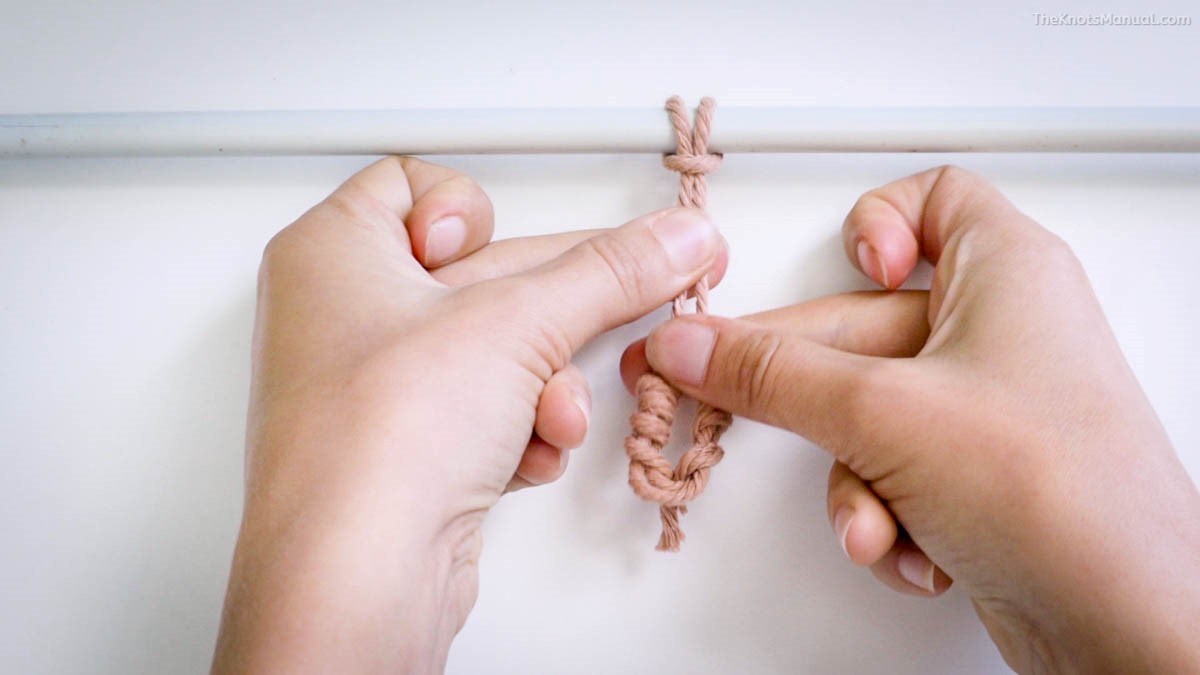
5. Single Strand Braid Knot
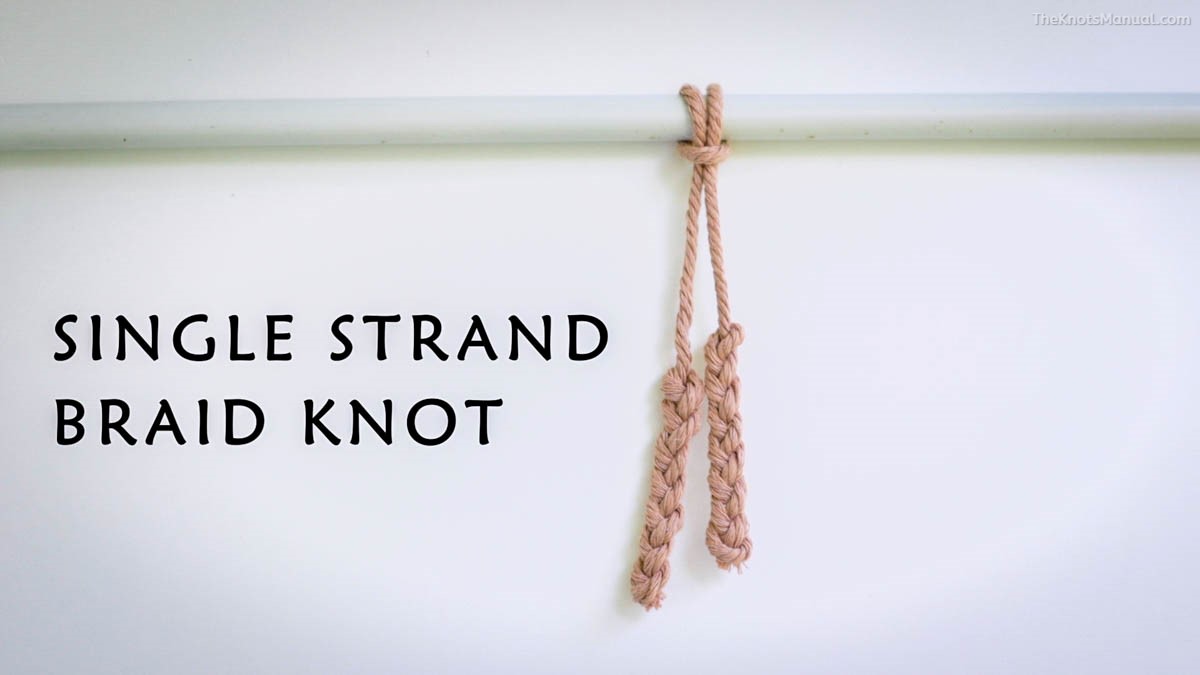
A simple single-strand finishing knot that creates a long, braided knot. You can tie it as long or as short as you prefer. You can also incorporate it in various macrame projects to make a single strand look nicer, not just as an end knot.
Create a loop with the end of the strand.
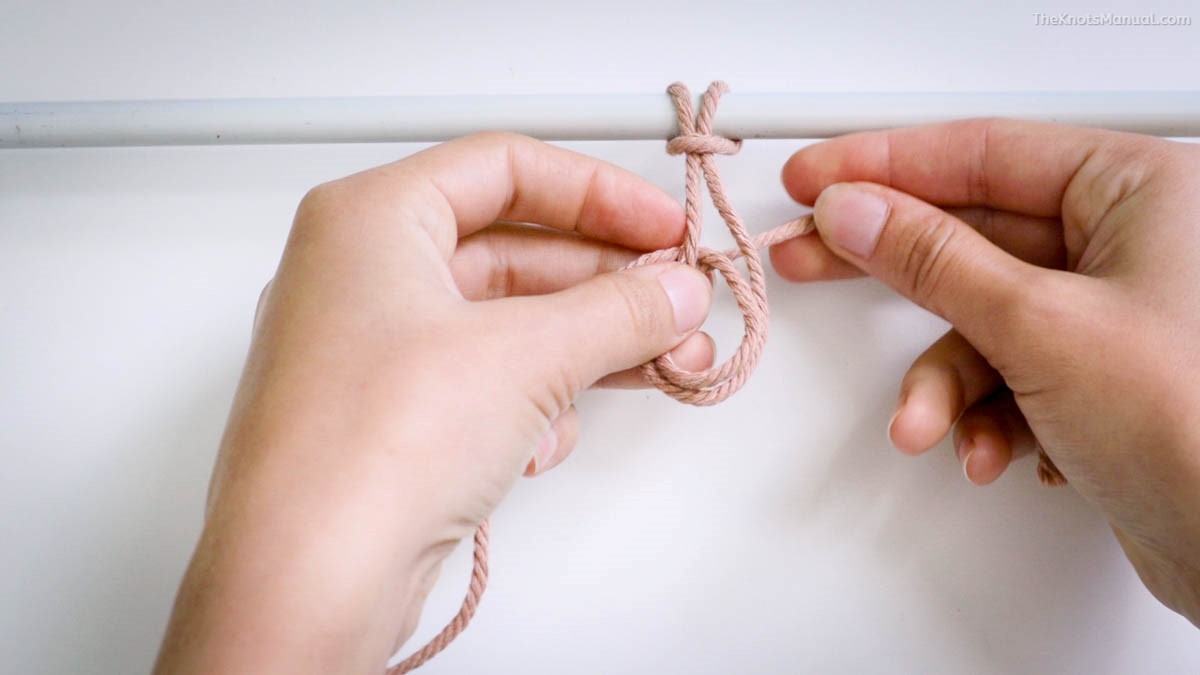
Pass the end through the loop, creating a closed loop on the right side.
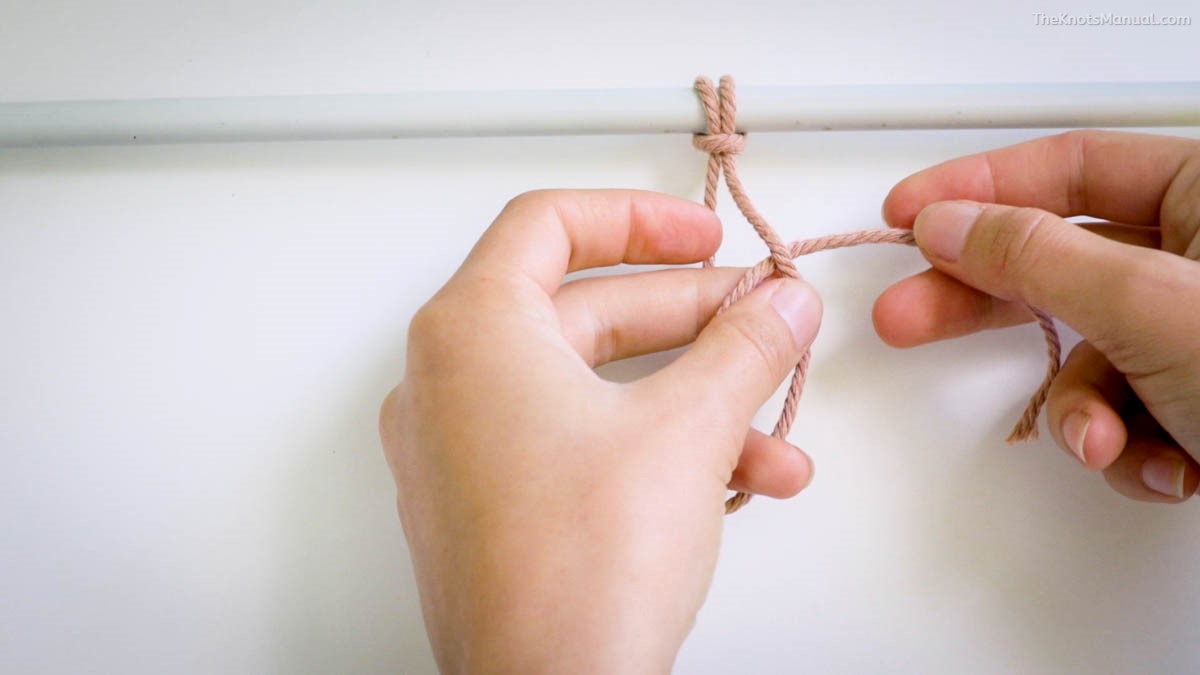
Take the loop in your right hand, and turn it counter-clockwise.
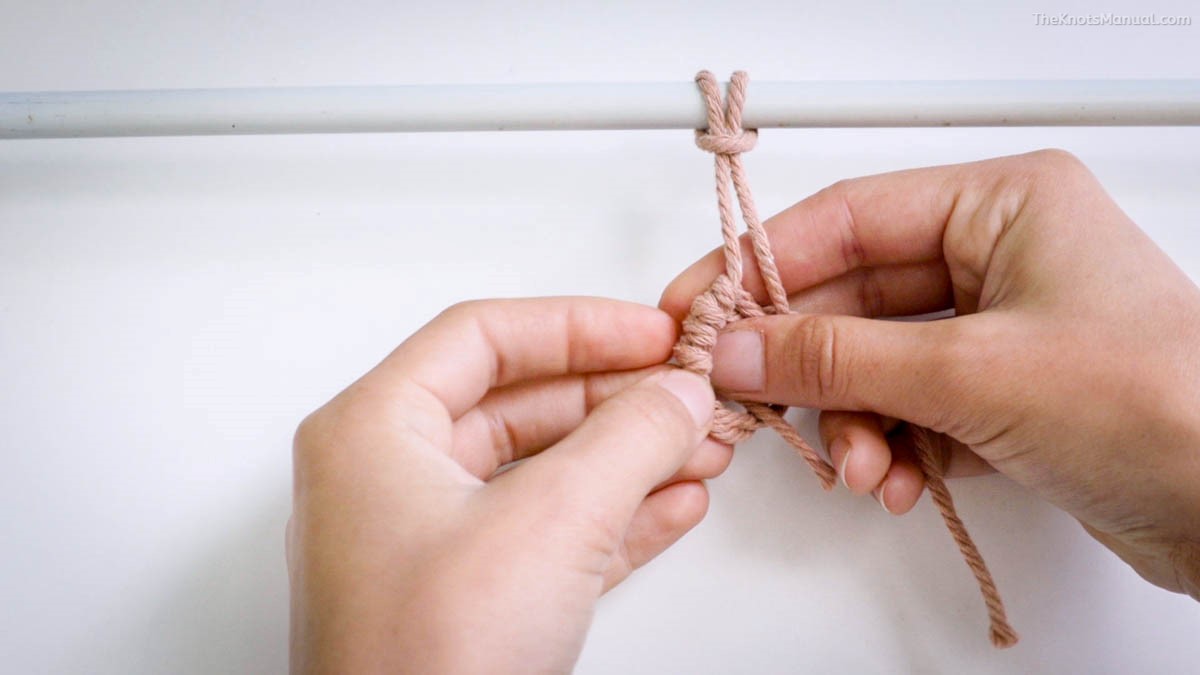
Now take the end of the strand and pass it through this loop. This should move the strand over to the right side and the loop to the left one.

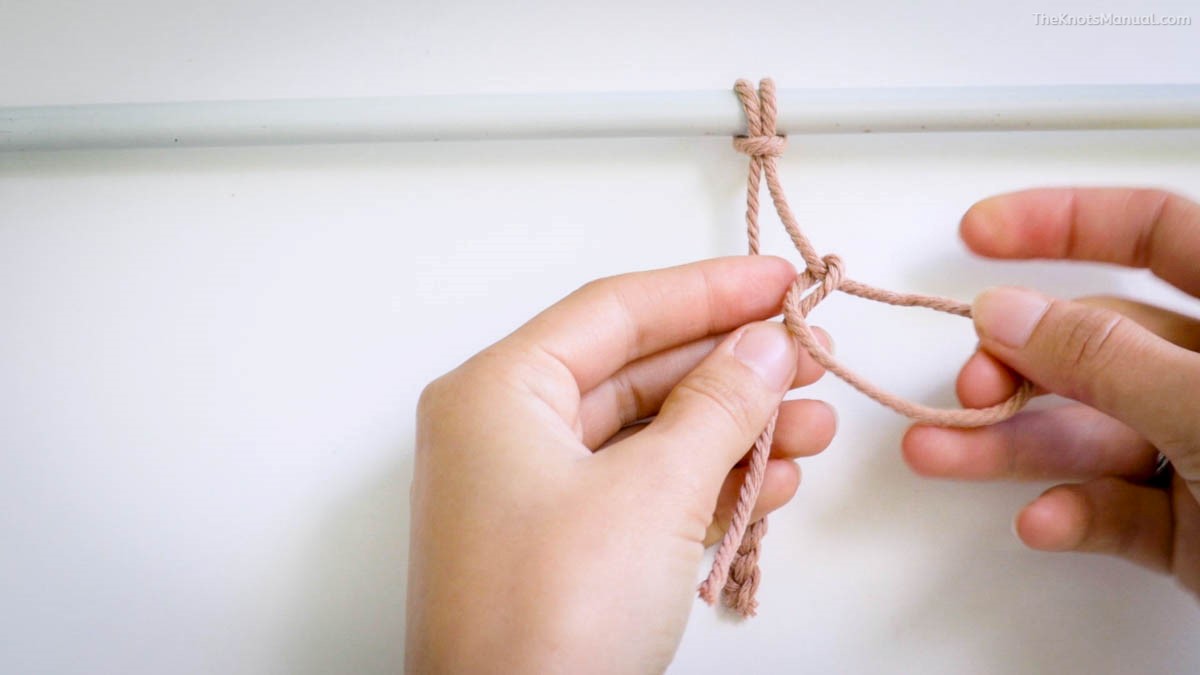
Turn the loop clockwise (in the other direction) with your left hand.
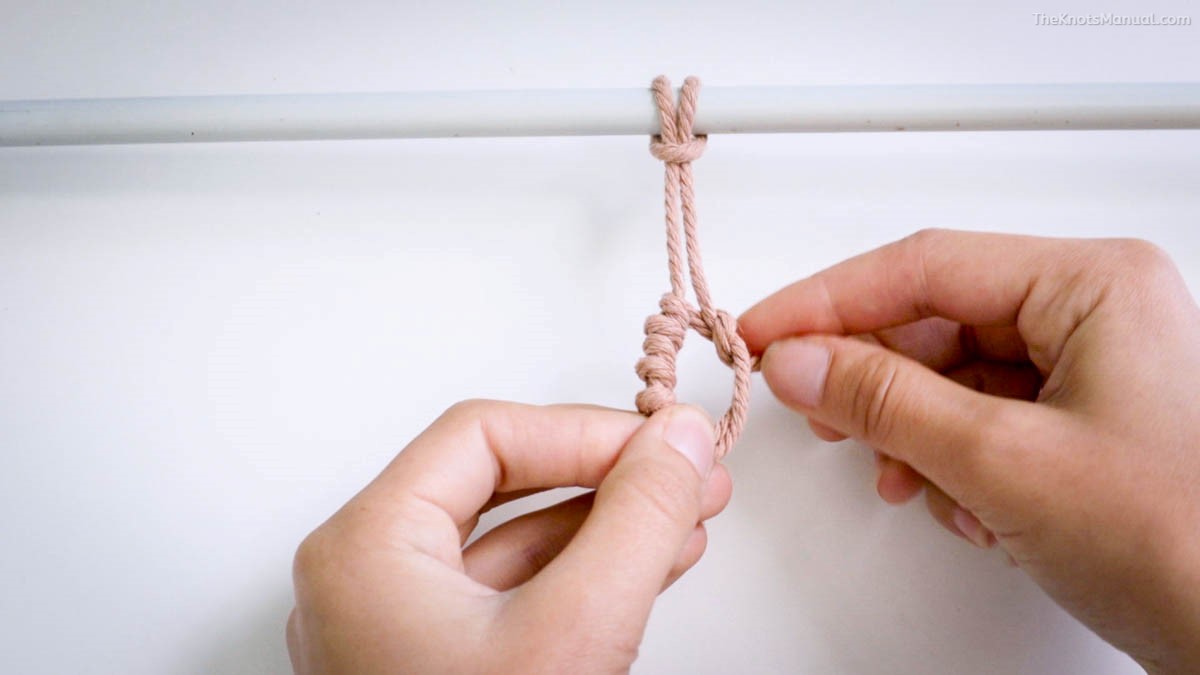
Continue this process until you reach the desired length. Make sure to tighten the last loop carefully before cutting off the end, so that it doesn’t come loose.
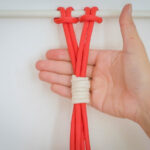
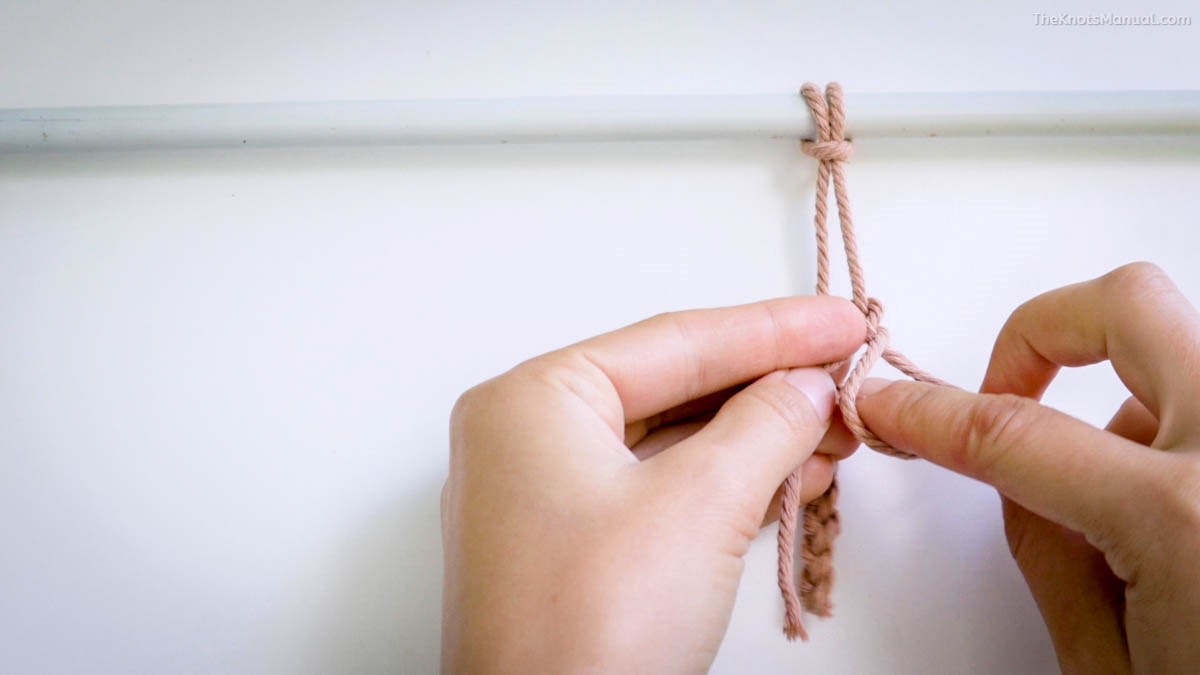
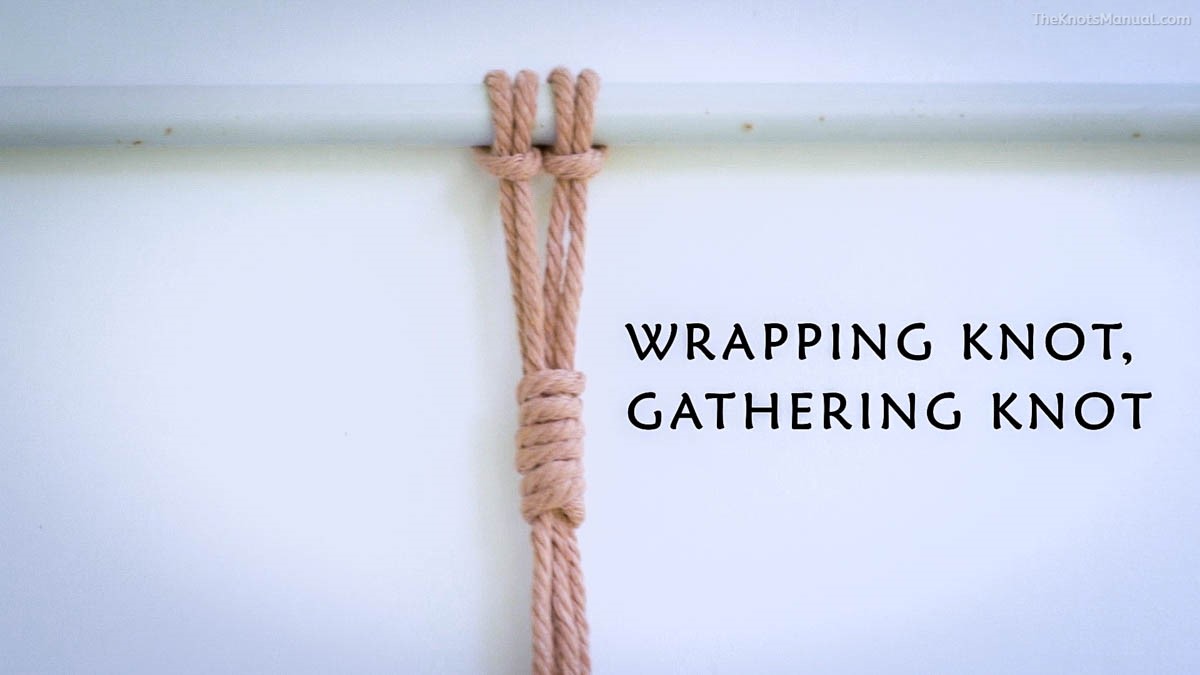
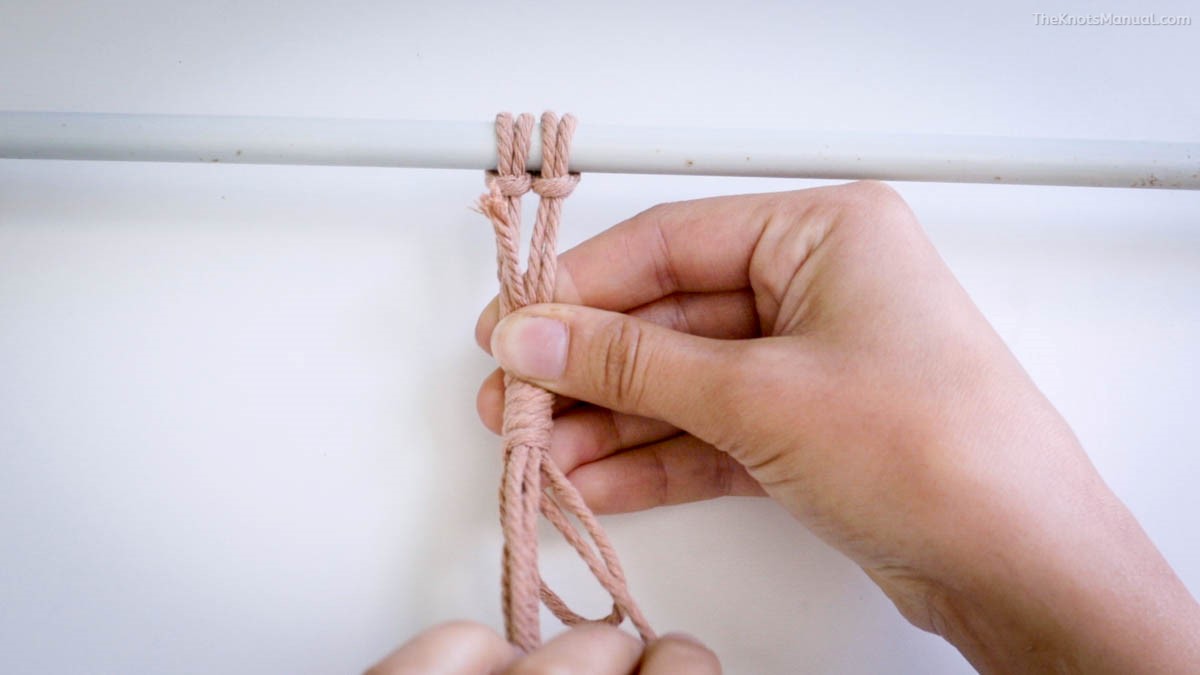
6. Gathering Knot (Wrapping Knot)
A very common macrame end knot. You can wrap it around as many strings as you want, usually ranging between 2-8 strings. It’s very easy to tie but requires an extra string that you wrap around the central ones. In some sources, it’s referred to as the Wrapping Knot and in other ones as the Gathering Knot.
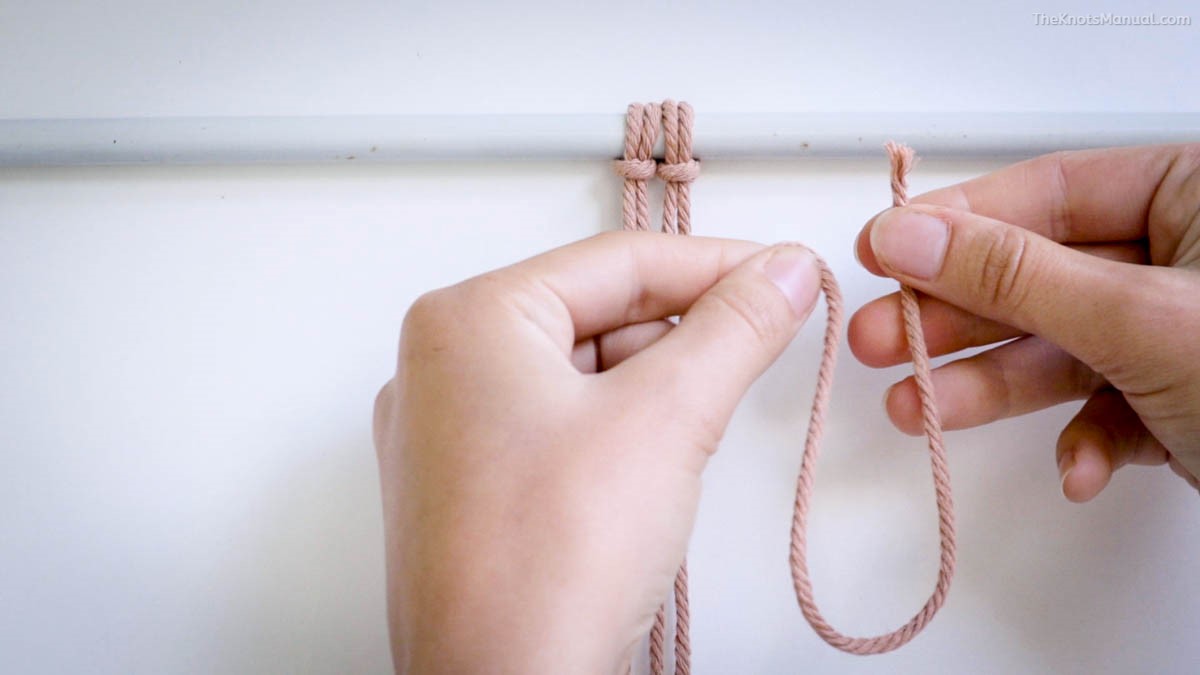
Take a 12-20 inch (30-50 cm) long string and create a bight with the end of it, as shown in the photo above.
Put it in front of the central strings.
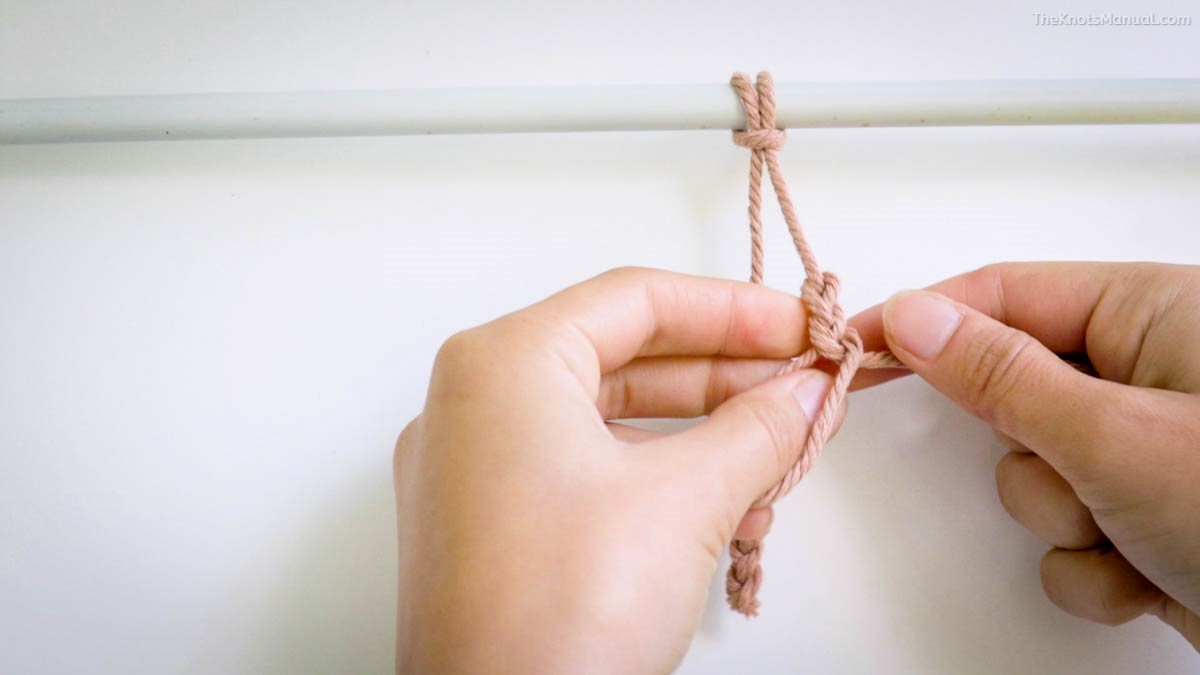
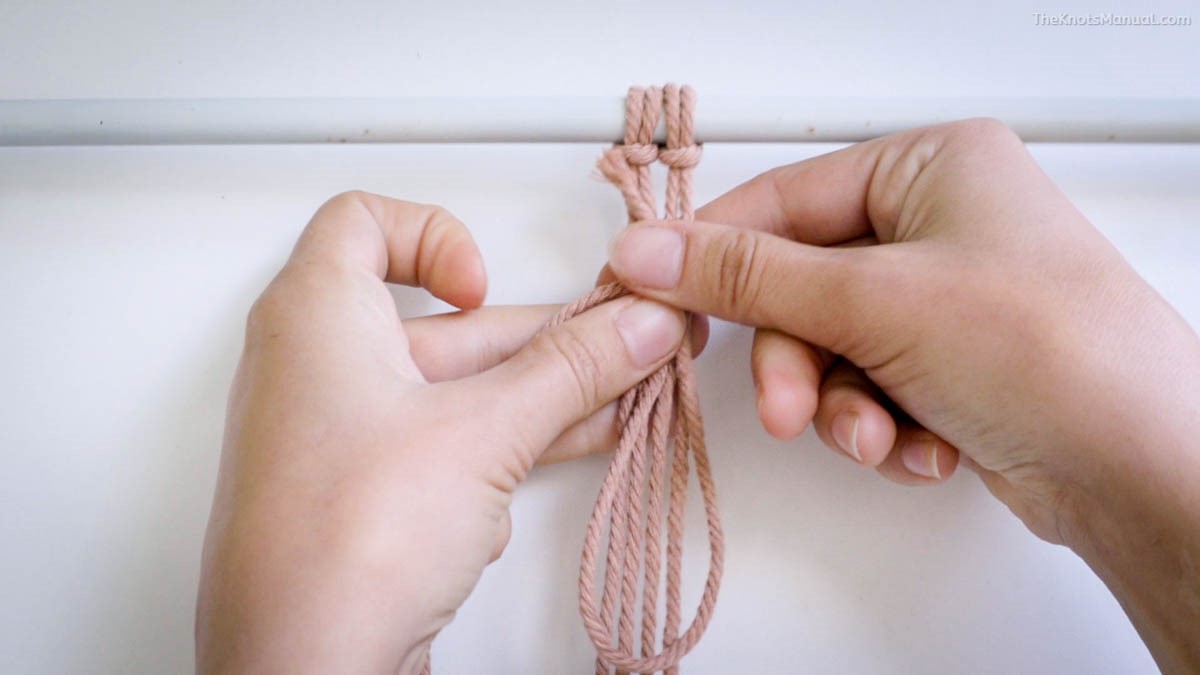
Pass the longer end behind the center strings and start wrapping it around.
Start from the top and move toward the bottom, making sure to place each wrap right next to the last one. Do as many turns as you want.
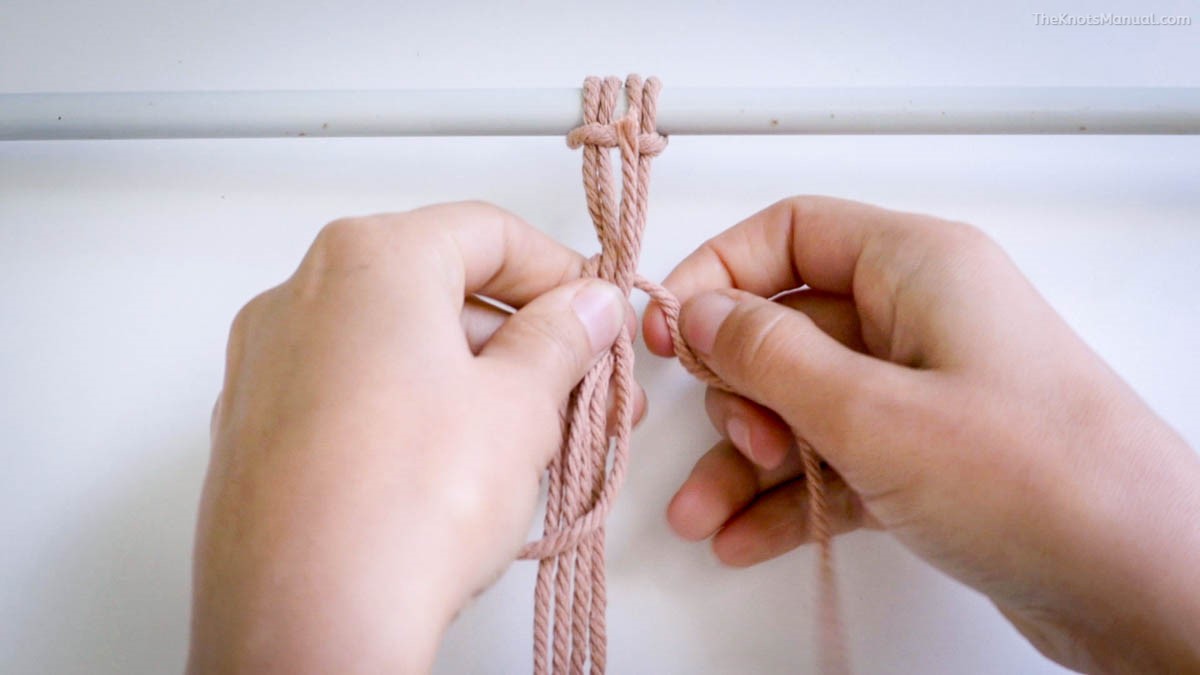
When you reach the desired length, pass the working end through the bottom loop, as illustrated above.
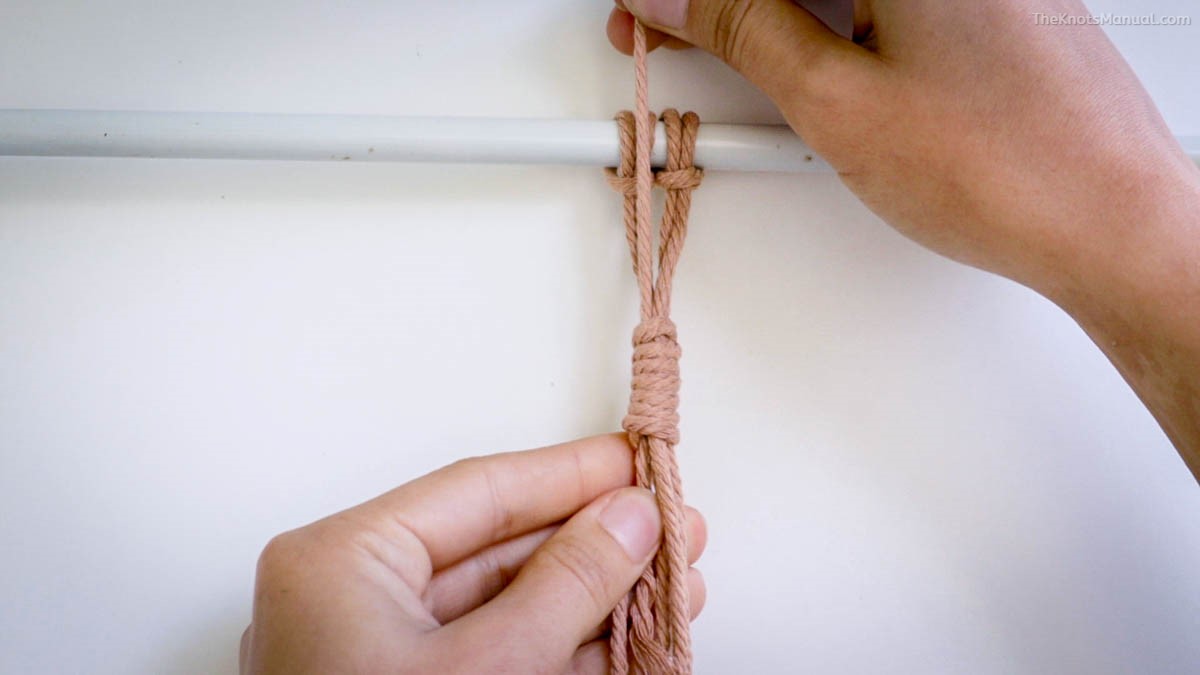
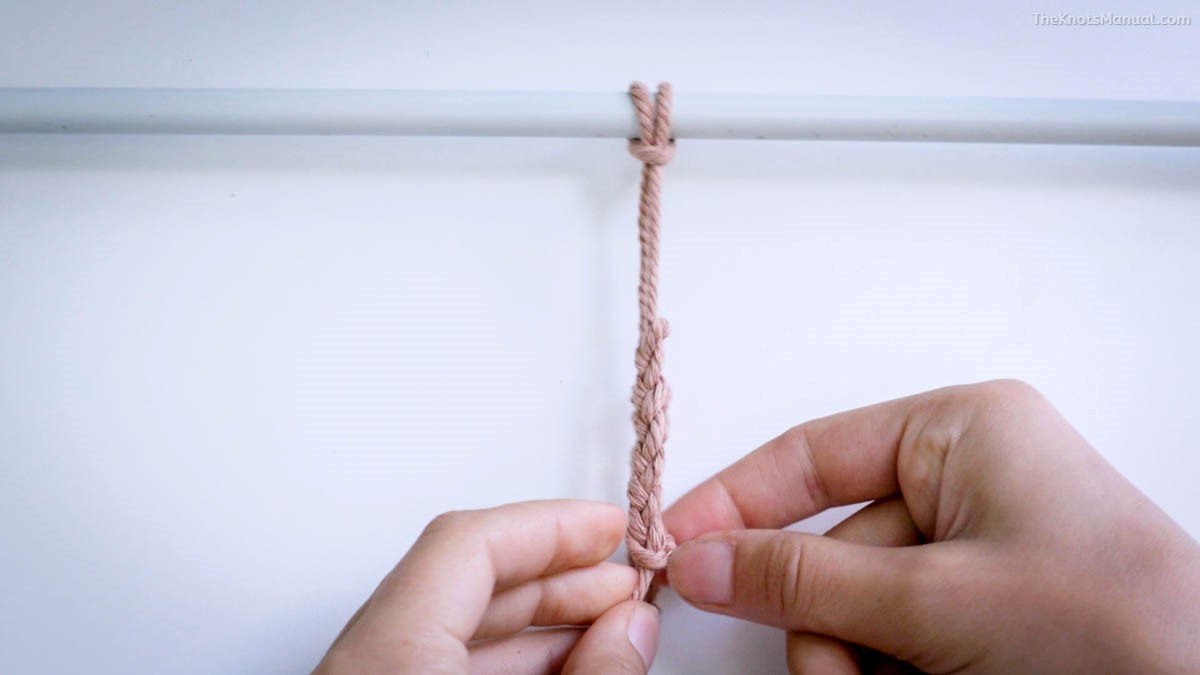
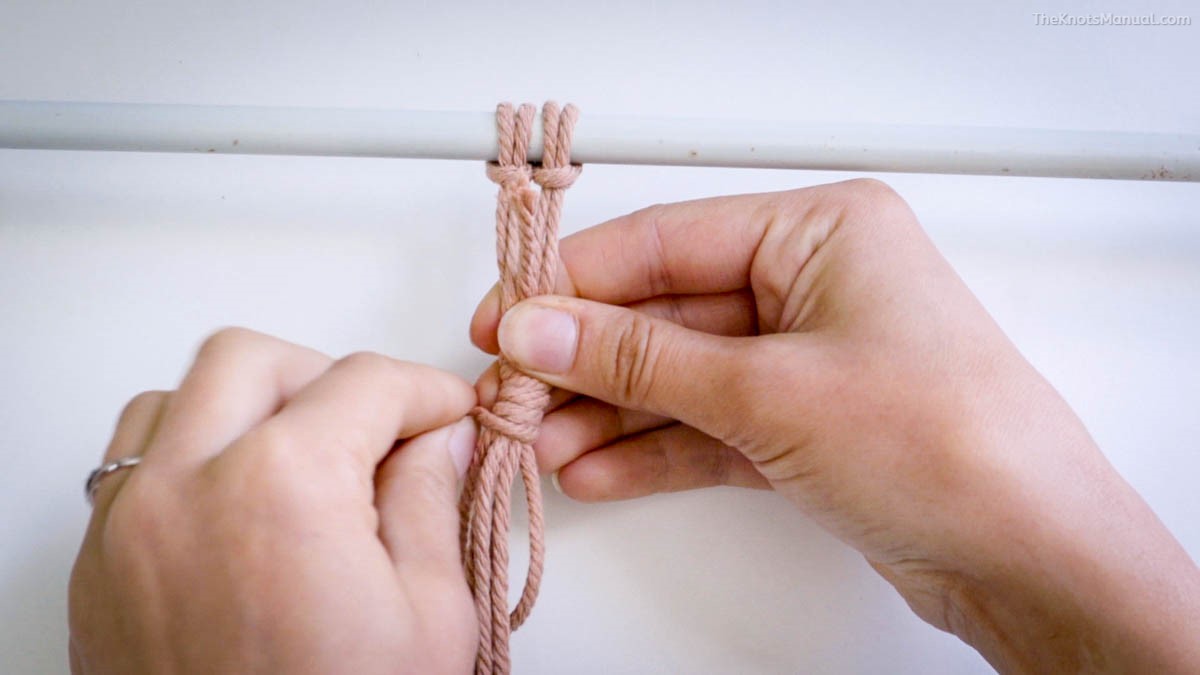
To tighten the Wrapping Knot, pull the top string. This should tighten the bottom loop and hide it underneath the bottom wraps.
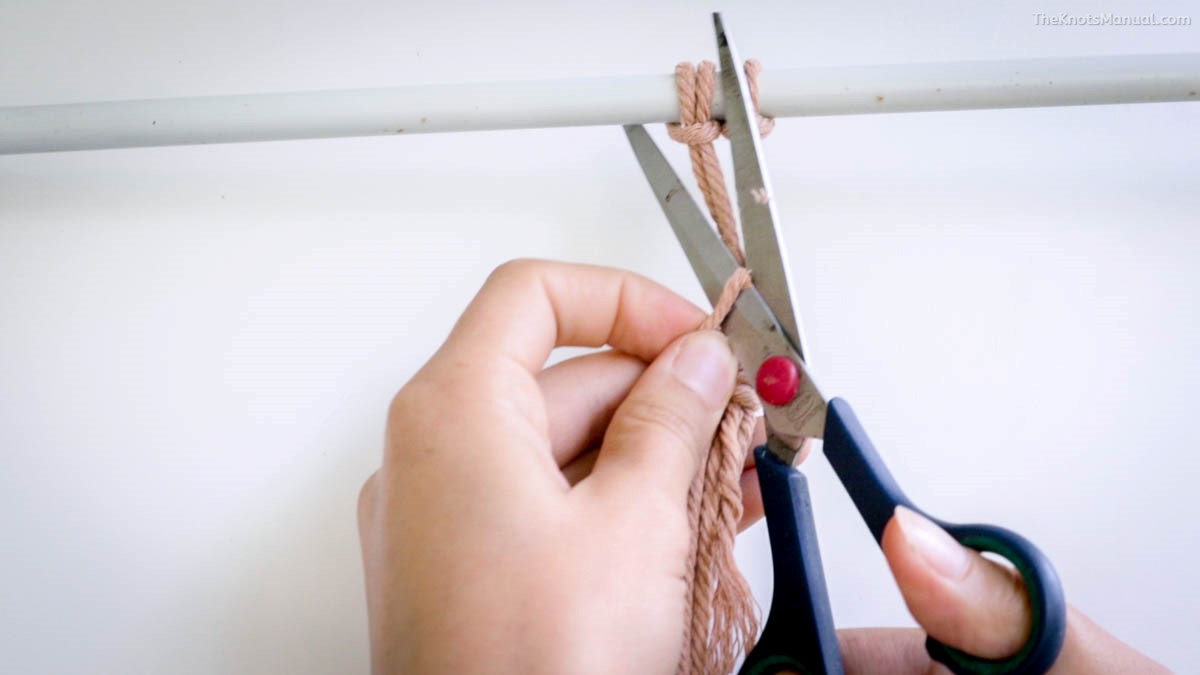
Cut off the top and bottom ends with scissors.
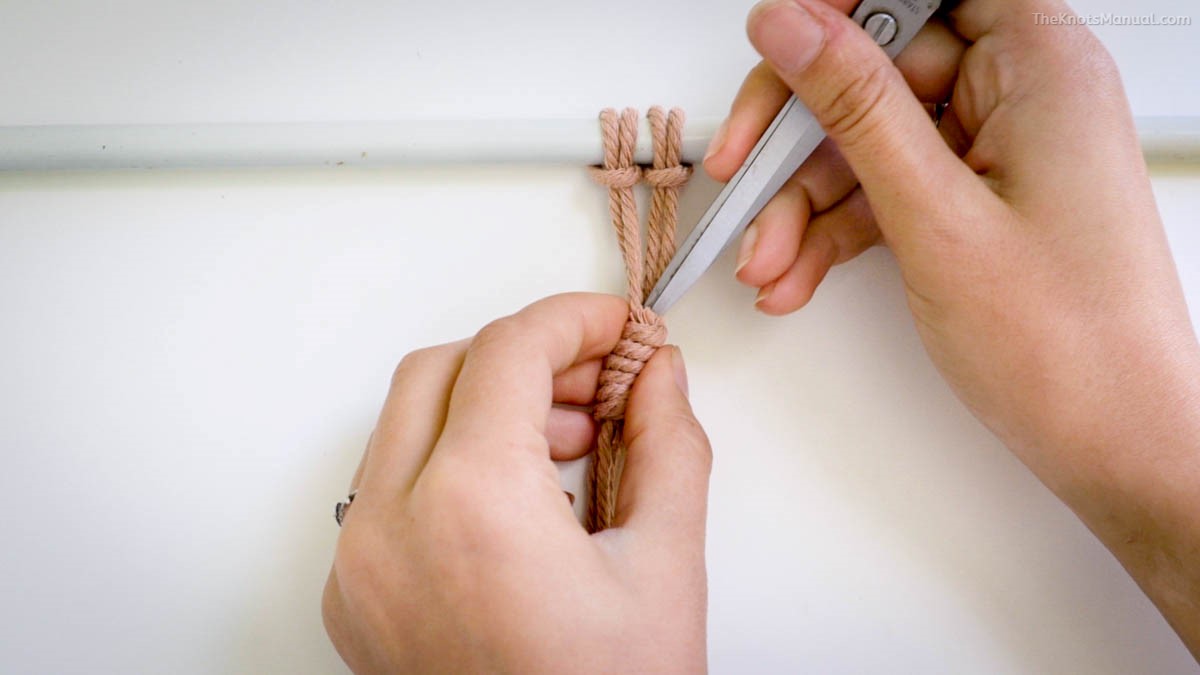
To make the end result look clean, hide the tag ends underneath the wraps with the tip of the scissors.