The Slippery Eight Loop is a knot that creates an adjustable loop at the end of a rope. It isn’t very commonly known but deserves more popularity because it’s reliable, easy, and doesn’t jam.
In other sources, this knot is also sometimes referred to as the Slippery Figure 8 Knot or the HFP Slippery Eight Loop.
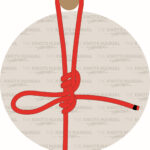
Quick Guide: Tying the Slippery Eight Loop
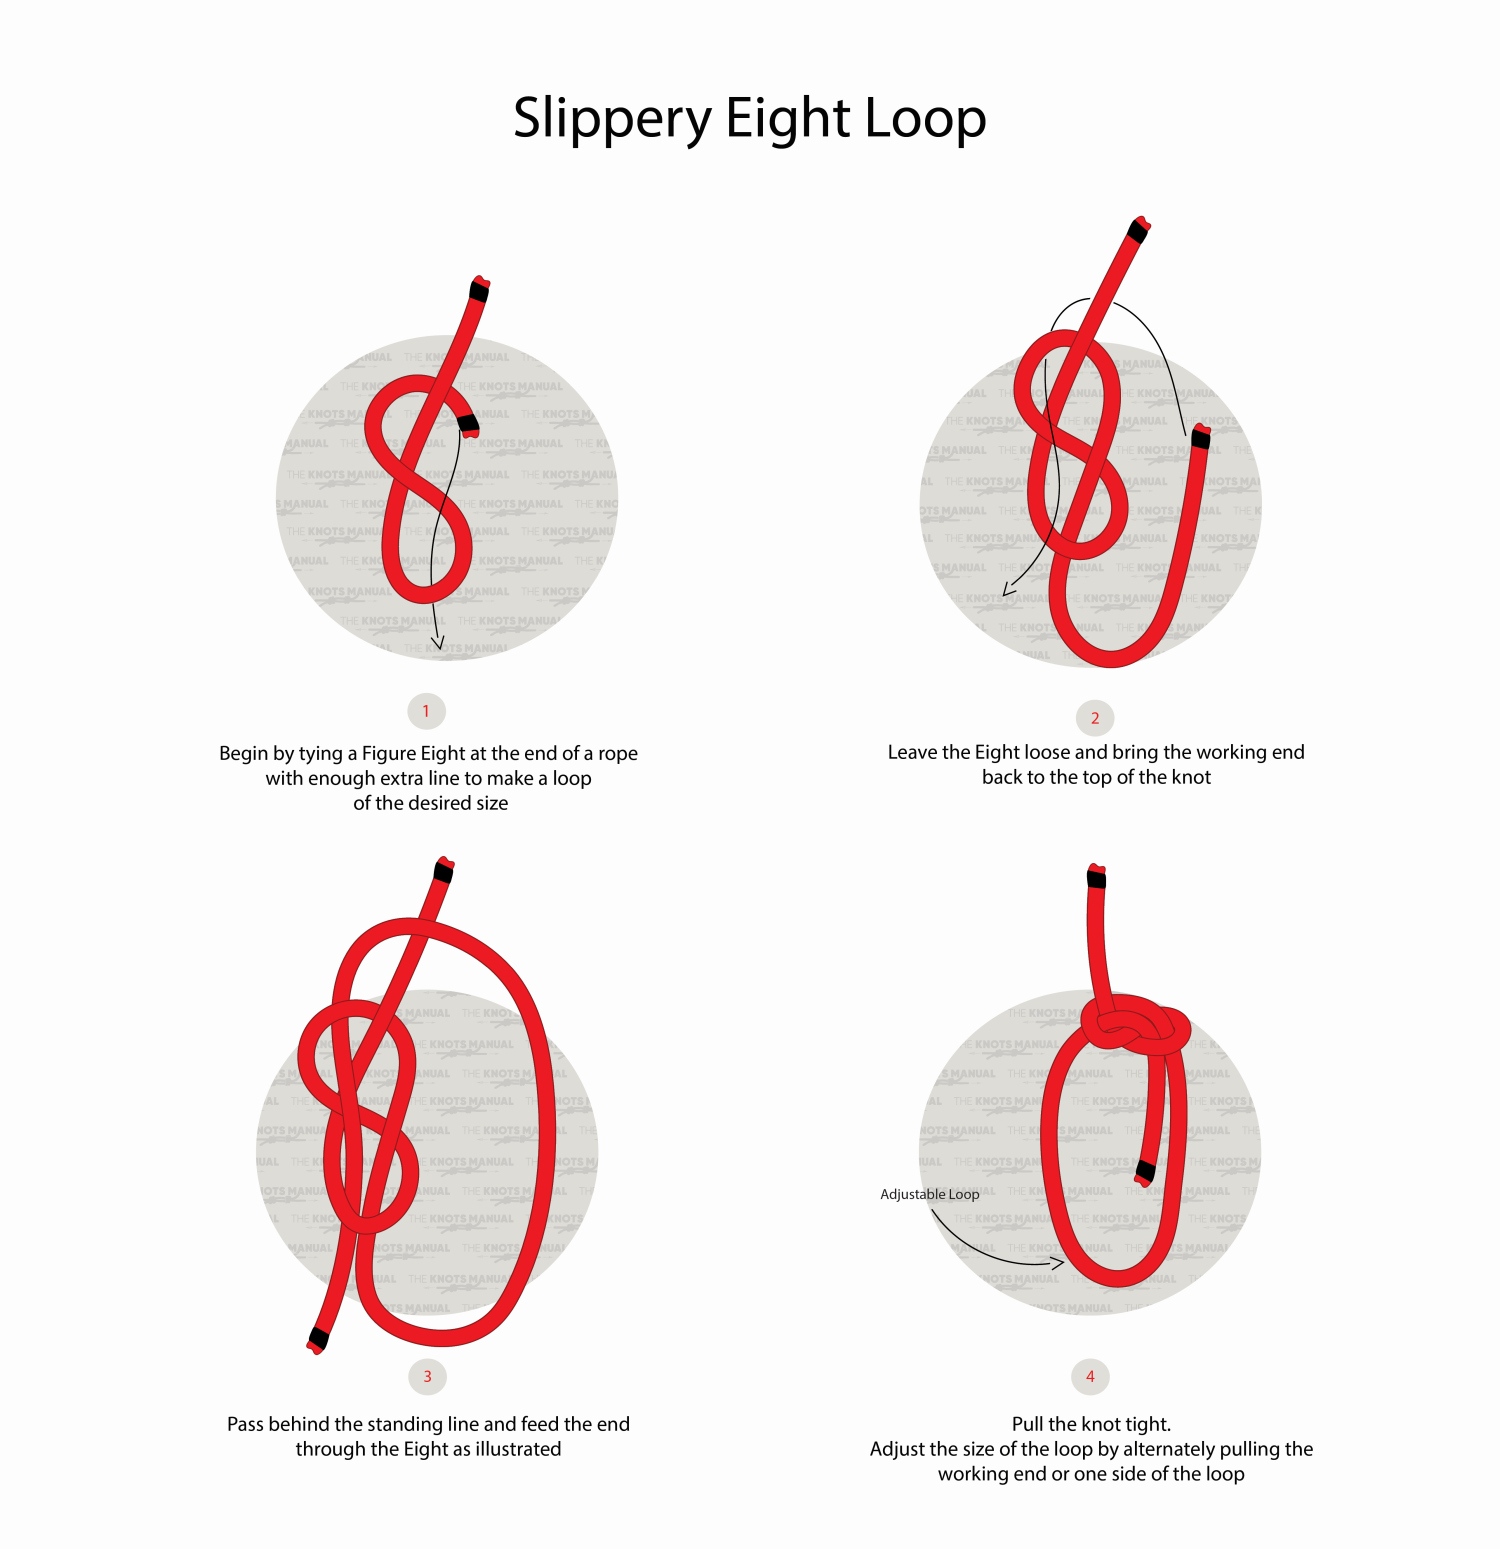
To tie the Slippery Eight Loop, create a loose Figure 8 Knot near the end of the rope (step 1). Leave the end after it is 10 inches (25 cm) long. Now pass the working end behind the standing end and through the loose Figure 8 Knot (steps 2-3). Finally, tighten the knot by holding the loop in one hand and pulling the standing end with your other hand.
You can adjust the size of the loop by pulling one side of it. It adjusts more easily as you straighten the working end and the side of the loop opposite to it.
You should keep the working end after the knot at least a few inches long to account for slippage.
Even though the Slippery Eight Loop is quite reliable, it shouldn’t be used for critical loads. In this case, you should choose another knot or tie a stopper knot on the working end. A good option for this case is the Stevedore Stopper Knot.
Pros and Cons of the Slippery Eight Loop
This knot is very simple to tie and easy to remember because it’s based on a simple Figure 8 Knot.
The Slippery Eight Loop is quite reliable and strong even without a stopper knot. That’s because the strand of the “slippery” loop is bent 180 degrees when tightened. This results in a lot of friction, which keeps the loop in place even with heavier weights.
One advantage over other friction hitches is that the Slippery Eight Loop can be set in place once you figure out what size loop you’ll need. You can do this by tieing a stopper knot on the working end and pulling it right next to the knot. This essentially seizes the knot in place.
If the loop of it knot is used to tie around a wide object, then this knot is less effective. That’s because the adjustable loop loosens much more easily in this situation. It should only be used for attaching to something smaller, like a carabiner or a ring, as the loop is less likely to slip.
Common Uses for the Slippery Eight Loop
The Slippery Eight Loop is most commonly used in survival and in other universal situations. It’s a perfect knot to tie a ridgeline to a tree for various tarp setups and for hanging clothes. But it can also be used for a variety of other non-life-threatening situations.
Knots Like the Slippery Eight Loop
Bowline Knot: This is the most common knot for creating a strong and reliable fixed loop at the end of a rope. Its main disadvantage over the Slippery Eight Loop is that the loop isn’t adjustable.
Taut Line Hitch: This knot creates an adjustable loop at the end of a rope. Its advantage over the Slippery Eight Loop is that the standing end of the rope is the “sliding” one. This allows for more control of the tension of the rope. It’s almost as strong and even easier to tie. That’s why it’s much more commonly used than the Slippery Eight Loop.
Farrimond Friction Hitch: A similar knot to the Taut Line Hitch, except for its quick-release function. It’s less secure than the Slippery Eight Loop.
Midshipman’s Hitch: One of the most reliable adjustable loop knots. It isn’t as commonly used as the Taut Line Hitch, but it’s marginally superior. This knot can be used to replace the Slippery Eight Loop in most situations.
Adjustable Grip Hitch: Another knot that creates an adjustable loop. It doesn’t offer the largest amount of friction but is very easy to tie and dress.
Step-By-Step Guide: How to Tie the Slippery Eight Loop
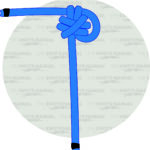
A step-by-step guide on how to tie the Slippery Eight Loop.
Step 1:
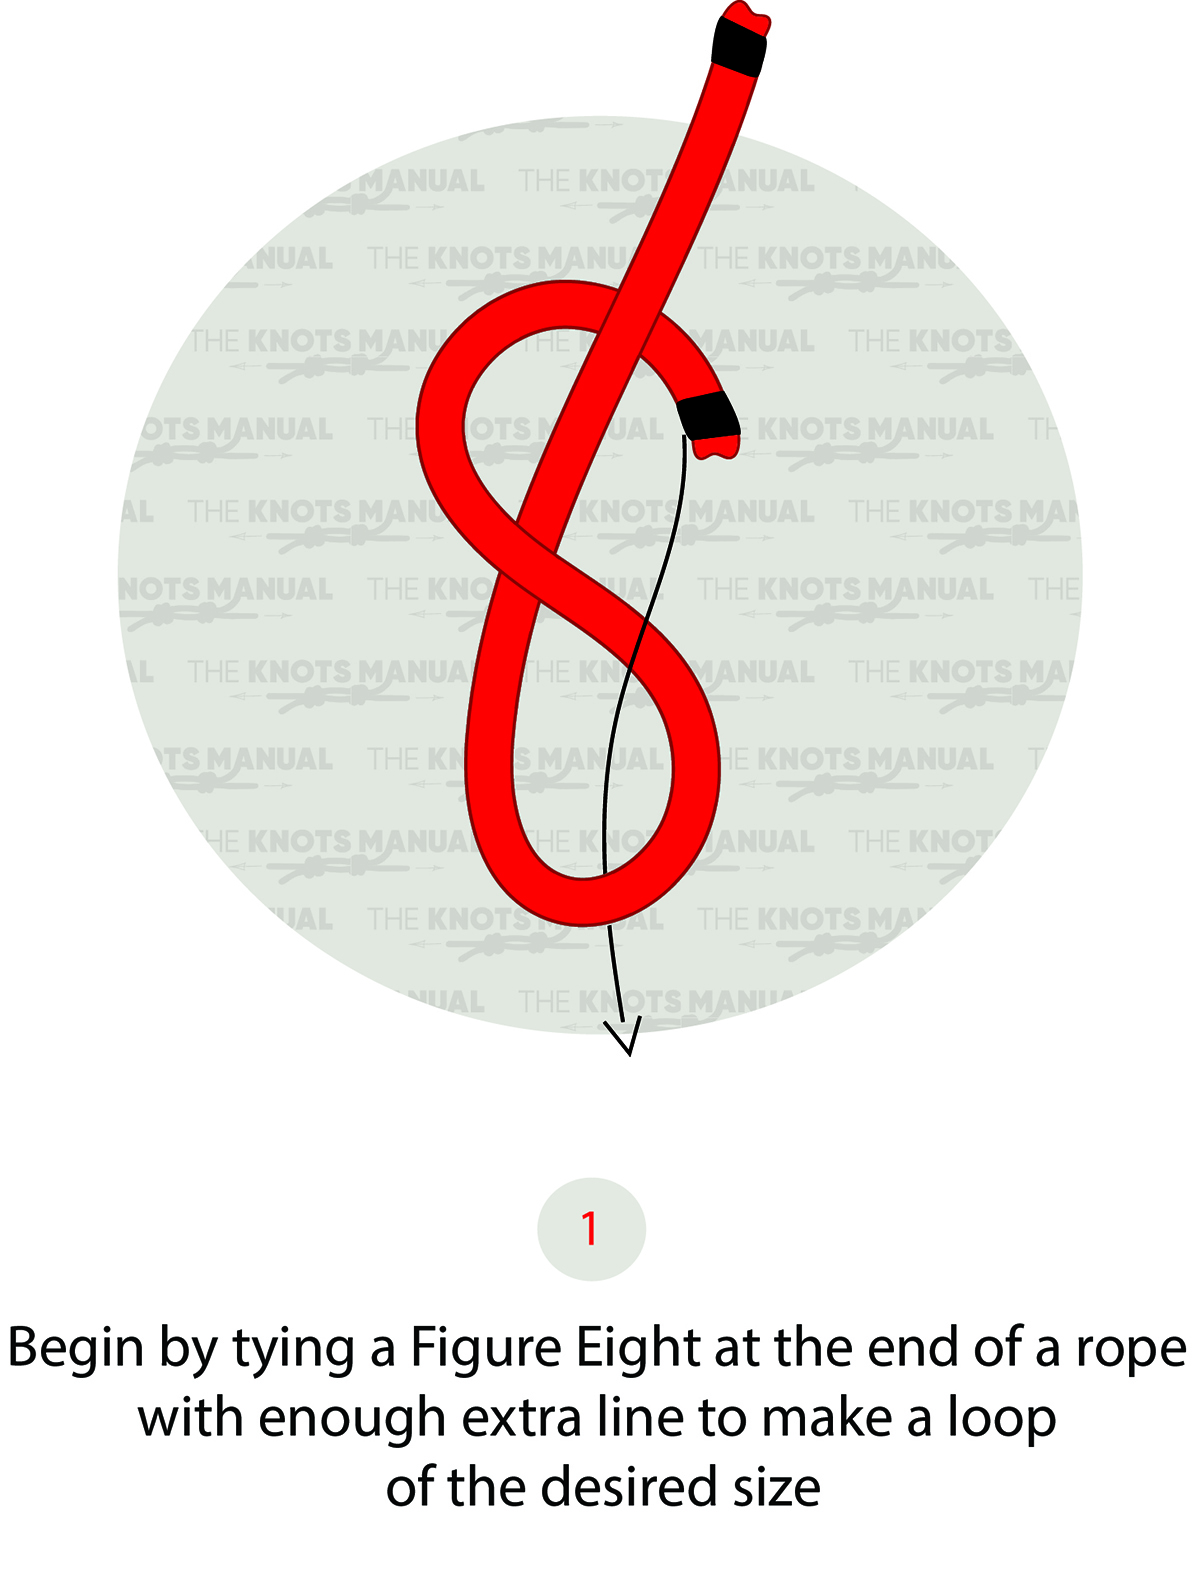
Create a loose Figure Eight Knot 10 inches (25 cm) from the end of the Rope. It’s tied by making a loop, then going around the standing end, and finally passing the end through the loop.
Step 2:
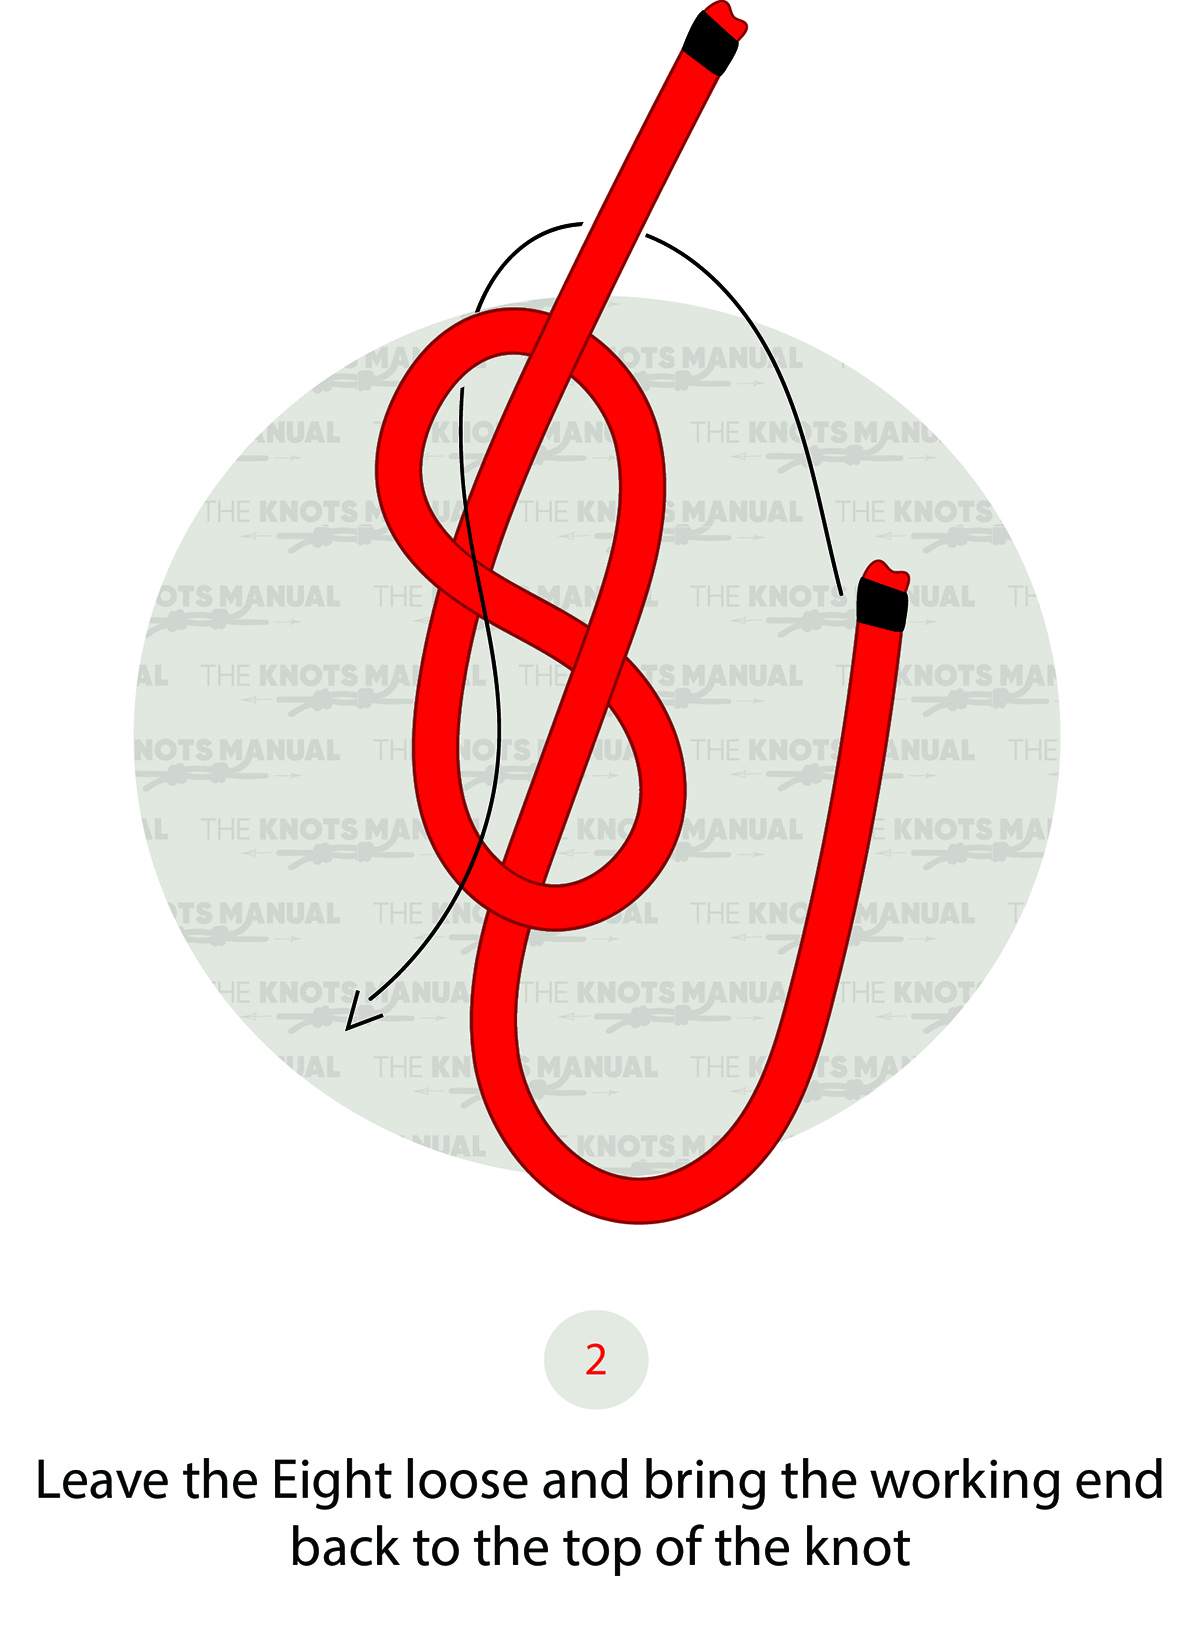
Pass the working end behind the standing end and through the loose Figure 8 Knot, as illustrated above.
Step 3:
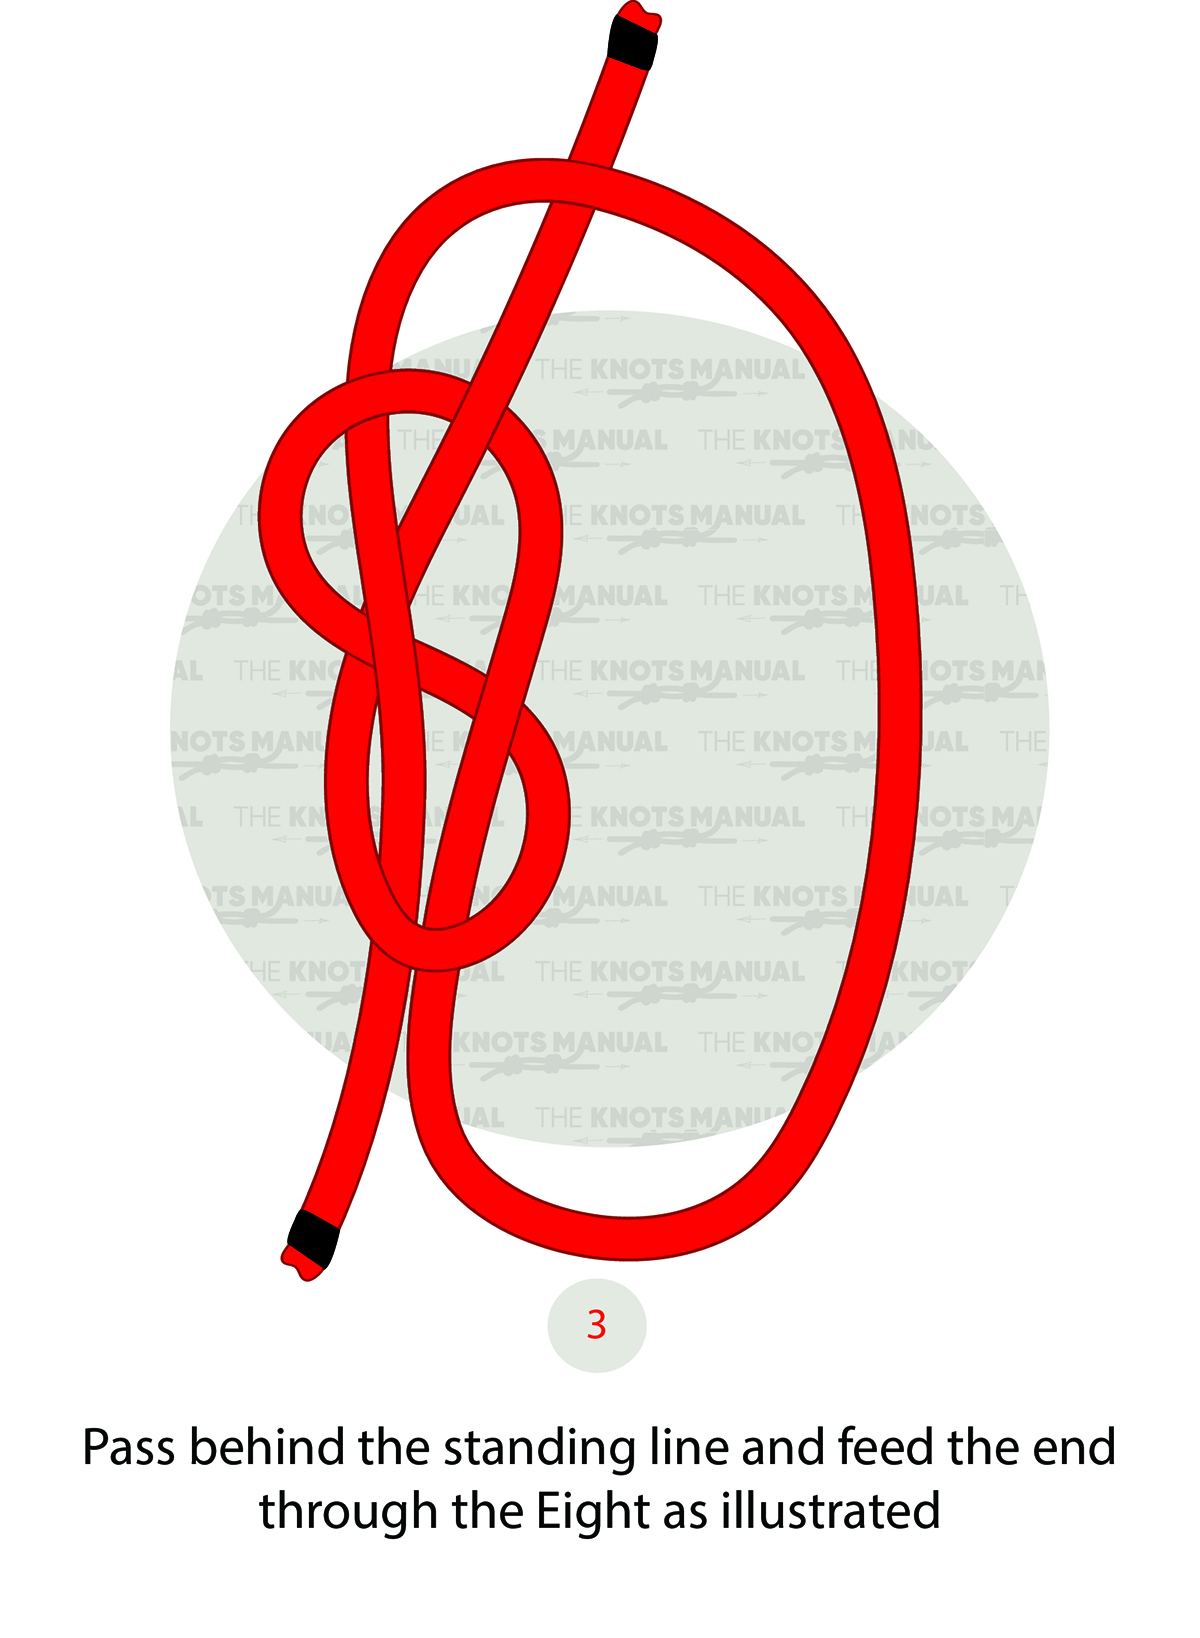
Tighten the knot by holding the loop in one hand and pulling the standing end with your other hand.
Step 4:
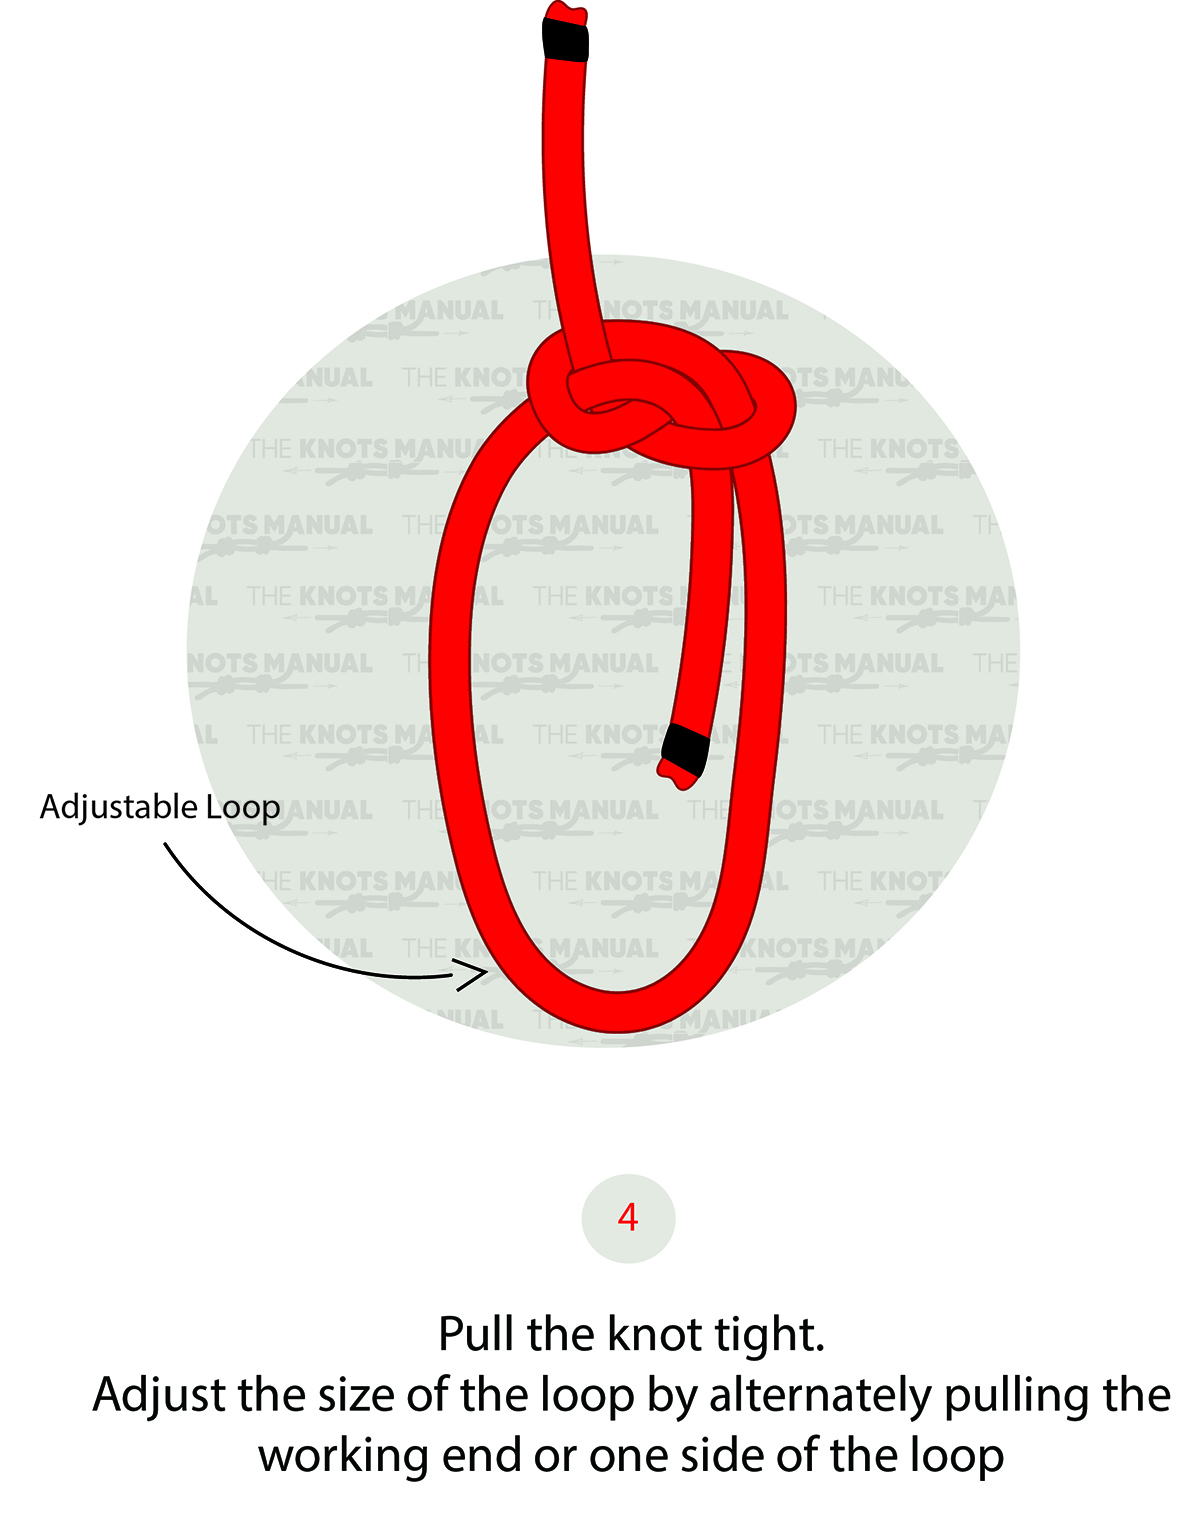
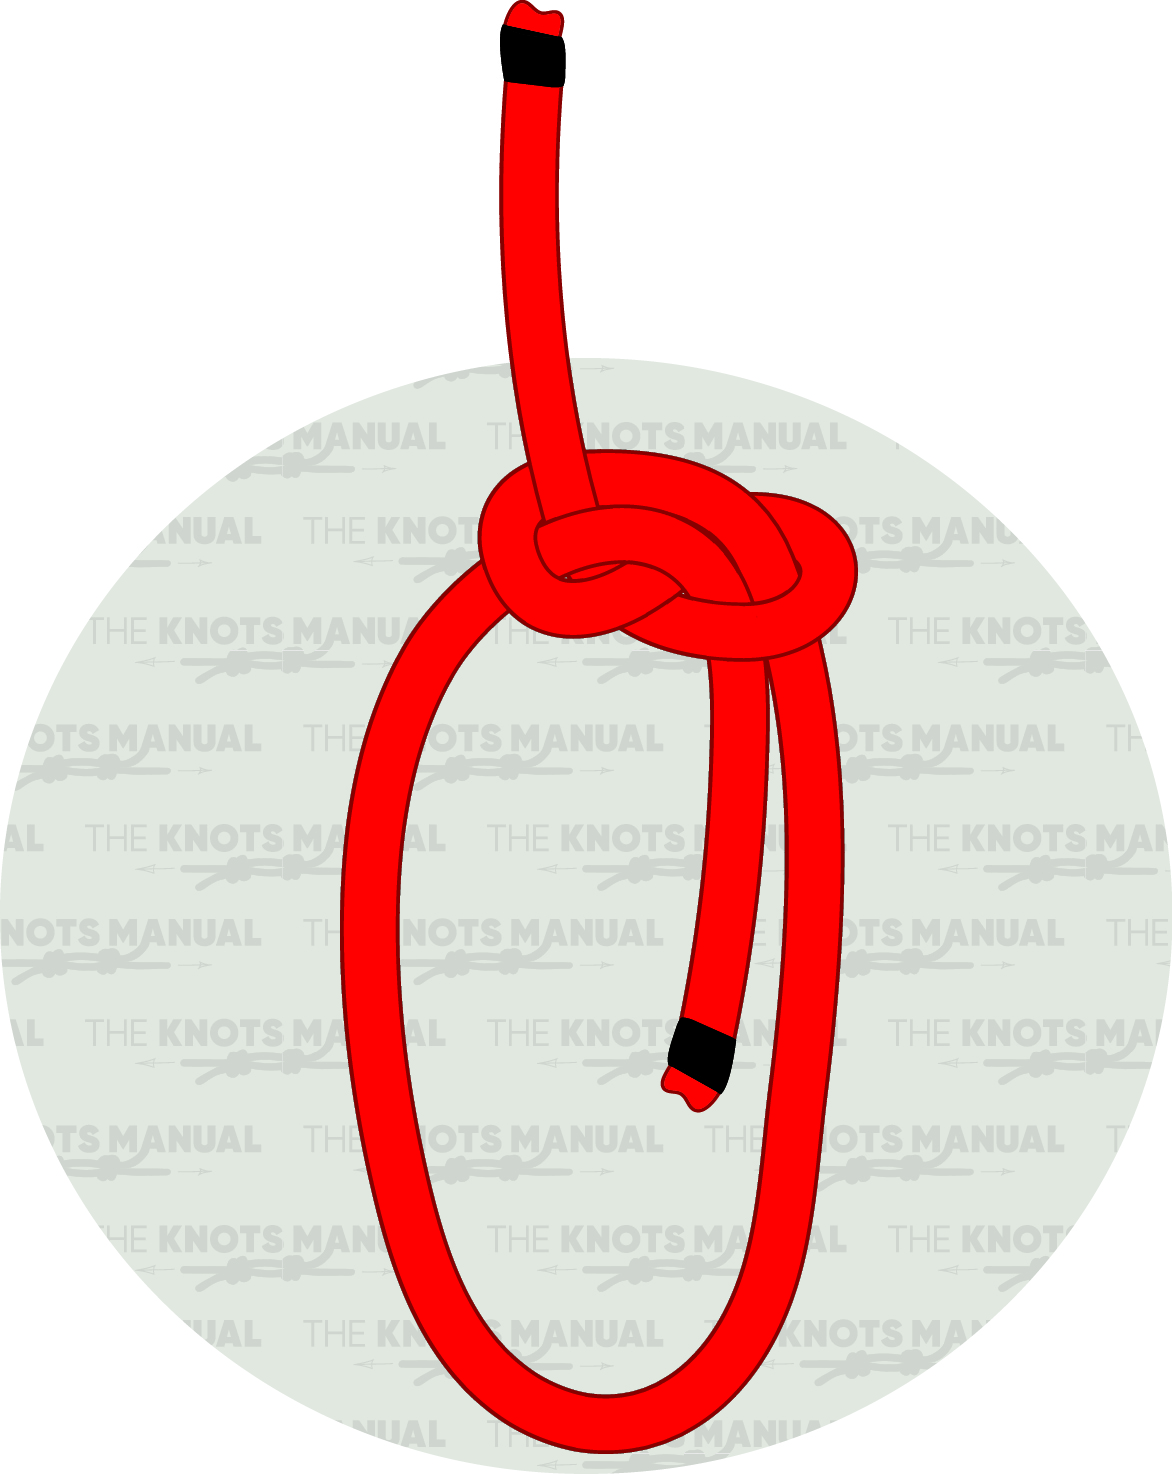
The Slippery Eight Loop Knot is finished.