The Farrimond Friction Hitch is an easy knot that creates an adjustable eye (loop) at the end of a rope. You can tighten or loosen it, and it will hold in place under moderate pressure. The best application for it is for setting up tents and tarps, where the rope needs to be adjusted to create tension.
It’s a somewhat new knot, first used in 2008, and it’s from the family of rolling hitch knots. Some people prefer it over the more traditional Taut Line Hitch because it’s much easier to untie.
Quick Guide: How to Tie the Farrimond Friction Hitch Knot
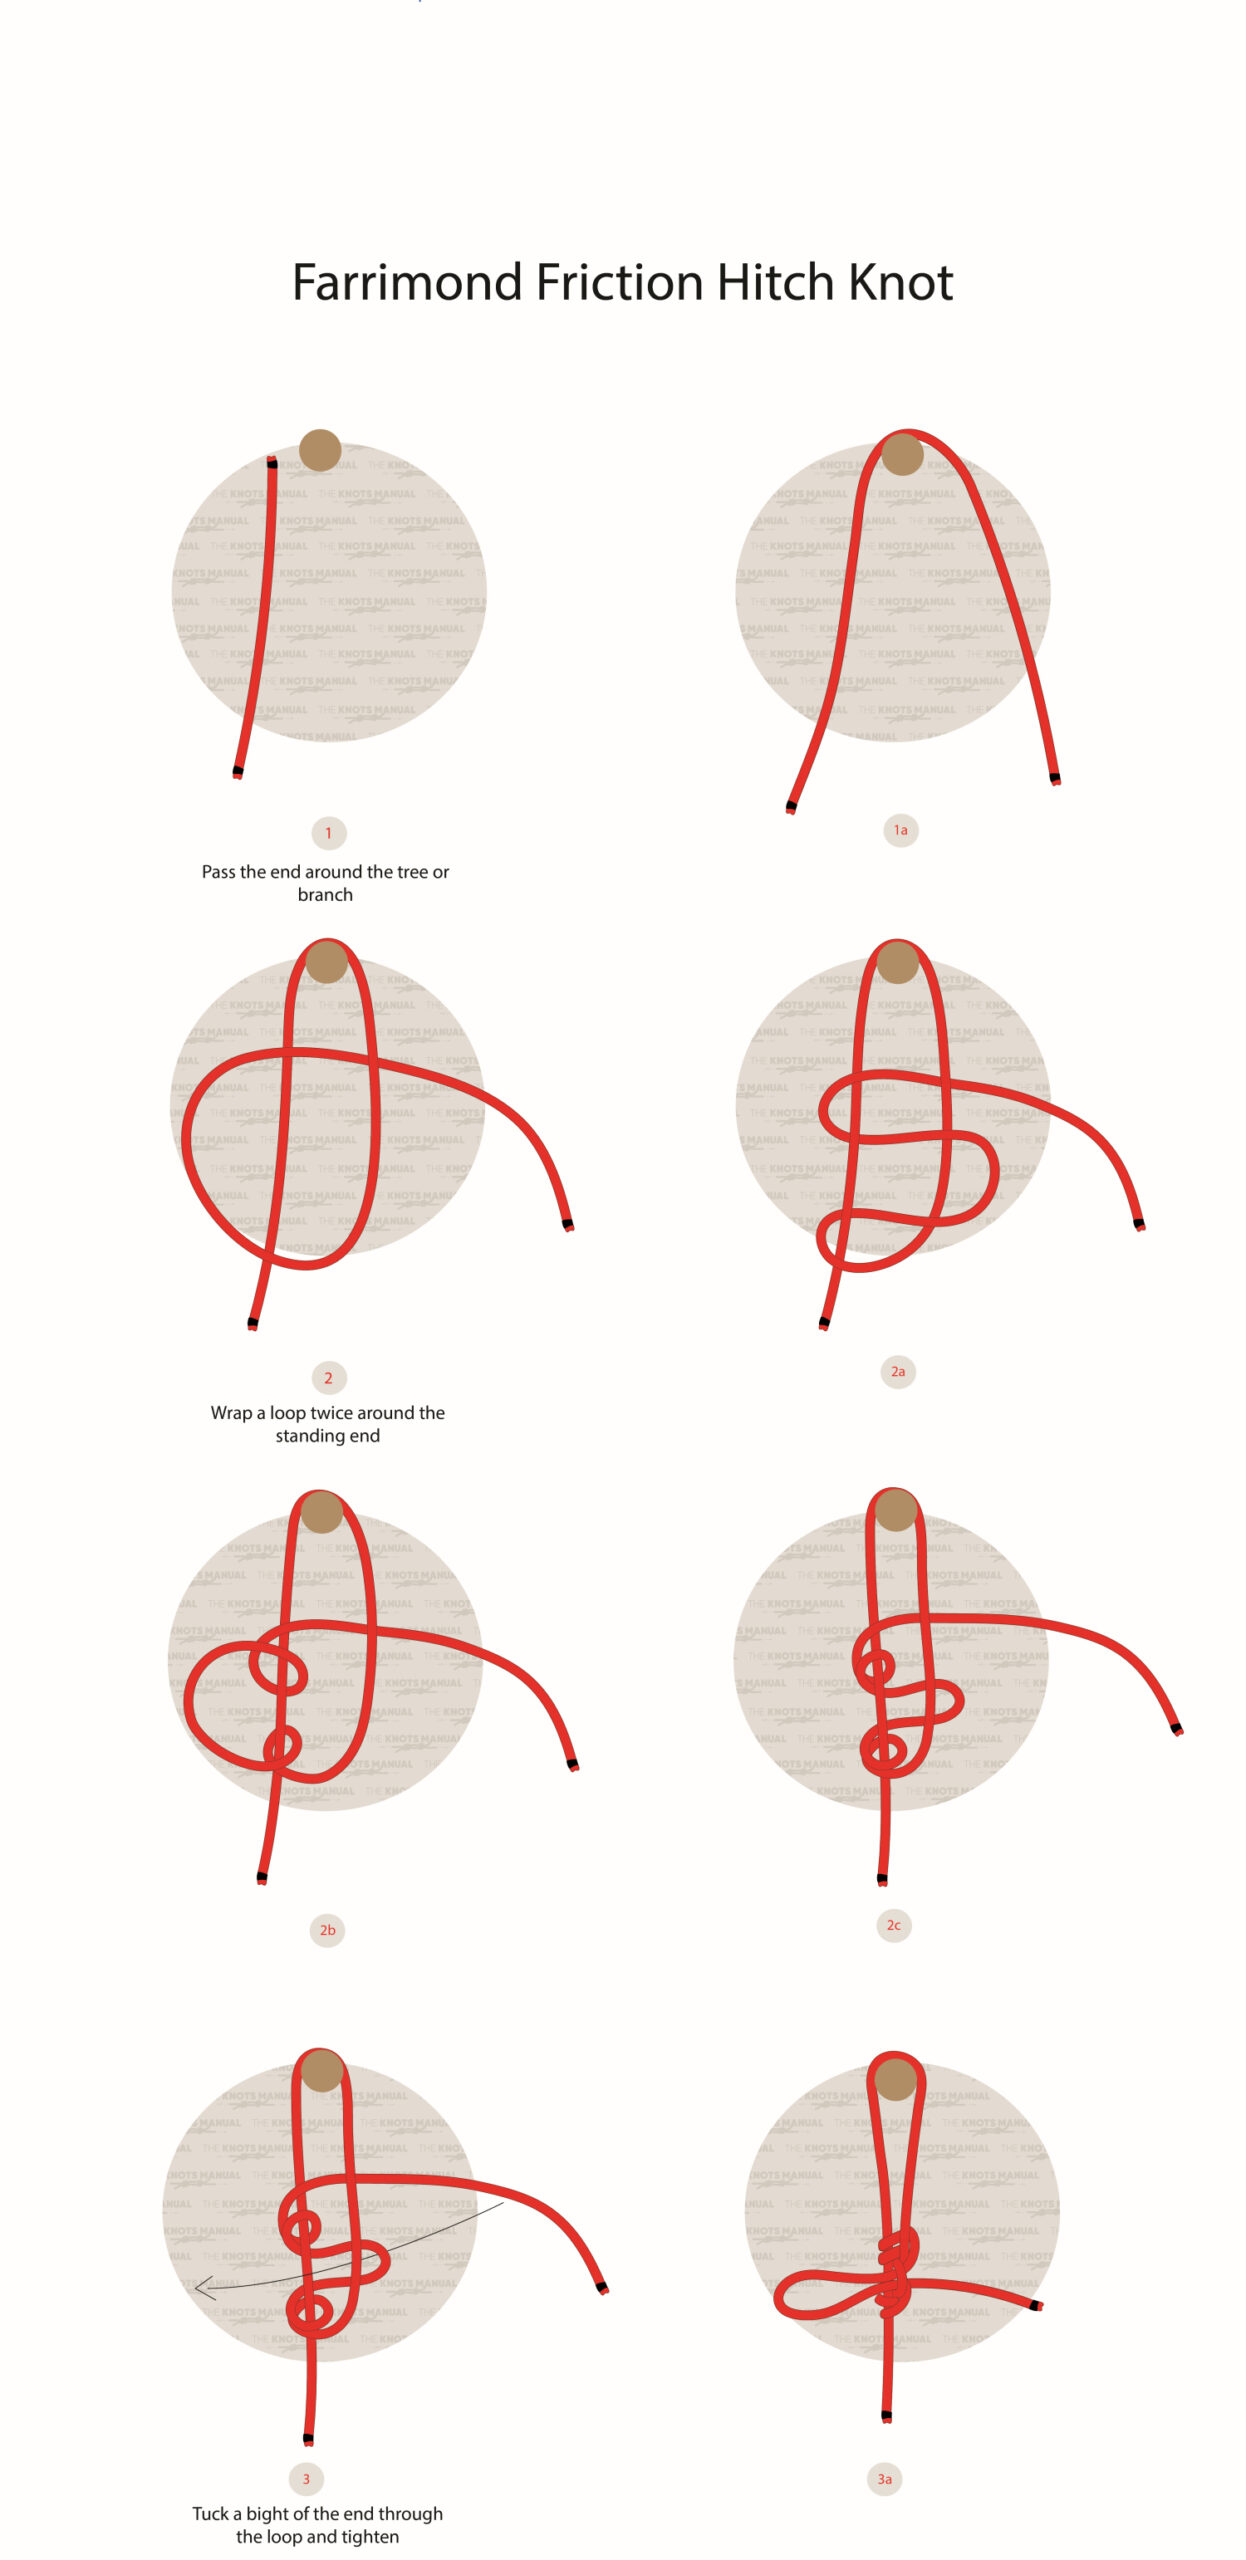
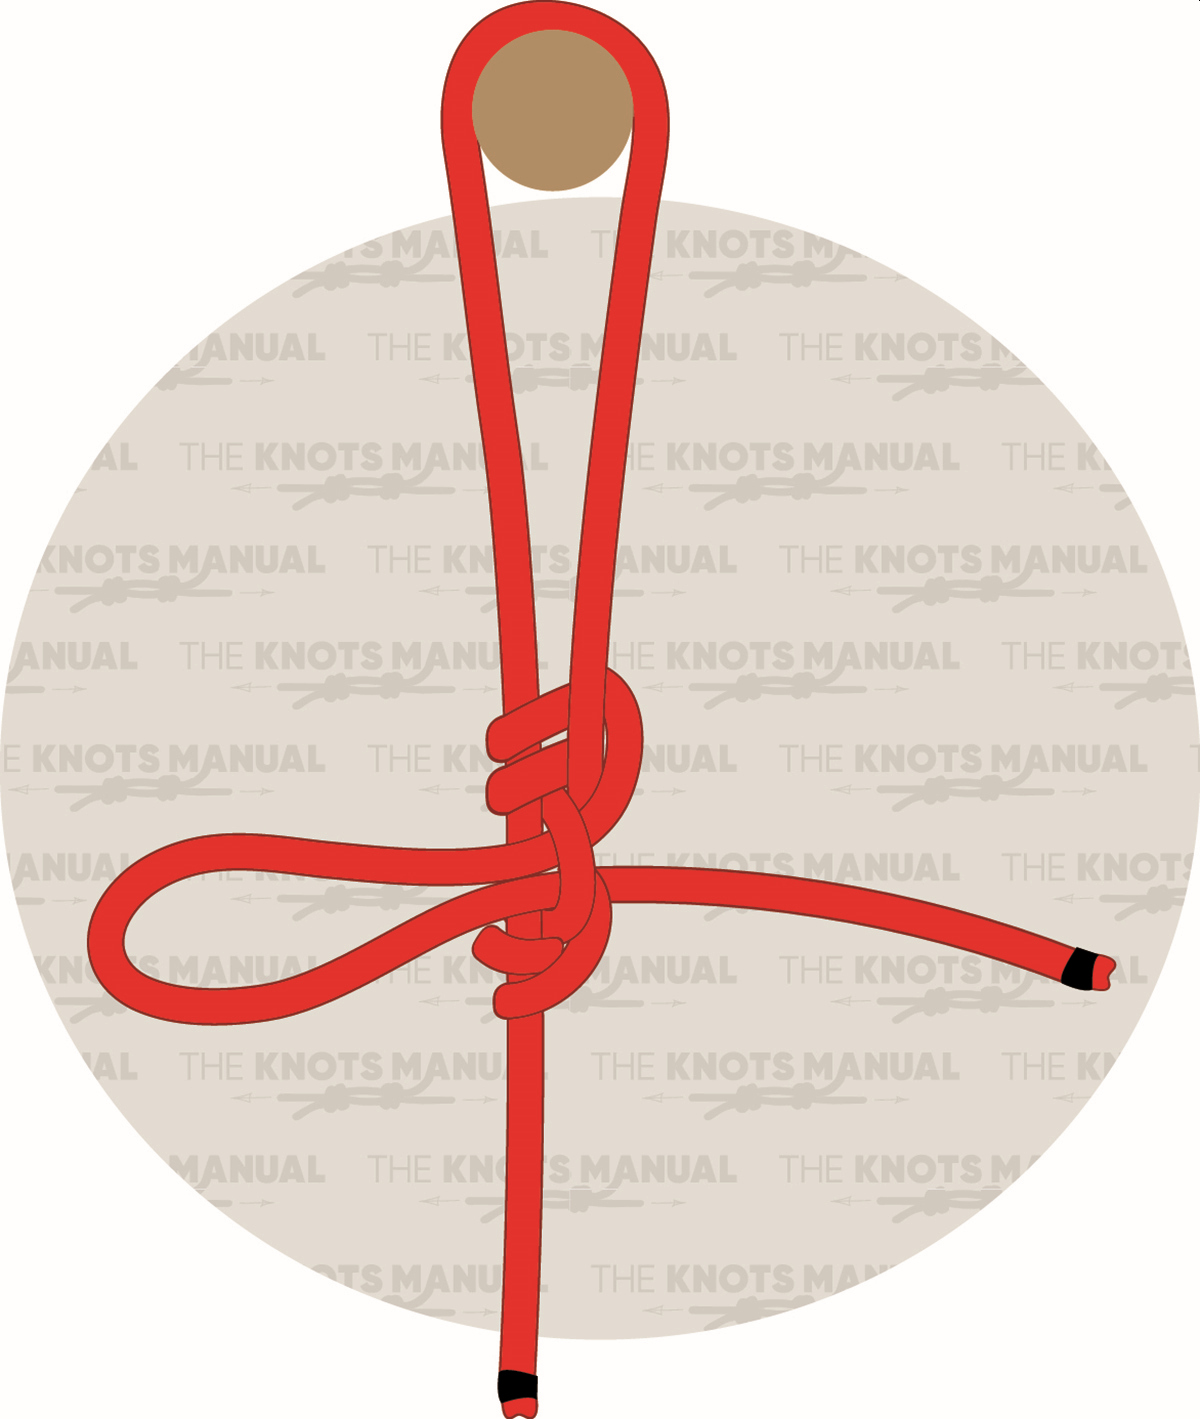
To tie the Farrimond Friction Hitch, wrap the working end of the rope around your support (for example, a tree), and make another loop with it (steps 1-2). Then create a bight in the loop and wrap it around the standing end of the rope (steps 2a-2c). Then create another bight in the working end of the rope, and pass it through the bight that you created (step 3).
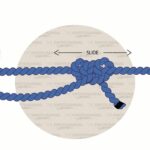
To tighten the Farrimond Friction Hitch, pull on all ropes separately. It’s a bit difficult to tighten, but once it’s finished, the loop shouldn’t move by itself when you pull on the standing end of the rope. You can adjust the size of the loop by sliding the knot forward and backward.
If the knot slides too easily, you can wrap the bight that you created in step 2a around the standing end of the rope many times while tieing the knot. Wrapping it three or four times creates a much stronger knot that’s still very easy to untie.
For the best results, try to keep the size of the adjustable loop fairly small. When the knot is closer to the object placed in the loop, it’s much less likely to slide when put under pressure.
Pros and Cons of the Farrimond Friction Hitch Knot
When dressed (tightened) correctly, the Farrimond Friction Hitch can support heavy loads. It can hold a ridge line for tarps tensioned on a windy day. It’s also easy to tie and remember.
But the best part about the Farrimond Friction Hitch is that it’s very easy to untie. You need to pull on the working end of the rope (which is very easy to do, even with one hand) and the whole knot will come undone.
One minor inconvenience of this knot is that it’s pretty hard to tighten. When you tie it, you need to pull on different ends of the rope one by one several times to tighten the knot. It can be difficult at first, but as you get used to this knot, it gets easier.
Another downside is that this knot doesn’t work well with very slippery ropes, like ones made from PET or Polyester. It works best with paracord ropes and ropes from natural materials. But you can also use it with slippery ropes if you wrap the bight around the standing end (steps 2-2c) many times.
Common Uses for the Farrimond Friction Hitch Knot
The Farrimond Friction Hitch Knot is ideal for setting up guylines for tents, ridge lines for various tarp setups, and washing lines for outdoor campers. It’s easy to tie, easy to untie, and it allows you to easily tension the rope. This is why it’s most commonly used by hikers and survivalists.
It’s also a useful knot to know for landscapers, arborists, and gardeners because you can tie it around smaller trees to guide them into falling in a certain direction. When you’re done, the knot is very easy to untie.
Knots Like the Farrimond Friction Hitch
Taut Line Hitch Knot: The Taut Line Hitch is the most common friction hitch knot out there. It’s also easy to tie, and it’s less likely to slide under load compared to the Farrimond Friction Hitch. Its main downside is that it’s harder to untie and it can jam under heavy loads. A properly dressed Farrimond Friction Hitch will be almost as strong as the Taut Line Hitch.
Adjustable Grip Hitch Knot: This knot also forms a rolling loop at the end of a rope. It’s similar in strength and ease of use to the Farrimond Friction Hitch. It can also be tied on a bight to create a quick-release mechanism. One advantage over the Farrimond Friction Hitch is that this knot is much easier to tighten.
Midshipman’s Hitch Knot: It’s, in our opinion, the best rolling hitch knot, even better than the Farrimond Friction Hitch and the Taut Line Hitch. Although it looks and ties very similarly to the Taut Line Hitch, it’s easier to tighten, and it’s also stronger. But when Taut Line Hitches and Farrimond Friction Hitches are modified to include more loops, they’re as strong as the Midshipman’s Hitch.
In-Depth Guide: How to Tie the Farrimond Friction Hitch Knot
A step-by-step guide on how to tie the Farrimond Friction Hitch Knot.
Step 1:
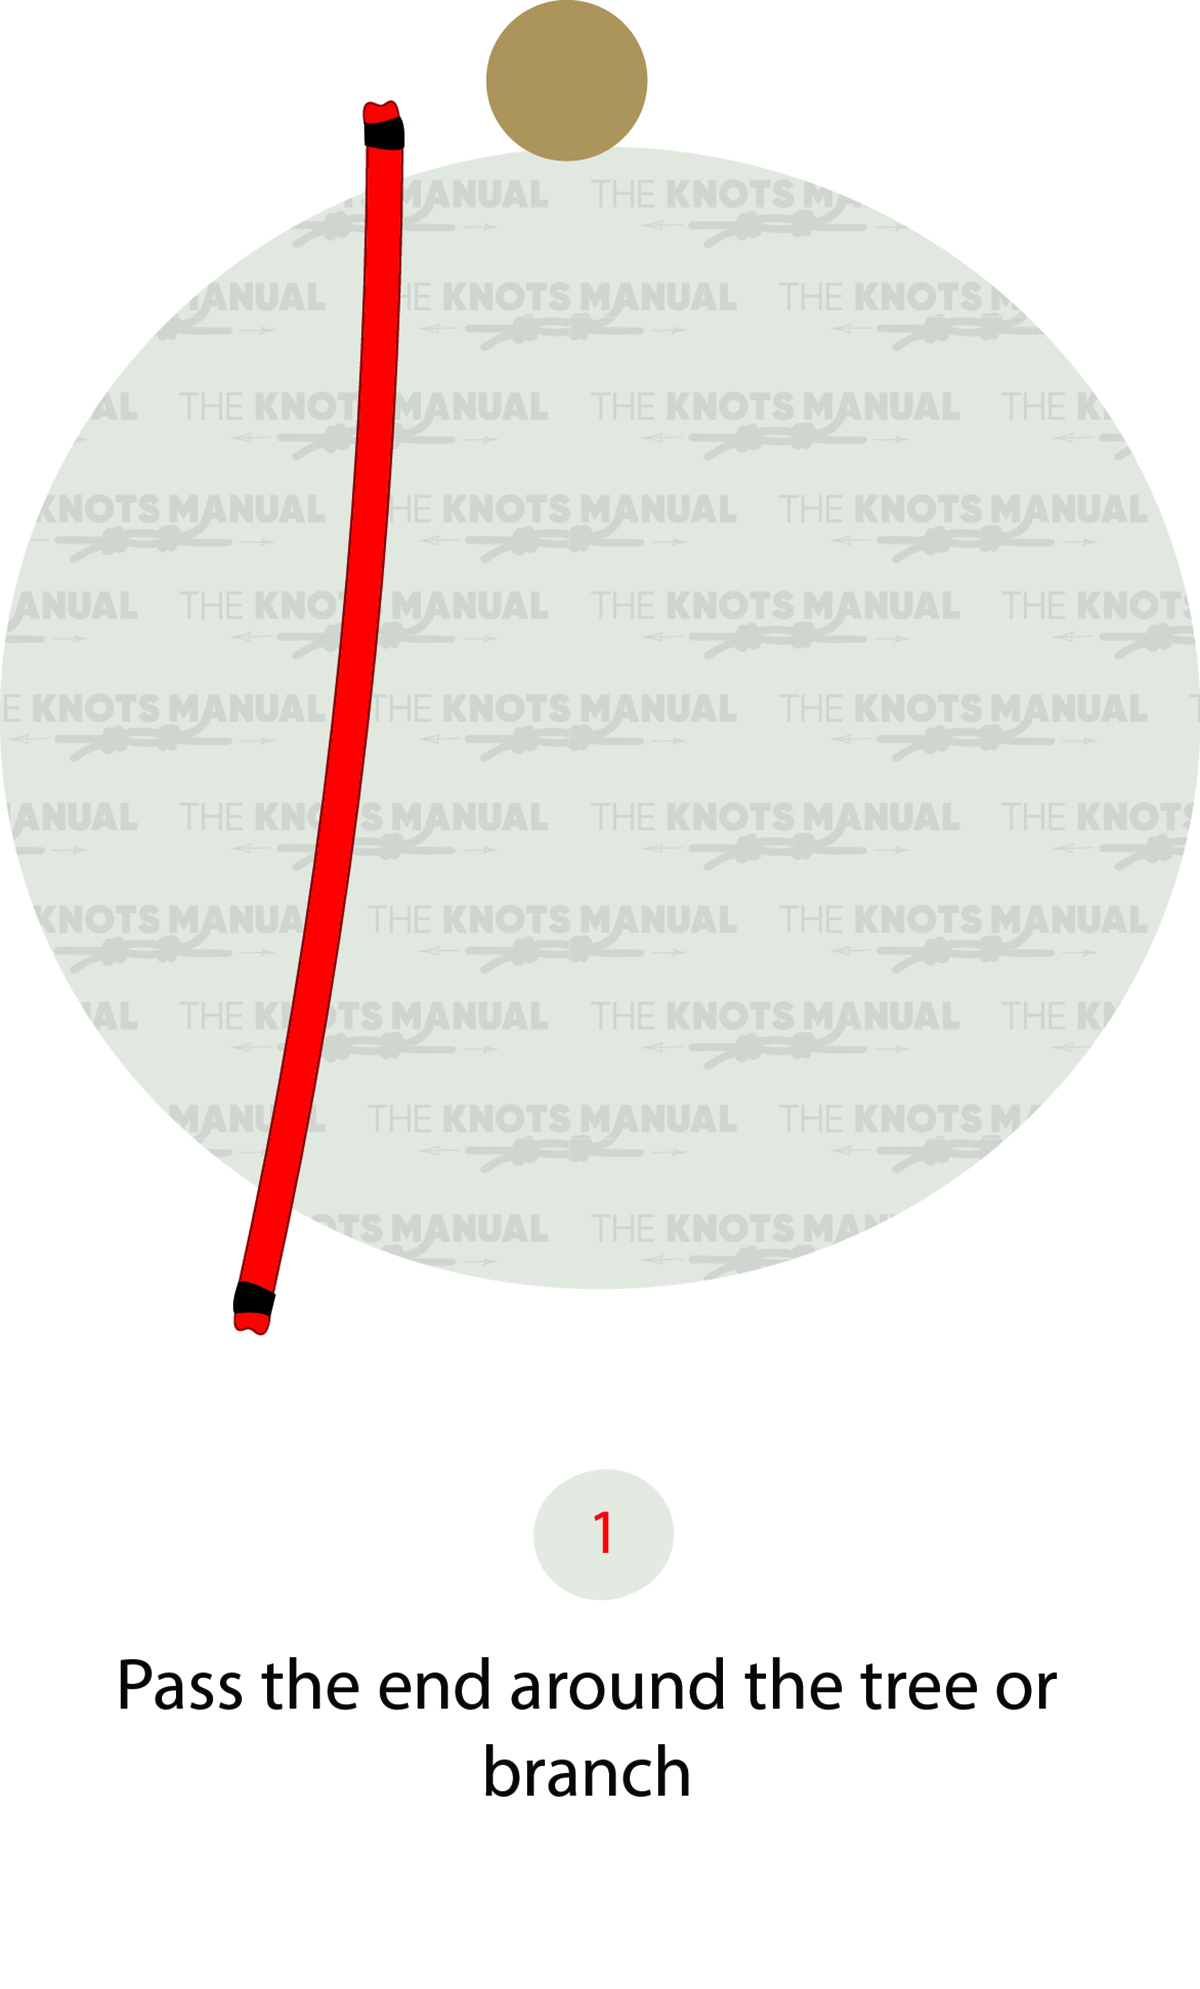
Free up a medium-length working end on your rope.
Step 1a:
Wrap the working end around the tree.
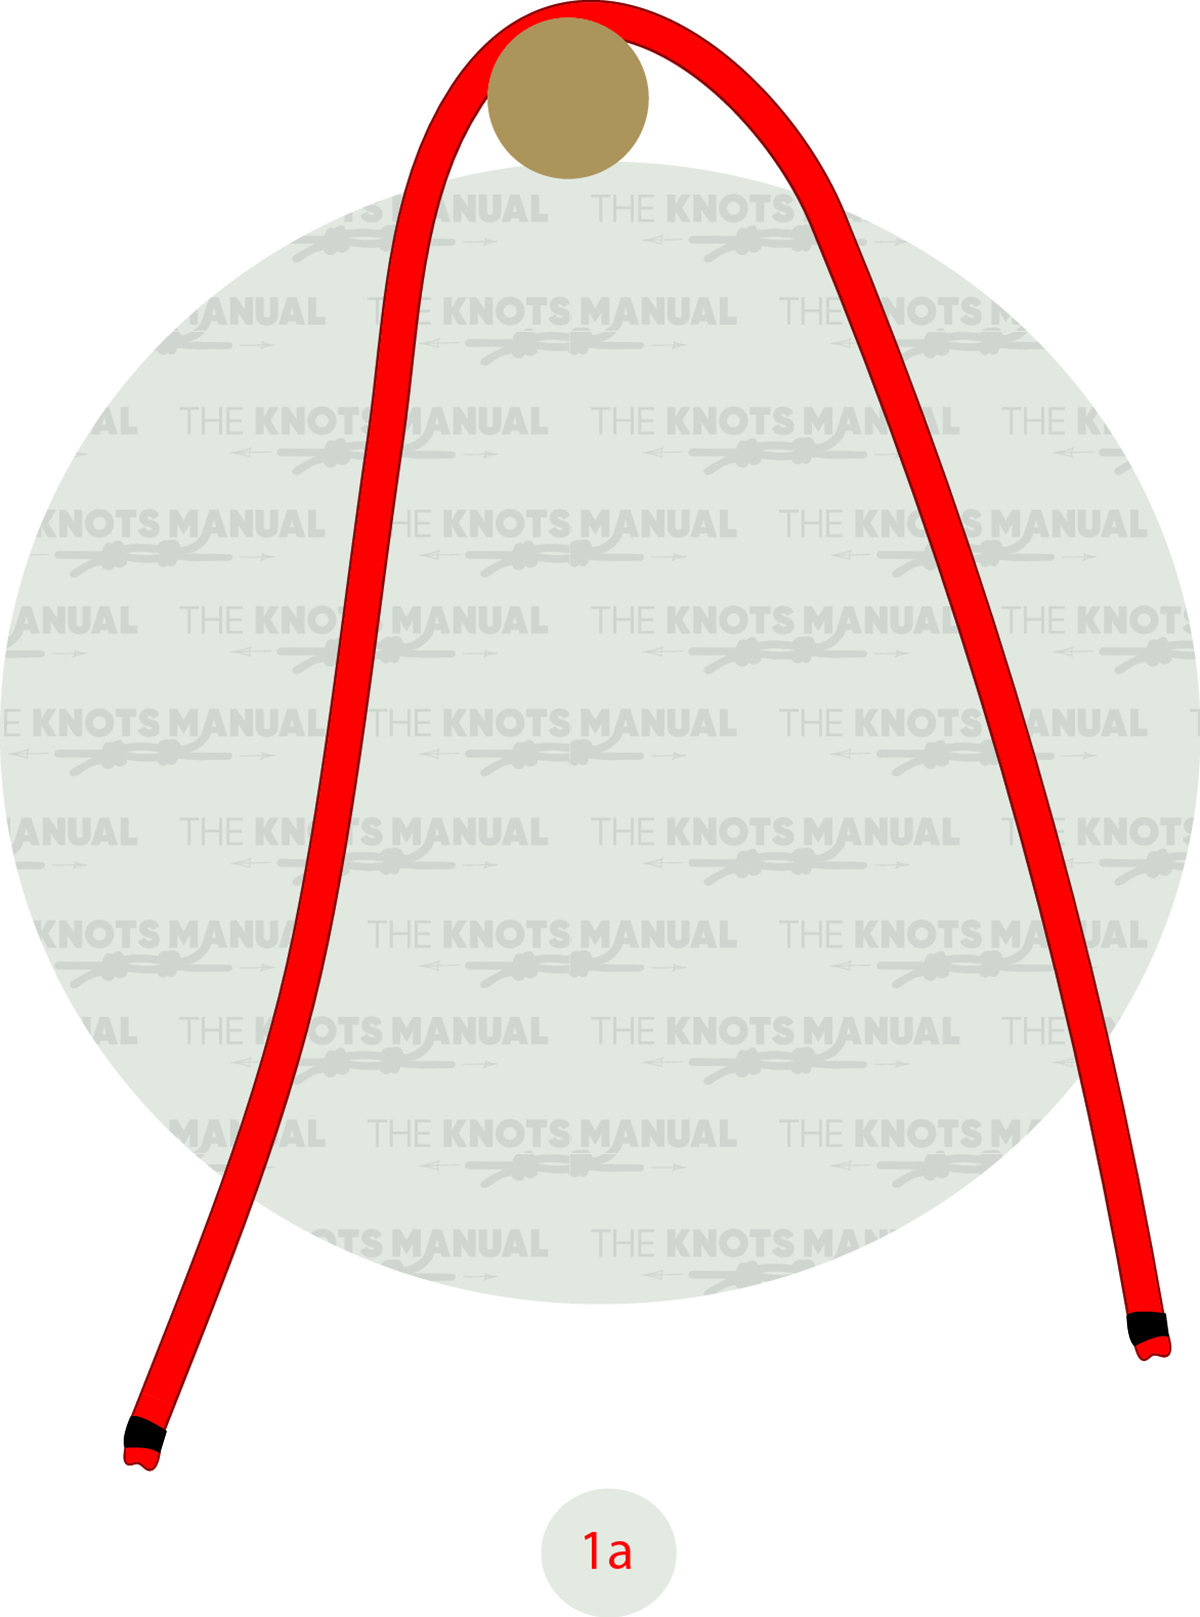
Step 2:
Form a loop in front of the standing end.
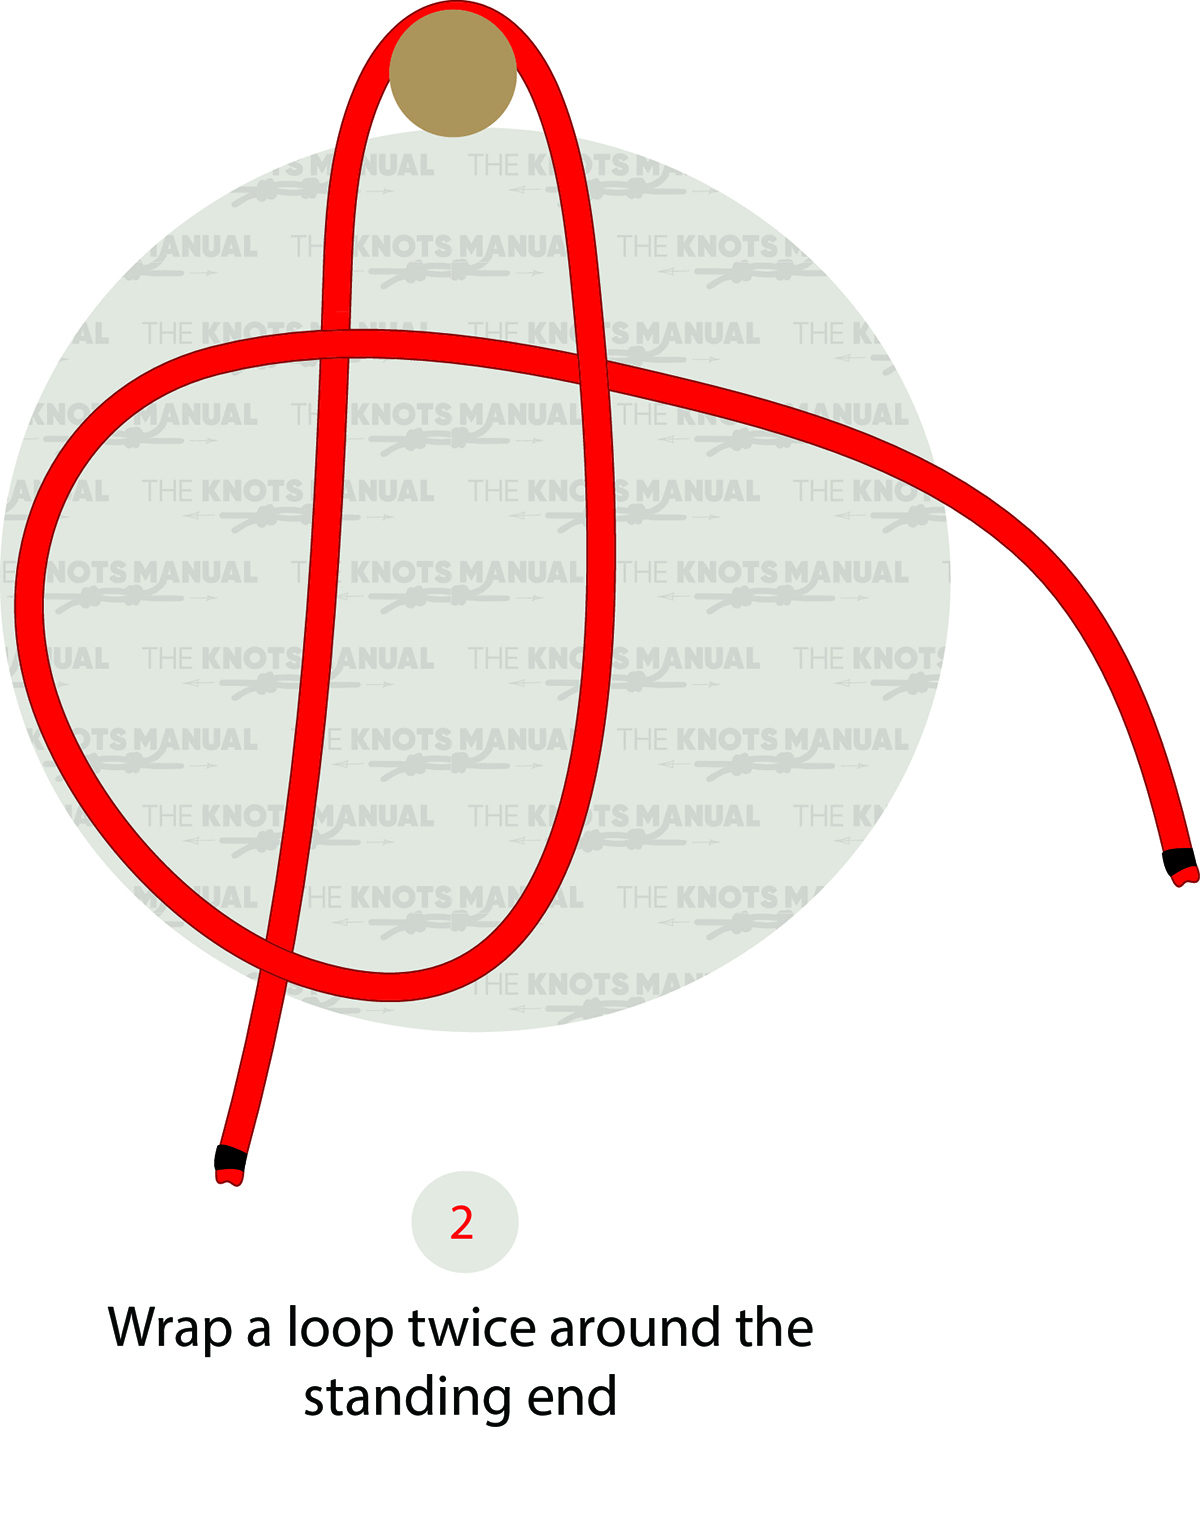
Step 2a:
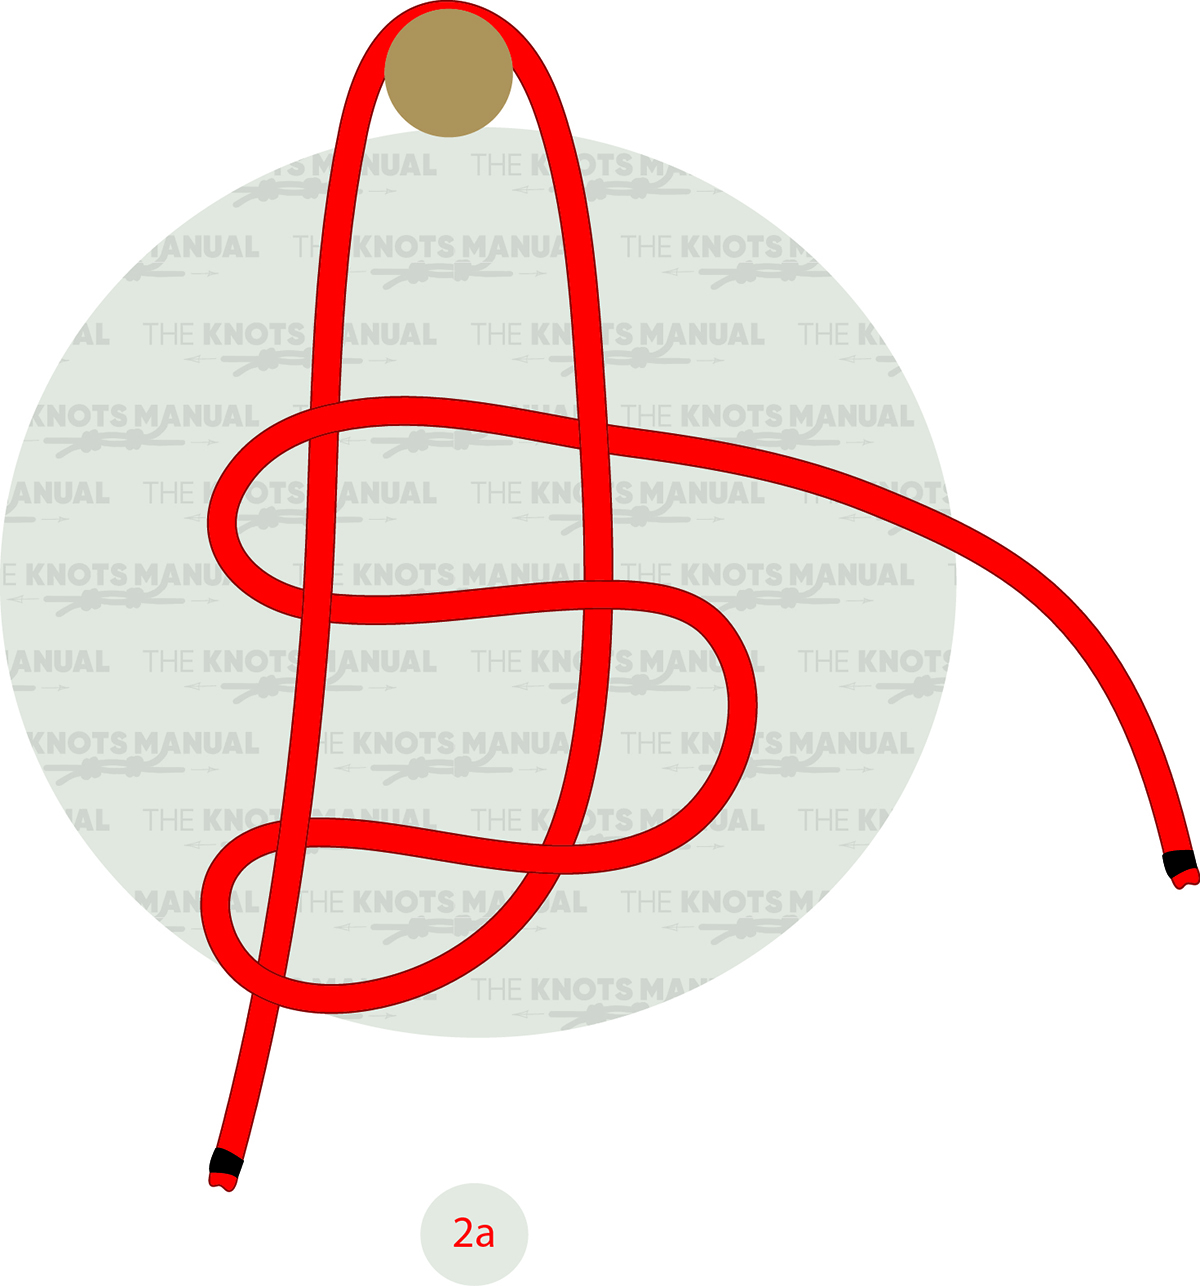
Make a bight in this loop and wrap it around the standing end.
Step 2b:
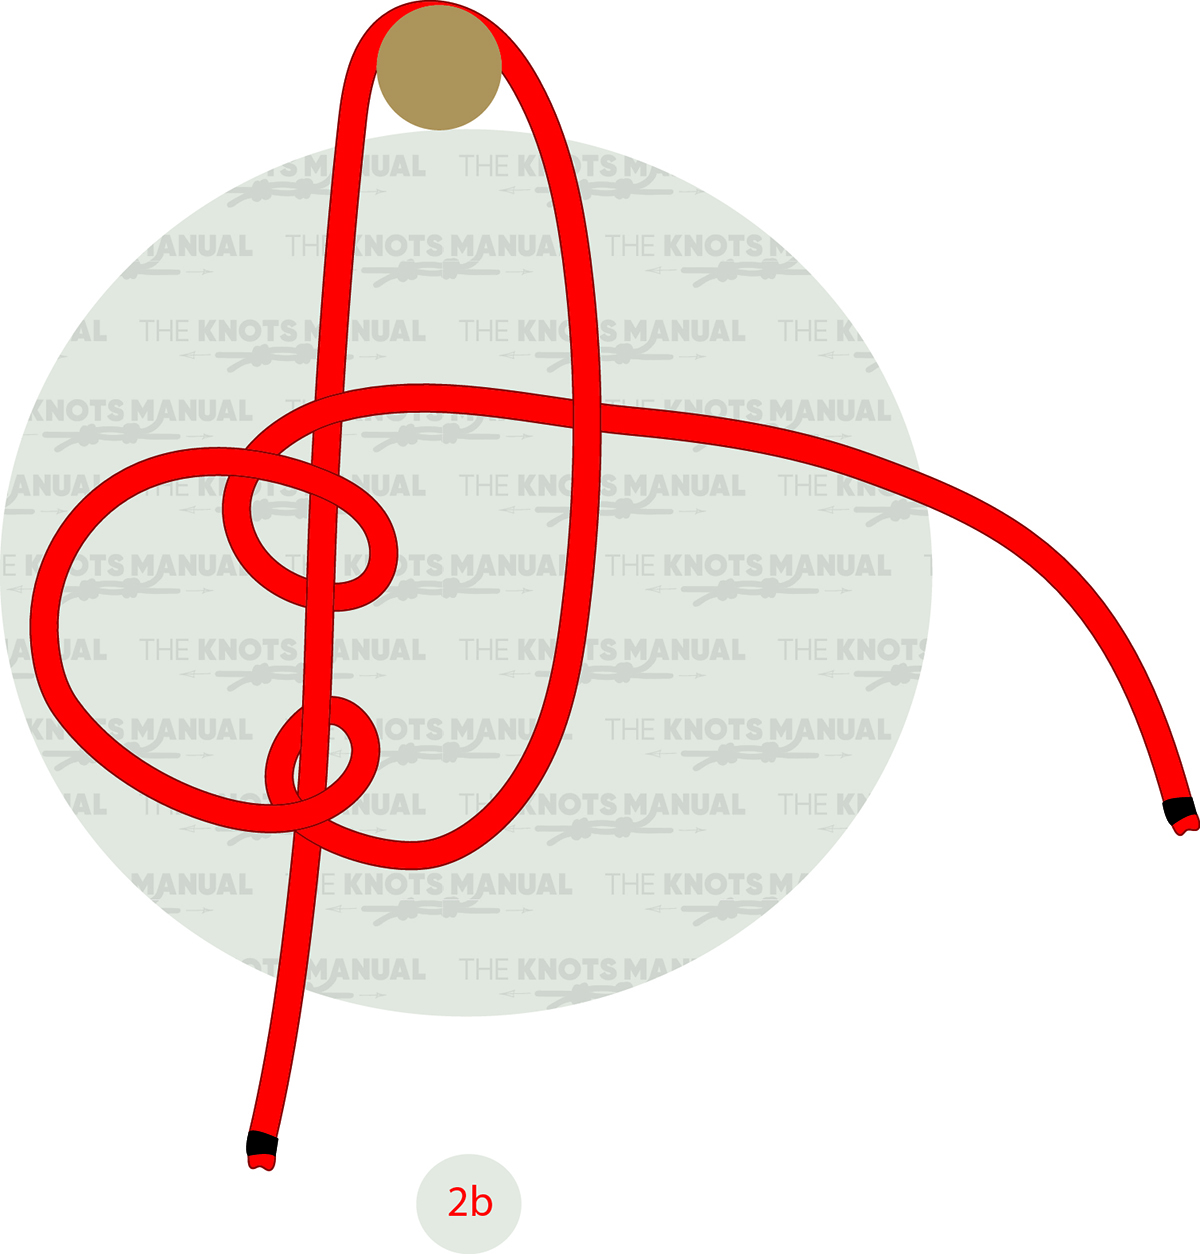
Wrap this bight around another time.
Step 2c:
Continue wrapping the bight until you’ve wrapped it twice around the standing end. For a more secure knot, you can wrap it three or four times.
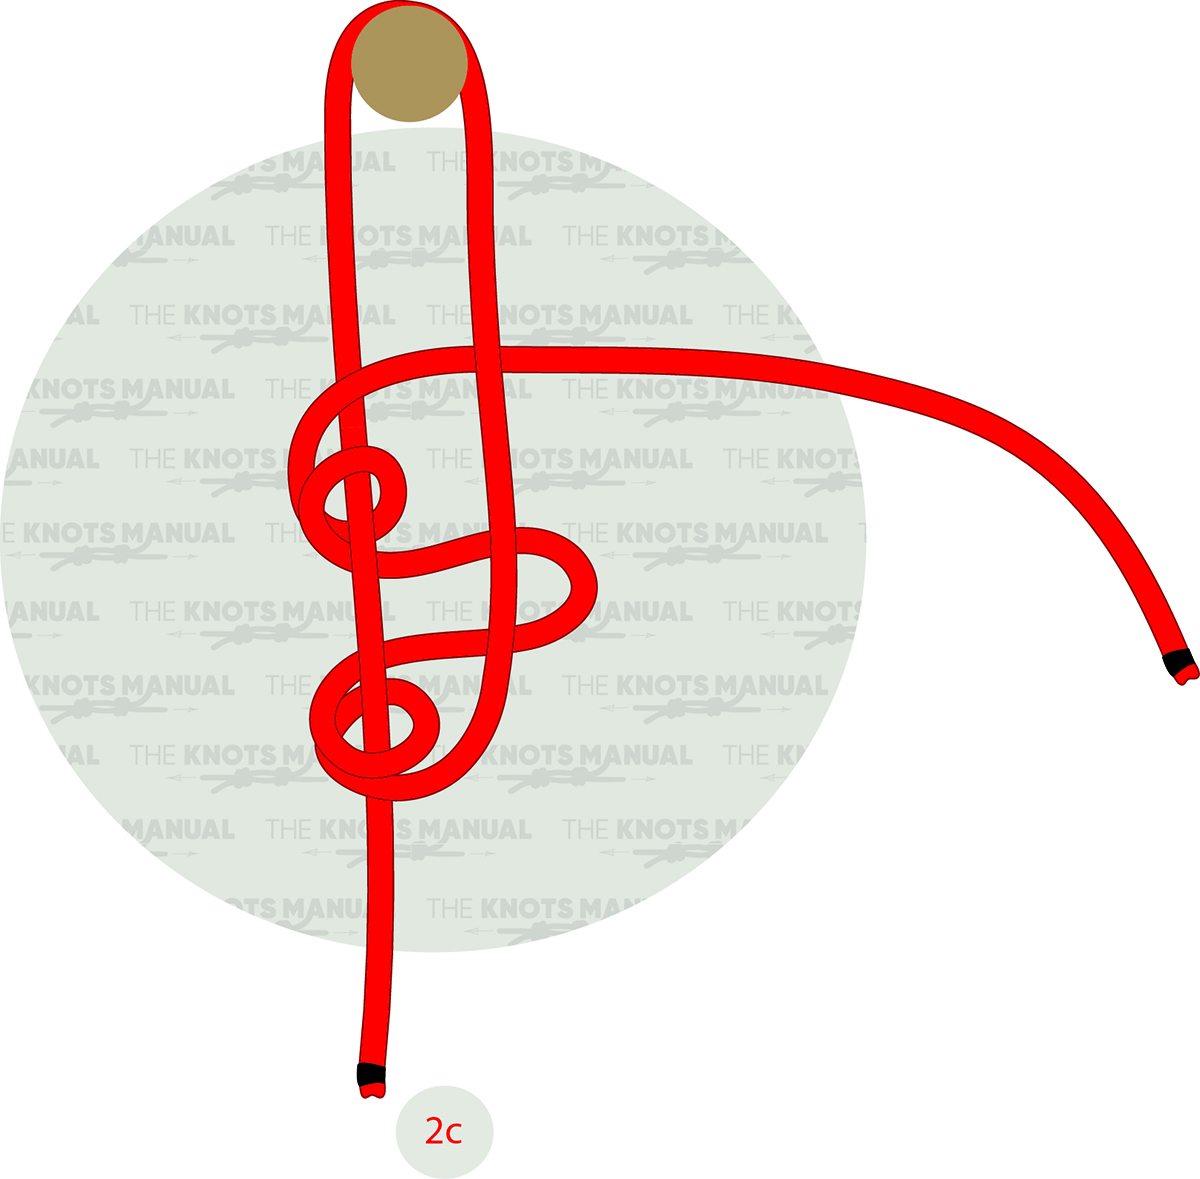
Step 3:
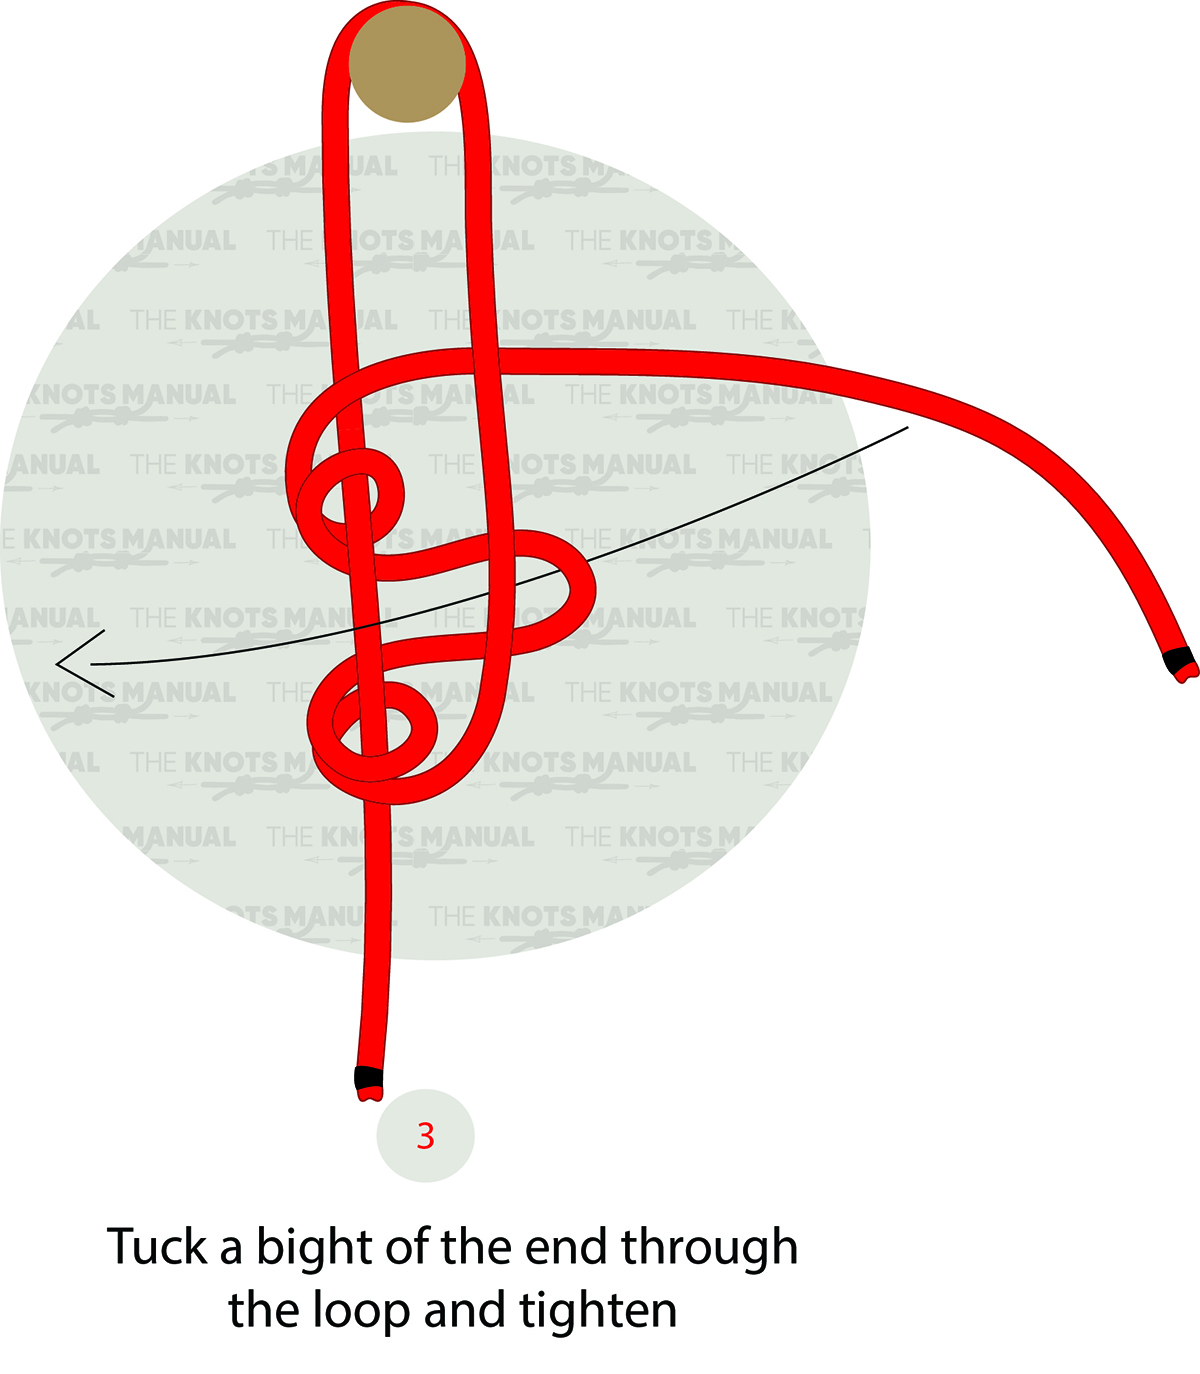
Make a bight on the working end of your rope and pass it through the bight that you formed in previous steps.
Step 3a:
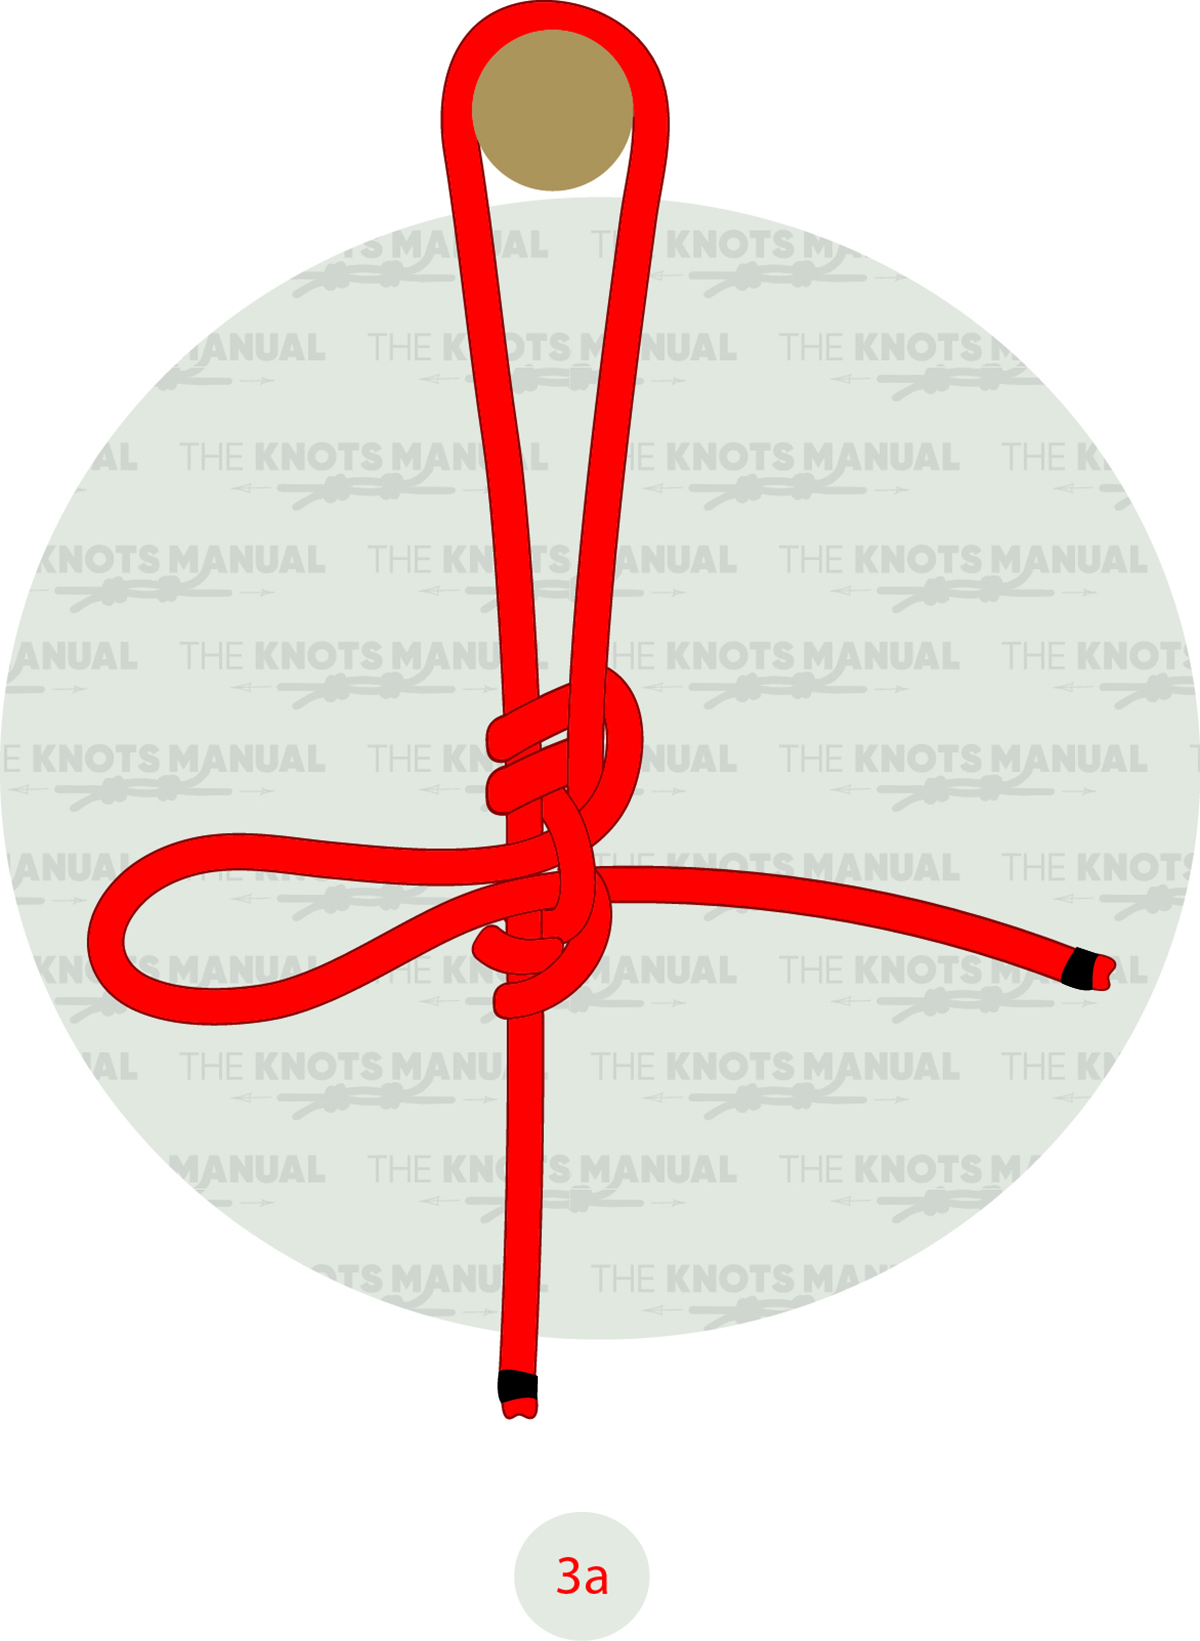
Tighten this knot by pulling on each end of the rope, loop, and bight separately.
Frequently Asked Questions
What Ropes Does the Farrimond Friction Hitch Work Best With?
The Farrimond Friction Hitch works best with ropes that have a bit of elasticity and play in them. Bungee cords and elastic synthetic ropes usually show the best results. When tied with hard synthetic ropes, this knot tends to slip much more easily.
What Can I Do if My Farrimond Friction Hitch Knot Keeps Sliding Under Tension?
If your finished knot slides when the rope is pulled, this means that you either haven’t dressed it properly, or you’re using a slippery rope. In this case, you can modify the knot to make it stronger. When tieing the knot, in steps 2a-2c, wrap the bight around the standing end three or four times, and continue the rest of the knot as usual. This will increase the grip around the standing end of the rope and reduce the chances of the knot slipping.