The Bell Ringer’s Knot is a very easy knot used to temporarily shorten a rope. It’s sometimes also referred to as the Bell Rope Knot.
Quick Guide: Tying a Bell Ringers Knot
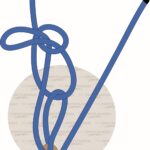
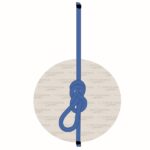
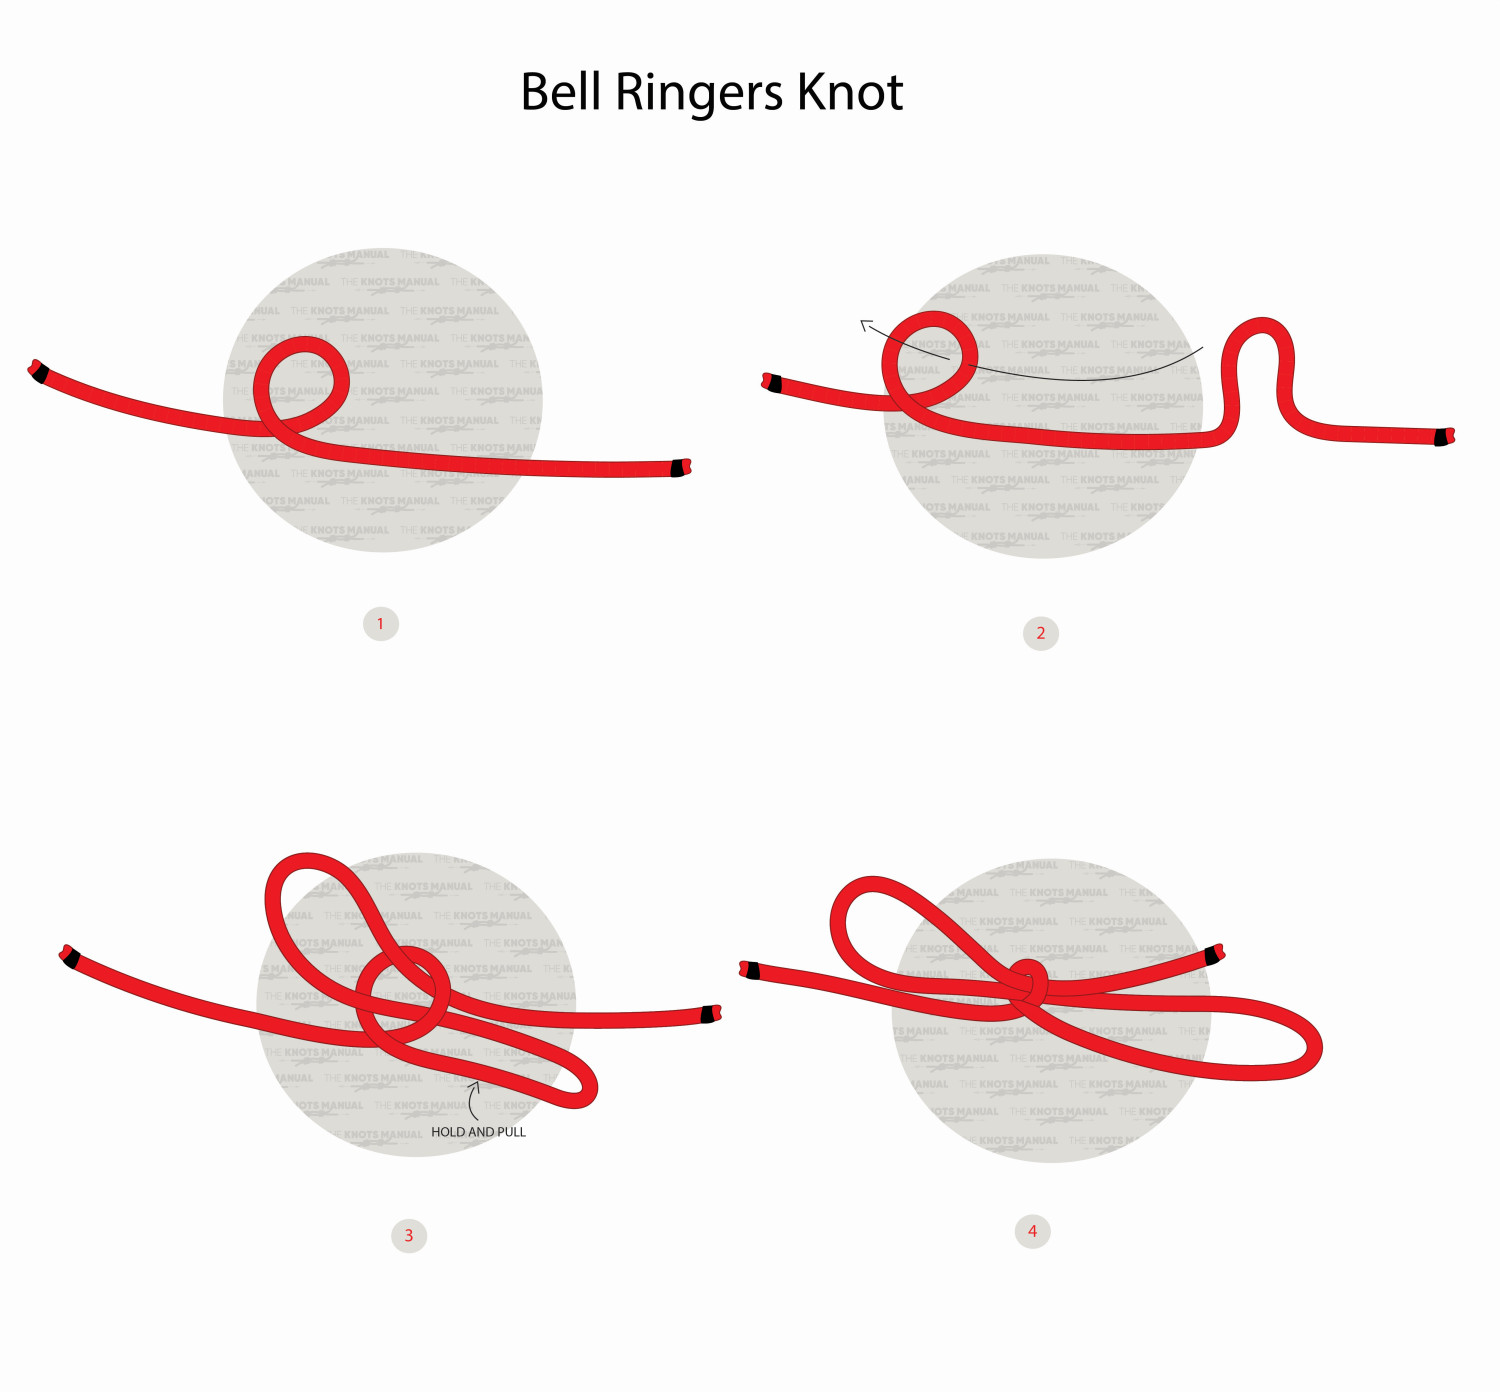
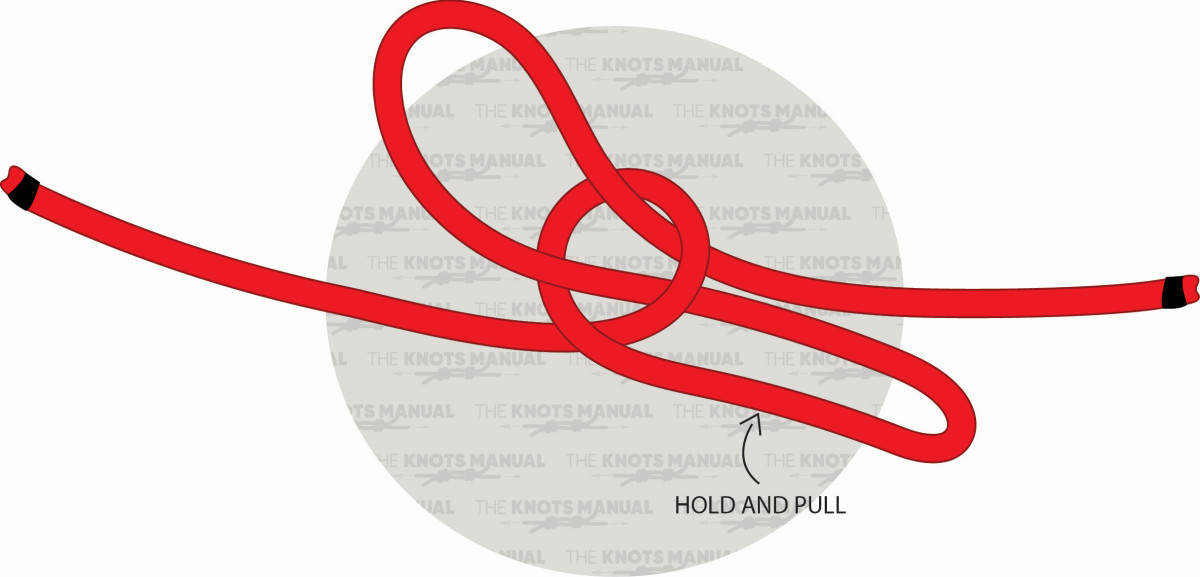
To tie a Bell Ringer’s Knot, make a loop in the rope. Then create a bight in the direction of the working end and pass it through this loop from the backside. Finally, pull the created loop opposite to the standing end of the rope to finish the knot.
Common Uses for the Bell Ringers Knot
The Bell Ringers Knot is used to temporarily shorten a rope. Its name comes from the fact that it was used to shorten the rope that was used to ring a church bell. After ringing it, a quick Bell Knot would be tied on the end of the rope to make it shorter, so that it wouldn’t lie on the ground.
You can use it anytime you need to temporarily shorten a rope. For example to shorten the rope that’s used to open or close older awnings and window shutters.
Pros and Cons of the Bell Ringers Knot
The Bell Ringer’s Knot is very easy to tie and it can be tied in seconds, even when using only one hand.
Another benefit is that the other end of the rope doesn’t need to be free to tie it. You can tie a Bell Ringers Knot in the middle of a rope.
It’s meant to only temporarily shorten a piece of rope, so it isn’t very strong. It can easily hold the rope weight, but it isn’t secure enough for attaching it to something or loading the loop with weight.
Knots Like the Bell Ringers Knot
Two Half Hitched Bell Ringers Knot: If you make two loops in step 1, about 10 inches from one another, and then pass the bight through both of them, you’ll make a Two Half Hitched Bell Ringers Knot. It’s more secure and allows you to shorten the rope even more.
Toggled Bell Ringer Knot: To make a Bell Ringers Knot more secure, you can put a pin between the unused loop and the standing end. This will allow you to add some weight to the bottom loop if needed.
Sheep Shank Knot: This knot is formed by making two Bell Ringers Knots opposite to one another. This allows you to pull the rope by both rope ends in opposite directions, and it shortens the rope even more than a regular Bell Ringers Knot.
Quick Release Trucker’s Hitch: You’ll make this knot if, after making a Bell Ringer’s Knot, you create another bight and pass it through the bottom loop. It’s used to make a secure quick-release hitch, which is useful when securing loads to a truck bed or a car roof.
Bowline Knot: A knot with a very similar structure to the Bell Ringers Knot. Except here, instead of passing through a bight in step 2, the working end of the rope is used and it’s passed underneath the standing end. This results in a very reliable fixed loop. It’s often referred to as the King of Knots.
Step-By-Step Guide: How to Tie a Bell Ringers Knot
A step-by-step guide on how to tie a Bell Ringers Knot.
Step 1:
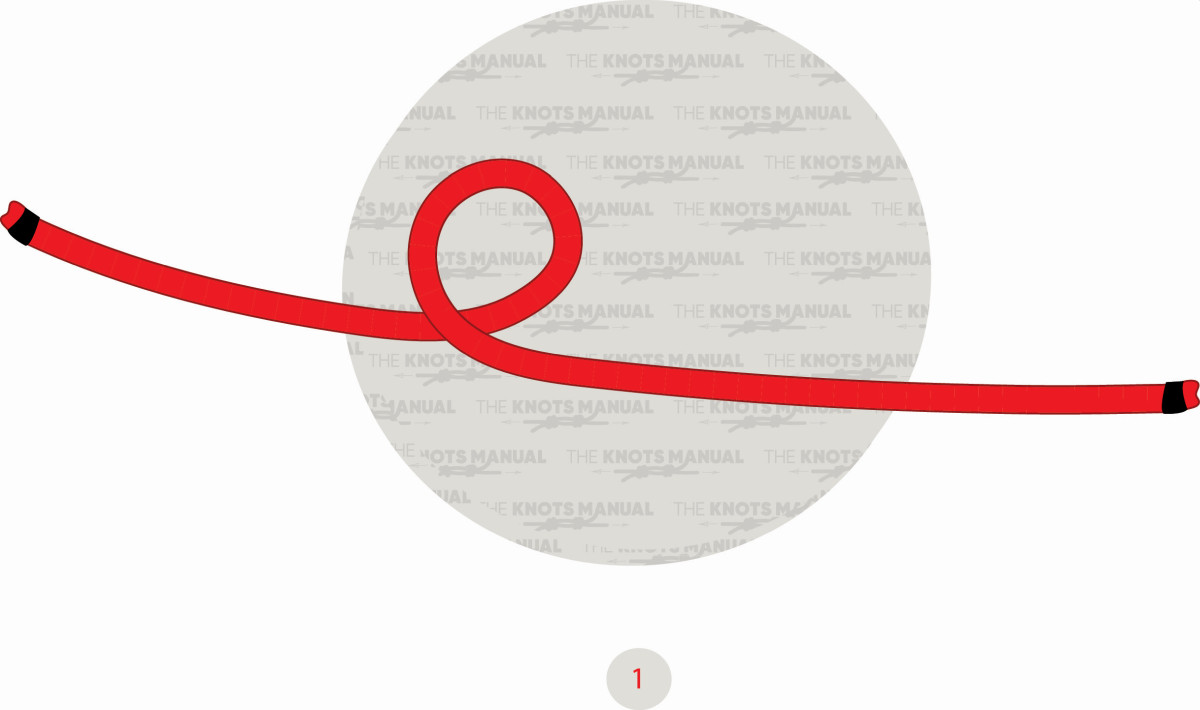
Make a loop in the rope.
Step 2:
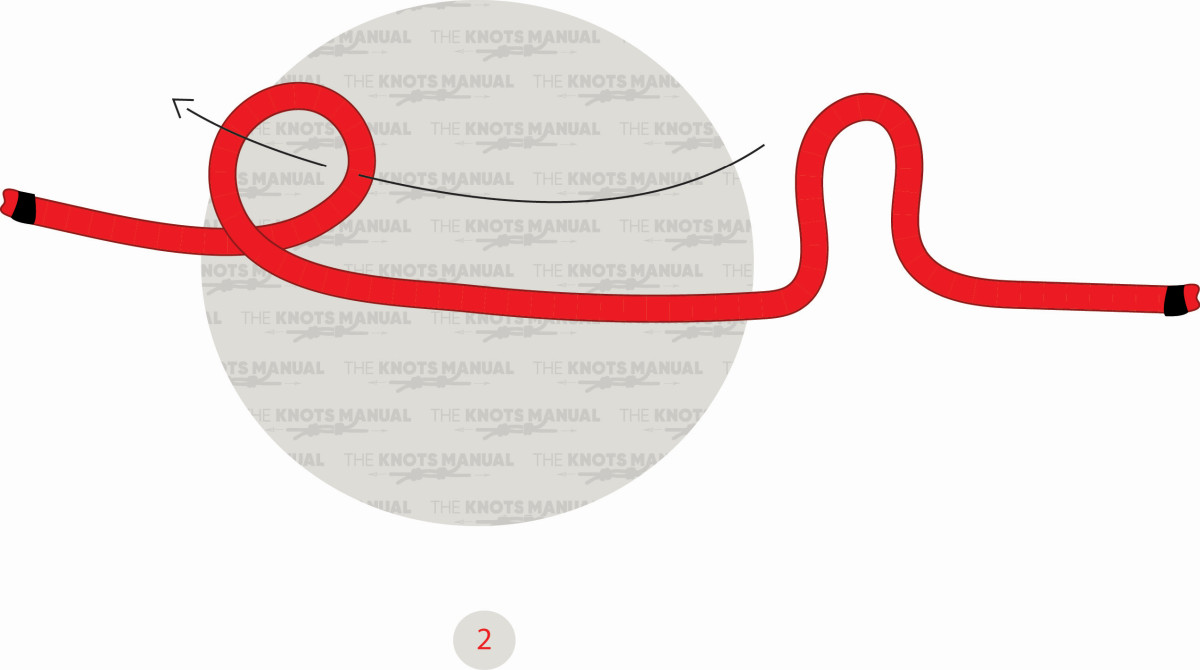
Make a bight and then pass it through the loop from the backside.
Step 3:
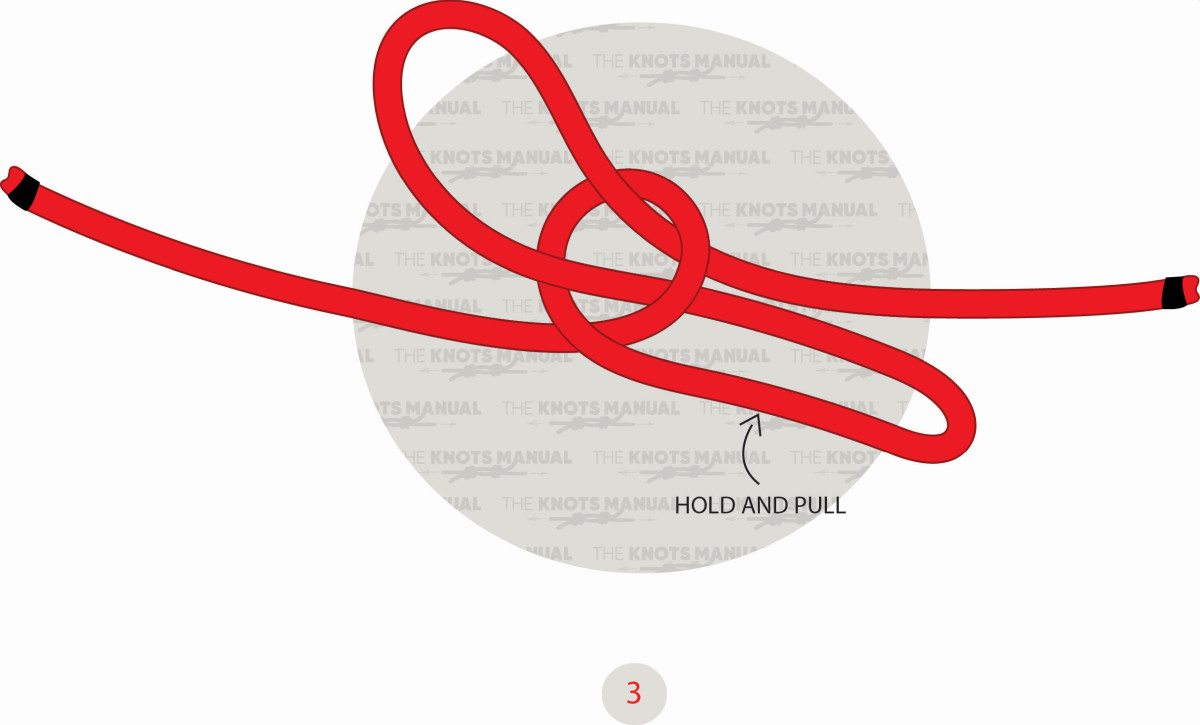
Load the newly created loop with weight and pull opposite to the other end of the rope.