The Quick-Release Trucker’s Hitch is a variation of the standard Trucker’s Hitch. With it, you can secure and untie long loads to your truck or trailer, in a zig-zag pattern, and using only one long rope.
Quick Guide: Tying a Quick Release Trucker’s Hitch Knot
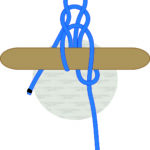
To tie the Quick Release Trucker’s Hitch, one side of the rope (side A) needs to be attached to an anchor with a more permanent hitch. Side B (the working end) should be free but left very long to continue tying other Quick Release Trucker’s Hitches after it.
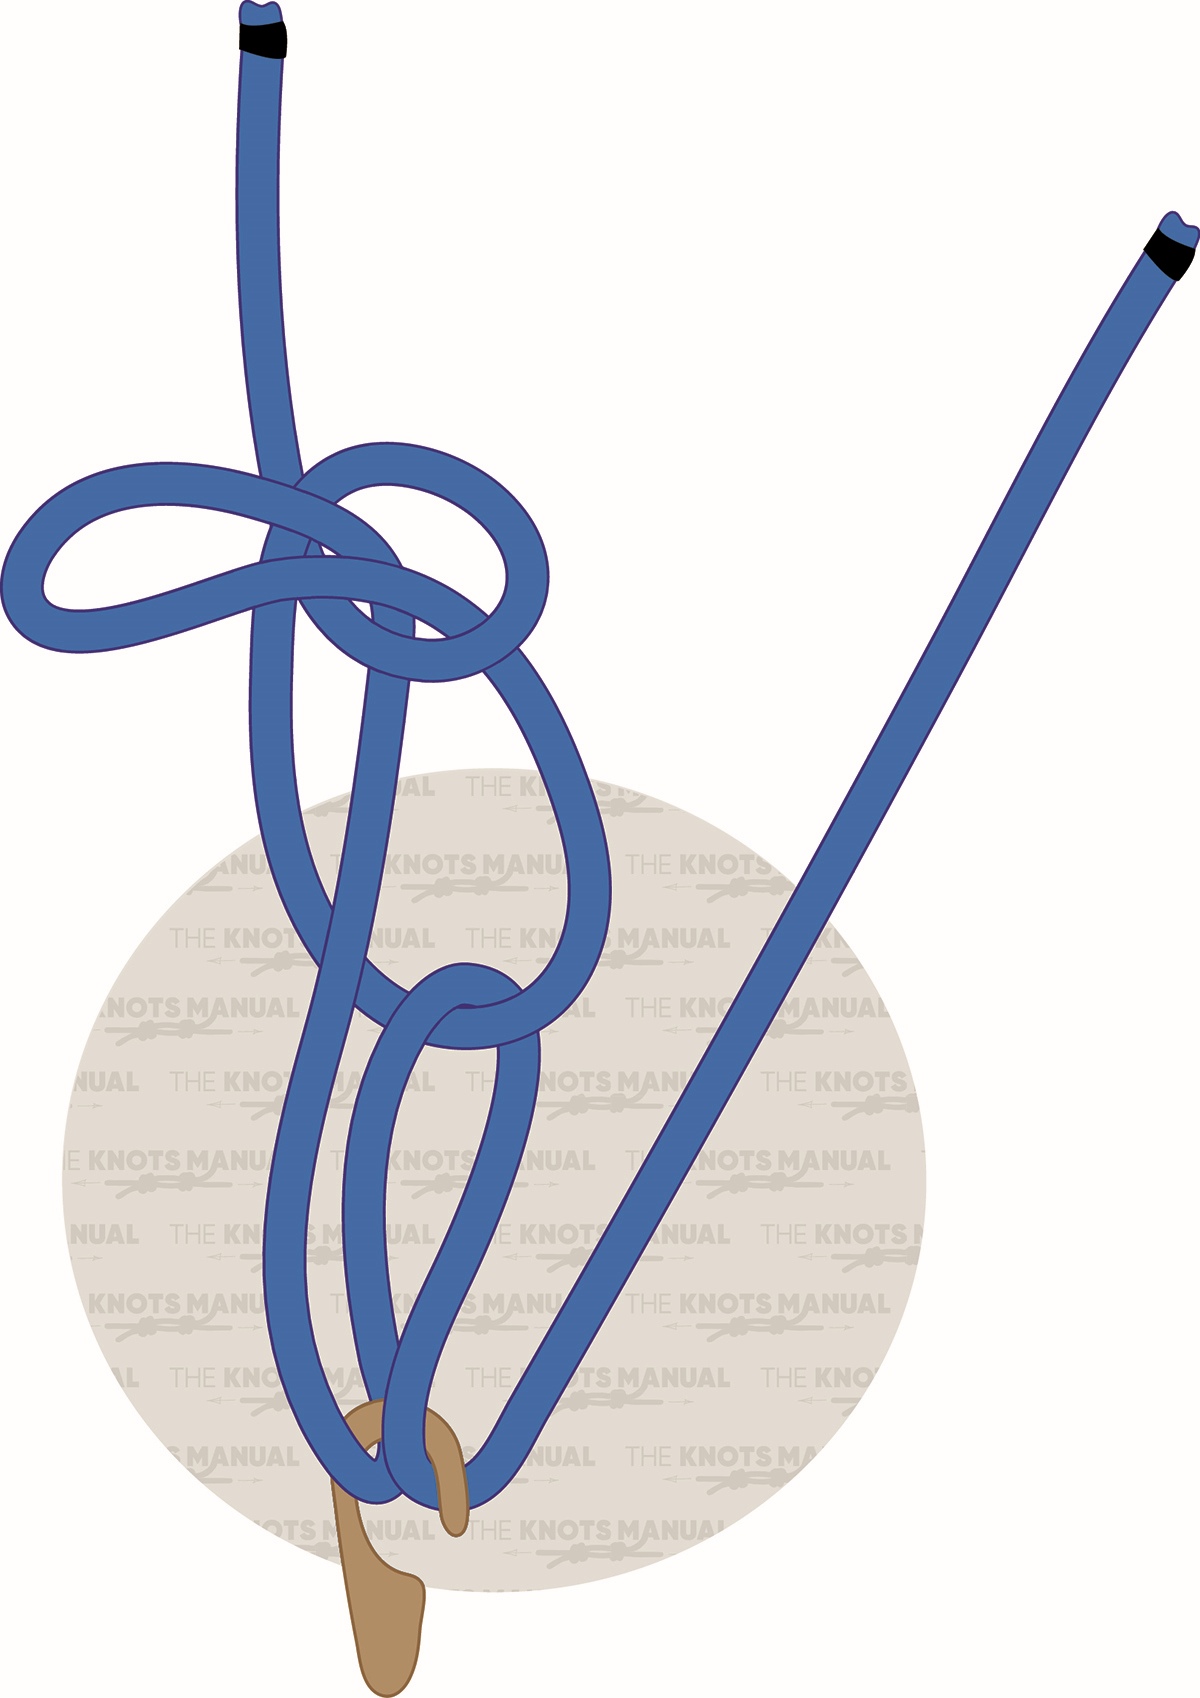
Make a loop by twisting the rope (1b). Then create another bight (step 2) and pass it through the first loop (step 2a). Now create another bight, pass it through the bottom loop (step 3), and pass it through the anchor hook (step 3a). You’ve now created a Bell Ringer’s Knot. Make sure to tighten it fully by pulling the working end before continuing. Finally, pass the working end over the hook once again (step 4) and tighten everything to finish the knot.
About the Quick Release Trucker’s Hitch
The Quick Release Trucker’s Hitch Knot is meant to be tied in a zig-zag pattern. It uses only one, longer rope to secure long loads to your trailer, truck, or car roof. Both ends of the rope should be attached to anchors with secure hitches, like an Anchor Hitch.
When tying it, you start by tying the first end of the rope on one side of the load with an Anchor Hitch. Then you continue on the other side with a Quick Release Trucker’s Hitch. Continue switching sides and doing Quick Release Trucker’s Hitches in a zig-zag pattern until you reach the end of the load. Secure the end of the rope with another Anchor Hitch.
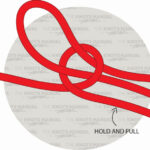
This technique provides one of the fastest ways of securing a load on a car. When you’re finished, just pull one of the Bell Ringer’s Knots down to release tension and untie the load.
Dangers of Using the Quick Release Trucker’s Hitch
This technique has been used for a very long time to secure loads to horse wagons and even in modern trucking. But it has some dangers because the Bell Ringer’s Knot isn’t a very reliable knot. It can untie very easily if something brushes against it. So only use it when there is nothing that can brush against the knot.
The loop on the Bell Ringer’s Knot should be left short because this way it’s much less likely to come undone.
It’s also important to tension the load very tightly to lose any slack in the rope. Otherwise, this could also make the Bell Ringer’s Knot come loose.
And finally, you should only use the Quick Release Trucker’s Hitch with natural ropes. Modern synthetic ropes are much more likely to slip, so the Bell Ringer’s Knot doesn’t hold much tension with them.
Other Variations of the Trucker’s Hitch Knot
Standard Trucker’s Hitch Knot: This version is much more secure than the Quick Release Trucker’s Hitch, which is why it’s much more widely used. It also incorporates a mechanical advantage mechanism, which allows to tension of the load very effectively.
Auto Locking Trucker’s Hitch Knot: In this variation, more friction is introduced, which allows you to tighten the load more effectively. It’s as secure as the Standard Trucker’s Hitch and preferred by most people.
Bell Ringer’s Knot: This knot is used in the formation of the Quick Release Trucker’s Hitch. It was originally used by bell ringers to temporarily shorten their ropes.
Step-By-Step Guide: How to Tie a Quick Release Trucker’s Hitch Knot
A step-by-step guide on tying a Quick Release Trucker’s Hitch Knot.
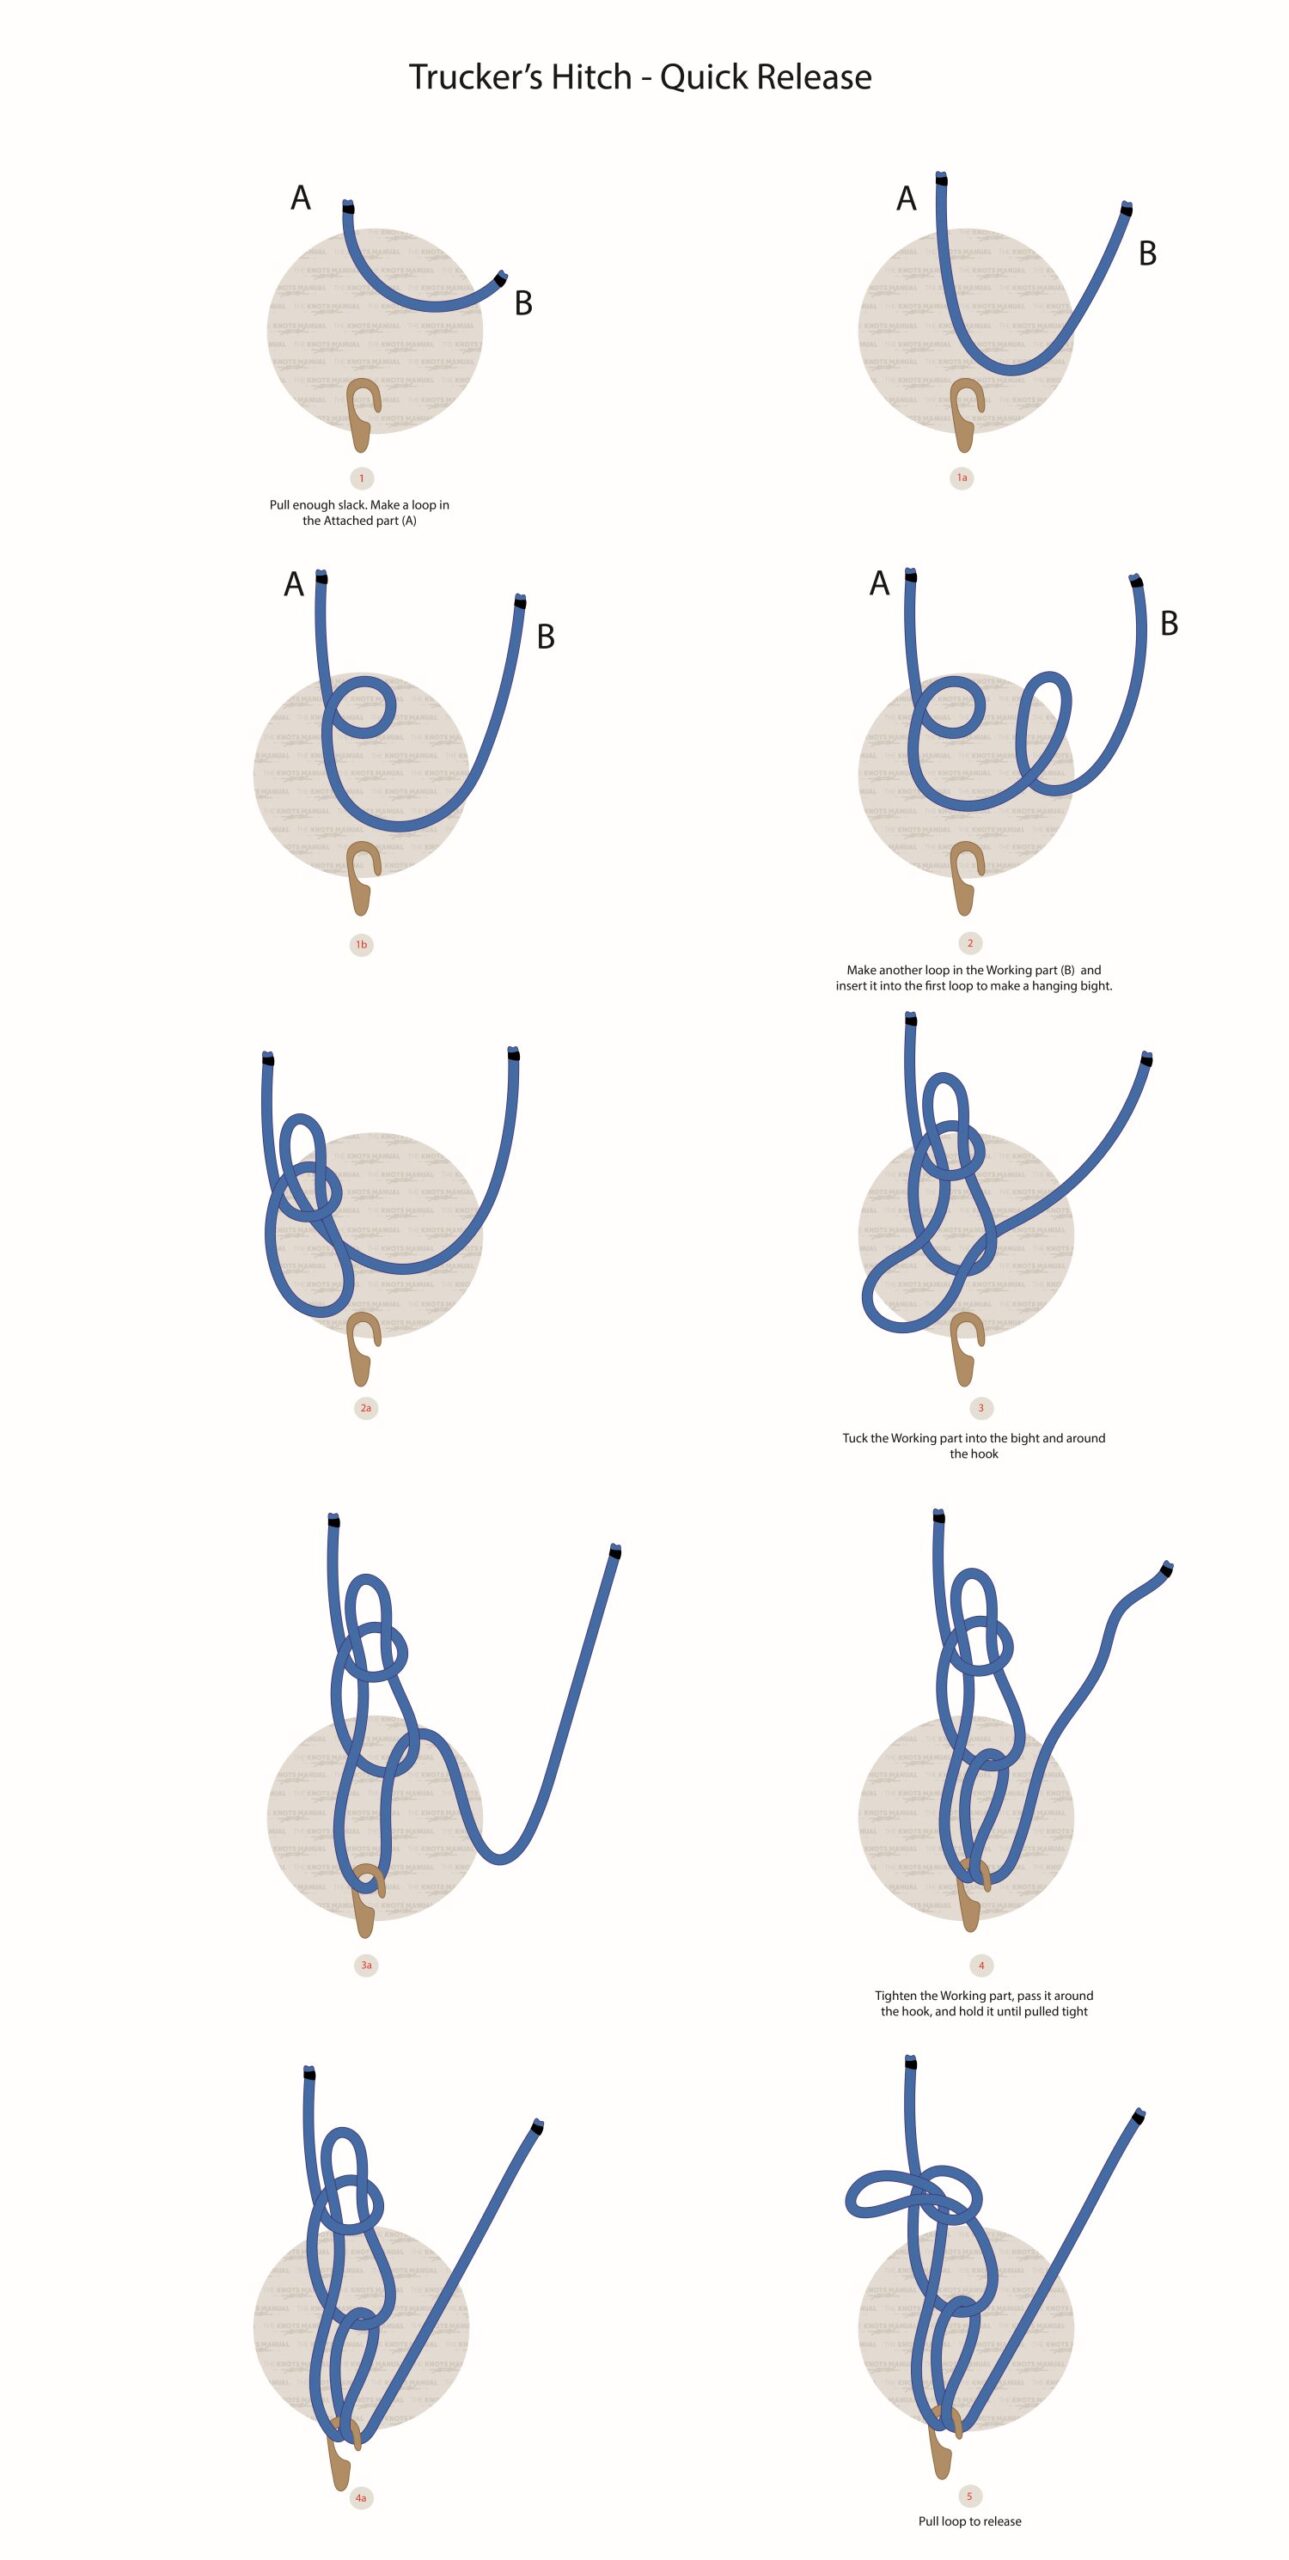
Step 1:

In our illustration, part A should be attached to an object, and part B should be free, but left very long.
Step 1a:
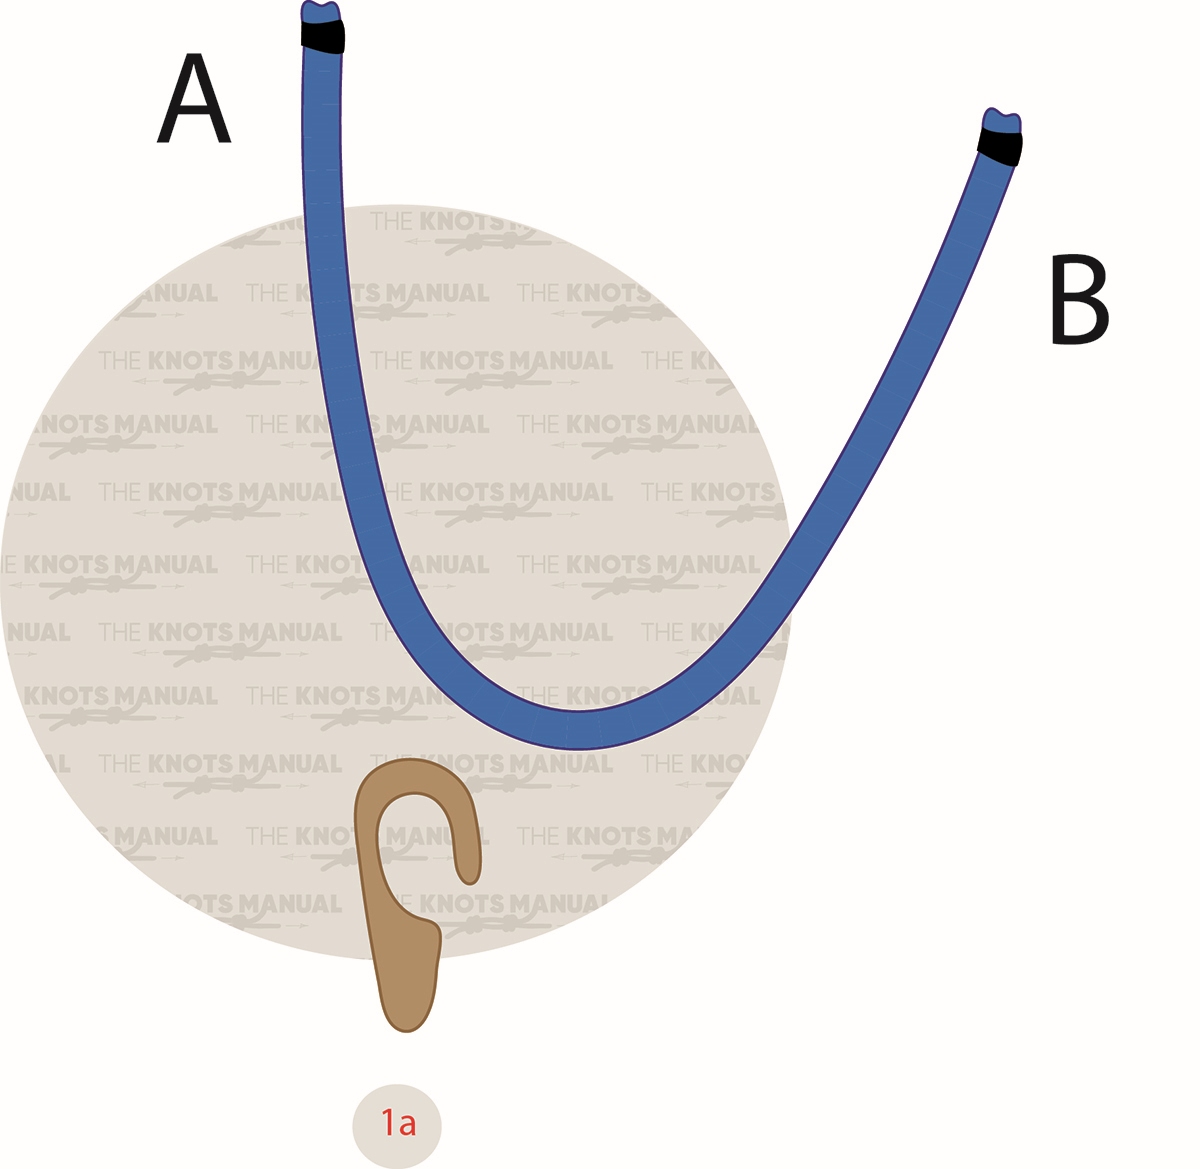
Pull enough slack in the rope to tie the knot.
Step 1b:
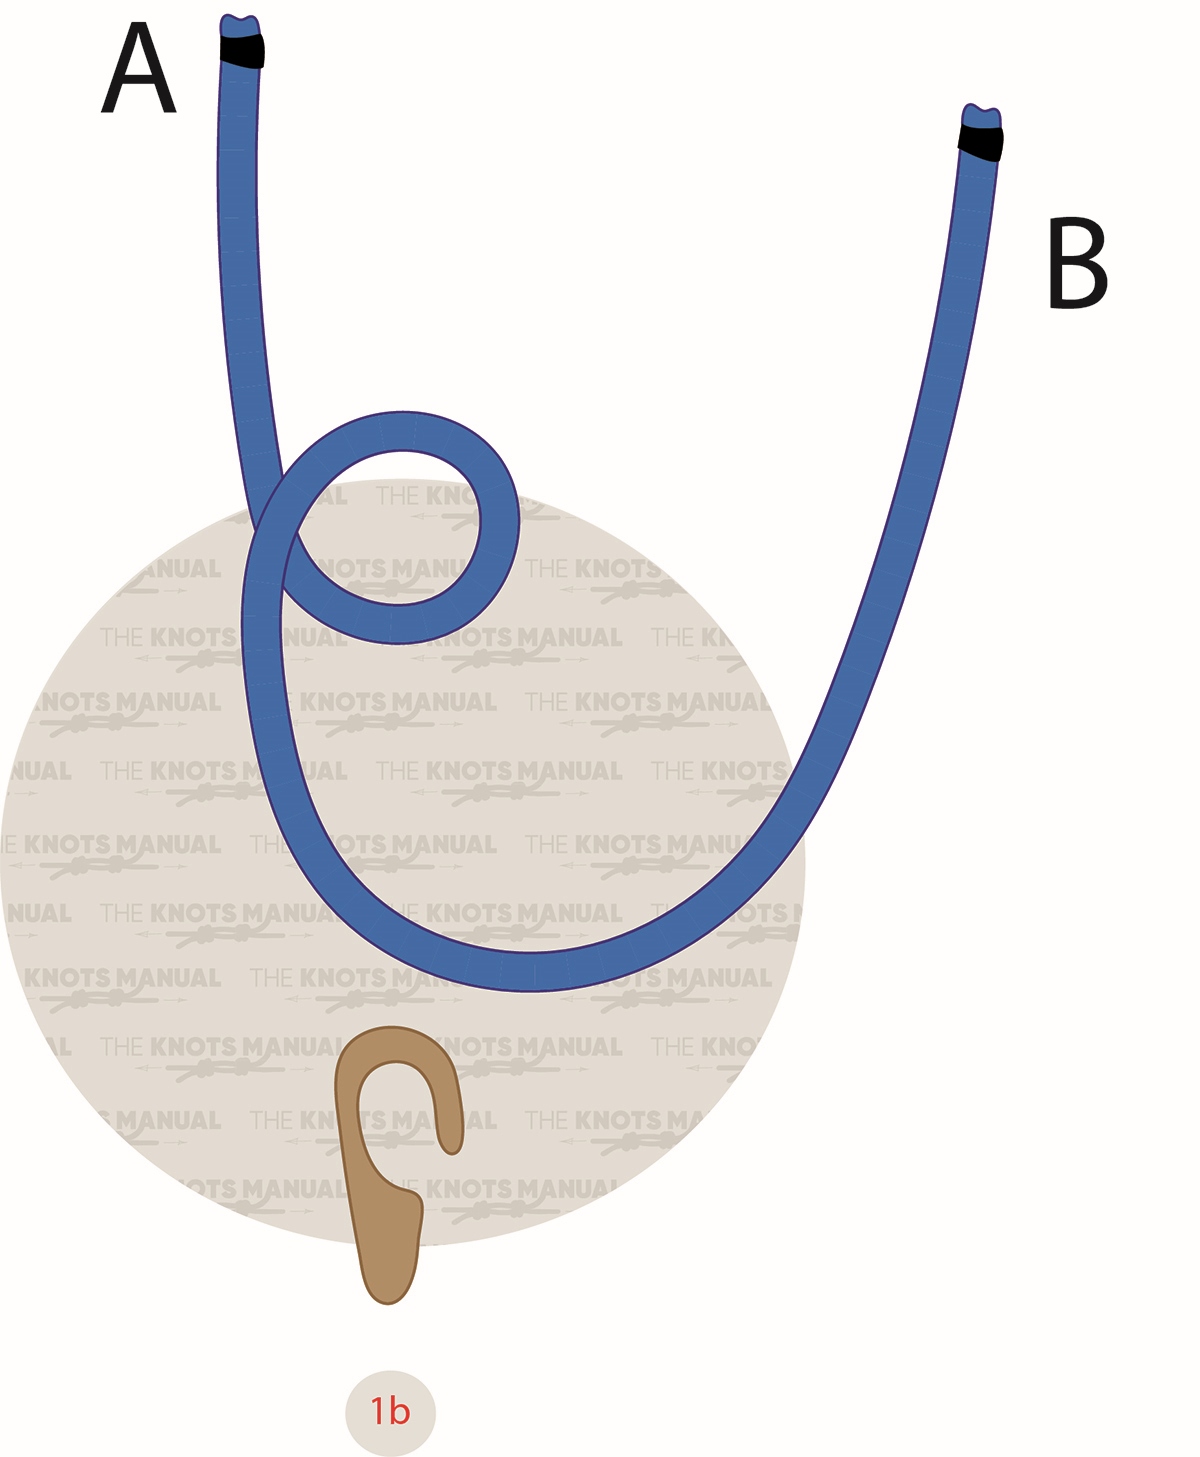
Make a small loop in the rope.
Step 2:
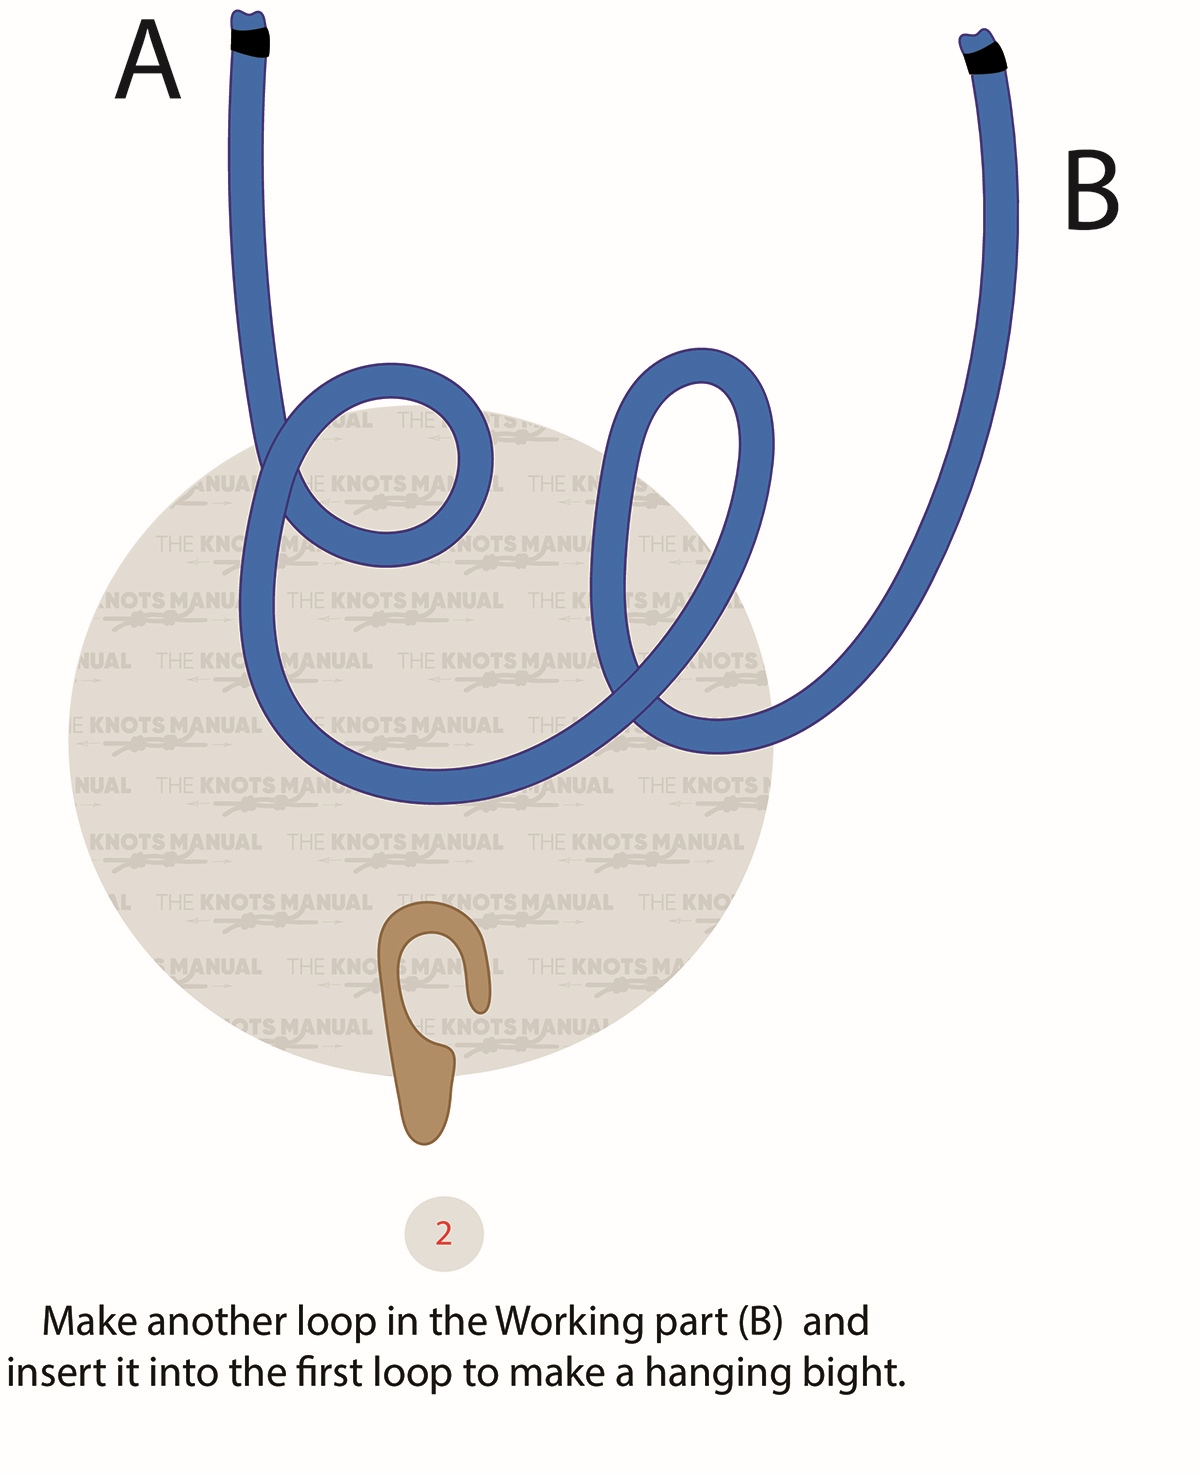
Make another loop the other way, towards the working end (B).
Step 2a:
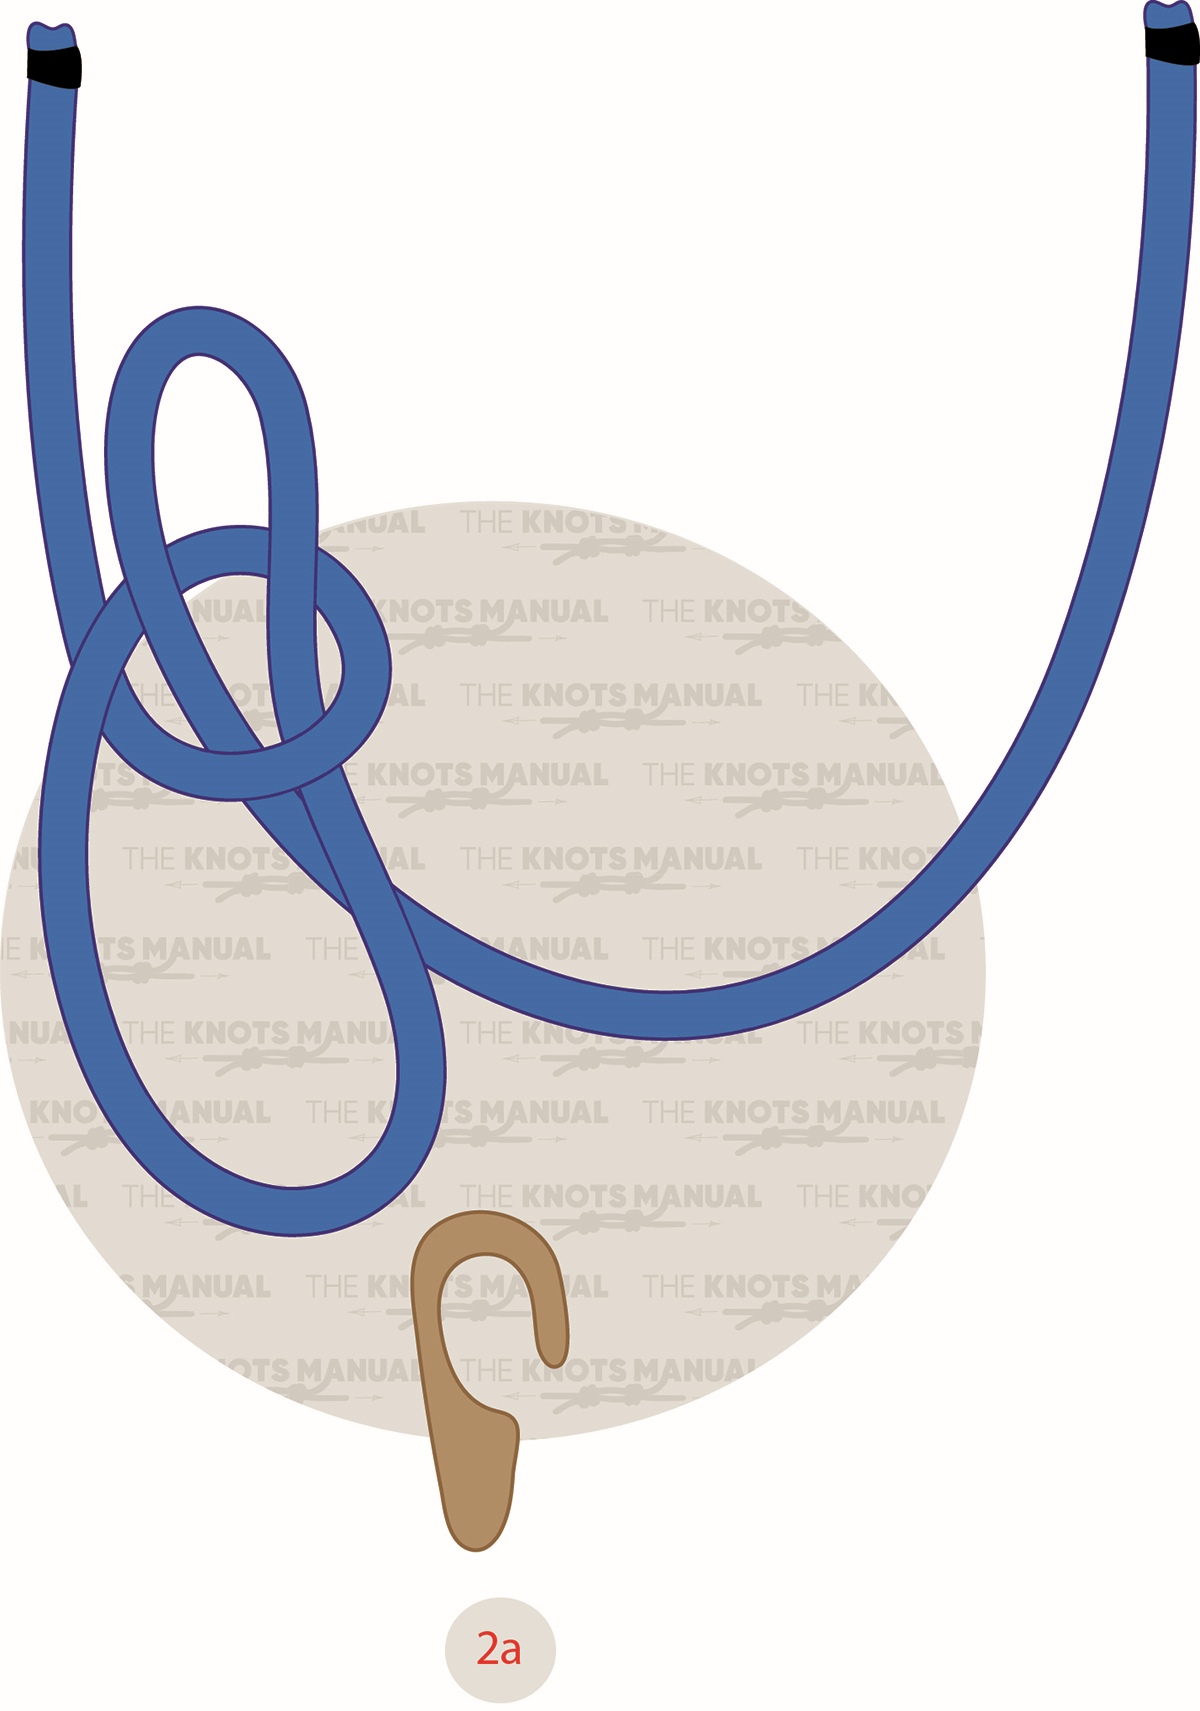
Pass the second loop through the first one to create a Bell Ringer’s Knot.
Step 2b:

Create another bight in the working end (B) and pass it through the bottom loop.
Step 3a:
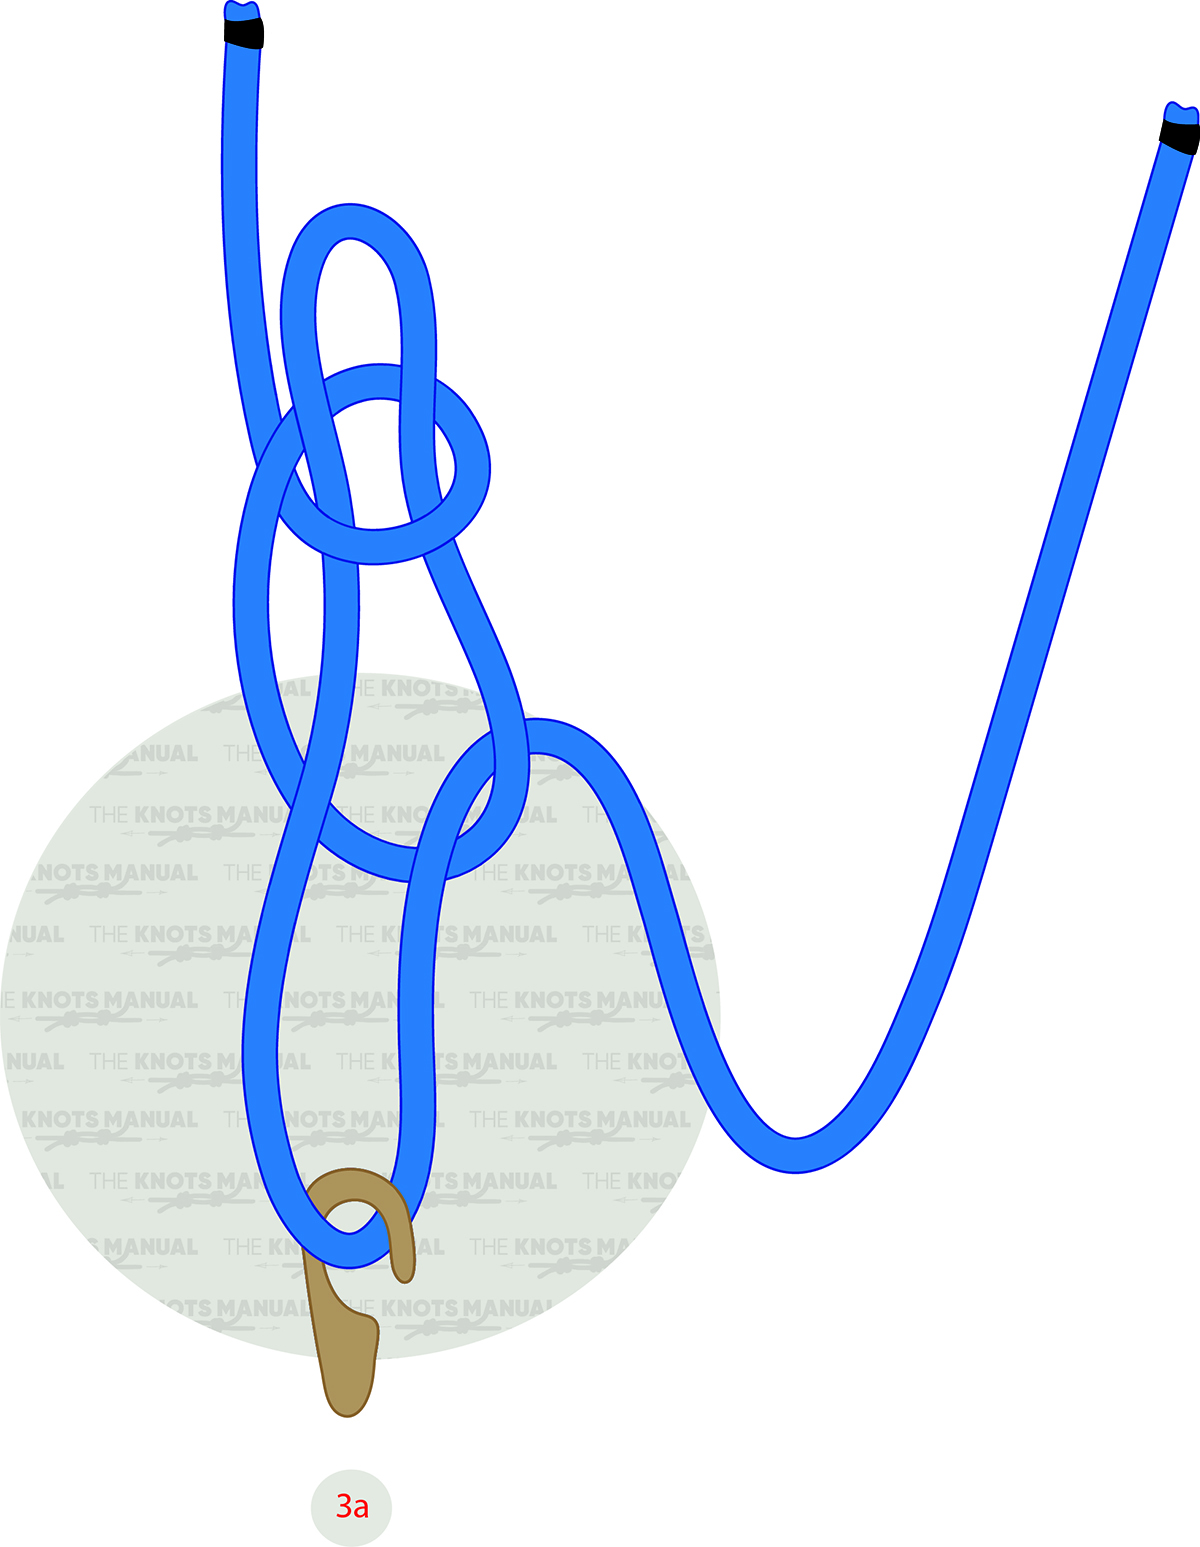
Attach the newly formed bight to a hook and pull the working end (B) as hard as you can. This will tighten the Bell Ringer’s Knot.
Step 4:
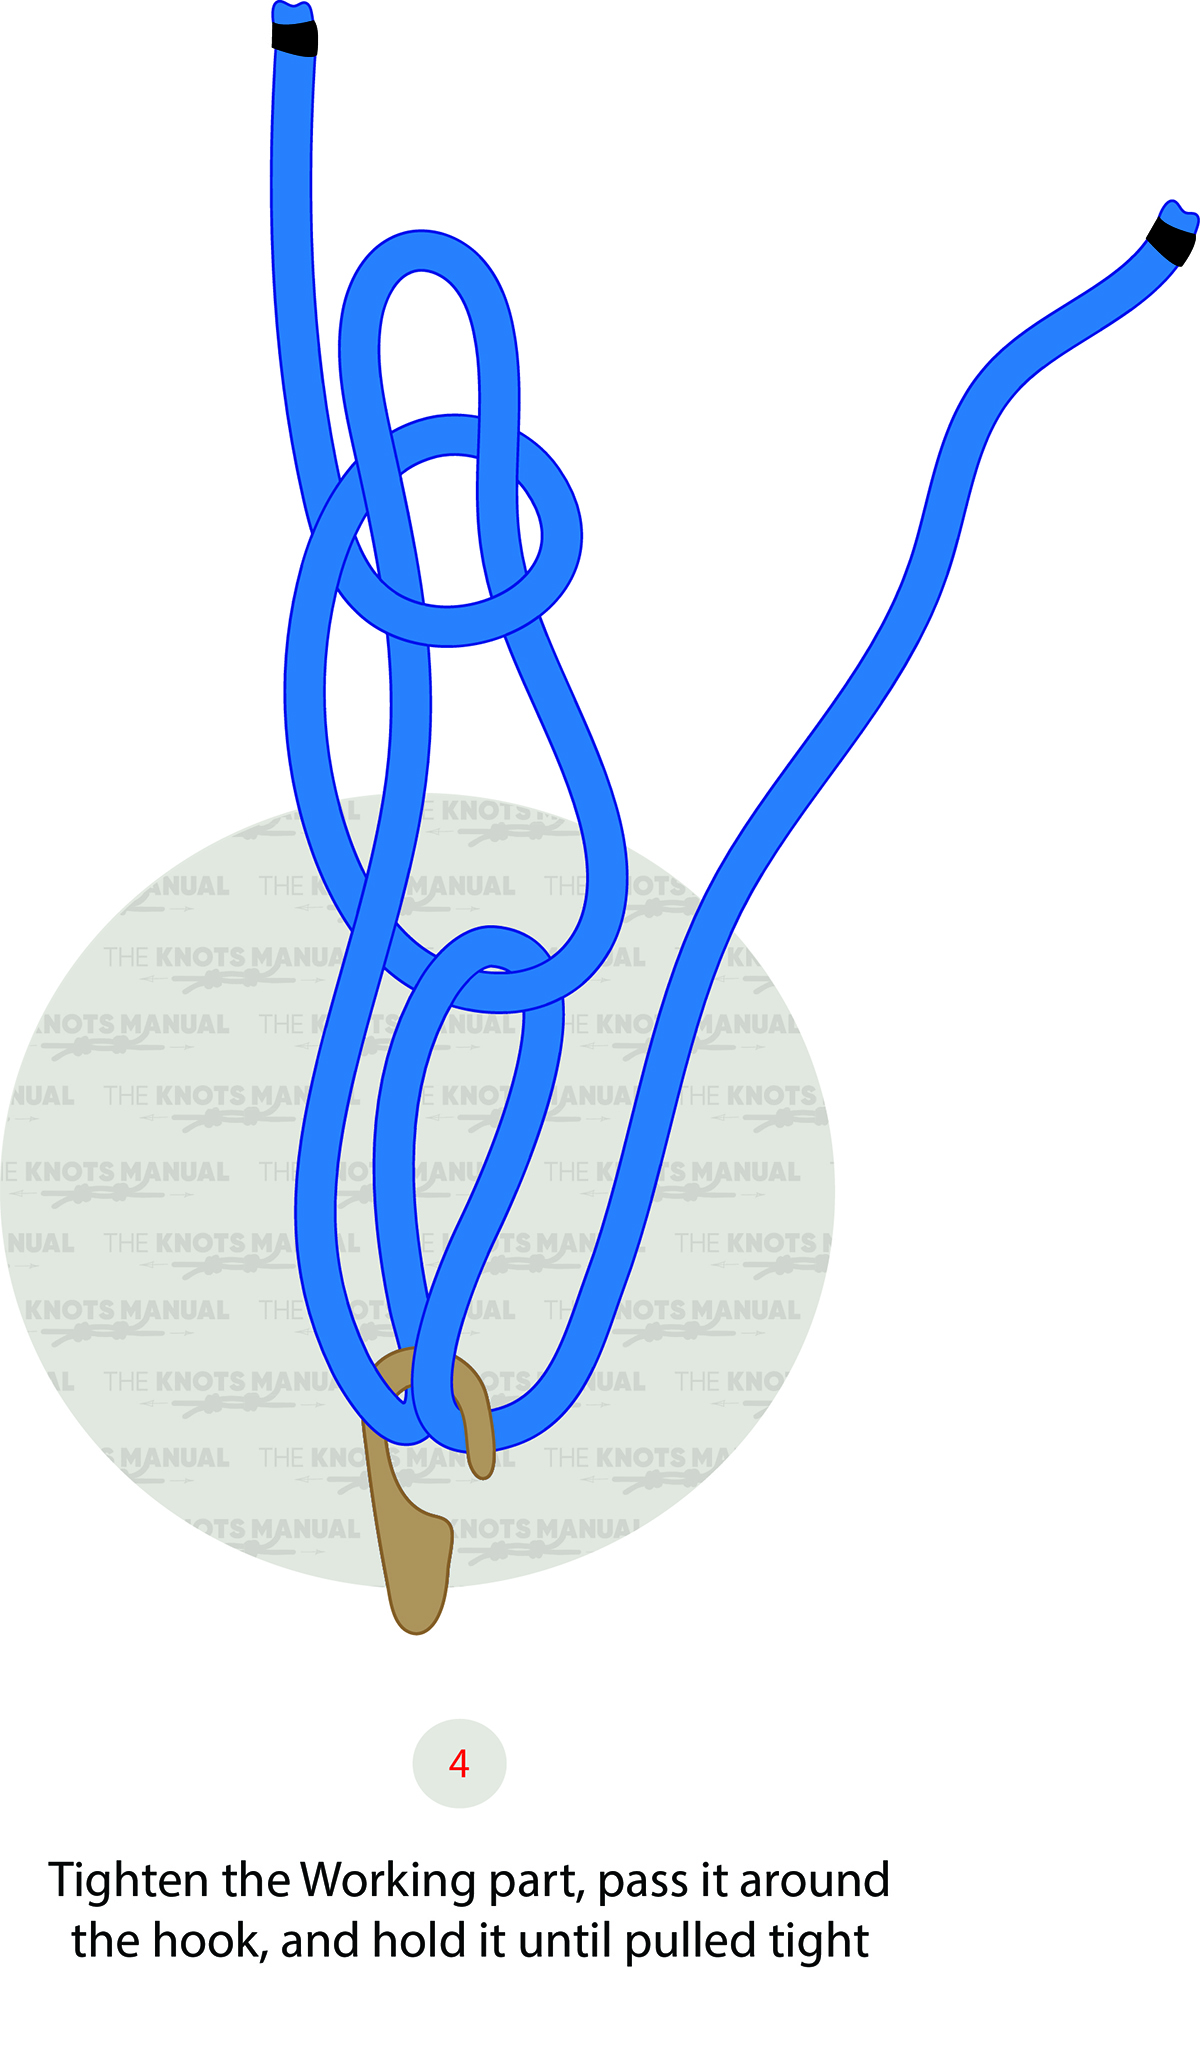
Make another bight on the working end and pass it through the hook.
Step 4a:
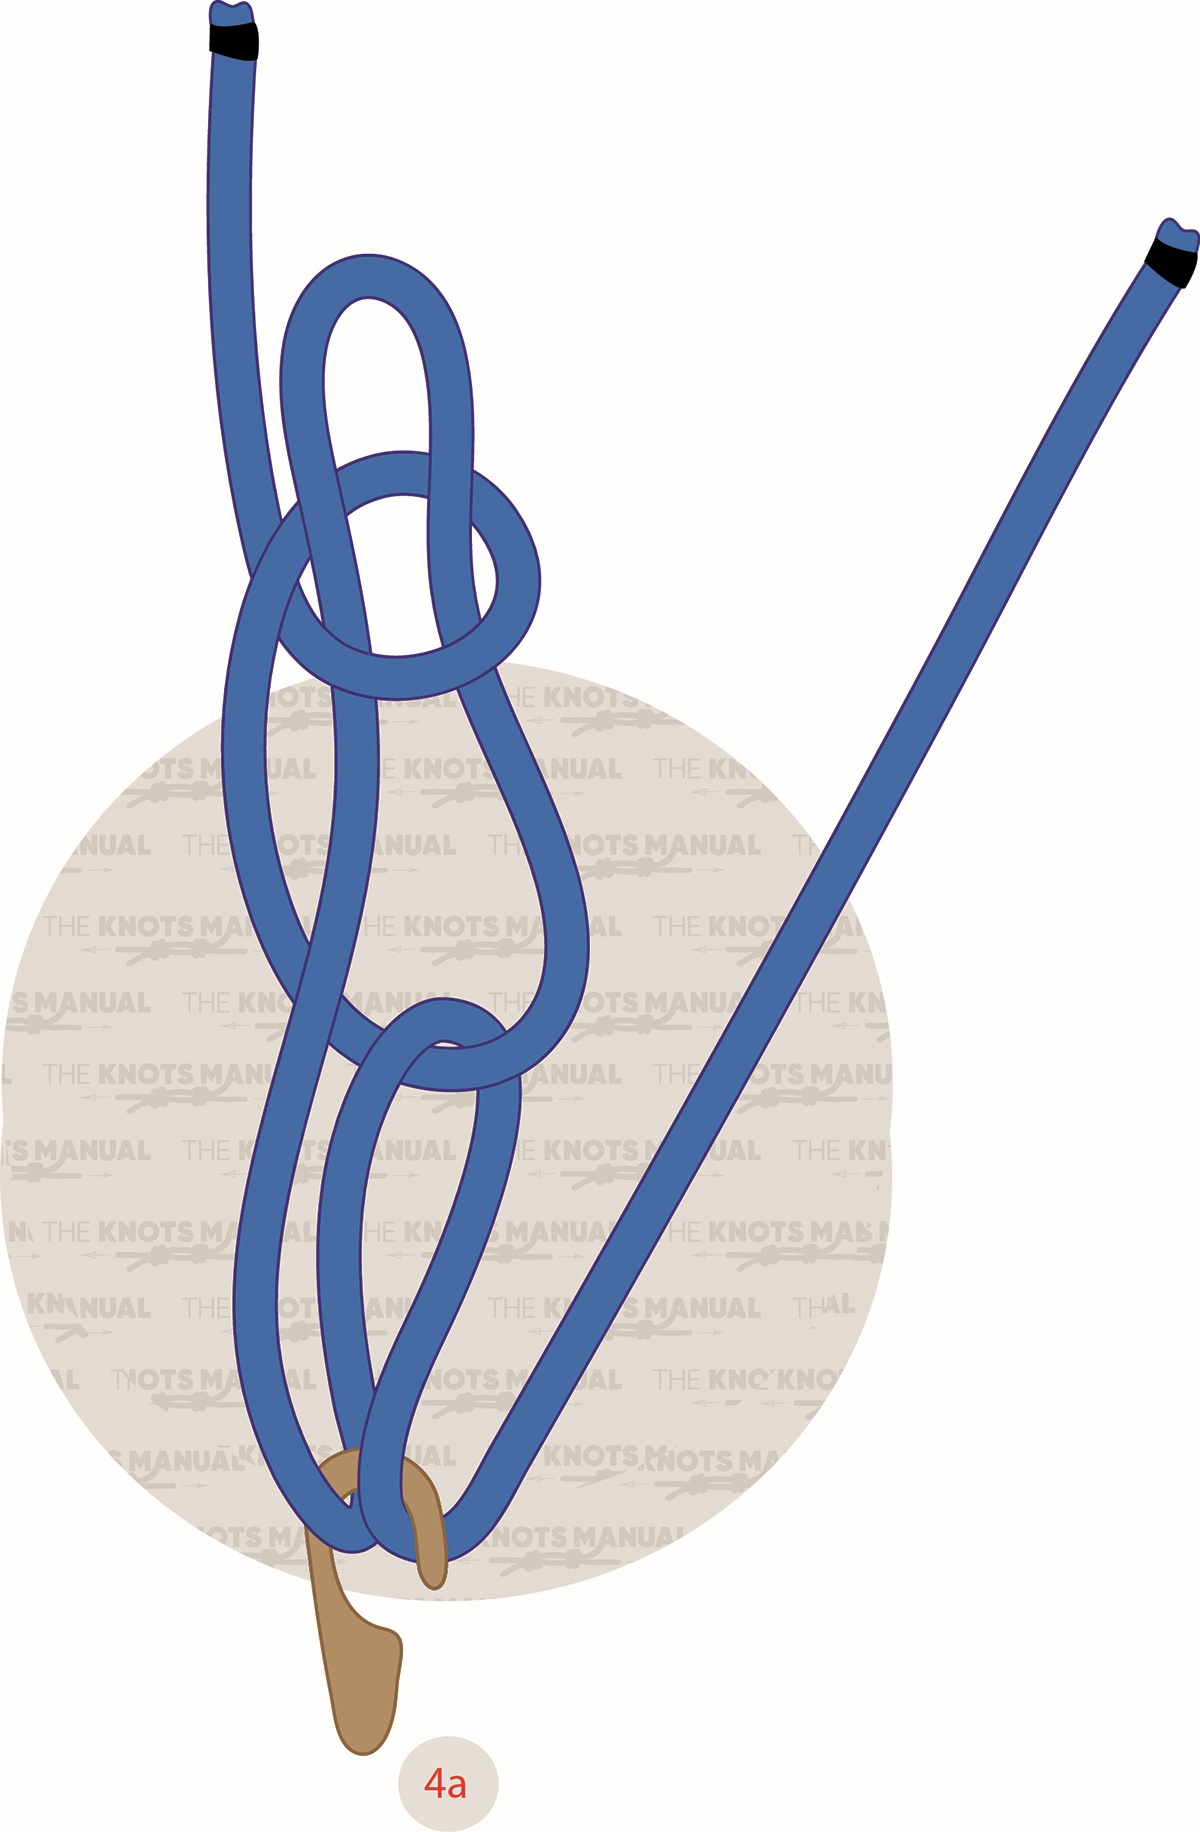
Tighten everything again before tying the next Quick Release Trucker’s Hitch on the other side.
Step 5:
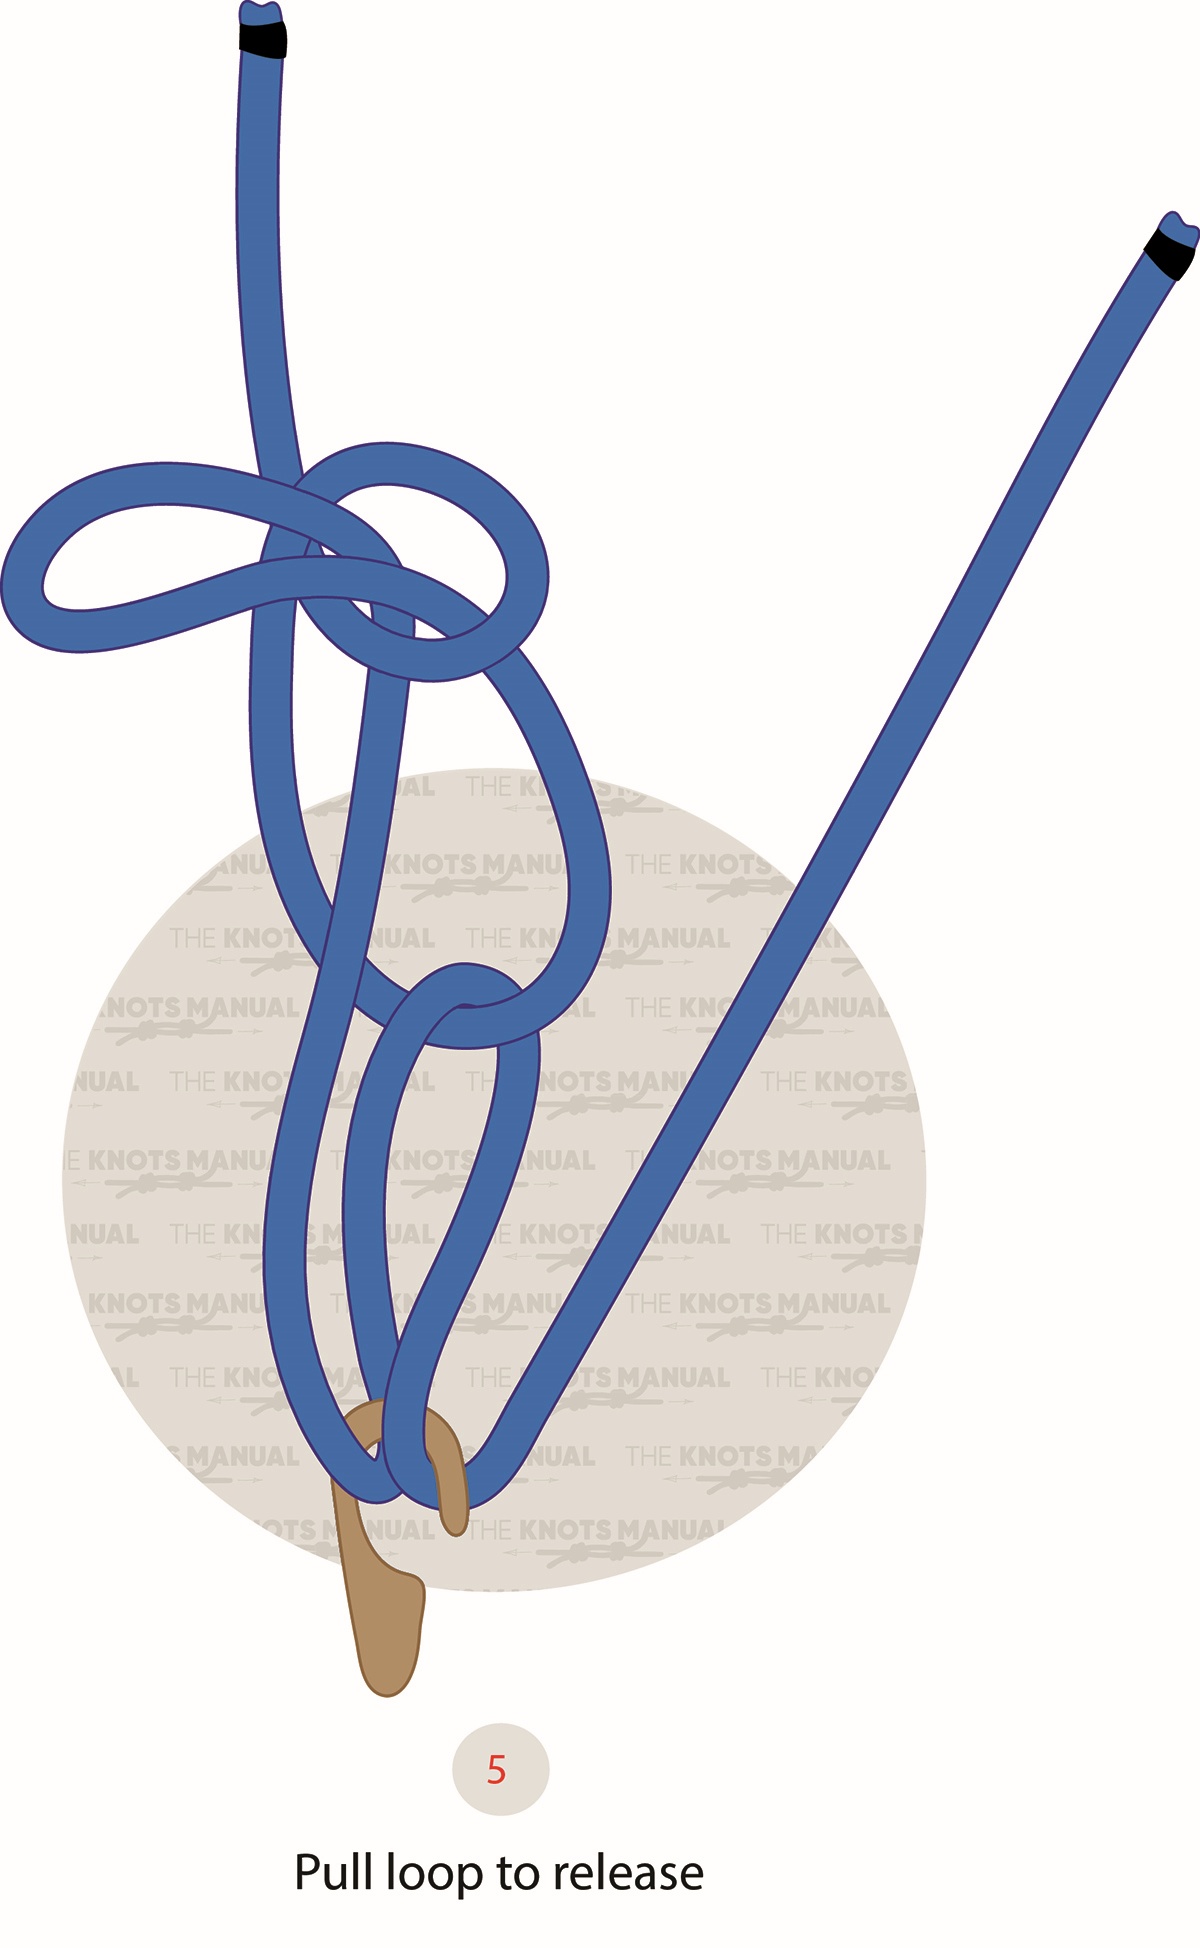
To release the knot under tension, pull the loop downwards, which will disassemble the Bell Ringer’s Knot.