The Chain Sinnet Knot creates a series of closed loops (chains) in the middle of a rope. Its main purpose is to shorten the length of the rope to keep it from tangling up later on.
It’s known under other names as well, like the Daisy Chain, Single Bugle Braid, Single Trumpet Braid, Chain Stitch, Monkey Chain, and Monkey Braid.
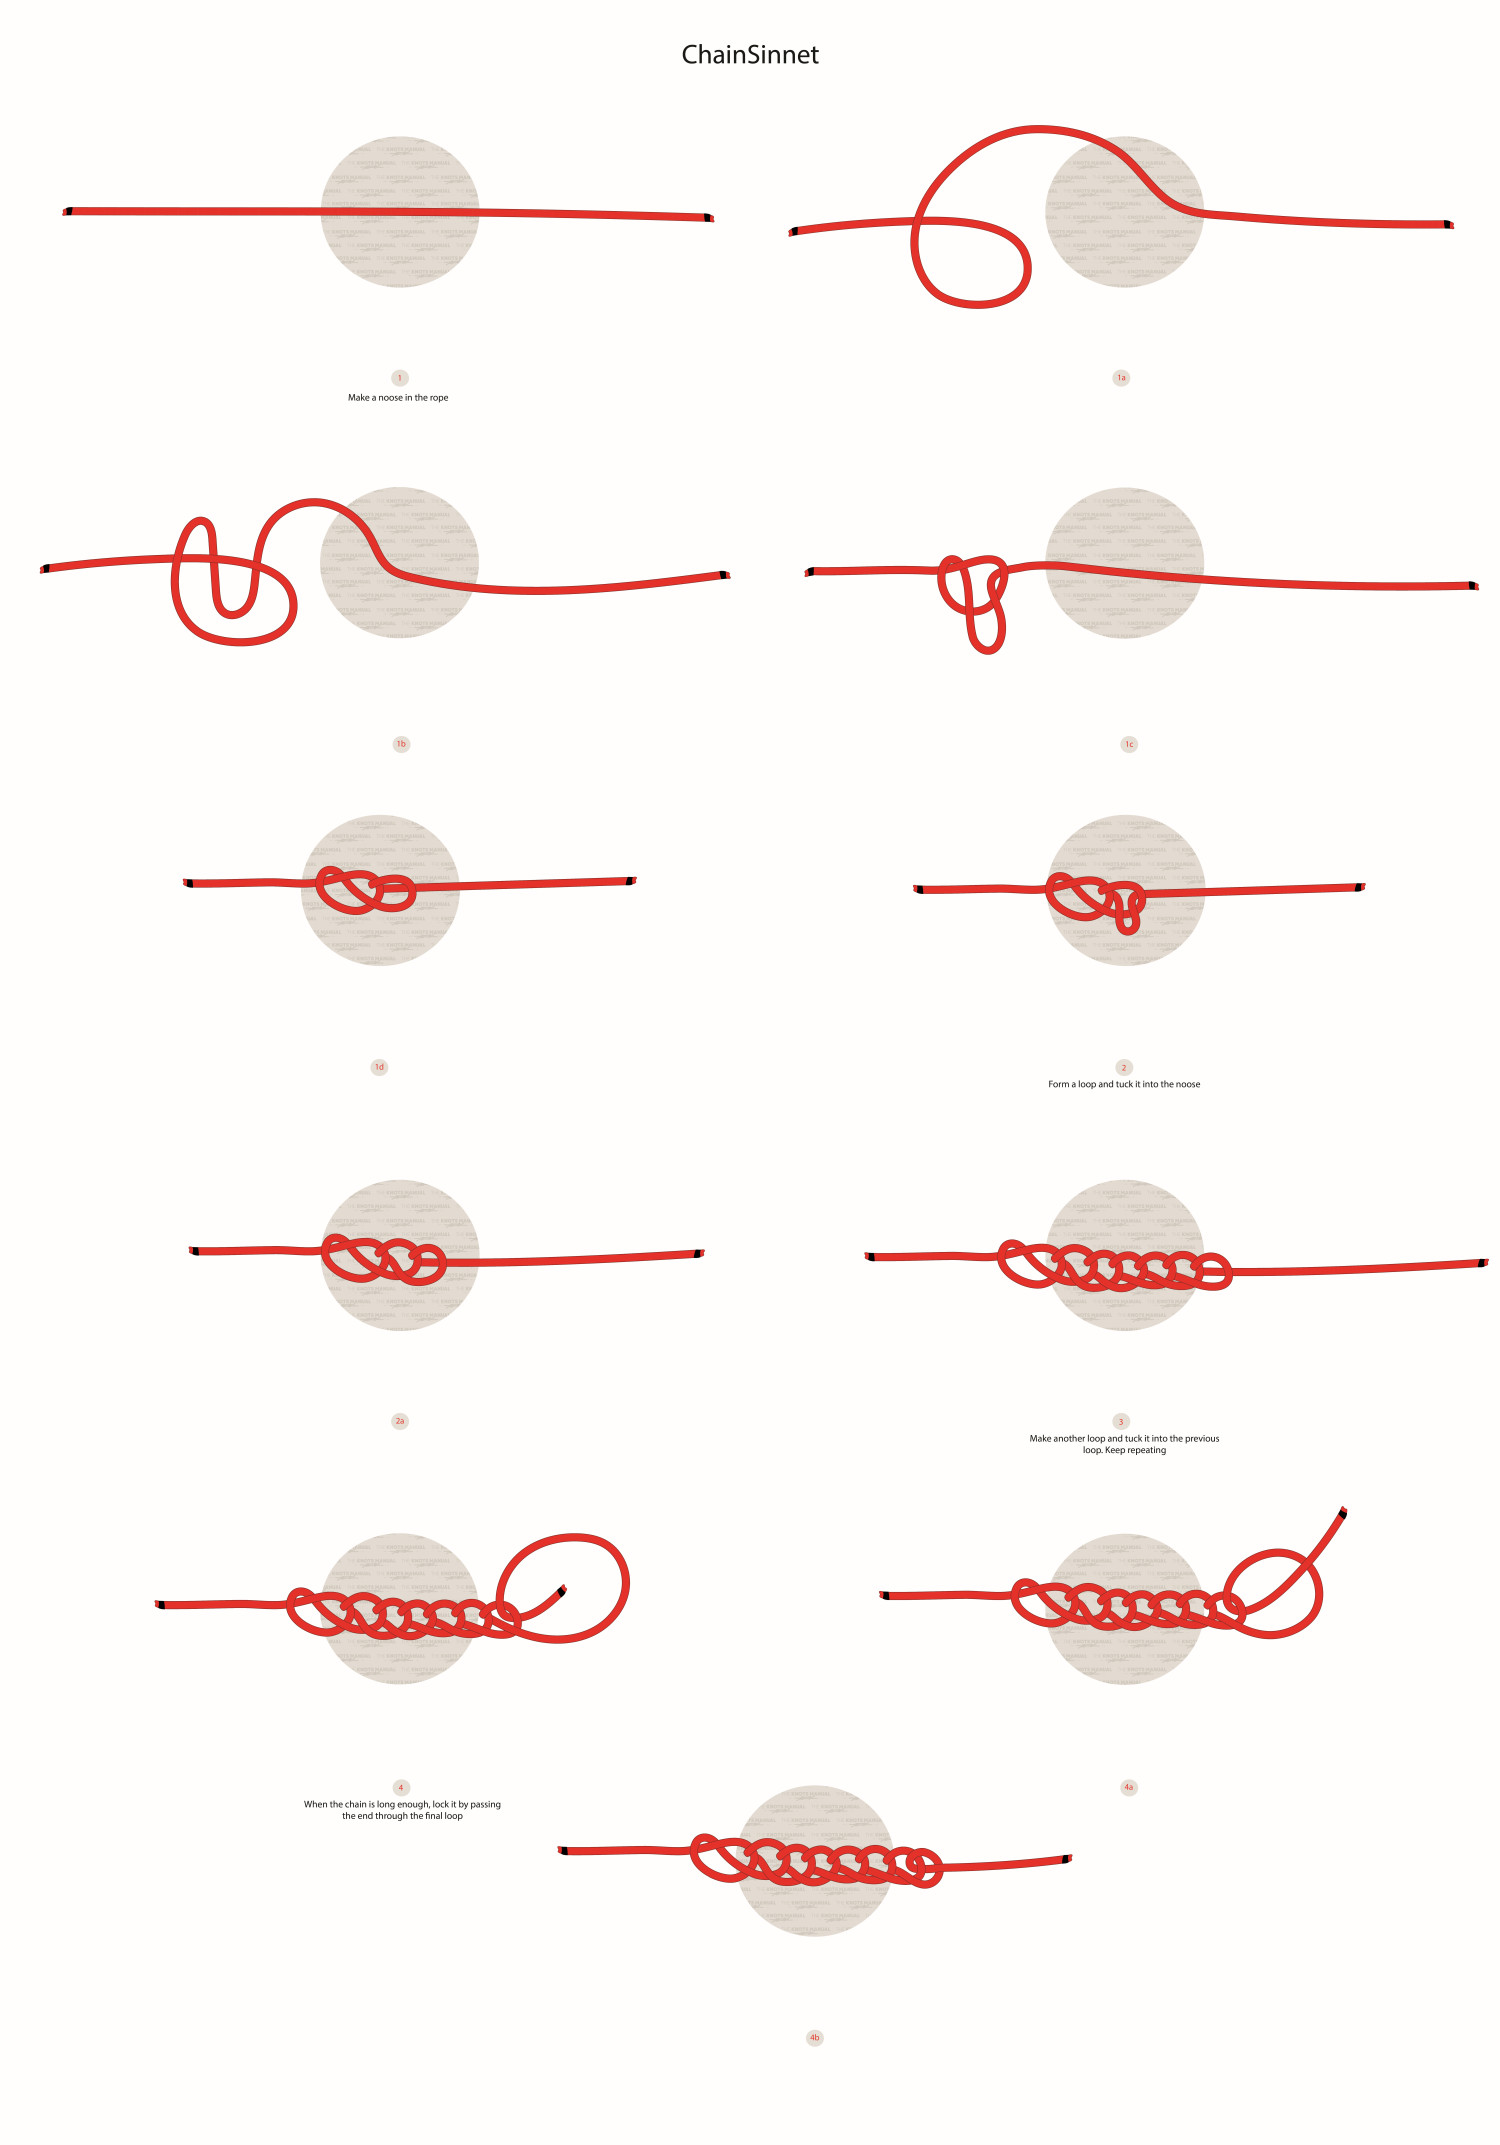
Quick Guide: Tying the Chain Sinnet Knot
To tie the Chain Sinnet Knot, create a loop in the middle of a rope (Step 1a). Then create a bight in the working end of the rope and tuck it through the loop from the backside (Steps 1b-1d). Repeat this as many times as you want (Steps 2-3). Make the final loop larger and pass the end through it to finish the knot (Steps 4-4b).
With each loop (chain) that you do, tighten the last one first. This will make the chain sinnet much tighter and keep it from becoming longer later on as you load the rope with weight. For storage or washing, you can keep the loops larger and more loose.
If you’re doing this with a very long rope, you can fold it in half before tying this knot. This will essentially double its effectiveness. You can also fold it another time if needed.
Pros and Cons of the Chain Sinnet Knot
The Chain Sinnet Knot is very easy to tie and learn. That’s why it’s often taught to children.
If loaded with weight, it also tends to lock in place. Once you put enough weight on it, it won’t stretch out anymore.
It’s also very easy to untie, even after loading with weight. It doesn’t jam and can be untied even with one hand.
The Chain Sinnet creates a closed system that can’t untie by itself – only tighten. This makes it ideal to use for loading with weight, even for critical situations.
To tie the Chain Sinnet, you’ll only need access to one end of the rope. The other one can be tied around a support or something else.
The only downside of the Chain Sinnet is that it can’t be used in situations where the rope needs to hold a certain tension. That’s because with enough force, the knot will tighten and the rope will become longer, which will loosen the tension of the rope.
Common Uses for the Chain Sinnet Knot
Most commonly, the Chain Sinnet Knot is used by climbers to shorten the rope and keep it from tangling while in storage or for washing in a washing machine. For this purpose, the rope can be folded in half or even two times to shorten it even more. It’s also used by electricians for the same purpose – to shorten or store wires.
It’s also often used for decorative purposes. You can create a good-looking bracelet by tying the Chain Sinnet Knot on a piece of cord. It’s also used in macrame to create a braid out of a single piece of string.
It also has a very satisfying quick-release function. Often, parents teach the Chain Sinnet Knot to their kids because it offers a simple and fun way to play with rope.
Knots Like the Chain Sinnet Knot
Double Chain Sinnet Knot: This knot is identical to the Chain Sinnet Knot, except it’s tied on the rope folded in half. This makes the resulting knot twice as short, which is beneficial for storage.
Daisy Chain Hitch Knot: This hitch is often used by arborists to attach a rope to a tree. It’s identical to the Chain Sinnet (Daisy Chain) Knot, except the standing end of the rope is wrapped around the tree and back through the first loop. It offers a reliable and secure way of attaching to a tree. Usually, there are five chains used in this knot, which offers more than enough reliability.
Square Sinnet Knot: Another knot that creates a chain-like pattern. It’s most commonly used to braid hair. But it’s also sometimes used to make braided rope or for decorative purposes.
Crown Sinnet Knot: This knot is often used for decorative purposes because it creates a symmetrical, squared chain. It’s more popular for decorative purposes than the Chain Sinnet. It’s based on the Crown Knot.
Step-By-Step Guide: How to Tie the Chain Sinnet Knot
A step-by-step guide on tying the Chain Sinnet Knot.
Step 1:
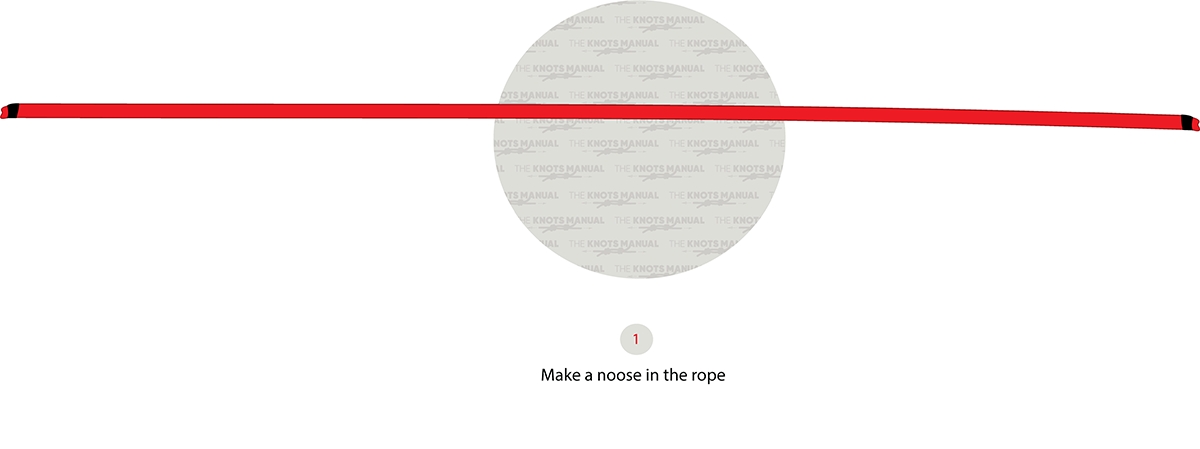
Leave one end of the rope free (in our illustration, the right side).
Step 1a:
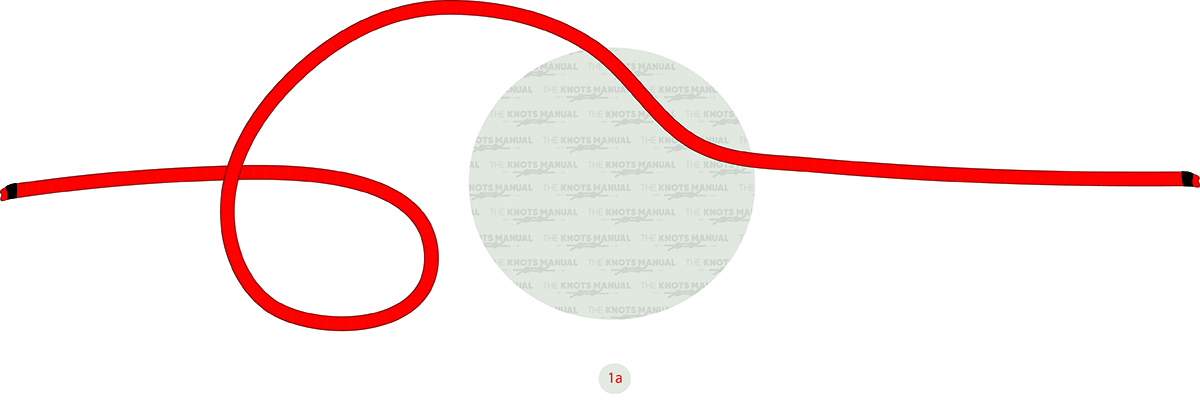
Make a loop in the rope.
Step 1b:
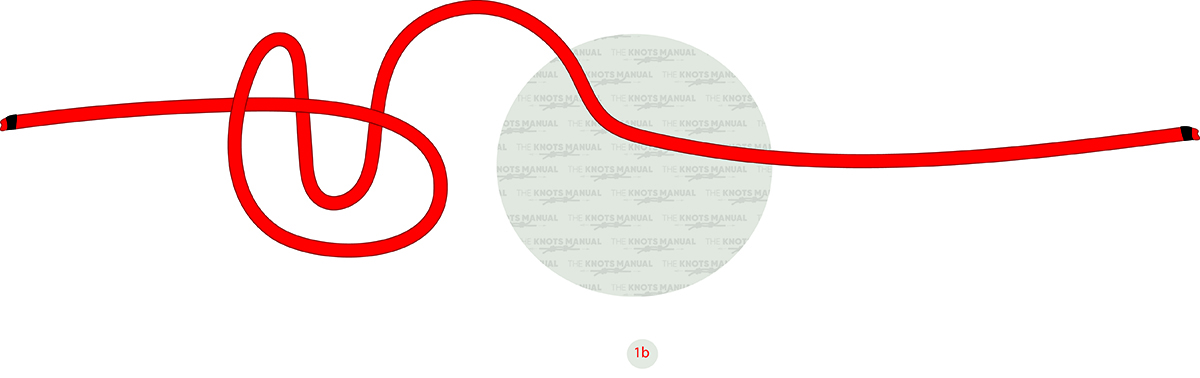
Create a bight in the rope and pass it through this loop.
Step 1c:
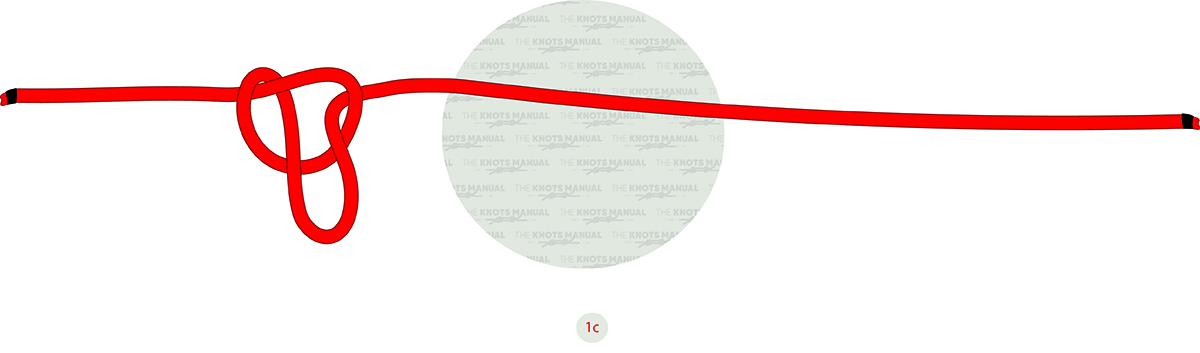
Pass it through fully to simplify tightening later on.
Step 1d:
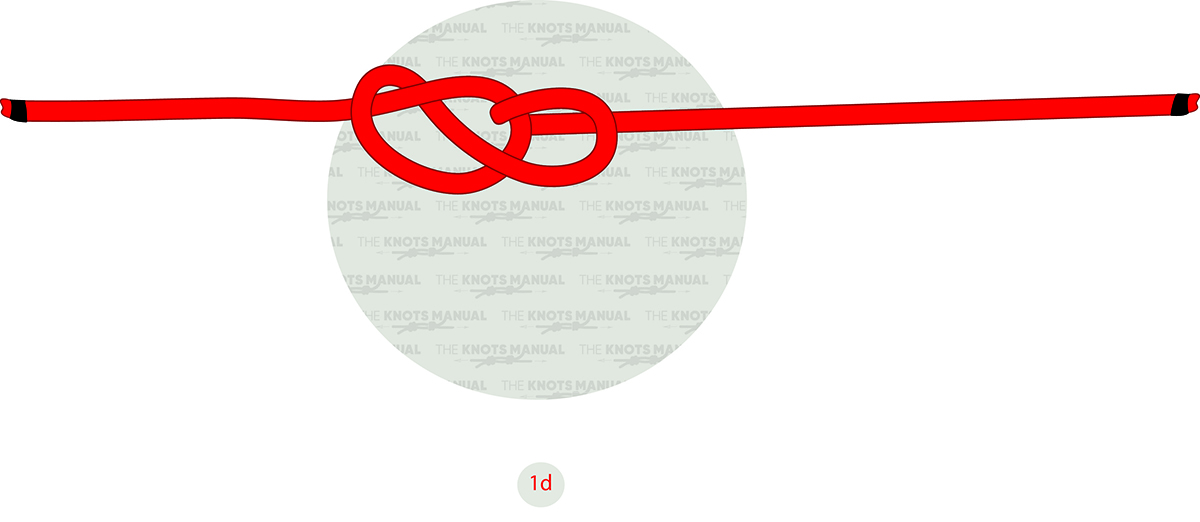
Place this loop in front of the working end of the rope.
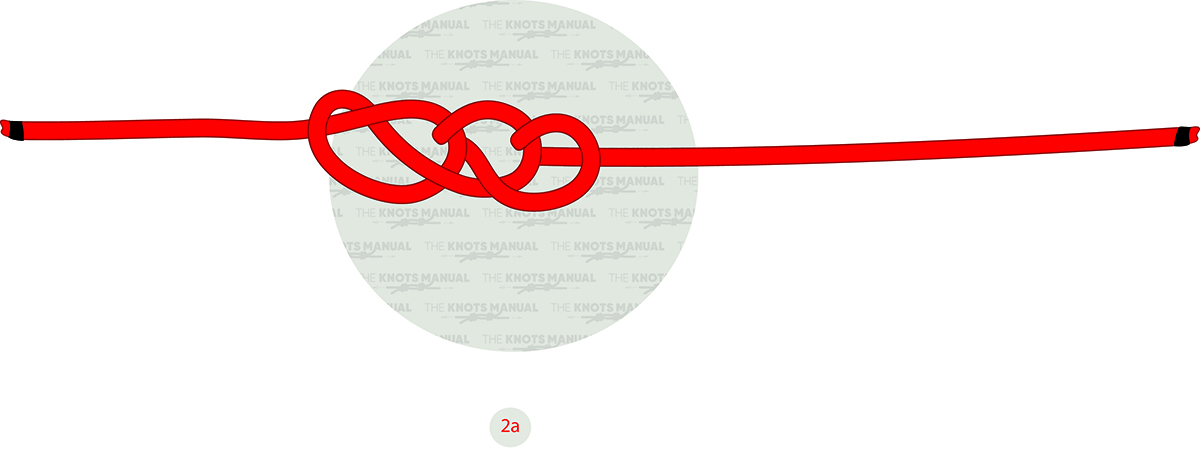
Step 2:

Again, create a bight in the working end and pass it through the last loop.
Step 2a:
Repeat with as many loops as you want to create.
Step 3:
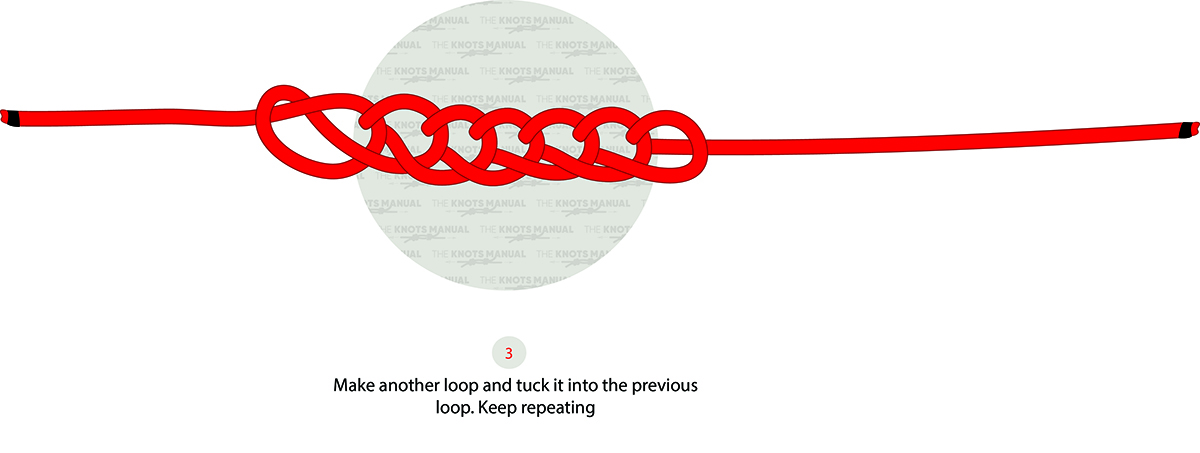
Place the final loop in front of the working end.
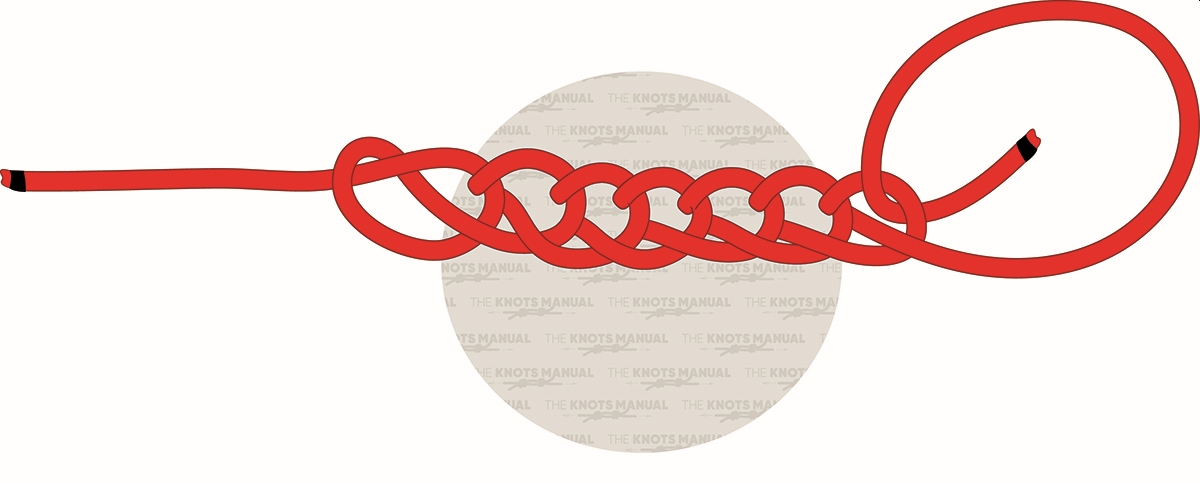
Step 4:
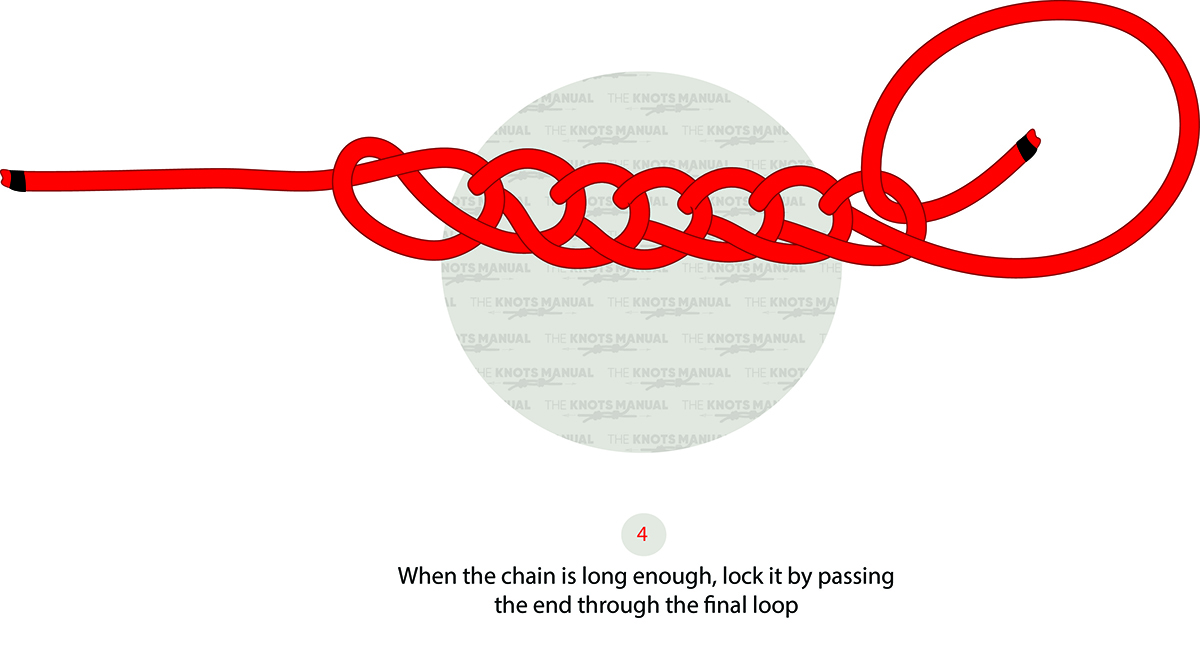
Make the last loop larger and pass the working end through it.
Step 4a:
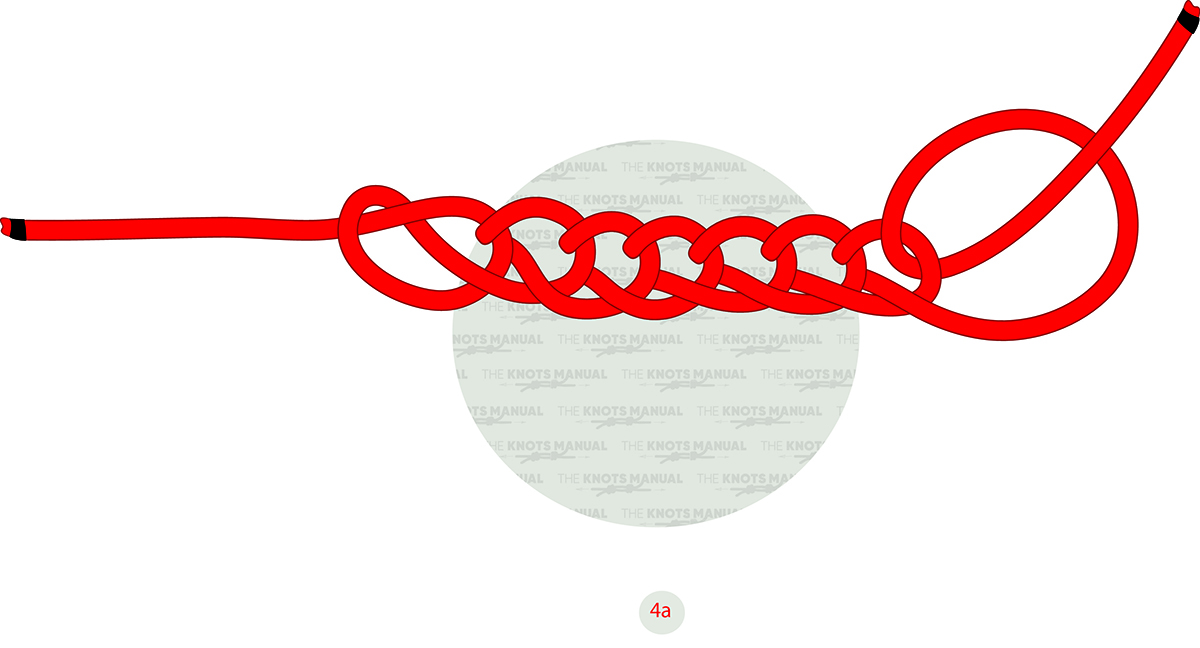
The loop is now closed and won’t untie.
Step 4b:
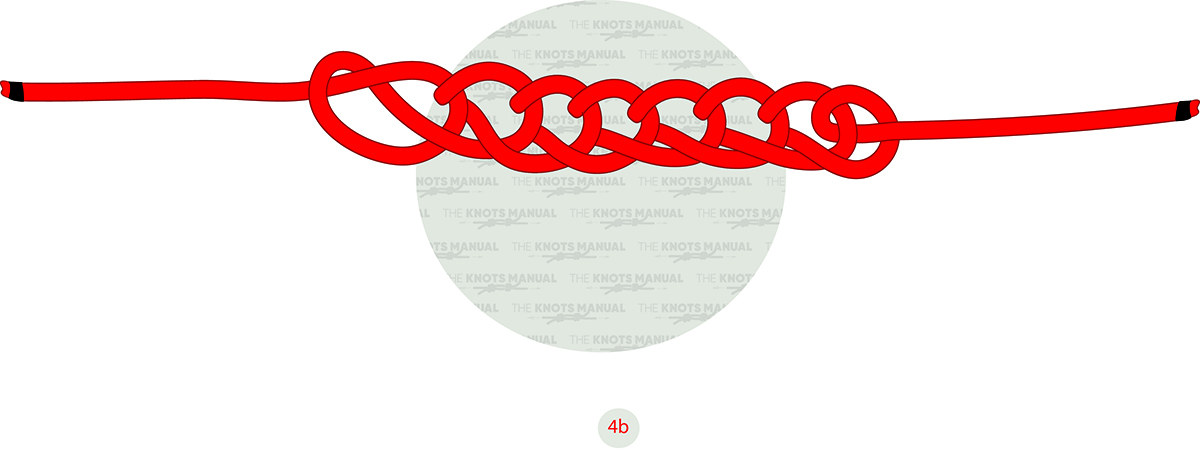
Tighten to finish the Chain Sinnet Knot.