A Prusik Knot is a friction hitch that stays in place when loaded with weight and moves freely without it. It’s most commonly used in rock climbing and mountaineering for ascending a rope and belaying.
It’s also sometimes referred to as the Triple Sliding Hitch.
The term Prusik can also be used as a verb. For example, to “prusik” a rope, which means to ascend it using Prusik Loops.
Quick Guide: How to Make a Prusik Loop
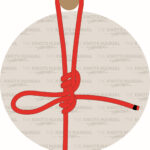
To tie a Prusik Knot, you first need to make a Prusik Loop. You can make it with a piece of short nylon rope that’s tied into a fixed loop with a Double Fisherman’s Knot (or Triple Fisherman’s Knot). You can also use climbing slings and commercially-made Prusik Loops.
The rope length for the Prusik Loop should be 3-6 feet (1-2 meters). Shorter loops are suitable for attaching to climbing harnesses and longer ones to use as footholds. It’s preferable to tie longer loops as you can always shorten them by tieing an Overhand Knot.
Prusik Loops are usually made from ropes that are 3/16 – 5/16 inches (5-8 mm) in diameter. The Prusik Loop should always be between 50-80% diameter of the rope that it’s attached to. Ideally, it should be 1/16 inch (2 mm) smaller than the larger rope. Smaller diameter Prusik Loops will grip better but too small will be too hard to move. Larger-diameter ropes won’t have enough grip.
Some people like to make very short Prusik Loops that are attached to a carabiner. This allows them to use a single Prusik Loop for many purposes. You can attach it straight to your harness or attach a longer Prusik Loop to the carabiner to use for your feet.
How to Tie a Prusik Knot
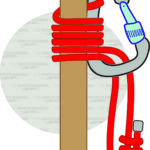
To tie a Prusik loop, you first need to tie a Girth Hitch using the Prusik Loop (wrap a bight around the static rope and pass it through itself). Then continue wrapping the end of the bight around the static rope 3-4 times in total to finish the knot.
For best results, make sure that it’s dressed correctly – no ropes are crossing one another and the original bight is in the center.
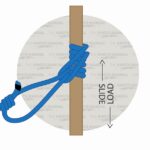
You should always test a finished Prusik Knot before using it to make sure that it has enough grip and that it moves freely when not loaded. That’s because different rope materials, the outside temperature, and the weather can influence its effectiveness. For a better grip, increase the number of wraps around the static rope.
It’s also important to always have a proper backup attachment point when climbing a rope with Prusiks. That’s because a Prusik Knot doesn’t offer a permanent attachment point – it can always slip.
When using Prusik Loops for extended periods, make sure to inspect them every once in a while. Look for slippage in the Double Fisherman’s Knot, wear in the cord, and check if the cord hasn’t become too stiff. If you find any of the above, retie the Double Fisherman’s Knot or change the rope.
Advantages and Disadvantages of the Prusik Knot
Prusik Loops are so commonly used because they are easy to tie and they work perfectly. They provide a good grip when loaded and slide freely without weight.
A Prusik Knot works in both directions (up and down) unlike the Klemheist Knot. So if you need to adjust the slack or move back a bit on the rope, you can do it without retying the knot.
Prusiks are also non-jamming and they untie very easily, even with one hand.
Another benefit is that the Prusik Knot doesn’t damage the rope that it’s attached to. Mechanical belay and ascending devices often damage the rope over time. But when prusiking, usually, the Prusik Loops break first due to wear.
Prusiks can also be tied around two ropes – even if they’re in different diameters. This makes it especially useful when using many ropes for safety purposes.
And their last benefit is that Prusik Loops can also be used as slings when climbing, so they don’t have a single purpose.
The only downside of the Prusik Knot is that it does not work well on frozen or wet rope. In these conditions, a mechanical Prusik works much better.
Common Uses for the Prusik Knot
Most commonly, Prusik Loops are used by climbers. But they’re also popular in search and rescue, caving, canyoneering, mountaineering, and by arborists for the same purposes.
The most common use for a Prusik Knot is to ascend a rope. In this case, two or three Prusik Loops are used – one for the harness and one or two for the climber’s feet. With this setup, no mechanical devices are needed.
Another use for the Prusik Knot is belaying, rappelling, and abseiling. For example, with the Munter Hitch. In this situation, a Prusik Knot is tied between the main rope and the harness. This allows for a slower and more controlled descent. Very often, a Prusik is also used as a backup when rappelling with modern climbing devices.
Sometimes, a Prusik Loop is also used for progress capture when climbing. The climber ties a Prusik into another rope and their harness, which assists with climbing vertically.
In mountaineering and caving, a Prusik Knot is also tied into a rope when ascending steep cliffs. This acts as an adjustable anchor point in case of a fall.
A Prusik Knot can also be used to adjust the tension of the ridgelines for tent and tarp setups. In this case, it’s attached to another rope that’s already tensioned.
Knots Like the Prusik Knot
Autoblock (French) Prusik: In this variation of the Prusik Knot, the bight is wrapped around the static rope from bottom to top, like the Klemheist Knot. This makes it work only in one direction but with a better performance. A lot of climbers use this variation for ascending a rope.
Purcell Prusik Loop: This is a method of tieing more advanced Prusik Loops. These are useful to use as footholds when prusiking because you can adjust the tension of each foothold.
Klemheist Knot: This is another alternative to the Prusik Knot. It also works only in one direction, like the Autoblock Knot, only it doesn’t need a carabiner. It’s used for belaying, rappelling, and ascending a rope.
Bachmann Knot: Another friction hitch that uses a Carabiner. It works similarly to Klemheist and Autoblock Knots, only is a bit easier to slide, as you need to grab the carabiner and move it.
Valdotain Tresse: A complicated friction hitch that’s also used for ascending and descending a rope. It’s easier to slide and can be untied under load.
Prusik Cuffs: You can also tie DIY handcuffs using a Prusik Knot, which are somewhat difficult to escape from.
Blake’s Hitch: A friction hitch that doesn’t need a Prusik Loop. It can be tied using one end of the rope. It’s used for similar purposes as the Prusik Knot, only by arborists.
Illustrated Guide: How to Tie the Prusik Knot
A step-by-step guide on how to tie a Prusik Knot.
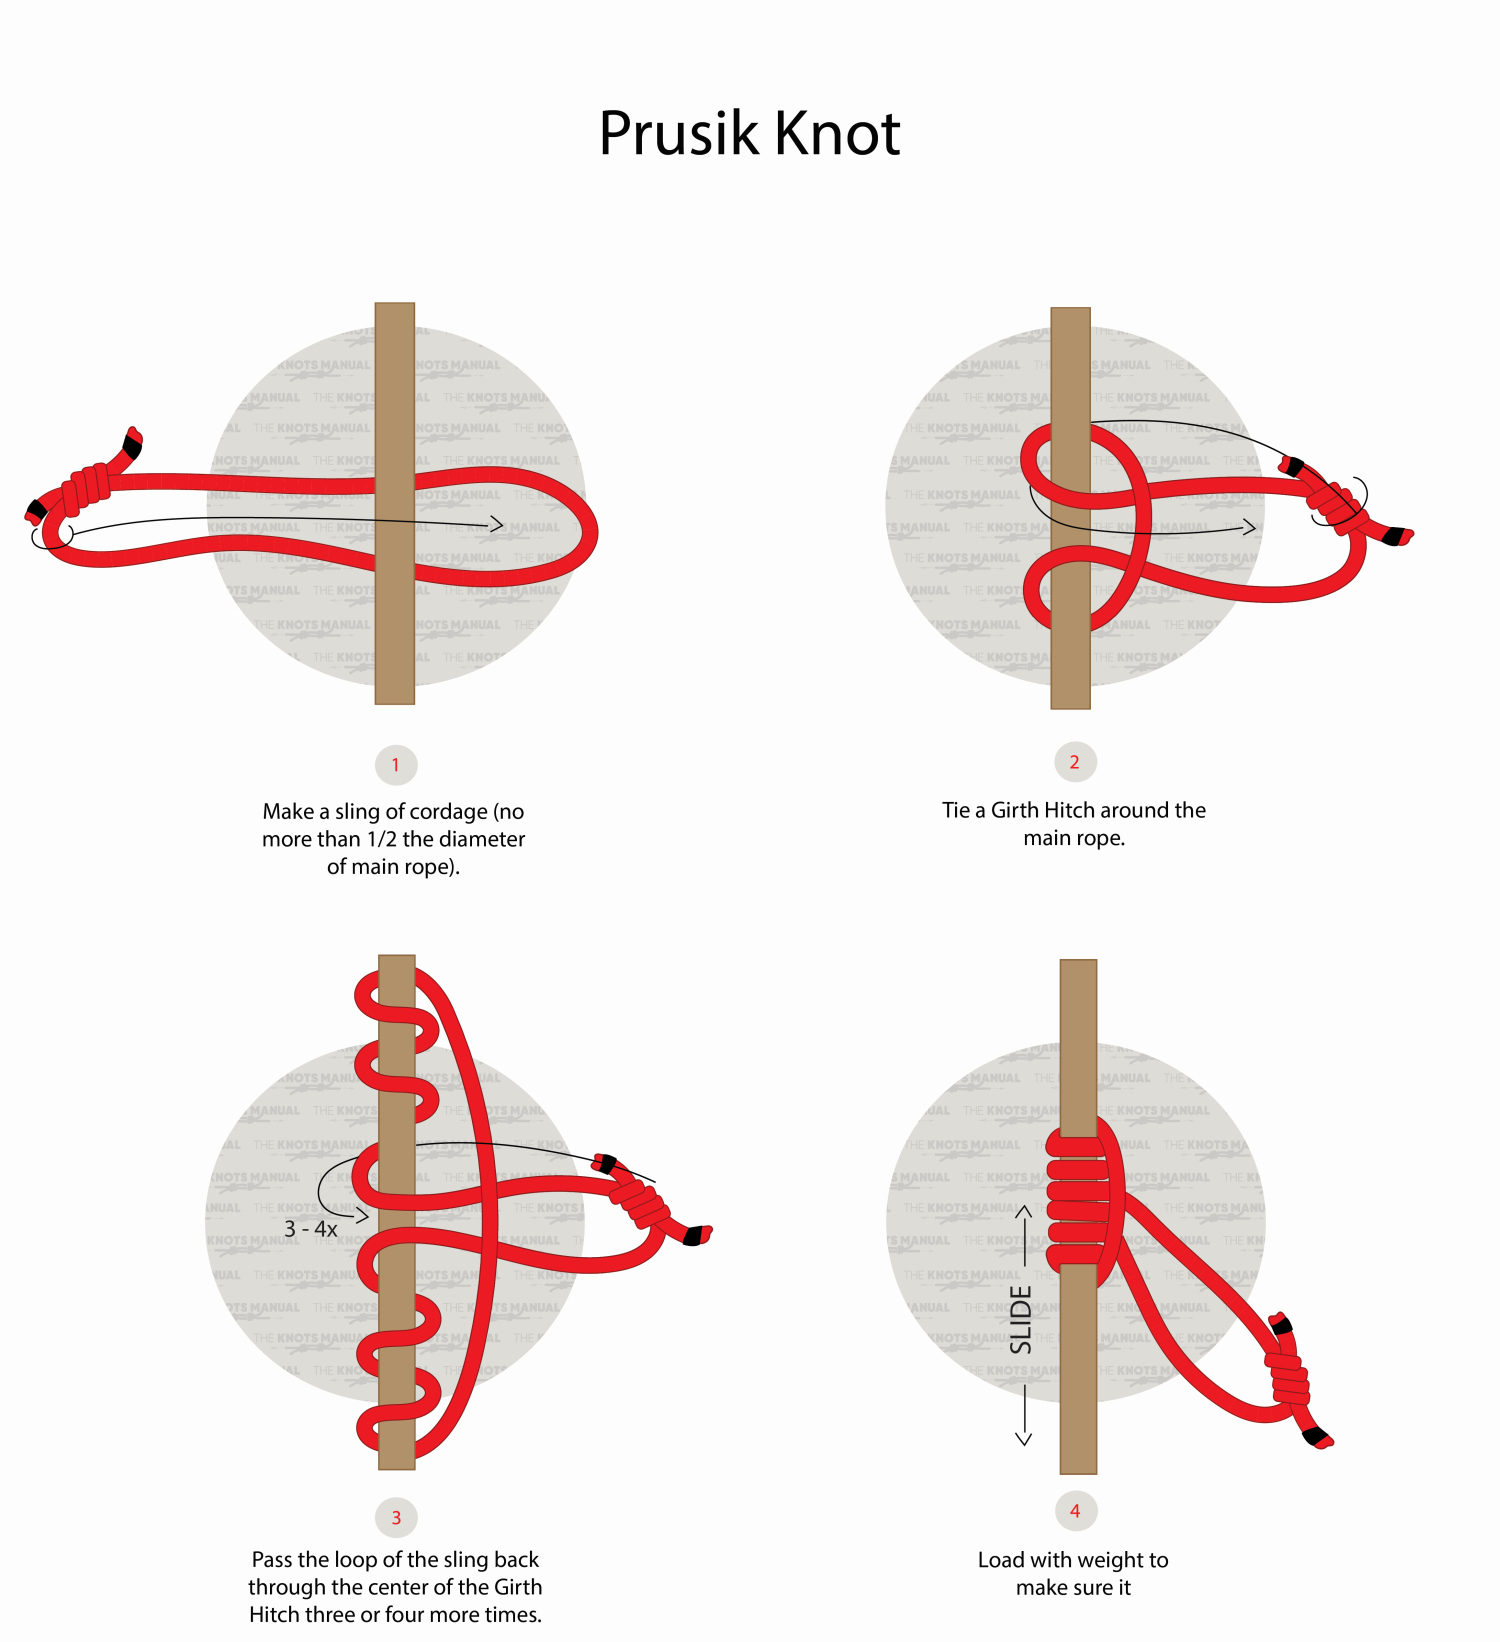
Step 1:
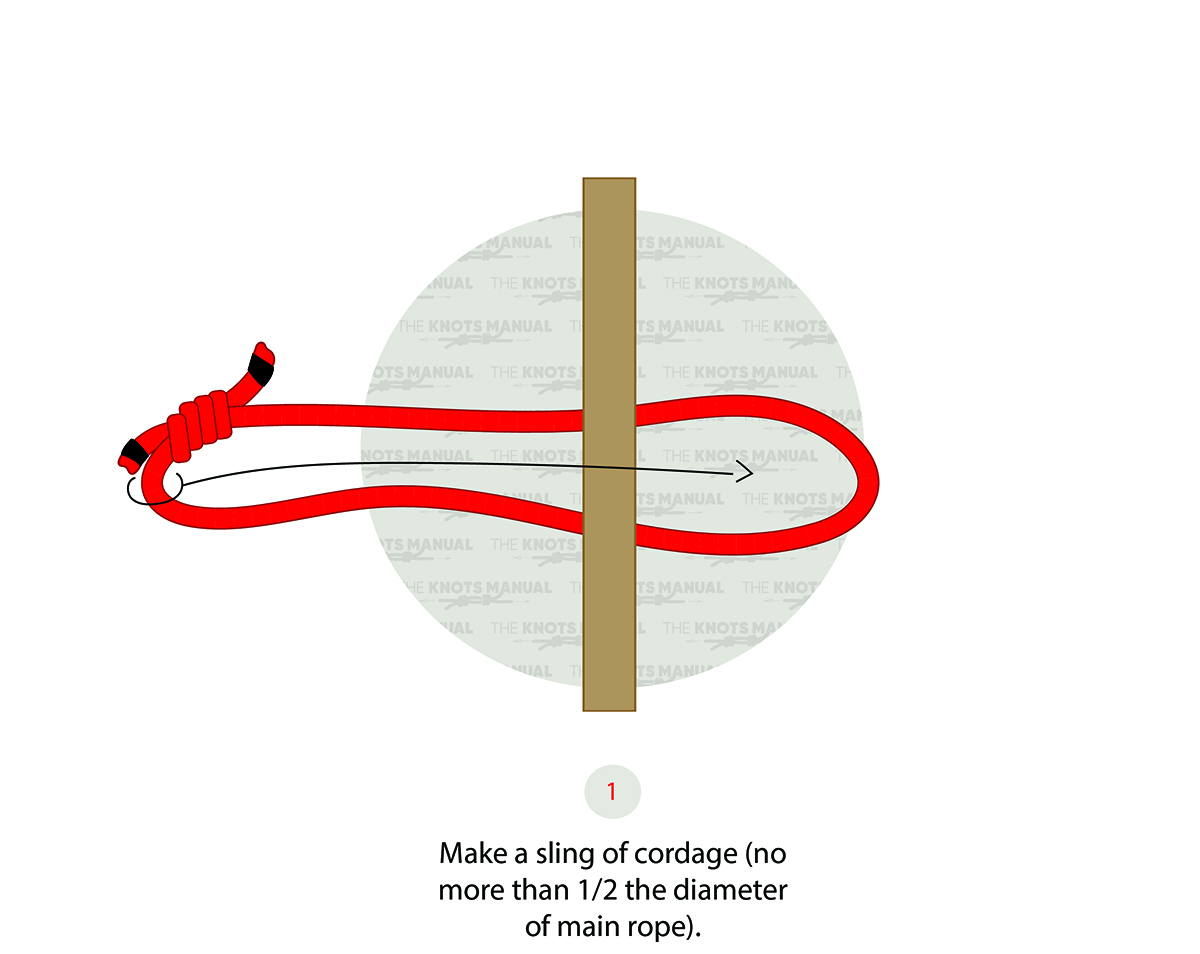
Start by making a Prusik Loop using a 3-6 feet (1-2 meters) long rope that’s 3/16 – 5/16 inches (5-8 mm) in diameter. Connect it using a Double Fisherman’s Knot.
Step 2:
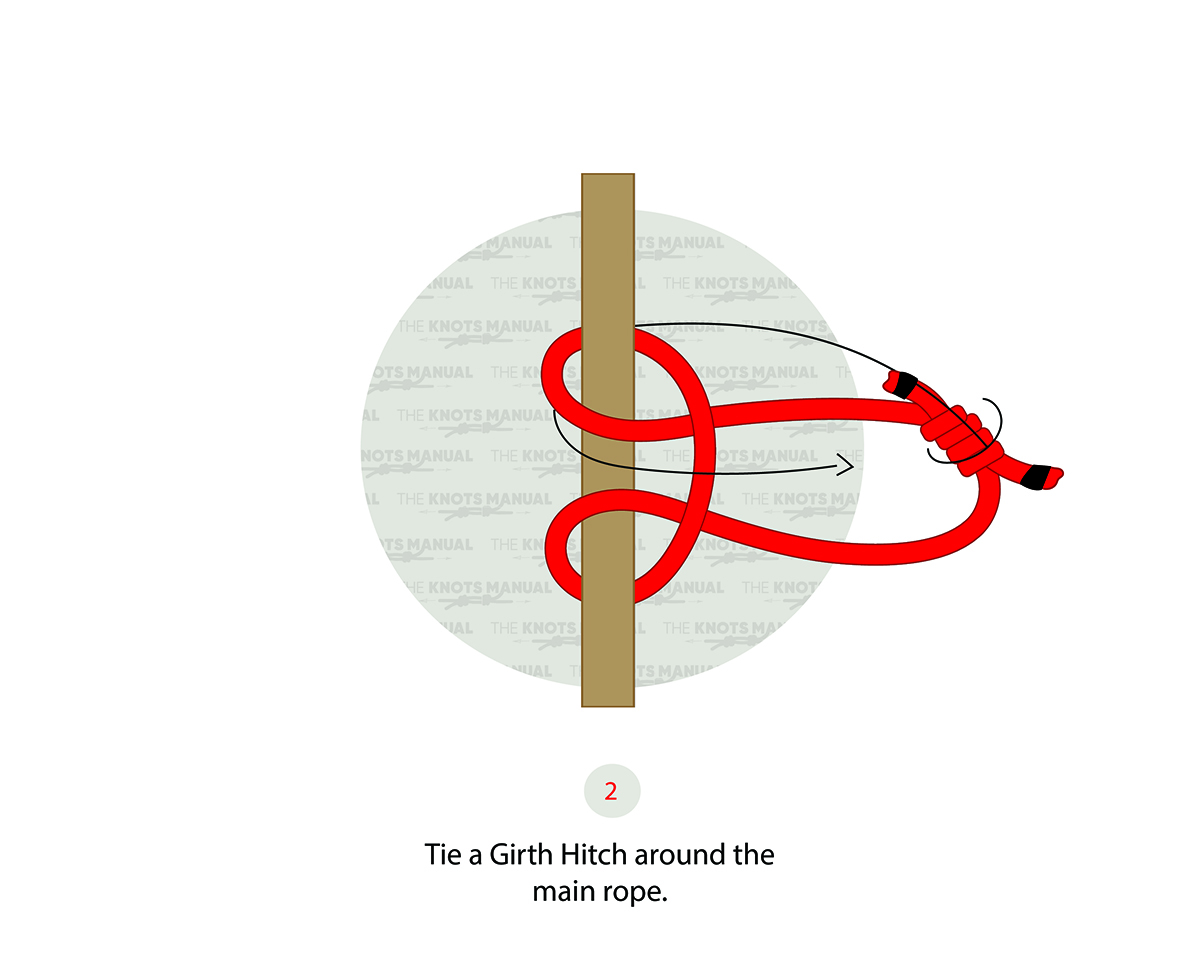
Make a bight in the Prusik Loop and tie it around the static rope.
Step 3:
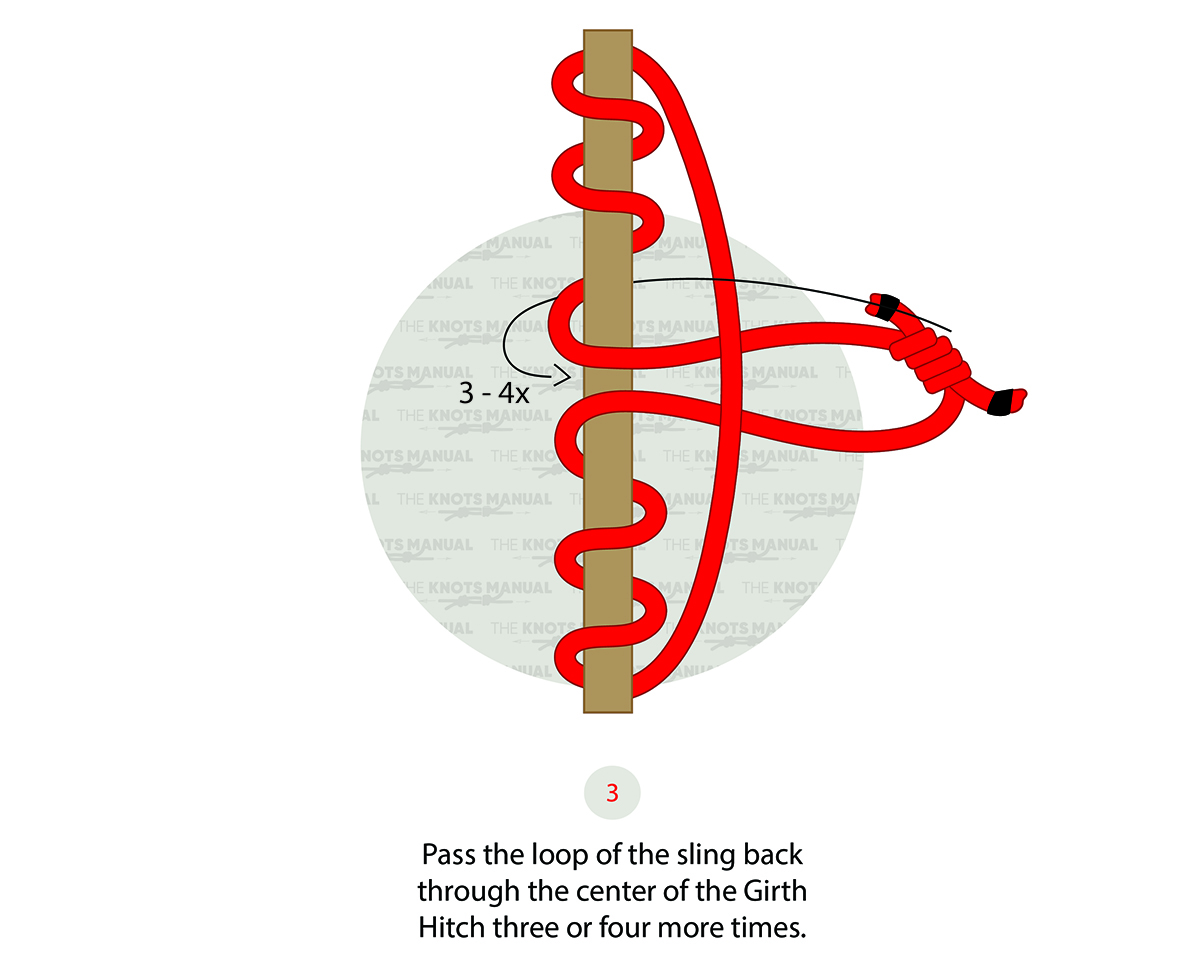
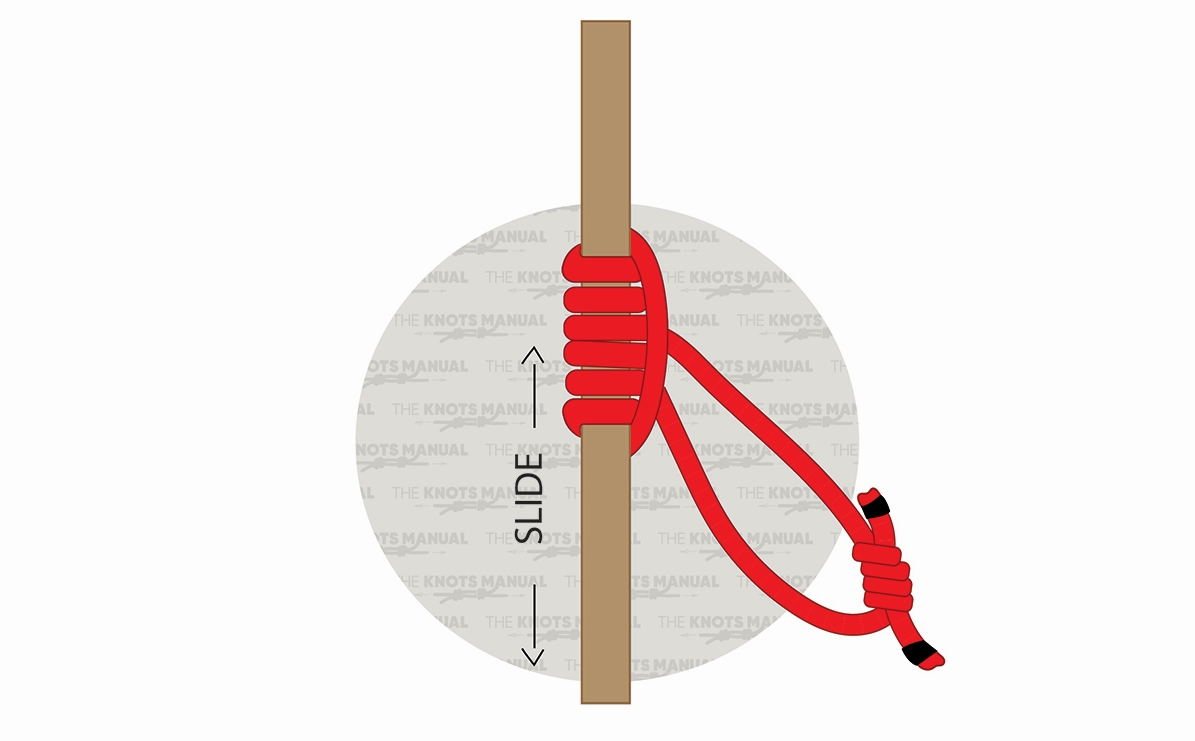
Tie it another 3-4 times, making sure that the bight stays in the center.
Step 4:
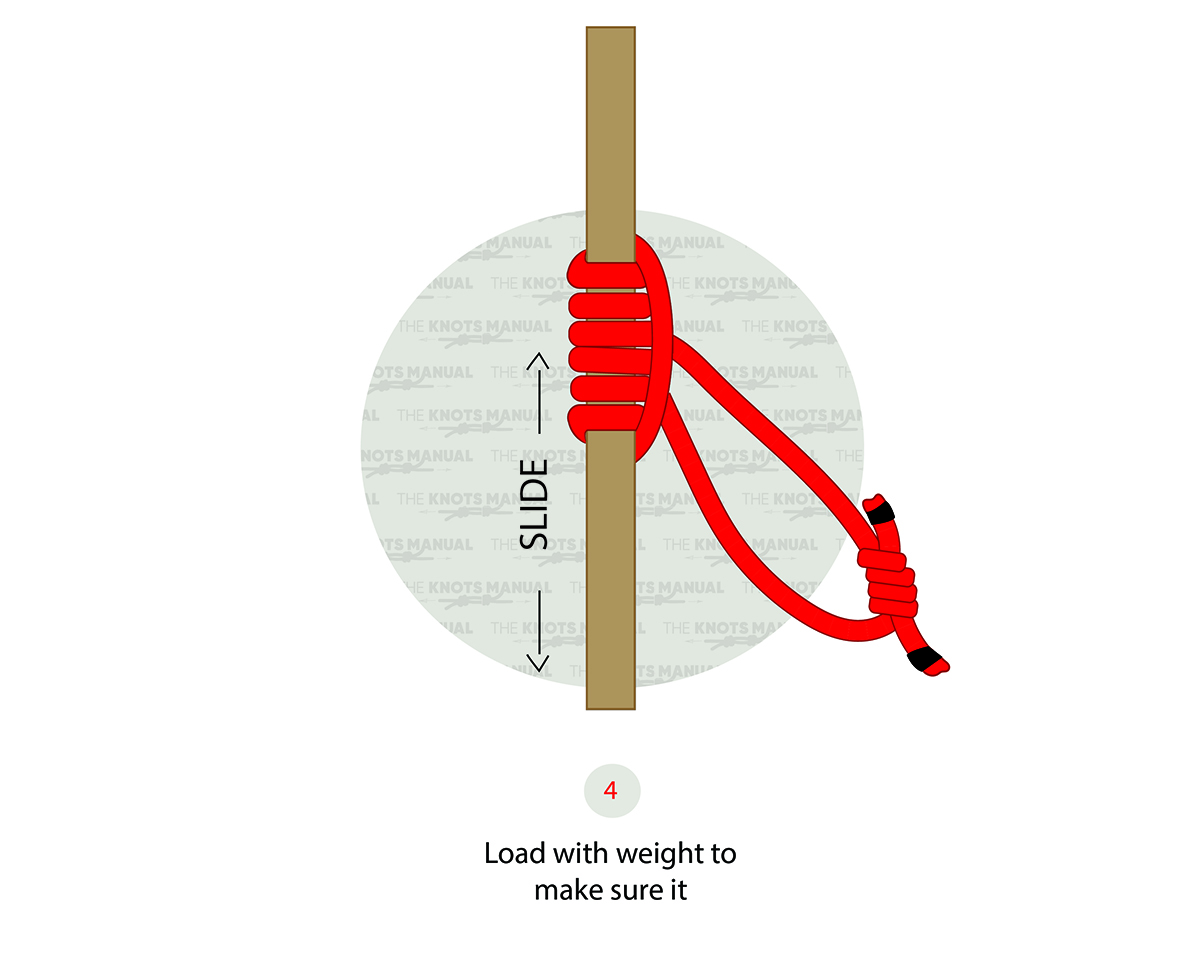
Apply load and check that the knot is properly dressed (the ropes aren’t crossing one another).
Frequently Asked Questions
Is the Prusik Loop the Best Friction Hitch?
The Prusik Loop has a bit more “give” compared to Klemheist and Autoblock Knots. It makes it better for shock situations, as it can withstand higher forces. It also works in both directions, unlike other friction hitches. Due to these reasons, it’s the most popular friction hitch. Some also argue that it’s the best one.
What Type of Cord/Rope Should I Use for the Prusik Loop?
Most commonly Prusik Loops are made from nylon cord, as it grips well on most climbing ropes. But you can also use rope made from other materials. You only need to test how well it grips and releases and adjust the number of turns.
How Do I Climb a Rope Using Prusik Loops?
You need to make two Prusik Loops – a longer one to act as a foothold and a shorter one to attach to your harness. Attach both of them to the static rope, and start ascending it. Straighten your legs while holding onto the rope with your hands, and pull up the harness Prusik Loop. Then hang into the harness Prusik Loop and pull up the foothold one. Repeat these steps until you’re finished. With each of these steps, you’ll ascend about 4-12 inches (10-30 cm) vertically. It’s also advisable to attach to another rope to act as a backup.