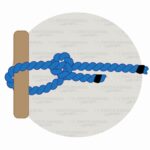
A Munter Hitch Knot creates friction between a rope and a carabiner. Its most common use is belaying, rappelling, and abseiling without a belaying device.
This knot has other names as well, like the Italian Hitch, Mezzo Barcaiolo, Crossing Hitch, HMS, Half Clove Hitch, or the Tag Knot.
Quick Guide: How to Tie a Munter Hitch Knot
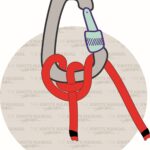
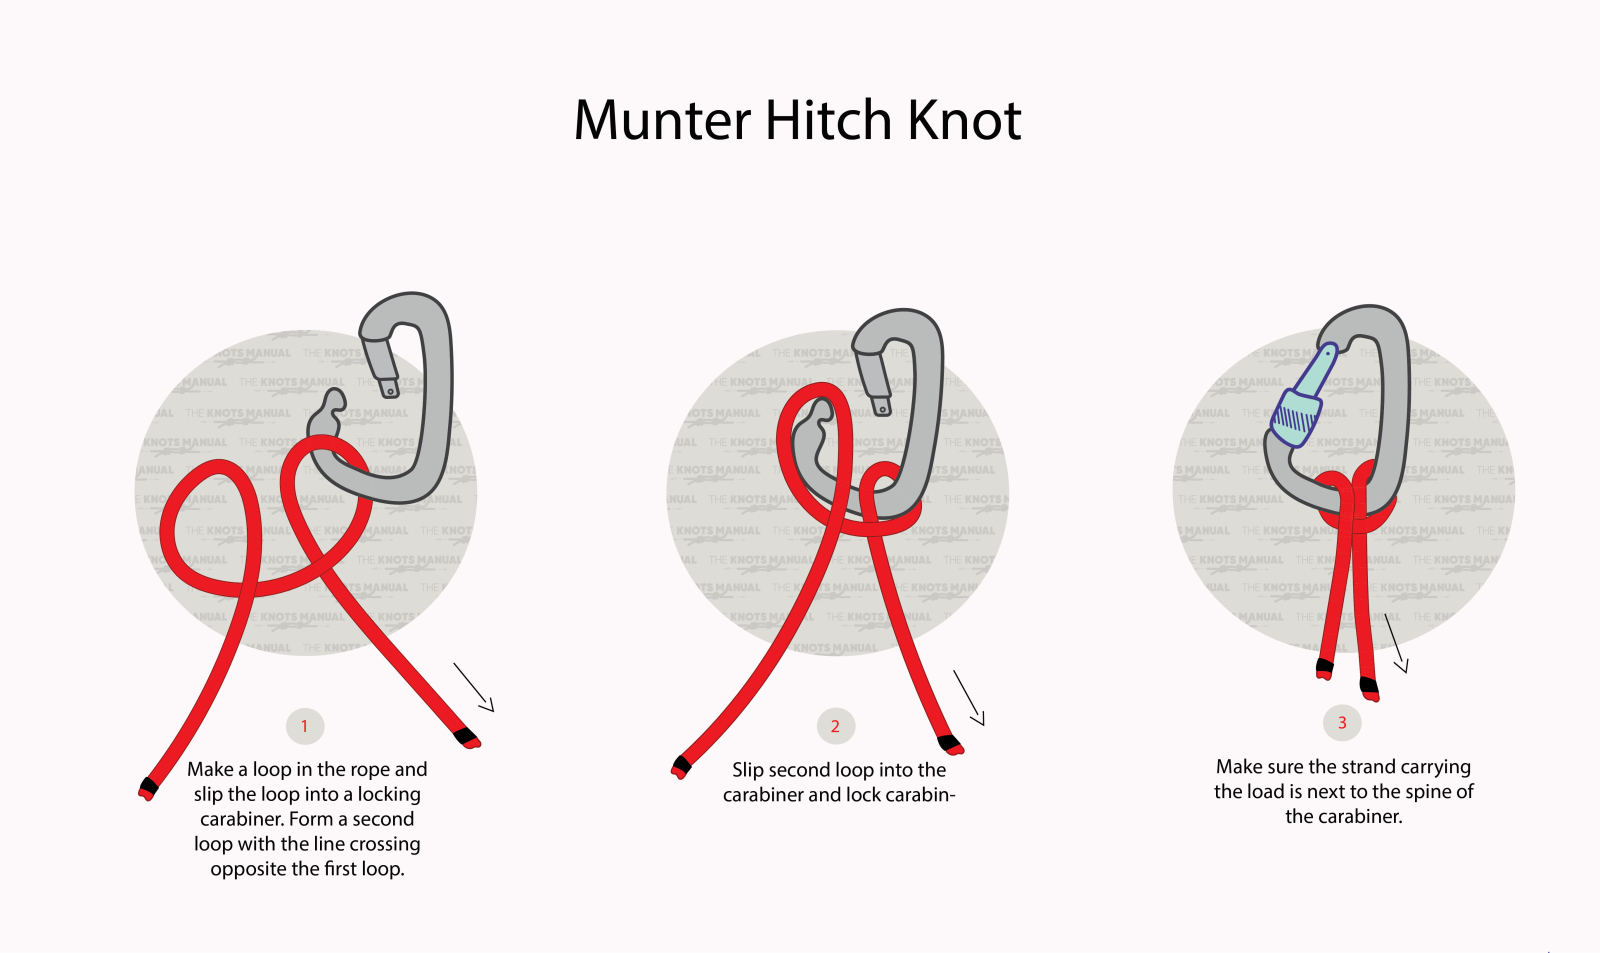
To tie a Munter Hitch Knot, make two loops in the middle of a rope in opposite directions. Then place a carabiner through both of them.
The Munter Hitch should only be used with large, locking, pear-shaped carabiners. You can also use two carabiners next to each other for extra safety.
It’s important to check that this knot is tied correctly as it’s used for life-threatening situations. Always test it first to make sure that it’s working as it should be.
Benefits and Disadvantages of the Munter Hitch Knot
The Munter Hitch is very easy to tie and hard to tie wrong, making it very beginner-friendly.
It requires only a rope and a single carabiner, making it a very versatile and useful knot to know for emergency belaying.
As you lower a person (or yourself) with the Munter Hitch, heat generated from the friction isn’t an issue, so you don’t need to wear gloves. That’s because the rope is constantly moving through the knot, and each spot is exposed to heat only temporarily.
Another benefit is that you can also use it in the other direction. So for example, if you lower someone and need to back up a bit, then you can do it without adjusting or retying the knot. As the load increases, the friction also increases, so you don’t need to re-adjust it based on how heavy the load is.
One of its main downsides is that it generates a lot of friction and heat on the carabiner. This can cause it to fail if the carabiner is worn-down, too thin, or used for extended periods.
Another disadvantage is that the Munter Hitch causes a lot of twisting in the rope. That’s why you have to train on using this knot first before using it in a real-life situation.
And finally, the Munter Hitch can cause a locking carabiner to unlock. As the rope moves around, it can cause the locking mechanism to unscrew. That’s why it’s important to keep an eye on the carabiner as you rappel.
What Uses the Munter Hitch Knot is Good For
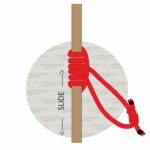
The Munter Hitch is most commonly used in combination with a carabiner. But you can also use it with fixed pipes and similar anchor points.
It’s most commonly used only as a backup rappelling/belaying system due to the fact that it causes a lot of twisting. But it’s very useful to know if you lose or break your rappelling device.
The Munter Hitch is very commonly used in climbing, search and rescue, mountaineering, and caving. It’s used for solo rappelling, belaying with another person, lowering a climber, or as a backup belay system. The Munter Hitch is also taught by the military as a simple way of lowering yourself from vertical or steep cliffs. It’s also used by arborists and riggers for controlled lowering of moderately heavy loads.
This knot is so useful in these situations because the brake strand is located right next to the other end of the rope, allowing for a controlled descent. You also only need a rope and a carabiner for it to work.
Knots Like the Munter Hitch Knot
Clove Hitch: This is another hitch very commonly used in climbing. It allows you to secure yourself to a carabiner. As opposed to the Munter Hitch, it doesn’t move and remains fixed in place. It’s tied very similarly to the Munter Hitch, and beginners often accidentally tie the Munter Hitch wrong as the Clove Hitch.
Prusik Hitch: This knot is often used in combination with the Munter Hitch for belaying or rappelling when climbing. Usually, a Prusik Knot is tied between the brake strand and the harness to allow for a slow and controlled descent.
Munter Mule Overhand: In this variation, another slip knot and half hitch knot are tied right after the Munter Hitch Knot. This allows the climber to secure the Munter Knot and keep the rope from lowering.
Super Munter Hitch: This is a variation of the Munter Hitch knot which allows for a slower and more controlled descent. It’s usually used when rappelling heavier loads. Another loop is tied around the loaded end and then passed through the carabiner to create more friction.
In-Depth Guide: How to Tie the Munter Hitch Knot
A step-by-step guide on how to tie the Munter Hitch Knot.
Step 1:
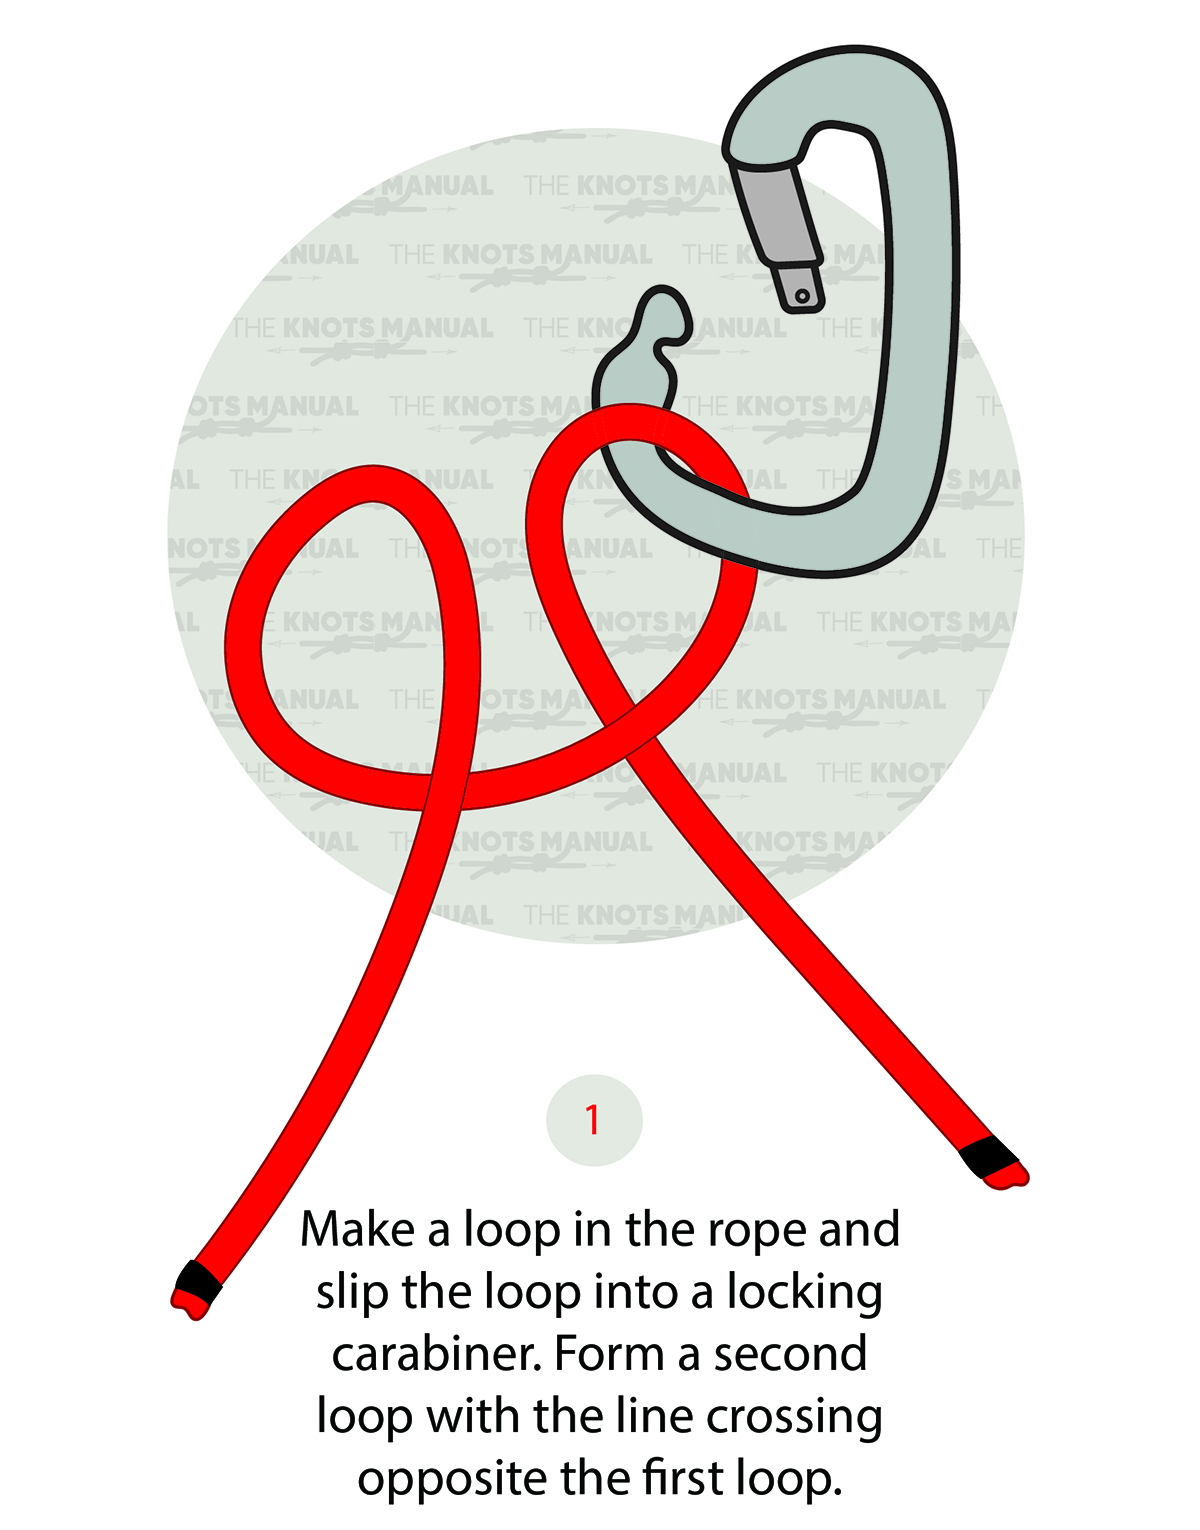
Make two loops in the middle of the rope in opposite directions and put the first one through a carabiner.
Step 2:
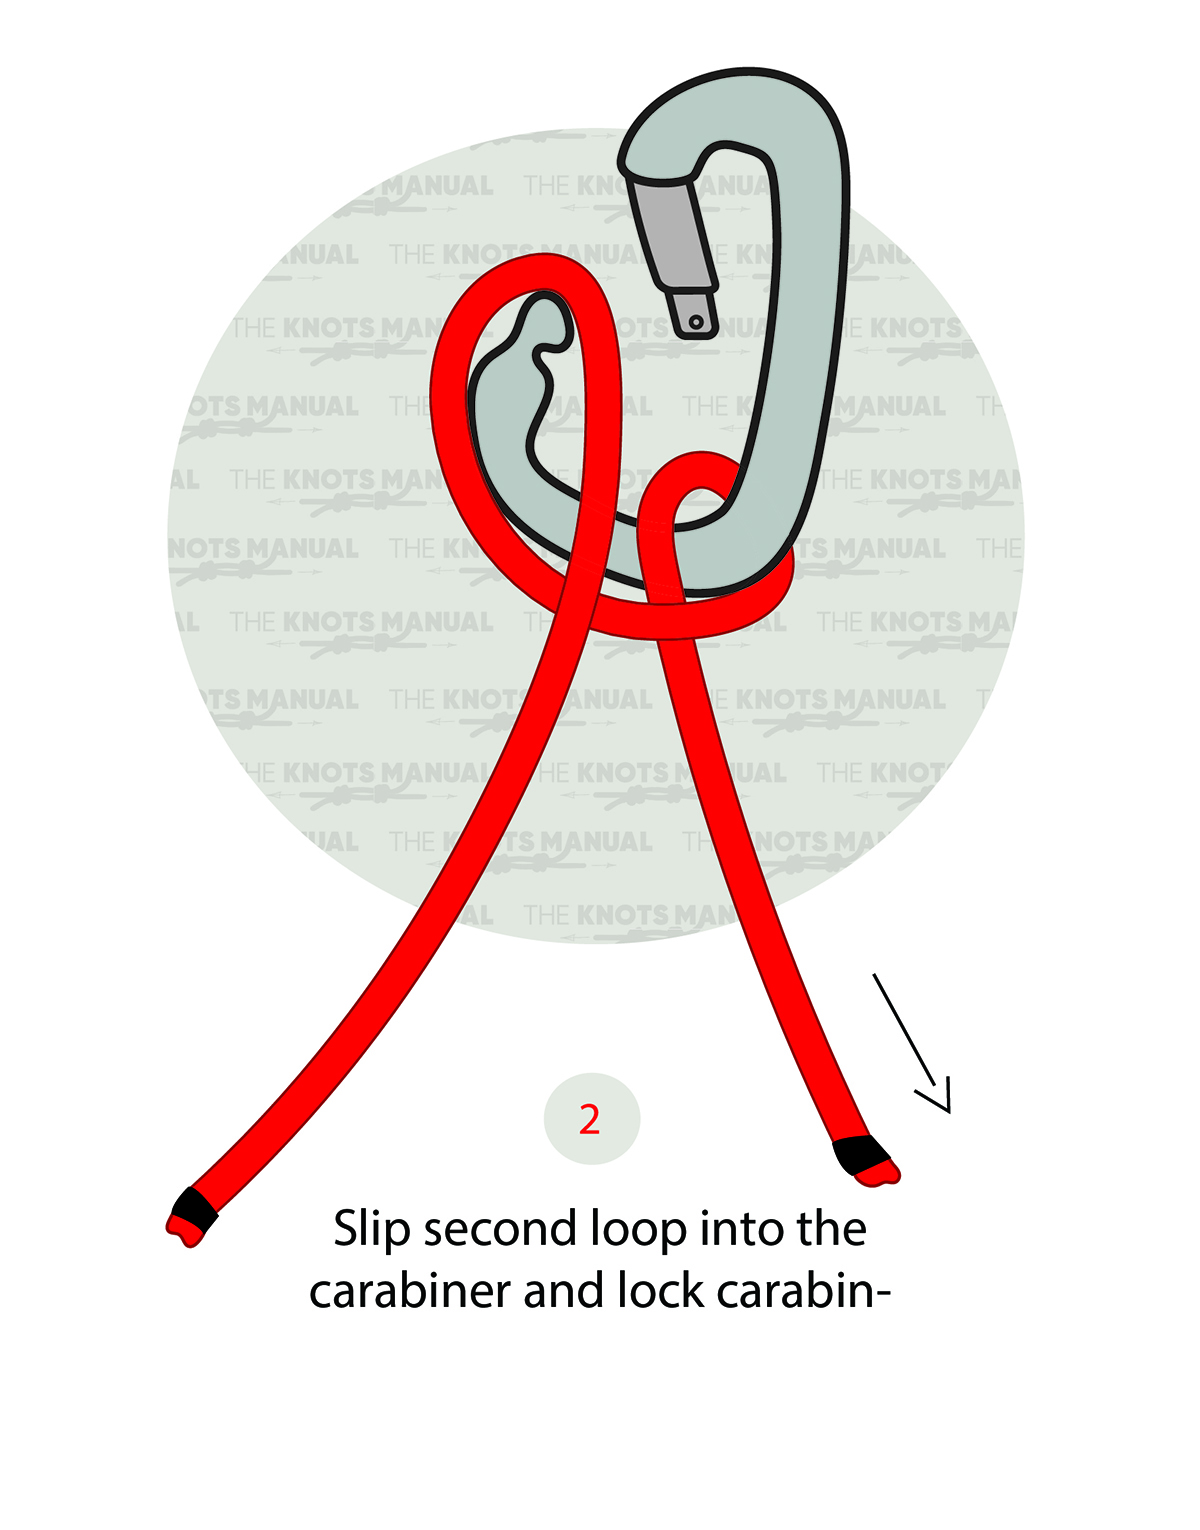
Put the second loop through the carabiner.
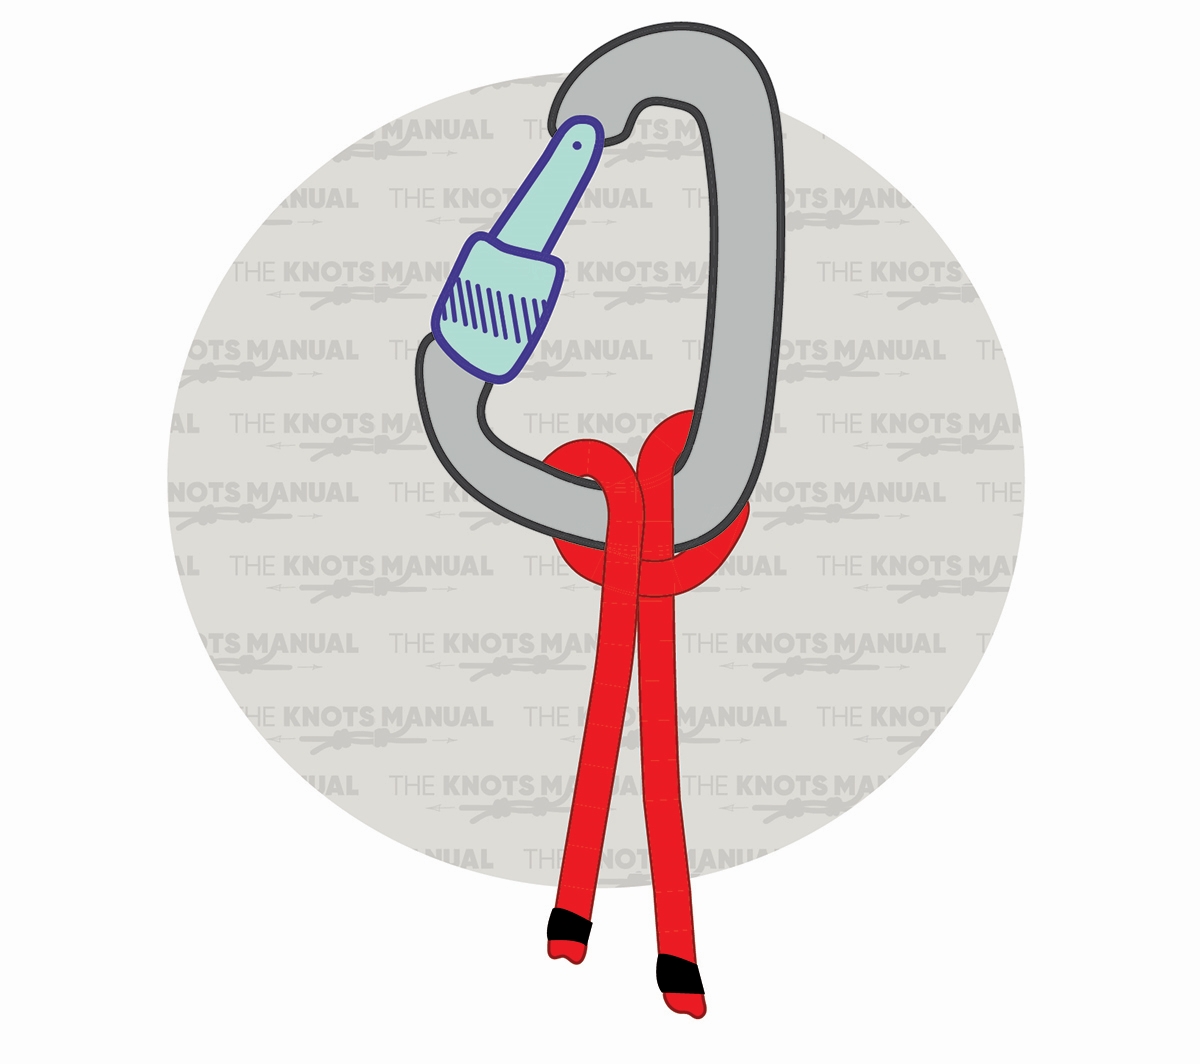
Step 3:
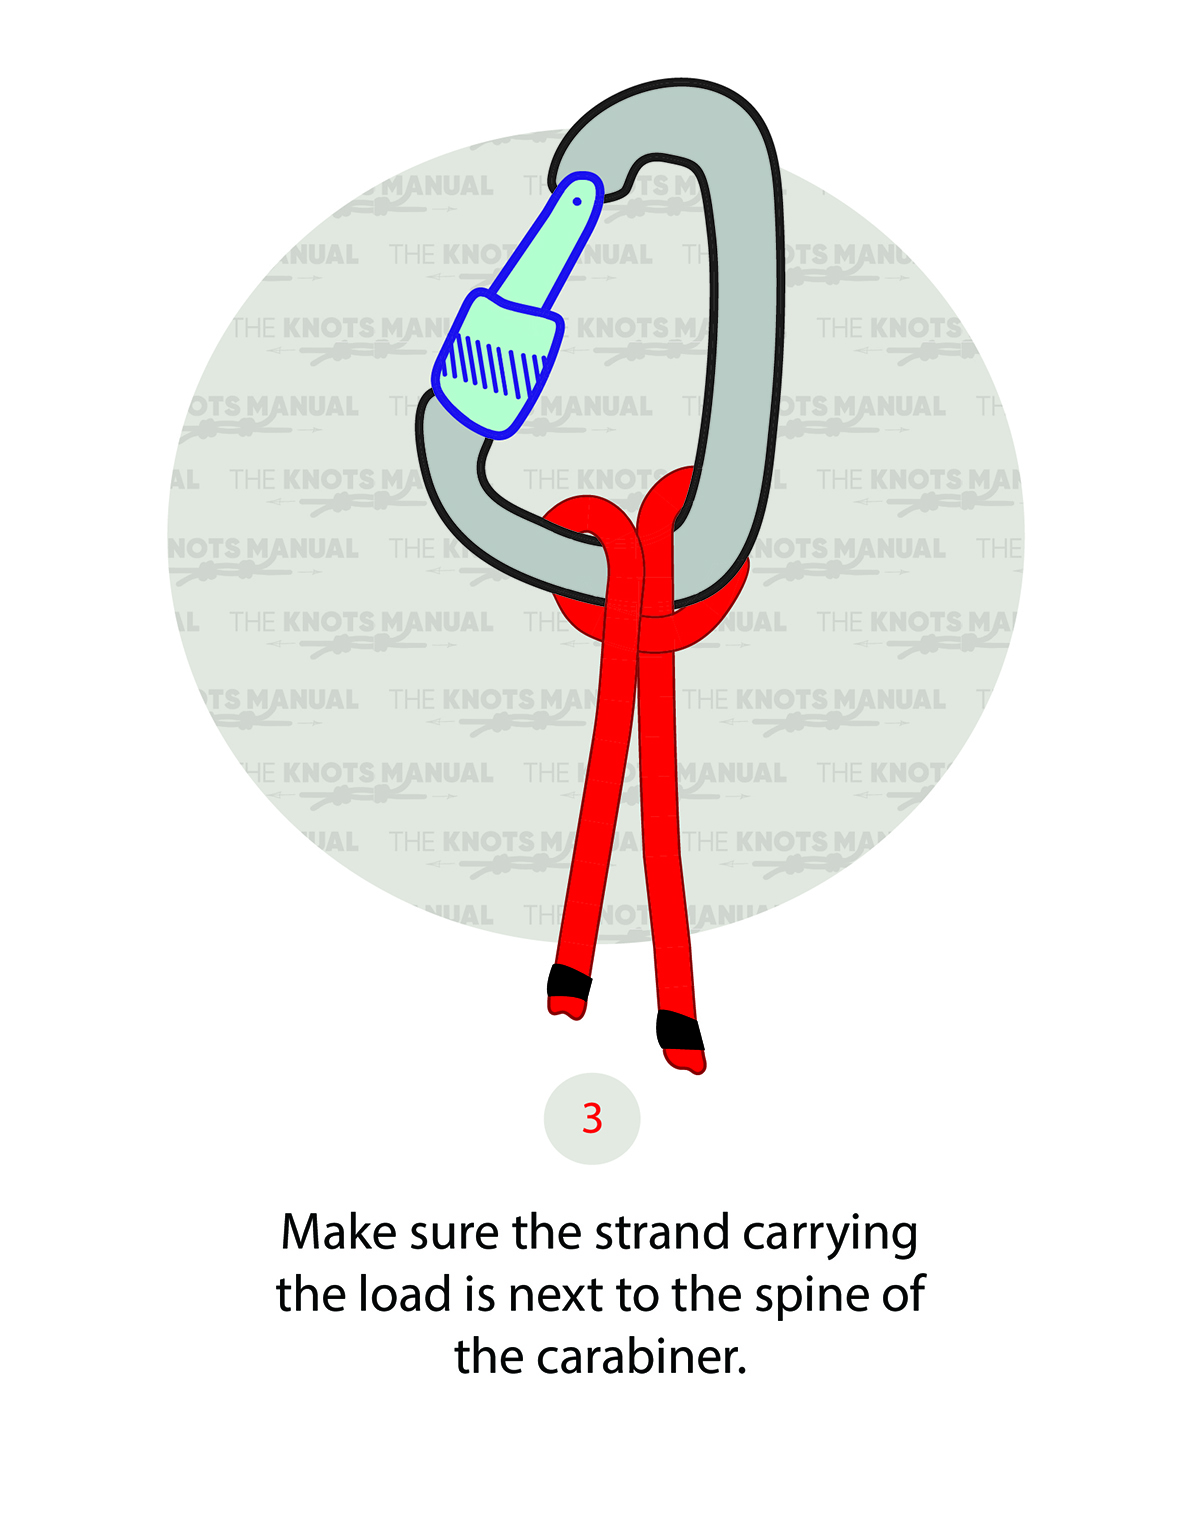
Finish the knot by locking the carabiner.
Frequently Asked Questions
In the Munter Hitch Safe Enough to Belay With?
The Munter Hitch is generally considered a safe way to rappel, abseil, and belay. But you need to be experienced with it because it often twists and turns the rope, making it very difficult to rappel. It’s often used as a backup or “emergency-only” way of rappelling because modern belay devices are considered much safer and easier to use.
How Do I Belay Someone With the Munter Hitch?
First, you have to tie a munter hitch around a locking carabiner with one or two ropes. You can also use two carabiners for extra safety. You also need to tie a friction hitch between the brake strand and your harness, such as the Klemheist Knot or the Prusik Knot. Finally, lower the climber by placing both of your hands on the brake strand and slowly releasing it.
How Do I Lock the Munter Hitch in Place While Belaying?
To lock the Munter Hitch, you have to use the Munter Mule Overhand Knot. Start by tieing a regular Munter Hitch, then making a bight with the brake strand and creating a slip knot, and finally a half hitch to lock it off. This will keep the climber that you’re belaying in one spot without you needing to hold the rope.
What Other Knots Are Used for Belaying?
Another popular variation is the Munter Super Hitch, which has a bit more grip and allows for a slower, more controlled lowering. It can also be used for belaying heavier climbers and heavy climbing gear.