The Distel Hitch is a slide-and-gip knot that only grips when loaded with weight from the bottom. It’s most commonly used by arborists to ascend and descend a rope.
Quick Guide: Tying a Distel Hitch Knot
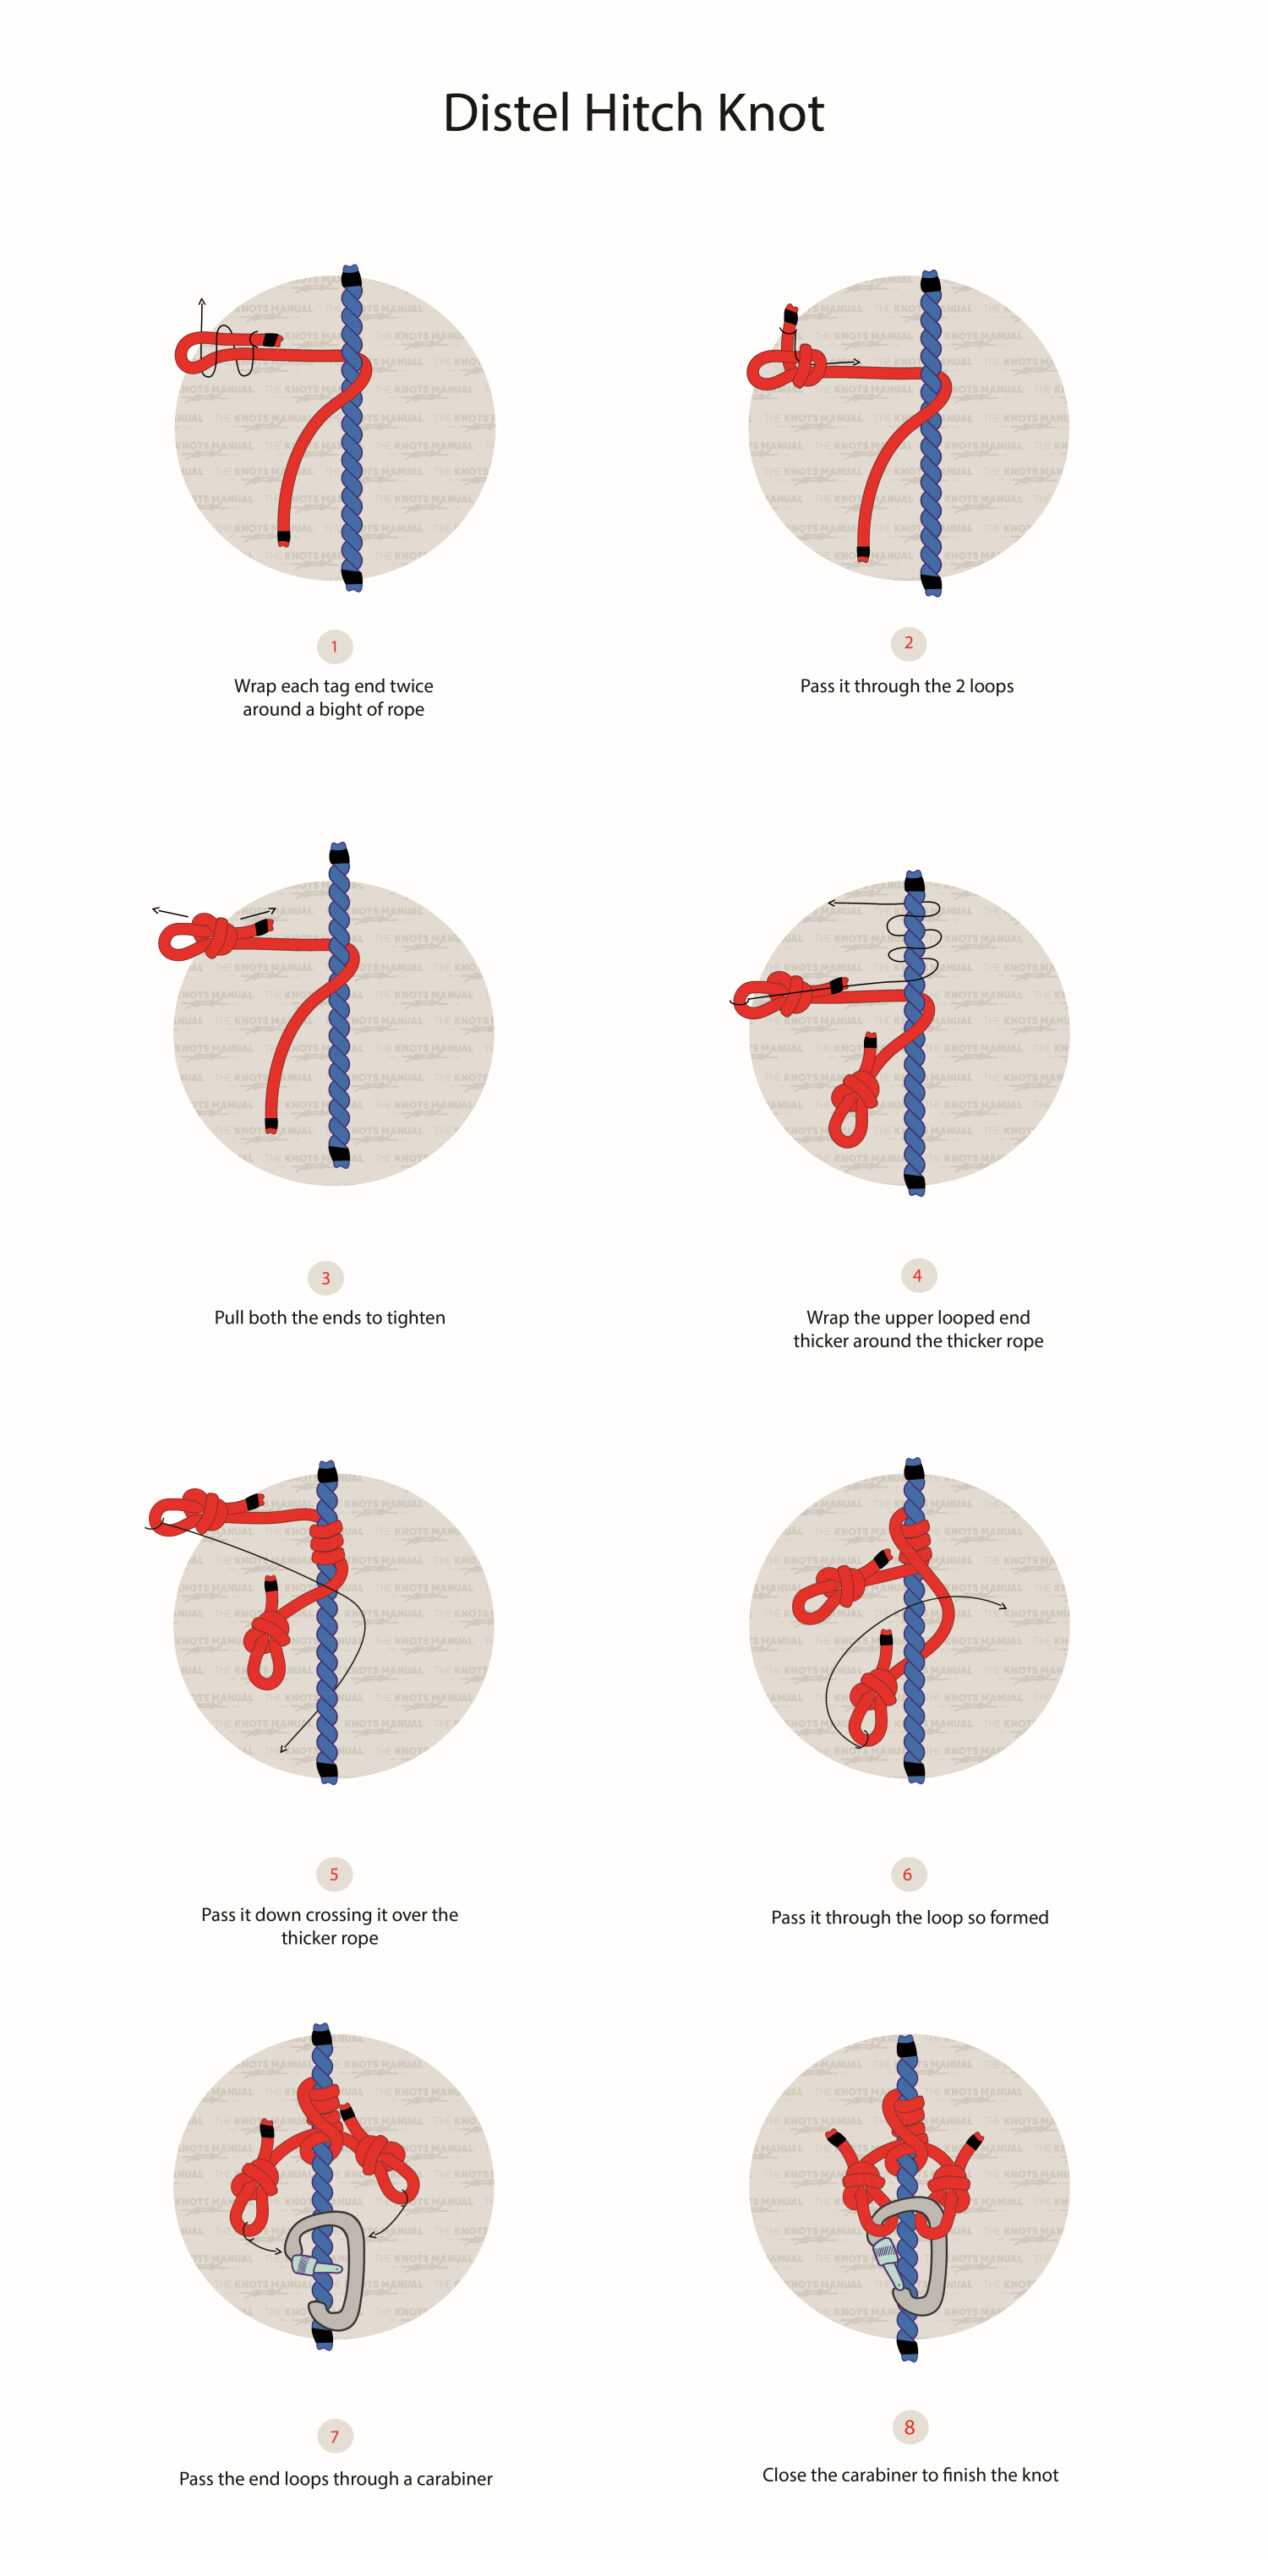
To tie the Distel Hitch, you first need to make a Lanyard with eyes on each side. This can be done with a cord roughly 1 meter (40 inches) in length. It must be smaller in diameter than the main line to grip well.
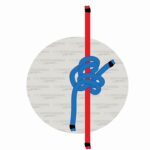
To tie the eyes, most commonly, a Poacher’s Knot is used, which is essentially a Double Overhand Knot. It creates a self-tightening eye at the end of the rope. You can tie it by making a bight at the end of the rope, wrapping around it 2 times, and passing the working end through both loops (Steps 1-3).
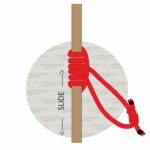
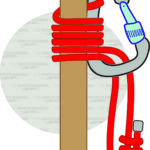
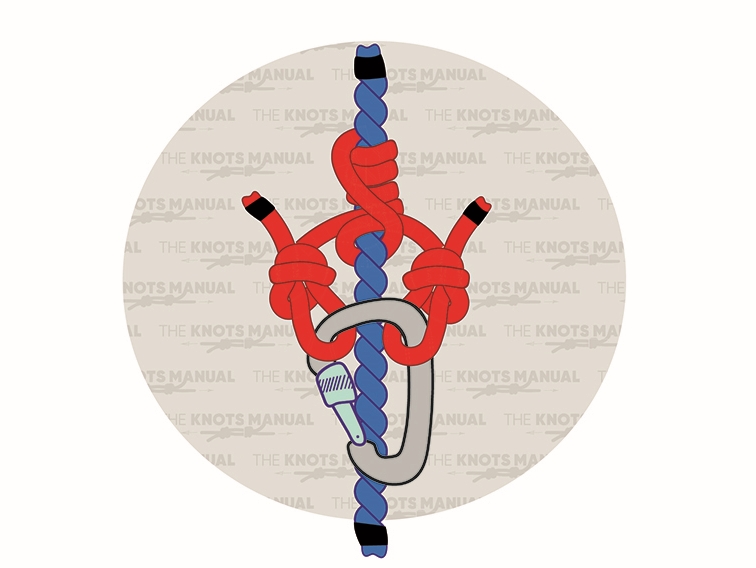
The Distel Hitch itself is tied identically to the Clove Hitch, only with additional turns. Wrap the top eye around the main line 3-4 times. Then pass it over the bottom eye, do another turn, and pass the eye under the final loop. Finally, pass a carabiner through both eyes and lock the carabiner to finish the knot.
It’s suggested to do 4 turns (4 to 1) on the top part of the knot, but some people prefer to do only 3 turns (3 to 1). It works, but not with all rope materials so you have to experiment for yourself. 3 turns will result in less grip, but it will be easier to slide.
It’s also important to dress this knot carefully because it directly affects its performance. All wraps should be neatly placed next to each other.
Some people like to tie this knot upside down. You can start by tieing the bottom part first and then do 3-4 turns at the top. The structure of the knot doesn’t change, so it’s a matter of preference.
Pros and Cons of the Distel Hitch
The Distel Hitch Knot is so popular because it’s straightforward and easy to tie. It’s also hard to tie it incorrectly, which reduces the chances of accidents.
It also offers a very good grip while the knot is loaded with weight. Enough to easily support the weight of a climber.
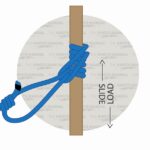
The Distel Hitch is advantageous to use for descending a rope. Even when loaded with weight, you can easily release its grip with one hand, allowing for an easy and controlled descent.
It can be combined with a micro pulley that’s attached to the carabiner. It’s very beneficial for ascending the rope because you can hold the top part of the rope with one hand while pulling the bottom one with your other hand to slide the knot upwards. This makes the task of climbing up a rope much easier.
The main downside of this knot is that it requires a carabiner. A Prusik Knot, for example, doesn’t require any carabiners.
Another downside is that it holds friction only when pulled from one direction. This limits it only to climbing up vertically.
And the last downside is that sometimes, the Distel Hitch can lock up and become very hard to slide. That’s why it’s important to always pay attention to how well this knot is dressed. The locking up is caused by some of the wraps overlapping one another.
Common Uses for the Distel Hitch Knot
Most commonly, the Distel Hitch is used by arborists to climb up a tree. A rope is attached to one of the top branches, and then the arborist can slowly ascend it using a single Distel Hitch. Usually in this system, a micro pulley is used to ascend more easily. Another safety rope is also attached to the harness to work as a backup.
It’s also very commonly used for descending a rope. In this case, the descent should be slow and controlled not to damage the thinner Lanyard rope. A Distel Hitch is beneficial in this case because friction can be released very easily just with one hand.
The Distel Hitch can be used any time you need to ascend or descend a rope. It’s also used in search and rescue, caving, climbing, mountaineering, the military, and by survivalists.
Knots Like the Distel Hitch
Prusik Knot: The Prusik Knot is the most popular slide-and-grip knot used to ascend or descend a rope. It also works very well (in both directions) but it does not grip as well as the Distel Hitch. One advantage is that it’s less likely to lock up than the Distel Hitch.
French Prusik: A variation of the Prusik Knot which is meant for loading weight only in one direction. It has a very similar structure to the Distel Hitch, only used with a Prusik Loop. It’s similar in strength and ease of use, only doesn’t require a carabiner.
Klemheist Knot: Another slide-and-grip knot that’s very similar to the French Prusik and also works only in one direction. It’s easier to slide than the Distel Hitch but doesn’t provide as good grip. It also doesn’t need a carabiner to work.
Blake’s Hitch: A very simple slide-and-grip knot that doesn’t need a carabiner and a separate Lanyard. It’s also tied very similarly to the Distel Hitch. Its main disadvantage is that it can come loose if used as the main grip knot for ascending/descending. That’s why it’s most commonly used as a backup.
Valdotain Tresse: A very similar knot to the Distel Hitch, often used by expert climbers for rappels and ascends. It’s easy to tie incorrectly, so it shouldn’t be used by inexperienced hikers. It offers less friction than the Distel Hitch, but it can be released under load much more easily.
Bachmann Knot: Another popular slide-and-grip knot used by climbers and arborists to climb and descend vertical ropes. It directly involves a carabiner in the knot itself. It’s very easy to slide, but over time, damages the rope and offers less grip.
Step-By-Step Guide: How to Tie a Distel Hitch
A step-by-step guide on how to tie a Distel Hitch Knot.
Step 1:
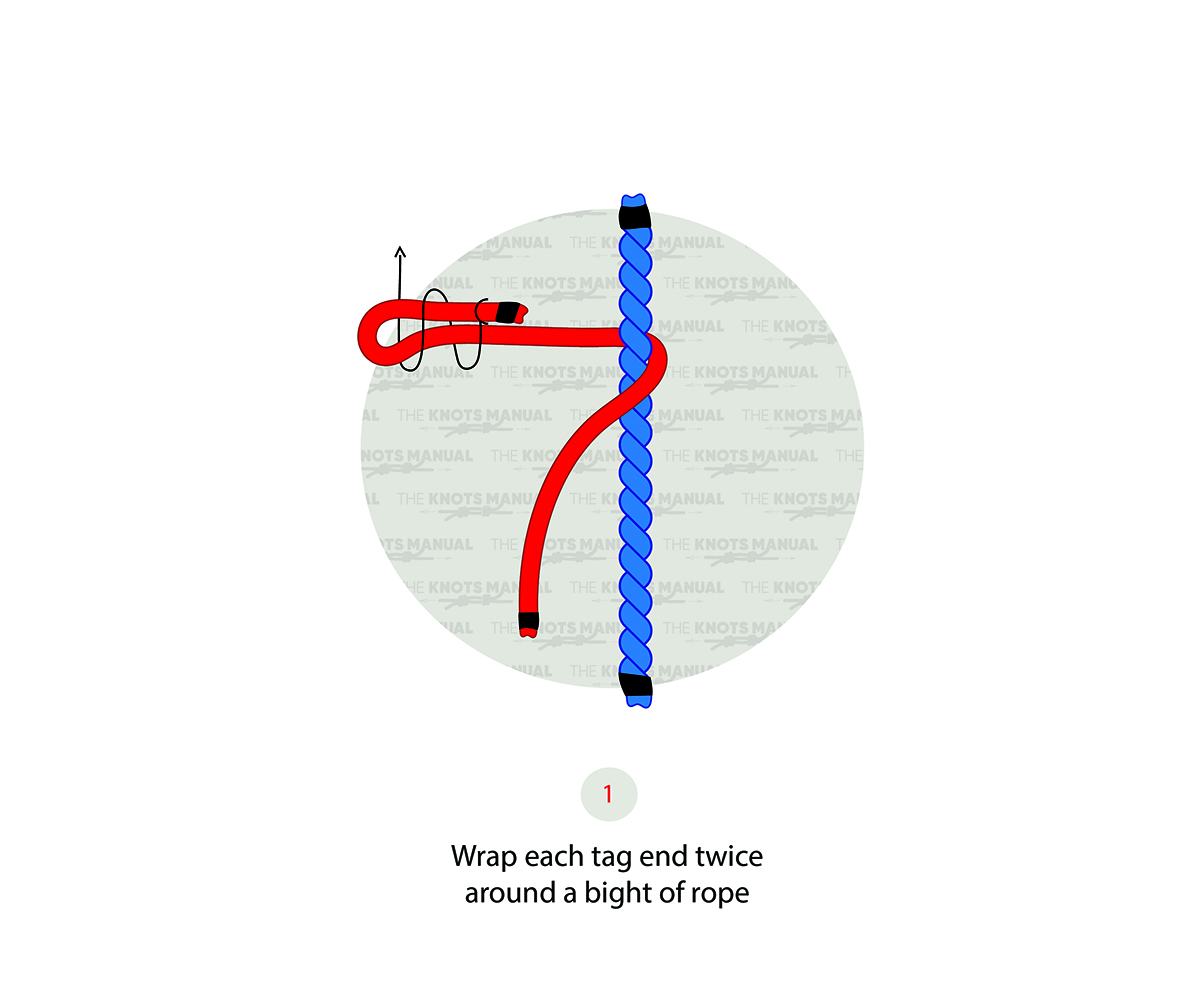
To tie the Distel Hitch, you’ll need to create a shorter eye-to-eye piece of rope that will go around the main rope. To tie each eye, make a bight in the end and then go around it twice with the working end.
Step 2:
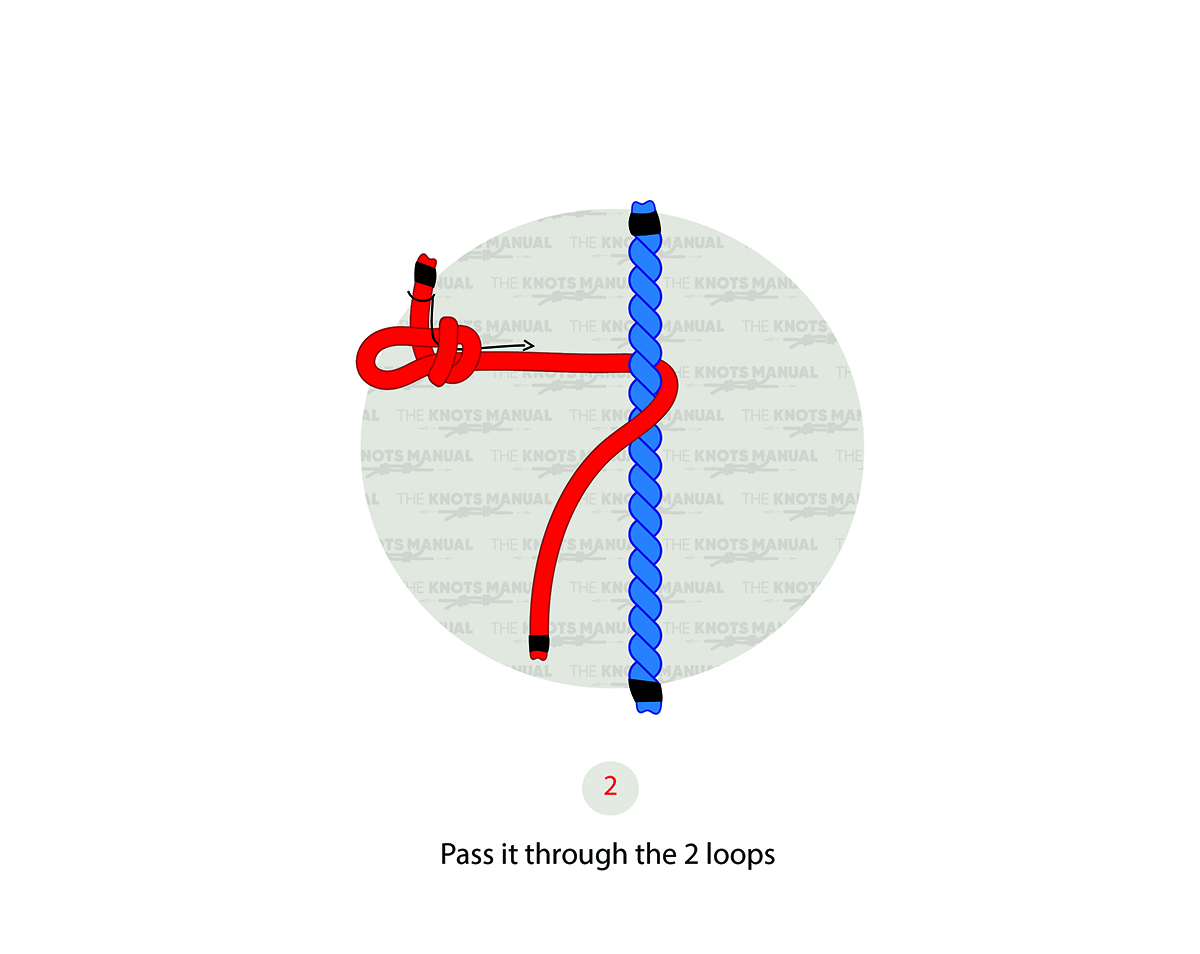
Pass the working end through both loops to form a Poacher’s Knot (a self-tightening eye).
Step 3:
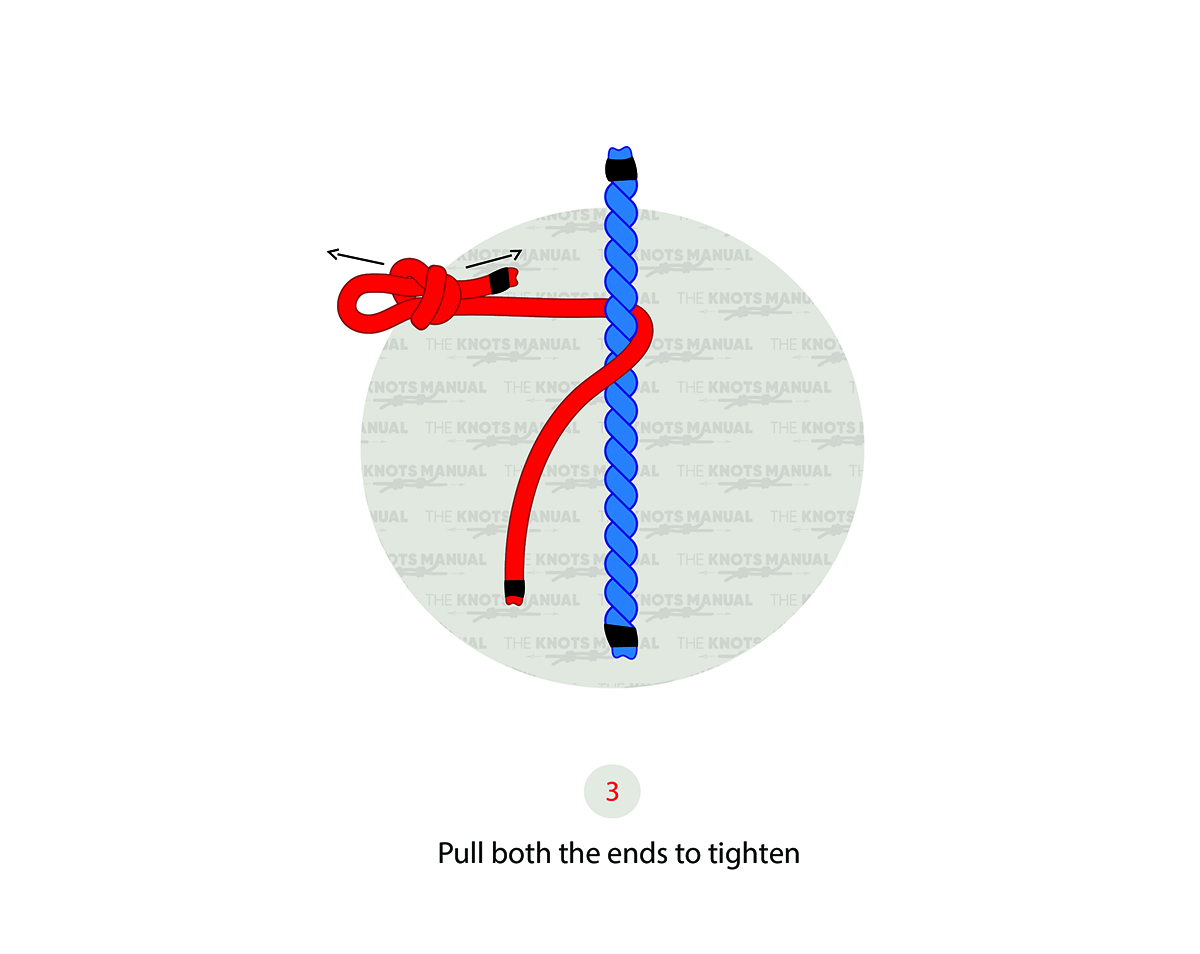
Tighten by pulling the eye opposite to the rope.
Step 4:

Wrap the top eye 3-4 times around the static rope.
Step 5:
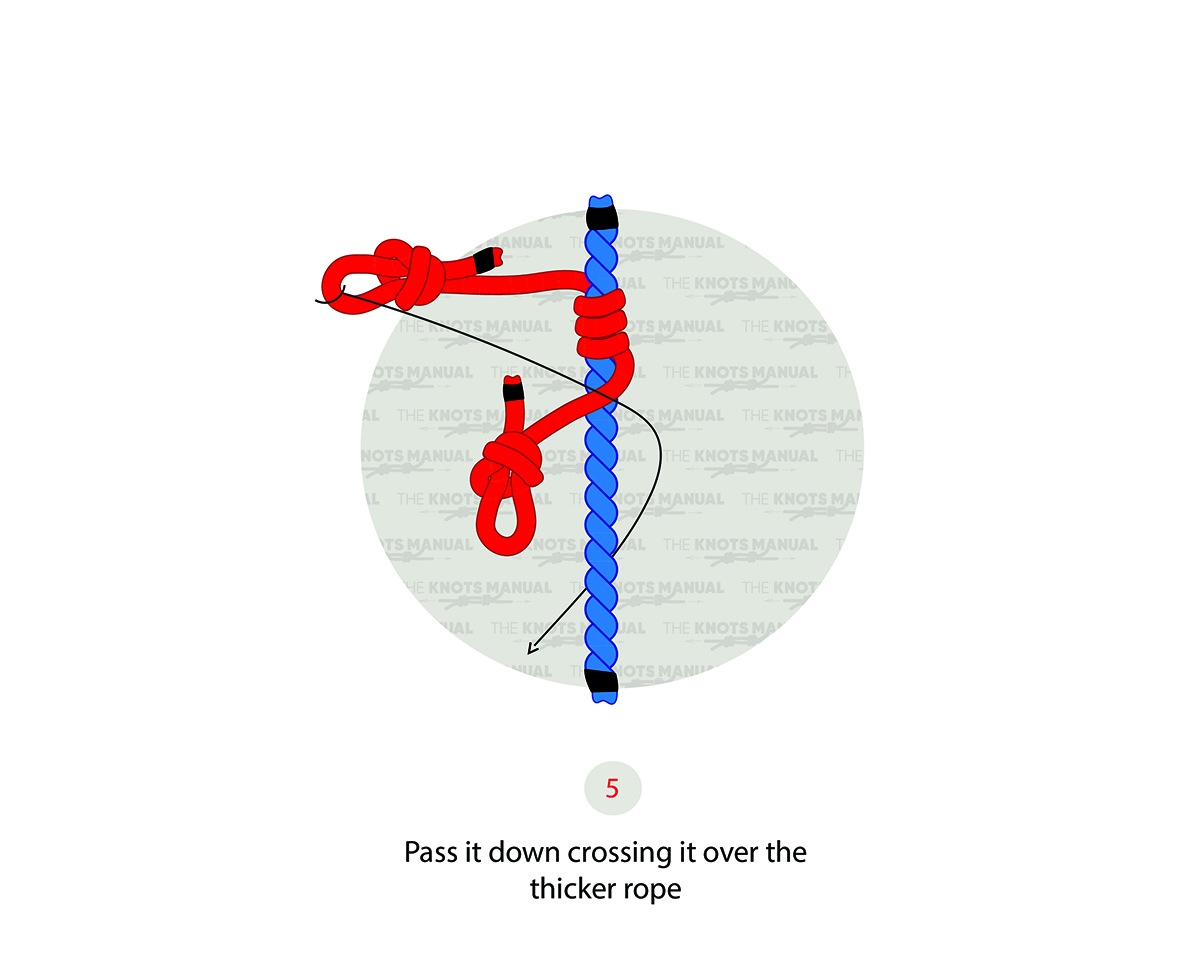
Go over the bottom eye and wrap it around another time.
Step 6:
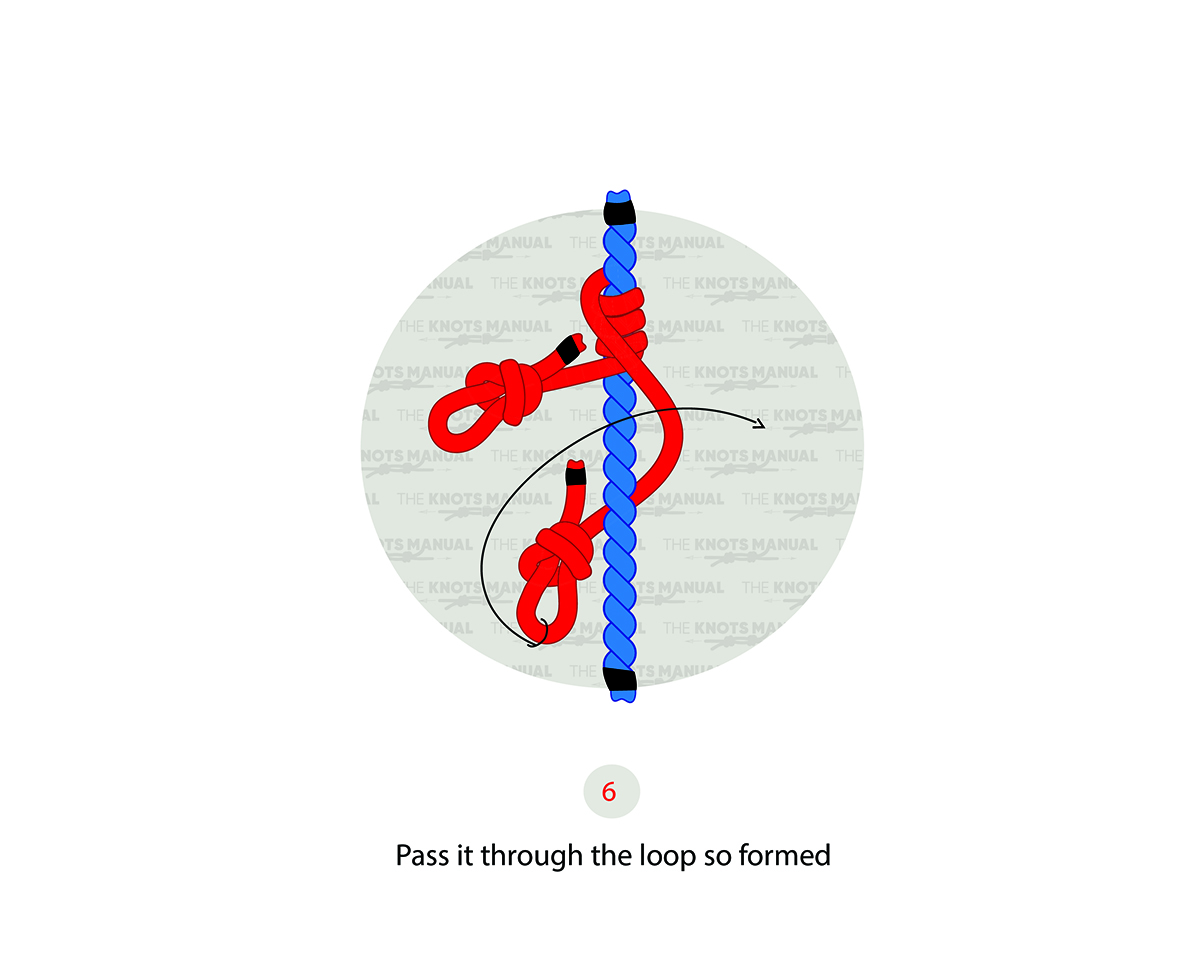
This time go underneath the strand that you just formed.
Step 7:

Pass a carabiner through both eyes.
Step 8:
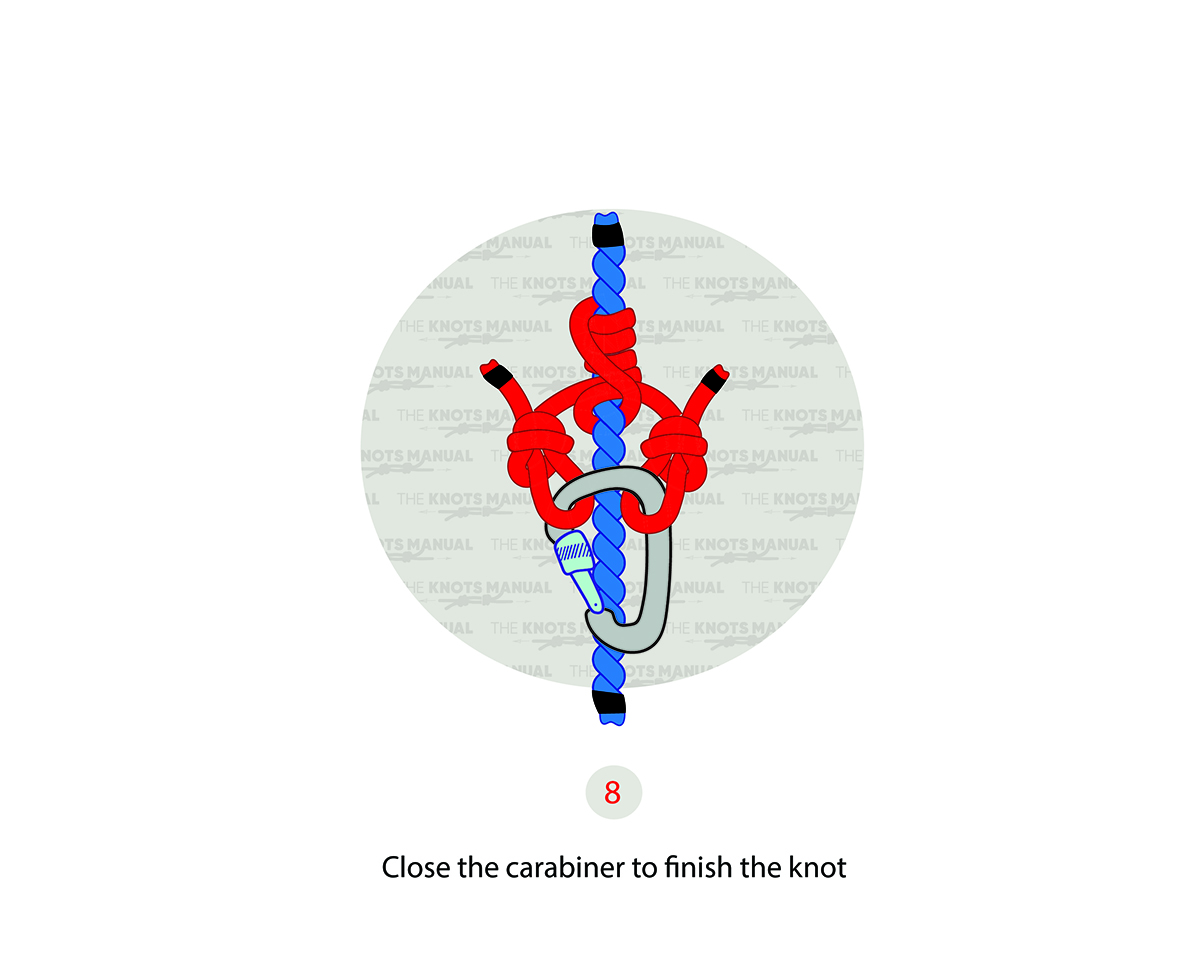
Lock the carabiner to keep it from opening.