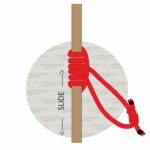
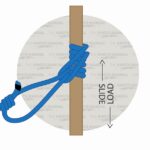
The Blake’s Hitch Knot is a very commonly used slide and grip knot used to ascend and descend a rope. It’s advantageous in some situations over the Prusik Knot because it can be tied with the end of the rope, allowing for a closed-loop system.
Quick Guide: Tying the Blake’s Hitch Knot
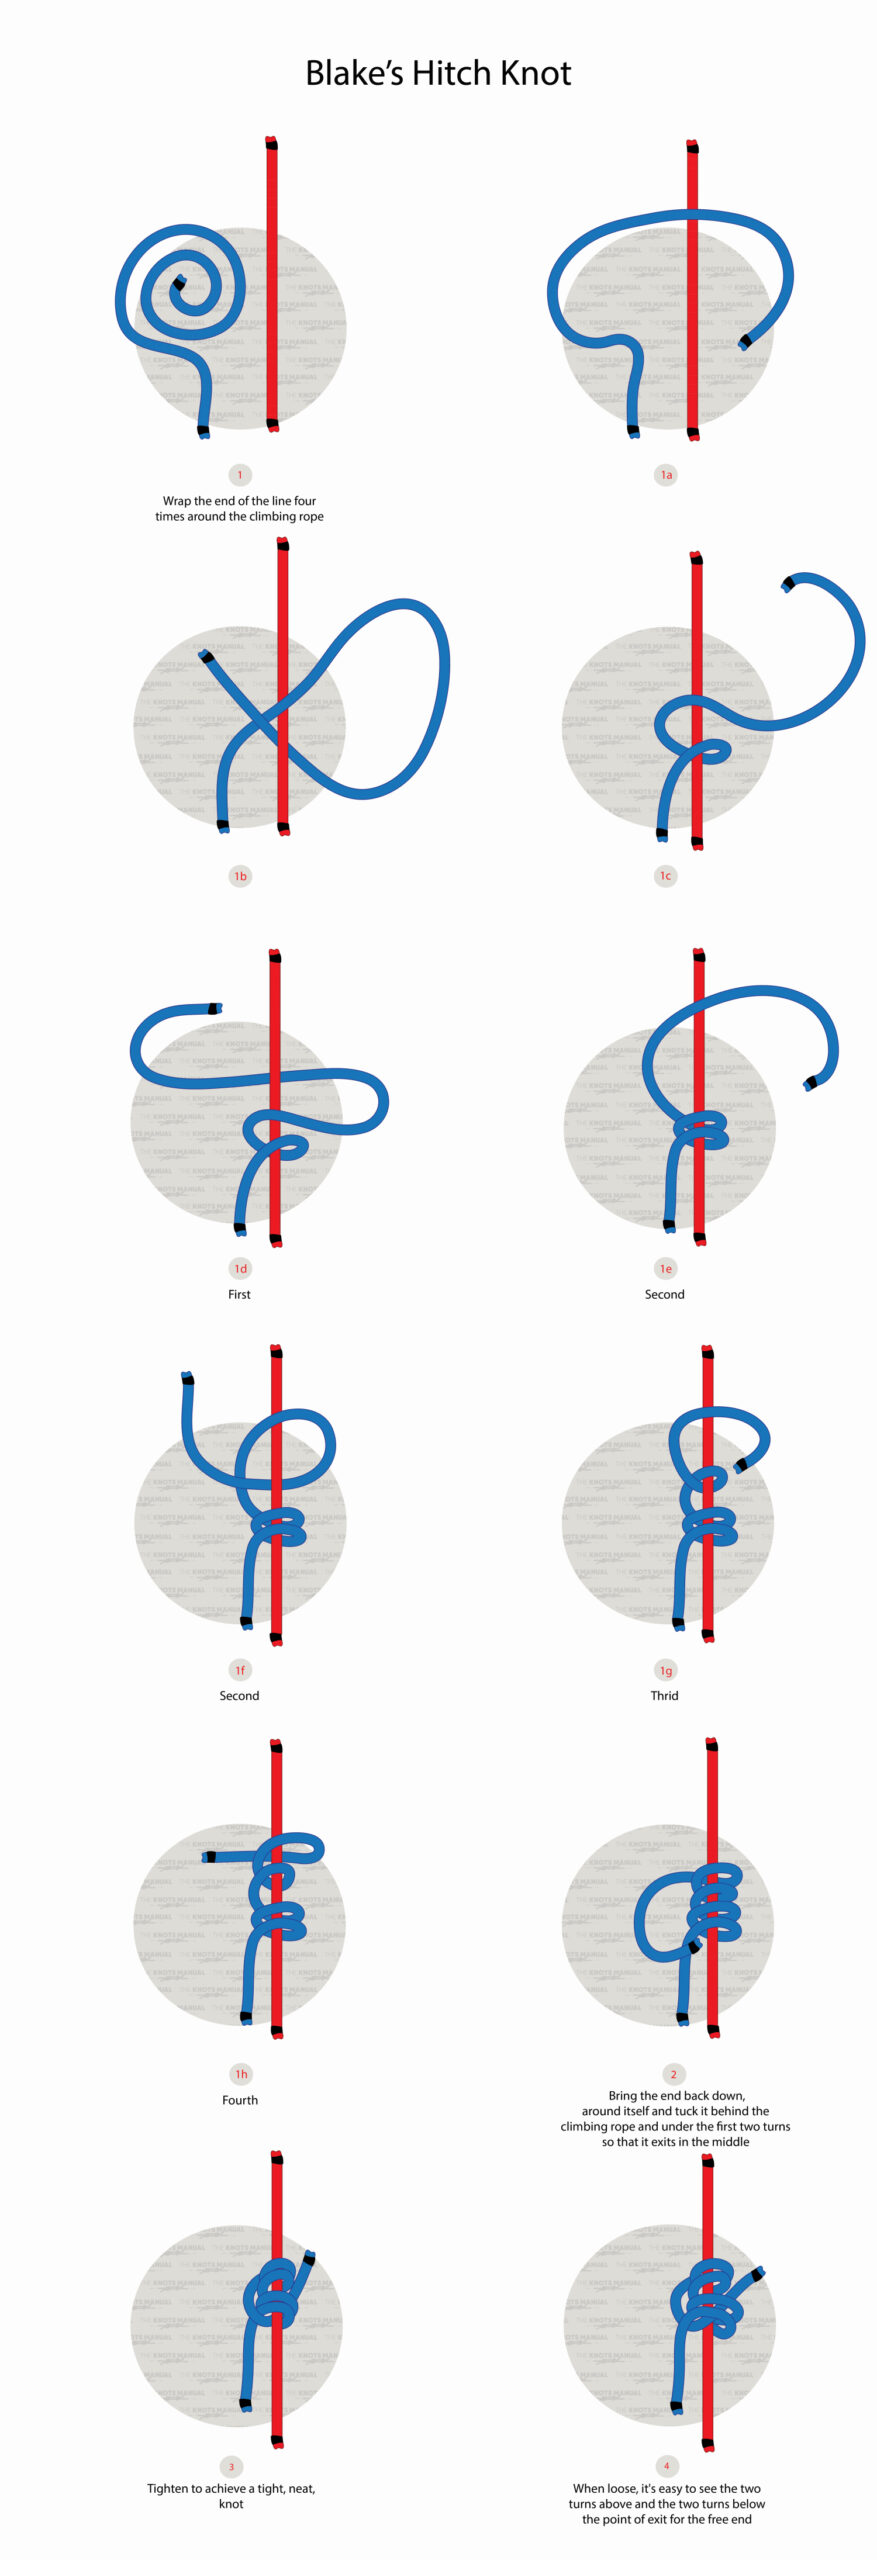
To tie Blake’s Hitch Knot, leave a rather long end near the end of the rope (Step 1). Then wrap it around the standing rope four full times (Step 1a – 1h). Then pass the end down over the standing end, and through the two bottom loops (Step 2). Finally, tighten the knot (Step 4).
When making the four turns, you can wrap the first two around your thumb. This will make it easier to pass the end of the rope through them later on.
This results in a 4/2 system, with 4 turns in total, and the end passed through 2 turns. But you can also tie it in a 5/3 system, with 5 full turns, and the end passed through 3 turns. The 5/3 system is preferable with slippery ropes because it results in more grip. But the 4/2 one is reliable enough with most ropes.
The end after the knot should be left rather long to account for slippage, much longer than in our illustrations. A lot of people also recommend tying a stopper knot right after the knot to make it safer. The Figure 8 Knot or the Double Overhand Knot are the most commonly used ones for this purpose.
Warning: In step 2, the working end has to go over the standing end, not behind it. Not doing this disassembles the bottom wrap and results in a much weaker knot.
Pros and Cons of the Blake’s Hitch Knot
The Blake’s Hitch Knot is very easy to tie and remember. This makes it ideal for teaching beginner knot makers.
Another advantage is that you don’t need a Prusik’s Loop to tie it. You can tie it with the end of the rope that you’re using to ascend or with another piece of shorter rope attached to your climbing harness.
The Blake’s Hitch is also a very secure knot. Even without a stopper knot, it’s unlikely to come undone under normal conditions. When used in combination with a stopper knot, it becomes even more reliable and secure.
When tying the Blake’s Hitch, you don’t need to use a rope that’s smaller in diameter than the main line (as opposed to most other slide and grip knots). It can be the same diameter as the main rope. This allows you to create a closed-loop system using a single rope by attaching the end of the rope to the standing end.
Its final advantage is that it doesn’t bind or jam. It’s easy to slide in most conditions and also easy to untie when you need to take it down.
The main downside of Blake’s Hitch is that it isn’t as reliable as the Prusik Knot and other more commonly used ascending knots. When you hold the knot with your hand, it can slip very fast and uncontrollably. So you need to learn how to use it first and use another backup knot when rappelling.
With the Blake’s Hitch, you can also apply load only from the bottom. So it should only be used in vertical situations, with the weight below the knot.
Common Uses for the Blake’s Hitch Knot
Most commonly Blake’s Hitch is used to ascend and descend a rope in a closed-loop system. To achieve this, you need to feed the main line over the top attachment point (anchor, tree branch, etc.) and then back down. Then tie a Midline Clove Knot roughly 4 feet from the end to attach to your climbing harness. And finally, tie the Blake’s Hitch to the main standing line.
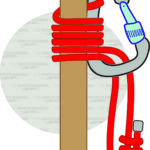
The Blake’s Hitch can also be tied with a micro pully for a more controlled and easier ascend. The bridge (the part between the knot and your climbing harness attachment point) should be left short. The pulley should sit right underneath Blake’s Hitch. In this system, the climber climbs up the rope using their hands and pulls the bottom of the rope with their free hand to tighten the slack. The pulley allows for a much easier tightening – easily doable with one hand.
Some Arborists also use the Self Tending variant of Blake’s Hitch. It’s tied by making the same closed-loop system and then tying the working end to the other end of the main line. A knot similar to the Bowline is tied around the standing line 1 foot above the Blake’s Hitch. By pulling the end of the standing line, the Blake’s Hitch now automatically tightens itself.
It’s mainly used by arborists to climb up and down trees. But it’s sometimes also used by climbers, mountaineers, cave explorers, and in search and rescue.
Knots Like the Blake’s Hitch
Prusik Hitch Knot: The most commonly used slide and grip knot to ascend and descend a rope. It requires a Prusik’s Loop which is 1/2 the diameter of the main line. It’s more secure than the Blake’s Hitch and doesn’t require stopper knots.
Klemheist Knot: A very similar knot to the Prusik Knot, used for similar applications. It slides just as easily as Blake’s Hitch and is more reliable. Its only downside is that it requires a Prusik Loop.
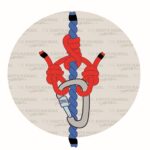
How to Tie the Bachmann Hitch KnotBachmann Knot: Another common slide and grip knot. Like the Prusik and Klemheist Knots, it also requires a Prusik Loop. Its main difference is that it is based on a carabiner, which allows the climber to slide it more easily, even more than Blake’s Hitch.
Rolling Hitch Knot: A very commonly used slide and grip knot that’s very similar to Blake’s Hitch. It’s much less reliable, so it’s mainly used to temporarily attach the end of a rope around an object.
Taut Line Hitch: Another commonly used slide and grip knot. It’s less secure than the Blake’s Hitch, so it’s usually used to tension a rope.
Stey-By-Step Guide: How to Tie the Blake’s Hitch Knot
An illustrated guide on how to tie the Blake’s Hitch Knot.
Step 1:
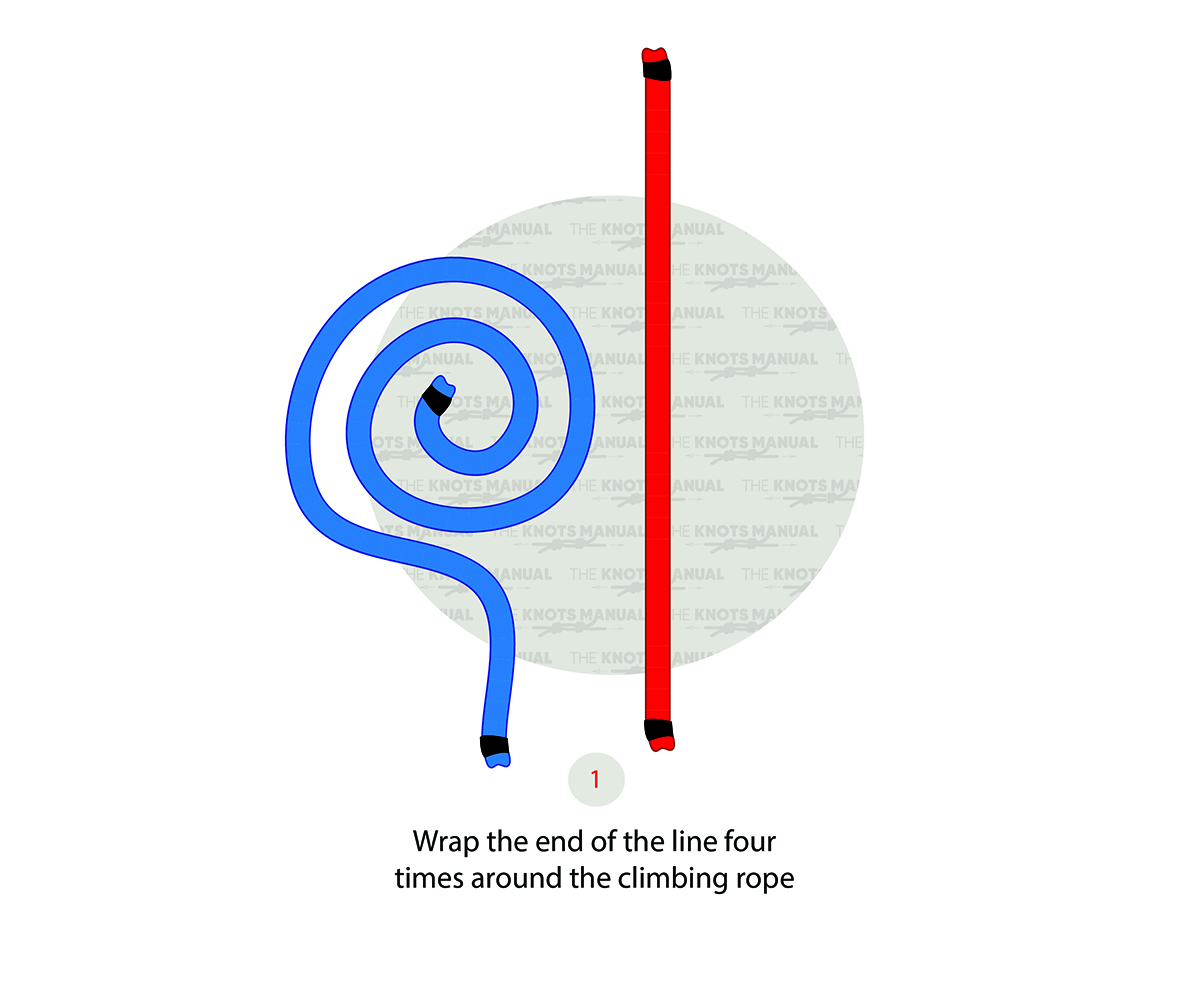
Take a rather long end of the rope.
Step 1a:
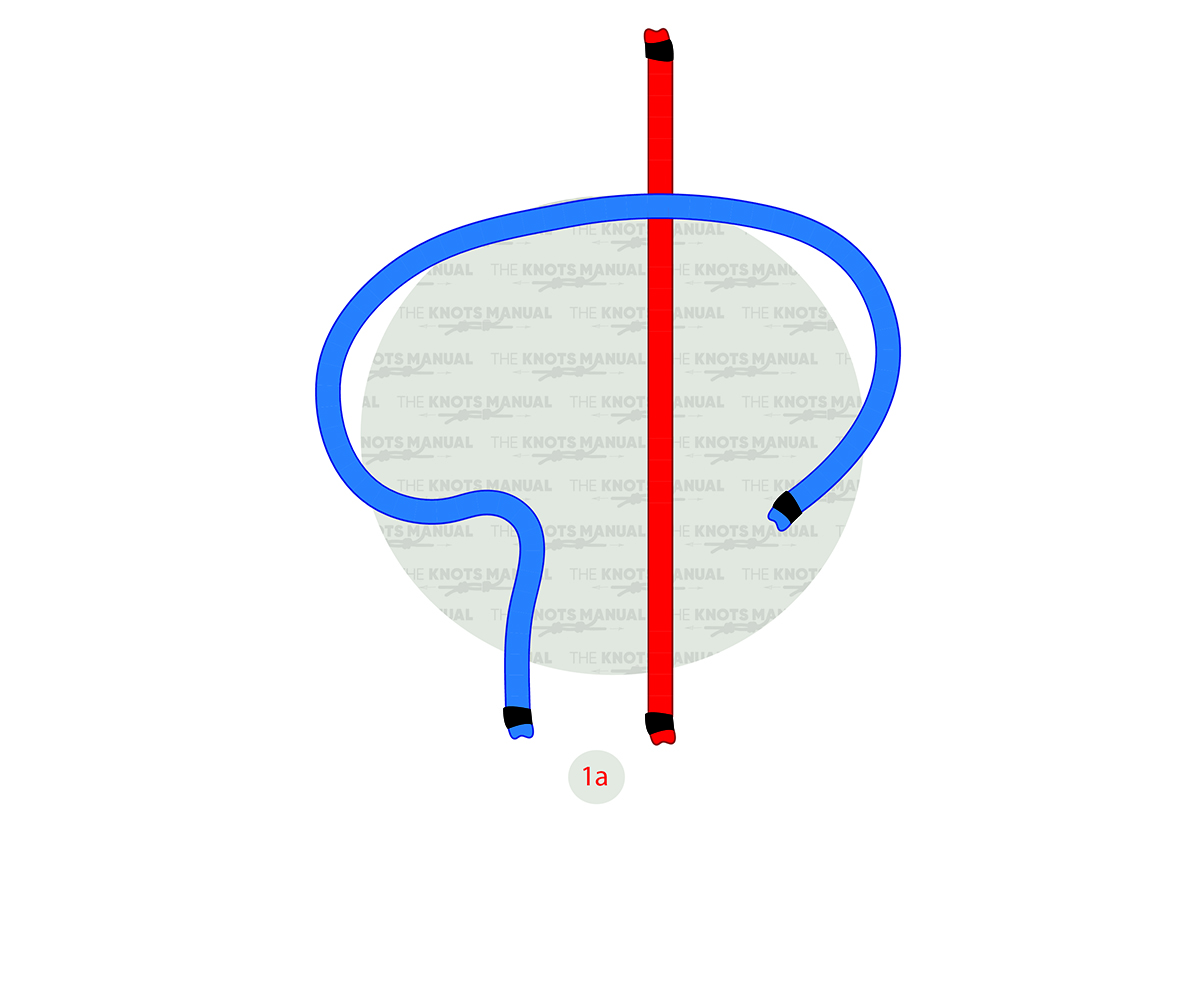
Pass it over the standing rope.
Step 1b:
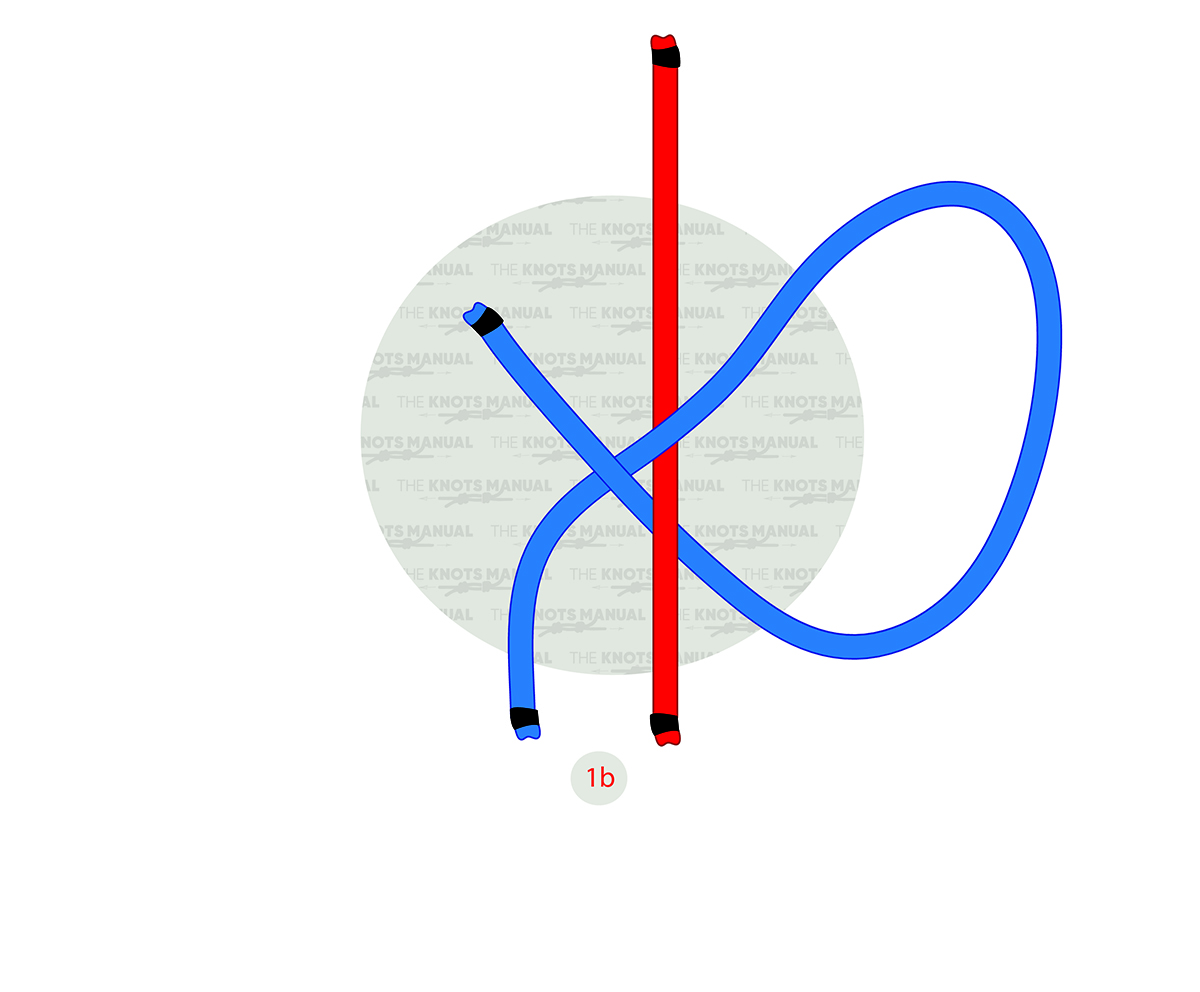
Make the first full turn.
Step 1c:
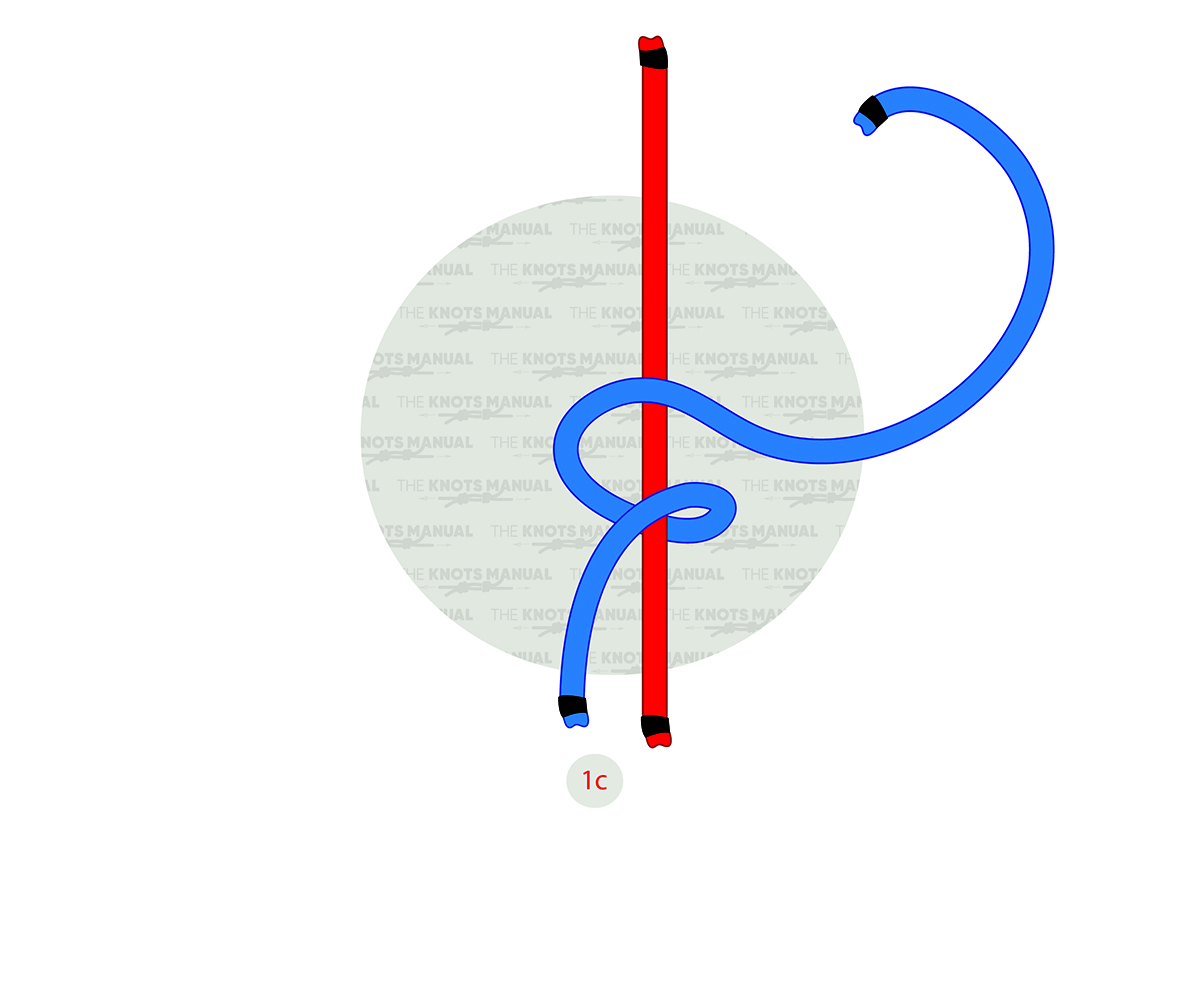
Continue wrapping it around upwards.
Step 1d:
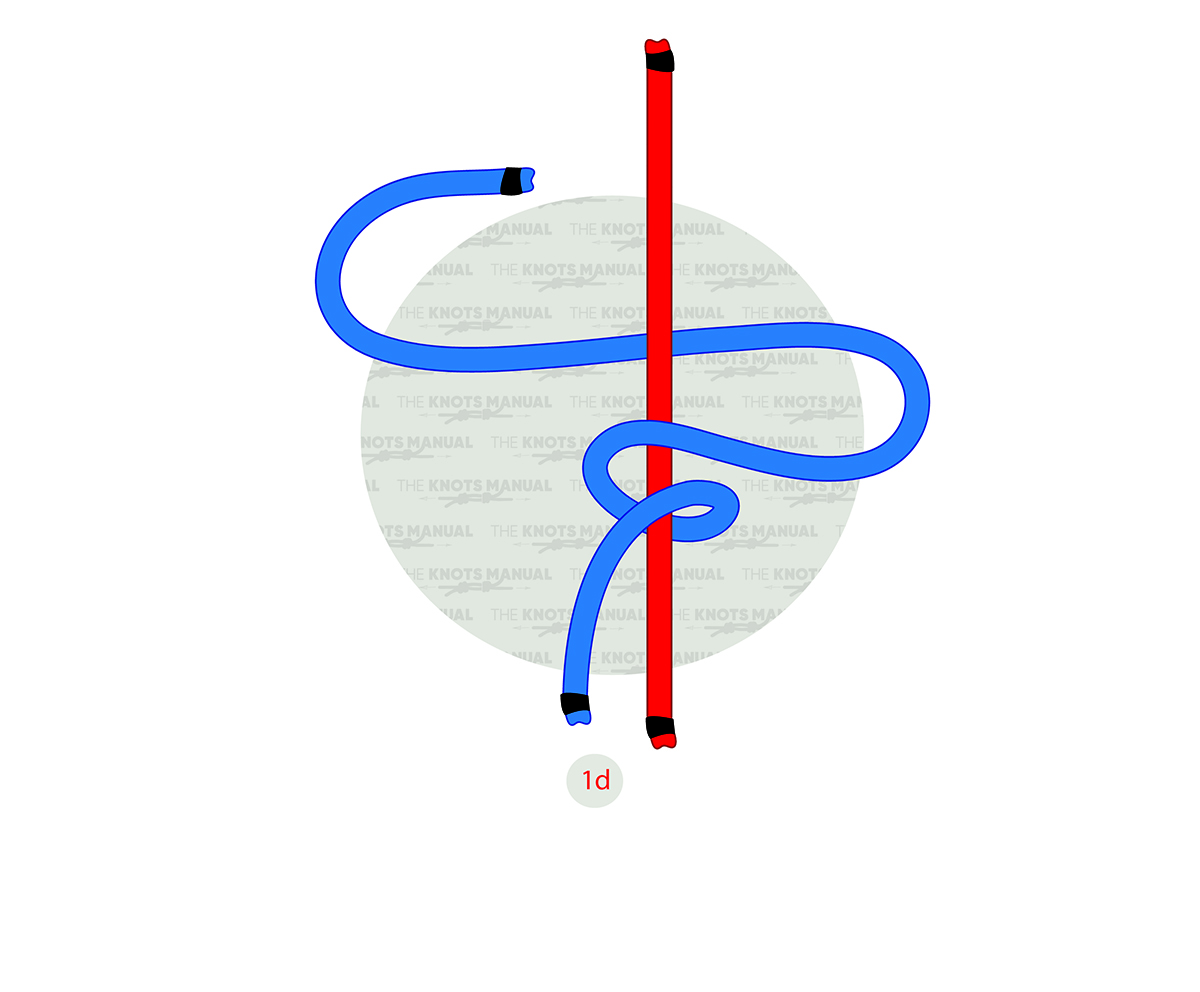
Do a second turn.
Step 1e:
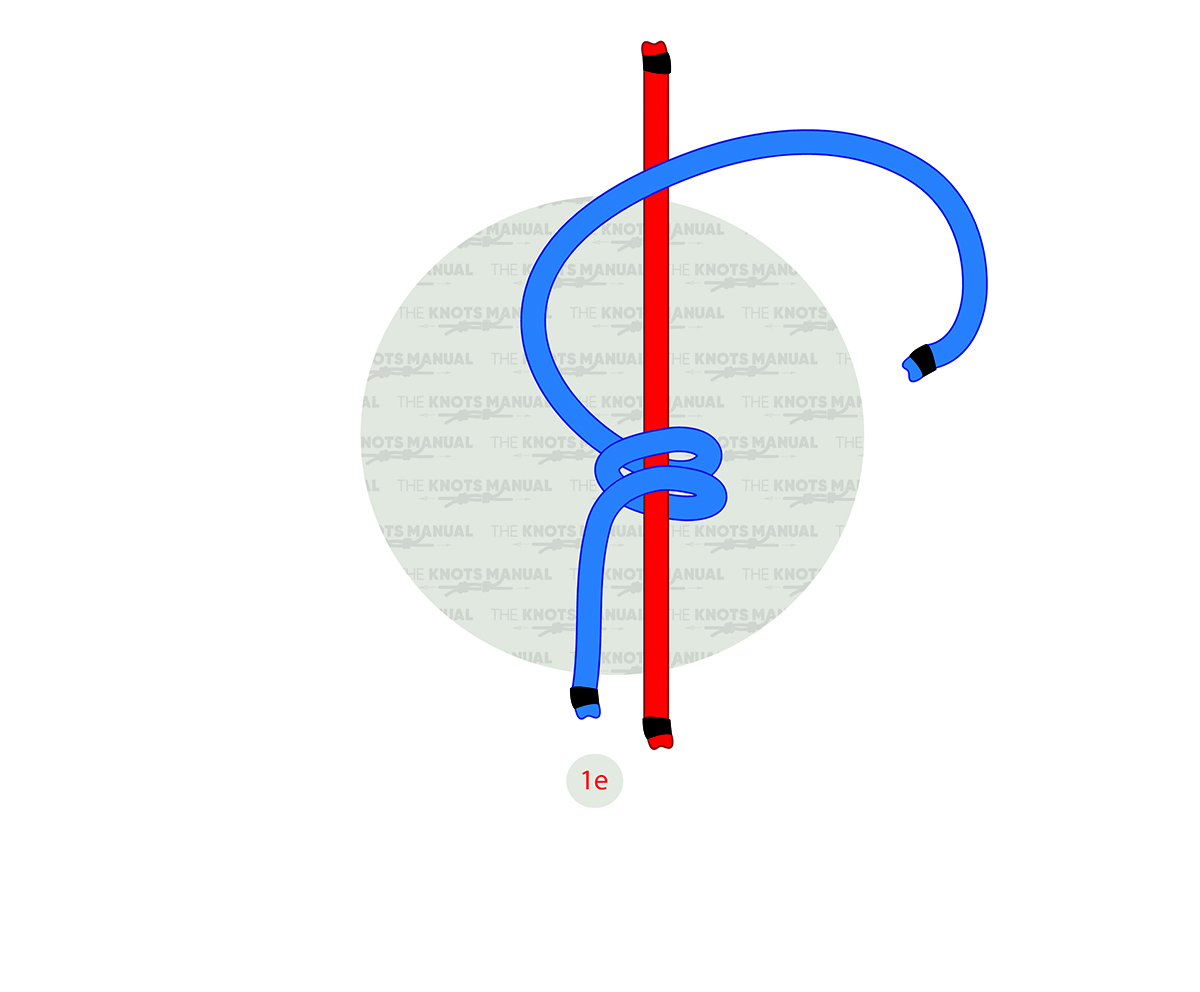
Leave a slight gap after the second turn.
Step 1f:
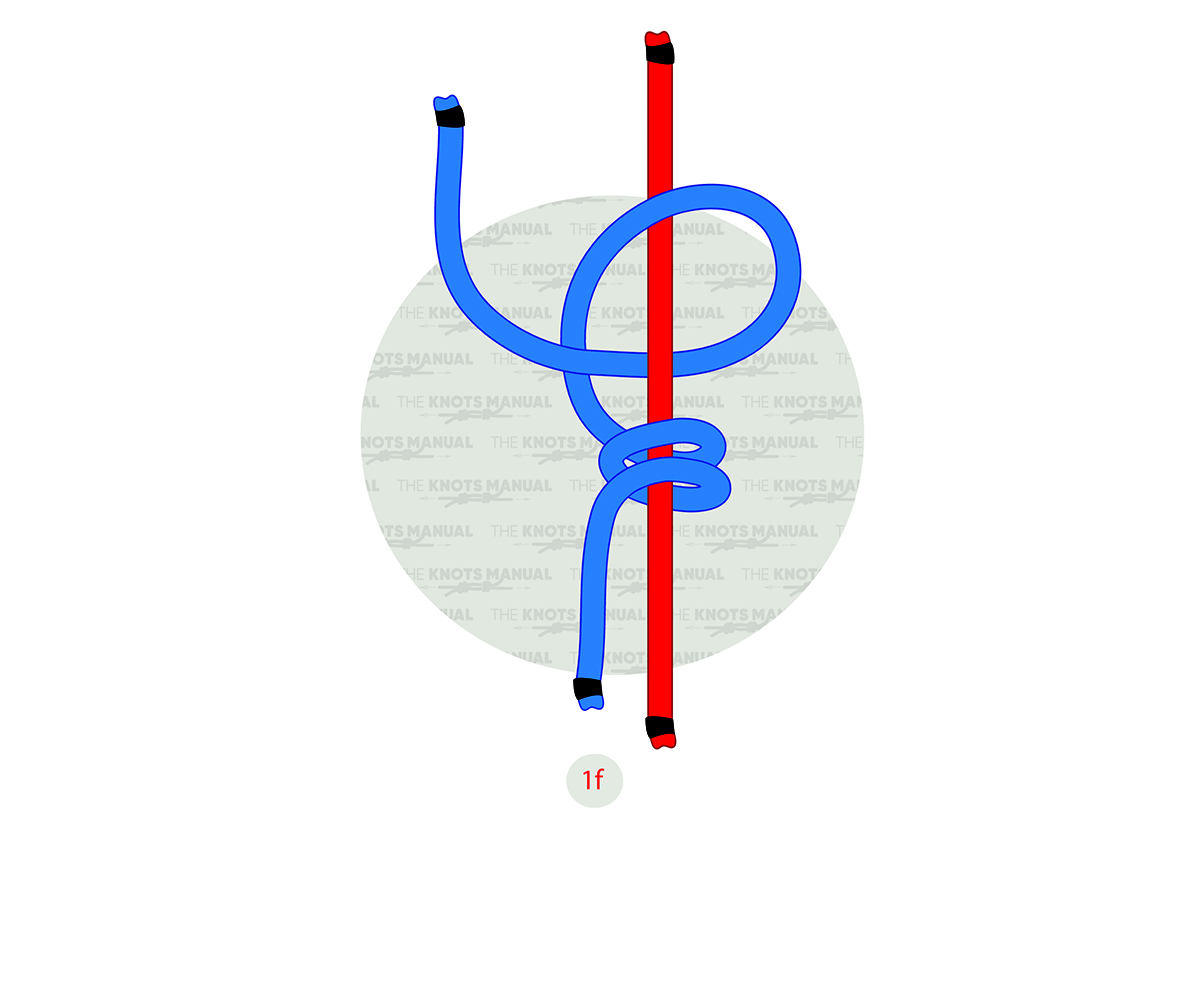
Do the third full turn.
Step 1g:

Continue with another turn.
Step 1h:
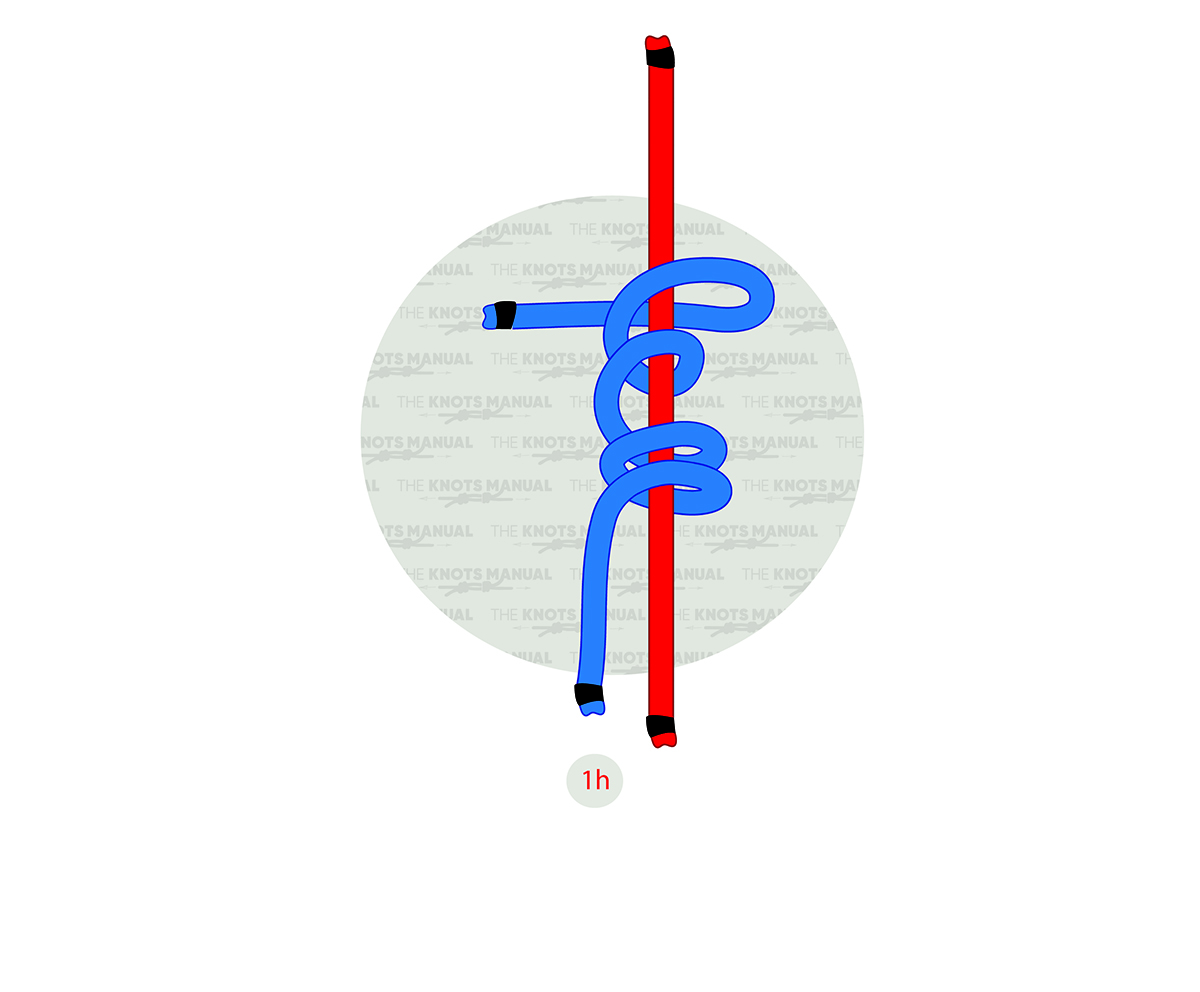
Do the fourth full turn.
Step 2:
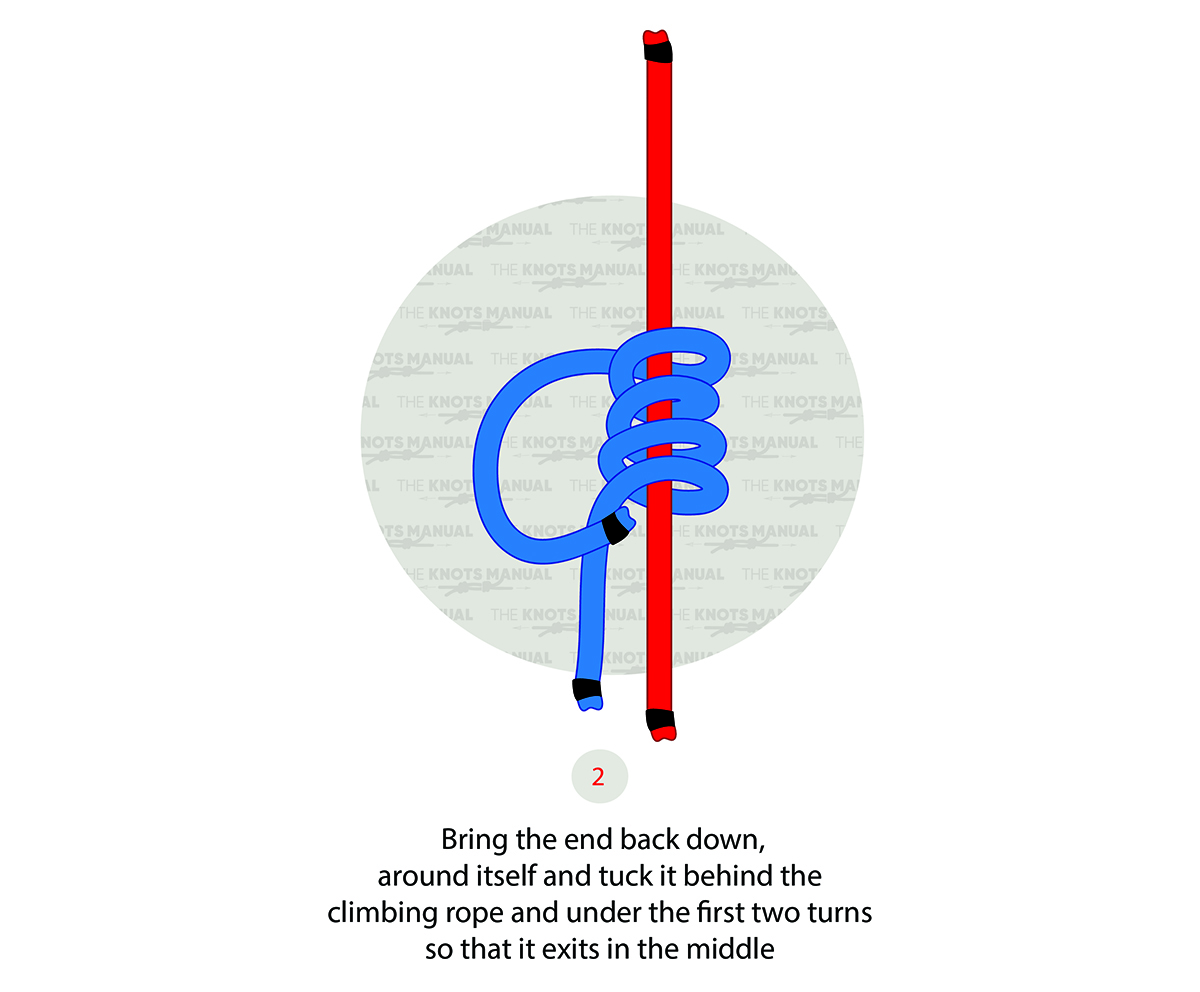
After four full turns, pass the working end over to the bottom of the knot, going over the standing end.
Step 3:
Pass the working end through both bottom loops formed by making the first two turns.
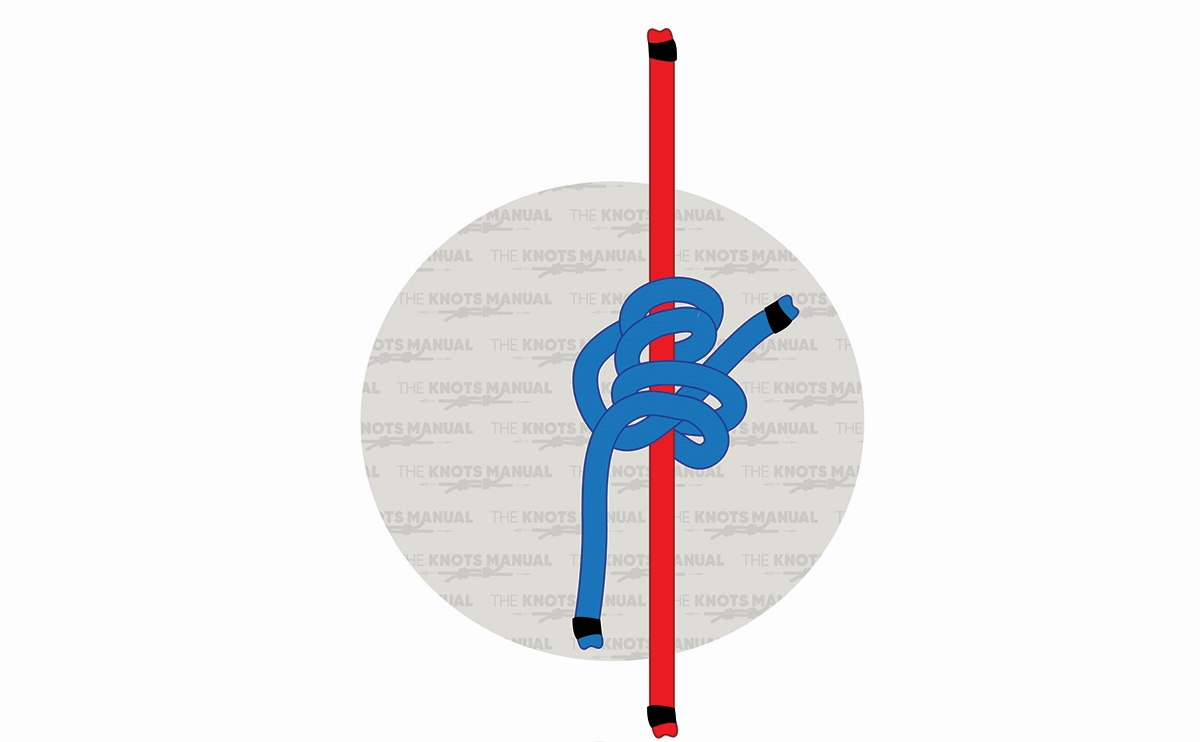
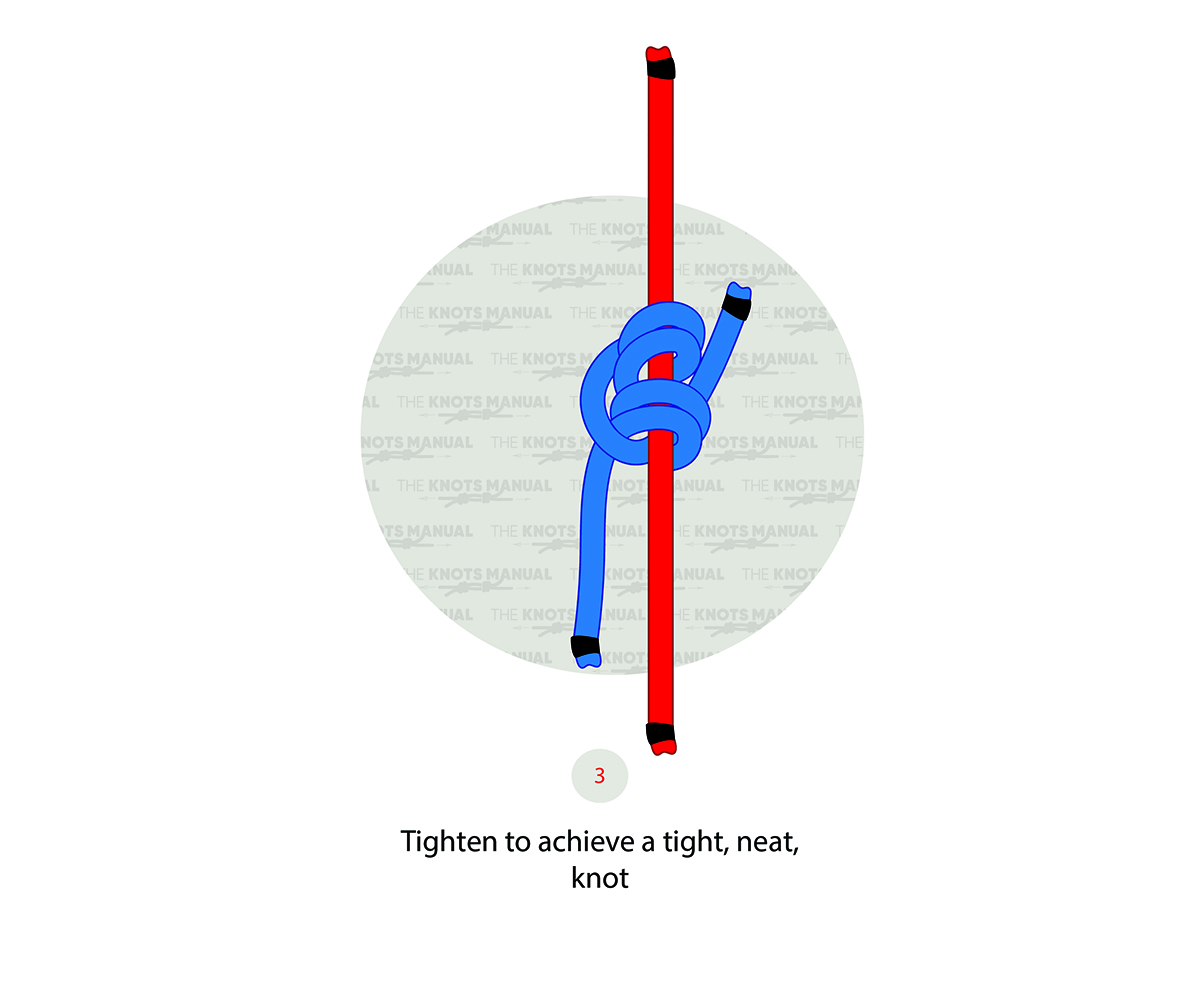
Step 4:
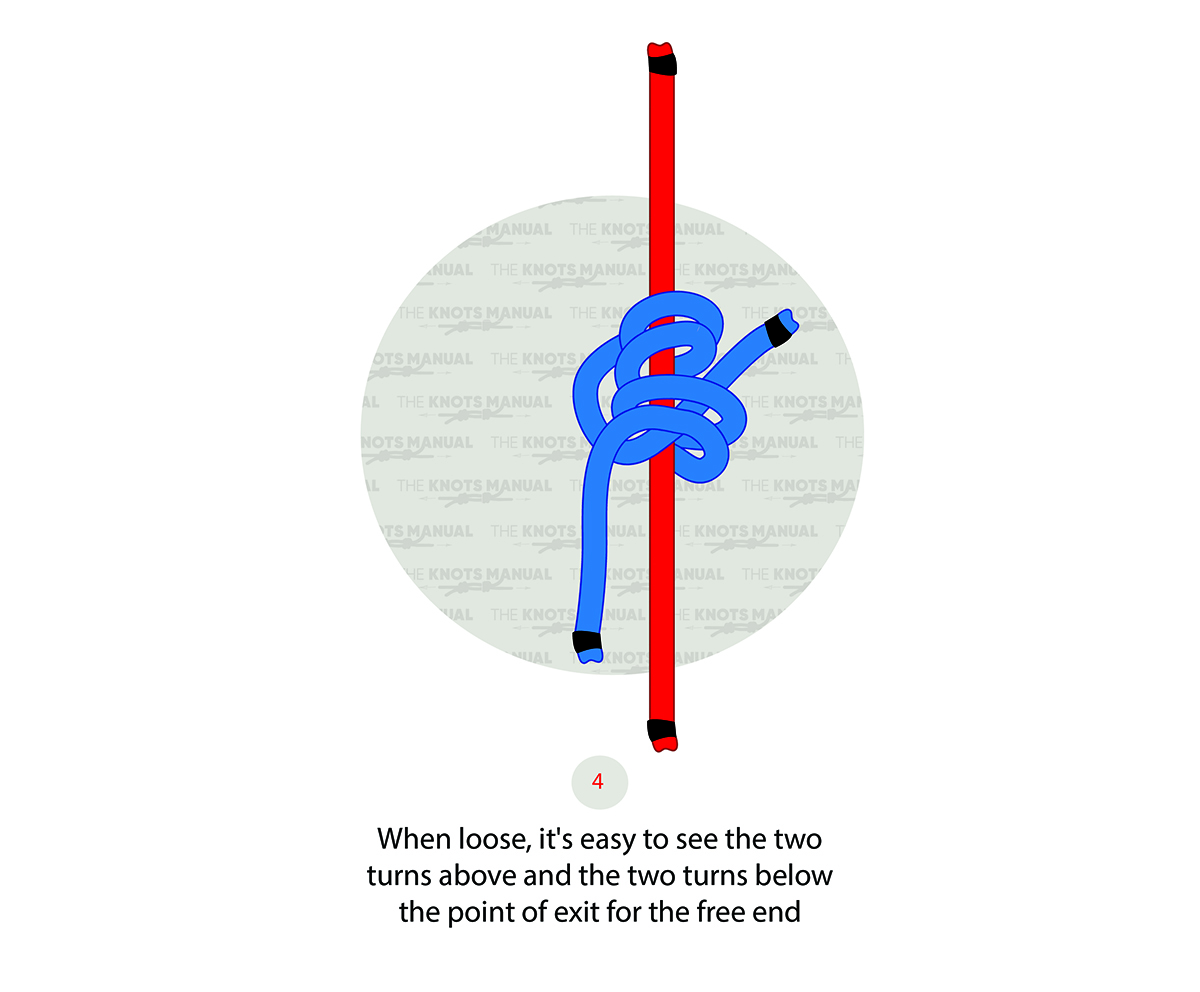
The working end should exit in the middle of the knot, with two turns above and two turns below. Finally, tighten the knot.
Are Steps F and G illustrated properly?