The Tensionless Hitch is considered to be the strongest anchor hitch knot. When tied around a rough, large anchor with a sufficient amount of wraps, it doesn’t lose any strength. The final strength is identical to the rope used.
Other sources also sometimes refer to it as the “No-Knot”.
Quick Guide: Tying the Tensionless Hitch Knot
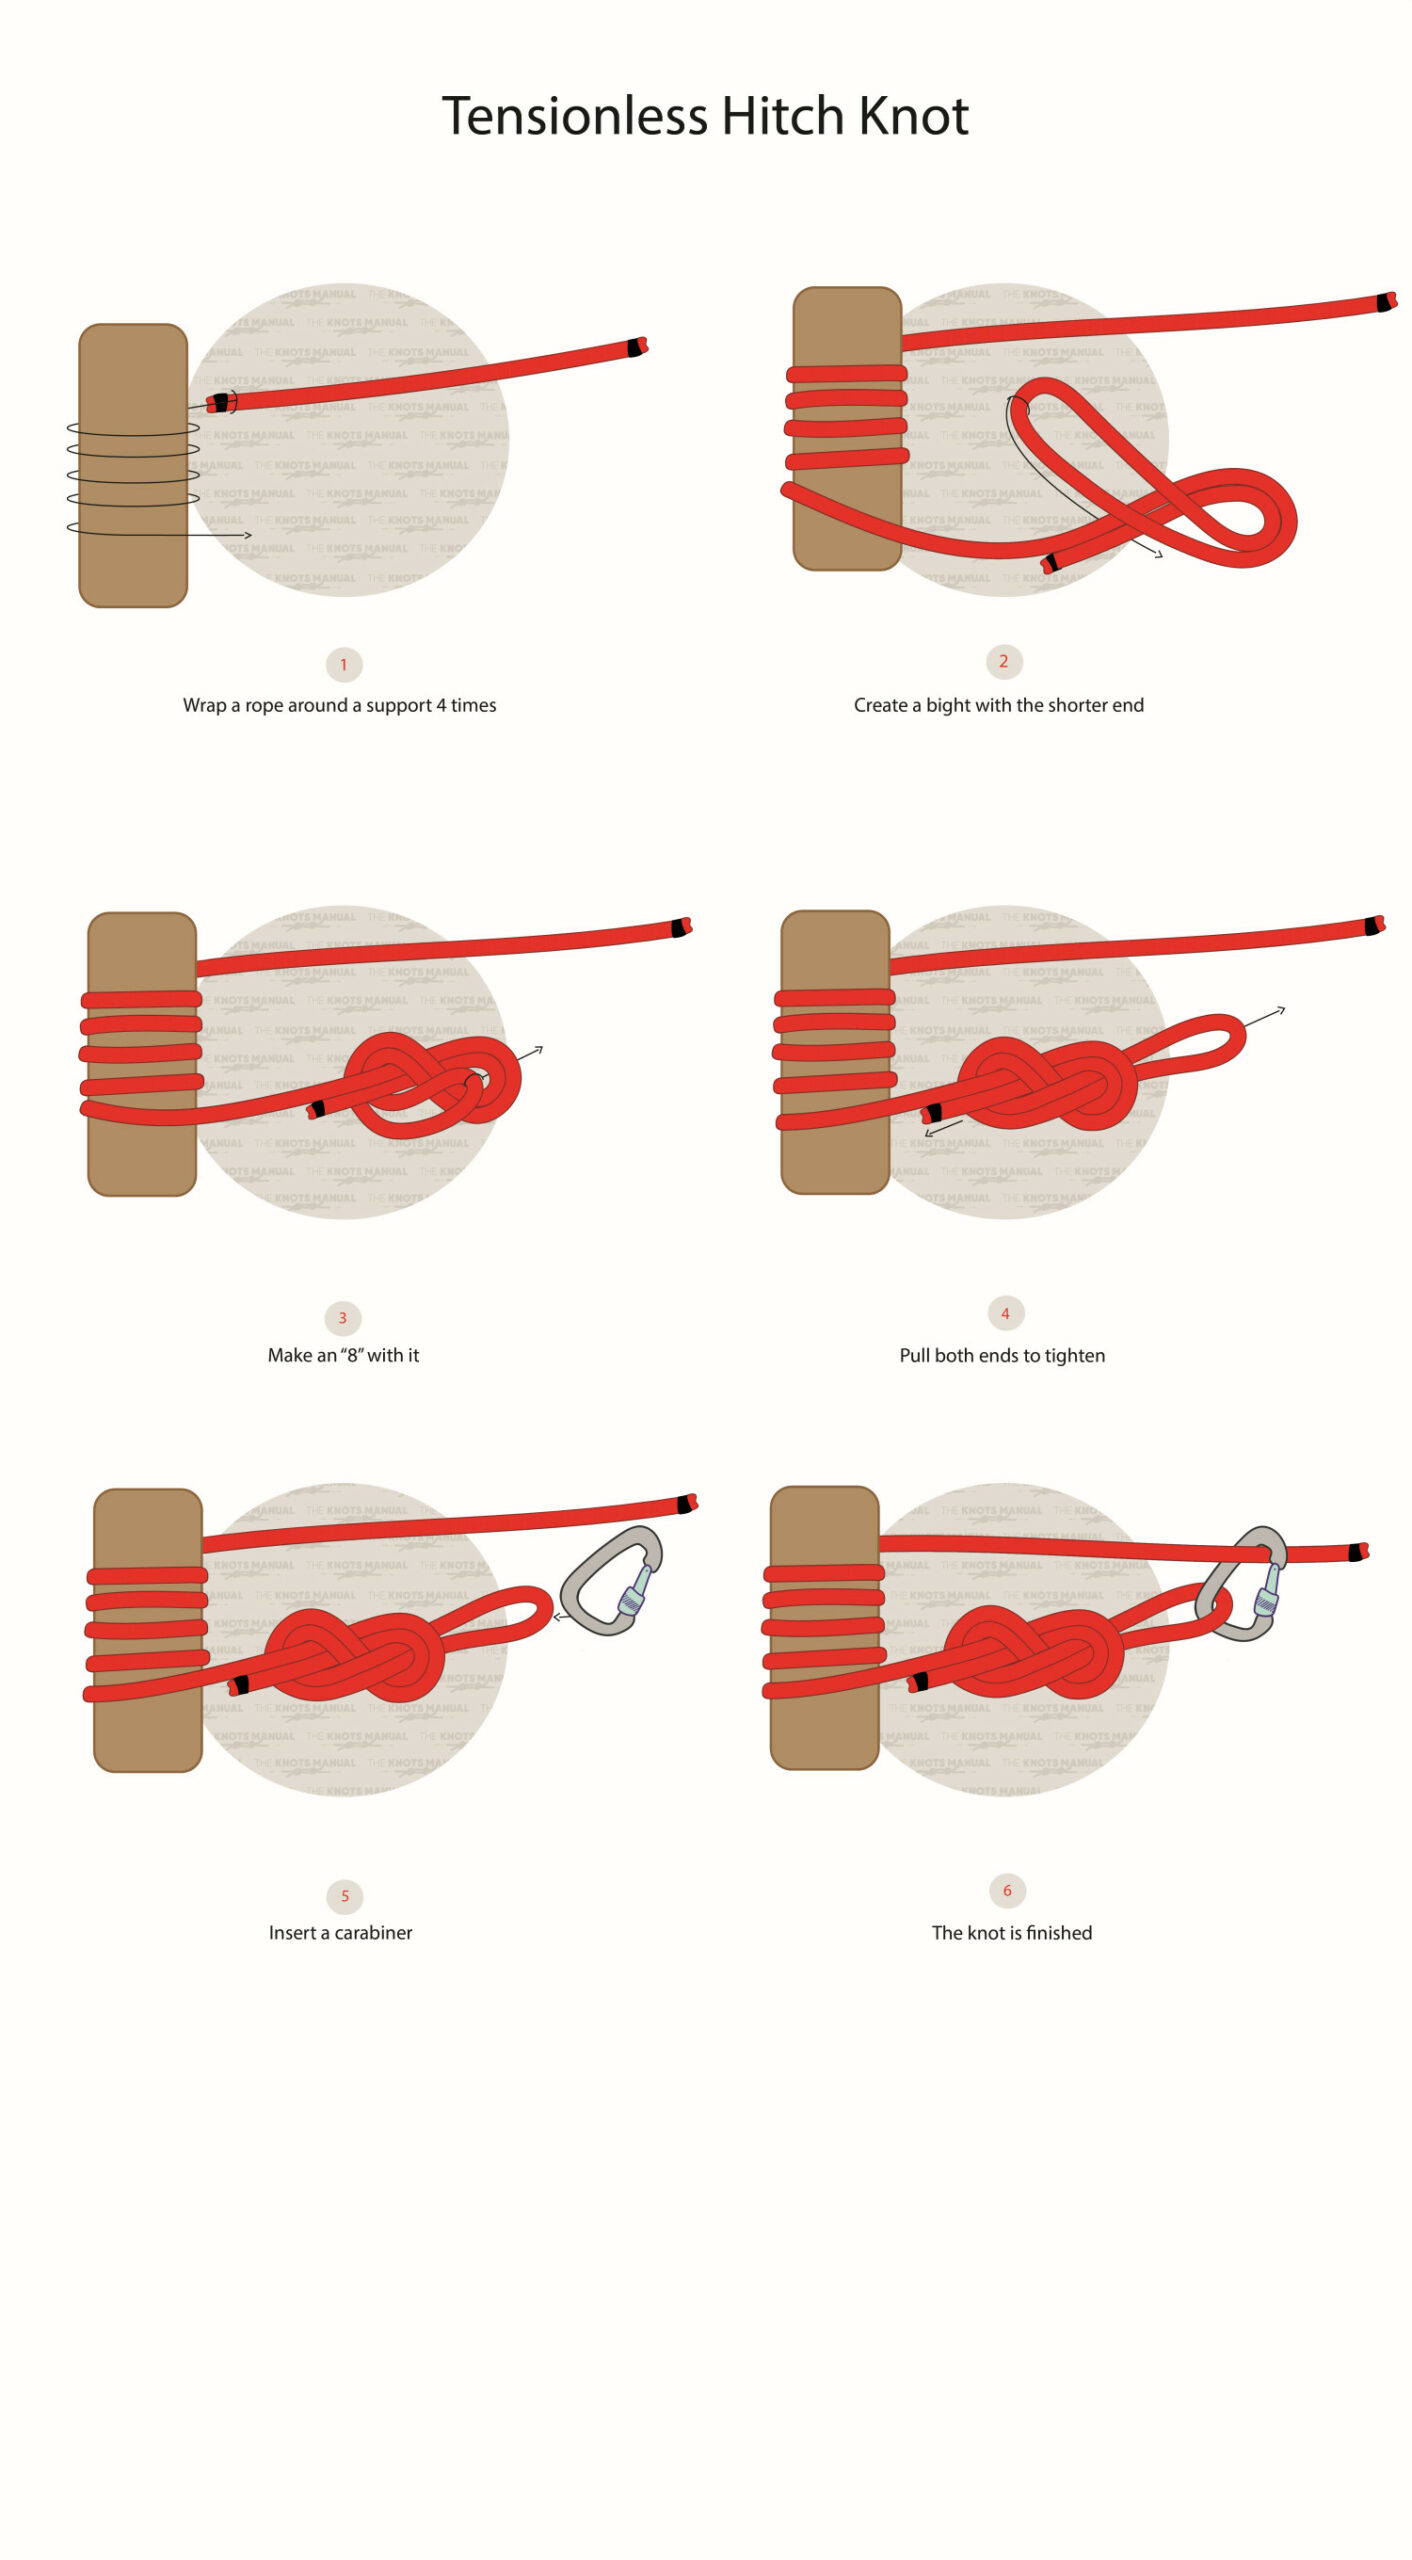
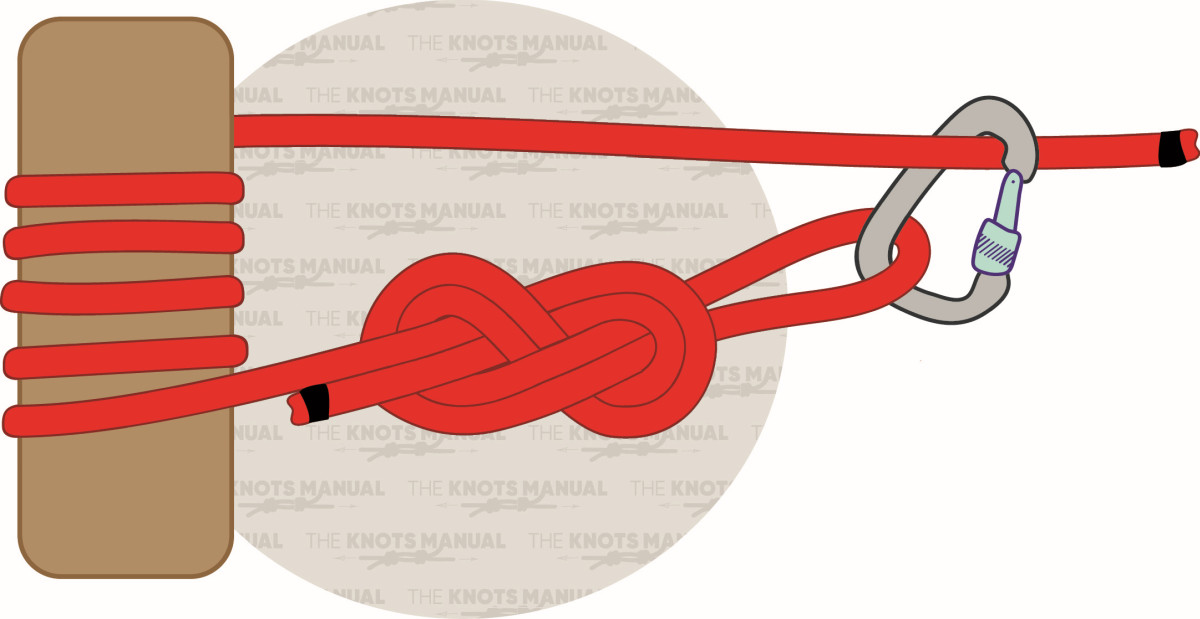
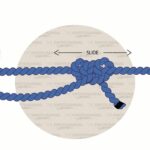
To tie the Tensionless Hitch Knot, wrap the end of the rope around the support four times. Leave the end at least 30 inches (75 cm) long. Then make a bight near the end of the rope and tie a Figure 8 Knot with it. Put a carabiner between the resulting loop and the standing line to finish the knot.
When tightening the Figure 8 Knot, make sure to check that all strands are parallel to one another and aren’t crossing each other.
The diameter of the chosen support should be at least 6-10 times larger than the diameter of the rope. If not, other knots, like the Round Turn and Two Half-Hitches will work better.
For smooth poles which don’t have a lot of friction, you can increase the number of wraps to 5-6. But for trees and rough poles, 4 wraps should be more than enough.
Pros and Cons of the Tensionless Hitch Knot
The Tensionless Hitch Knot is very easy to tie and remember. If you’re working with anchor hitches a lot, then you can learn this hitch and apply it to most applications.
It’s also a very secure and strong knot. It’s very unlikely to come undone due to the Figure 8 Loop tied to the carabiner. It also doesn’t reduce any rope strength because the standing rope enters the knot at an almost straight angle. Various tests have confirmed the Tensionless Hitch Knot to be at 100% strength.
Another benefit is that it can be untied very easily. The Figure 8 Follow Through is a non-jamming knot, and in this application, most of the strength isn’t even applied to it.
One downside is that you need a carabiner to finish this knot. But it can be replaced by tying the Figure 8 Follow Through Knot around the standing line. But this will make it more complicated to untie.
Another disadvantage is that it doesn’t work well with smooth or small poles. In this case, you can introduce more wraps around the pole or choose another hitch knot.
Common Uses for the Tensionless Hitch Knot
Most commonly, the Tensionless Hitch Knot is used for attaching a rope around an object for rappelling or lowering. It’s used for this purpose in climbing, mountaineering, caving, and rescue work.
Due to its ability to hold strength, it’s also used in various winching and rigging setups. It works very well in situations where the load is very close to the rope strength.
You can use it to attach around trees, concrete beams, metal poles, wooden poles, and other similar anchors.
Knots Like the Tensionless Hitch Knot
Round Turn and Two Half-Hitches: A simple hitch knot that works well with smaller poles or when the knot strength isn’t vital. Ir consists of several wraps around the pole secured with two half hitches. It isn’t as secure as the Tensionless Hitch Knot, but it’s good enough for most situations.
Lighterman’s Hitch: A very similar hitch to the Round Turn and Two Half-Hitches Knot. The only difference is that after each turn around the pole, the direction is reversed. This results in a more secure hitch which is strong, but not as strong as the Tensionless Hitch Knot.
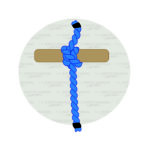
Figure 8 on a Bight (Figure 8 Loop): This knot is used in the formation of the Tensionless Hitch Knot. It’s tied by making a simple Figure 8 Knot on a bight.
Figure 8 Follow-Through Knot: This knot is identical to Figure 8 on a Bight, explained above. The only difference is in how it’s tied. A regular Figure 8 Knot is tied next to the support, then the rope is wrapped around it and finally passed back through Figure 8 in the other direction.
Tensionless Hitch Without a Carabiner: You can skip adding the carabiner by tying the Figure 8 Loop directly around the standing line. In this case, you’ll need to tie the Figure 8 Follow Through Knot, by wrapping around the standing line and retracing Figure 8 in the other direction. This setup is similar in strength to the Tensionless Hitch, only harder to untie.
Step-By-Step Guide: How to Tie Tensionless Hitch Knot
A step-by-step-guide on tying the Tensionless Hitch Knot.
Step 1:
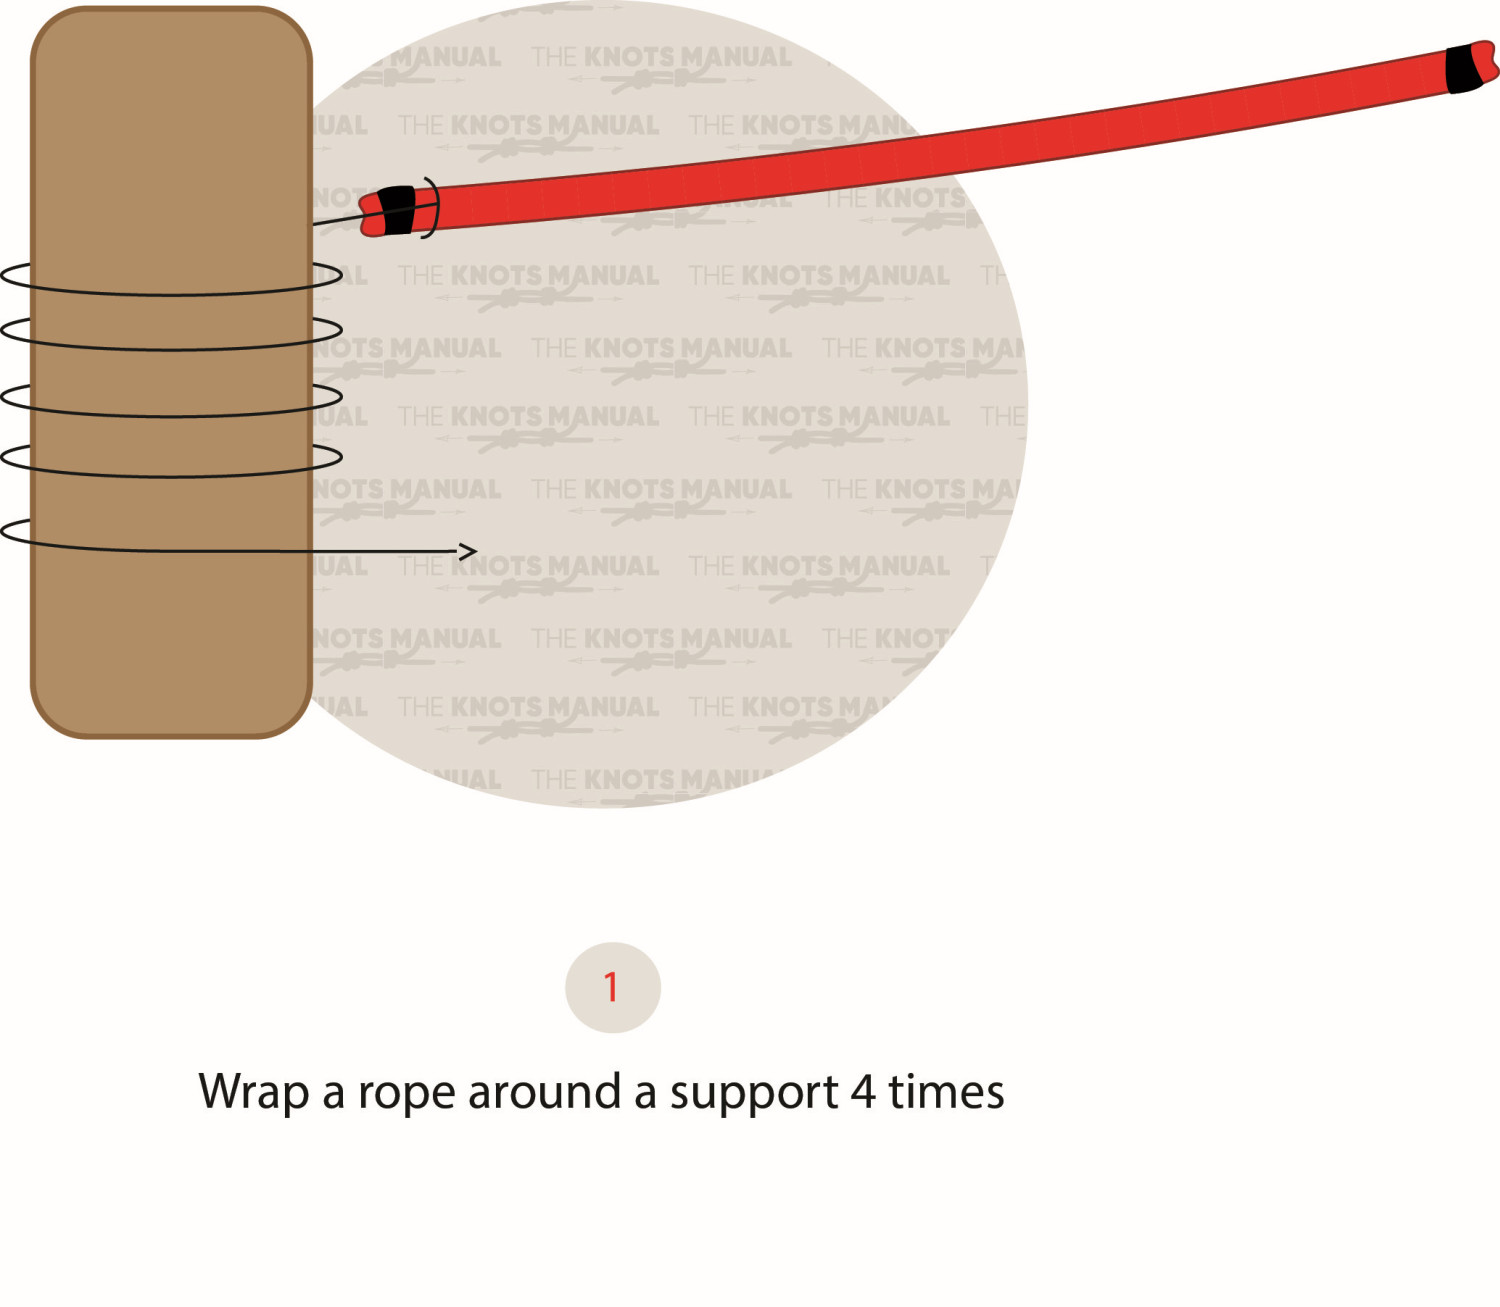
Wrap the end of the rope around the support 4 times. Leave at least 30 inches (75 cm) of rope after it.
Step 2:
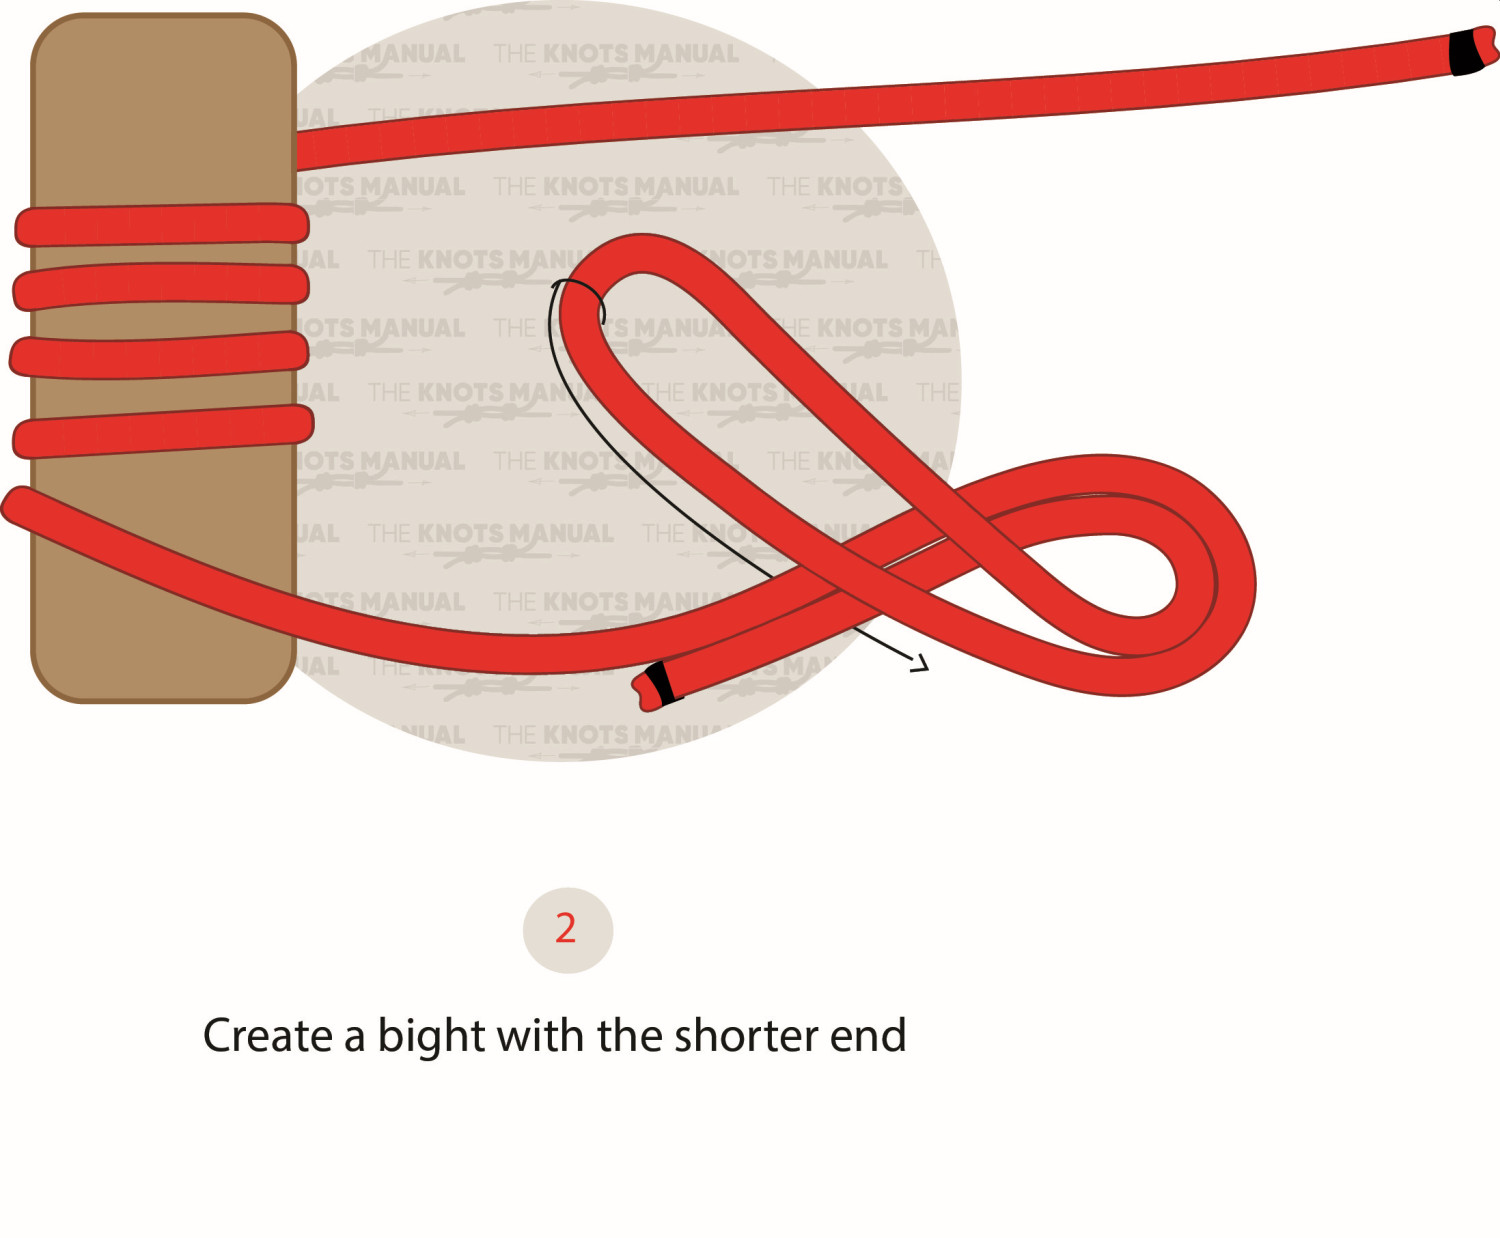
Create a bight at the end of the rope and then make a loop with it.
Step 3:
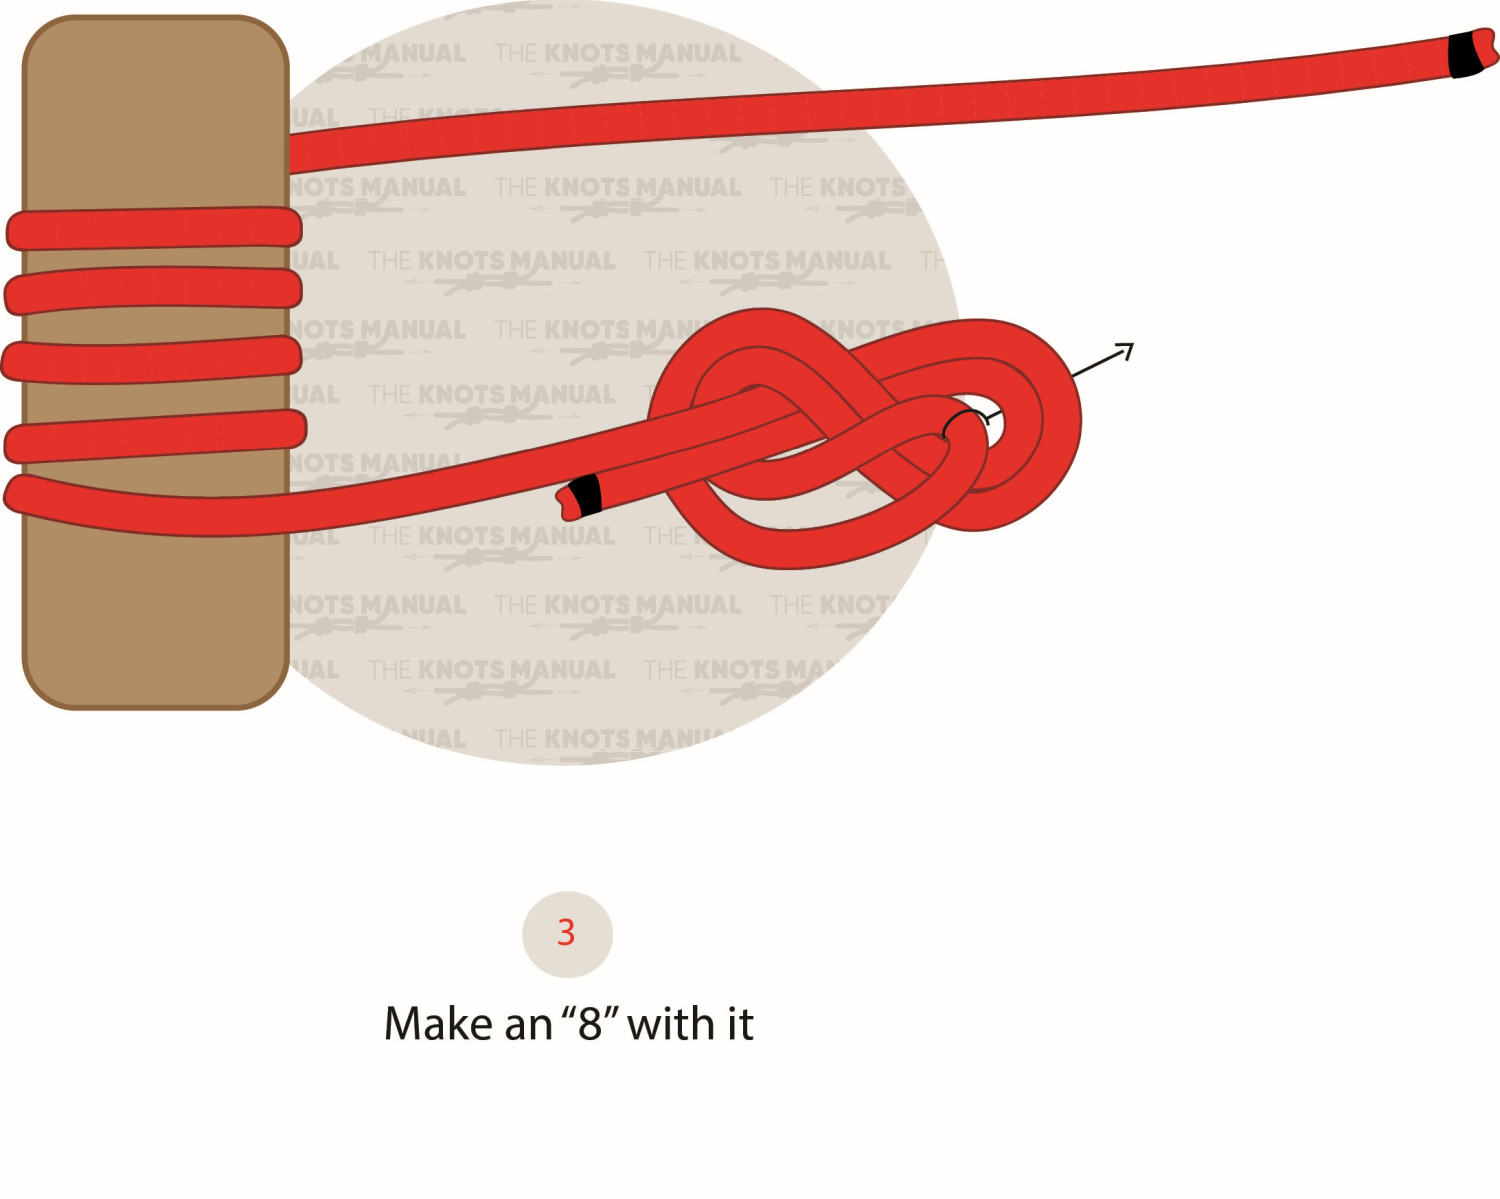
Go around the standing line one full turn and back through the end loop to make a Figure 8 on a Bight Knot.
Step 4:
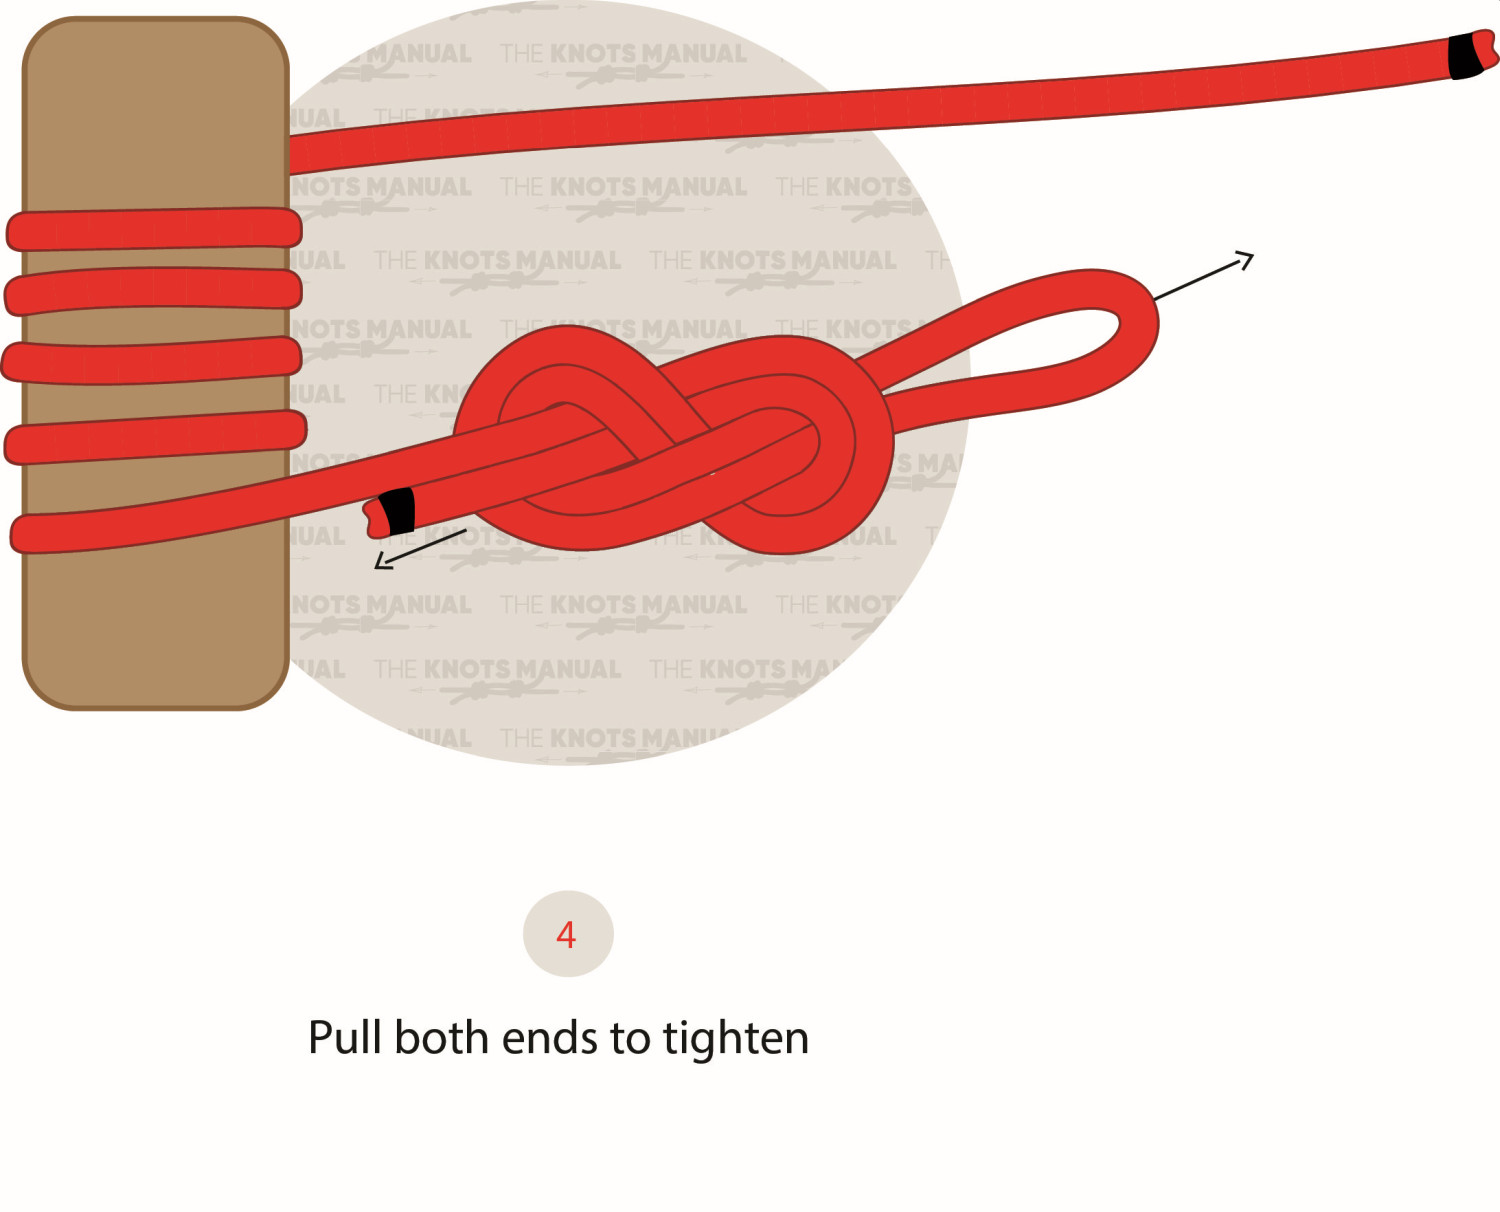
Tighten it and make sure that it’s dressed correctly with no lines crossing one another.
Step 5:
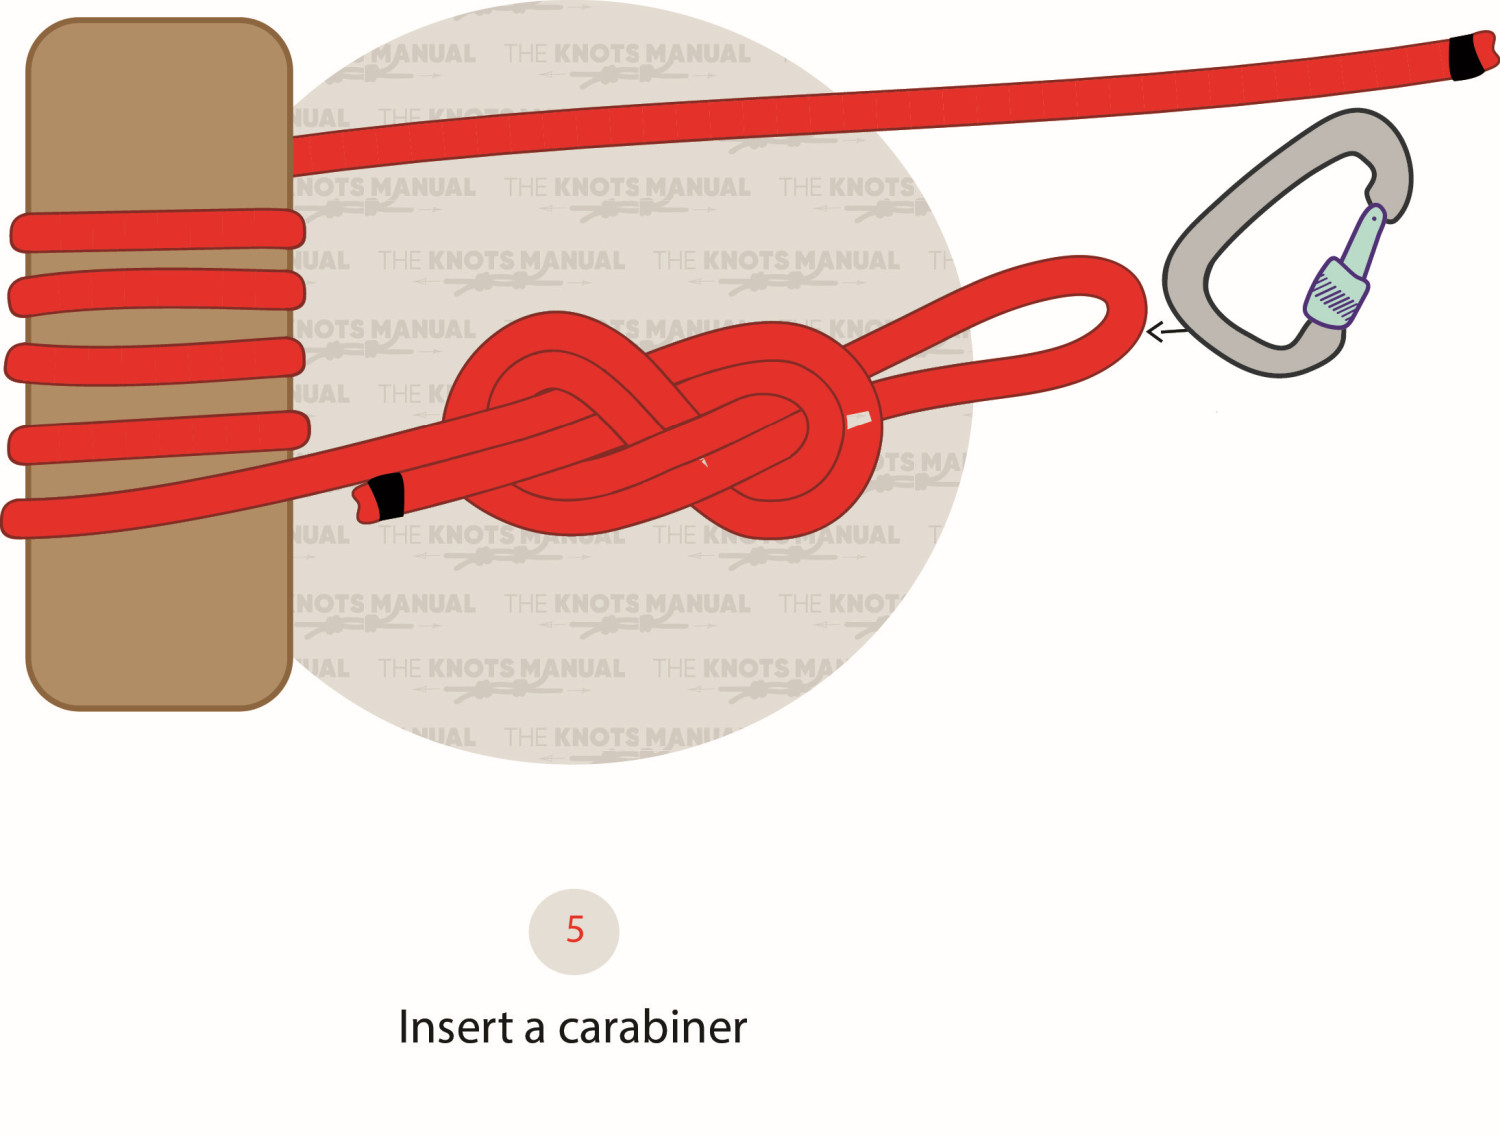
Insert a carabiner in the end loop and around the standing line.
Step 6:
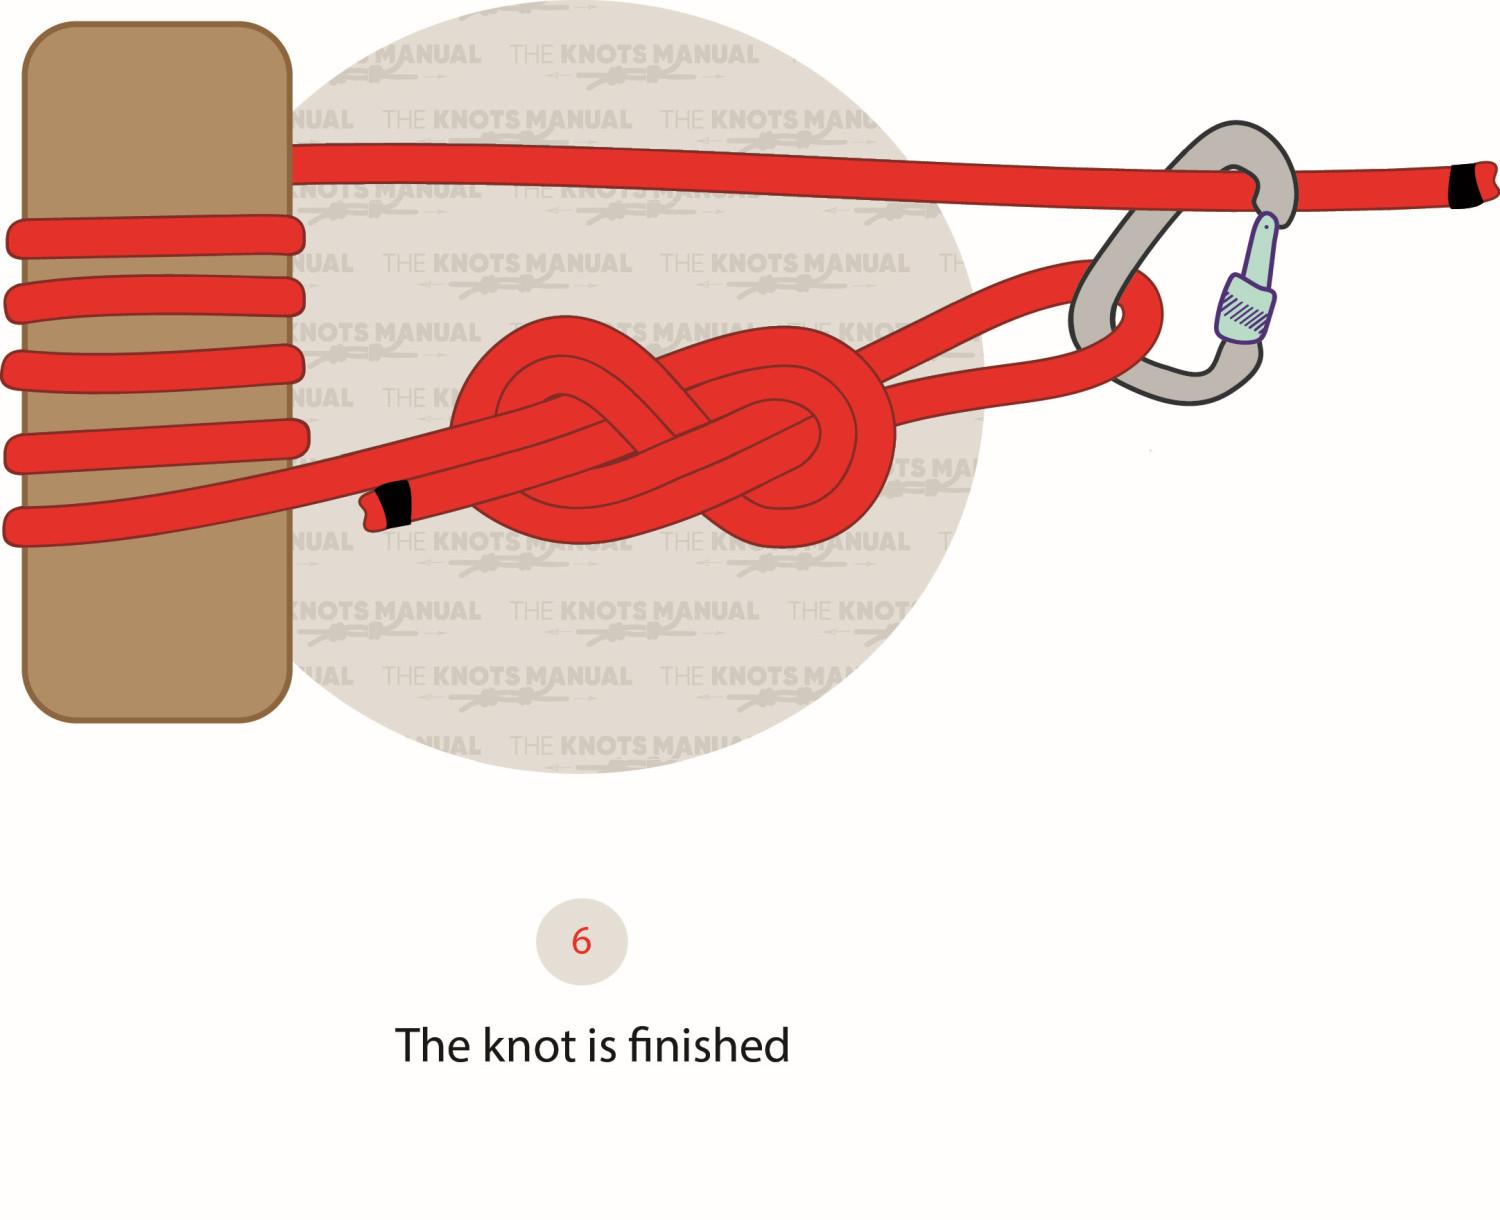
The Tensionless Hitch Knot is finished.


The end loop is good to do but can be unnecessary. I absolutely recommend using the end loop but if you didn’t use it, the rope will still hold without it on all but the most slippery surfaces. In my organisation, when we need to anchor a rope for a rappel/abseil, there is a large roundish anchor point, we have very little gear with us and the situation is urgent, we are permitted to wrap the rope around the anchor 7 times and then abseil on that rope. I’ve also used this method to anchor redirection points on trees when winching vehicles – minimises tree damage and requires almost no effort to untie (since there is no knot).