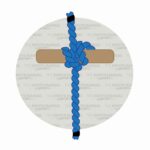
The icicle knot is a type of slip-and-grip knot. It’s intended to grip a post or pole when force is applied parallel and in one direction. This knot has earned its name from its ability to grip straight, tapered, and slippery posts.
The icicle hitch knot sets itself apart from the Kleimheist knot by utilizing a bight instead of a loop.
Quick Guide: Tying an Icicle Hitch Knot
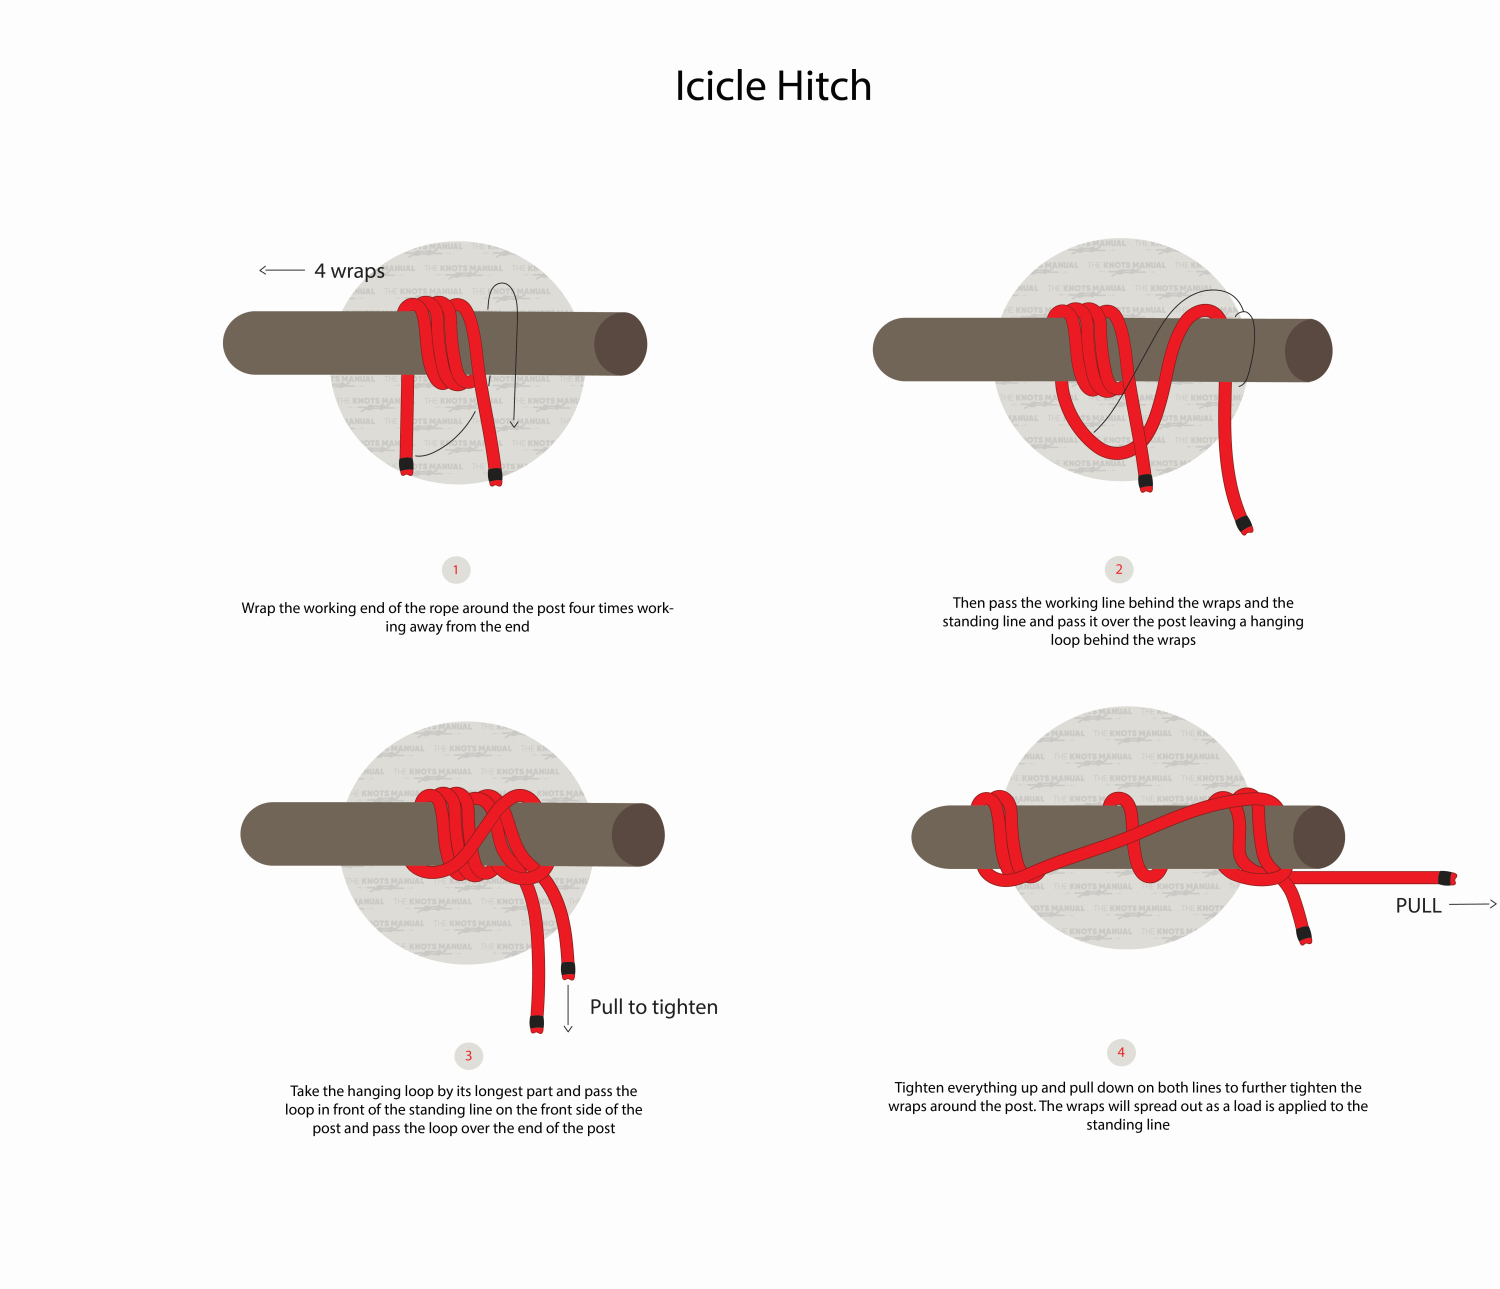
To tie an icicle hitch, start by wrapping the rope’s working end around the post four times. Next, pass the working line behind the wraps and standing line. Then, pass it over the post to create a loop under the wraps.
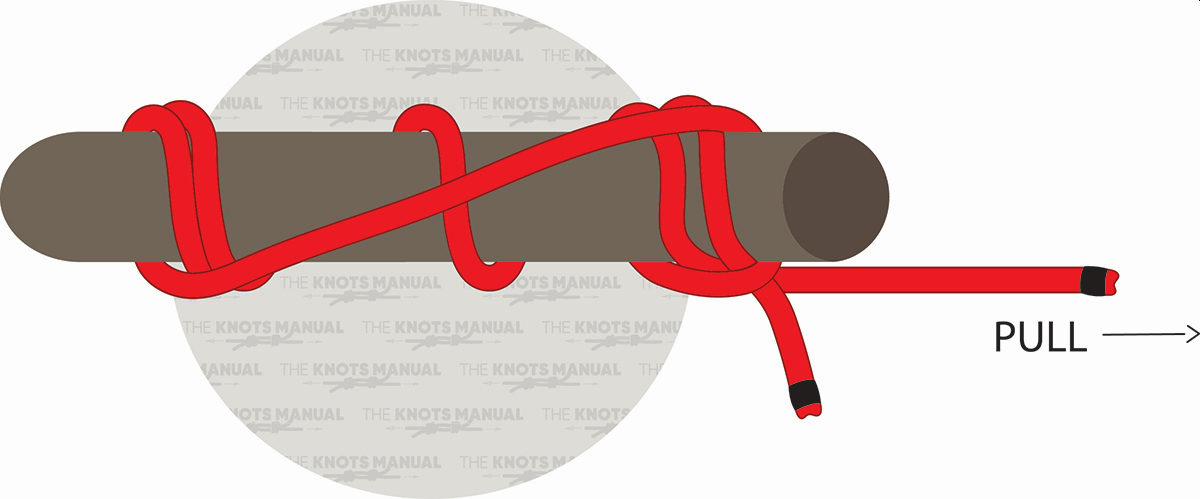
Grab the hanging loop and pass it over the standing line on the front end of the post and then over the end of the post. Pull down on the lines to tighten the hitch. The lines will naturally spread out as tension is applied to the load.
Should You Use the Icicle Hitch Knot?
The icicle knot is incredibly strong and can hold even slippery or tapered loads. It also unties easily compared to other gripper hitch knots. However, some people find this knot confusing to tie. We suggest practicing before using this knot in real-world situations.
Knots Similar to the Icicle Hitch
Klemheist Knot—The Klemheist knot is very similar to the icicle hitch. This knot is a little more complicated to tie since it uses a loop that you must thread rope through, while the icicle hitch uses a bight.
Adjustable Grip Hitch Knot—This knot provides friction when pulled but is easily adjustable when not under pressure.
Blake’s Hitch Knot—Blake’s Hitch Knot is a slide and grip knot that works for lowering and raising loads.
Prusik Knot—Also called the triple sliding hitch, this knot is a friction hitch with varying uses. It’s popular in rock climbing and mountaineering.
Farrimond Friction Hitch Knot—This knot is suitable for use with medium pressure. It creates an adjustable loop at the end of the rope and is most often used with tents and tarps.
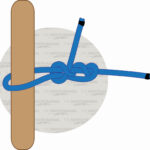
Step 1:
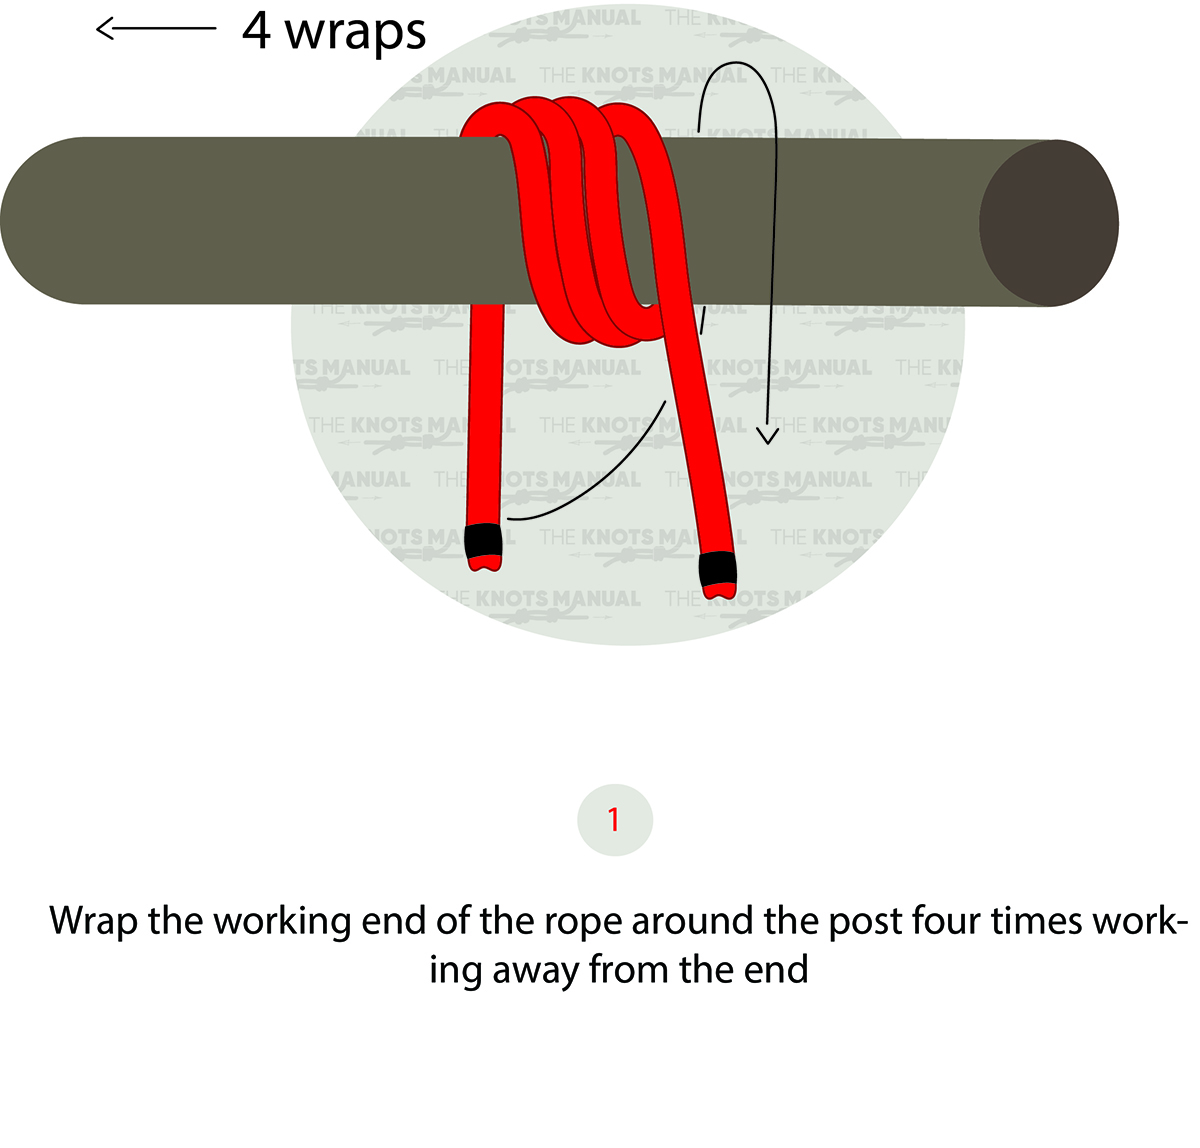
Wrap the working end of the rope around your post four times. Ensure that you’re wrapping away from the end.
Step 2:
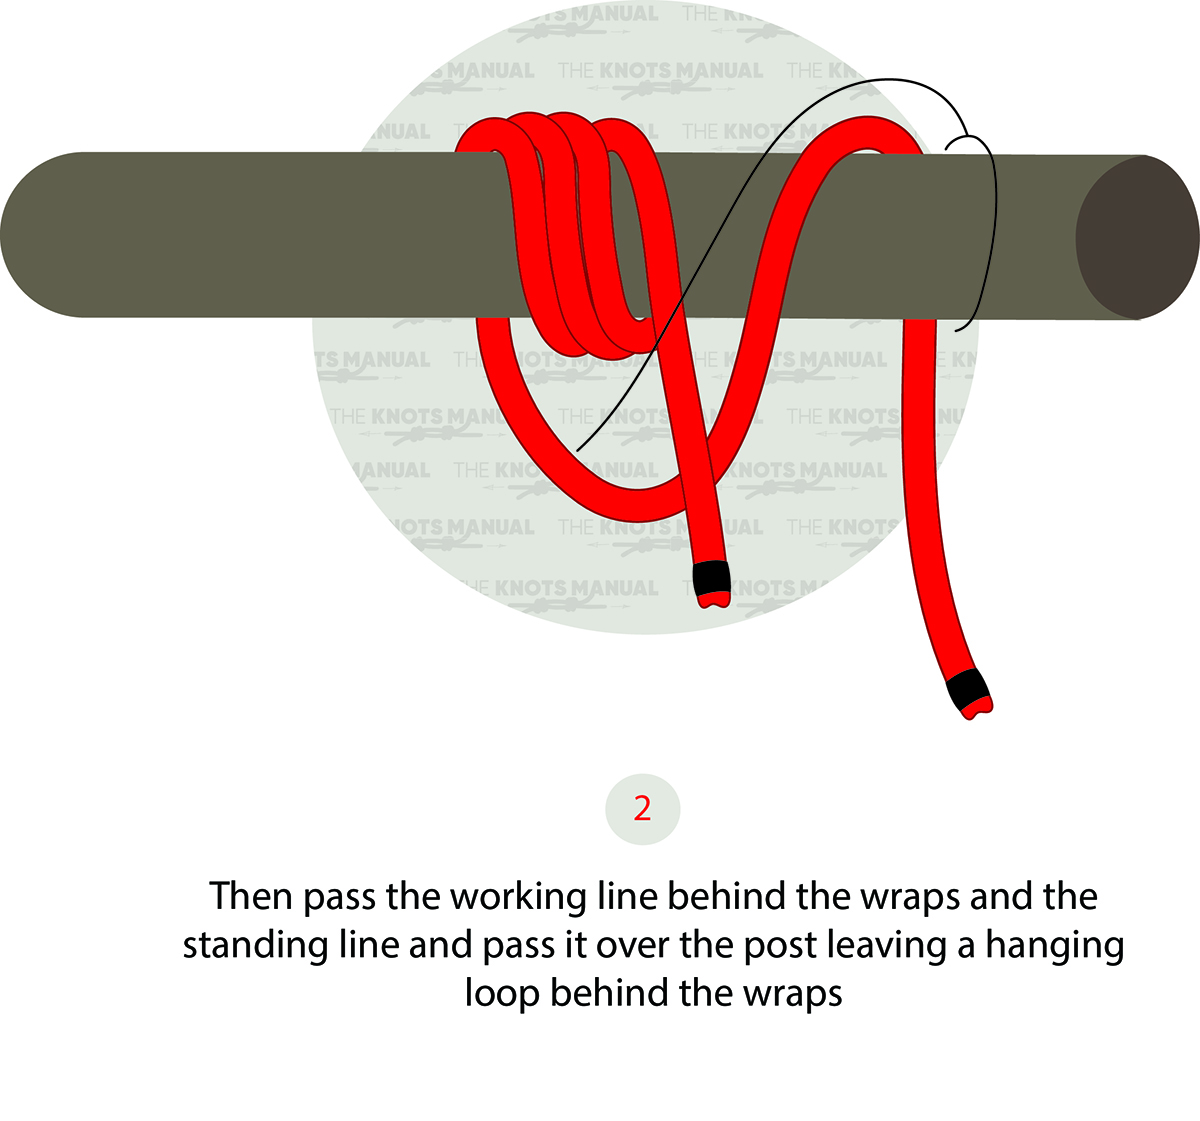
Take your working line, pass it behind the wraps and standing line, and back over the post to create a hanging loop under the wrapped section.
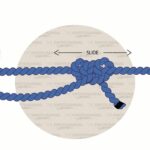
Step 3:
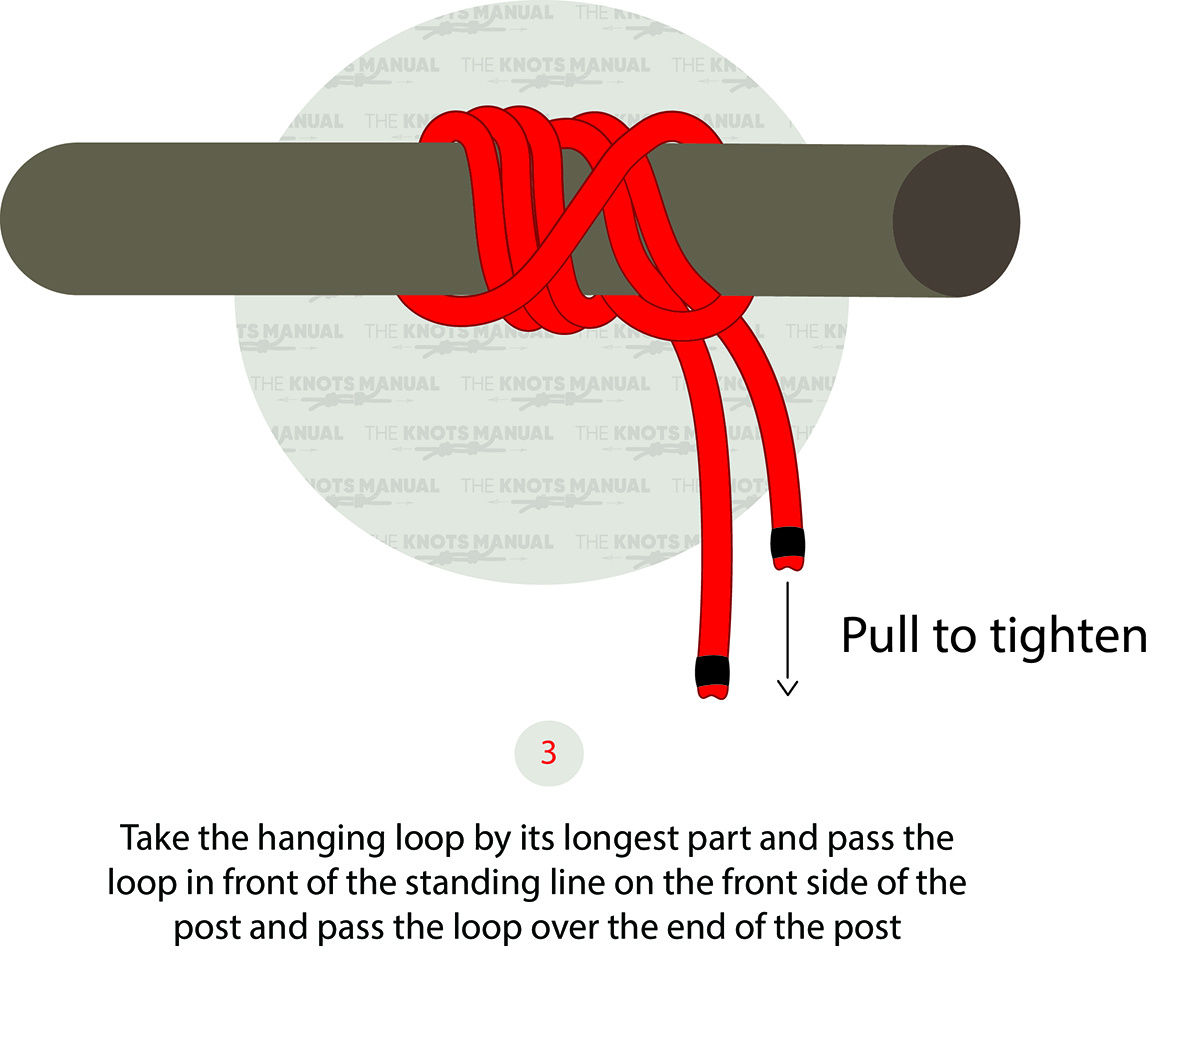
Grab the longest part of the loop and pull past the standing line on the front side and over the end of the pole.
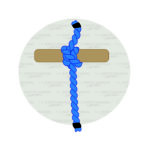
Step 4:
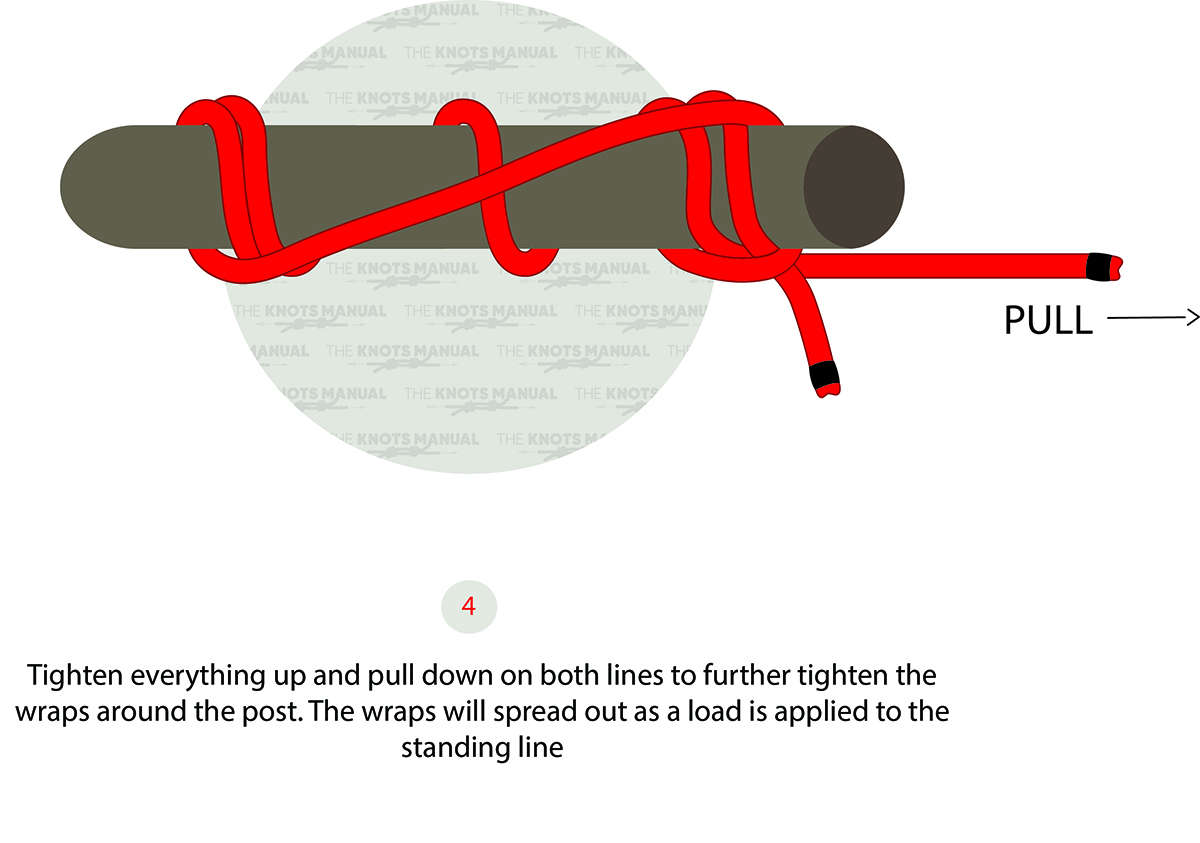
Pull down on both wraps to tighten the knot. It will further tighten, and the wraps will spread when pressure is applied to the load.