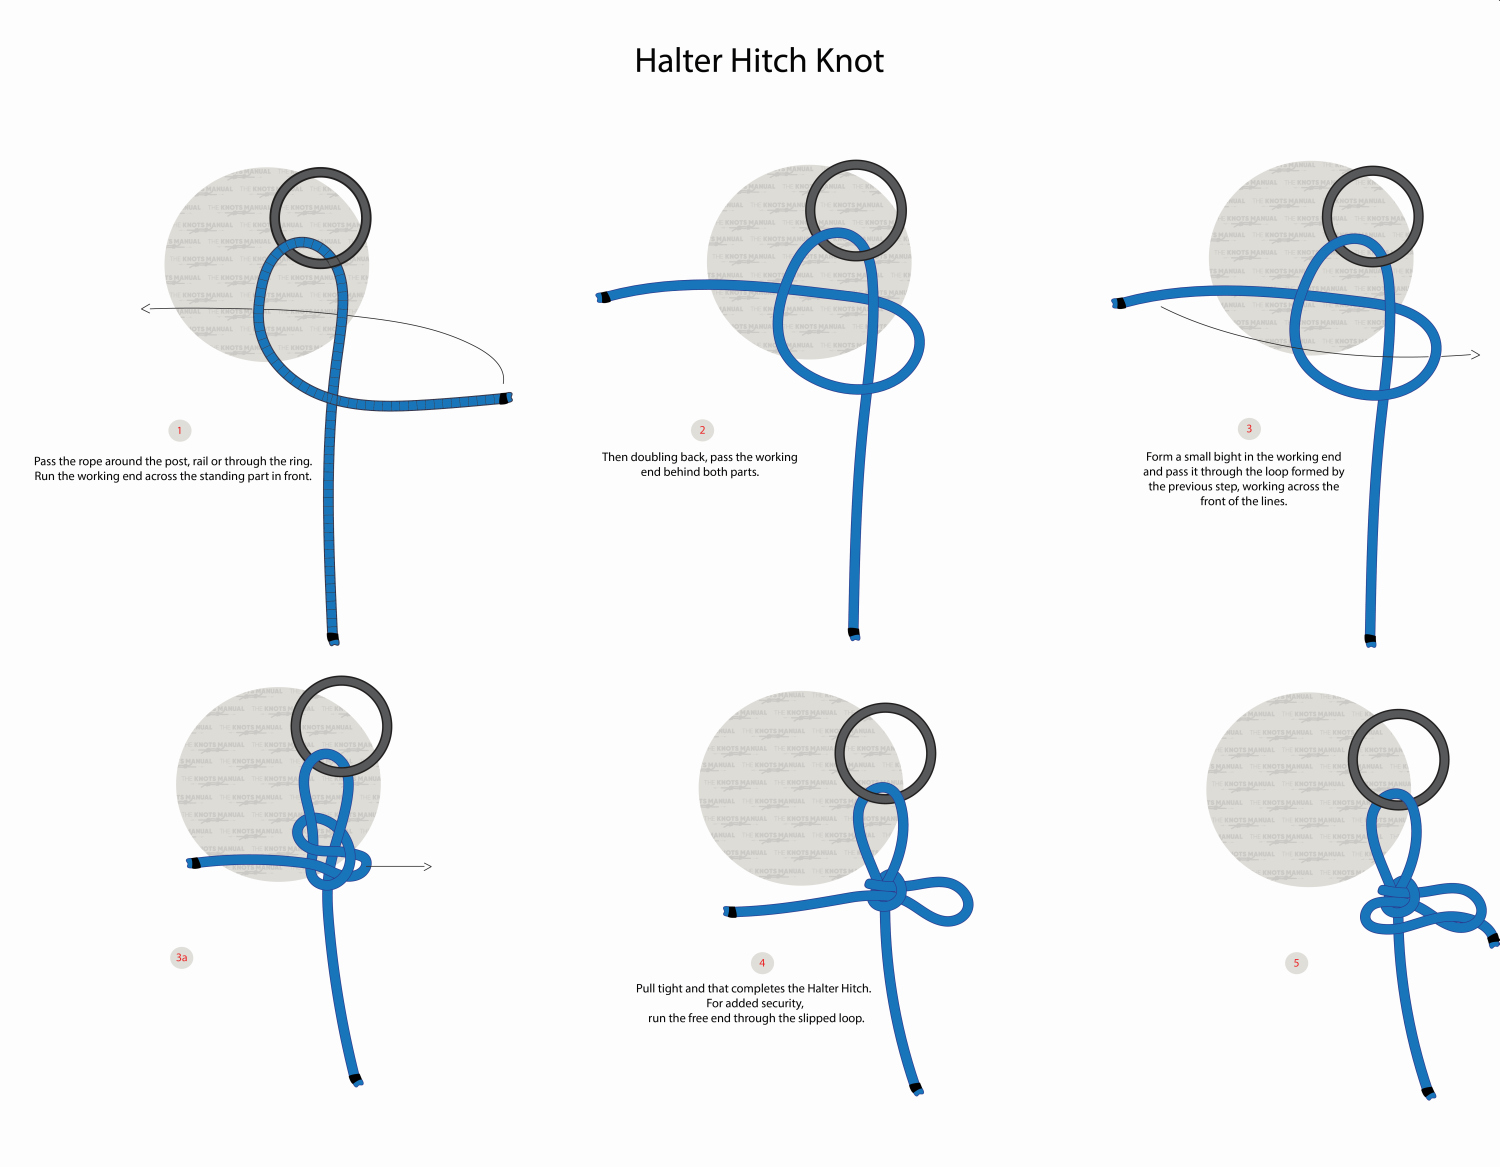
The Halter Hitch is a very simple quick-release hitch, which unties by pulling the working end. It’s commonly used in general applications, like tying animals to fence posts or tying tarp ridgelines around trees.
Quick Guide: Tying a Halter Hitch Knot
To tie a Halter Hitch Knot, start by passing the working end through the ring and then over the standing end (step 1). Then pass it behind the formed loop (step 2). Fold the end in half to make a bight and tuck it underneath the right-most strand (steps 3-3a).
First tighten the knot itself, by holding it with one hand and pulling the quick-release loop in the opposite direction (step 4). Only then pull on the standing end to move it closer to the ring.
For extra safety, you can pass the working end through the quick-release loop (step 5). This will make it less likely to accidentally pull the working end and unravel the knot.
Pros and Cons of the Halter Hitch Knot
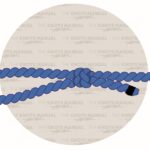
The main advantage of the Halter Hitch is that it is very easy to tie. It’s arguably the simplest quick-release hitch out there. It consists of a slipped Overhand Knot tied around the standing end. This makes it very easy to learn and remember.
It’s also somewhat secure, despite its simplicity. It won’t unravel even when you pull it with moderate force. But as with all quick-release hitches, never use it in life-threatening situations, like climbing.
Common Uses for the Halter Hitch Knot
The Halter Hitch doesn’t have a specific use that it is known for. It’s sometimes used to temporarily tie in animals around fence posts. People use it to tie horses because if they panic, you can release the hitch in seconds by pulling the end of the rope.
It’s also often used by survivalists and outdoors people to tie tent ridgelines around trees or to hang their food. You can use it anytime you need to make a non-essential hitch that can be untied in seconds.
Knots Like the Halter Hitch Knot
Tumble Quick Release Hitch: Considered to be the most secure quick-release hitch. It’s more difficult to tie than the Halter Hitch, but it’s less likely to accidentally come undone.
Highwayman’s Quick Release Hitch: A similar hitch to the Tumble Quick Release Hitch. It isn’t as strong, but still is one of the strongest quick-release hitches.
Slipped Buntline Hitch: A very simple quick-release hitch. It’s only marginally more secure than the Halter Hitch Knot so they can be used as alternatives.
Mooring Quick Release Hitch: A simple quick-release hitch that’s similar to the Slipped Buntline Hitch. It’s most commonly used to temporarily moor boats, but you can use it as an alternative to the Halter Hitch.
Trucker’s Quick Release Hitch: A quick-release hitch that’s used to tie down heavy loads to car roofs, truck beds, and trailers. It allows for quicker untying of the load.
Step-By-Step Guide: How to Tie a Halter Hitch Knot
A step-by-step guide on how to tie a Halter Hitch Knot.
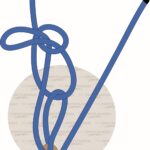
Step 1:
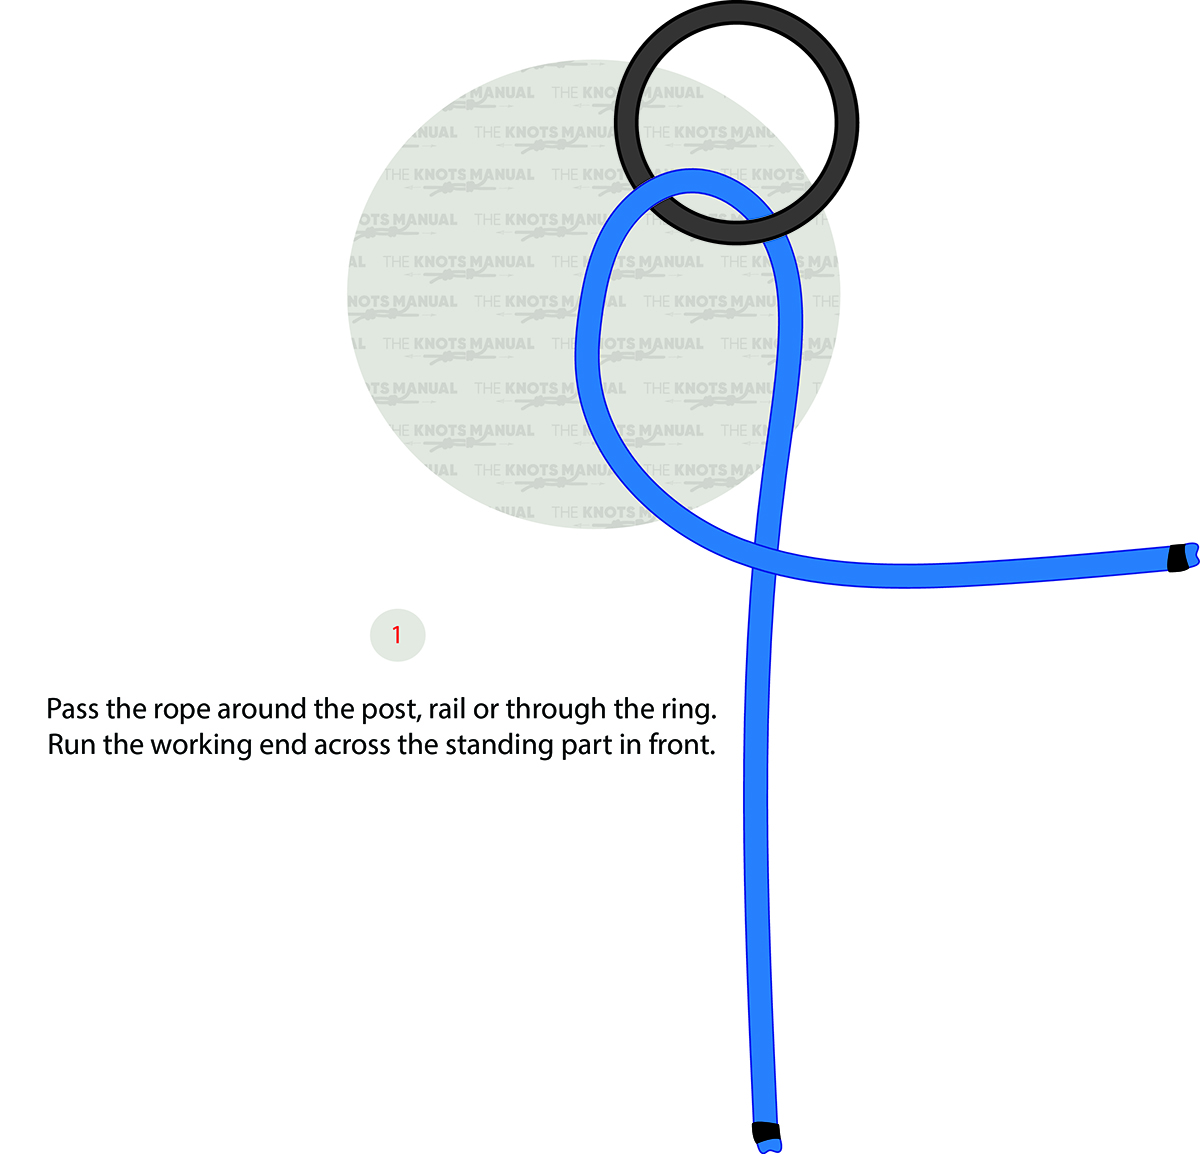
Pass the working end around the post or (in our illustration) through a ring. Then place it over the standing end as illustrated above.
Step 2:

Wrap it around the standing end and behind itself.
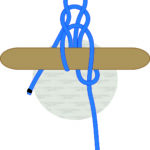
Step 3:
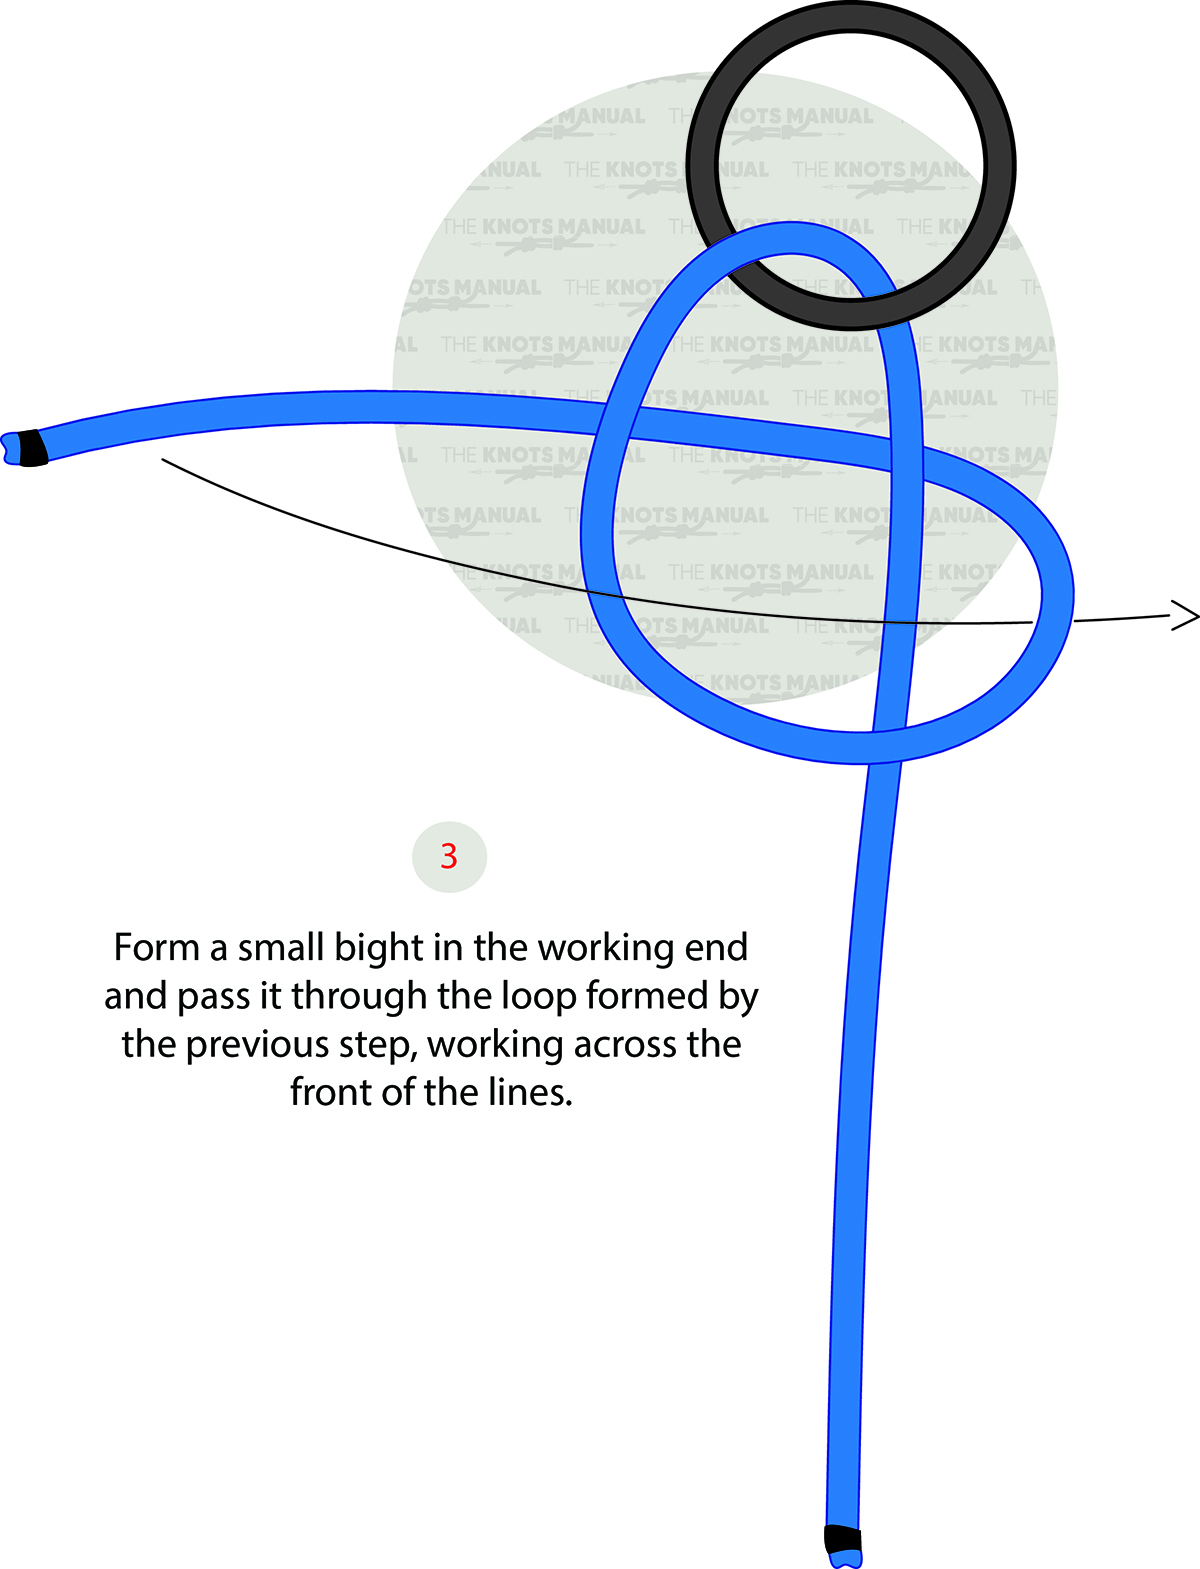
Form a bight on the working end and pass it under the right-most strand, as illustrated above.
Step 3a:
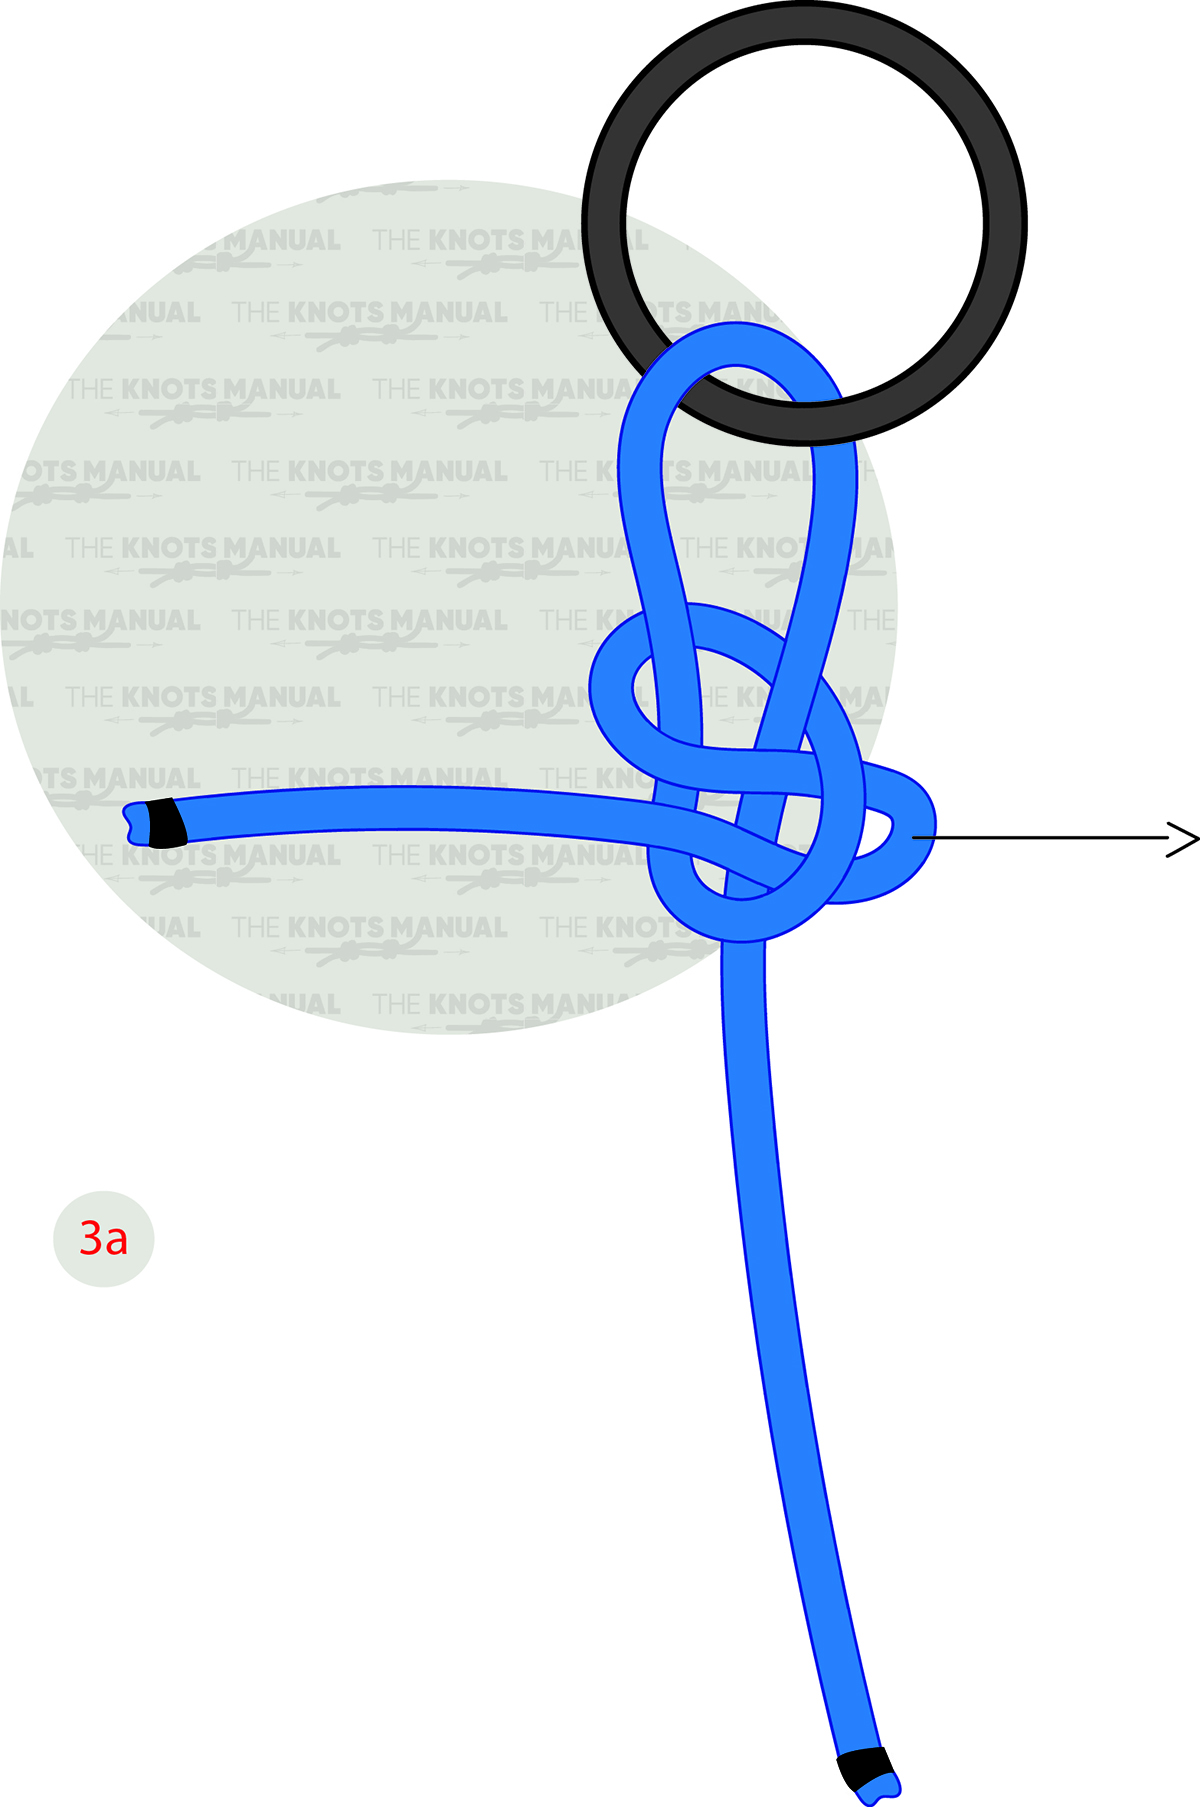
This will create a quick-release function for the knot.
Step 4:
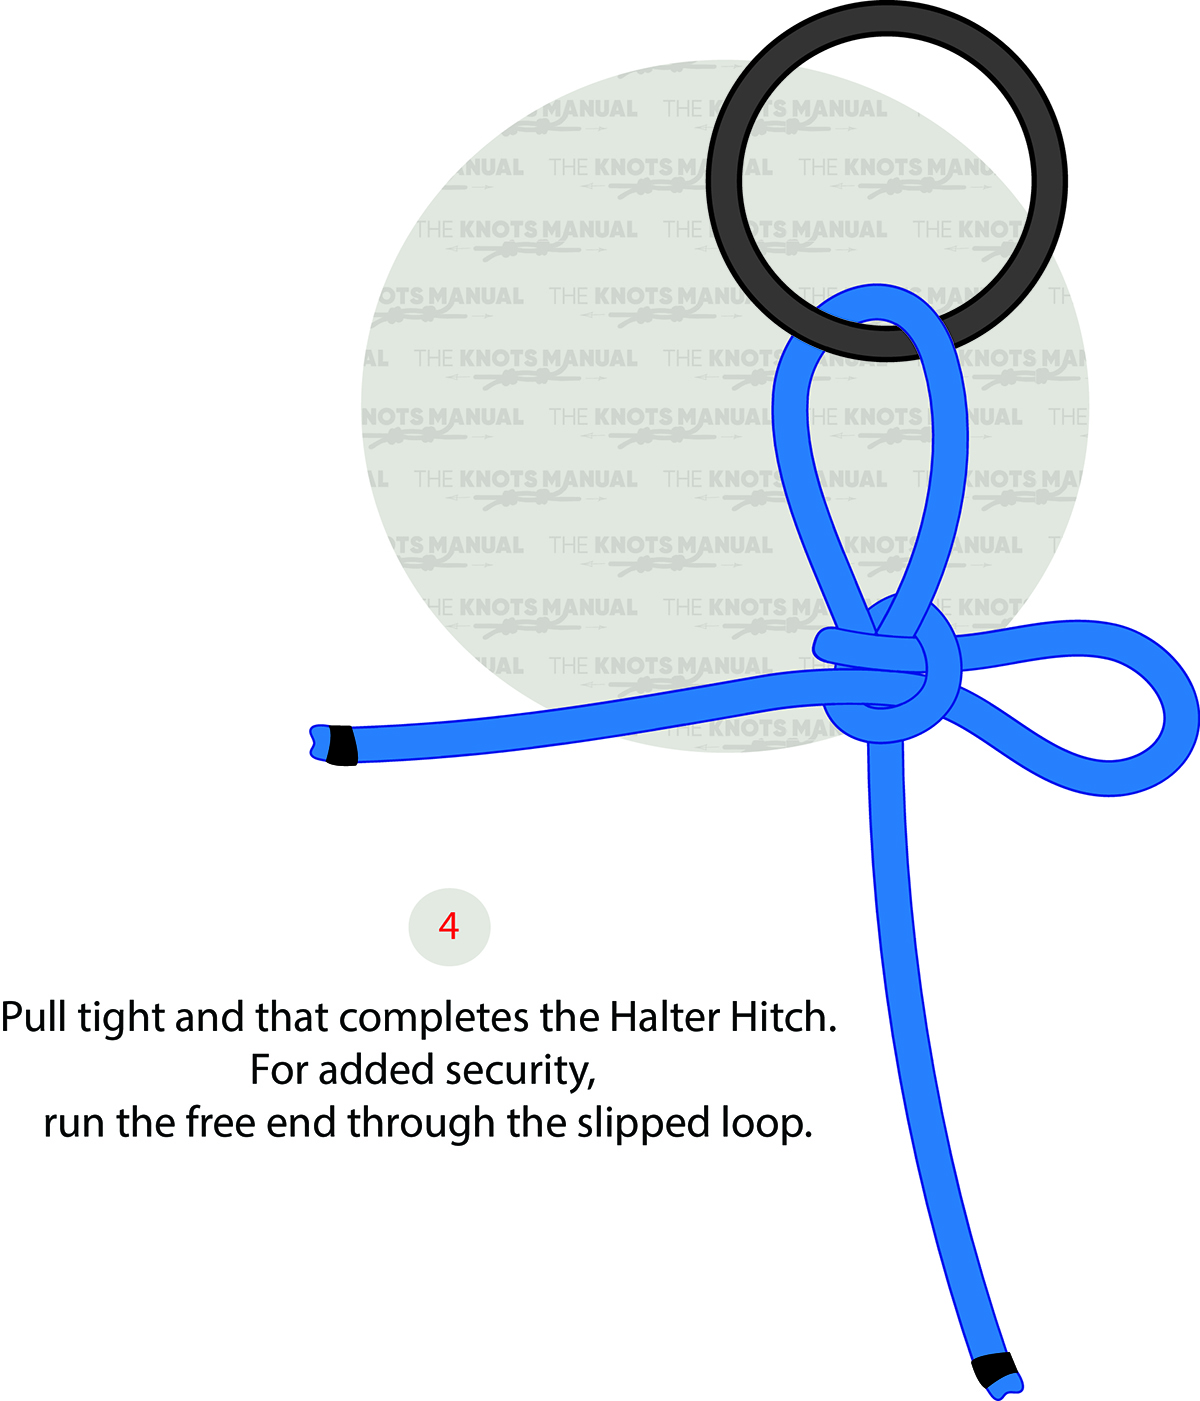
Tighten the knot by pulling the slipped loop while holding the knot with your other hand.
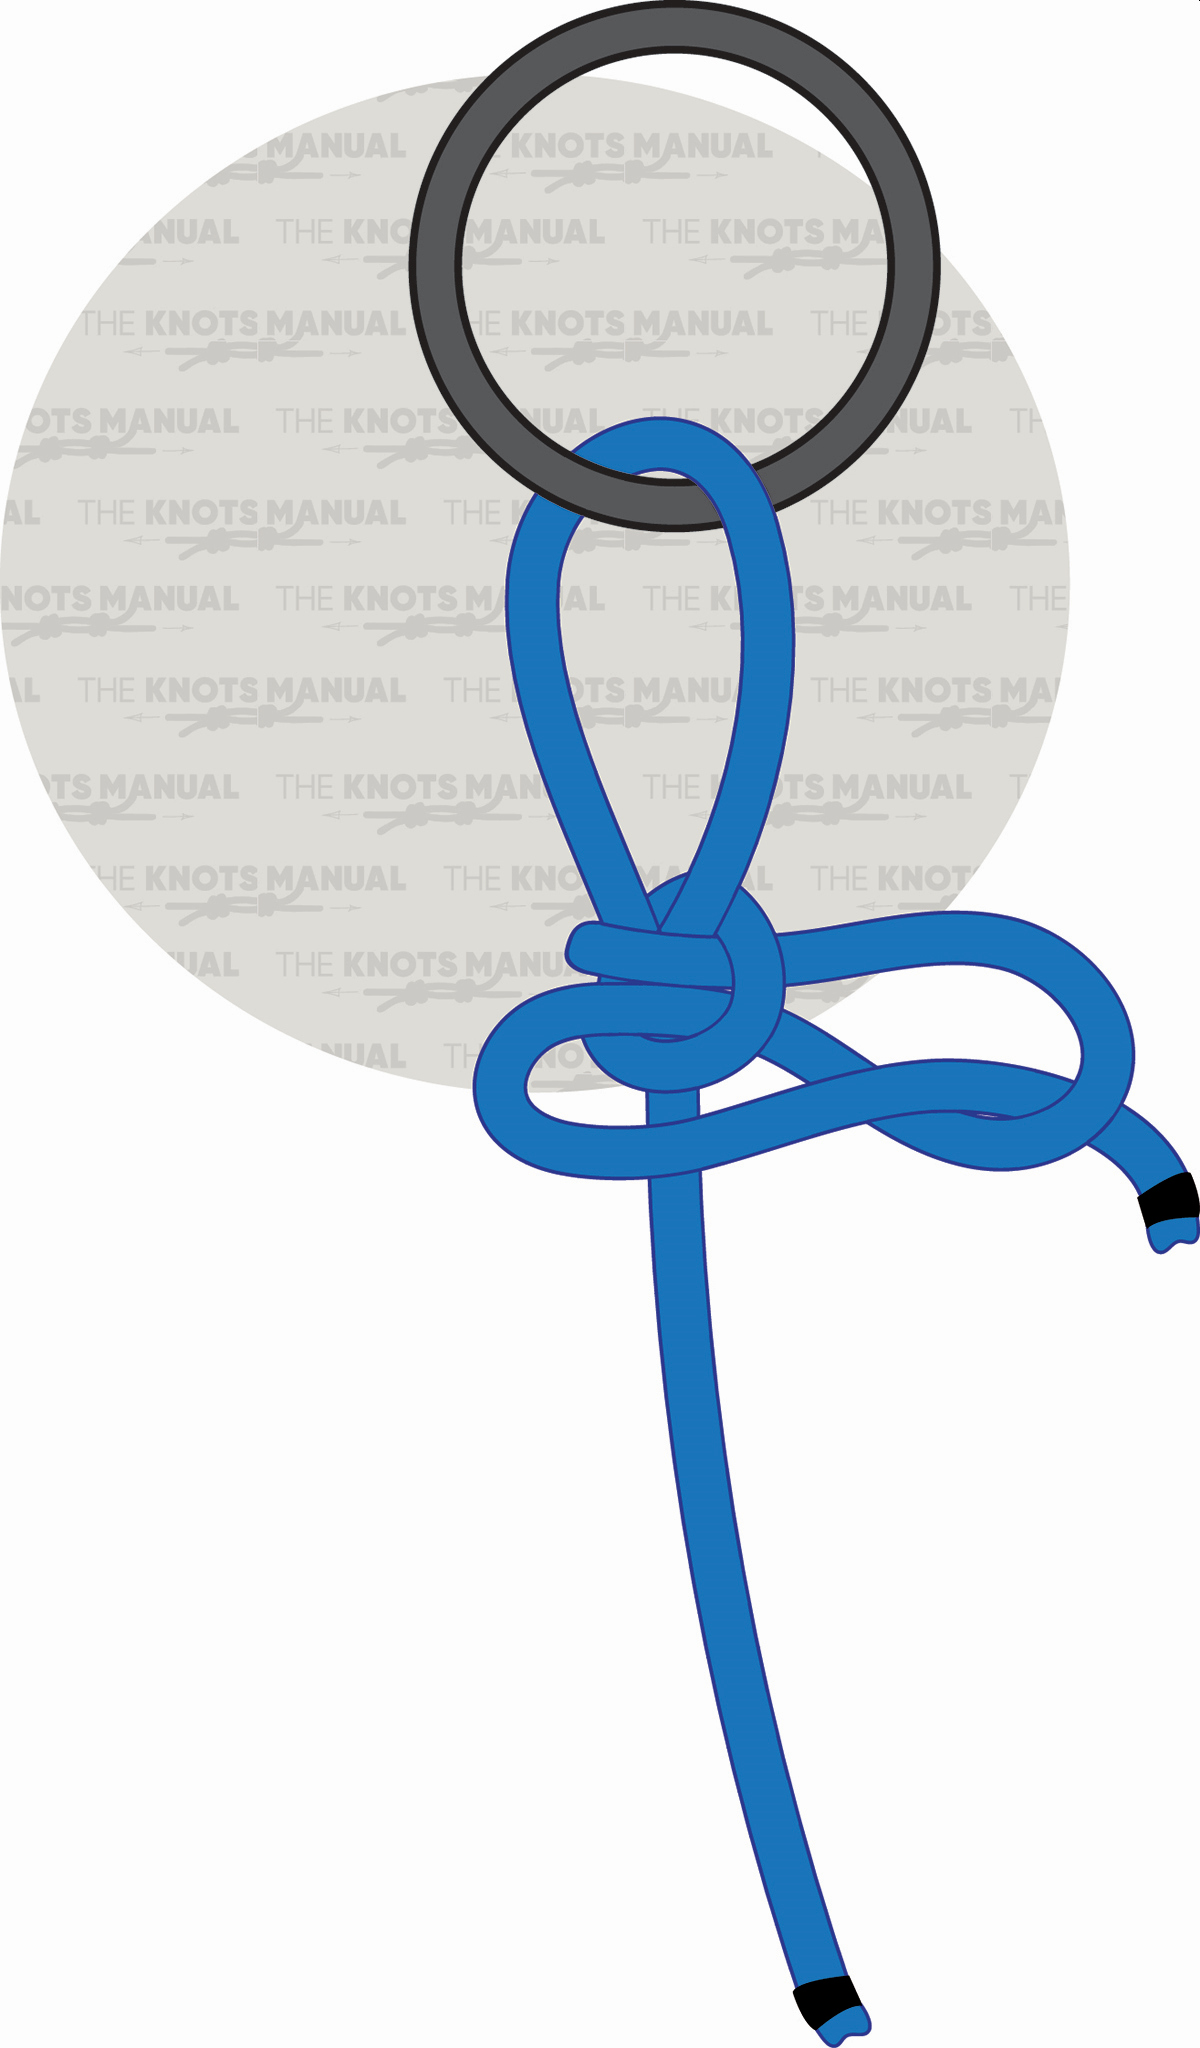
Step 5:
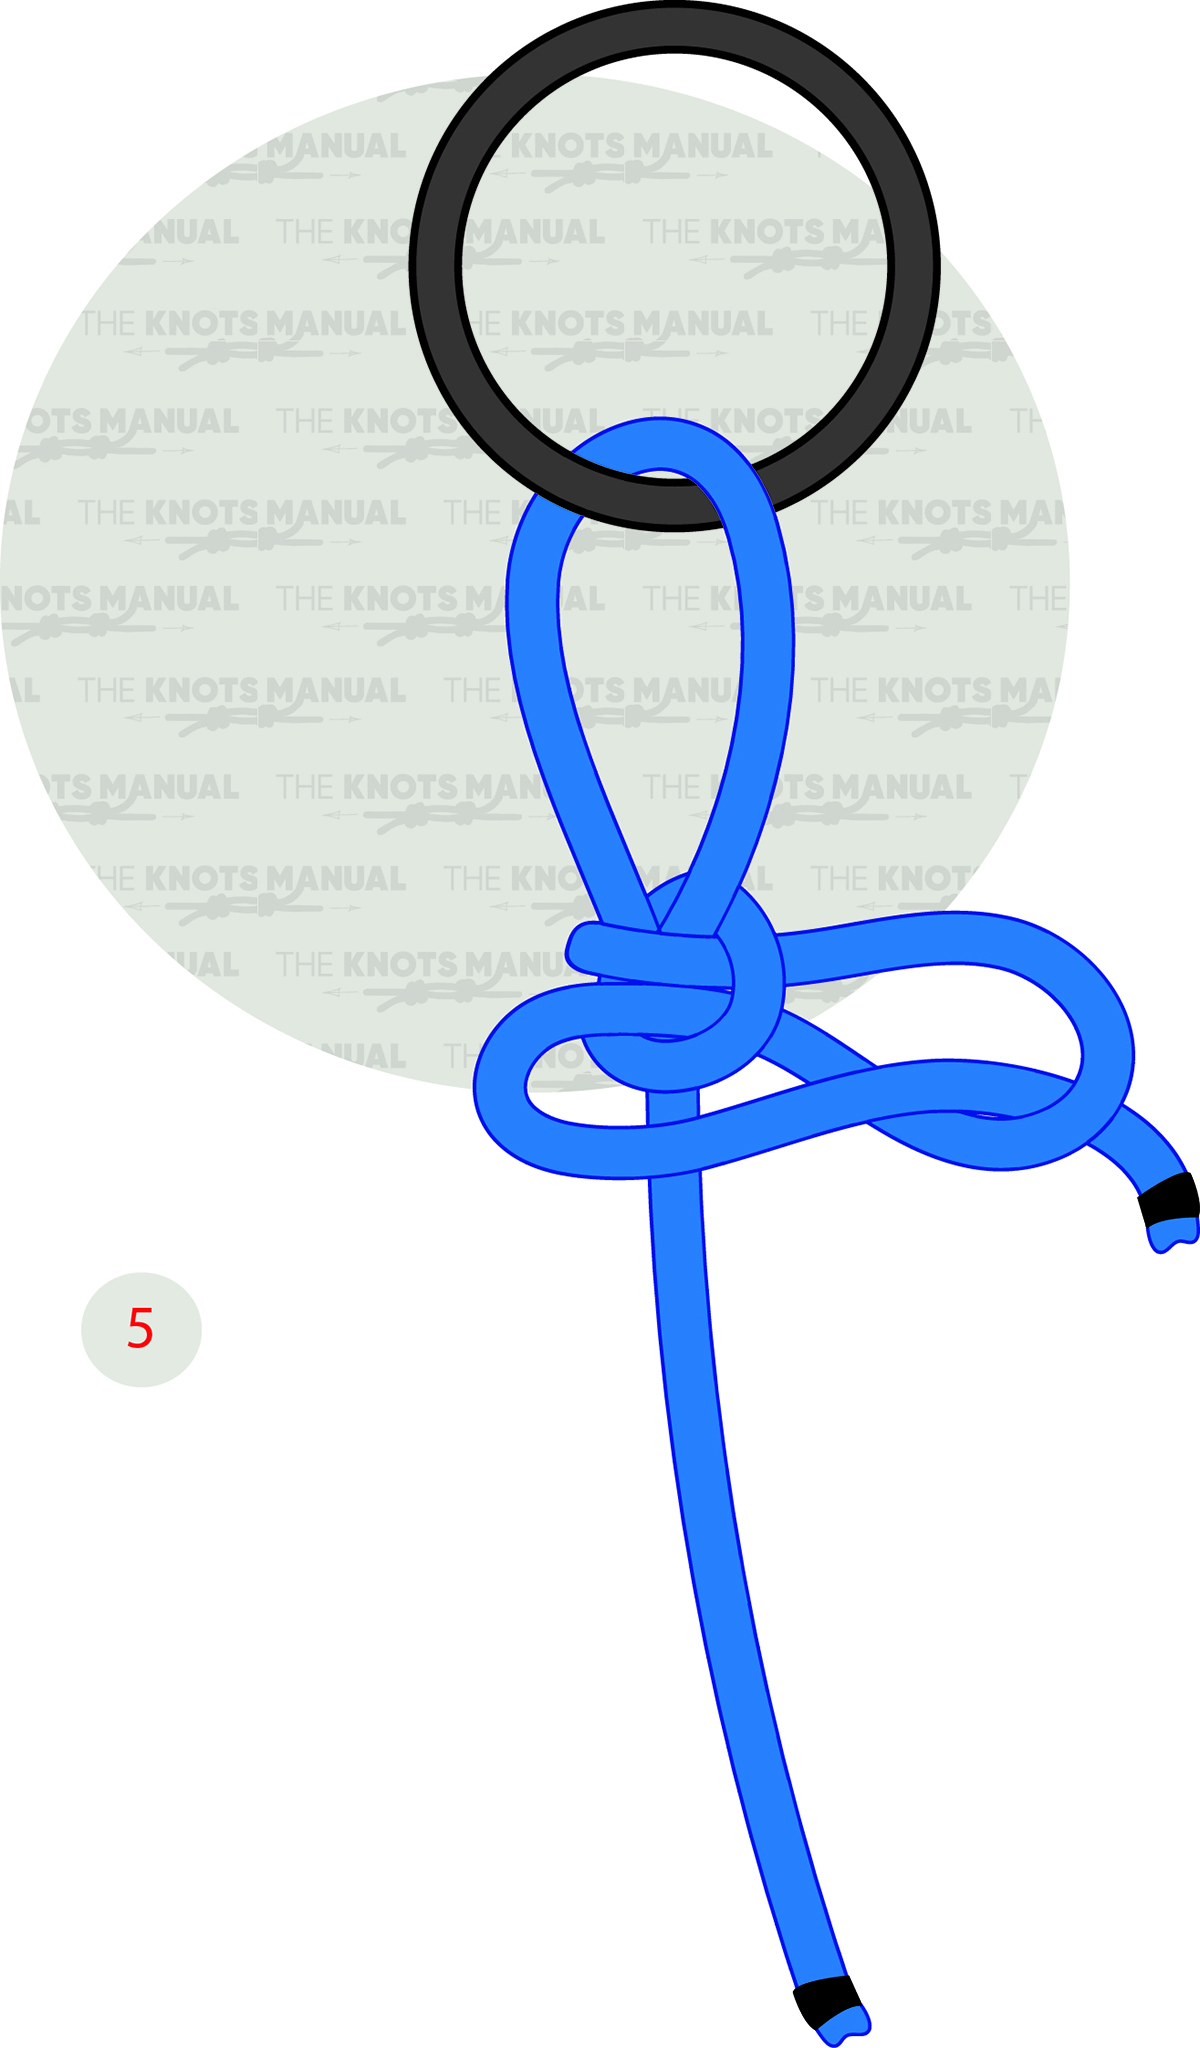
For extra safety, you can pass the working end through the slipped loop.
LOL! I just realize that this is also a Falconers’ Hitch! Just tied a bit differently.