A nail knot is a fisherman’s knot to connect their fly line and leader. Nail knots are excellent for attaching two lines of differing diameters. Nail knots are strong, do not slip, and are smooth and compact.
As long as you have the right tool, they are quick and easy to create. In the past, fishermen used nails to tie these knots, hence the name. Today, you can use a hollow tool or straw.
Knots that are similar to the nail knot include:
- Double nail knot
- Double uni knot
- Albright knot
- Surgeon’s knot
- Blood knot
- Loop-To-Loop
To learn how to tie a nail knot, follow the directions below. We explain how to tie a nail knot with a tool as well as without one.
What Is The Nail Knot?
Nail knots are used in fishing to connect the fly line to the leader. These knots help join two different lines or ropes with different diameters. They are sometimes called “tube” or “gryp” knots.
The nail knot gets its name because fishermen initially used a nail as a guide for creating the knot. Fishermen don’t use actual nails much anymore. They can be somewhat dangerous, and nails are more difficult to use than other objects.
Instead, fishermen typically use a needle, a straw, or another kind of thin hollow tube as their guide. You can also buy a nail knot tool specifically for this purpose. Using a nail knot tool allows you to construct several nail knots quickly.
You can make a nail knot by hand if you don’t have any tools available. Keep in mind that, without any tools, it will be more difficult and time-consuming to create a nail knot.
Nail knots are helpful because they are very strong and don’t slip. They are resistant to hinging and don’t hold much water, so you don’t have to worry about spraying. Nail knots are tiny and smooth, so they easily pass through guides. They are even suitable for fluorocarbon lines.
The downside of nail knots is that they are difficult to untie.
Advantages & Disadvantages Of The Nail Knot
| Advantages | Disadvantages |
| Resistant to hinging | Hard to tie without a tool |
| Suitable for fluorocarbon lines | Difficult to replace the leader, especially without ample lighting |
| Quick tying with a tool | Difficult to untie |
| Strong | Tedious |
| Smooth & compact knot | |
| Does not slip | |
| Holds no water, so there’s not much spraying |
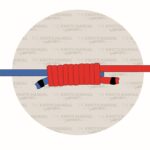
How To Tie A Nail Knot
Tying a nail knot doesn’t have to be complicated. Follow the directions below to learn how to attach a leader to a fly line:
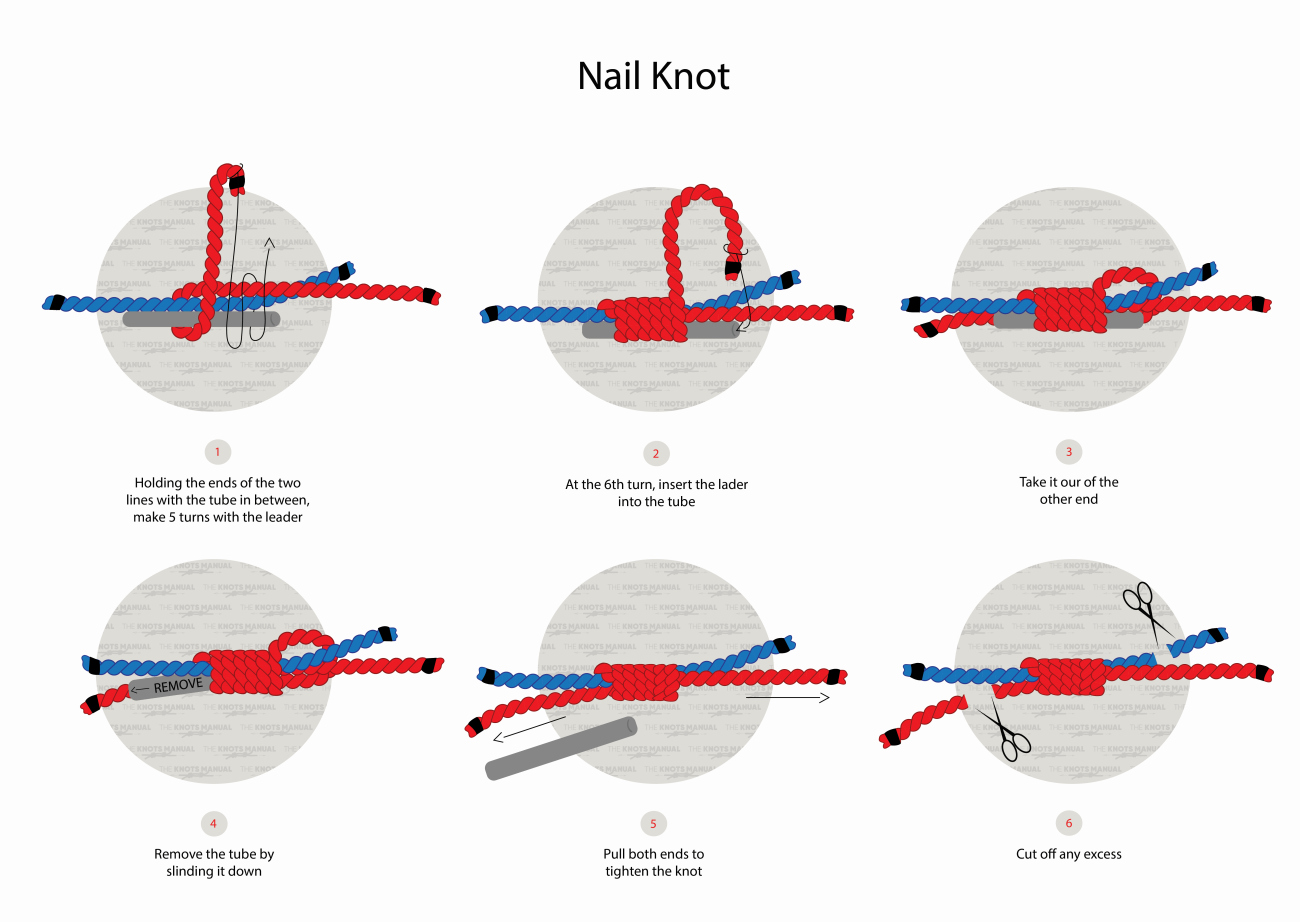
Step 1:
Lay your chosen tying tool against the end of your fly line.
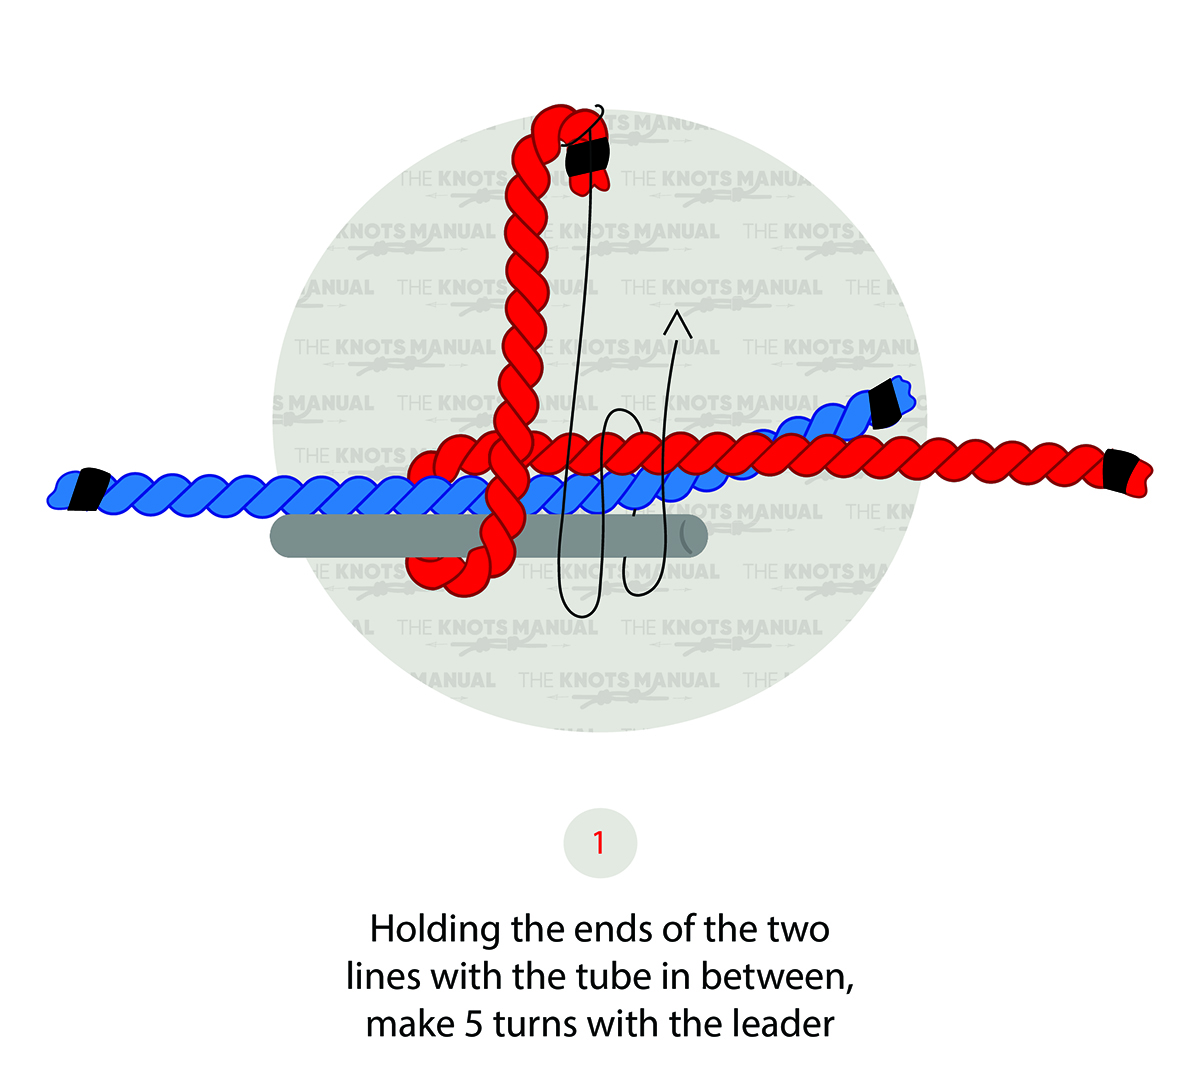
Step 2:
Set the butt end of your leader against the fly line and the tool. Leave 10-12 in (25.4-30.5 cm) of the working end to tie the knot.
Step 3:
Working left to right, wrap the leader around the fly line and tying tool 5-6 times.
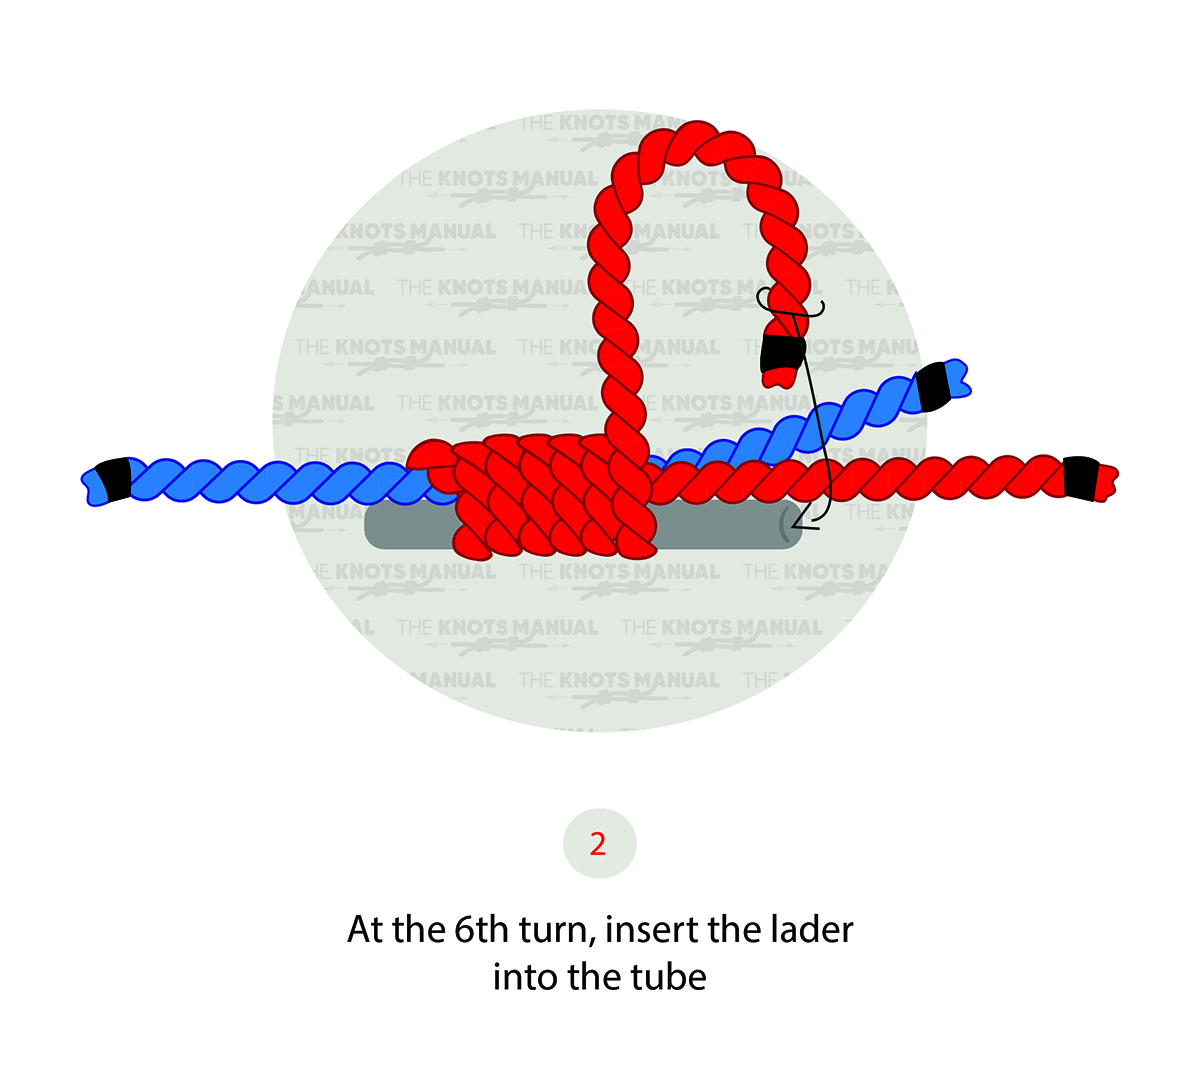
Step 4:
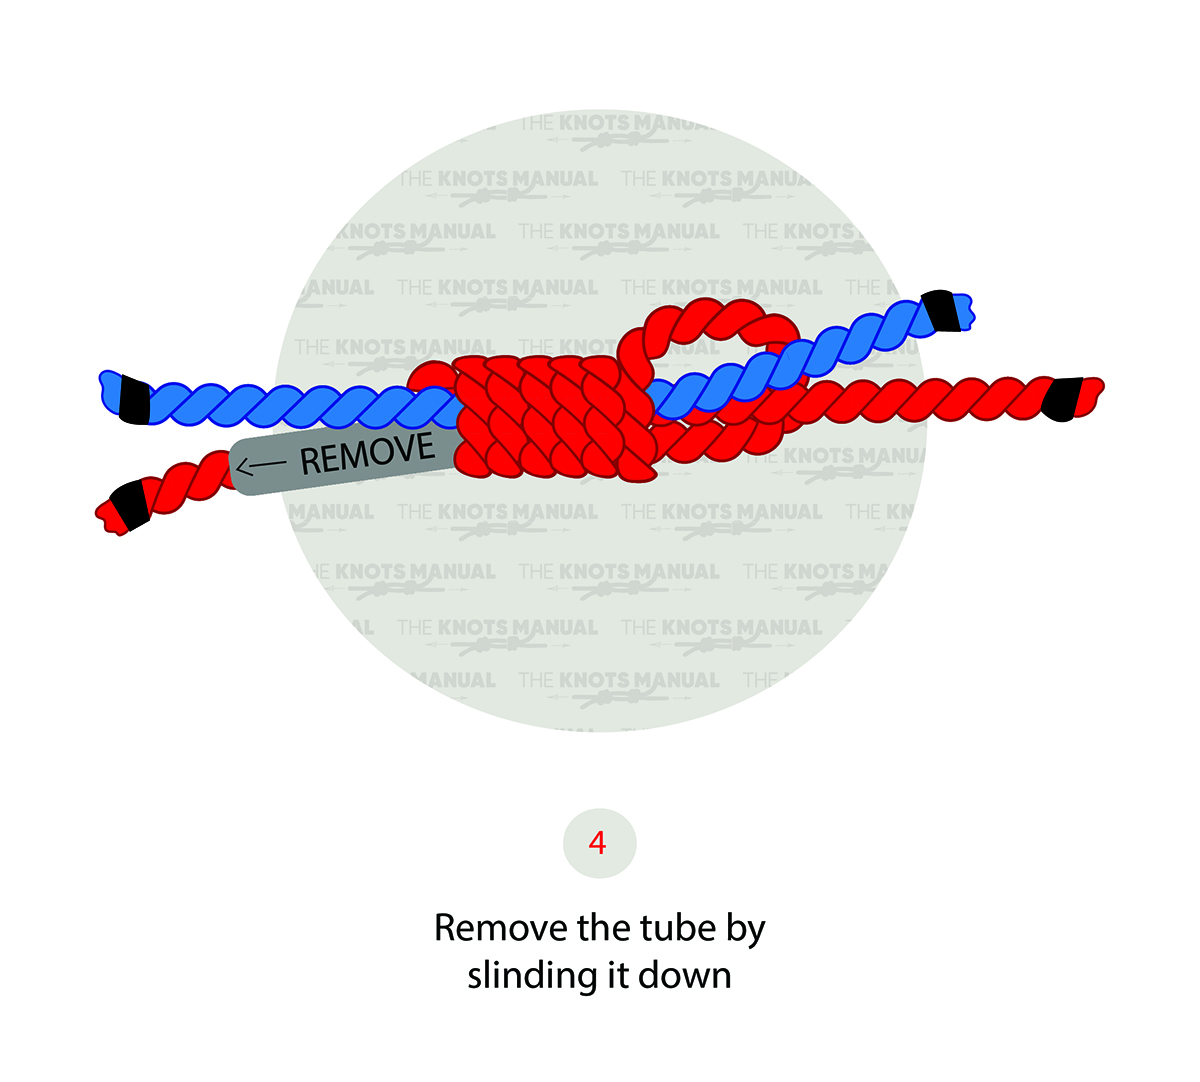
Pass the working end of the leader through the hollow opening of your tool. Pull the leader’s working end to tighten the tool’s knot. Then, remove the tool.
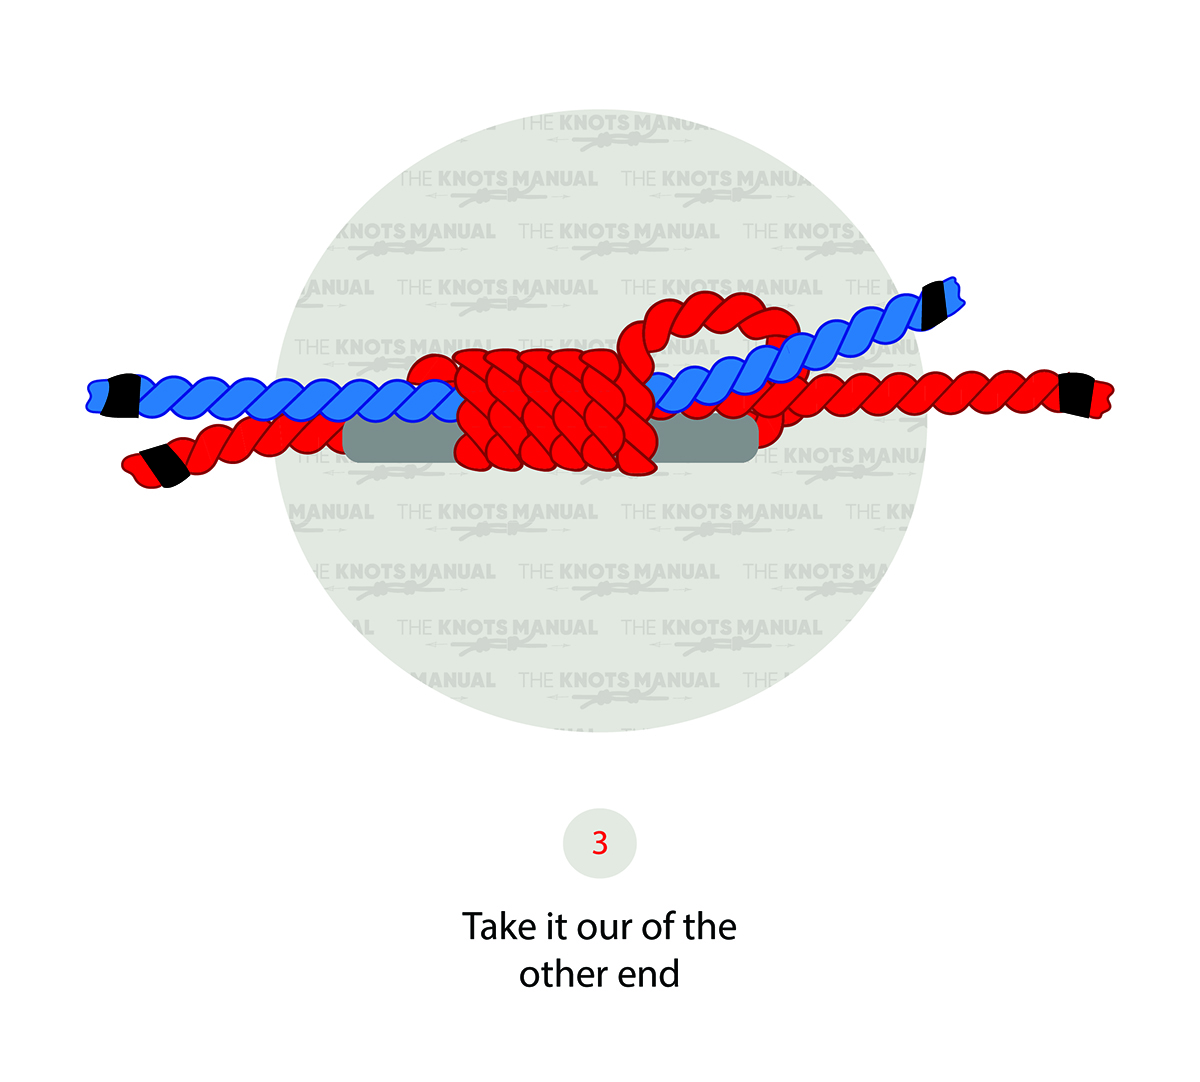
Step 5:
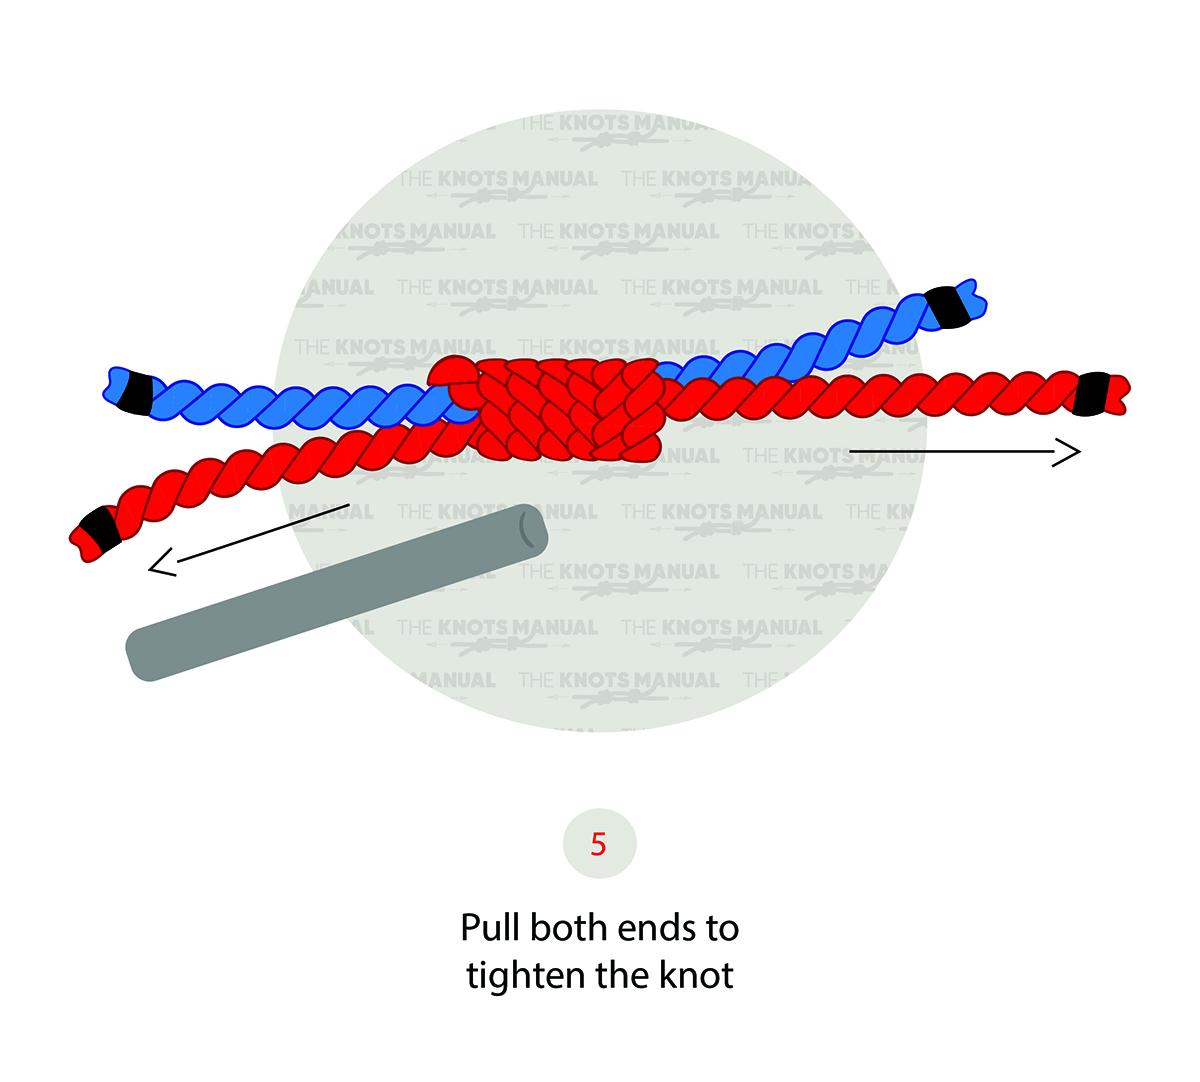
Pull the working end of the leader to tighten the coils.
Step 6:
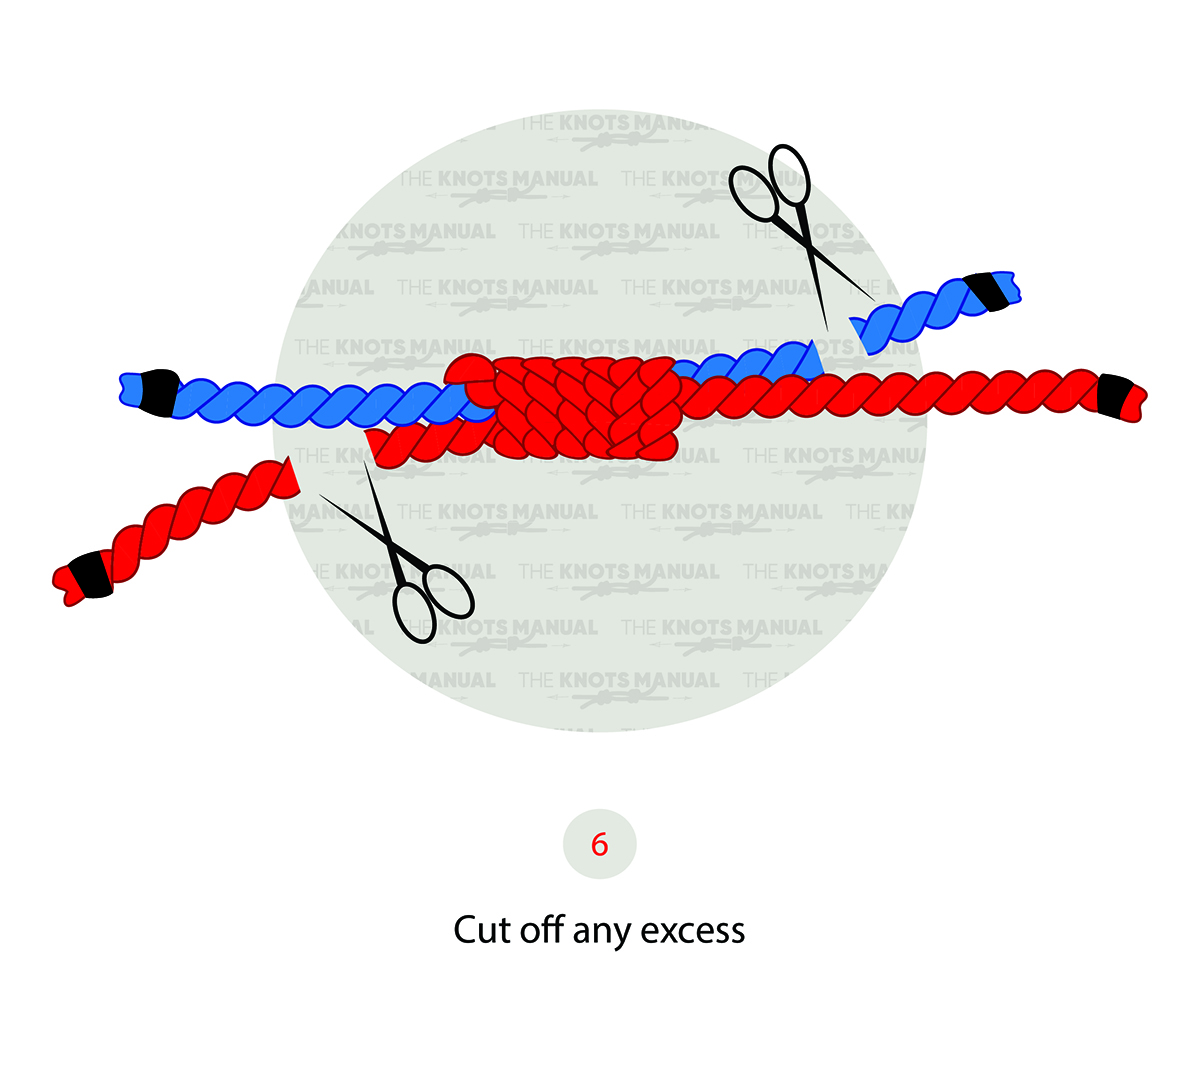
Trim the working end of the leader close to the knot.
* Is your tool lacking a hollow opening (i.e., if you’re using a nail)? Pass the leader through the space between the tool and the fly line. *
How To Tie A Nail Knot Without A Tool
To learn how to tie a nail knot without a tool, follow the directions below:
[1] Double over the first few inches of your fly line to create a large loop.
[2] Create a large loop with your leader so both ends face opposite directions.
* The leader’s butt section should face toward the reel end of the fly line. The leader’s tippet should extend past the fly line. *
[3] Hold the leg of the leader loop with your thumb and forefinger.
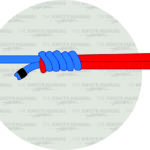
[4] Wrap the leader back over itself and both of the fly line’s legs.
[5] Wrap the leader around the fly line 5-6 times.
* Pinch each wrap with your finger as you work, or the leader will unravel. *
[6] Continue holding the wraps with your left thumb and forefinger. With your right hand, pull the tippet of the leader until the loop comes through all the way.
* Take care not to pull too tight. *
[7] Continue holding the wraps with your left thumb and forefinger. Pull the doubled-over part of the fly line with your right hand, so it’s straight.
[8] Ensure that the knot sits near the end of your fly line. Adjust the position of the knot if necessary.
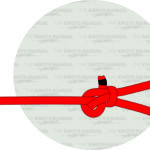
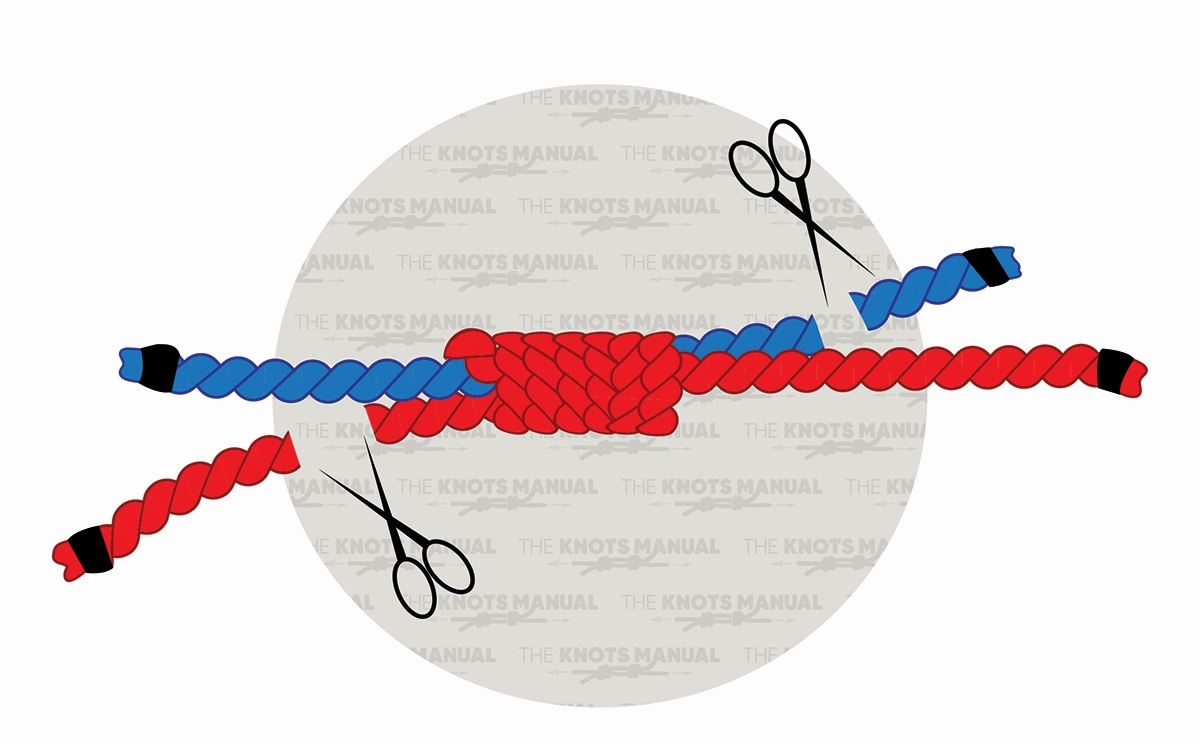
[9] Pull each end of the line to pull the nail knot tight.
[10] Trim the ends of your rope.
[11] The knot is complete.
What Are The Uses Of A Nail Knot?
The primary use of the nail knot is to tie two different lines together for fishing. These knots are suitable for joining two lines of differing diameters. Such a characteristic makes them useful for attaching the backing to the fly line. You can also use them to attach the fly line to the leader or tippet.
Nail knots are the slimmest but strongest way to add a loop to the end of a fly line.
You can use a nail knot for fly fishing, angling, or traditional fishing.
Here are some ways fishermen use nail knots:
- Used on a hook or swivel
- As a bobber stop
- For splicing a mono leader into a hollow braid
Knots Similar To The Nail Knot
Double Nail Knot: These knots are the same as a single nail knot but doubled. Usually, fishermen only tie one nail knot to the end of a line. With a double nail knot, two knots are tied at the end of the line.
Double Uni Knot: These knots join two lines with similar or different strengths.
Albright Knot: These knots appear less smooth than the nail knot.
Surgeon’s Knot: These knots are easier to tie than a nail knot but are bulkier. Fishermen use them to join the leader and tippet.
Blood Knot: These knots are better for joining two lines of equal diameter.
Loop-To-Loop: These knots are suitable for fly lines that have welded loops on their ends. They create a quick and easy connection between the lines.
FAQs
Is A Nail Knot Strong?
Every knot you add to your line will lessen the strength of your line. That’s simply the nature of knots. Still, the nail knot is strong. Fishermen typically use nail knots on lines with higher breaking strength. So, a nail knot typically reduces the breaking strength by only about 30%.
Do You Really Need A Nail Knot Tool?
A nail knot tool isn’t necessary, but you can buy one for under $10, and they make your life easier. A hollow straw works similarly, but a proper tool is sturdier and lasts longer. A straw or nail knot tool is a much better option than using a solid object like a nail.