The Carrick Bend Knot is used to join two ropes – most commonly, very heavy ones that don’t bend well. It’s also used for decorative purposes due to its symmetrical, visually-pleasing structure.
In other sources, the Carrick Bend is also sometimes referred to as the Pretzel Knot, Sailor’s Breastplate, Ormonde Knot, or Wake Knot.
Quick Guide: Tying the Carrick Bend Knot
To tie a Carrick Bend, create a loop near the end of the first rope (step 1). Then intertwine this loop from the other direction using the second rope (steps 2-3).
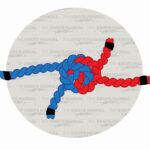
To check that the Carrick Bend is tied correctly, make sure that each rope intertwines with the other one. At each crossing, each rope should go under, over, under, over, under, over, under, and over (when looking from the standing end). It should look like two loops intertwining each other.
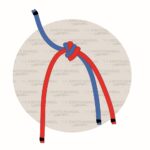
To tighten the knot, pull the standing ends of each rope in opposite directions. The knot will capsize and turn into a smaller knot, where both ends exit roughly in the same place, but in opposite directions.
If used for life-threatening situations the ends after the Carrick Bend should be left much longer. They should be left at least 4-8 inches (10-20 cm) long (depending on the thickness of the rope used). This is to account for slippage, which occurs as you load the knot with weight.
In some situations, this knot is seized to preserve its aesthetic form (as illustrated in step 3). To do this, you need to secure the working ends parallel to the standing ends with metal clips or smaller-diameter rope. This ends up in a more secure and visually good-looking bend.

Pros and Cons of the Carrick Bend Knot
The Carrick Band is especially useful when connecting very heavy ropes thick in diameter. That’s because the bends form in wide angles, which allows thicker ropes to grip well.
It’s a very secure and reliable knot, especially in the capsized (tightened) form. Tests have shown that in the capsized form, this knot holds 60% of the rope strength. If it isn’t capsized, then the ends of the rope should be seized to the standing lines to make it more reliable.
The main advantage of the Carrick Bend is that it is very easy to untie. Even after shock loads and becoming wet, the knot can be easily untied, even from the capsized form. This makes it especially advantageous over other bend knots.
Its key downside is that it isn’t as strong as other bend knots. For example, the Double Fisherman’s Bend Knot and the Figure 8 Bend are more secure (hence, more widely used).
Common Uses for the Carrick Bend
The Carrick Bend is most commonly used to connect heavy ropes (for example, hawsers for mooring large ships). In this case, usually, the non-capsized form is used and the ends are seized. But you can use it anytime you need to connect two ropes (in the capsized form).
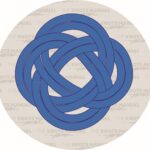
It’s also widely used for decorative purposes to make bracelets, mats, and wall hangings. It’s worth noting that it keeps its symmetrical aesthetic only in the seized form. Once it’s tightened too much and capsized, it loses this property.
Some people also like to use the Carrick Bend for making climbing nets and cargo nets. But it’s used rarely for this purpose because tying this knot is somewhat complicated. Replicating it on a mass scale is very time-consuming.
It’s also used as a base to tie other knots, like the Lanyard Knot.
Knots Like the Carrick Bend
Diamond (Lanyard) Knot: This knot uses the Carrick Bend as a base. It’s tied on a loop, and there’s an extra step where the ends go through the middle loops and exit in the same direction. This knot is often used for various decorative purposes.
Flat Overhand Bend: One of the simplest ways of connecting two ropes using an Overhand Knot. It’s often used in climbing due to its nature of rolling over rocks and not getting stuck.
Fisherman’s Knot: Another simple way of connecting two ropes. In strength, it’s slightly weaker than the Carrick Bend but easier to tie.
Double Fisherman’s Knot: A very strong bend knot used to connect two ropes. It’s based on two Double Overhand Stopper Knots and is very commonly used in climbing.
Zeppelin Bend: Another secure and visually-pleasing way of connecting two ropes. It’s more reliable than the Carrick Bend but harder to untie.
Figure 8 Bend: A reliable bend knot that connects two ropes. It’s stronger than the Carrick Bend but not as strong as the Double Fisherman’s Knot. It also works well with larger-diameter ropes and is visually-pleasing.
Step-By-Step Guide: How to Tie the Carrick Bend Knot
A step-by-step instruction on tying the Carrick Bend Knot.
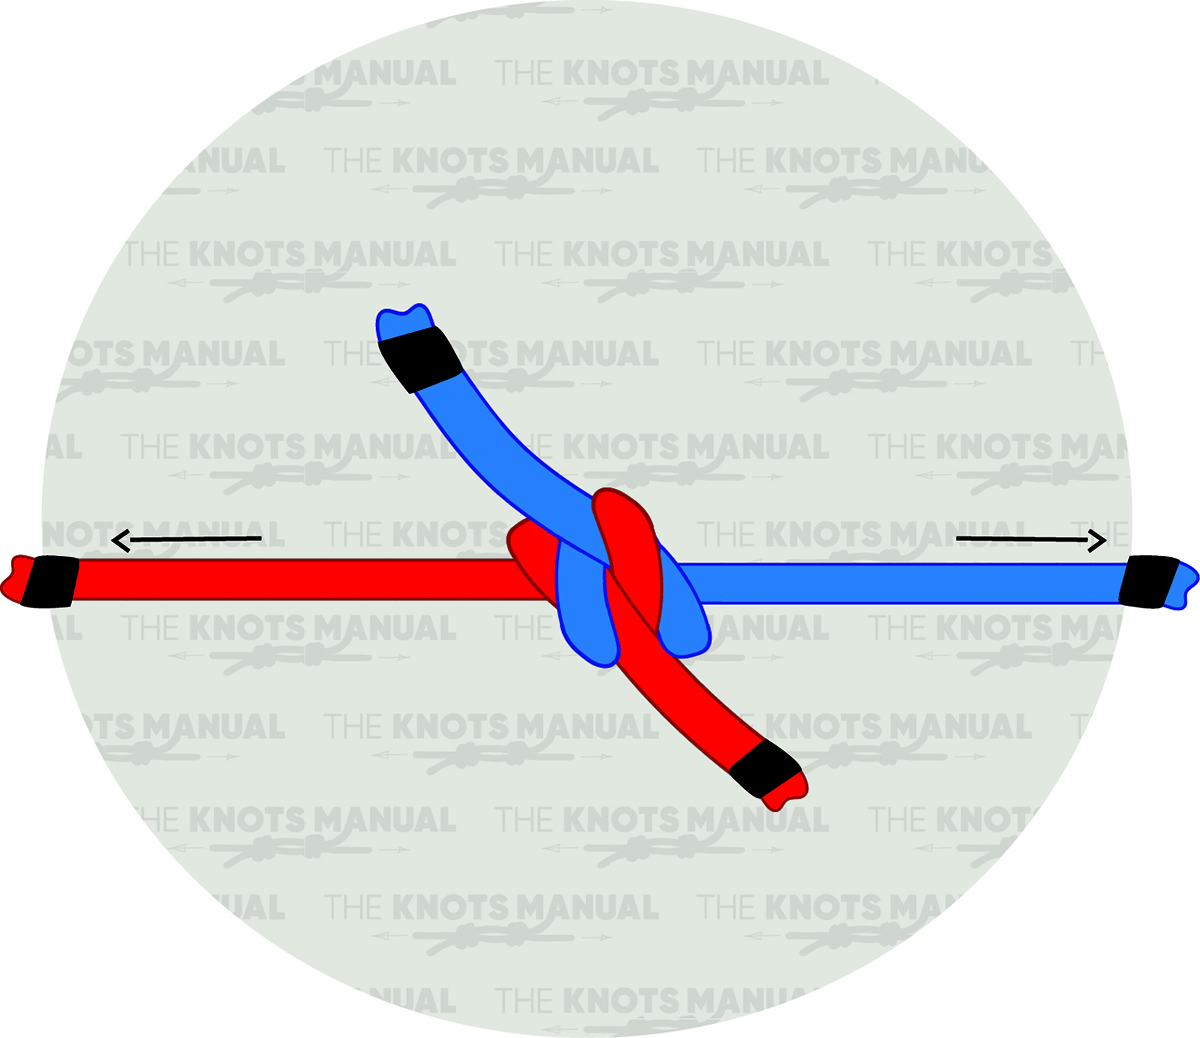
Step 1:
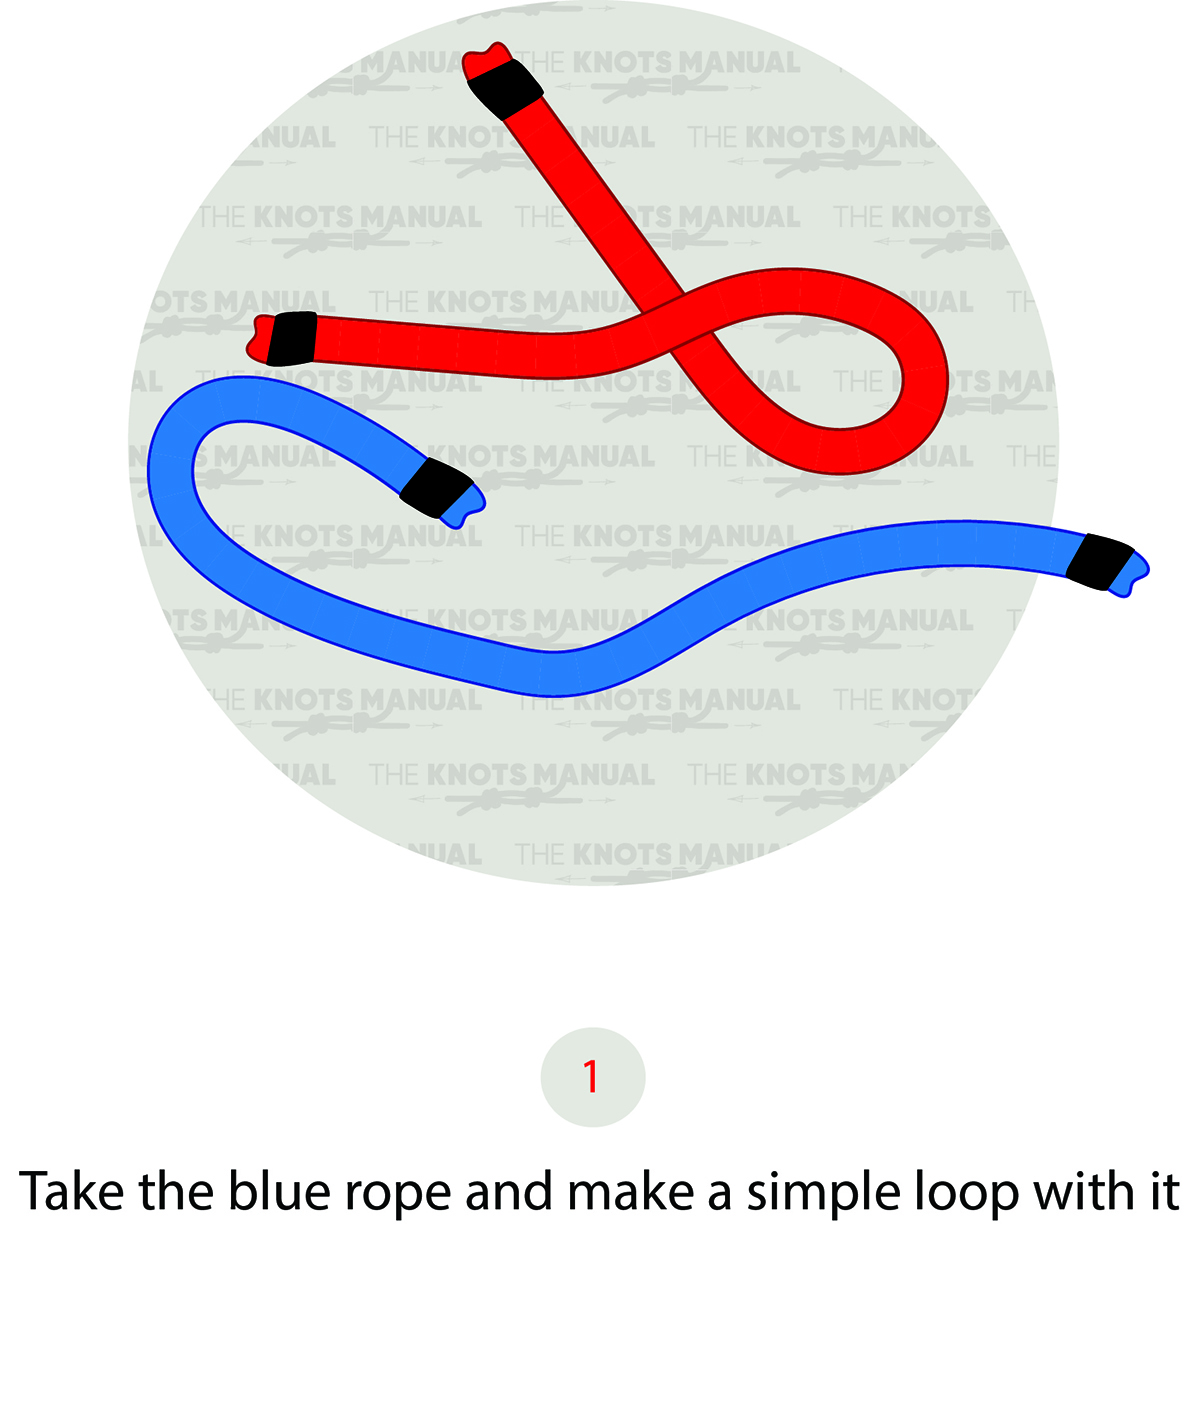
Create a loop near the end of the first rope.
Step 2:
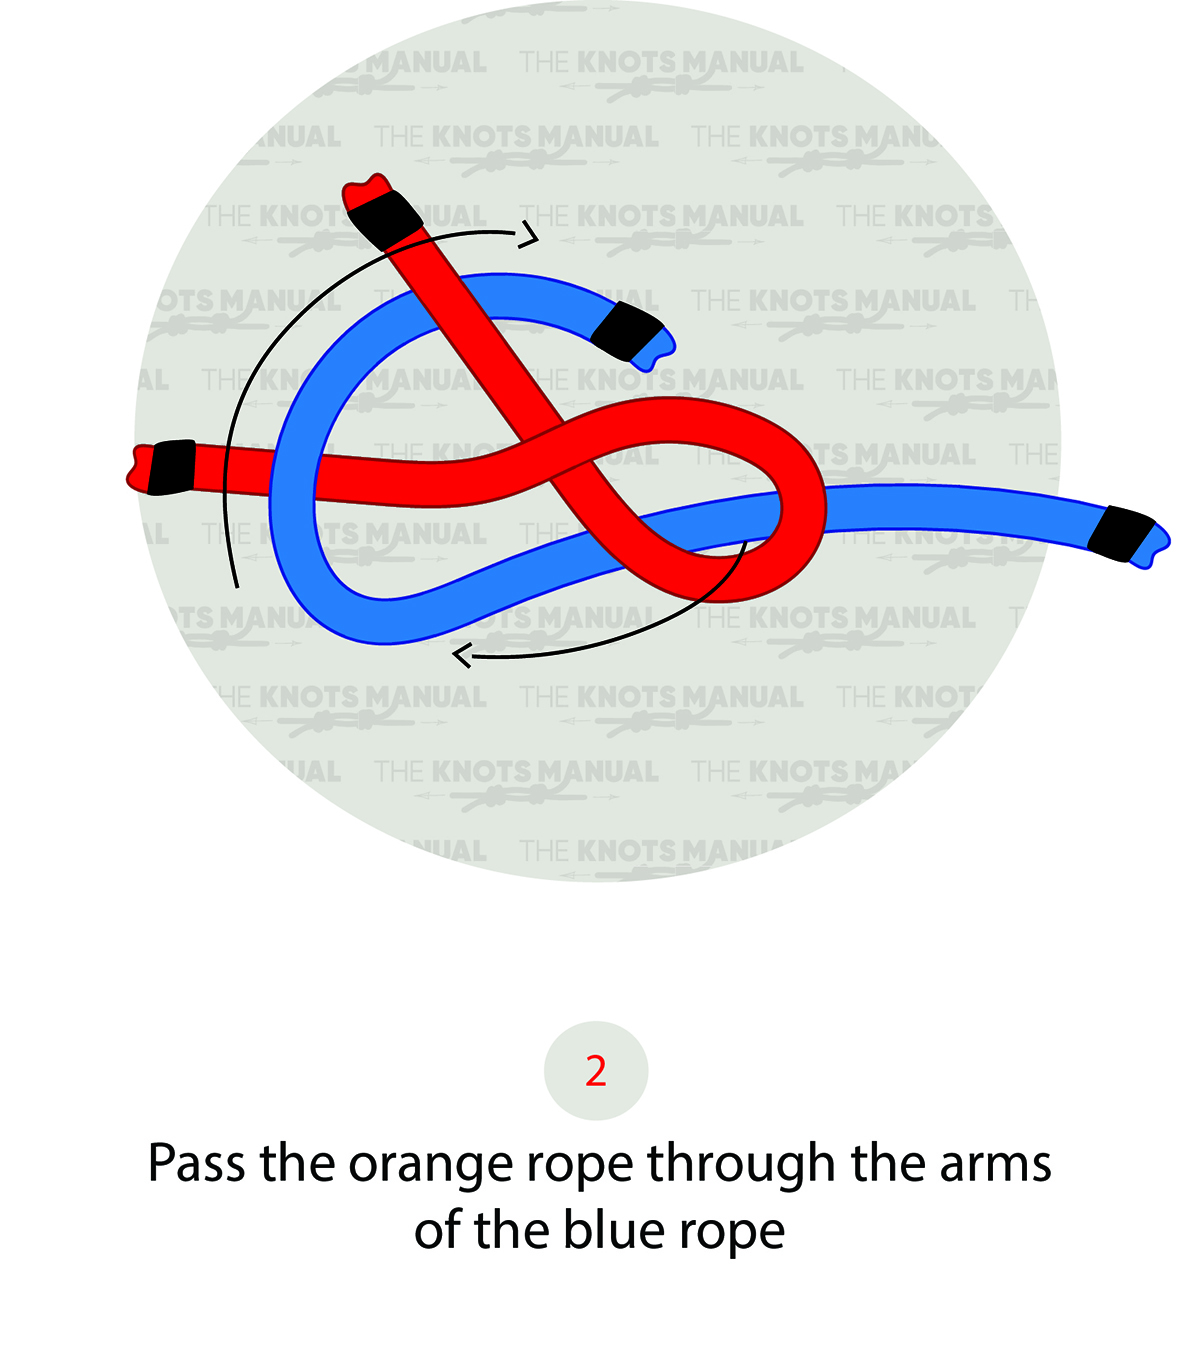
Then pass the end of the second rope through it as shown in the illustration above.
Step 3:
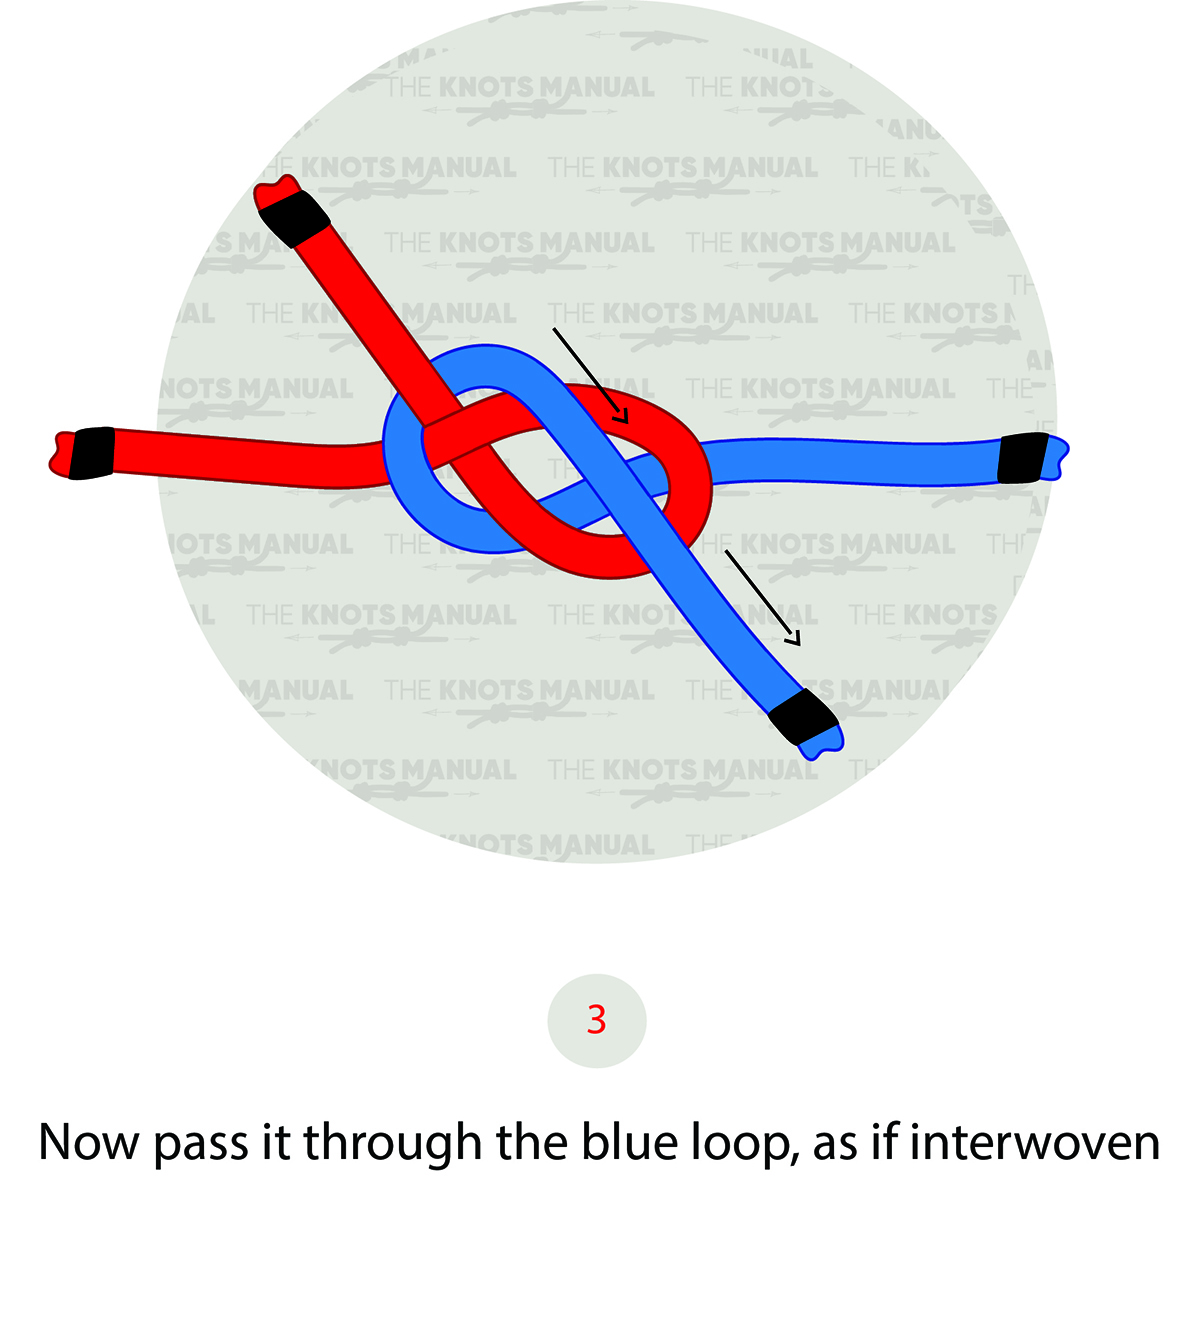
Pass the end of the second rope underneath itself to make it intertwined.
Step 4:
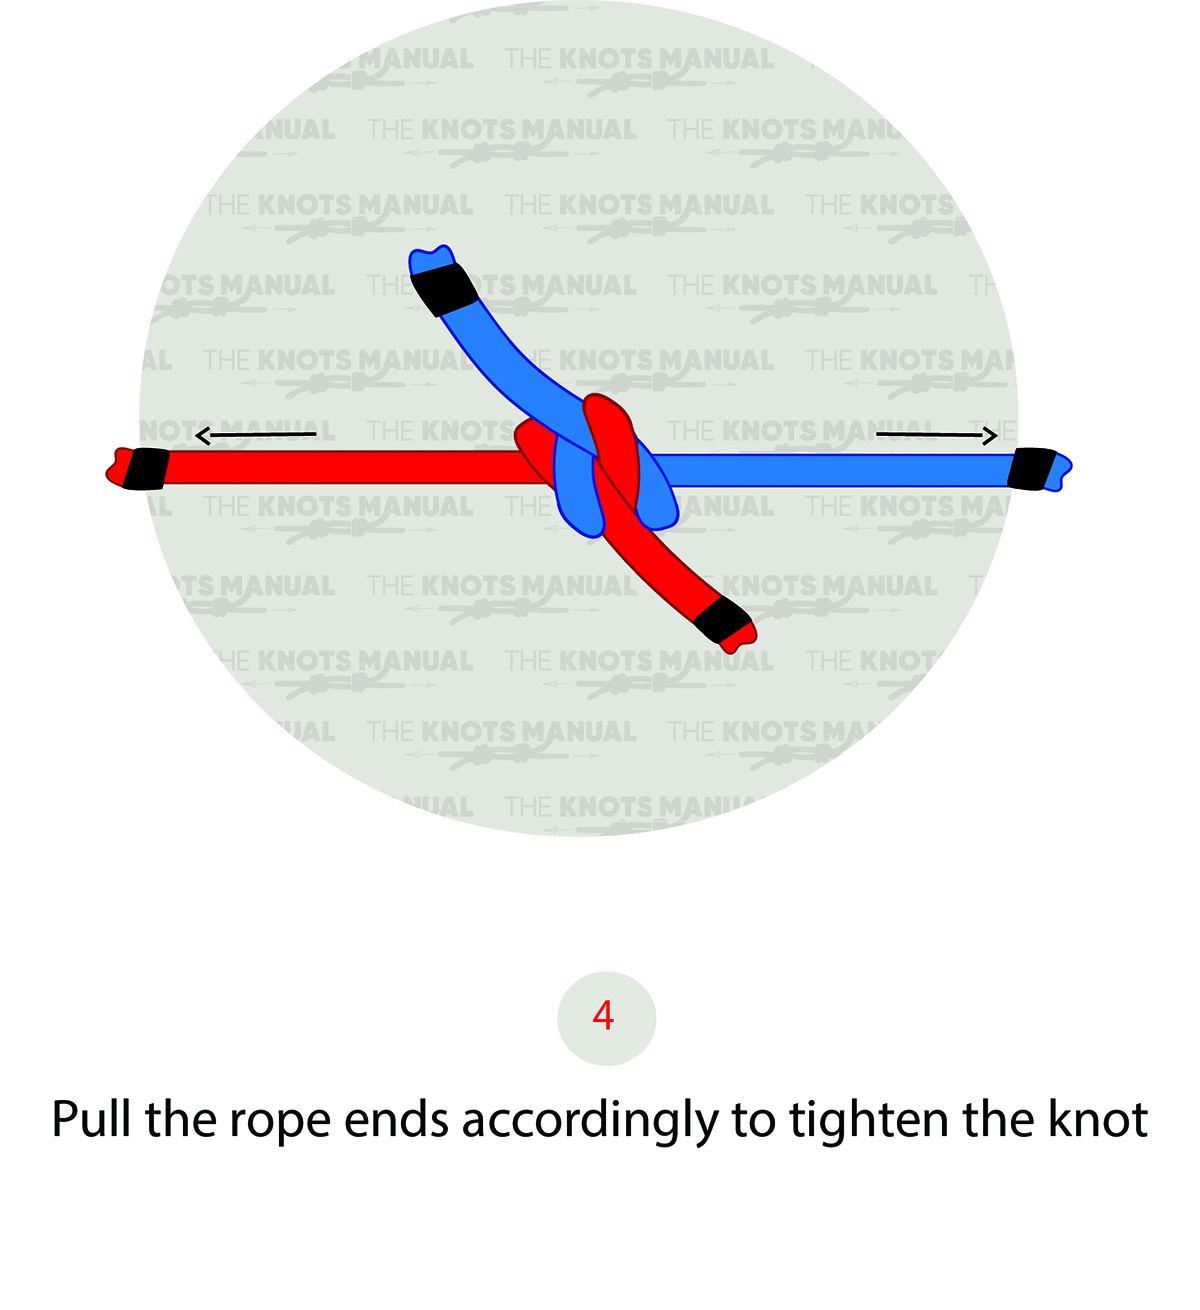
Pull on each rope in opposite direction to tighten the knot.