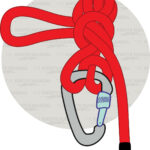
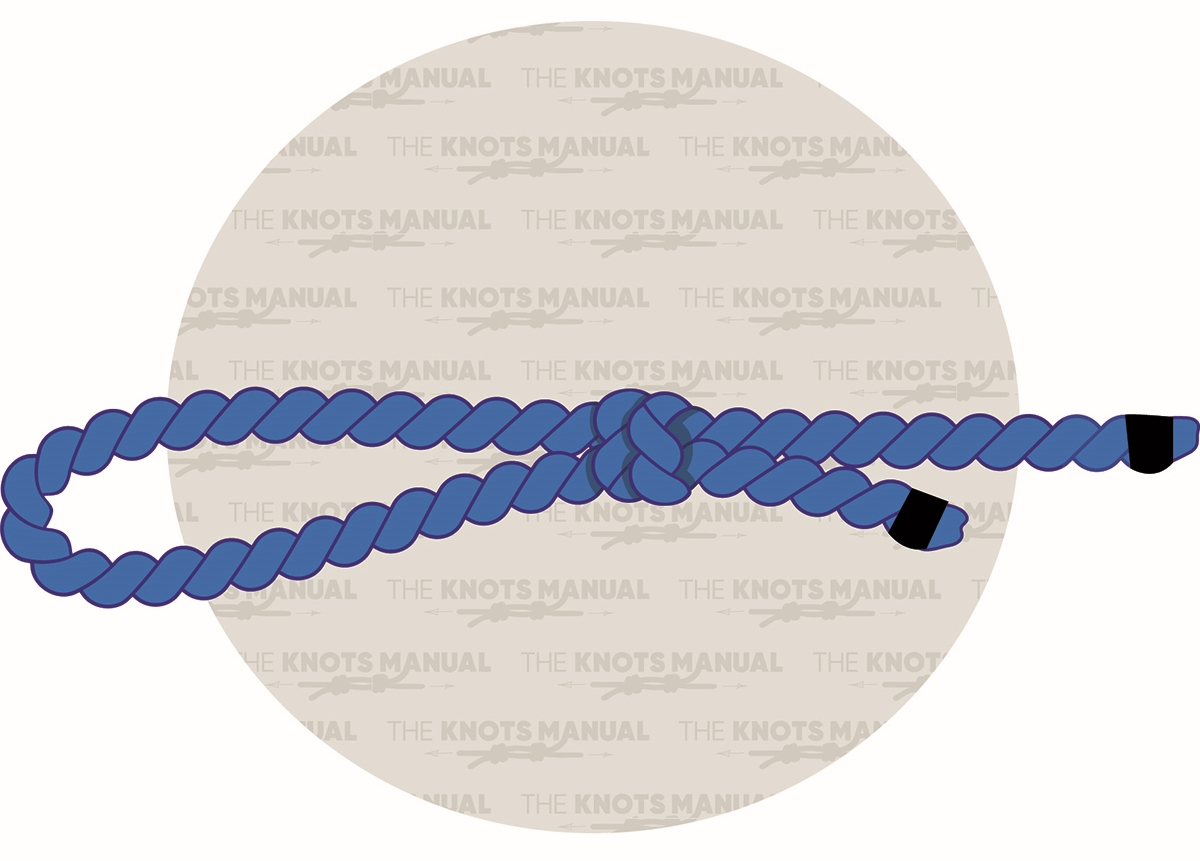
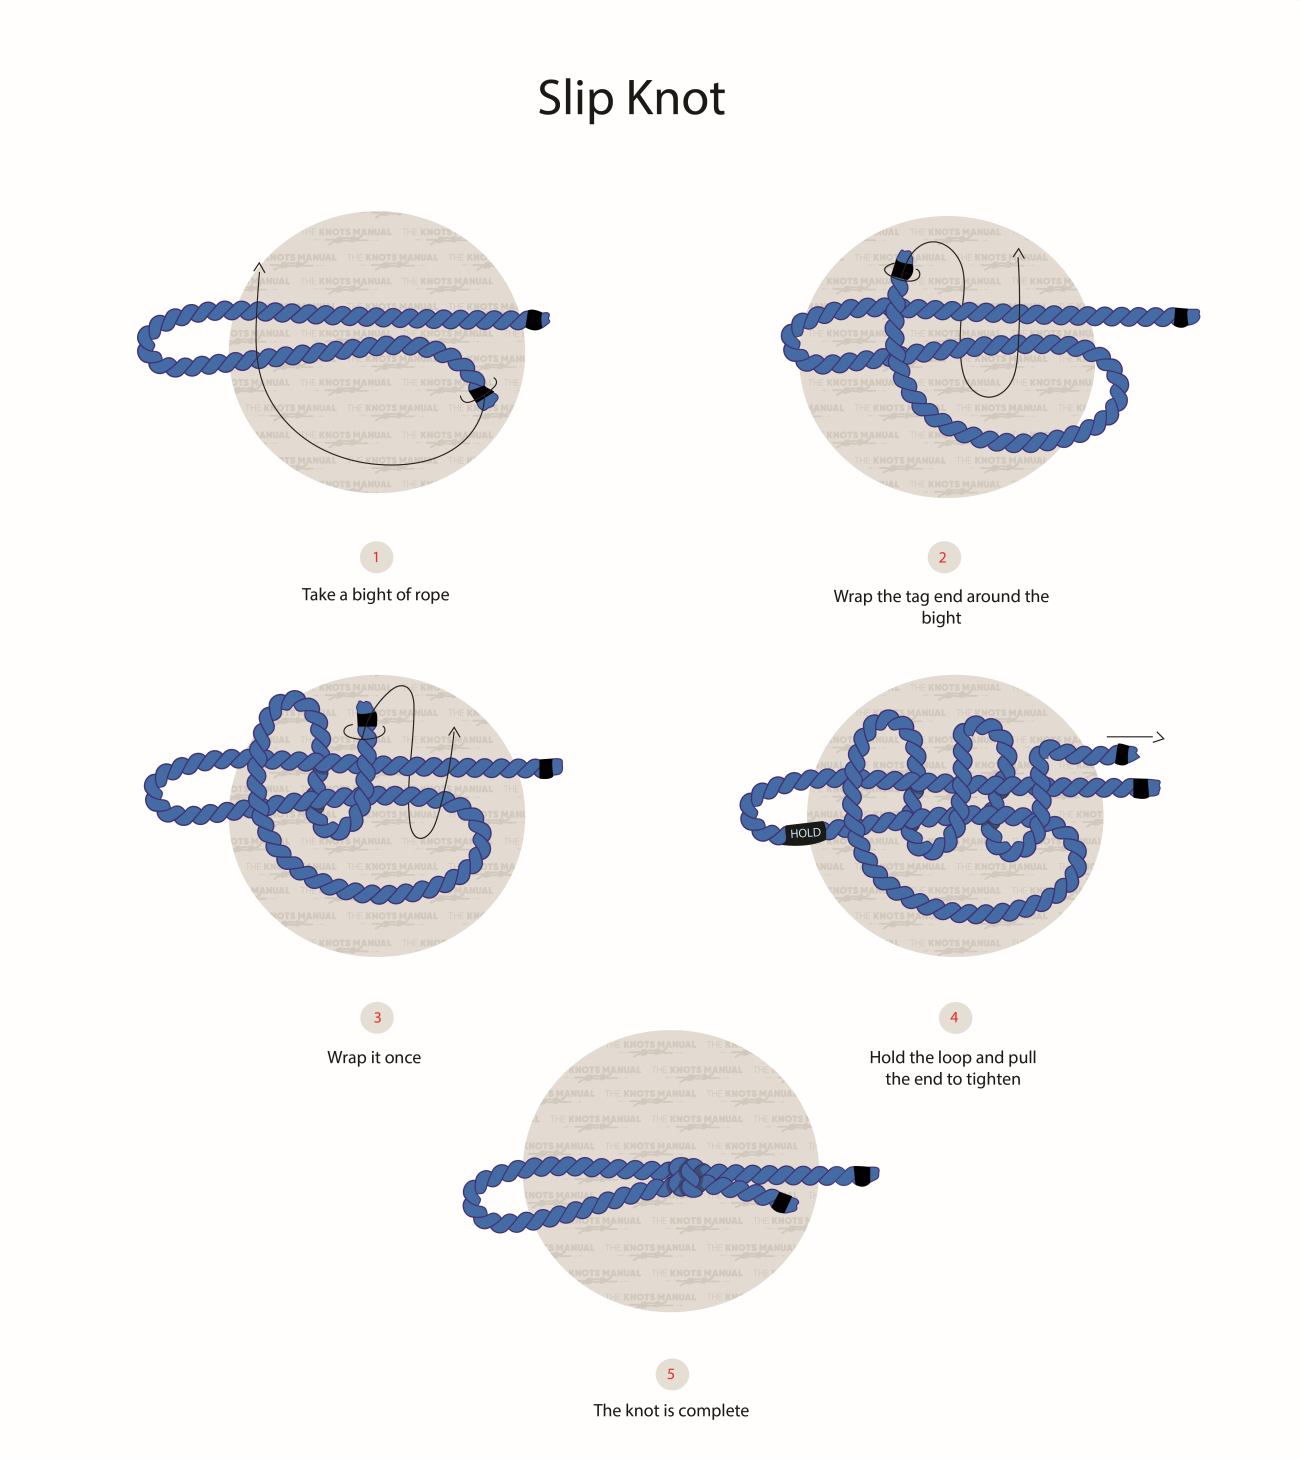
A slip knot is a simple, adjustable loop made by forming a bight in the rope and wrapping the working end around it to create a slipped overhand knot. It tightens under tension and releases instantly when the free end is pulled, making it ideal for temporary fastening in crafts, climbing, and everyday tasks.
Tying a slip knot doesn’t have to be challenging; follow these five simple steps:
Step 1:
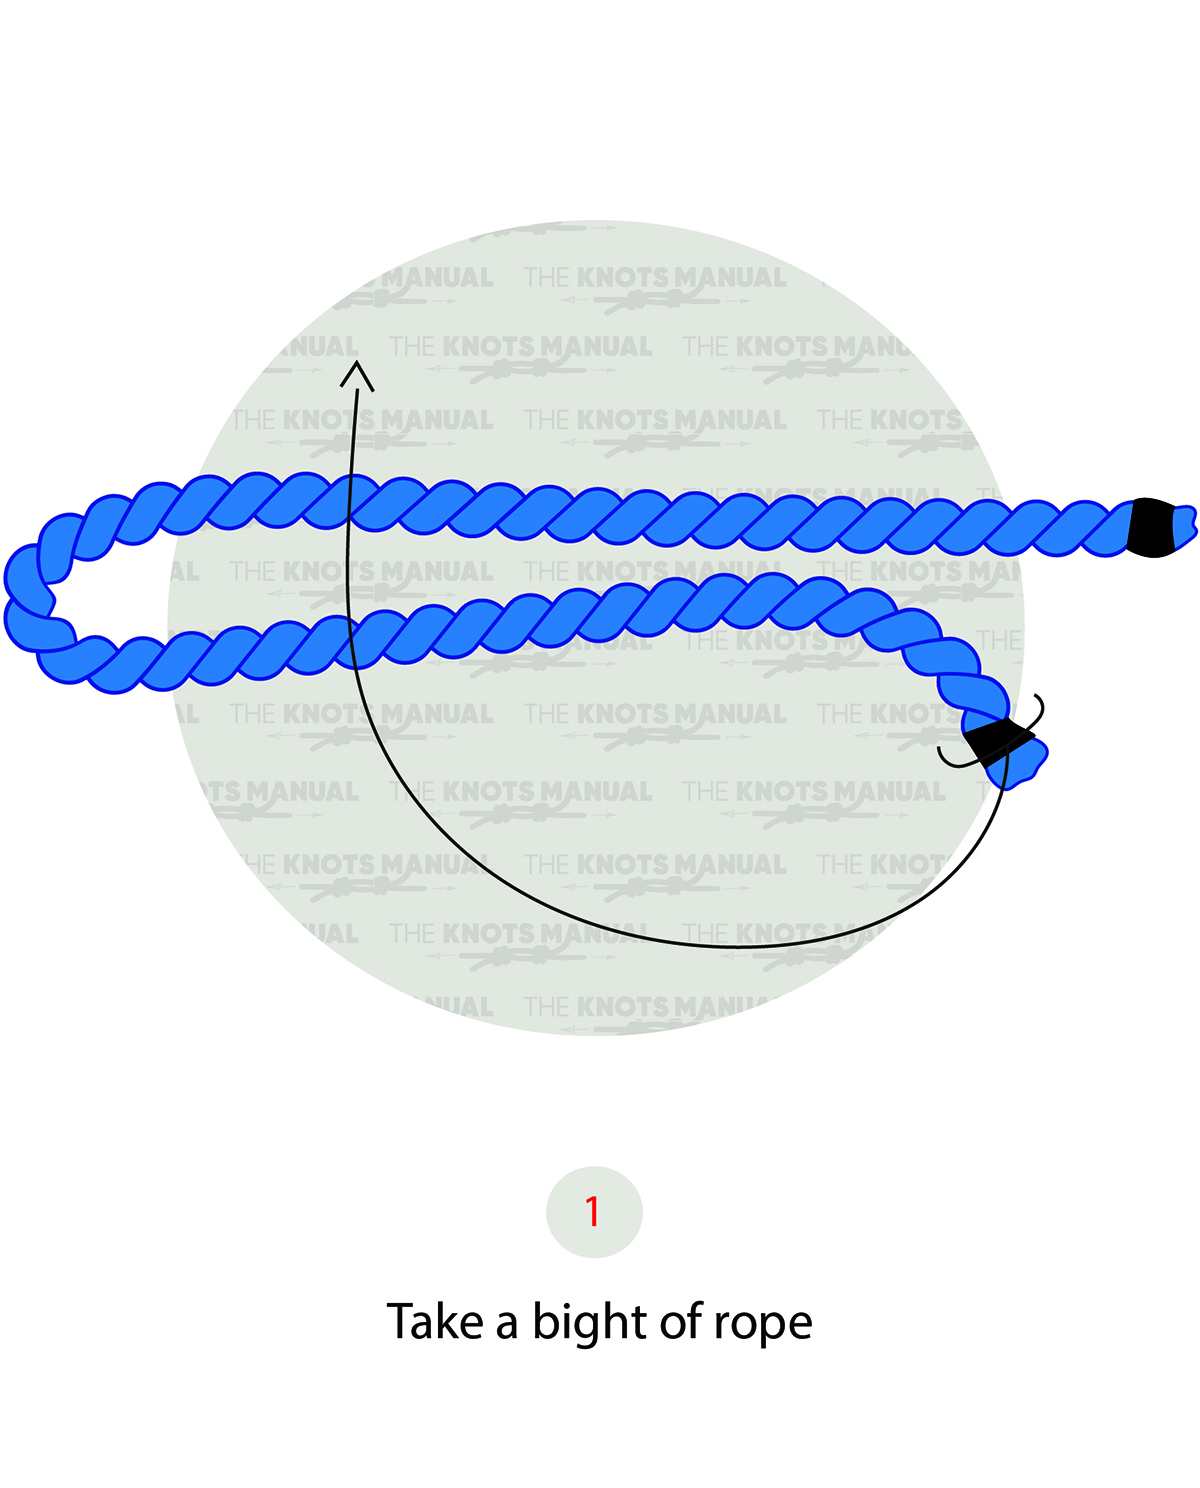
Create a bight in the rope and pull the rope’s working end under the bight.
Step 2:
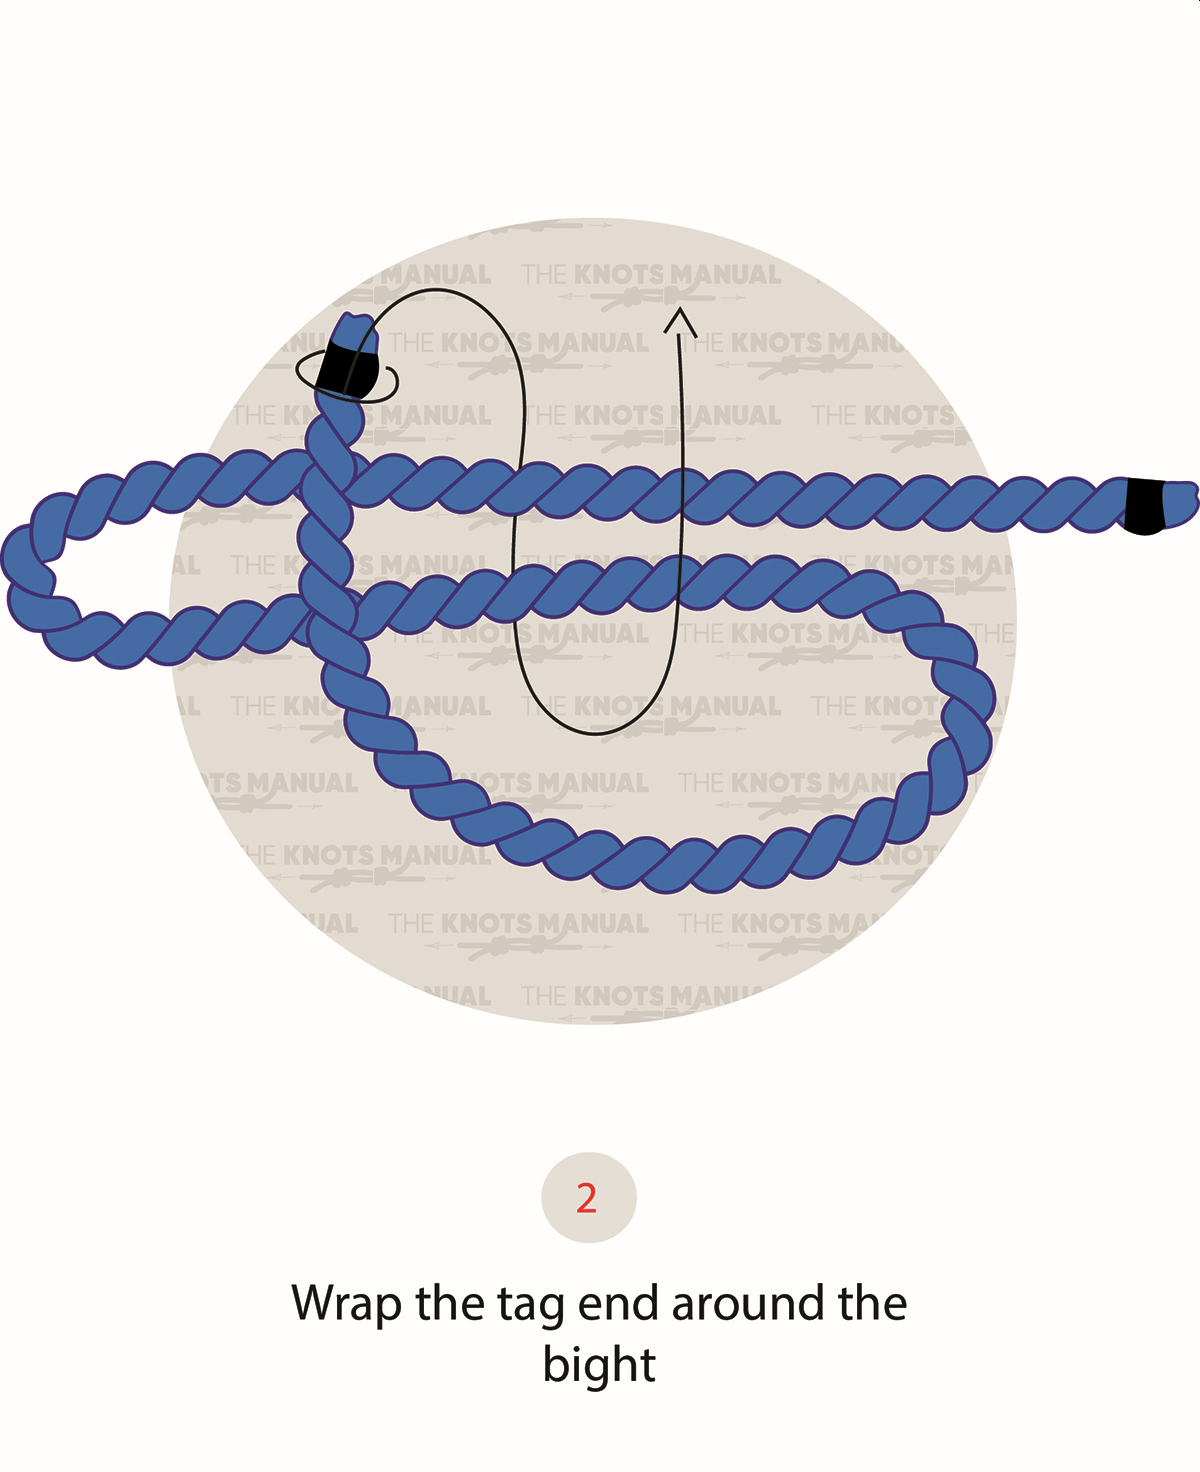
Wrap the working end around the bight, pulling the rope under it and then back over it.
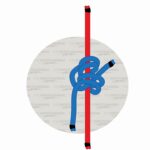
Step 3:
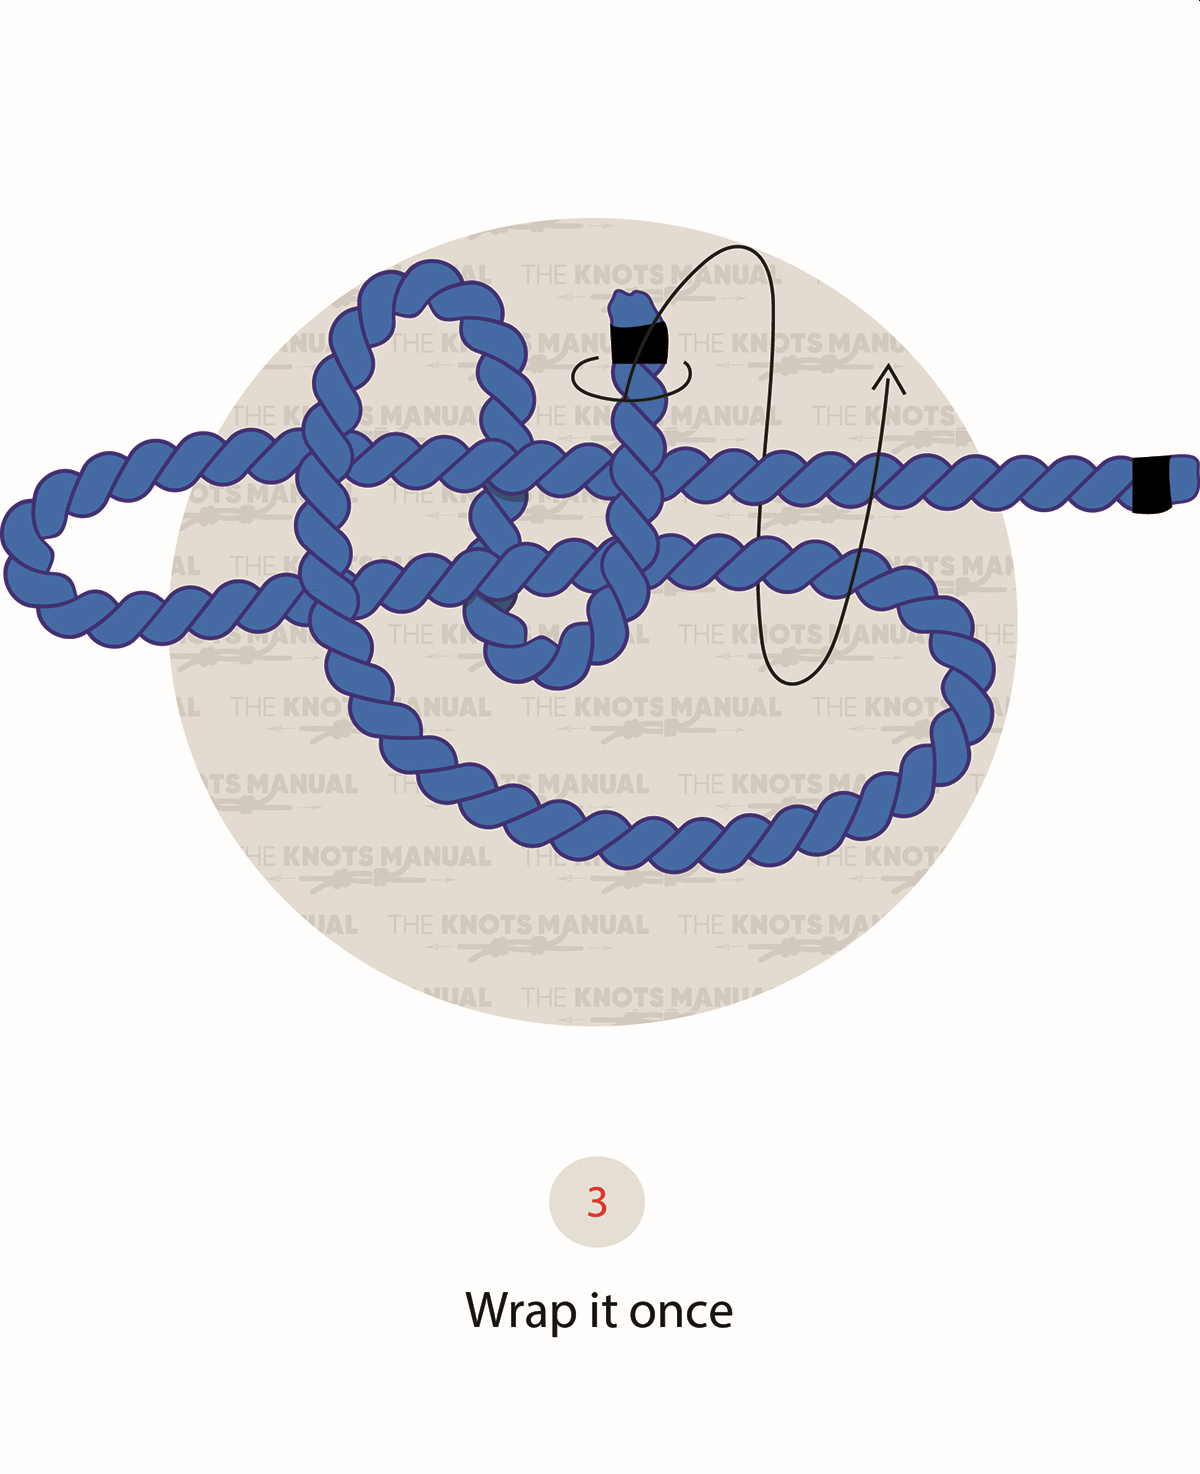
Wrap the working end around the bight once more.
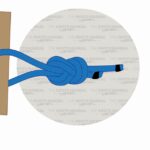
Step 4:

With one hand, hold the loop at the end of the bight. With the other hand, pull the working end of the rope to tighten the knot.
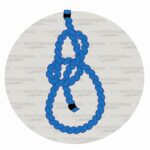
Step 5:
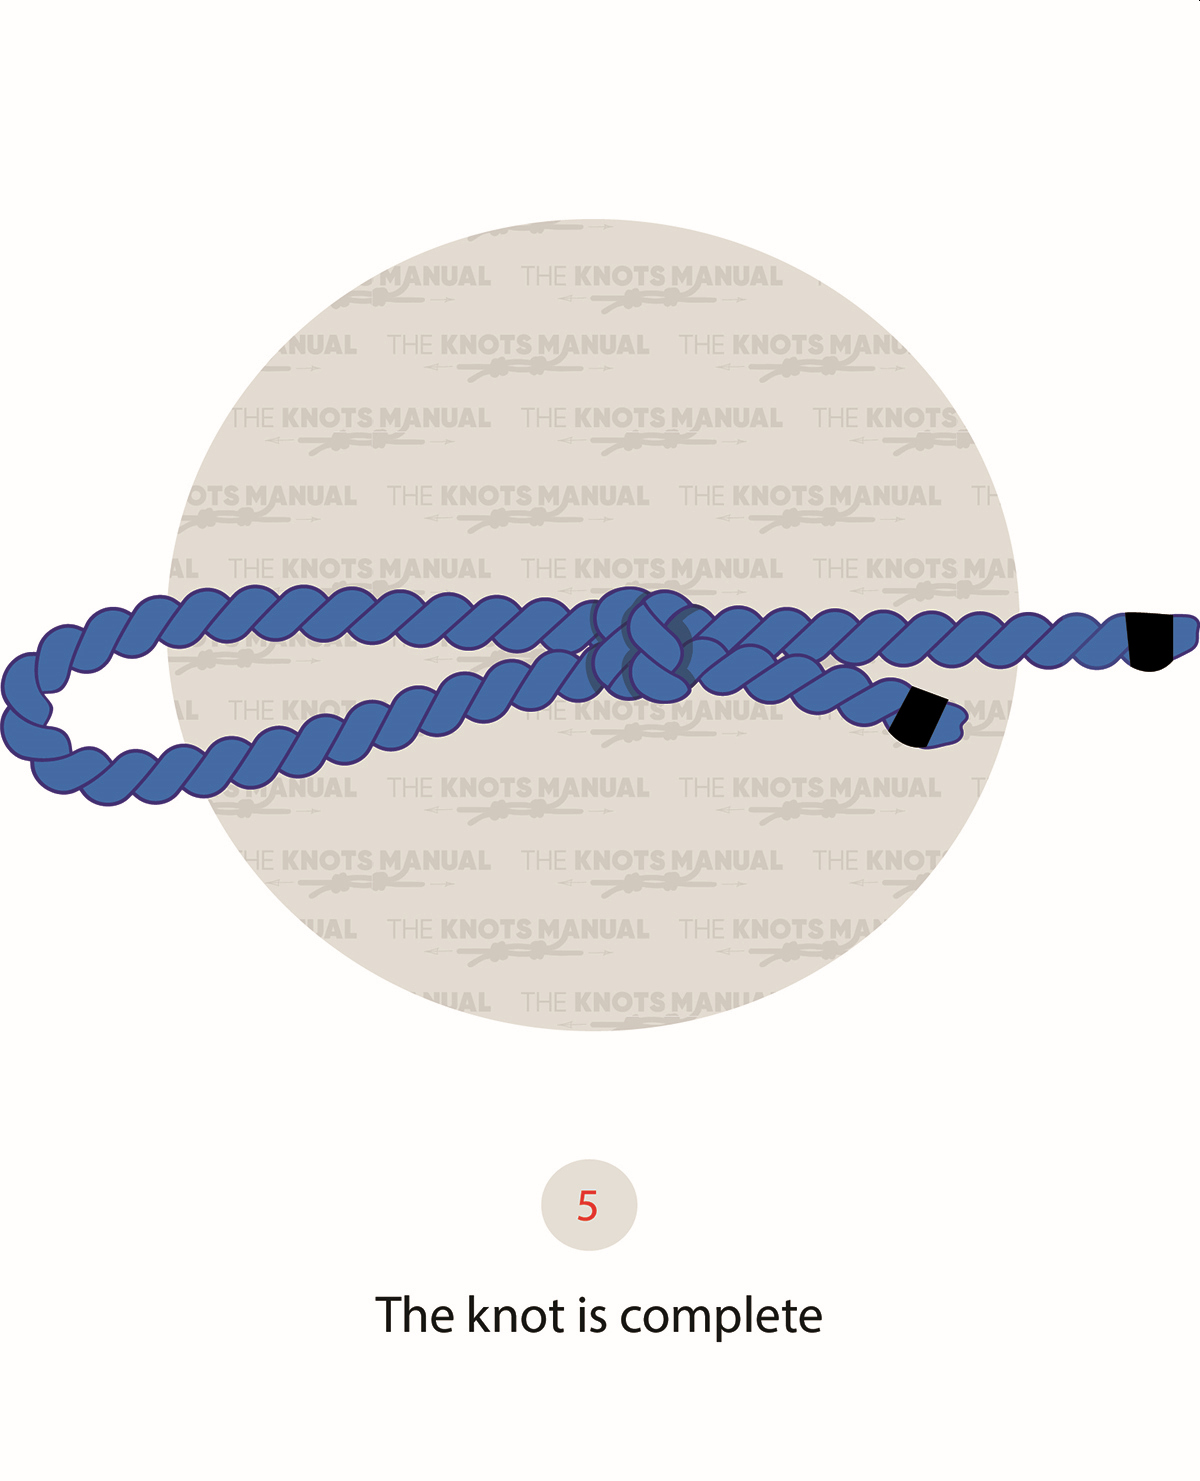
The slip knot is complete.
Knots Similar to the Slip Knot
| Knot | Main Use | Key Difference |
|---|---|---|
| Uni Knot | Fishing loops and joins | Stronger under tension |
| Noose Knot | Traps, adjustable loops | Loop tightens under load |
| Scaffold Knot | Climbing gear loops | More secure, used with carabiners |
| Taut Line Hitch | Tensioning tent lines, mooring | Adjustable under load |
| Running Bowline | Boating, object retrieval | Forms a sliding loop around standing end |
| Honda Knot | Lasso (cowboy rope work) | Slides freely, used in roping |
FAQs
Can you crochet or knit without a slip knot?
Yes. Some use alternatives like a “knotless chain” to avoid the bump it creates.
Is a magic circle the same as a slip knot?
No. A magic circle is used to begin crochet in the round, while a slip knot is used for linear starts.