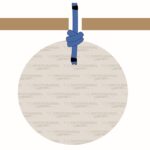
The Noose Knot is a simple knot that creates a self-tightening loop at the end of the rope.
It shouldn’t be confused with the Hangman’s Knot (which is tied similarly, but for a different purpose). The Noose Knot is instead used as a snare, in knitting, and in other general applications.
It’s also worth noting that the term “noose” is often used to describe a self-tightening loop in other knots. Depending on the context, it may not describe the Noose Knot, but rather the loop itself.
Quick Guide: How to Tie a Noose Knot
The Noose Knot is a simple Overhand Knot that’s tied around the standing end of the rope, creating a self-tightening loop in the process.
To tie it, you need to create a loop near the end of the rope. Then place the standing end over this loop and tuck it through it to create the self-tightening noose. Tighten the knot by pulling the working end opposite the noose.
It’s important to keep the working end at least a few inches long to keep it from untying. Because as you pull the standing end, this knot will tighten and the working end will slip until the knot sets in place.
You can also tie the Noose Knot using a different technique around supports with no free ends. Go around the support with the working end and then do an Overhand Knot around the standing end.
Pros and Cons of the Noose Knot
The main advantage of the Noose Knot is that it is extremely simple. It’s based on a simple Overhand Knot, so anyone can do it.
It’s also very easy to untie. You just need to twist the knot until it comes loose.
The main downside of the Noose Knot is that it isn’t very reliable. It shouldn’t be used as a permanent hitch or for life-threatening situations. In these cases, a Poacher’s Knot is a better alternative.
Common Uses for the Noose Knot
The Noose Knot is the most common knot to use as a snare for hunting small animals, like rabbits, weasels, squirrels, etc.
But due to its simplicity, it’s also used in countless situations where you need to attach a rope or a string around a fixed object. For example, in knitting, the Noose Knot is used as the first knot. It’s also used in many survival situations for simple tarp and tent setups.
Knots Based on the Noose Knot:
Hangman’s Knot: This knot is often incorrectly called the “Noose Knot”, but it’s different. It’s tied like the Noose Knot, except with many more turns around bight created in the process.
Butcher’s Knot: This knot is formed by tying a Noose Knot followed by a Half-Hitch. It’s used to tie meat for roasting and smoking.
Arbor Knot: This is a more secure version of the Noose Knot. It’s tied identically, except another Overhand Stopper Knot is tied on the working end. This decreases the chances of the working end slipping, which improves its reliability over the regular Noose Knot.
Slip Knot (Stopper): Tied almost identically to the Noose Knot, except the working end is passed through the loop, not the standing end. This results in a stopper knot instead of a self-tightening loop. This knot is advantageous because it’s a quick-release stopper knot.
Knots Like the Noose Knot
Poacher’s Knot: One of the most secure self-tightening loop knots. In this variation, a Double Overhand Knot is used instead of a regular Overhand Knot.
Duncan (Uni) Knot: This knot is mainly used in fishing for connecting two lines or attaching a hook to the fishing line. It’s tied identically to the Noose Knot, except tied with a Quintuple Overhand Knot (5 turns).
Slip Knot (Noose): The structure of this knot is identical to the Poacher’s Knot, except it’s tied using a slightly different technique. In strength, it’s identical to the Poacher’s Knot.
Running Bowline Knot: This creates a more reliable self-tightening loop compared to the Noose Knot. It can withstand higher loads, is less likely to come undone, and can be untied easily. It’s tied as a bowline around the standing end.
Honda Knot: This knot is used to create a Lasso. It’s very secure, doesn’t come undone, and slips very easily.
Step-By-Step Guide: How to Tie a Noose Knot
An illustrated guide on how to tie a Noose Knot.
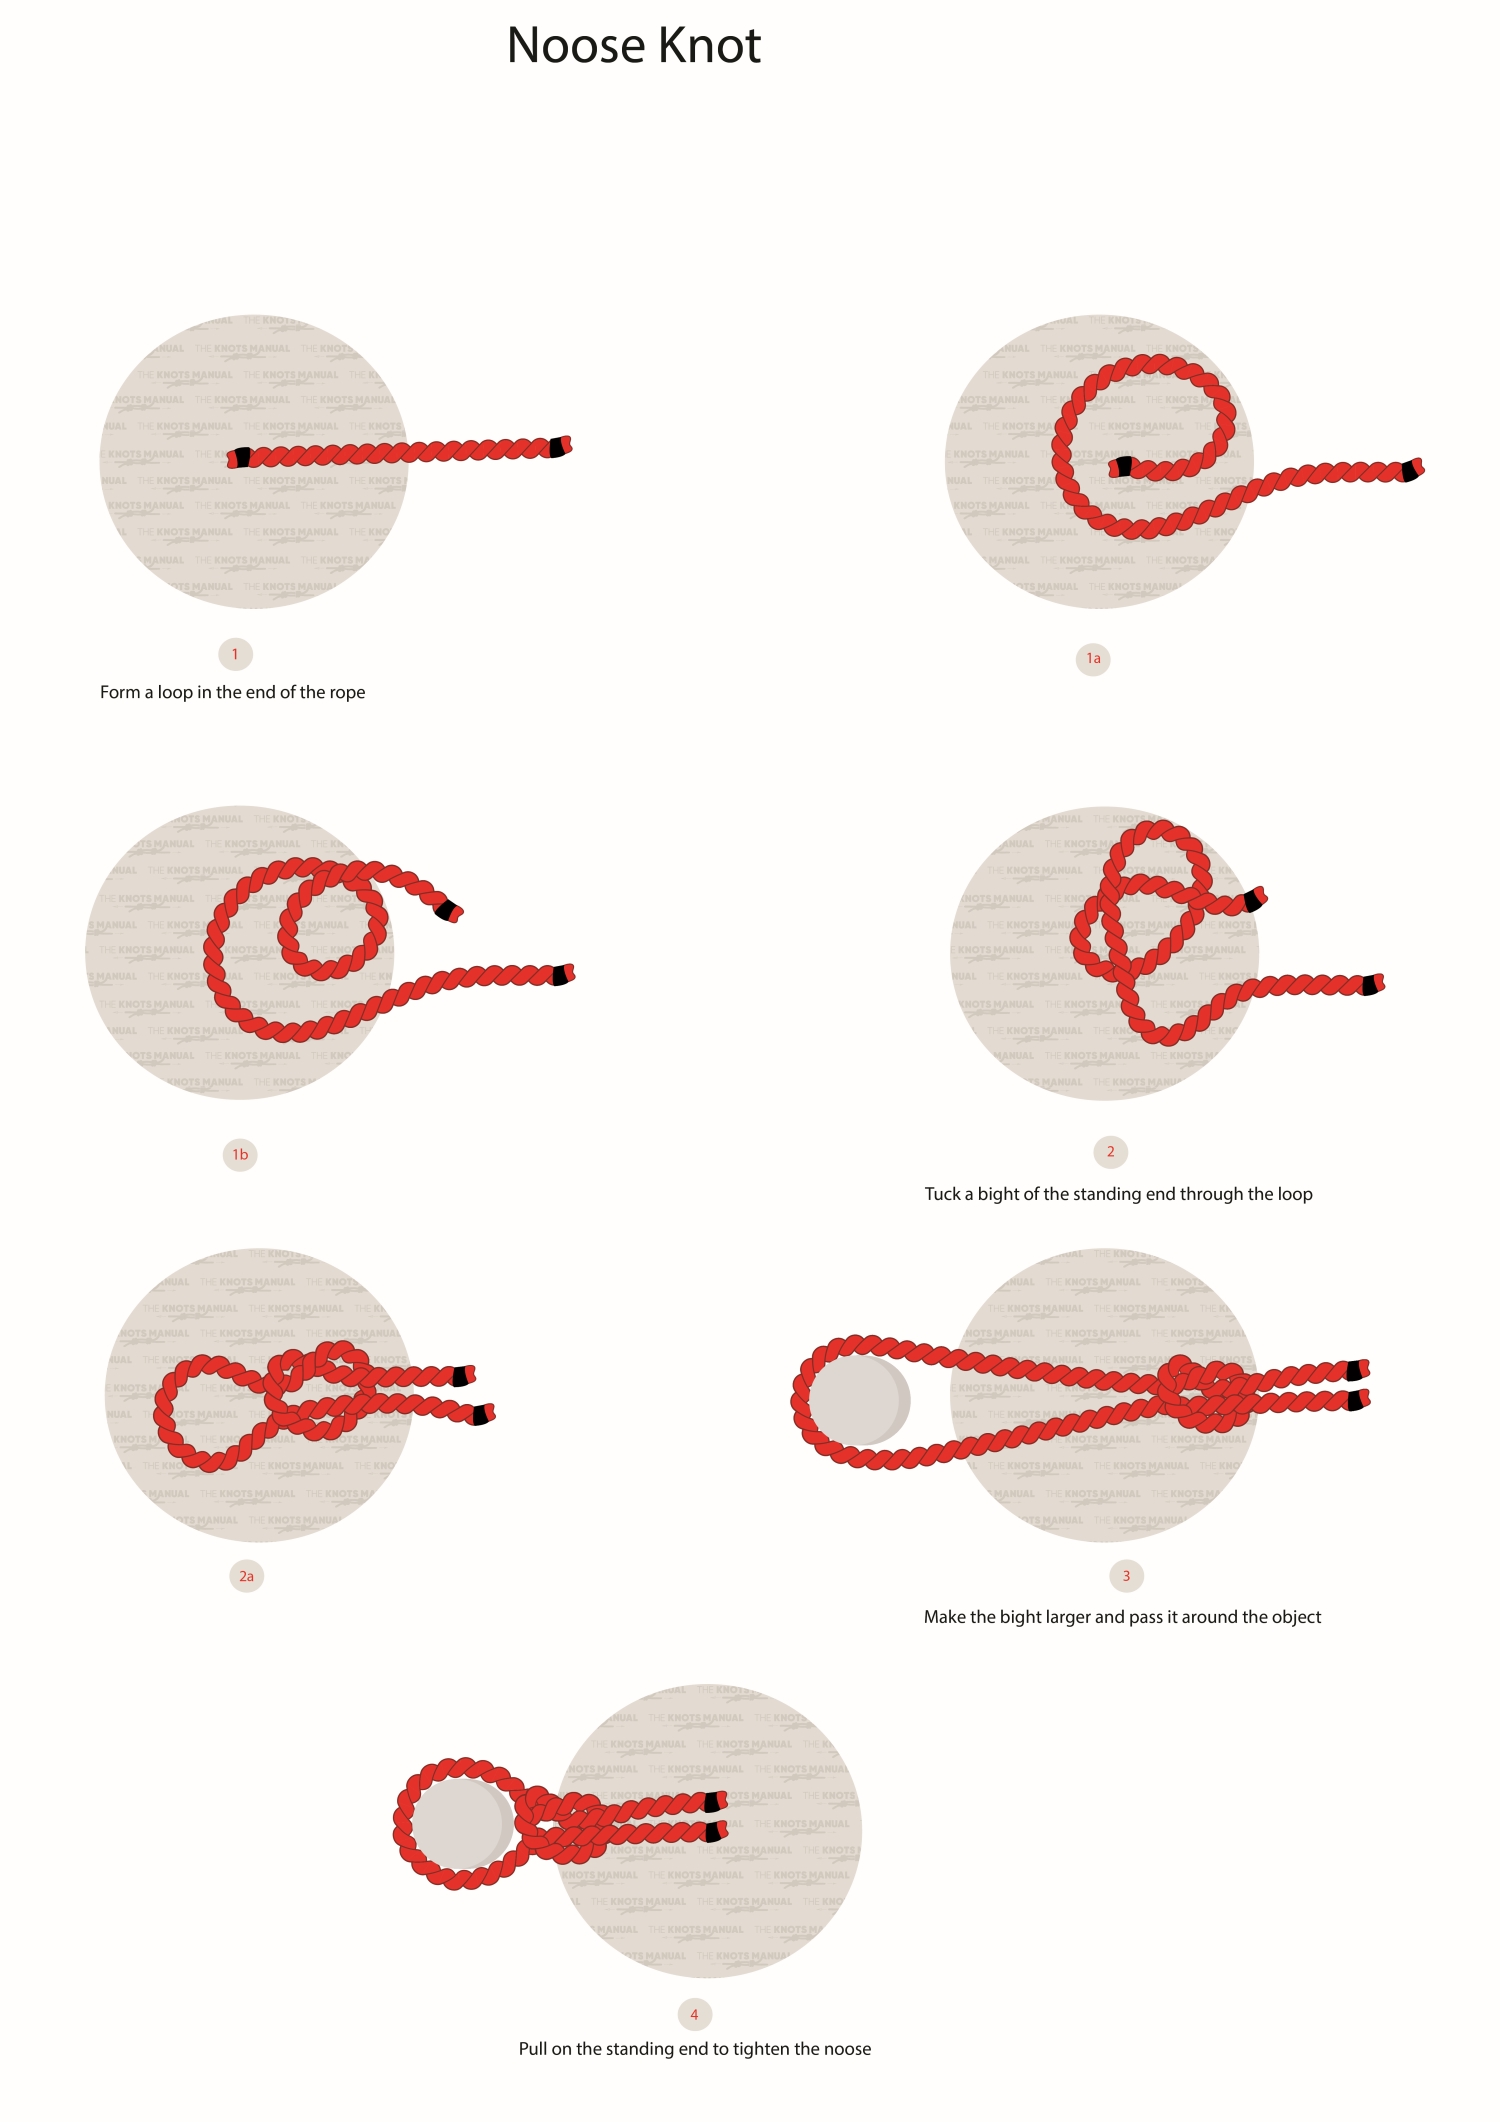
Step 1:
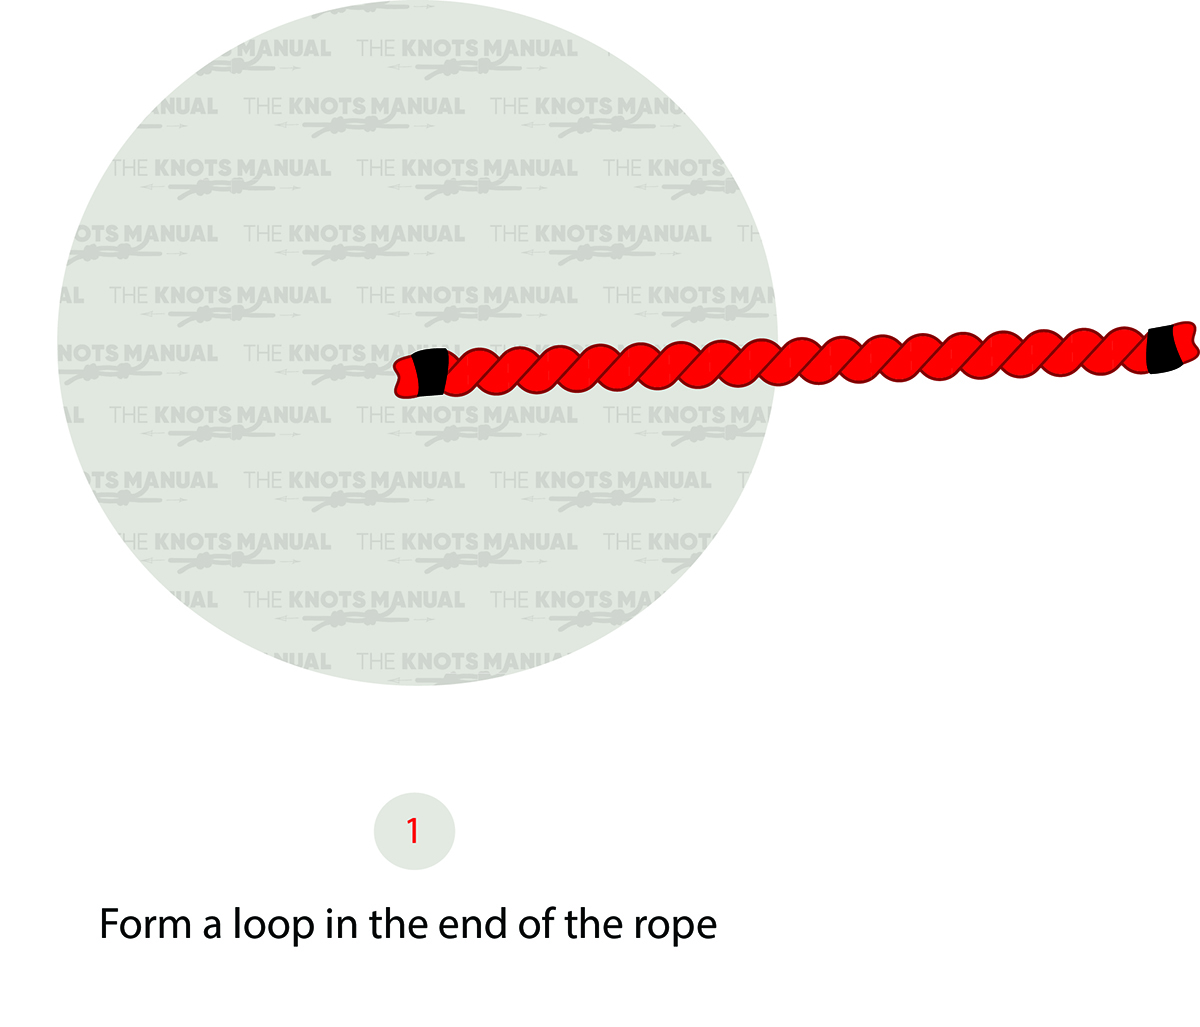
To tie this knot, you’ll need access to one end of the rope.
Step 1a:
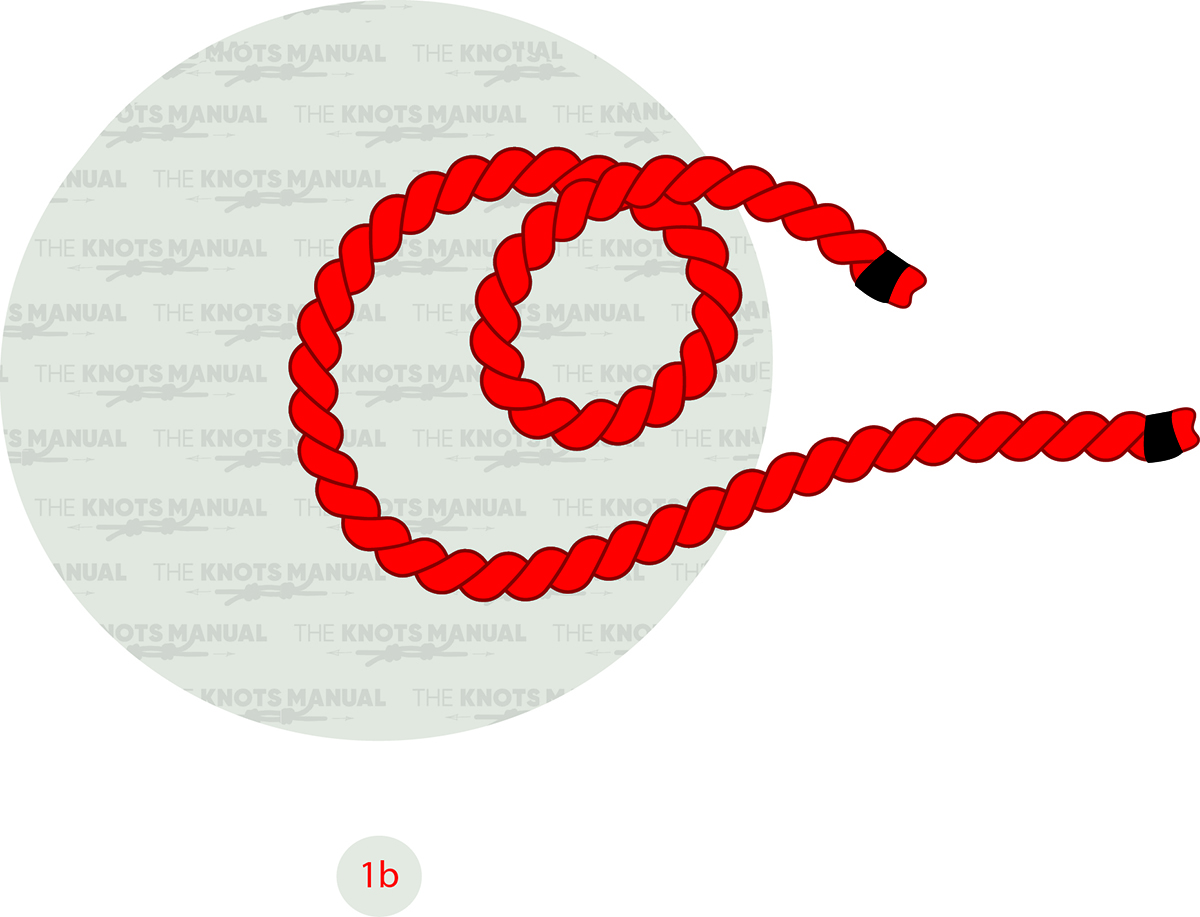
Create a loop near the end of the knot.
Step 2:
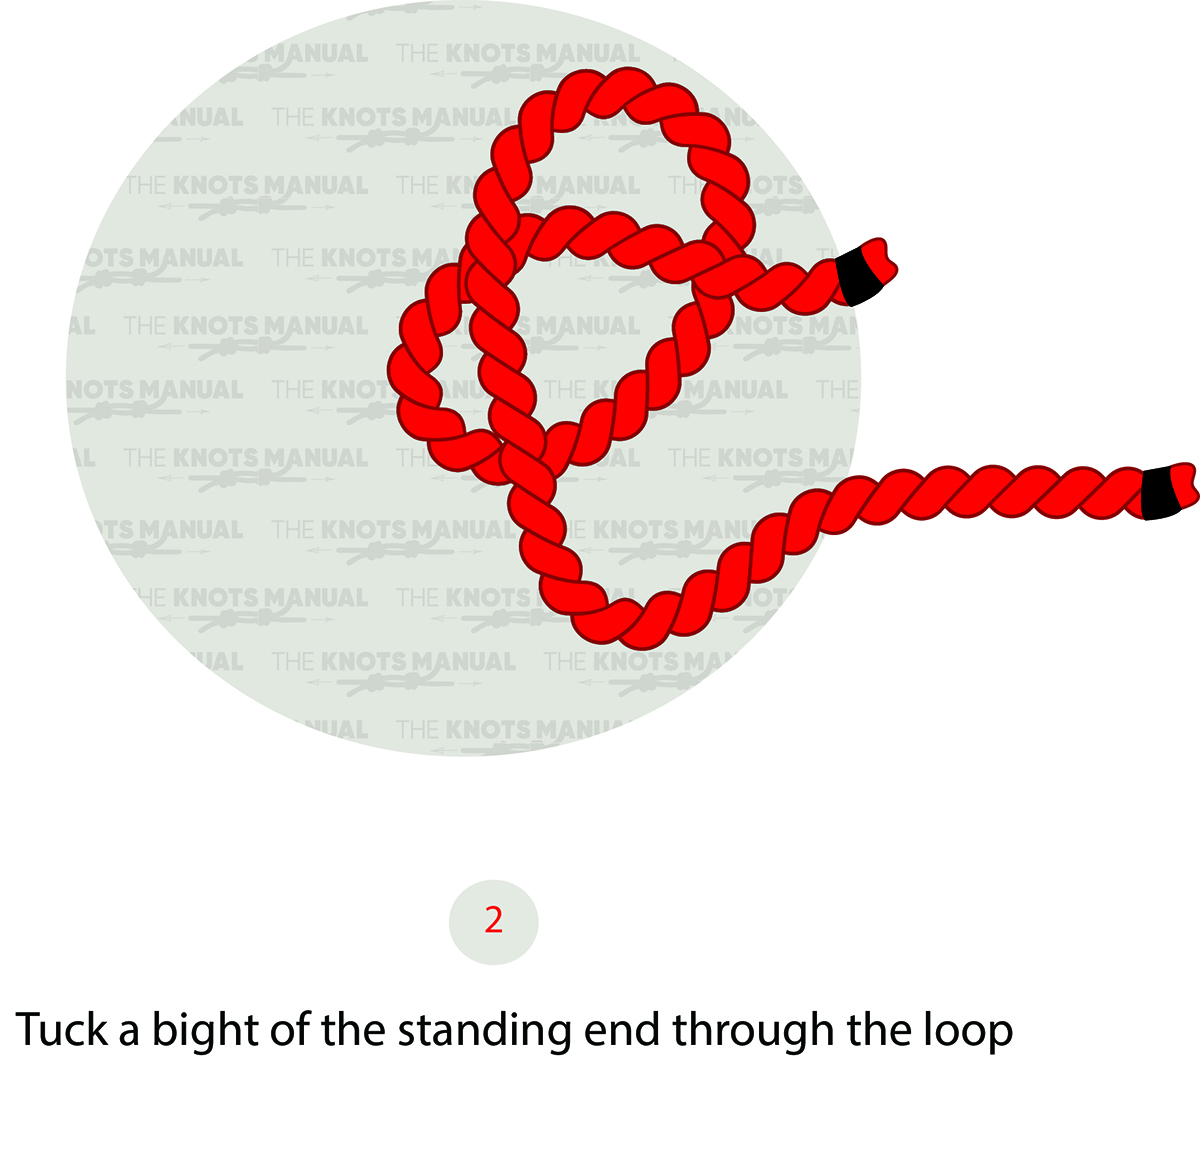
Place the standing end over this loop (as illustrated above).
Step 2a:
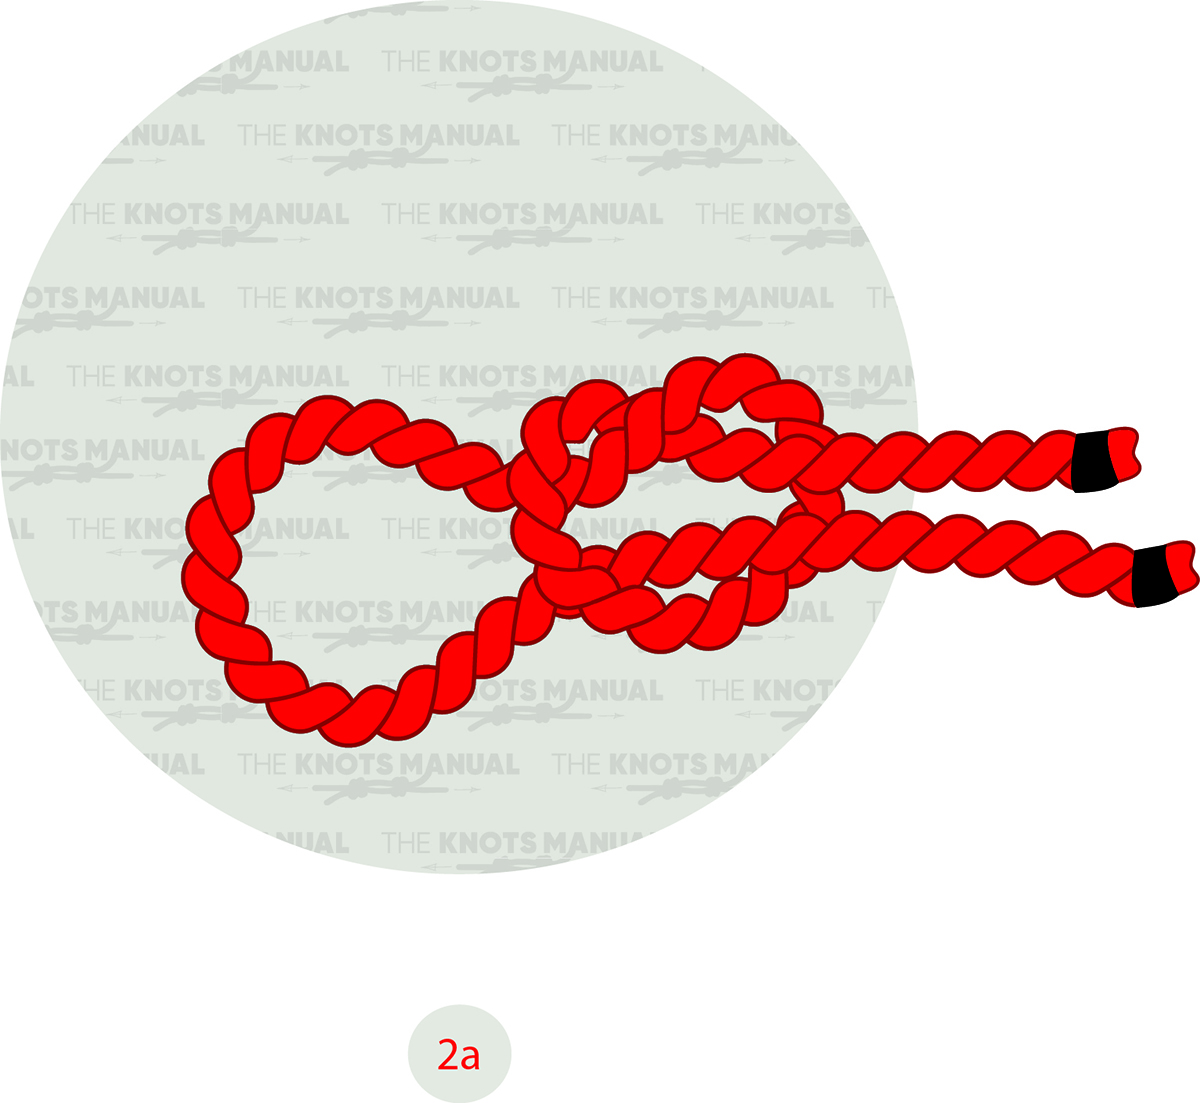
Now push the standing end through this loop to form the Noose Knot (illustrated above).
Step 3:
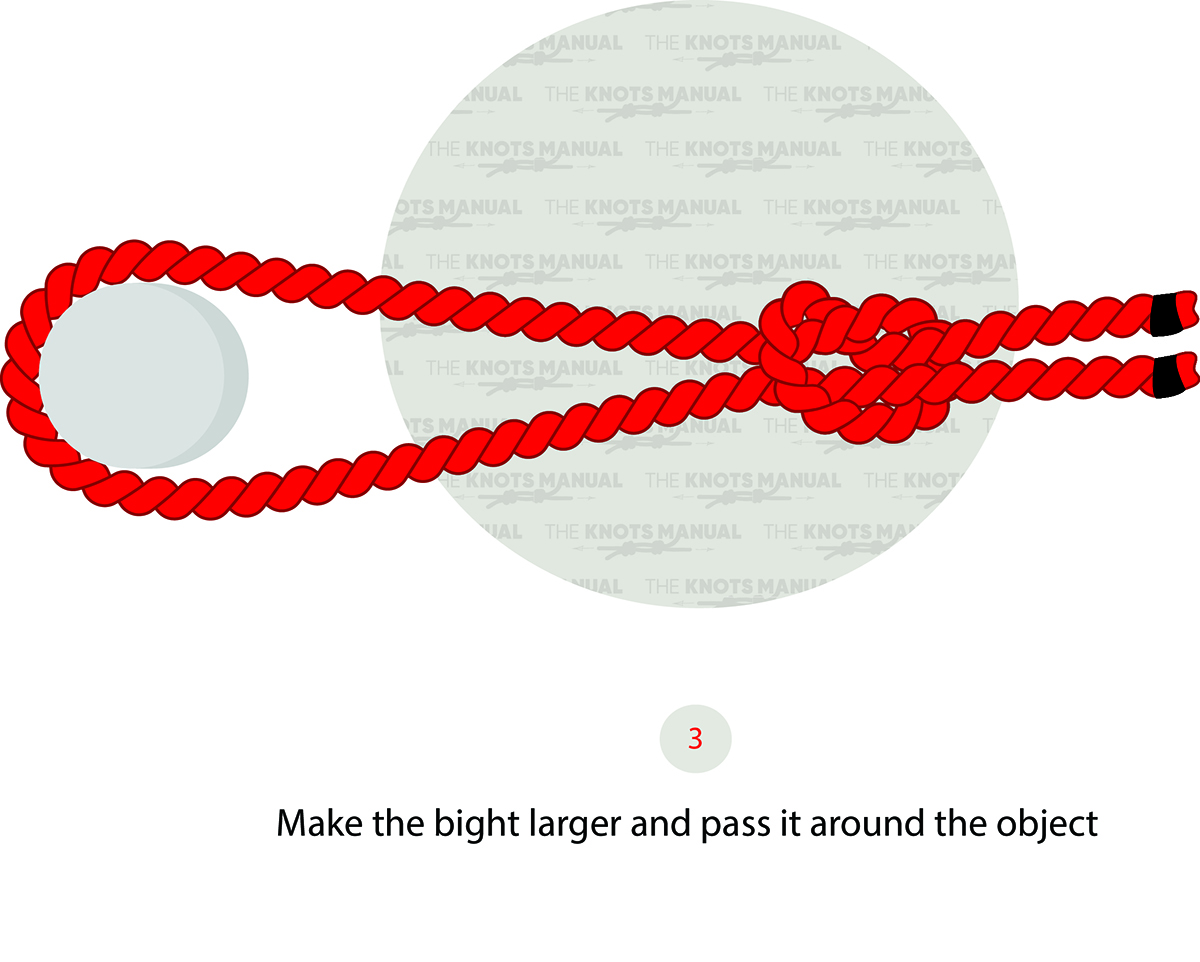
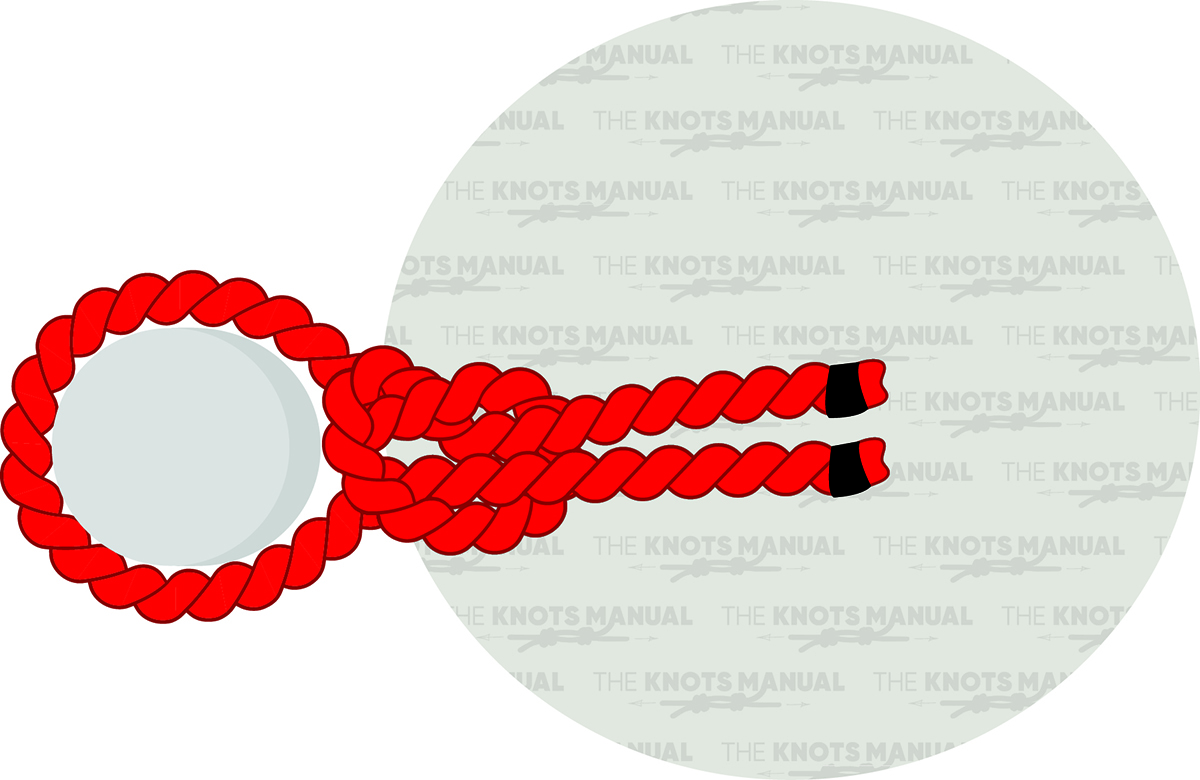
Place the support object inside the noose.
Step 4:
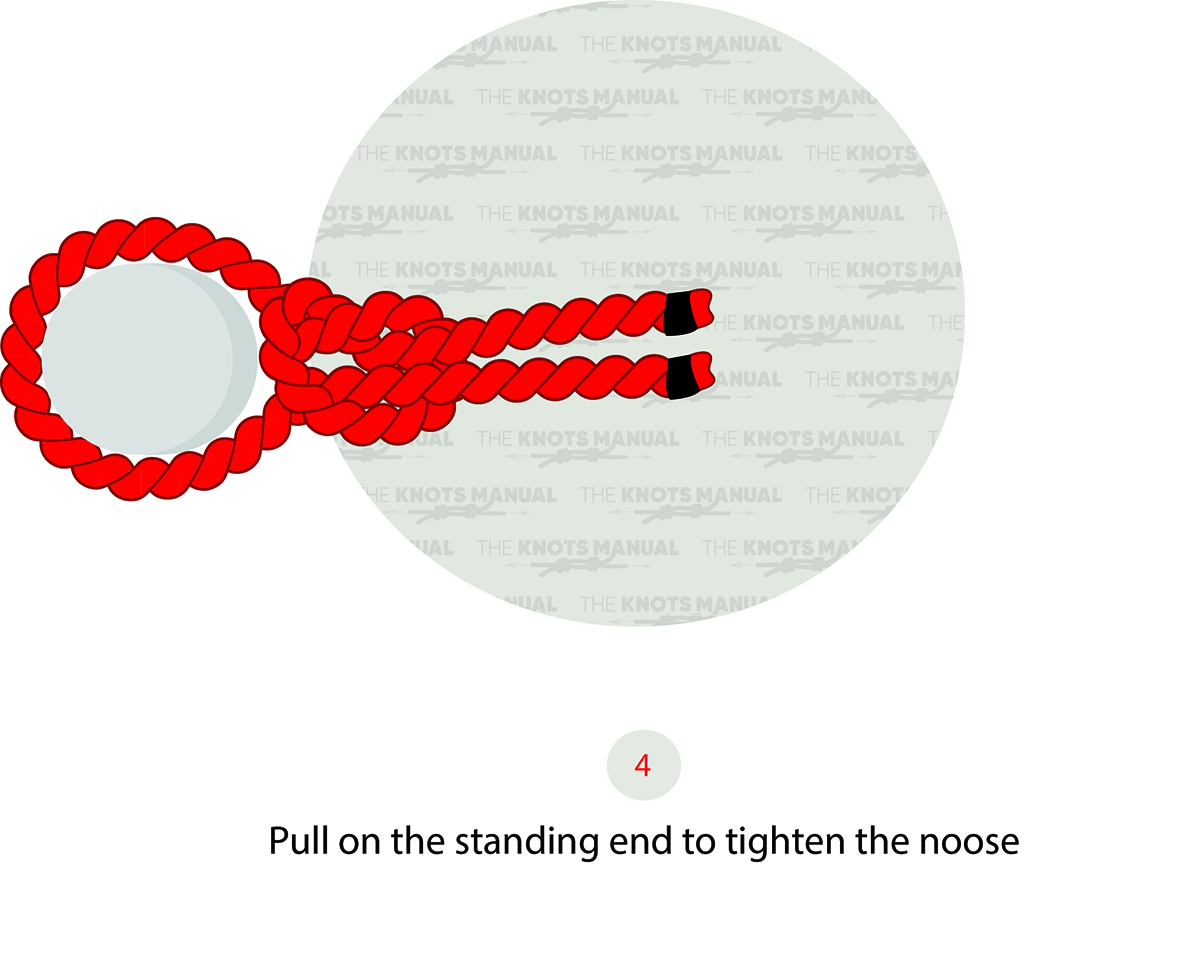
To tighten the knot, pull the standing end.