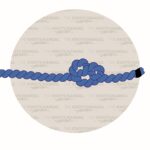
For creating a lasso (other called lariat), typically, a Honda Knot is used. It creates a strong and reliable eyelet (a fixed loop) at the end of a rope. Once you pass the standing end of the rope through this eyelet, a slip knot is created, which tightens as you pull it.
The eyelet in a lasso is called a Honda. This explains why this knot is called the Honda Knot. Sometimes, this knot is also referred to as the Lasso Knot, Bowstring Knot, Hondo Knot, or Lariat Knot.
Quick Guide: Tying a Lasso (Honda Knot)
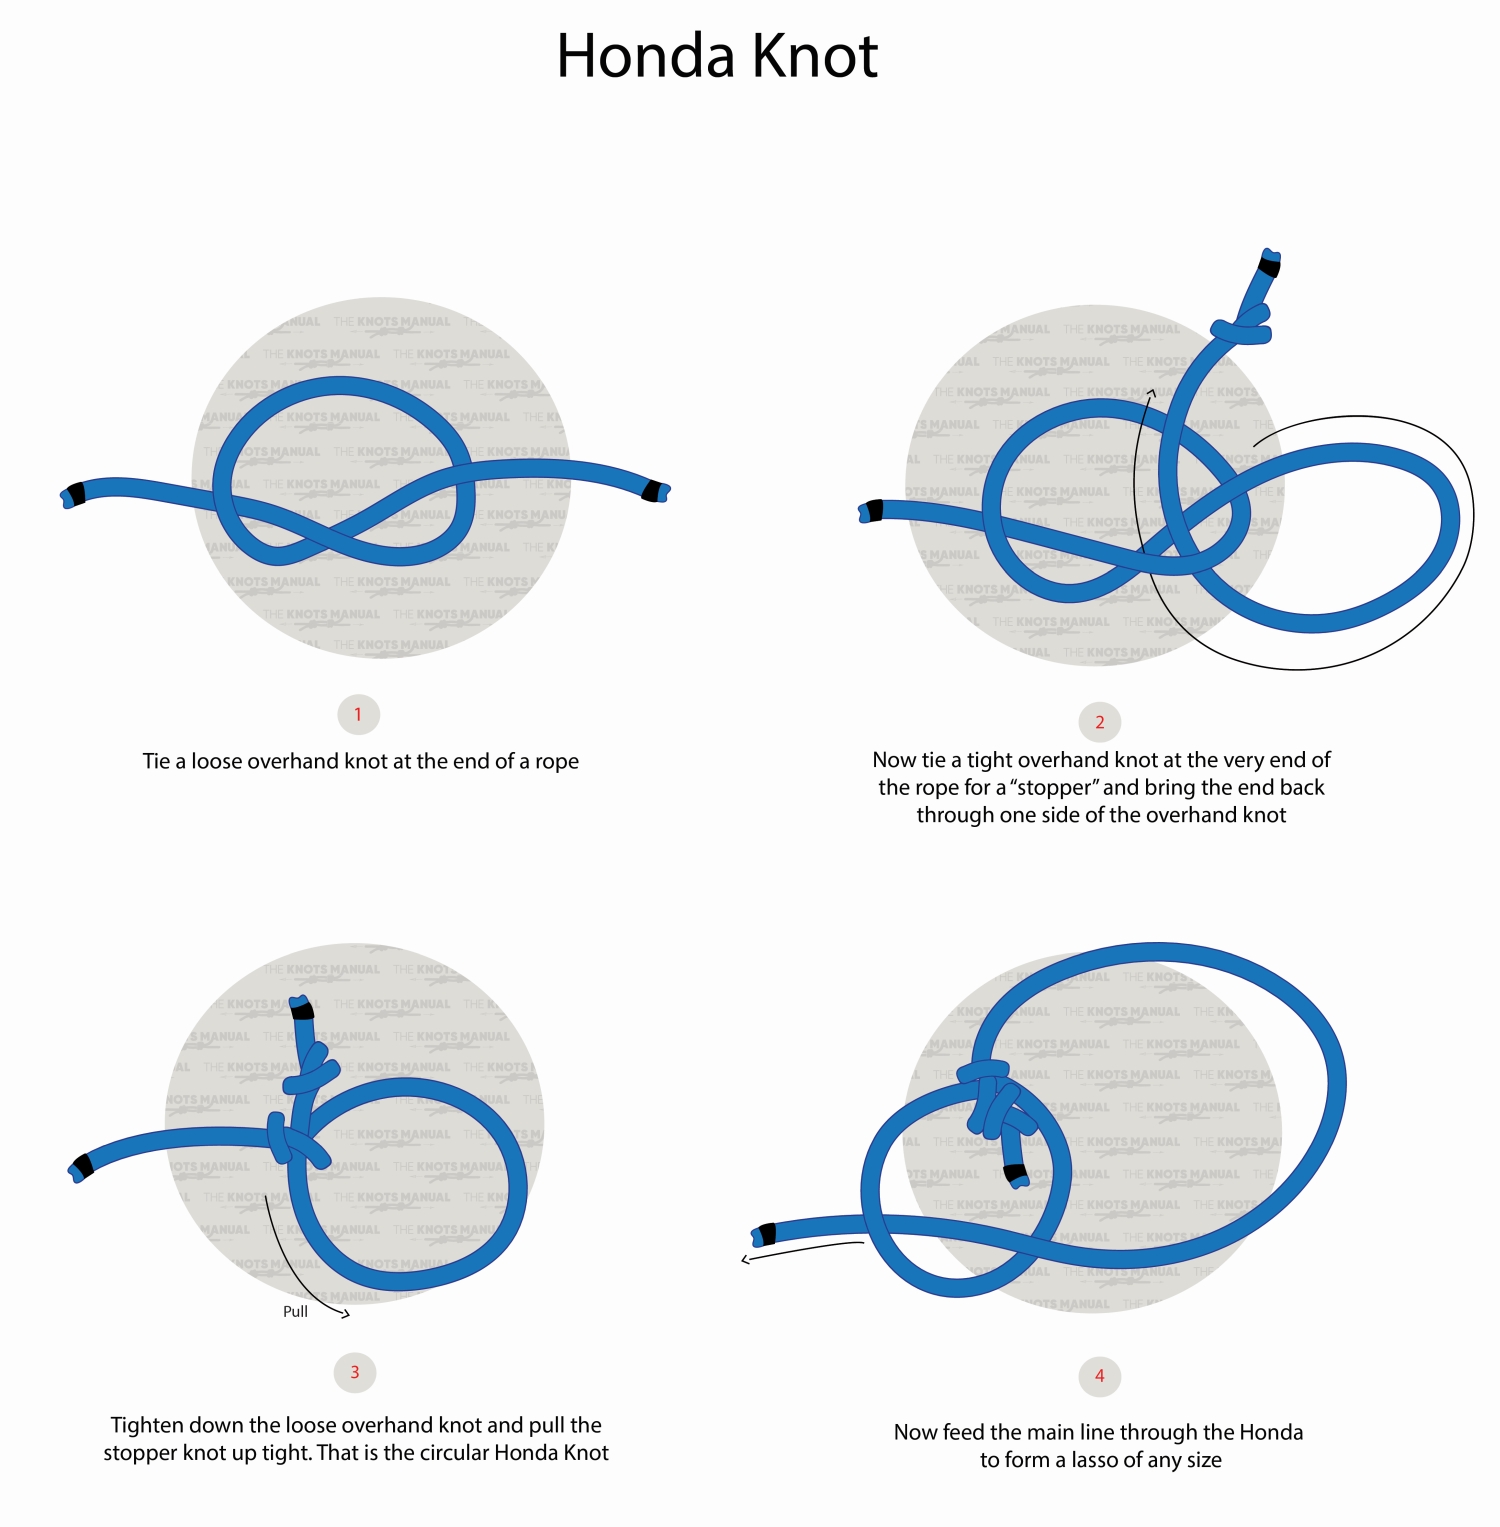
To tie a lasso, tie a loose Overhand Knot near the end of the rope (step 1). Then pass the end of the rope through this knot, creating another loop in the process (step 2). Tie another Overhand Stopper Knot near the end of the rope (also shown in step 2). Tighten the knot formed in step 1 and pull the working end near it (step 3). Now the Honda Knot is finished – A fixed eyelid at the end of the rope.
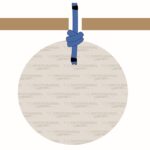
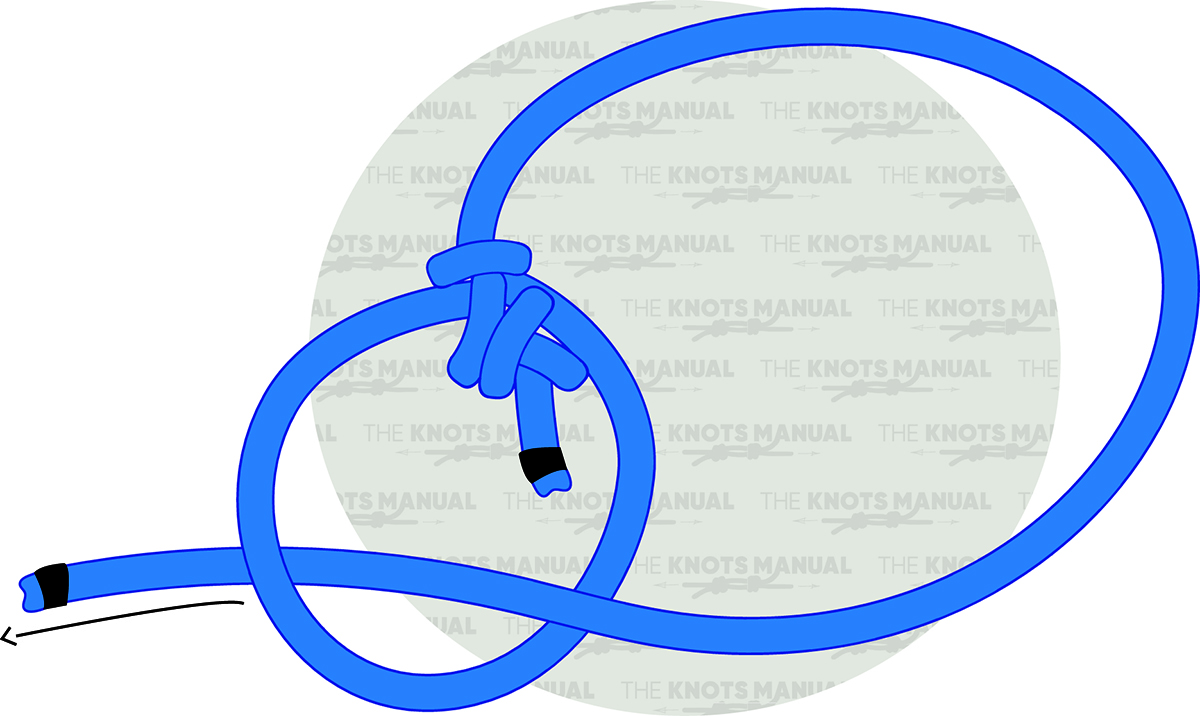
To create a lariat (a lasso), pass the standing end through this eyelid (step 4). This will create a sliding loop that will tighten as you pull it.
For creating a Lasso, you should use a rope that’s made from nylon or nylon composite. Its much stiffer properties allow for a more secure grip.
You can also buy premade lassos, other called cowboy rope or cattle rope. They’ll usually be reinforced at the end of the eyelet with leather or plastic. This reduces the wear on the rope because this spot gets the most wear from the rope brushing against itself. If you’re creating a DIY lasso, you can reinforce the tip of the eyelid with some duct tape and change it once it becomes too worn down.
The length of the rope for a lasso depends on your preference. A typical lasso is usually 30 feet (9 meters) long.
Pros and Cons of the Honda Knot
The main benefit of the Honda Knot is that it is very easy to tie. It’s based on two simple Overhand Knots, which everyone knows how to tie.
Another benefit is that the Honda Knot creates a perfectly round loop. This makes the rope slide through very easily without any jamming or dragging. It’s especially useful with stiffer ropes, that create a nearly-perfect ring.
The Honda Knot is also very reliable. Even though other knots, like the Figure 8 Follow Through, may be more secure, the Honda Knot is very unlikely to untie over time.
The main downside of this knot is that it jams very badly and that it is hard to untie. That’s why it’s usually only used for permanent solutions (for example, a lasso).
Common Uses for the Honda Knot
Most commonly, the Honda Knot is used to create a Lasso. Other sources also sometimes refer to it as a lariat, cowboy rope, cattle rope, or simply rope. It’s used by farmers to move (or hold them in place) cattle, sheep, goats, and other animals.
The Honda Knot can also be used for other applications, where you need to create a fixed loop at the end of a rope. But in practice, other knots are used more commonly, like the Bowline and Figure 8 Follow Through Loops. This is because they’re more reliable and easier to untie.
Knots Like the Honda Knot
Bowline Knot: This knot also creates a fixed loop at the end of the rope. It’s more secure than the Honda Knot but it doesn’t create a perfectly-round loop, which is why it’s rarely used for creating a lasso.
Figure 8 Follow-Through Knot: Like the Bowline Knot, but more secure. It also doesn’t create a perfect loop and it’s more bulky. It’s most commonly used in rock climbing to tie into a harness.
Noose Knot: This knot creates a self-adjusting loop. It’s most commonly used as a snare to catch small animals.
Poacher’s Knot: This knot also creates a self-adjusting loop. It doesn’t adjust as easily as on the Noose Knot, but easier than on the Hangman’s Knot.
Hangman’s Knot: A popular knot that creates a sliding noose. It’s rarely used as a lasso because the noose has much more friction.
Step-By-Step Guide: How to Tie a Honda Knot (Lasso)
A step-by-step guide on tying the Honda Knot.
Step 1:
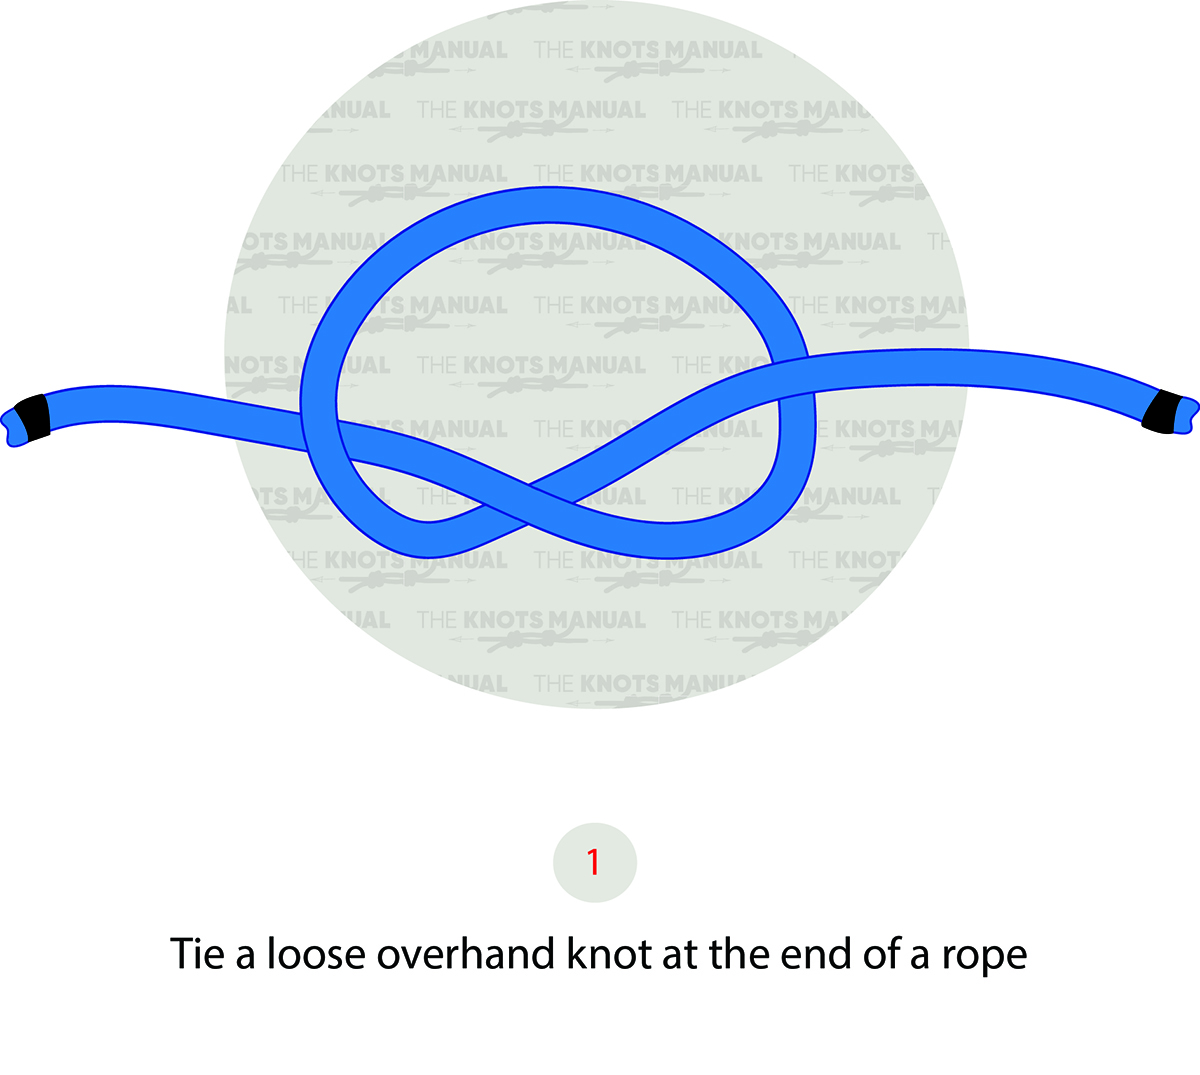
Tie a loose Overhand Knot near the working end.
Step 2:
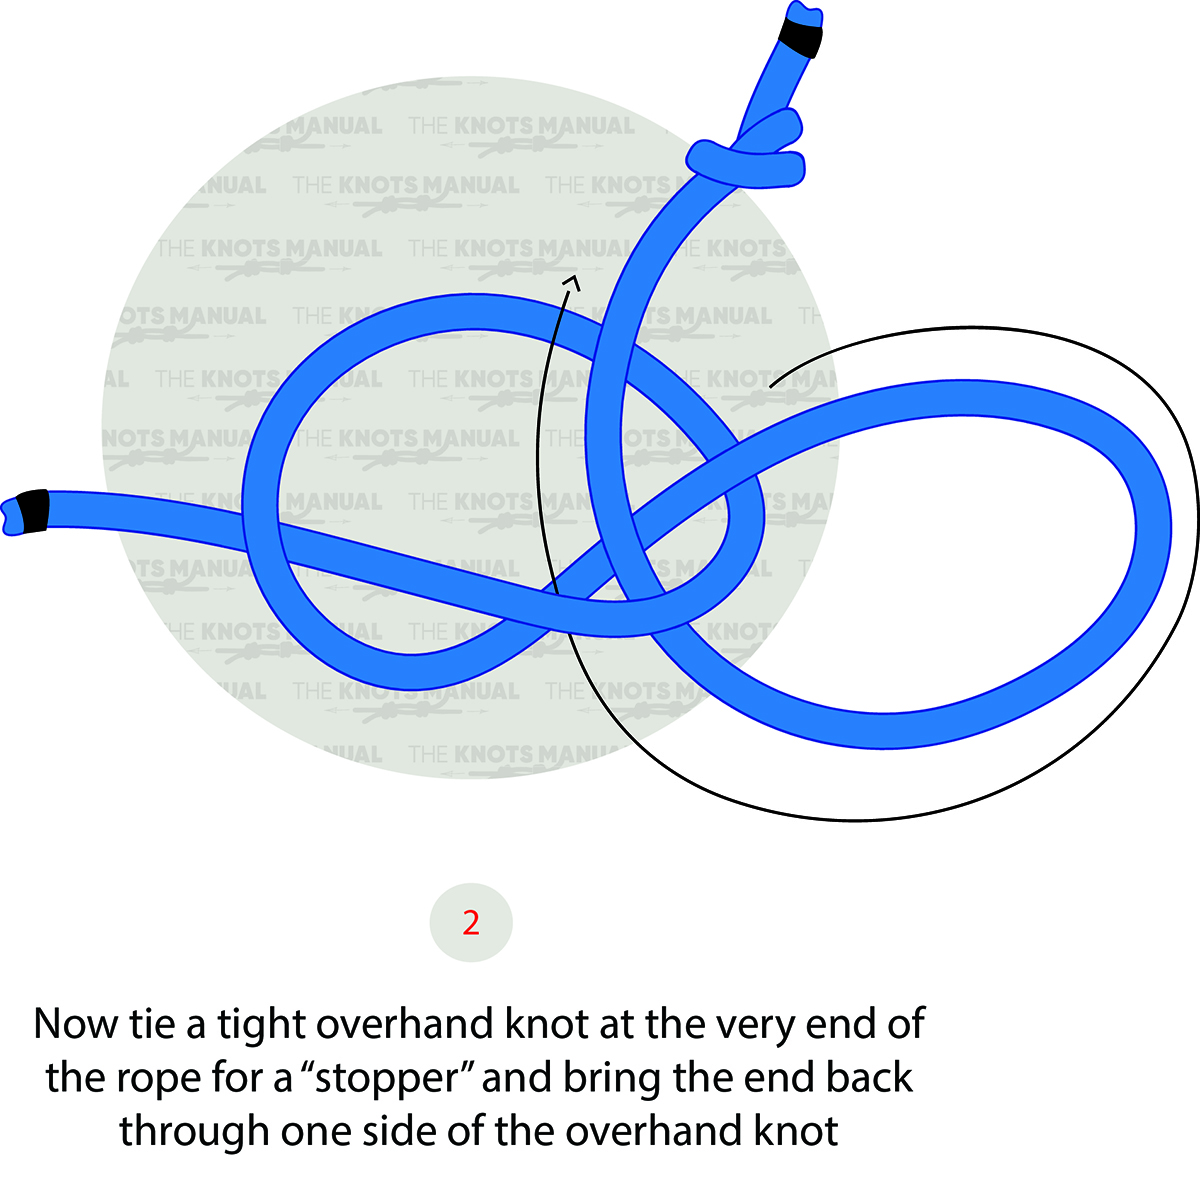
Pass the working end through the loose Overhand Knot, creating another loop (as illustrated above with the arrow). Then tie another Overhand Knot at the tip of the rope to act as a stopper knot.
Step 3:
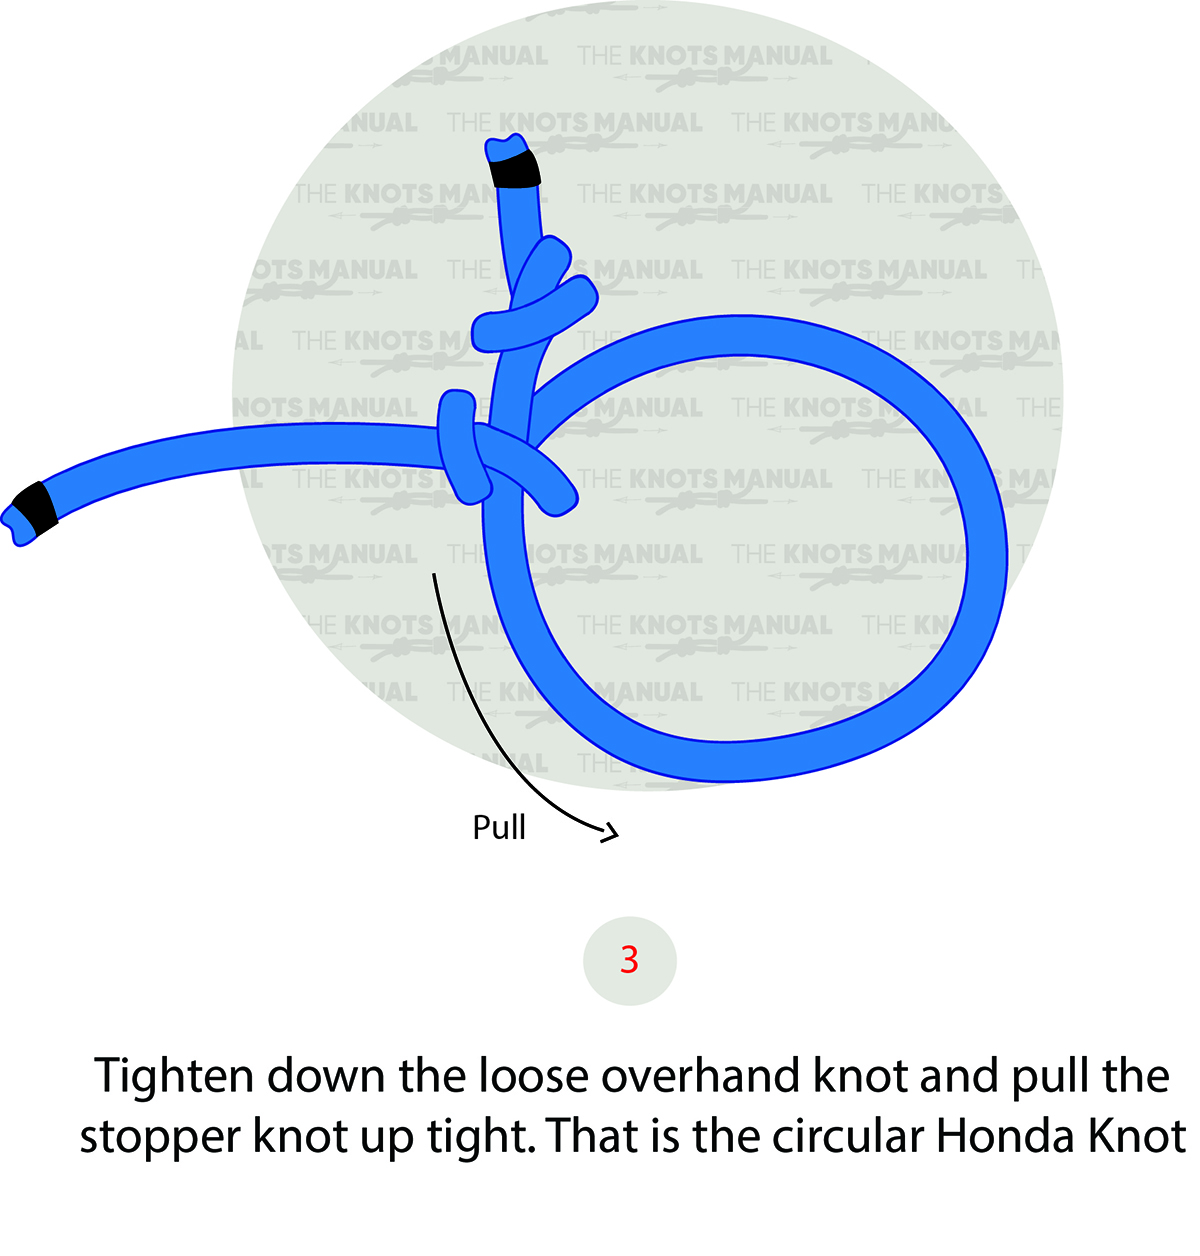
Tighten the loose Overhand Knot created in step 1. Then pull the loop created in step 2, which should pull the Overhand Stopper Knot right next to the second Overhand Knot.
Step 4:
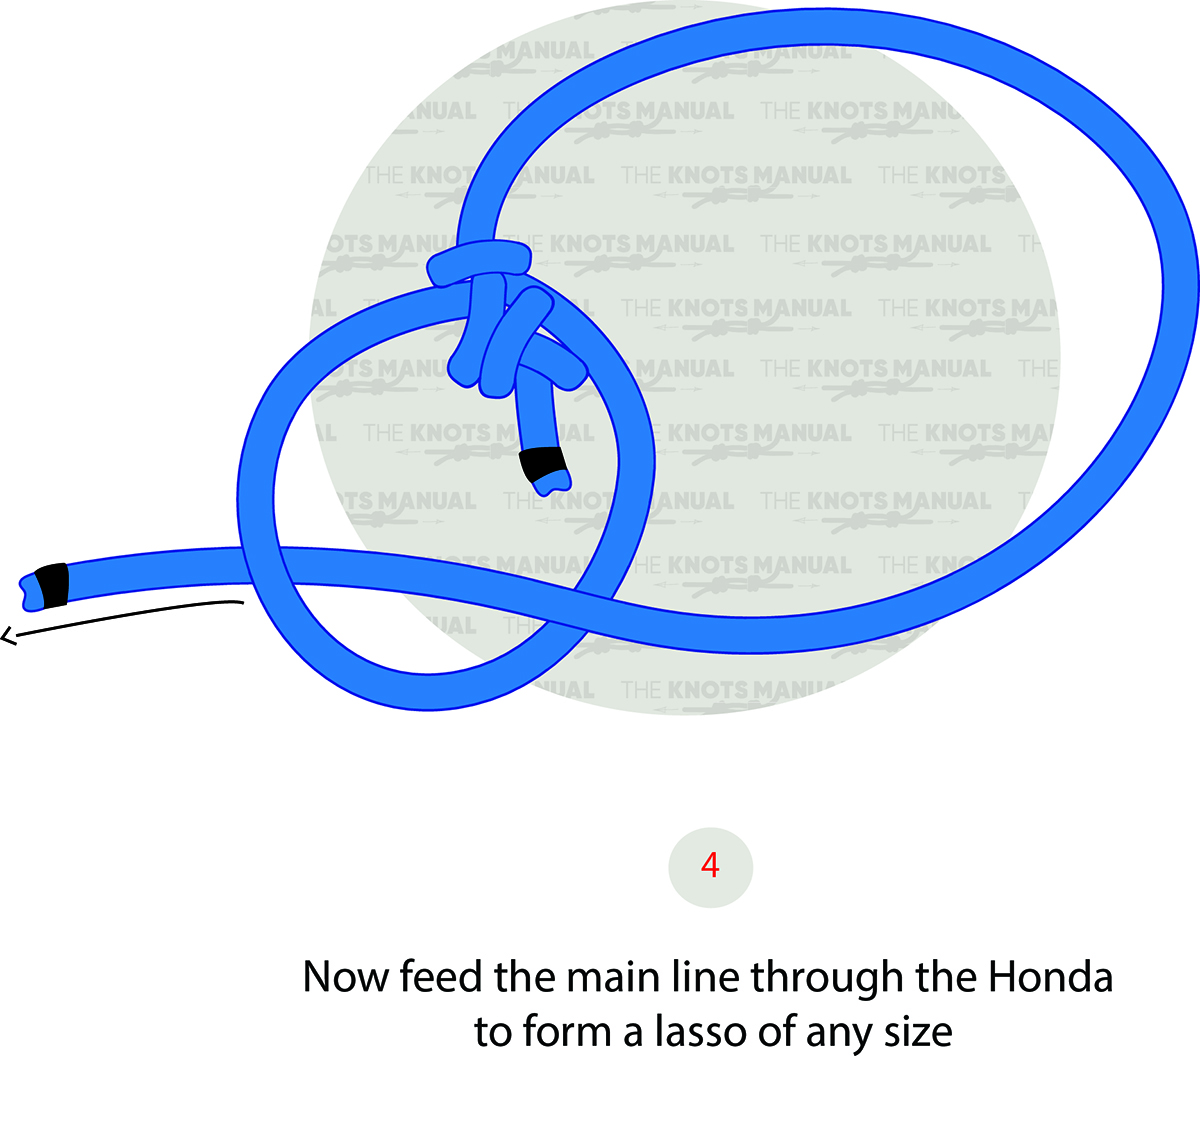
Pass the Standing end through this loop to create a lasso.