The Snell Knot is a fishing knot that attaches a fishing line to a hook. It’s so popular because it’s the only fishing knot that attaches directly to the straight end of the hook. Originally, it was only used with eyeless hooks, but it’s still widely used today.
This is a version of the Snell Knot that uses an inverted Uni Knot. It’s the easiest and most understandable version for most people. It’s also sometimes referred to as the Uni Snell Knot or the Circle Hook Knot.
Quick Guide: Tying the Snell Knot
Pass the tag end through the eye of the hook, leaving a 10-inch (25 cm) section to work with. Run it along the straight section of the hook and then create a large loop. Wrap the tag end 4-8 times around the hook and pass the end through the final loop, facing towards the end of the hook. Lubricate with saliva or water, tighten it, and cut off the tag end to finish the knot.
For smaller-diameter fishing lines, do 6-8 turns. For larger-diameter ones, you can do only 4-6 turns. After making each turn, hold the last one in place with your thumb to make it easier to tighten it in the end.
Pros and Cons of the Snell Knot
The main advantage of the Uni Snell Knot is that it is very easy to tie and remember. That’s why many fishermen use it as the only knot for attaching a fishing line to the hook.
Because it attaches directly to the straight section of the hook, fish are more likely to bait. As you pull it, more pressure is applied to the end of the hook, so it digs deeper into the mouth of the fish.
It’s also considered a very strong fishing knot, especially if you tie it with 6-8 turns. It’s often used to catch bigger fish for this reason.
Another benefit is that the standing end of the fishing line exits directly from the hook. Again, this increases the chances of catching fish.
It works well with all types of fishing lines, including braided, monofilament, and fluorocarbon.
Common Uses for the Snell Knot
Usually, the Uni Snell Knot is used when attaching live or dead bait on the hook. Because of the way that it’s formed around the straight section of the hook, it’s more likely to bait.
It’s also very strong and reliable, which is why it’s often used to catch bigger fish. In this situation, it works best with bent-eye and circle hooks.
Knots Like the Snell Knot
Easy Snell Knot: A different version of the Uni Snell Knot, that’s described in detail in this article. In the Easy version, the tag end is wrapped around the hook in the other direction and finally tucked under itself. This supposedly makes it stronger.
Improved Clinch Knot: Another easy and reliable knot that attaches the fishing line to the hook. Its main disadvantage over the Snell Knot is that it shouldn’t be used with braided lines because it’s more likely to slip.
Uni Knot: The Uni Snell Knot could be considered a version of the Uni Knot because it’s tied almost identically, only around the hook. The Uni Knot is a very versatile knot to know because you can also use it in loop-to-loop and line-to-line connections.
Palomar Knot: A very strong and reliable fishing knot that can be used with all types of fishing lines. It’s very strong and unlikely to break. Its main downside is that you have to pass a double line through the eye of the hook. This means that you won’t be able to use it with thicker lines in combination with hooks that have small-diameter eyes.
Trilene Knot: This fishing knot is said to have almost 100% of the line-breaking strength. It’s similarly easy to tie as the Snell Knot, but it can’t be used with braided fishing lines.
Eye Crosser Knot: A simple, but unpopular knot that attaches a fishing line to a hook. It’s said to outperform other more popular knots in breaking strength, like the Palomar, Snell, and Trilene Knots.
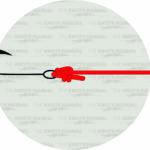
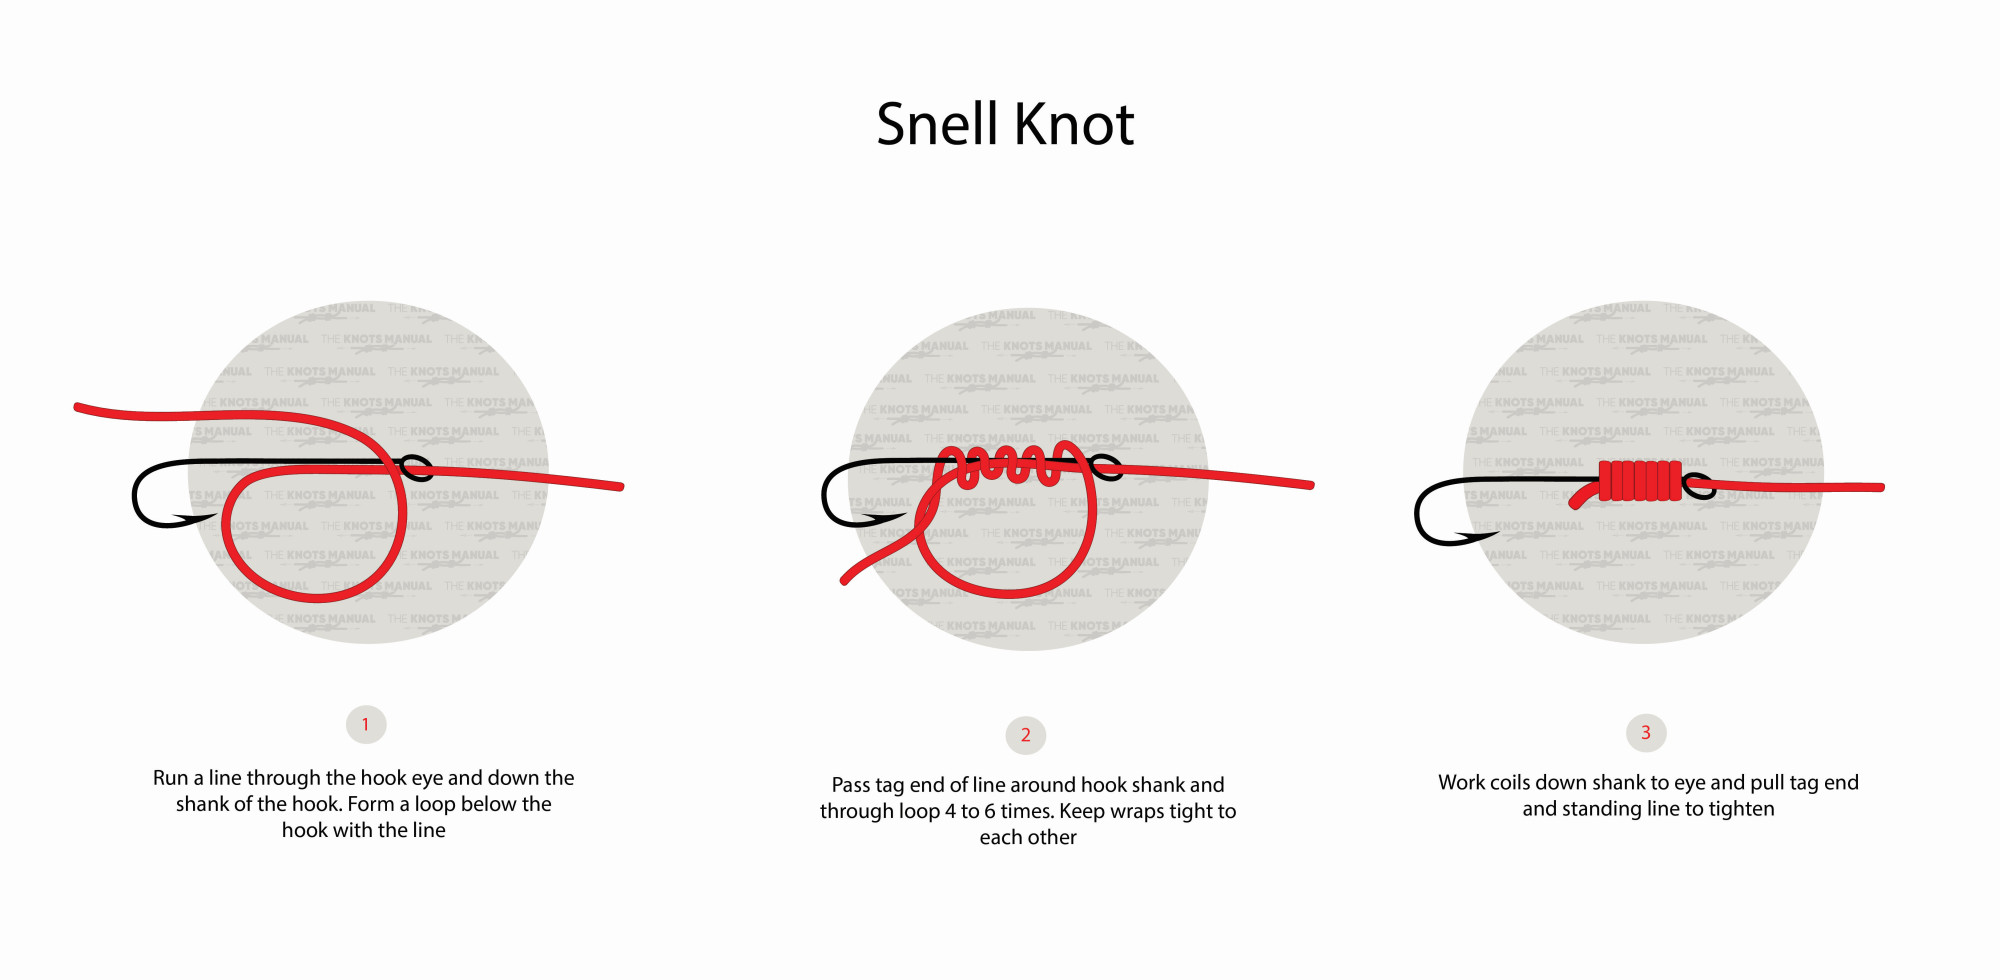
Step-By-Step Guide: How to Tie the Snell Knot
A step-by-step guide on how to tie the Snell Knot.
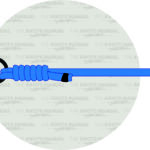
Step 1:
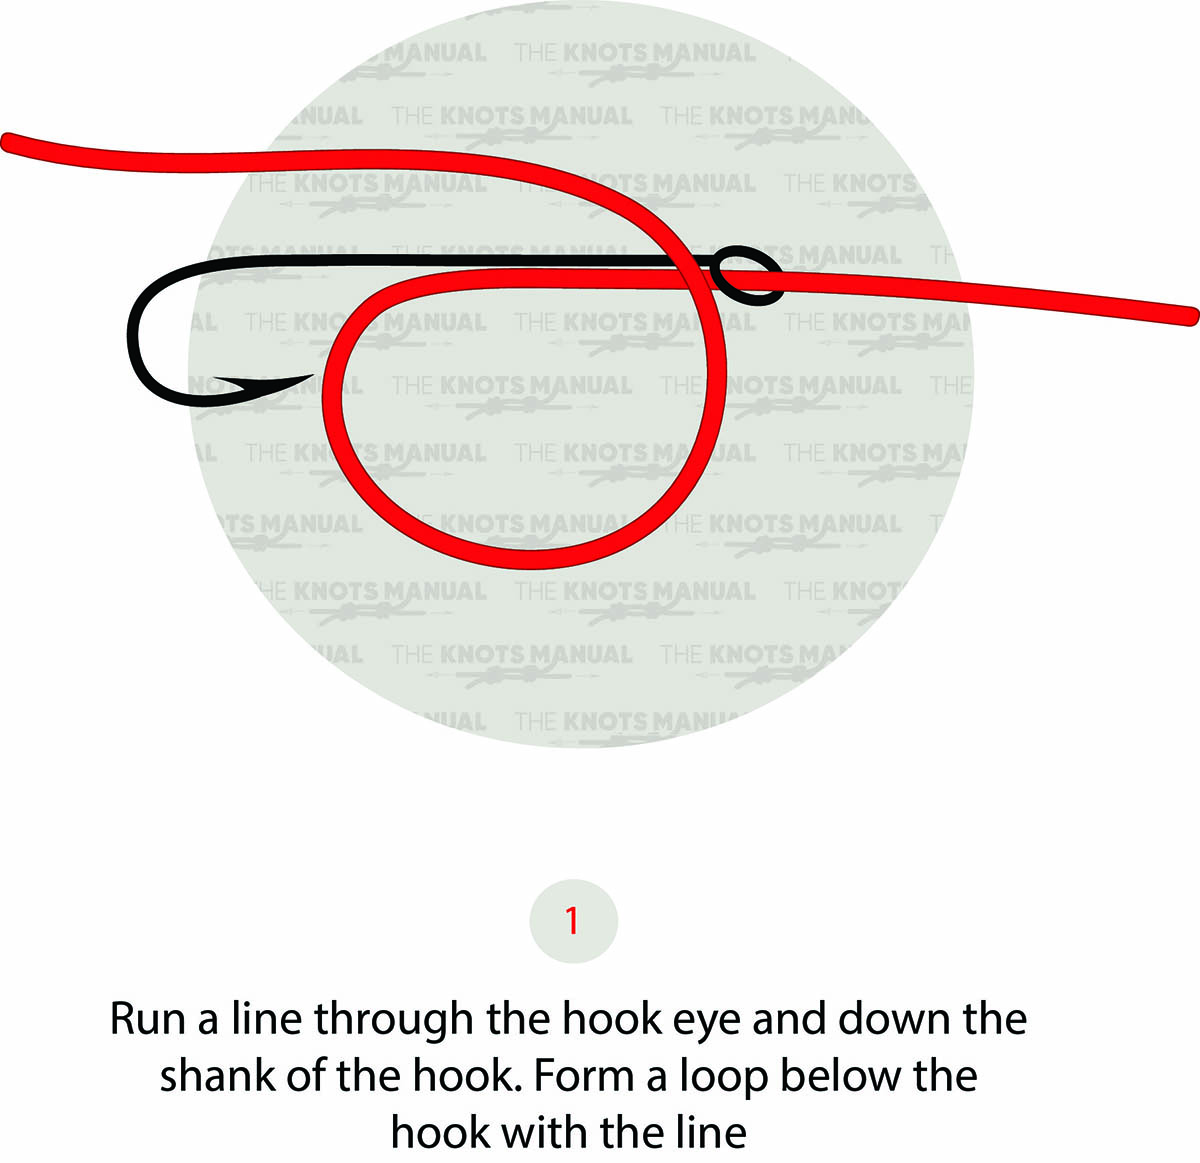
Pass the end of the fishing line through the hook and then along it, creating a loop as illustrated above.
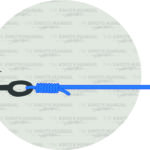
Step 2:
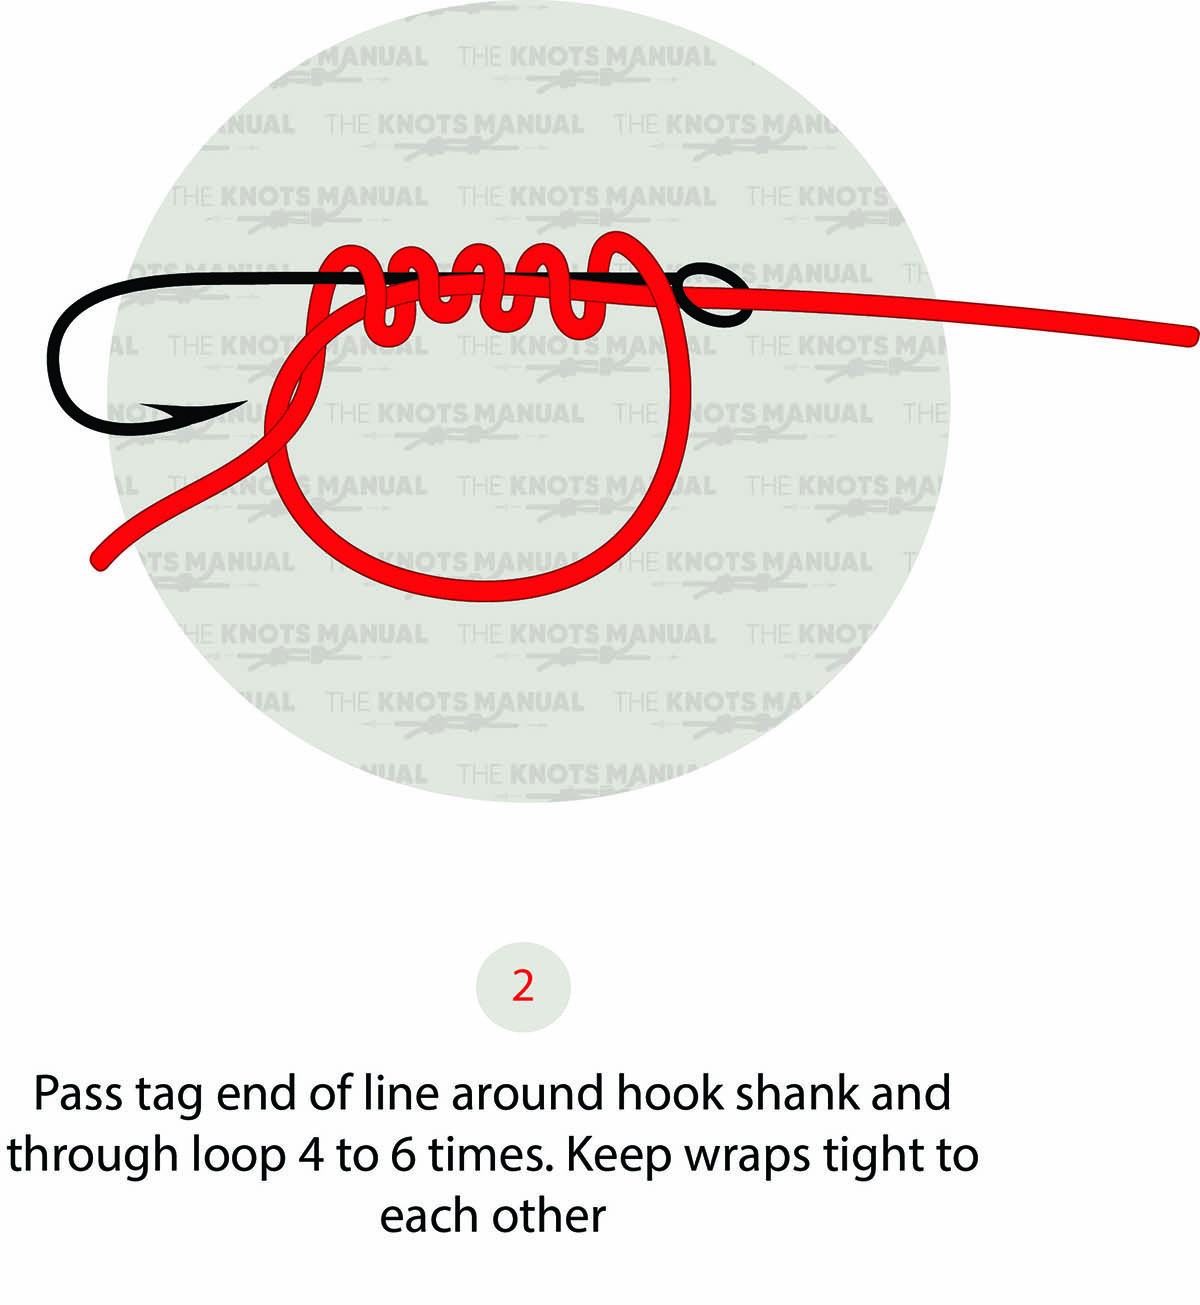
Wrap it 4-6 times around the hook. On the final turn, make sure to pass the tag end through the bottom loop.
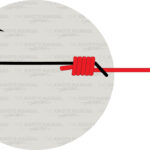
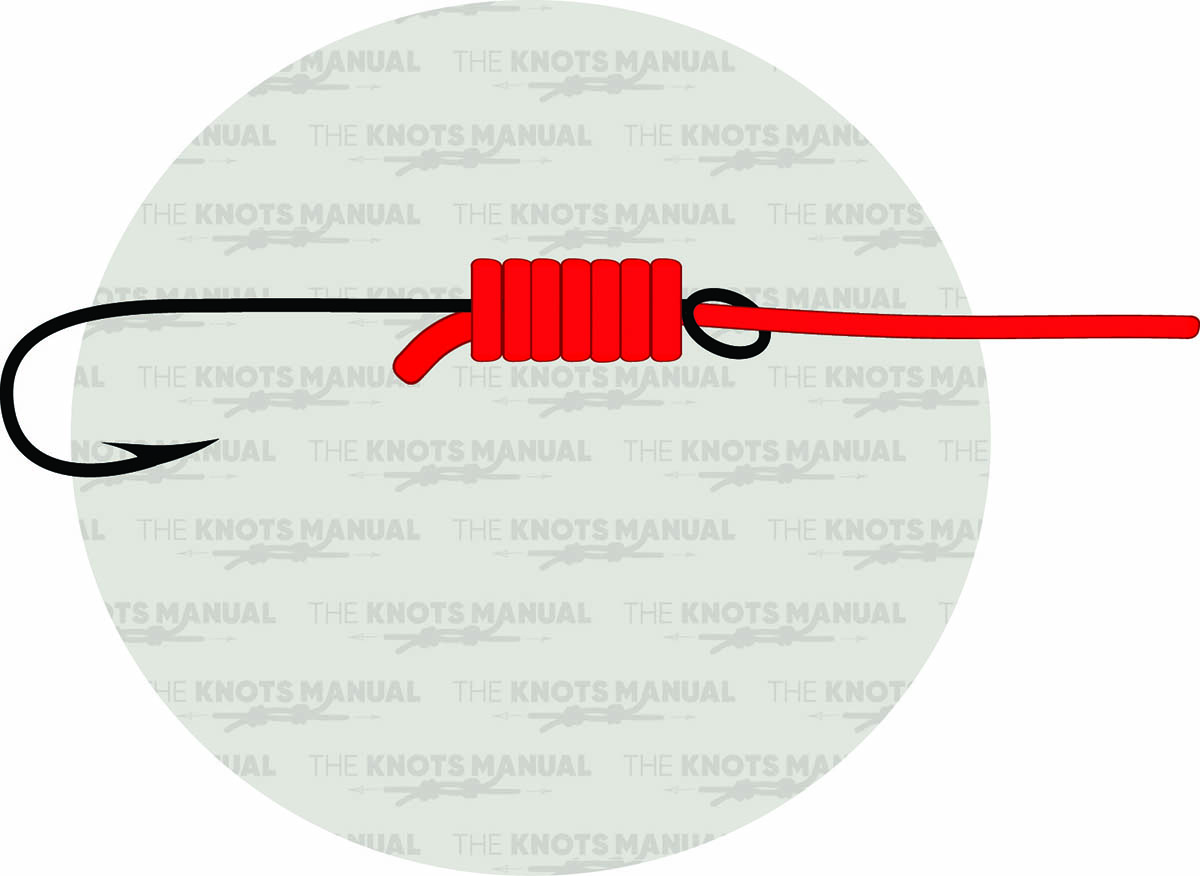
Step 3:
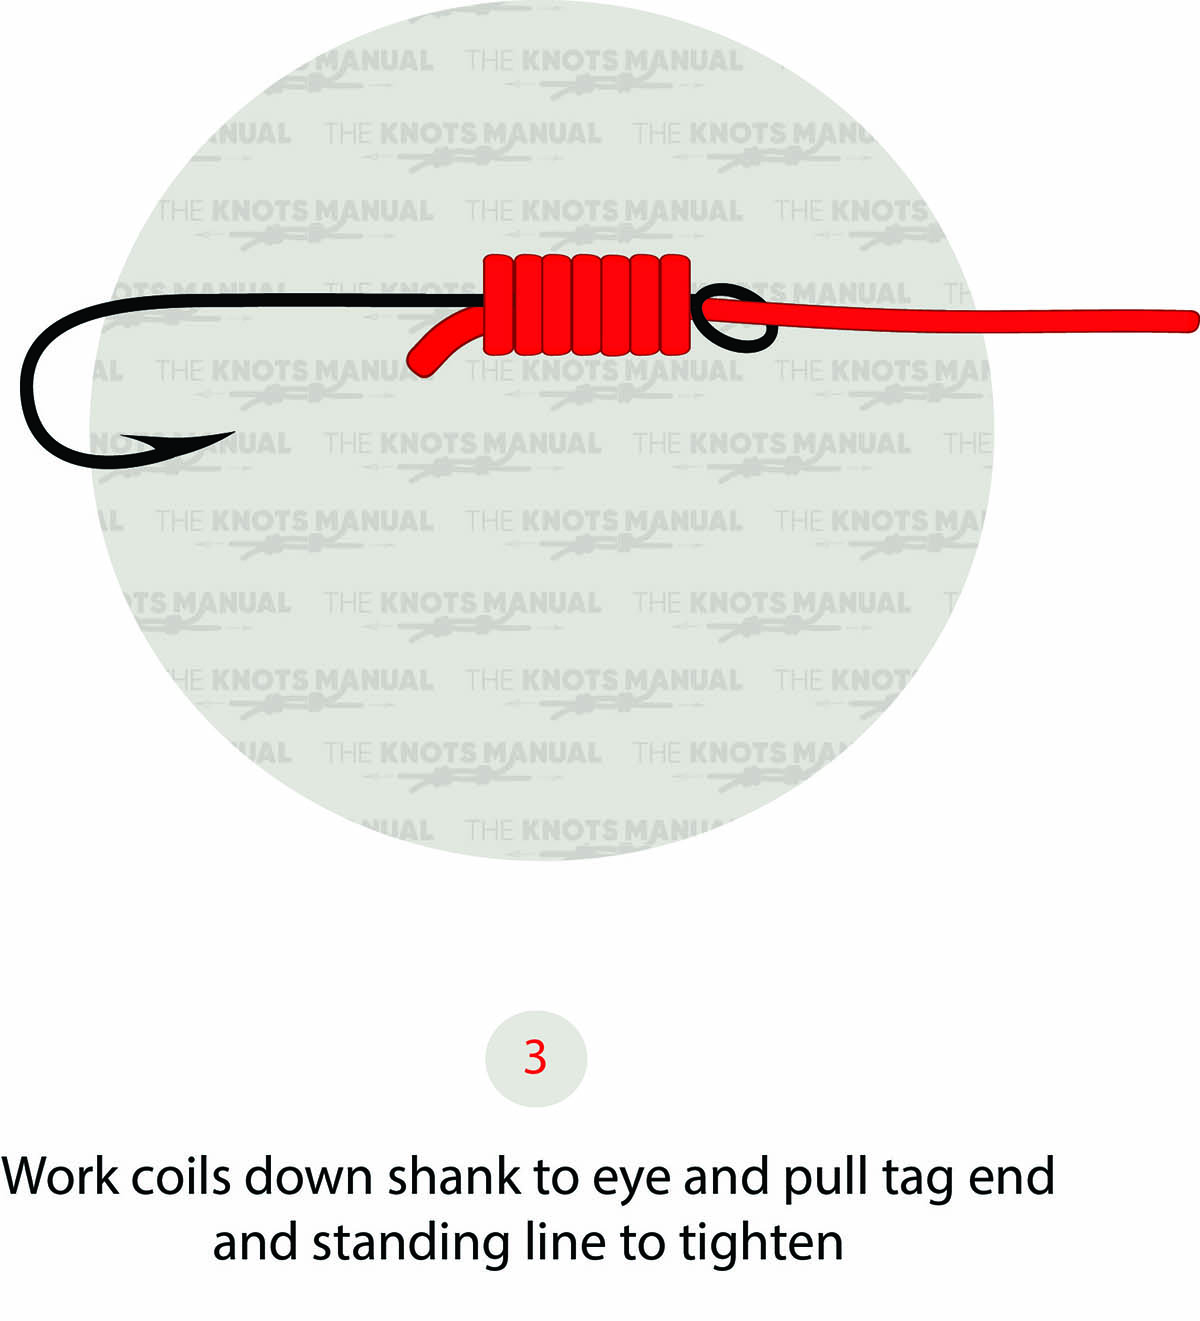
Lubricate the knot and tighten it. Finally, cut off the tag end.