The Trilene Knot is often used in fly fishing to attach monofilament and fluorocarbon fishing lines to hooks, swivels, lures, and snaps. It’s an easy and secure knot that resists slippage.
In other sources, it’s also sometimes referred to as the Two Turn Clinch Knot.
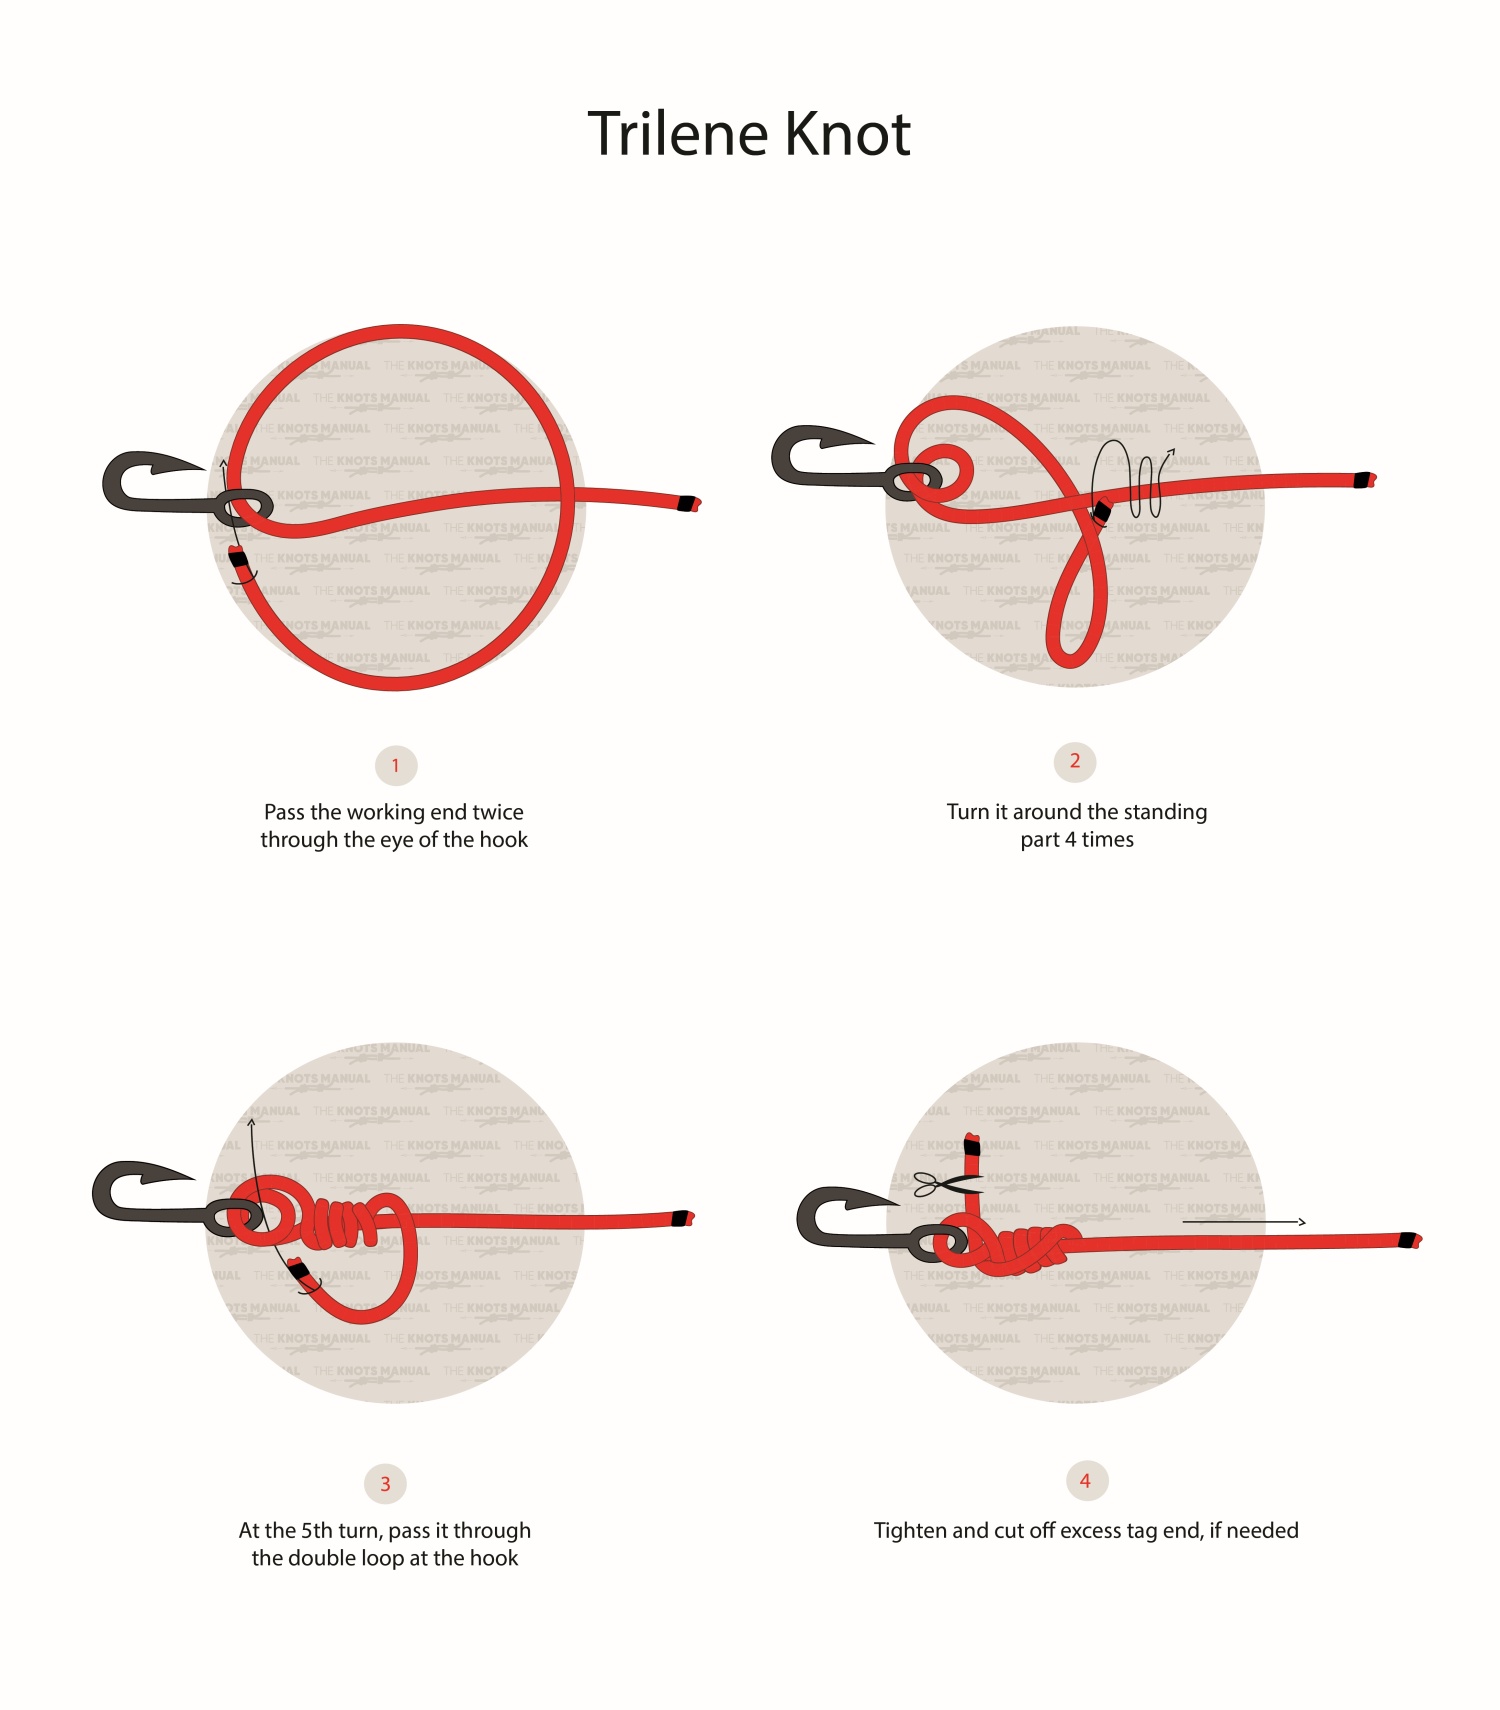
Quick Guide: Tying the Trilene Knot
To tie the Trilene knot, pass the working end of the fishing line through the eye of the hook twice (step 1). Keep the formed loop somewhat loose and leave another 8-10 inches (20-25 cm) of line free after it.
After that, wrap the working end around the standing line 4-6 times for thicker fishing lines and 6-10 times for thinner ones (Step 2).
Finally, go through the loops formed in step 1 to finish the knot. It’s important to go through the loops, not the eye of the hook.
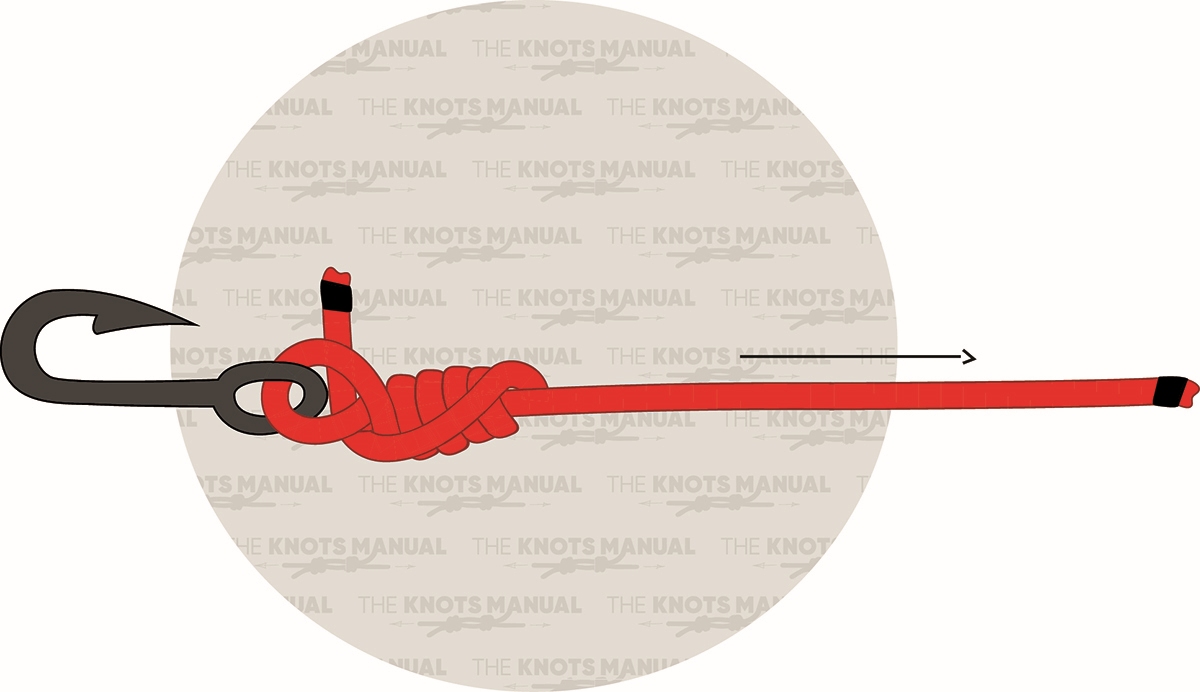
Submerge the knot in water or in saliva to lubricate it, and tighten it by holding the tag end in one hand and pulling the standing end with your other hand. Cut off the excess end but leave at least 1/5 inch (5 mm) to account for slippage as the knot settles in.
Pros and Cons of the Trilene Knot
The Trilene Knot is very easy to tie. Because of this, it’s easy to learn for beginners. That’s why it’s often taught as the go-to knot in fly fishing for attaching a fishing line to a hook.
Another advantage of the Trilene Knot is that it is relatively strong. Tests have revealed its strength to be close to 100% of the breaking strength of the line. In a lot of instances, the fishing line breaks first while the knot stays intact.
It works exceptionally well with monofilament and fluorocarbon fishing lines because it’s resistant to slippage.
The main downside of the Trilene Knot is that it doesn’t work well with braided fishing lines. In this case, choosing another knot, like the Palomar Knot is a better choice.
Common Uses for the Trilene Knot
Most commonly the Trilene Knot is used in fly fishing to attach directly to hooks, split rings on lures, swivels, and snaps. It’s used only with monofilament and fluorocarbon fishing lines. For this purpose, it’s considered as one of the best options.
Although it can be tied with braided lines and even ropes, it’s more likely to come undone. Using other knots for this purpose is better.
Knots Like the Trilene Knot
Improved Clinch Knot: A very similar knot to the Trilene Knot, except it wraps only once around the hook. In the Improved version, the tag end also passes behind the last turn, making it more secure. Compared to the Trilene Knot, it’s less secure.
Palomar Knot: One of the strongest fishing knots for attaching a fishing line to a hook. Arguably, it’s a better choice to use as the Trilene Knot. That’s because it’s easier to tie, stronger, and also works with braided fishing lines.
Nanofil Knot (Double Palomar): This is an improved version of the Palomar Knot, where the bight is wrapped around itself twice. It’s much stronger than the Trilene Knot and also stronger than the regular Palomar Knot. It’s used for extra-slippery braided fishing lines with gel elements.
Eye Crosser Knot: A lesser-known knot that’s tied very similarly to the Trilene Knot. It’s even stronger because the tag end is secured differently when it’s wrapped around the standing line. Even though it appears difficult to tie at first, it really isn’t.
Uni Knot: A simple and popular fishing knot that creates a loop at the end of the fishing line. It’s strong and works with mono and braided lines.
Perfection Loop: This knot creates a fixed loop at the end of the fishing line for loop-to-loop connections. Its main advantage is that it is easy to tie and the loop sits perfectly straight opposite from the fishing line.
Albright Special Knot: This fishing knot is the go-to knot for connecting two fishing lines. It works especially well if they’re in different diameters.
Step-By-Step Guide: How to Tie the Trilene Knot
A step-by-step guide on tying the Trilene Knot.
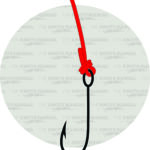
Step 1:
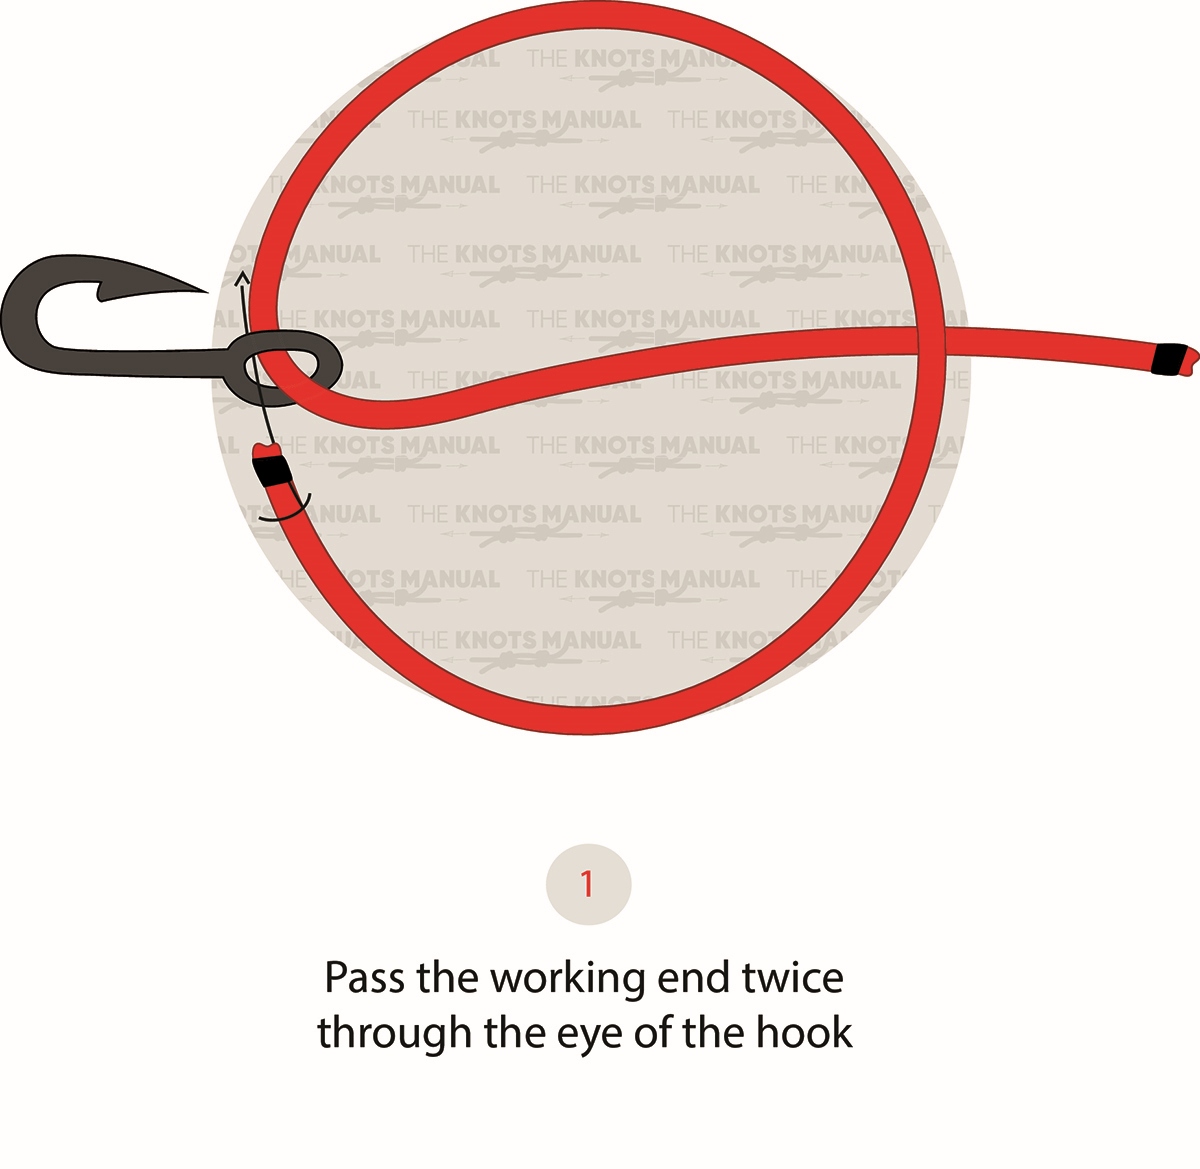
Pass the working end of the fishing line twice through the hook. Keep it somewhat loose because you’ll need to pass the line through it soon.
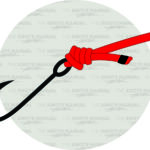
Step 2:
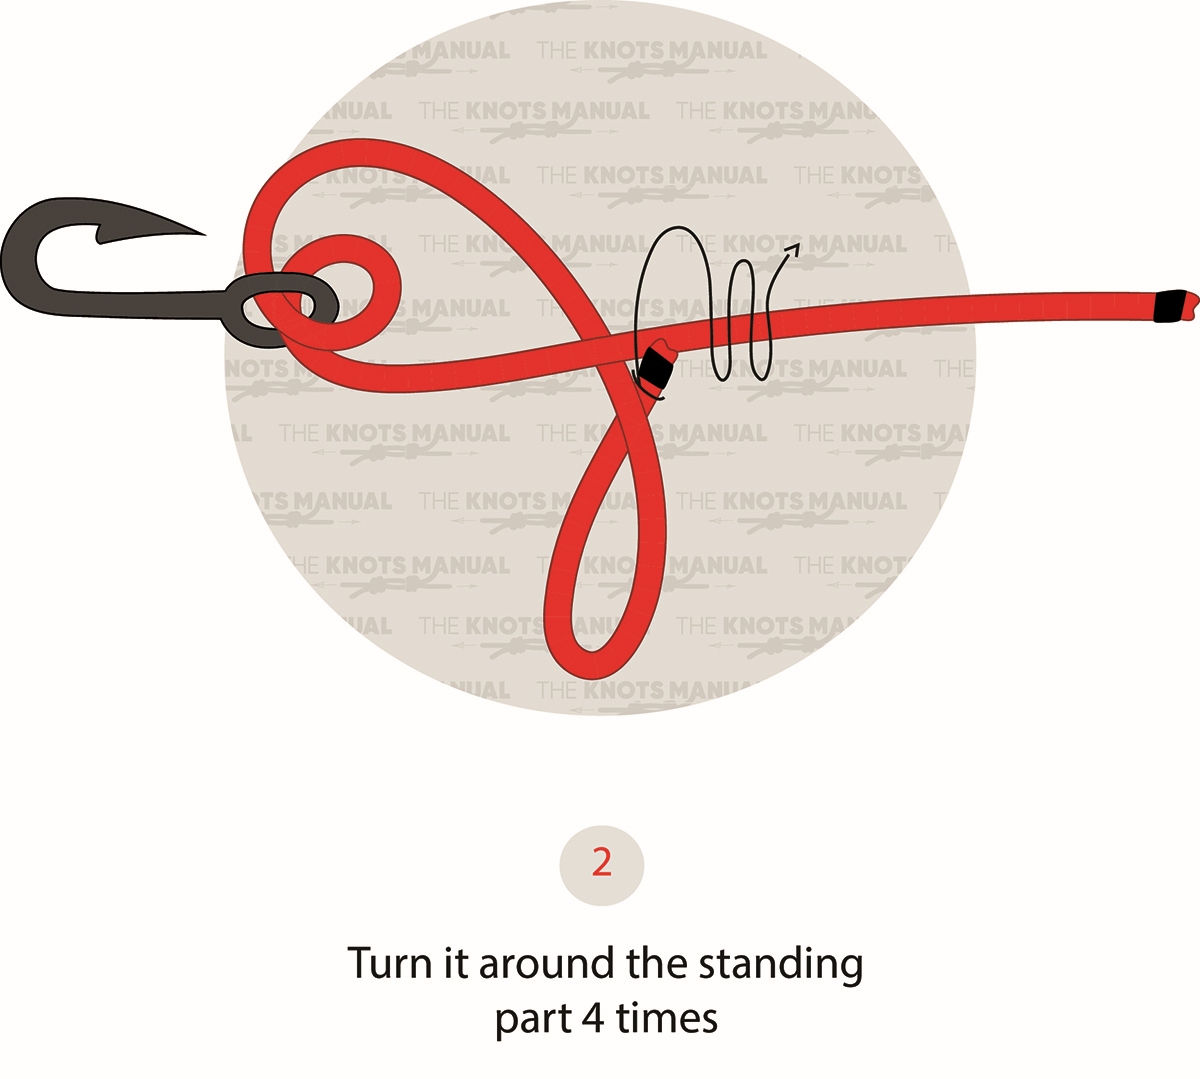
Wrap the working end of the fishing line four times around the standing end.
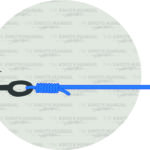
Step 3:
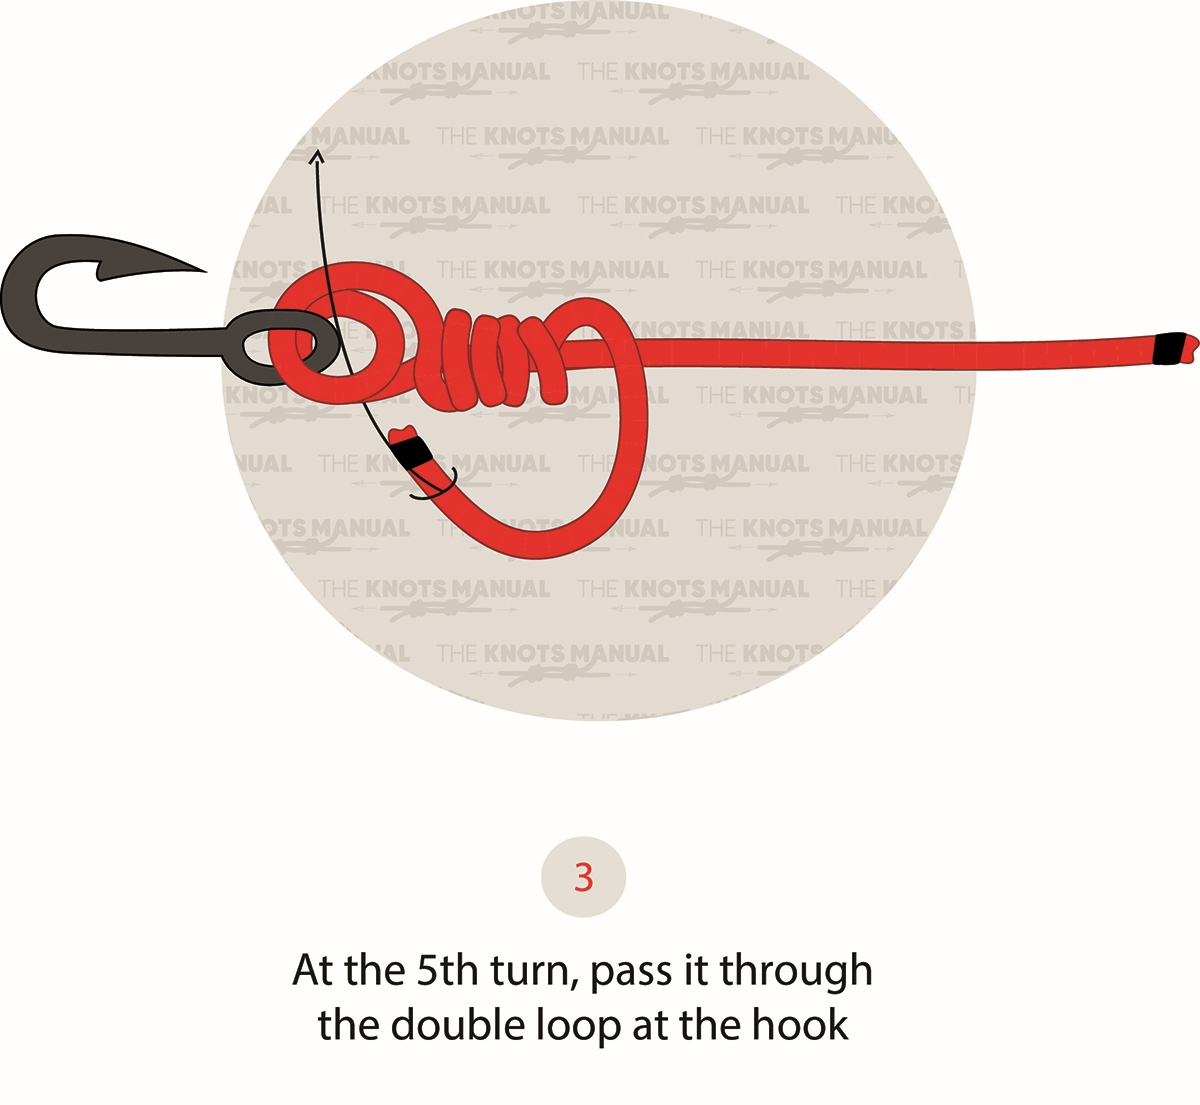
After another half-turn, pass the working end through the two loops created in step 1.
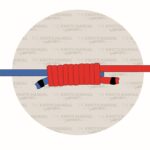
Step 4:
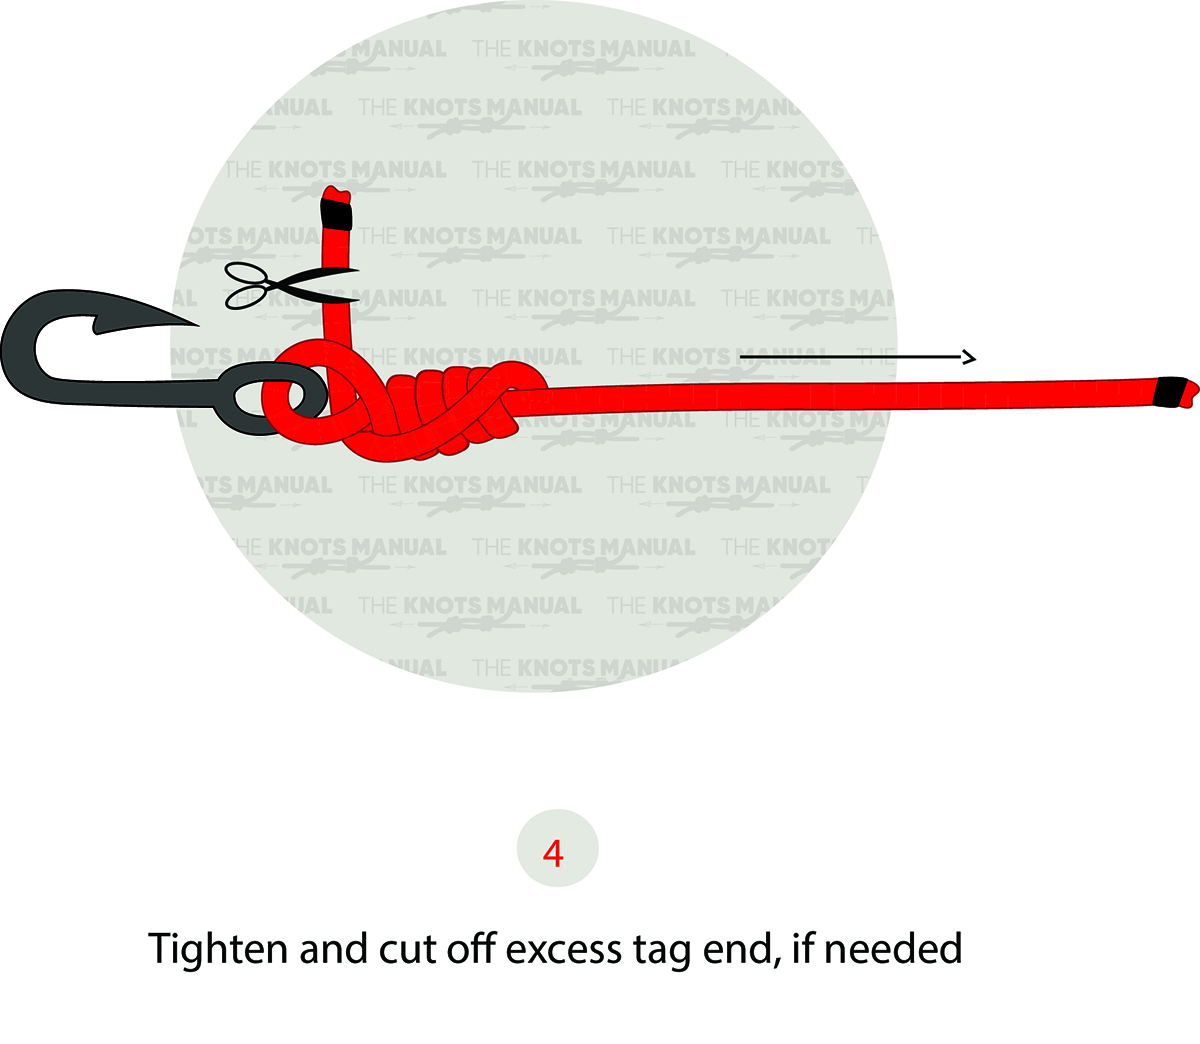
Submerge the knot in water or saliva, tighten it, and cut off the excess end.