The Uni Knot is a fishing knot that creates a self-tightening loop at the end of the line. It’s used to connect fishing lines to hooks, lures, and swivels, to connect two fishing lines, and for many other purposes.
It’s also sometimes referred to as the Gallows Knot, the Duncan Loop, or the Grinner Knot. All of these are its historic names. Uni Knot is the most popular pronunciation in modern times.
Quick Guide: Tying the Uni Knot
To tie the Uni Knot, pass the end of the line through the eye of the hook, and place it parallel to the standing end. Create an inch-long loop with it, and then wrap the tag end around the two parallel lines 3-8 times inside the loop. Do 3 turns for thick fishing lines and 5-8 turns for smaller-diameter ones.
Before tightening, lubricate it with saliva or water to avoid damage from friction heat. Tighten the Uni Knot by pulling on the standing end, then the tag end, and finally again on the standing end. Cut off the excess tag end close to the knot.
Pros and Cons of the Uni Knot
The main advantage of the Uni Knot is that it is a very versatile and universal knot. By learning a single knot, you can apply it to most fishing situations with reliable results. Some fishermen don’t learn any other knots because knowing just the Uni is sufficient.
Another large benefit is that it works with all types of fishing lines – braided, monofilament, fluorocarbon, and wires. It even works with lines of different diameters.
It’s also a strong and reliable knot. In line-to-line connections, it holds about 70% line strength. When attached to hooks, swivels, or lures, it has roughly 80% of the fishing line breaking strength. Many other knots (like the Palomar or the Trilene Knot) are stronger, but they only work better in certain situations.
If you learn how to tie it, then it’s very easy to remember in the future. But when just starting out, it may be a bit difficult and awkward to tie because you have to hold the loop in place. It becomes even more difficult when tied at night or in freezing weather.
Common Uses for the Uni Knot
Most commonly the Uni Knot is used to attach a fishing line directly to a hook, swivel, lure, or an artificial fly.
But you can also tie it without looping it through anything. You essentially create a loop at the end of the line, which can then be used for loop-to-loop connections or to attach a dropper.
It’s also very commonly used to connect two fishing lines. In this case, two Uni Knots are tied in opposite directions, so that they press against each other when pulled. In this situation, it’s referred to as the Double Uni Knot. When connecting two fishing lines made of different materials (or different diameters), the Uni Knot outperforms other similar fishing knots.
You can even use the Uni Knot to attach your fishing line to a spool or a reel.
Knots Like the Uni Knot
Improved Clinch Knot: One of the most popular fishing knots used to attach the line to a hook or a swivel. It’s easier to tie than the Uni Knot and also stronger. Its main downside is that it doesn’t work with braided lines.
Palomar Knot: A stronger knot compared to the Uni Knot. It works especially well with braided fishing lines, but you can also use it with monofilament lines.
Trilene Knot: A very reliable fishing knot, usually used with monofilament and fluorocarbon lines because it’s very unlikely to slip.
Eye Crosser Knot: A lesser-known fishing knot that has outperformed other popular and reliable fishing knots, like the Palomar and Trilene Knots.
Double Palomar (Nanofil) Knot: A more secure version of the Palomar Knot. It works very well with braided fishing lines.
Double Uni Knot: A knot that consists of two opposite Uni Knots. It’s used to connect two fishing lines. It works especially well if the lines are of different diameters or materials.
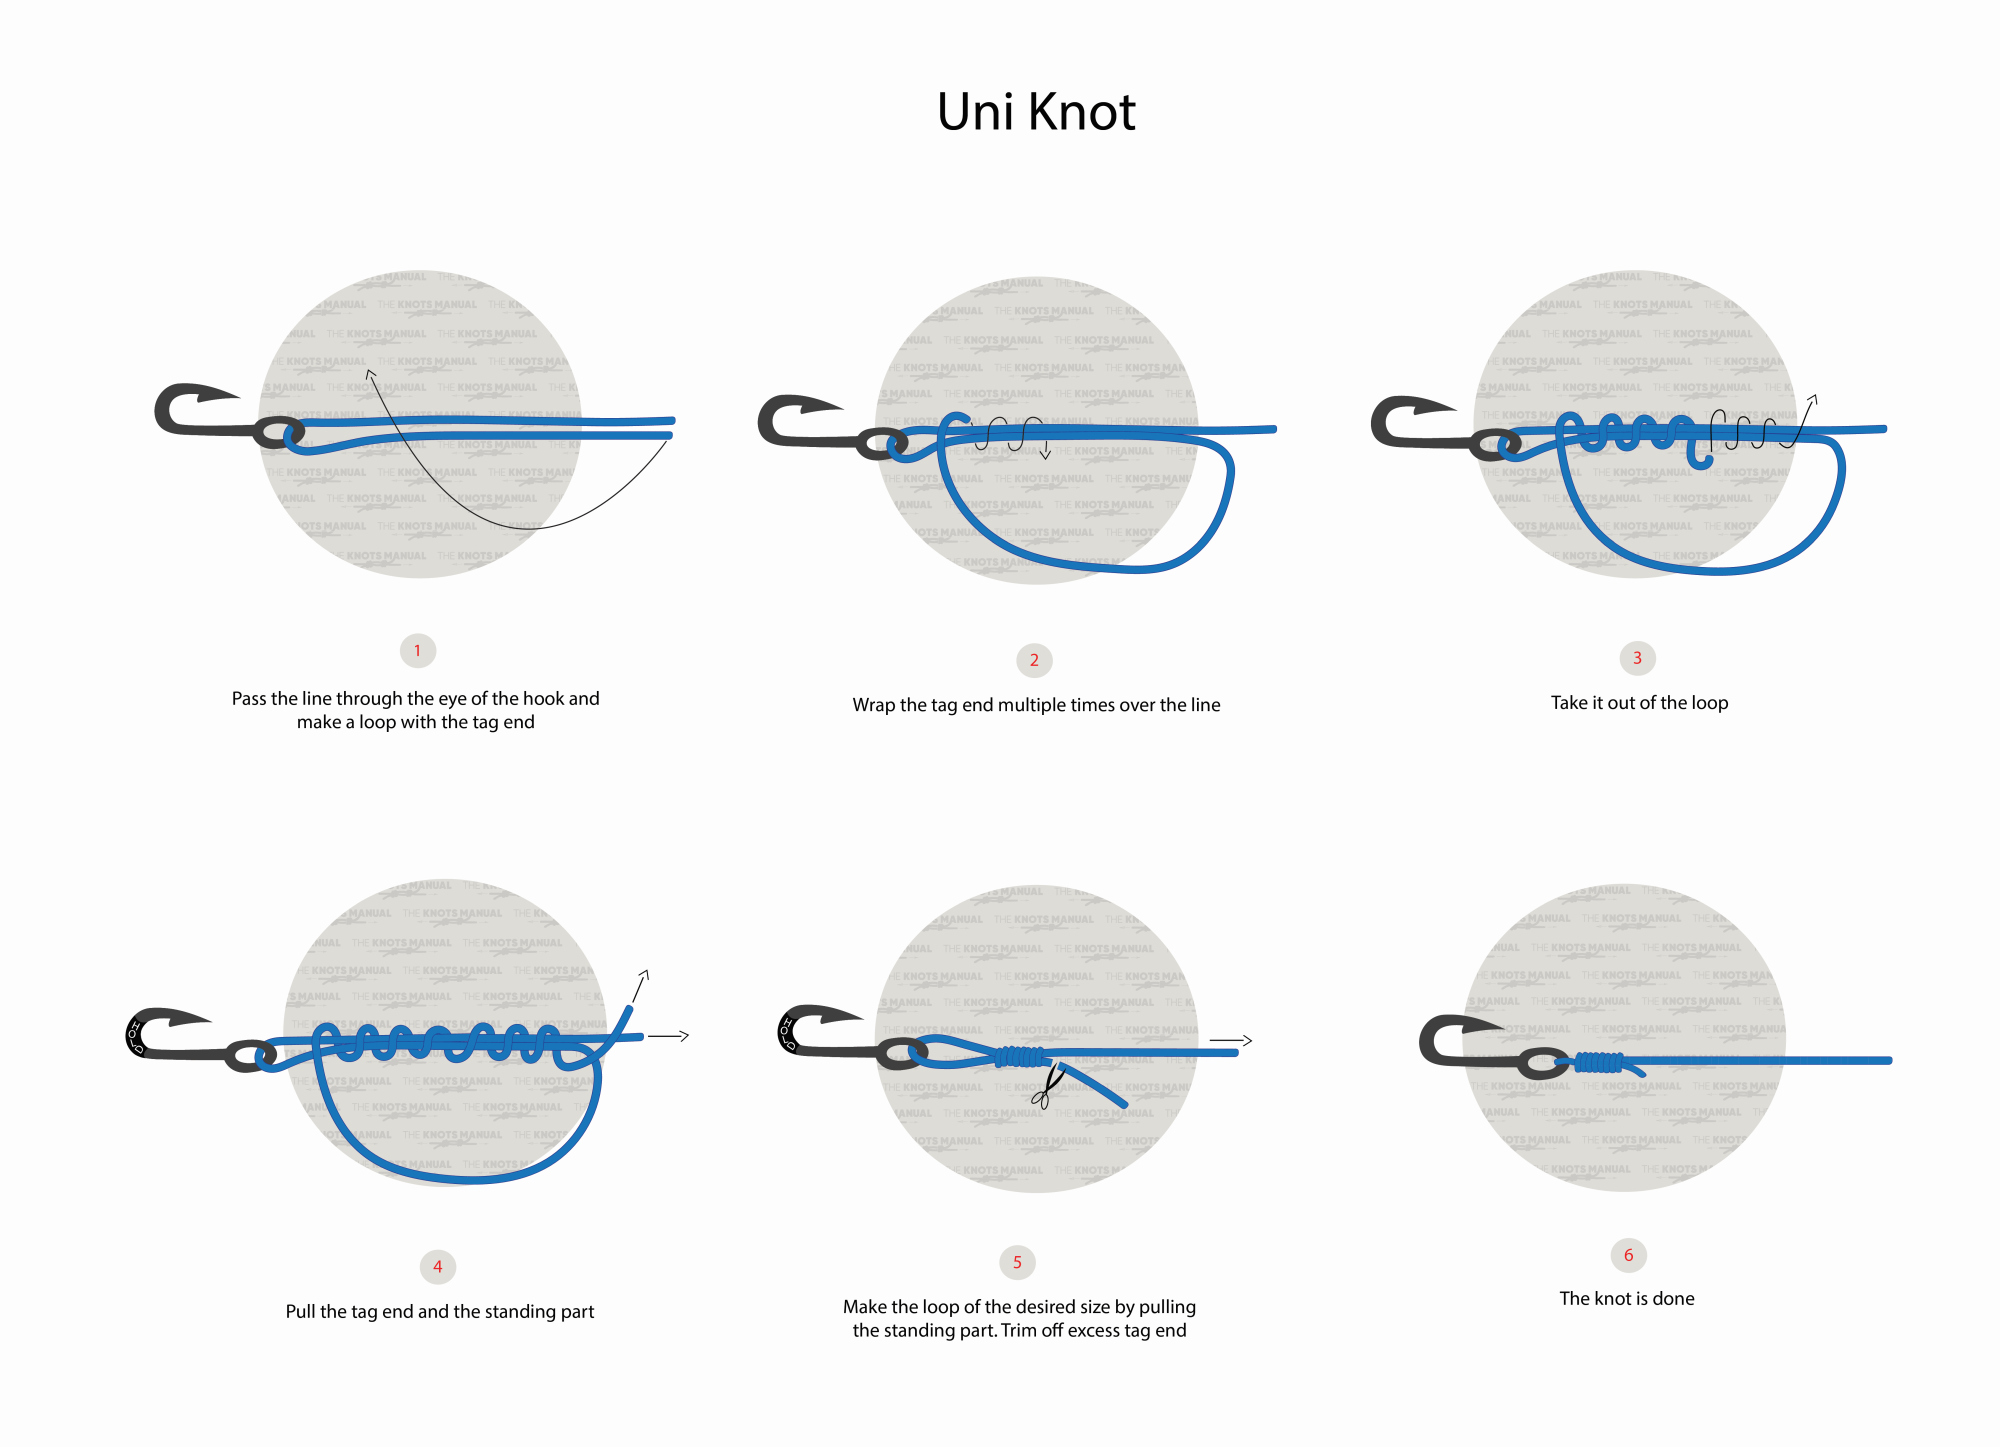
Step-By-Step Guide: How to Tie the Uni Knot
An in-depth guide on how to tie the Uni Knot.
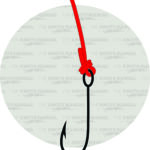
Step 1:
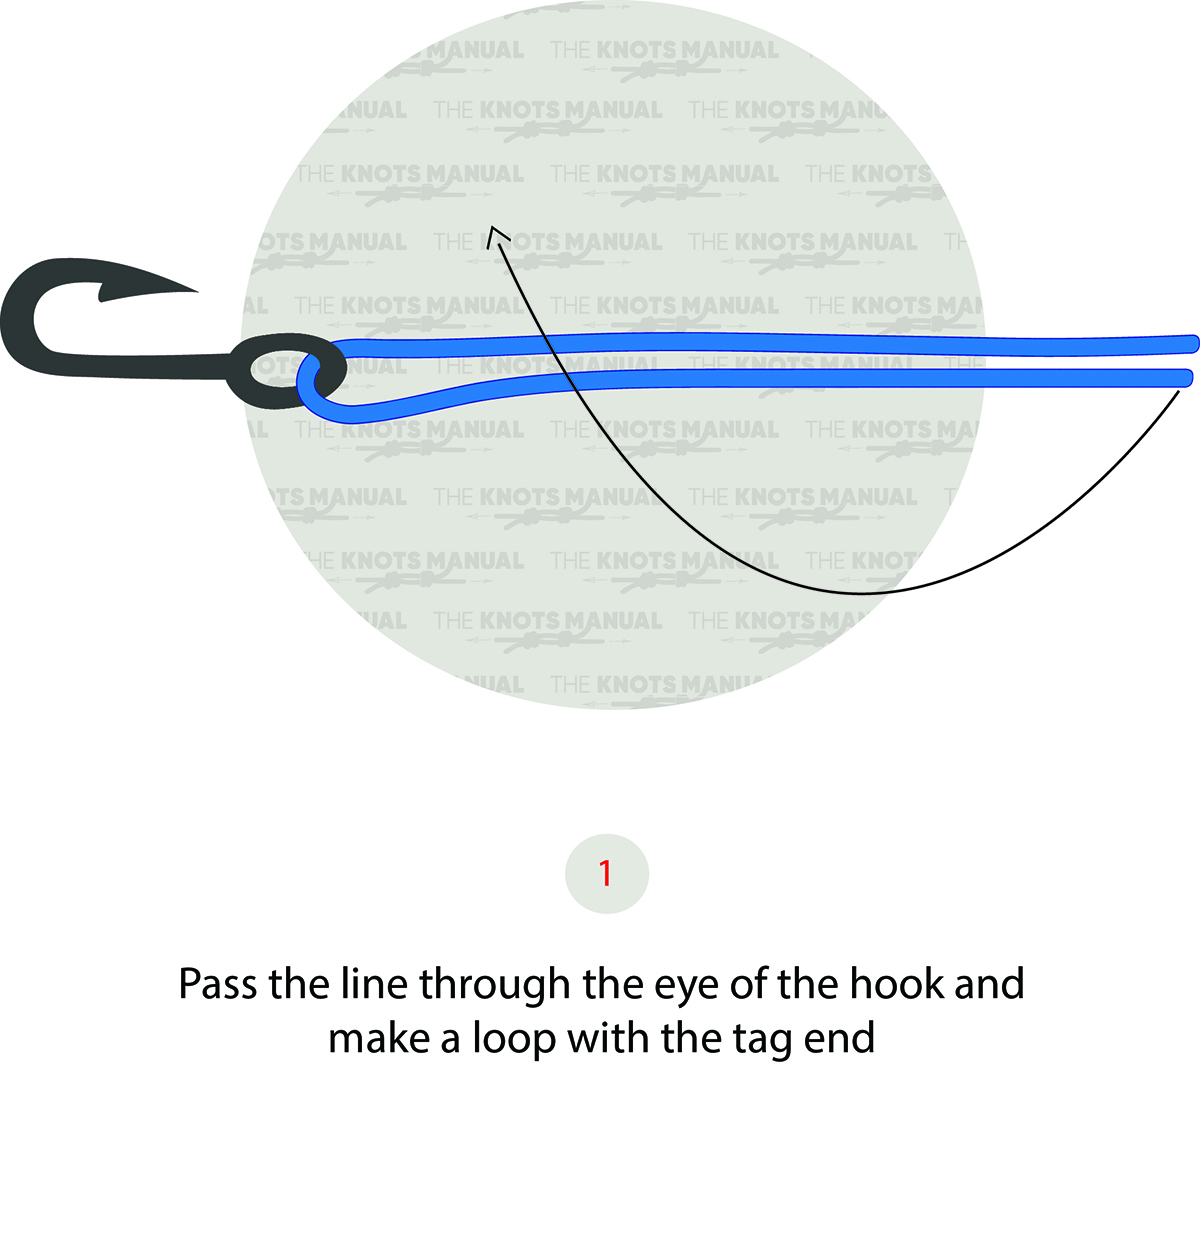
Pass the end of the line through the eye of the hook and place it parallel to the standing line.
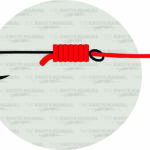
Step 2:
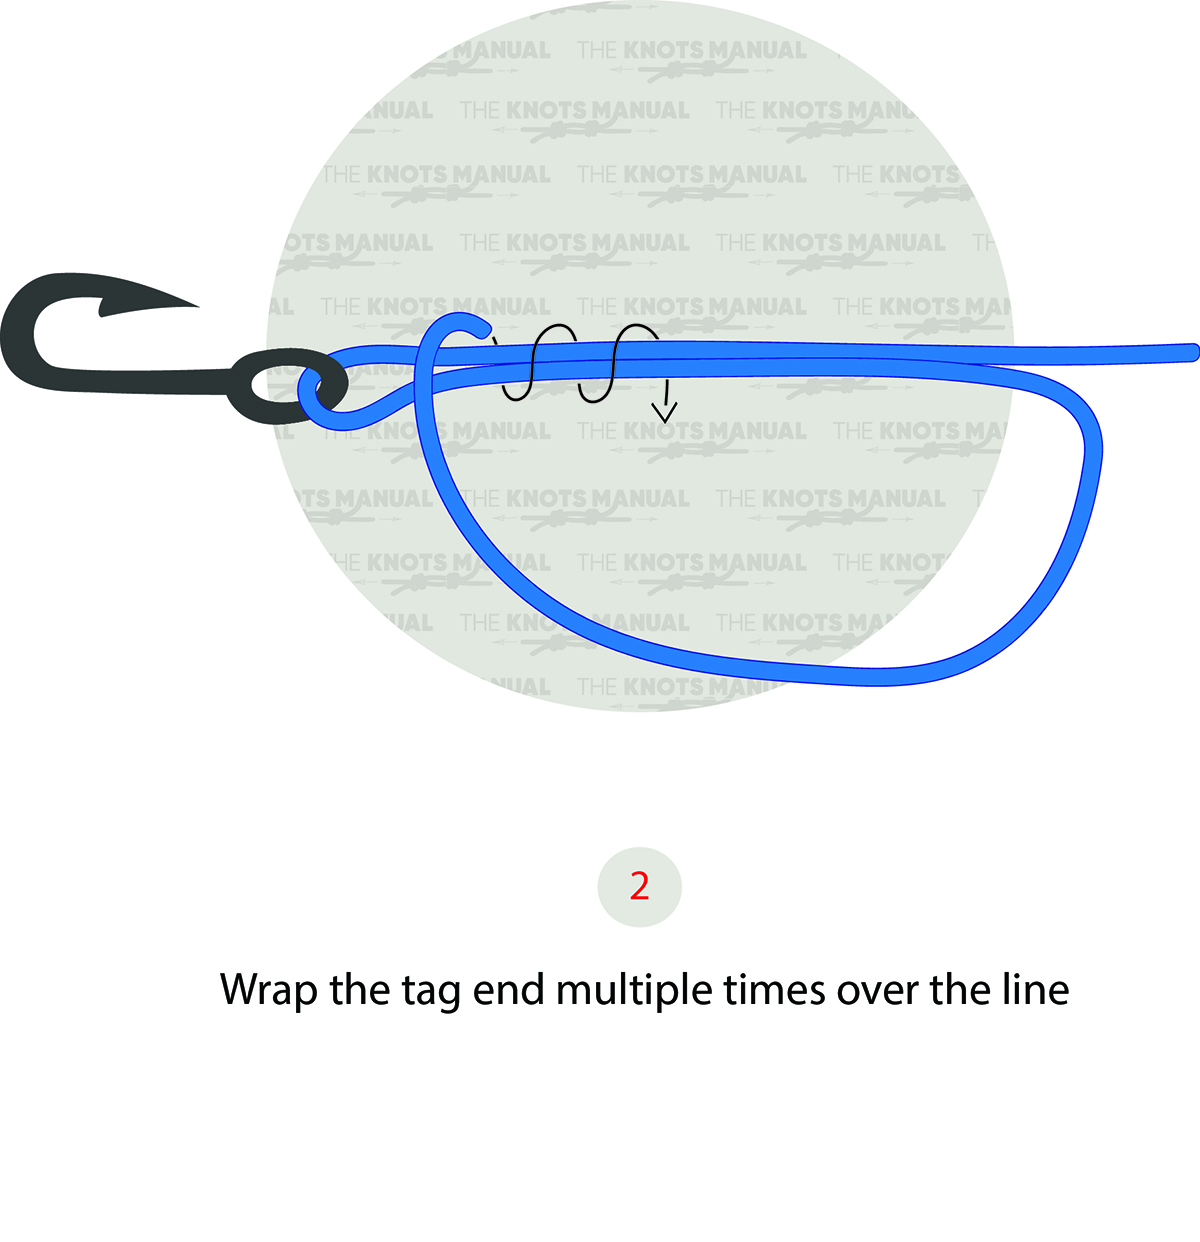
Make a loop and wrap the tag end 3-8 times around both parallel lines.
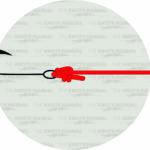
Step 3:
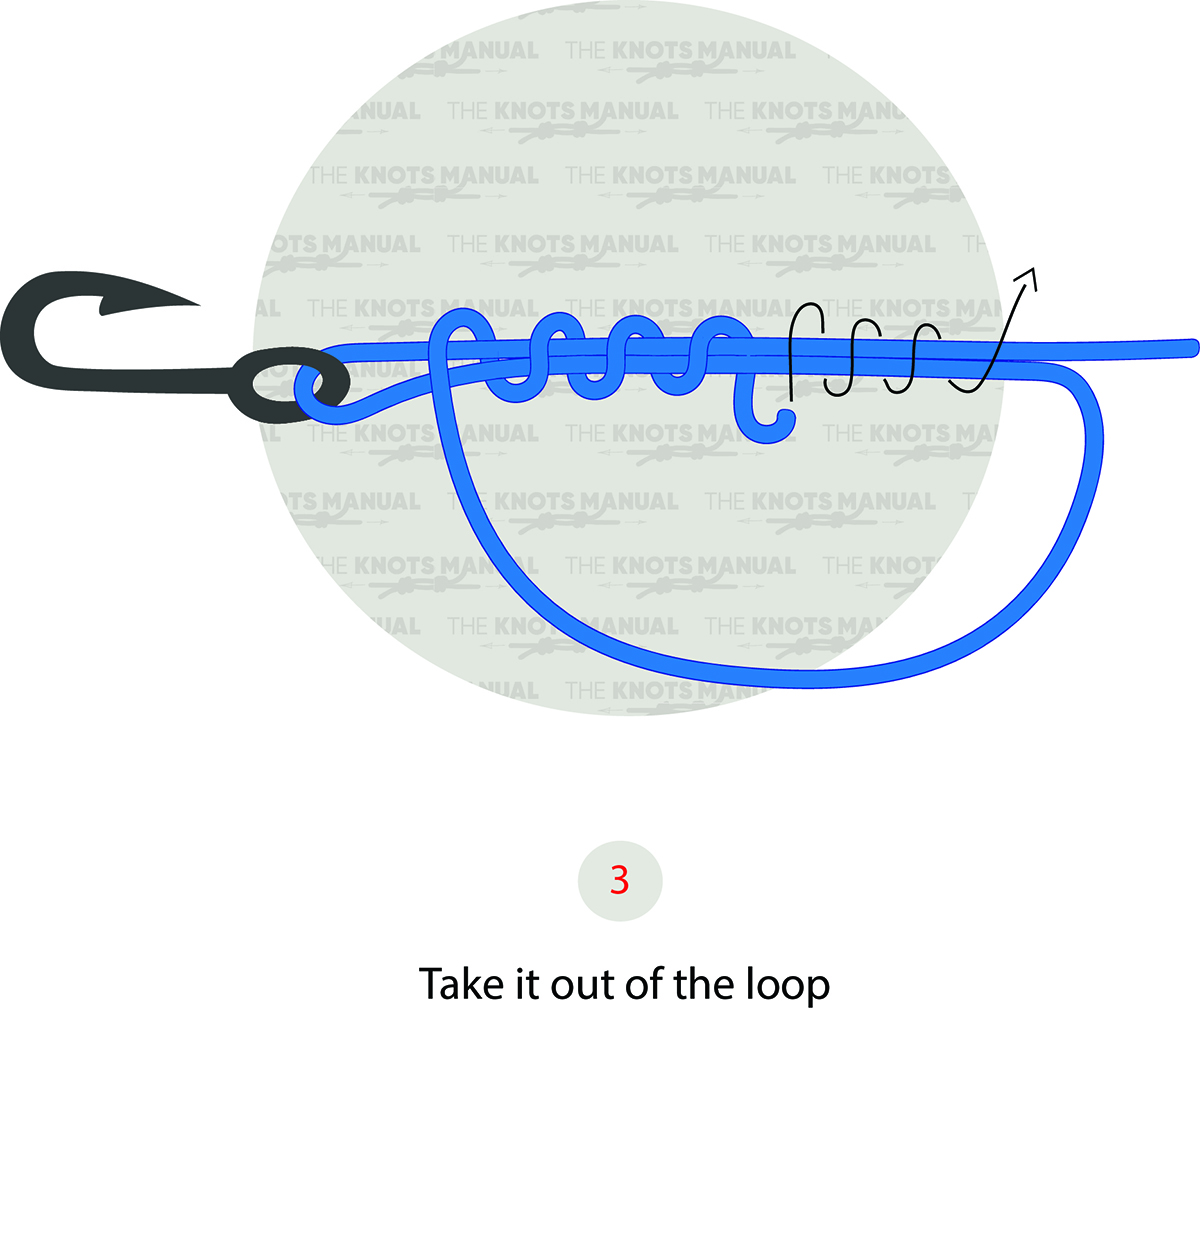
On the last turn, keep the tag end facing outwards.
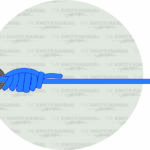
Step 4:
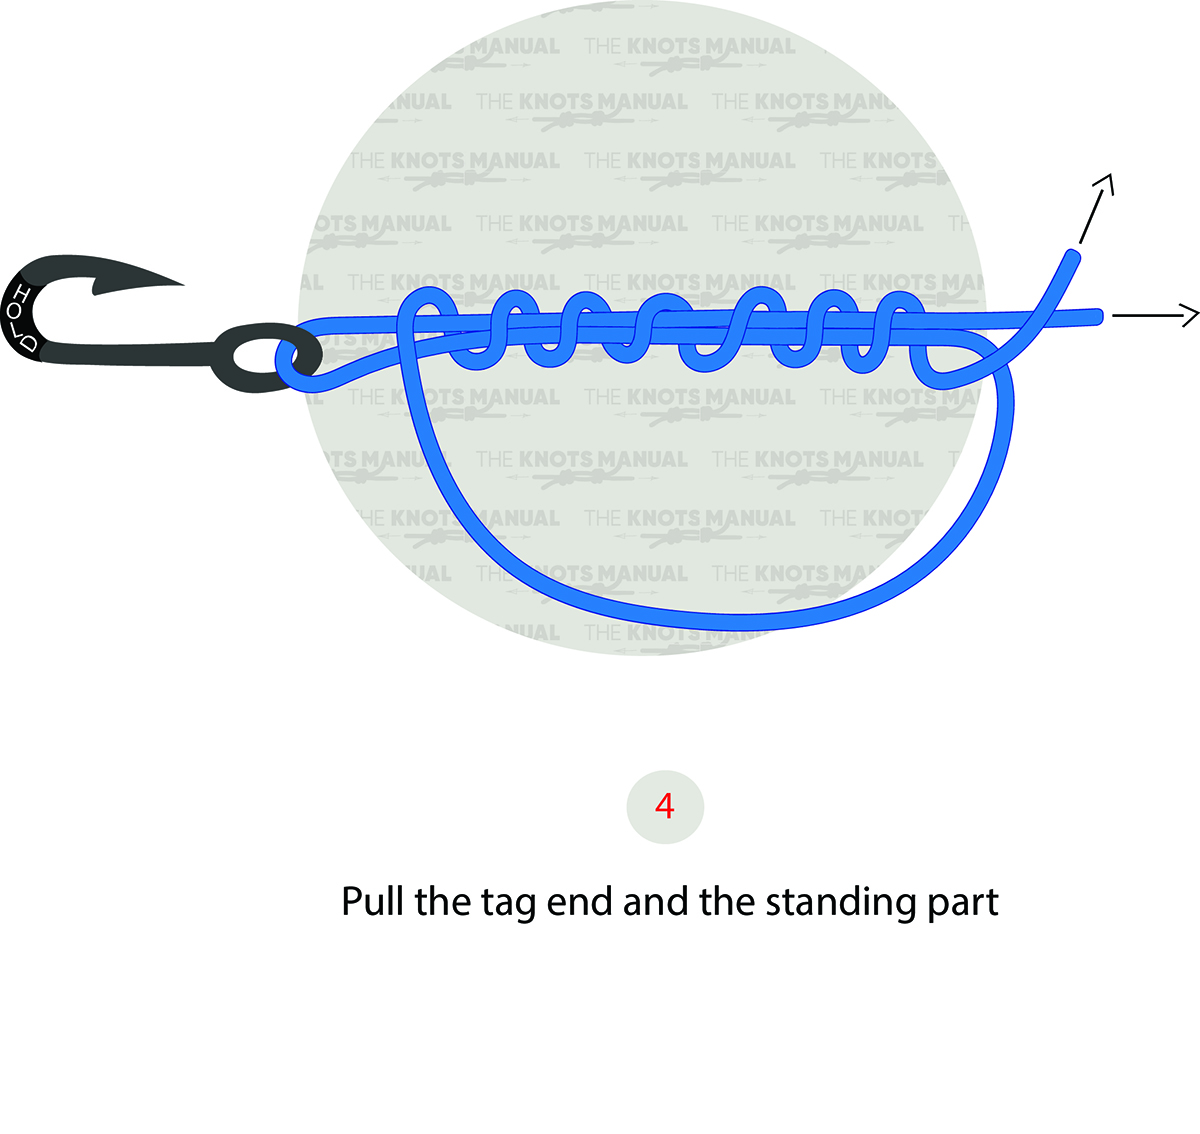
Tighten the knot by pulling the tag and standing ends.
Step 5:
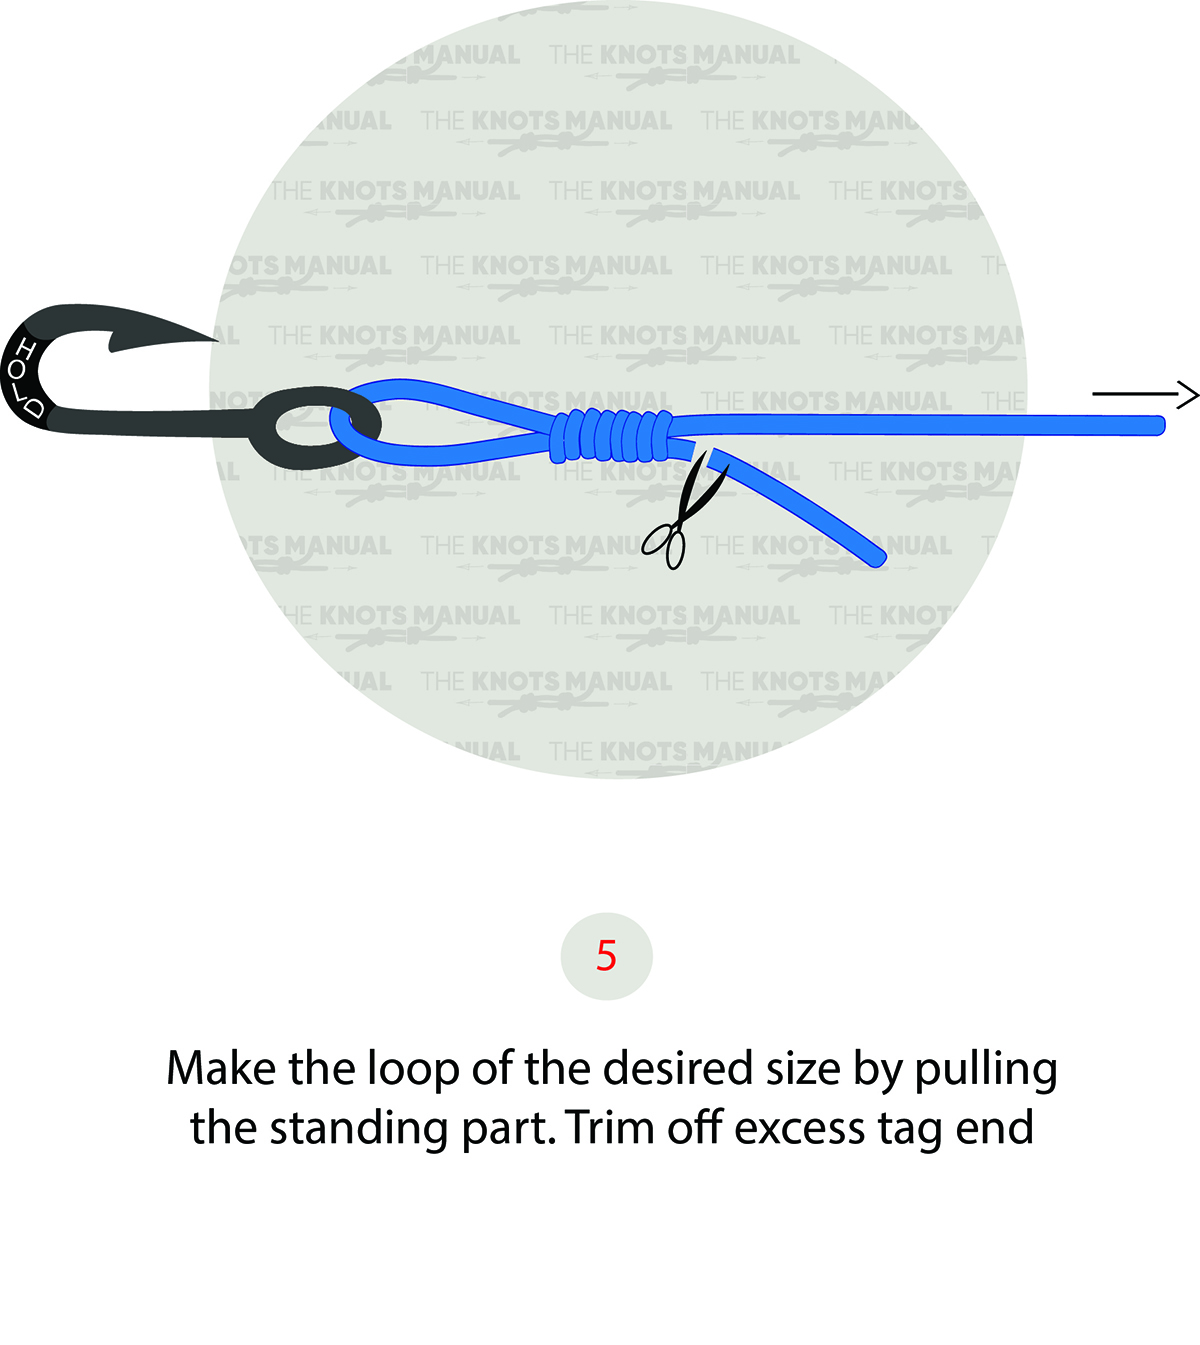
Cut off the tag end.
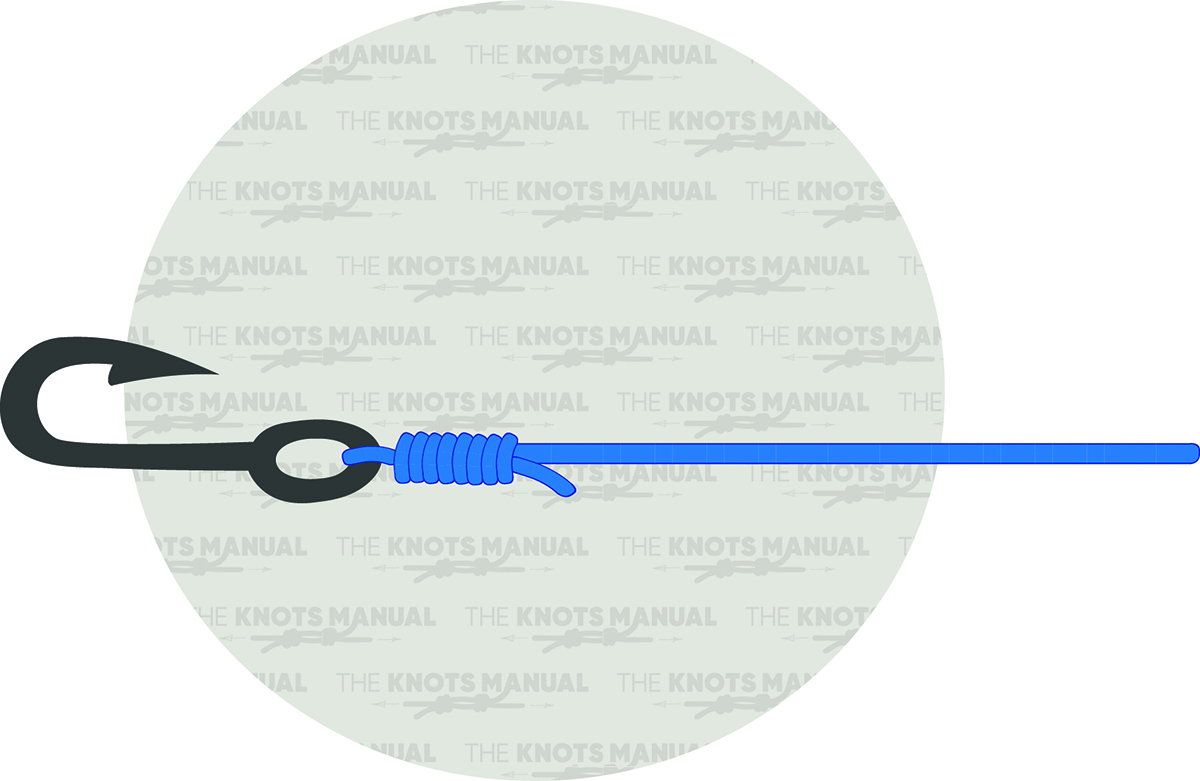
Step 6:
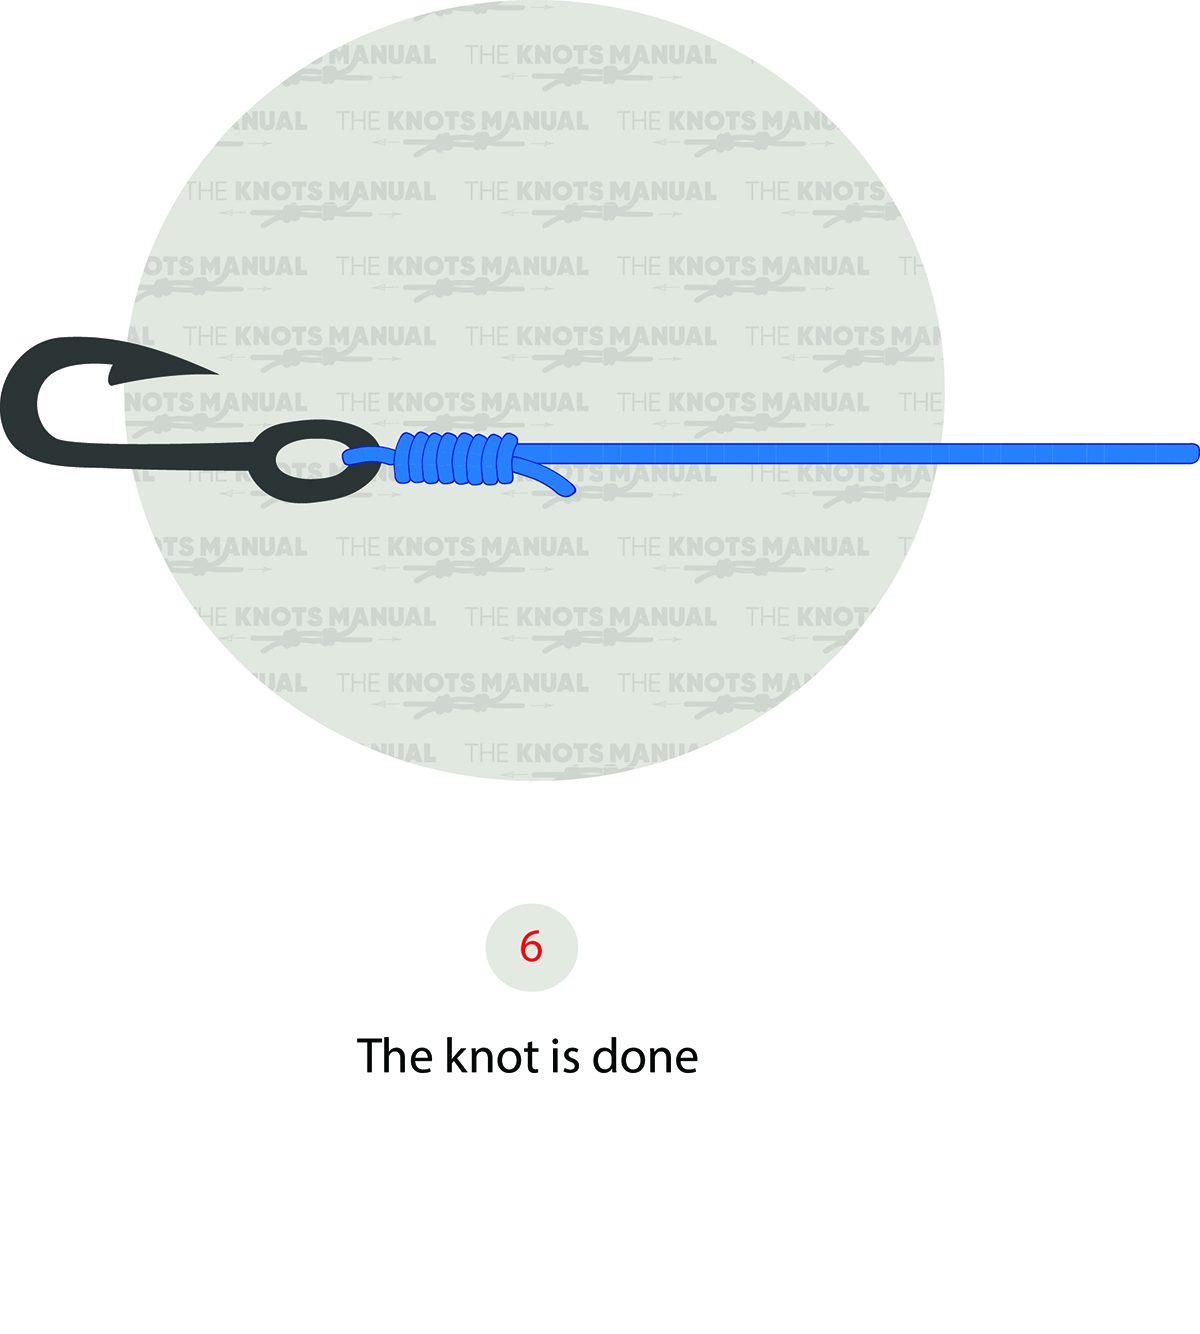
The Uni Knot is finished.