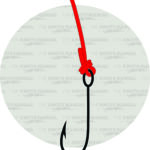
The Improved Clinch is a very popular fishing knot used to attach fishing lines to hooks, lures, and swivels. It’s also sometimes called the Salmon Knot.
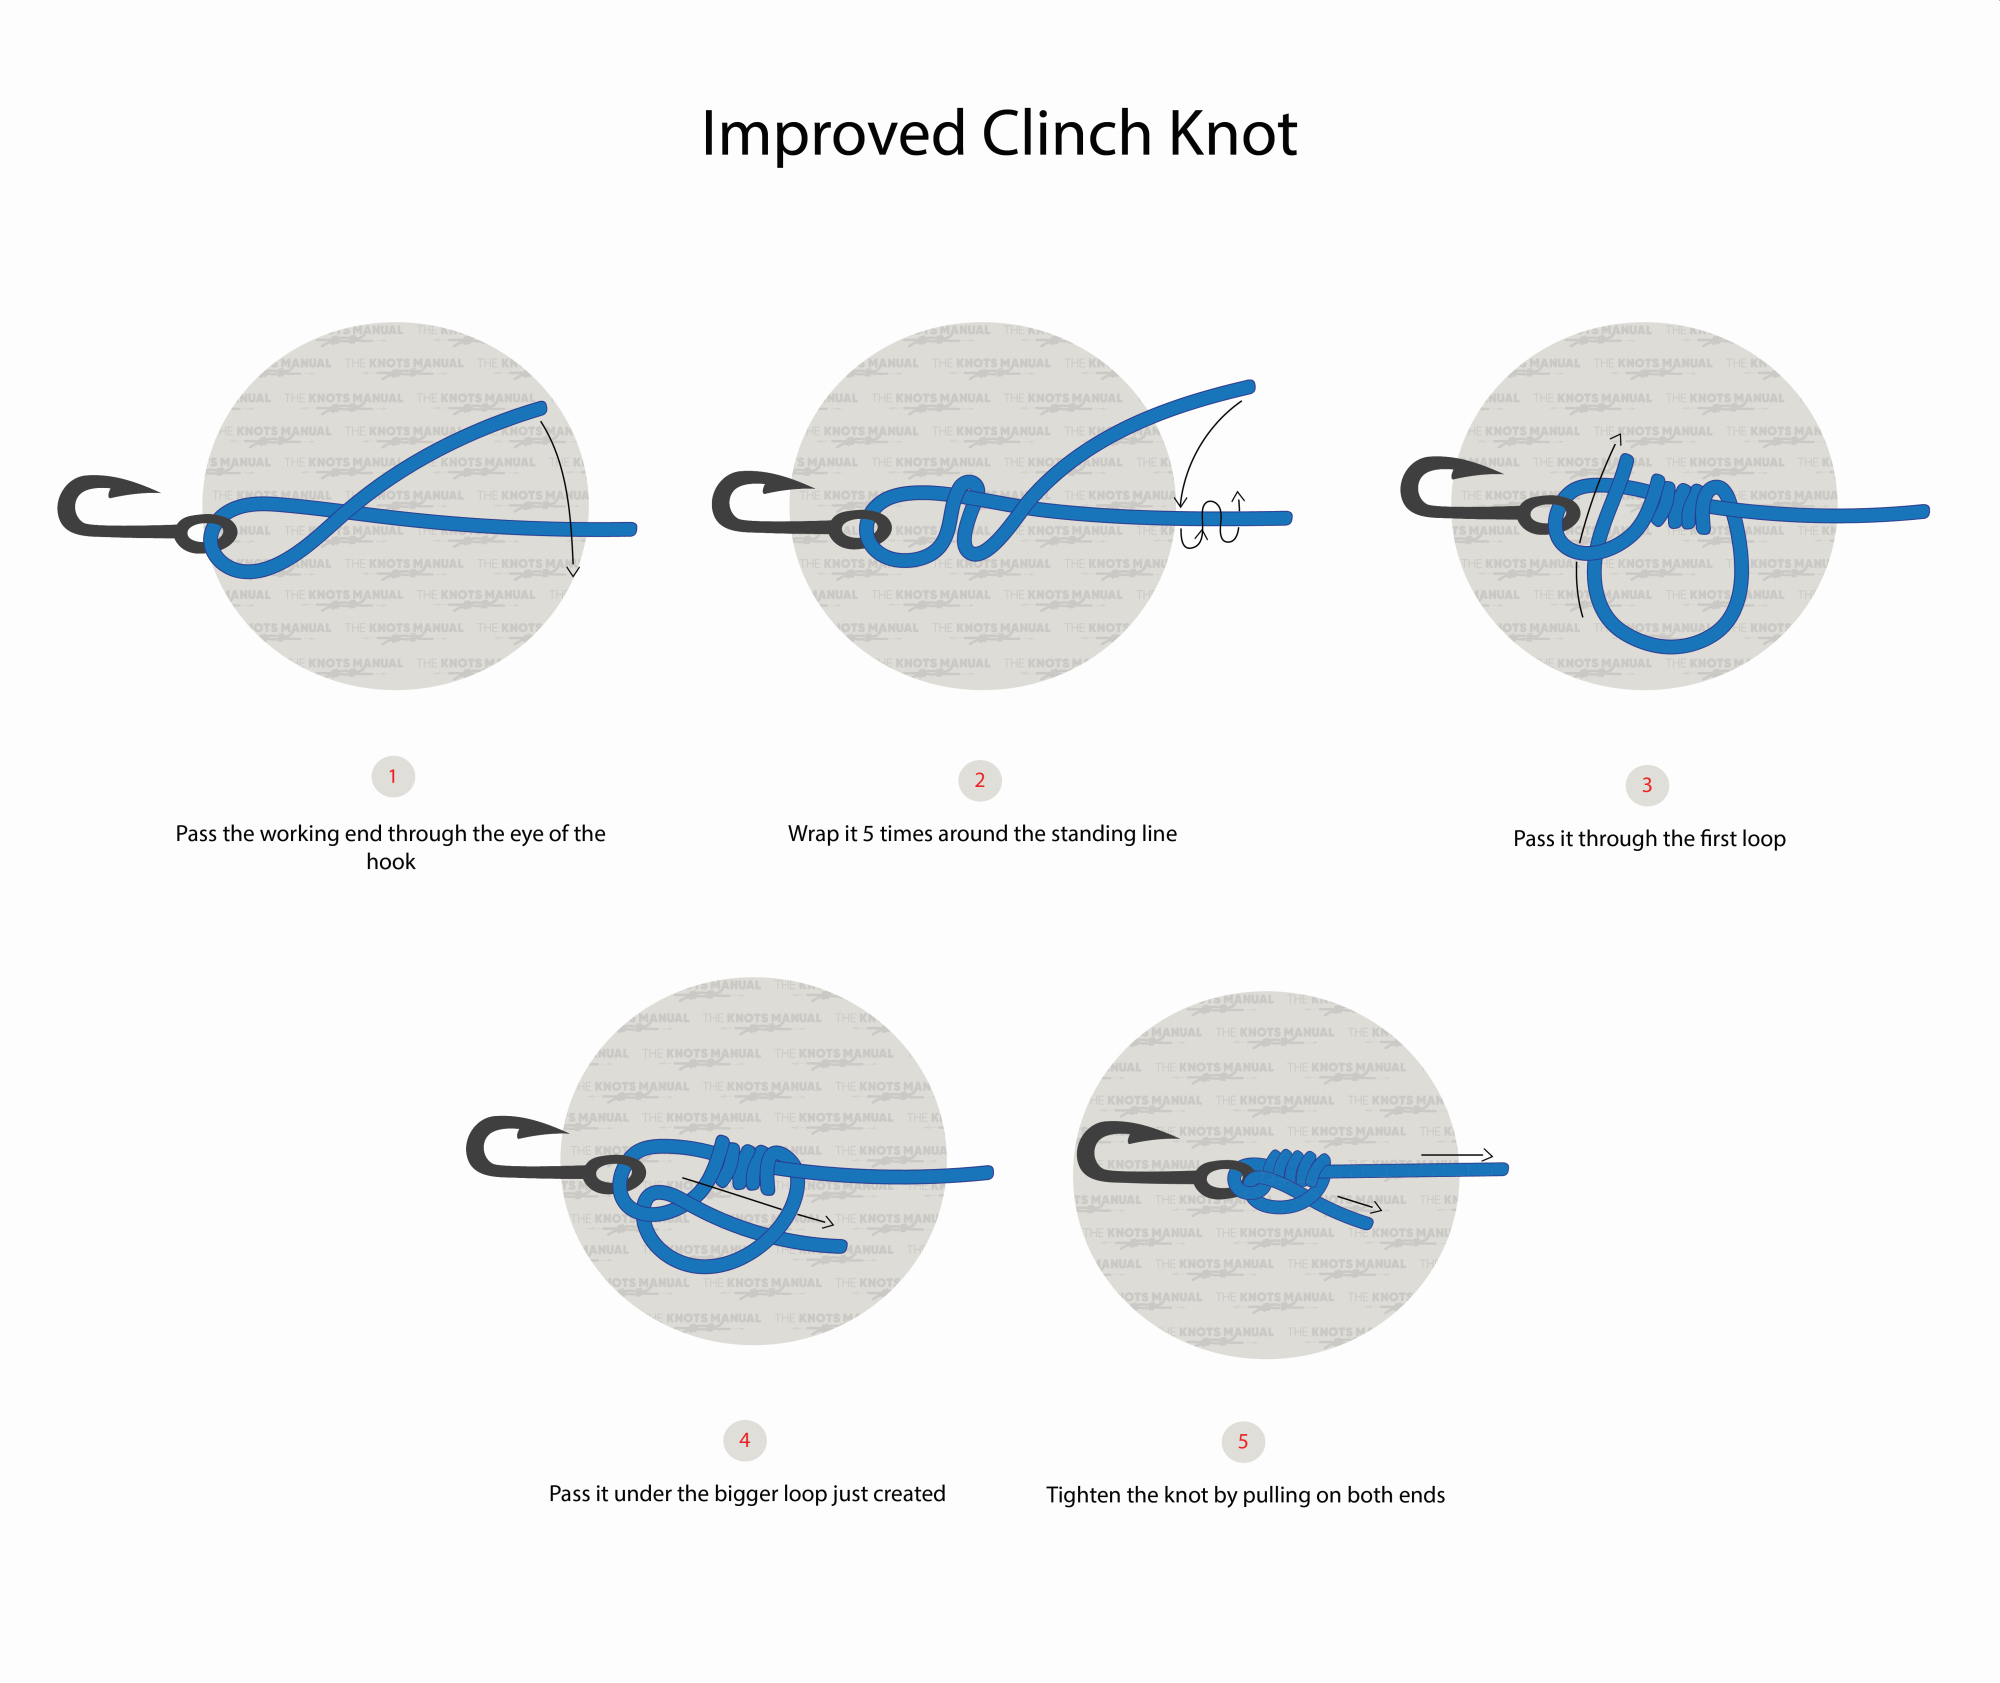
Quick Guide: Tying the Improved Clinch Knot
The Improved Clinch Knot is tied like the standard Clinch Knot, only with one more tuck under itself in the end. Doing this increases its strength.
To tie it, pass the tag end through the eye of the hook and then wrap it around the standing end 5 times. After that, pass the end through the loop near the eye of the hook and then back under itself.
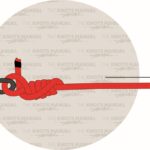
To tighten it, lubricate it with saliva or water, and pull on the standing end of the line. Finally, cut off the tag end.
With thicker lines, you can do only 3-4 turns. With smaller ones, you can do 5-7 turns.
Pros and Cons of the Improved Clinch Knot
The main advantage of the Improved Clinch Knot is that it is very easy to tie. That’s why it’s often taught to beginner fishermen because it’s so easy to remember.
It’s also a very strong knot. When you pull on the knot, it capsizes into many tight wraps that keep pressure on the tag end. It’s said to keep around 90-95% of the line-breaking strength.
Although you can use both with monofilament and braided lines, it works much better with monofilament. With braided lines, the knot doesn’t tighten as well, which reduces its strength.
You also shouldn’t use it with thicker fishing lines because it won’t tighten very well. If the line is rated above 25-30 lbs, then use another knot instead, like the Palomar Knot.
Common Uses for the Improved Clinch Knot
Most commonly, the Improved Clinch Knot is used to attach monofilament lines to hooks, lures, and swivels. But you can also use it to attach the leader to the fly. It also works well with small hook-eyes and large-diameter lines, because it passes through the eye of the hook only once. Realistically, you can use this knot in 80-90% of fishing setups.
Knots Like the Improved Clinch Knot
Clinch Knot: The standard version of the Improved Clinch Knot, without the extra tuck in the end. It was popular a few decades ago and now is rarely used because the Improved Clinch Knot outperforms it.
Palomar Knot: A very strong fishing knot that’s very easy to tie. In addition to working with monofilament, it also works with braided lines. That’s why if you only need to learn one fishing knot, the Palomar Knot is a better choice to learn than the Improved Clinch Knot.
Trilene Knot: A knot that’s tied like the standard Clinch Knot, only the line is passed through the eye of the hook twice. The Trilene Knot is usually used with thicker monofilament lines with a higher breaking strength. This is due to its close-to-100% breaking strength.
Nanofil Knot (Double Palomar): An even more secure version of the regular Palomar Knot, created with a Double Overhand Knot.
Eye Crosser Knot: One of the strongest and newest fishing knots, but it still isn’t very popular. It’s outperformed even the Palomar and the Trilene Knots.

A step-by-step guide on how to tie the Improved Clinch Knot.
Step 1:
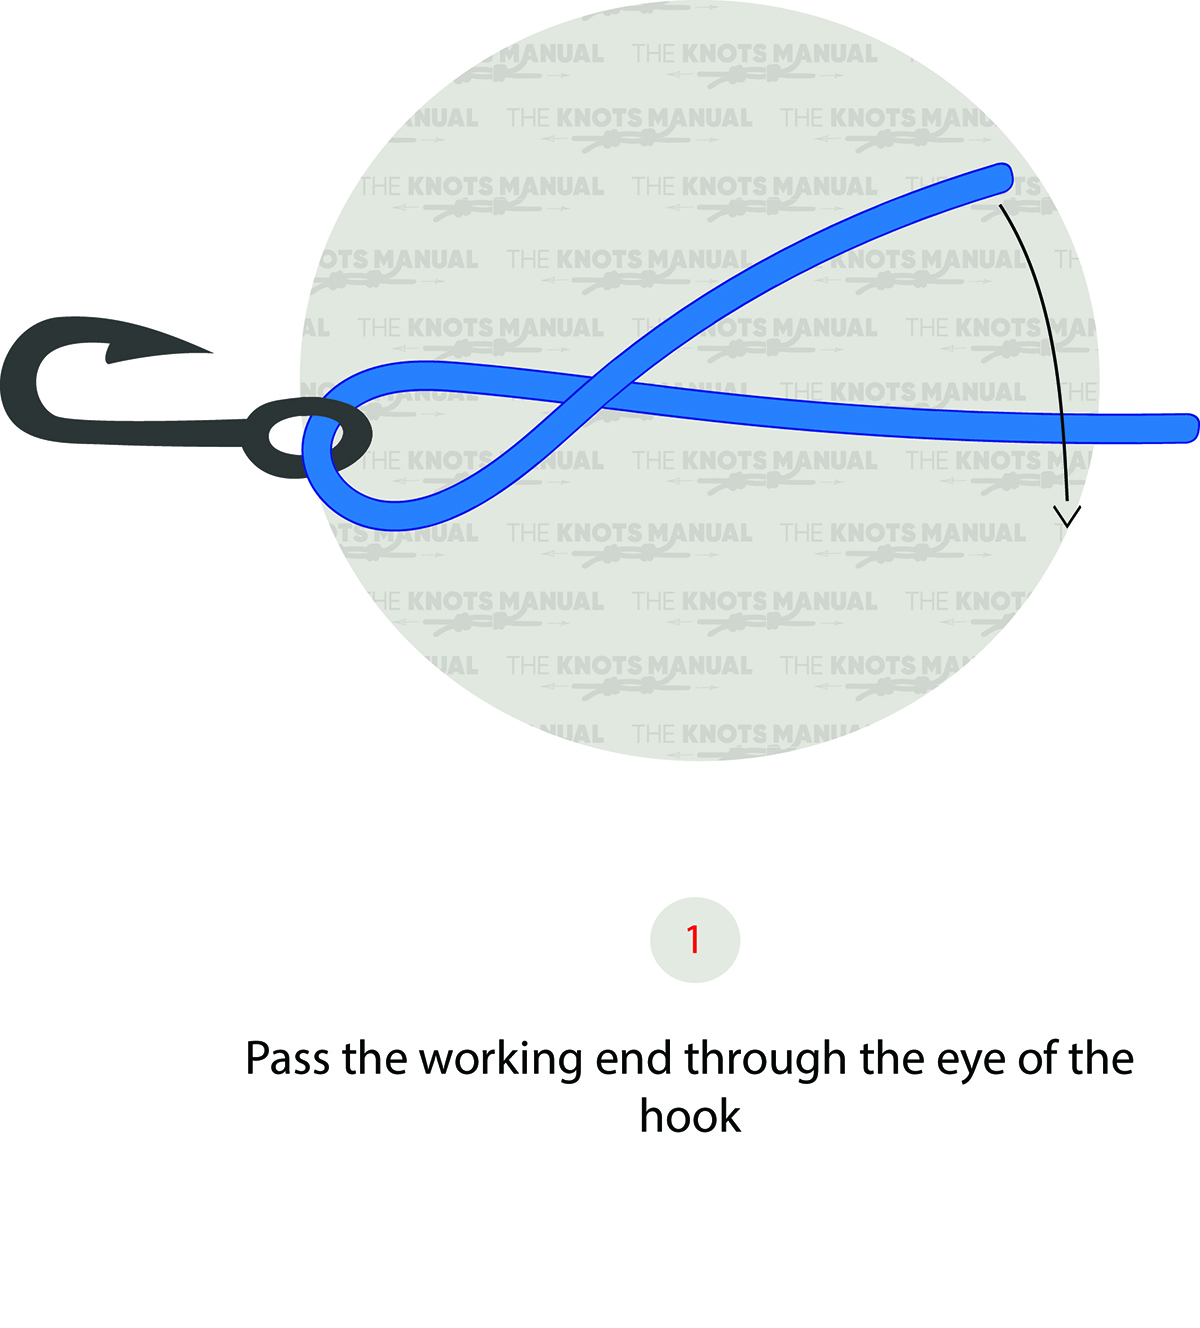
Pass the end of the line through the eye of the hook and start wrapping it around the standing end.
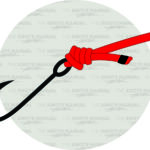
Step 2:
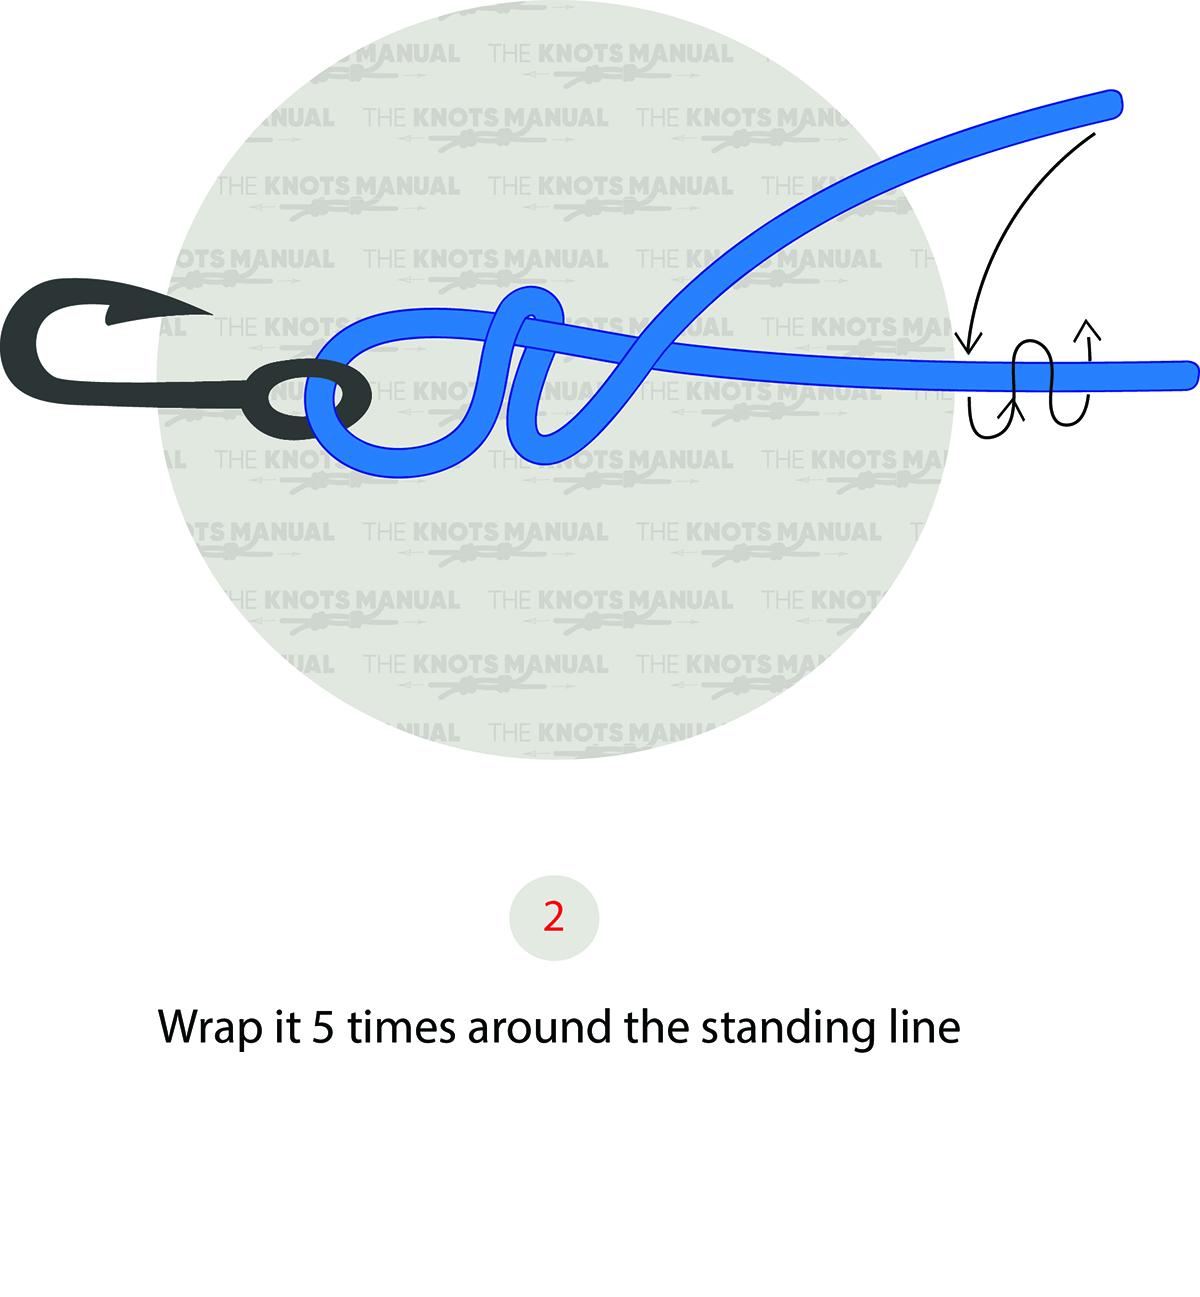
Do 5 full turns around the standing end.
Step 3:
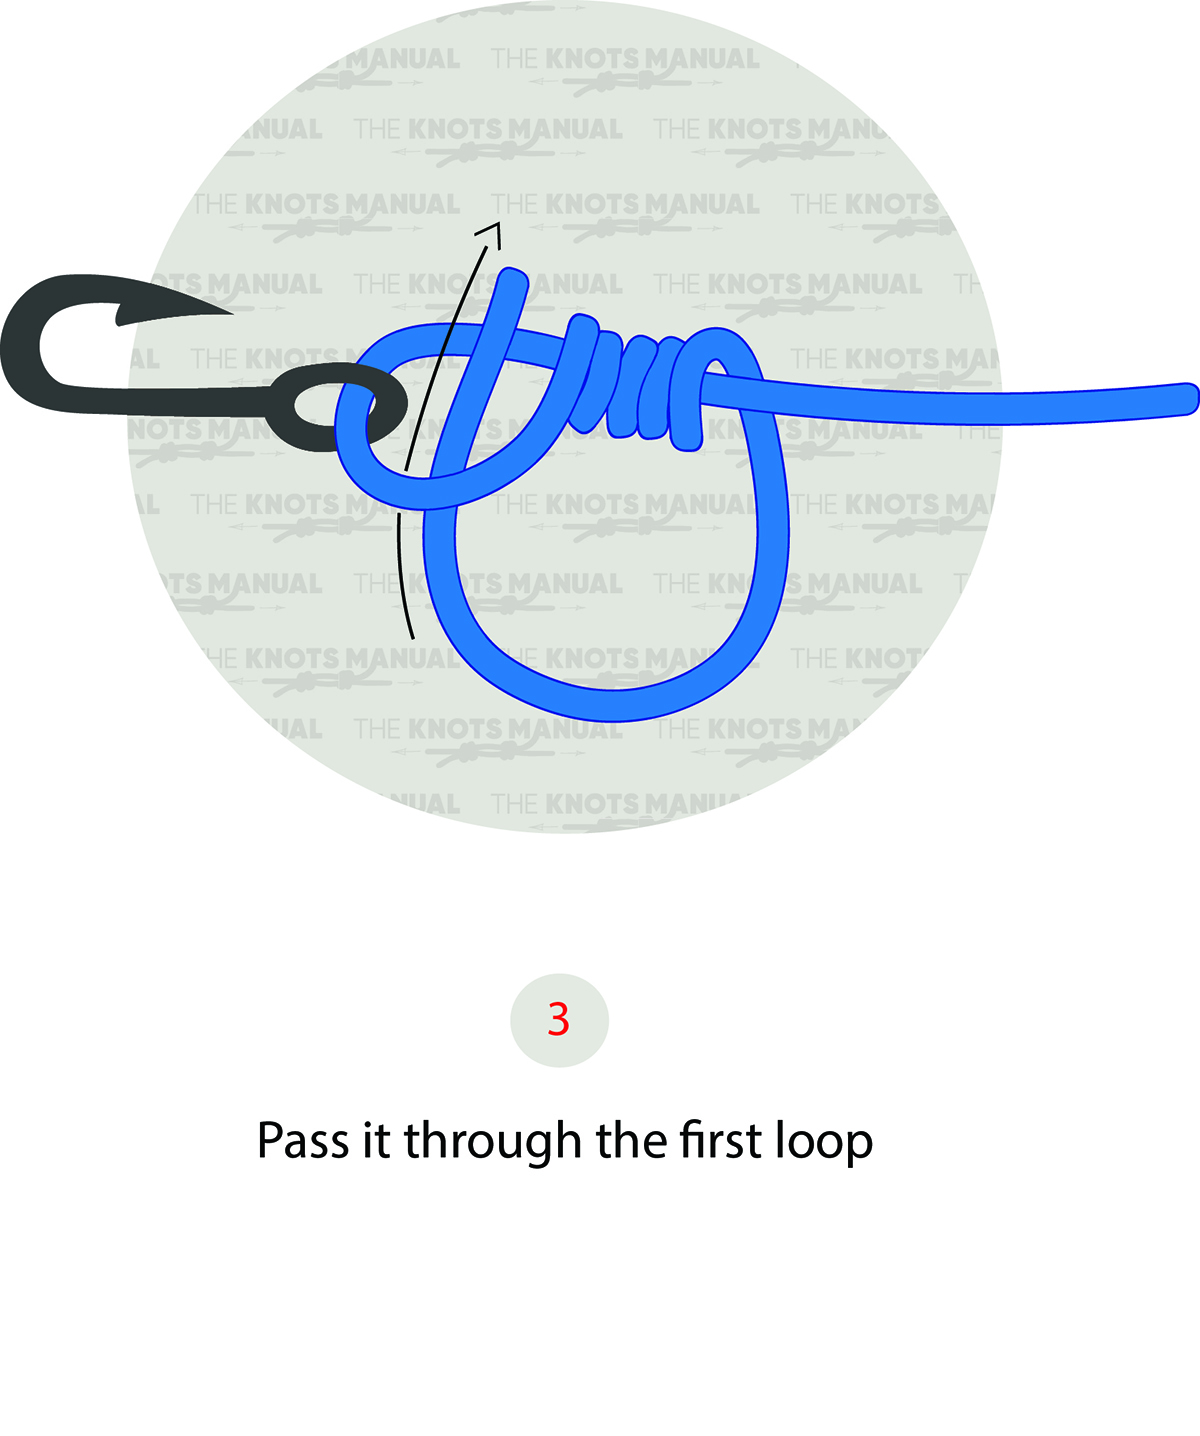
After the fifth turn, pass the end through the loop near the eye of the hook.
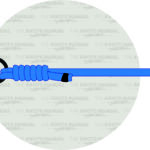
Step 4:
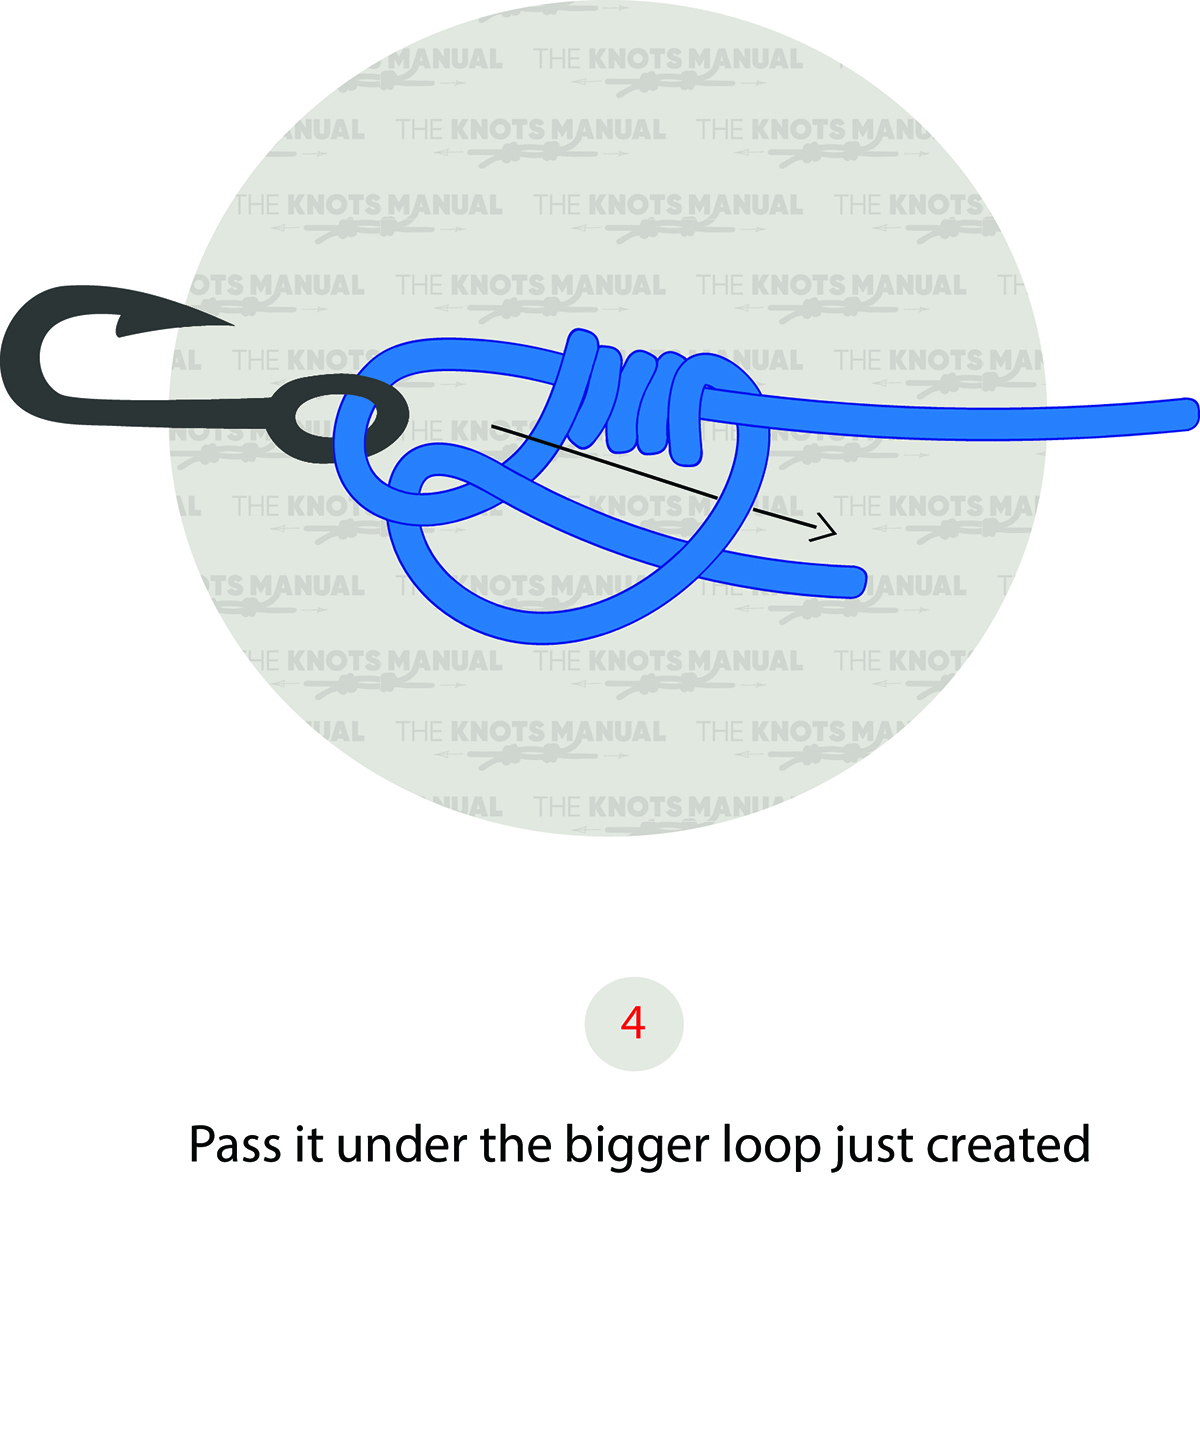
Finally, pass the end under itself.
Step 5:
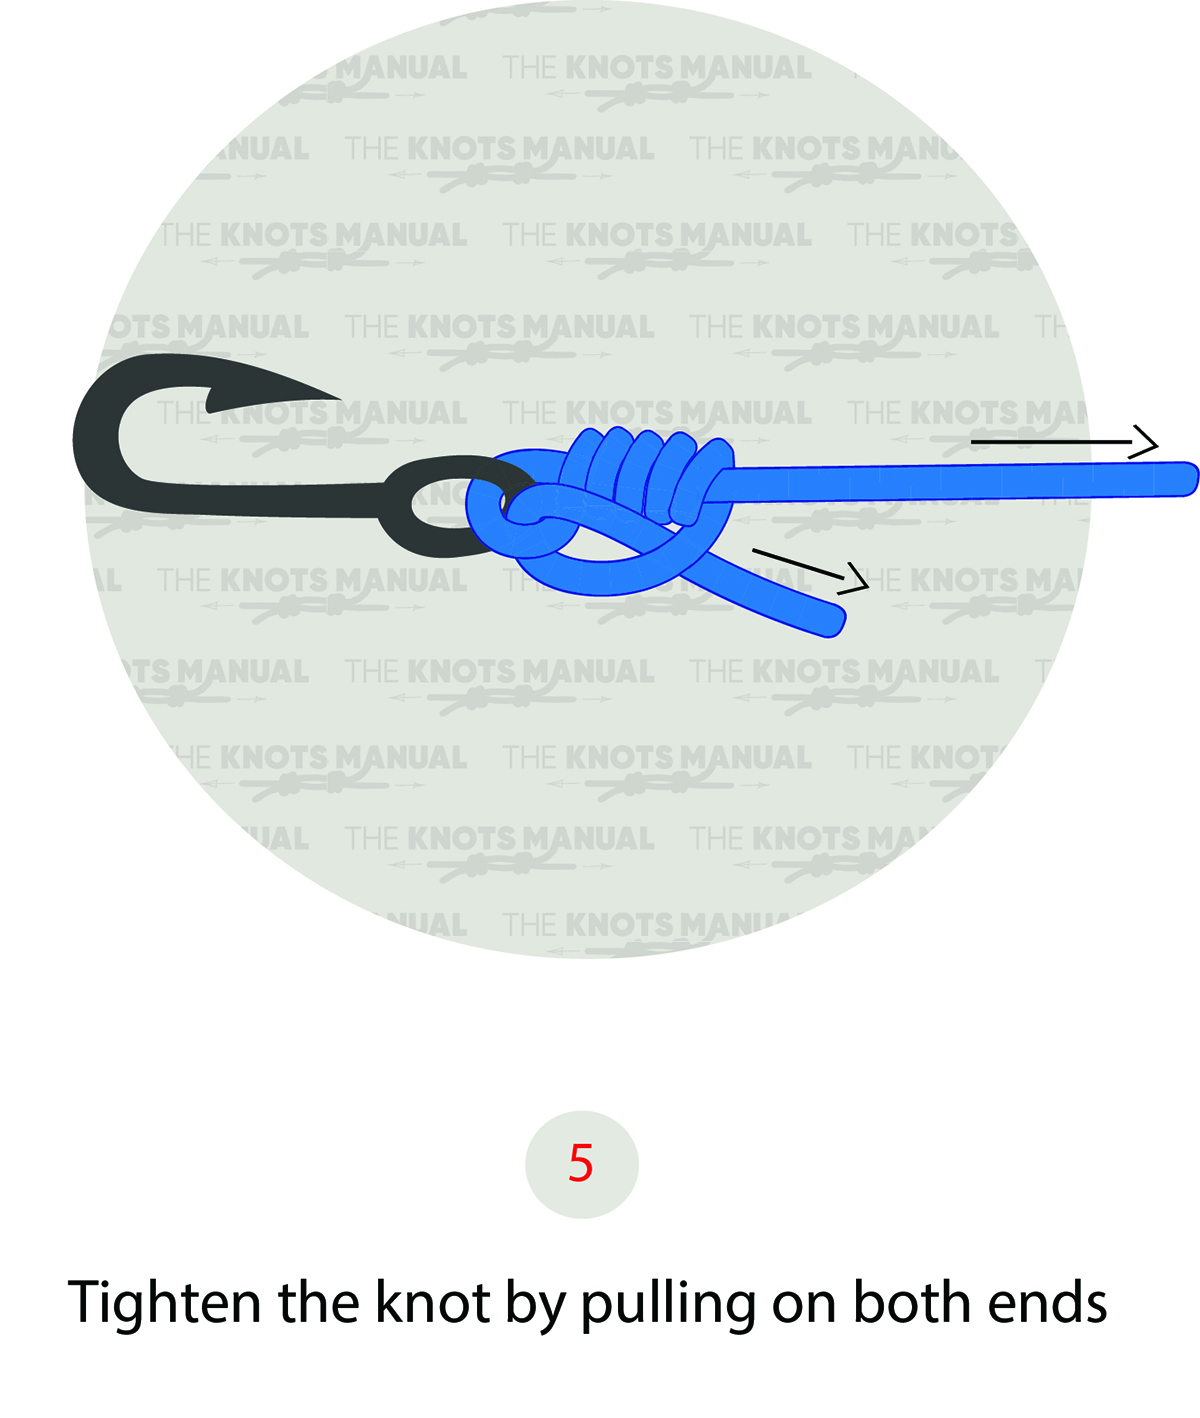
Lubricate with saliva or water and tighten the knot.