The San Diago Jam Knot offers a quick and reliable way of connecting a fishing line to a hook, lure, or swivel. It’s also sometimes referred to as the Heiliger Knot or the Reverse Clinch Knot.
Quick Guide: Tying the San Diego Jam Knot
To tie the San Diago Jam Knot, pass the tag end through the eye of the hook and then back parallel to the standing line. Make the tag end 10-15 inches (25-38 cm) long, so that you have enough length to work with.
Wrap the tag end 3-7 times around both lines. Place your finger in the loop made after making the first turn to keep it in place. Do 3 turns for 50 lbs lines or thicker, and 7 turns for thinner 10 lbs lines. On the last turn, pass the tag end between both lines. Finally, pass the tag end through the first loop where you were holding your finger.
To tighten it, lubricate the knot with saliva or water. Then pull the tag end while holding the hook with your other hand. After that, pull the standing end. Cut the tag end short.
Pros and Cons of the San Diego Knot
The San Diago Jam Knot is a bit difficult to tie if you’re doing it for the first time. But if you put your index finger in the loop of the first turn, then it’s quite easy to tie. With practice, it becomes very easy and quick to tie.
Another benefit of the San Diago Jam Knot is that it holds 100% of the line-breaking strength. It’s stronger than a lot of other fishing knots that are used for similar purposes.
It also works with all types of fishing lines, like monofilament, fluorocarbon, and braided. It works especially well with very thick fishing lines because it doesn’t involve any sharp turns.
Another advantage is that the tag end exits in the opposite direction from the hook. This makes it much less likely to catch against grass and seaweed.
Common Uses for the San Diego Knot
The San Diago Jam Knot is used to attach fishing lines or leaders to hooks, lures, swivels, rings, and snaps. You can use it universally anytime because it works with all types of lines and is reliable in all situations.
That said, it’s most commonly used for very heavy lines and big fish, for example, with 60-100 lbs lines when fishing tuna. That’s because other knots, like the Palomar or the Trilene Knot, are easier to tie and offer similar reliability, so they’re used for smaller fish.
Knots Like the San Diego Knot
Palomar Knot: A very strong fishing knot that works with all types of fishing lines. It’s also easier to tie than the San Diago Jam Knot. Its only downside is that it won’t work with hooks that have small eyes because it requires you to fold the line in half.
Trilene Knot: A very reliable knot for monofilament and fluorocarbon fishing lines. It’s easier to tie than the San Diago Jam Knot, offers similar durability, and has a smaller profile.
Orvis Knot: A simple and reliable knot used to attach a fishing line to a hook or lure. It was developed and popularized by the popular Orvis company. It also works with all types of fishing lines but isn’t as strong as the San Diago Jam Knot.
Improved Clinch Knot: A very popular fishing knot that’s used with monofilament and fluorocarbon fishing lines. It’s very easy to tie but isn’t as reliable as the San Diago Jam Knot.
Uni Knot: A simple and commonly used fishing knot. It isn’t as durable as the San Diago Jam Knot, but it’s much more versatile. That’s because it works with all types of lines in all situations, and you can even use it to connect two fishing lines.
Snell Knot: This fishing knot attaches directly to the straight section of the hook. It was developed to be used with eye-less hooks, but it’s still widely used today because of how simple and easy to tie it is.
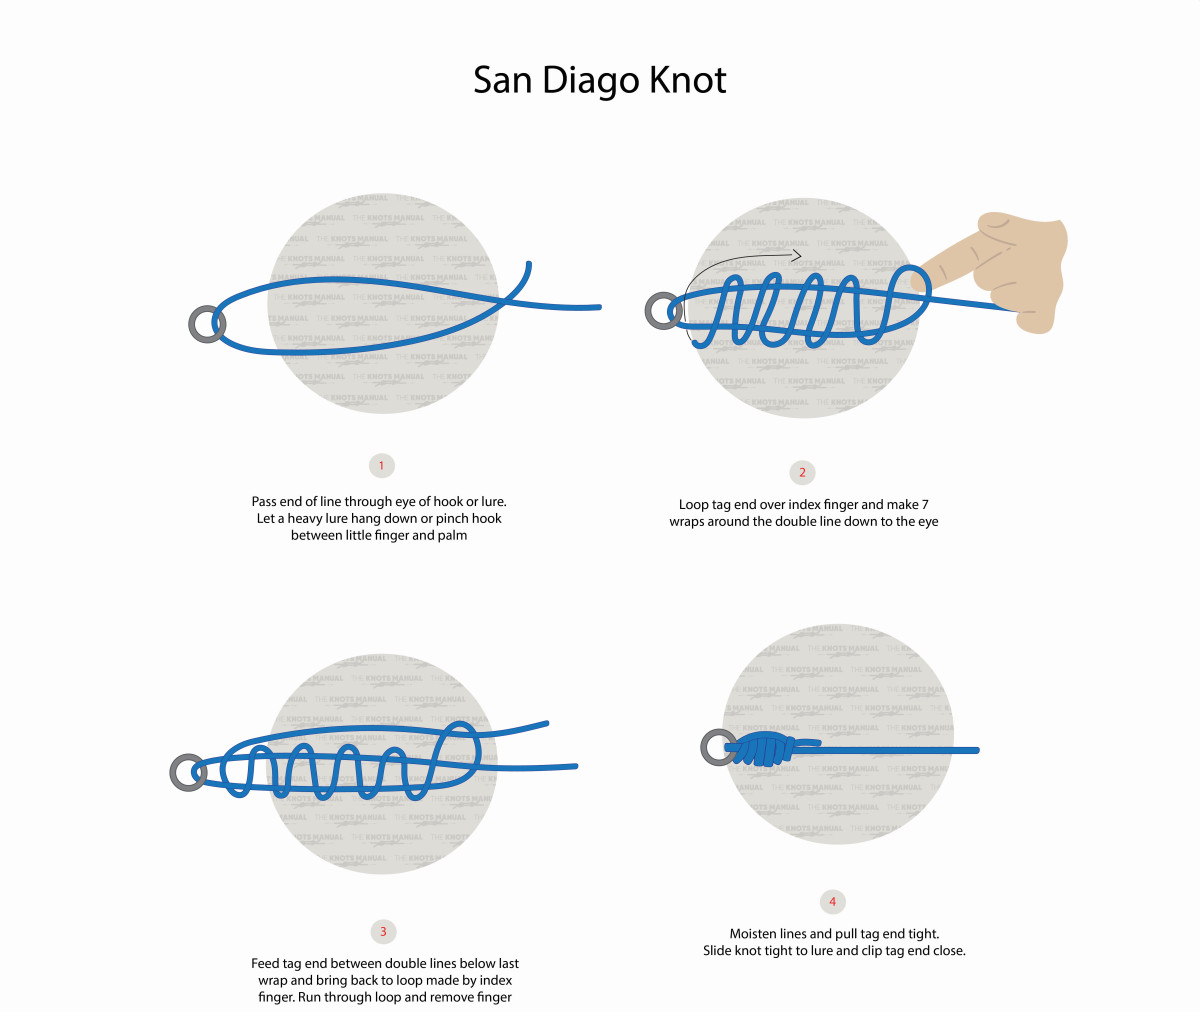
Step-By-Step Guide: How to Tie the San Diego Knot
A step-by-step guide on tying the San Diego Knot.
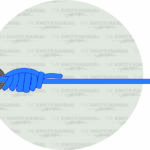
Step 1:
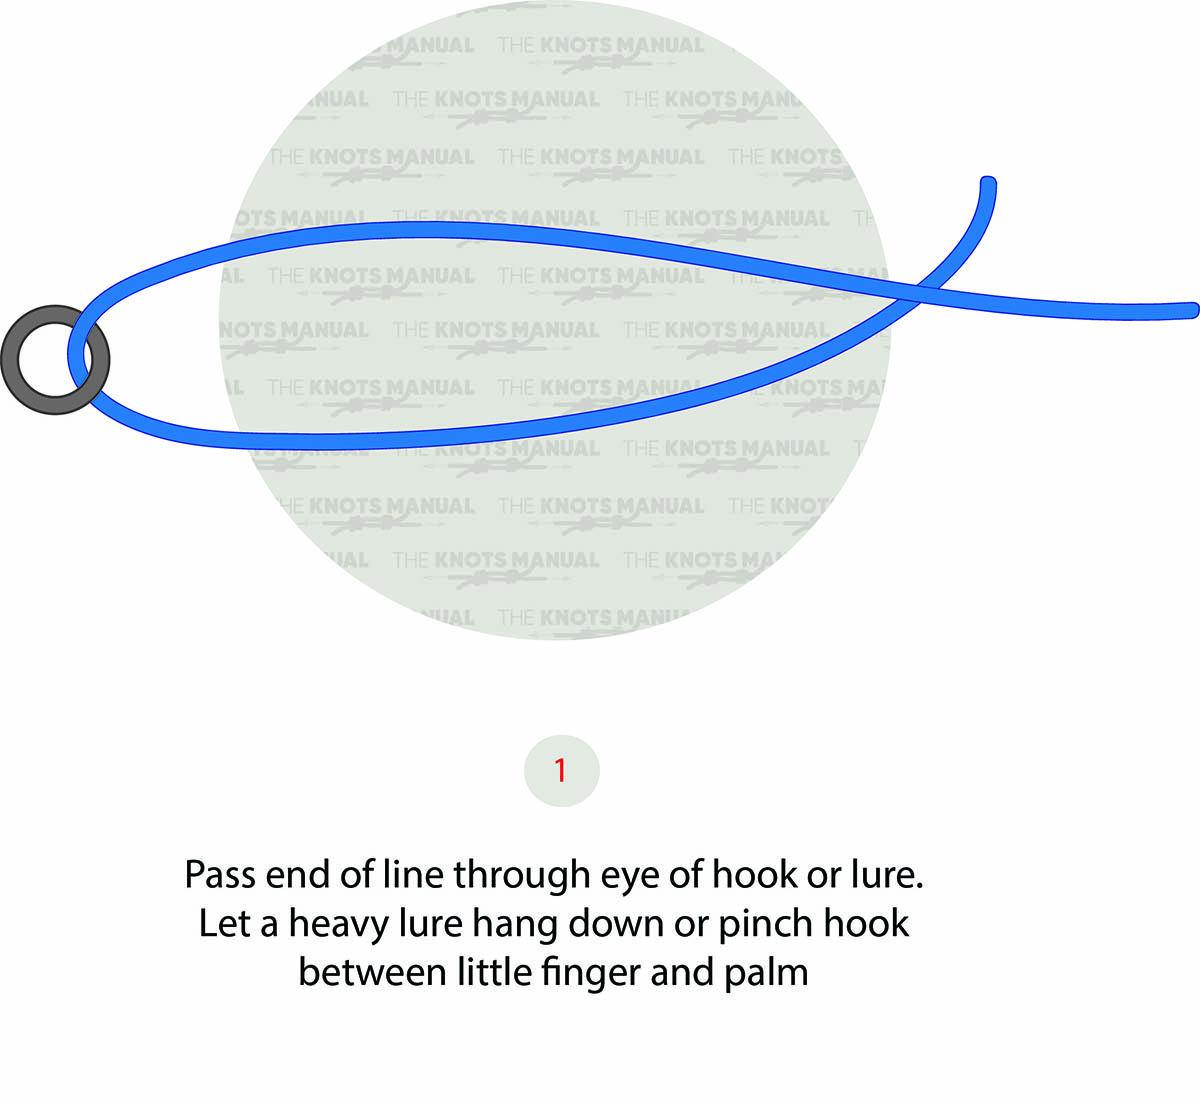
Pass the tag end through the eye of the hook and then place it parallel to the standing end, as illustrated above.
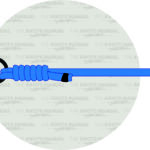
Step 2:
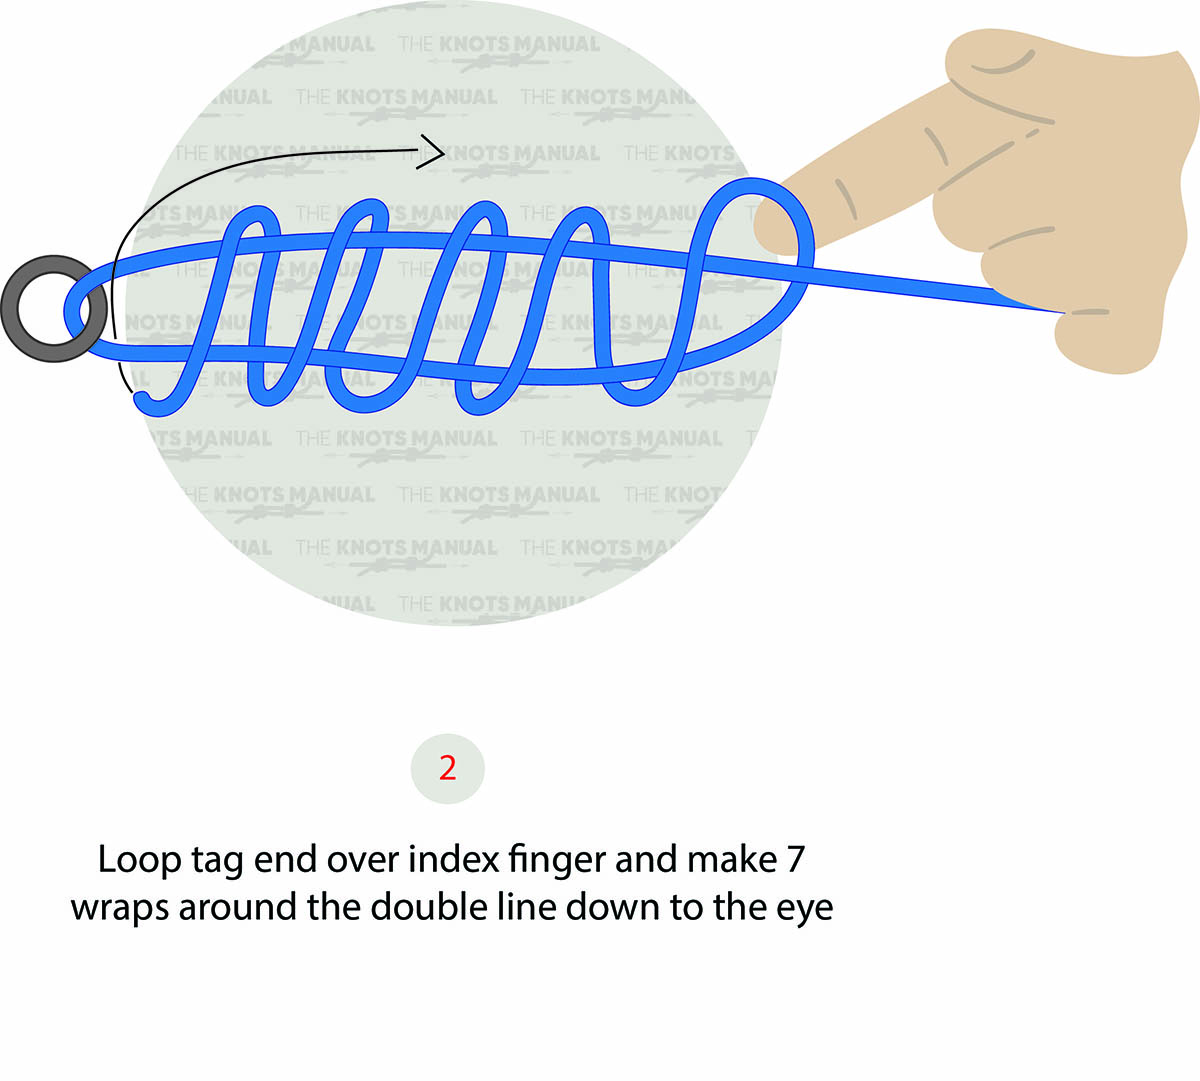
Do 7 turns around both lines. After making the first turn, put your index finger in there to keep it in place. On the final turn, pass the tag end between both lines.
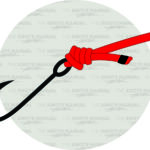
Step 3:

Pass the tag end through the loop made in the first turn.
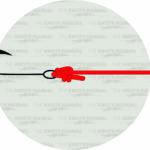
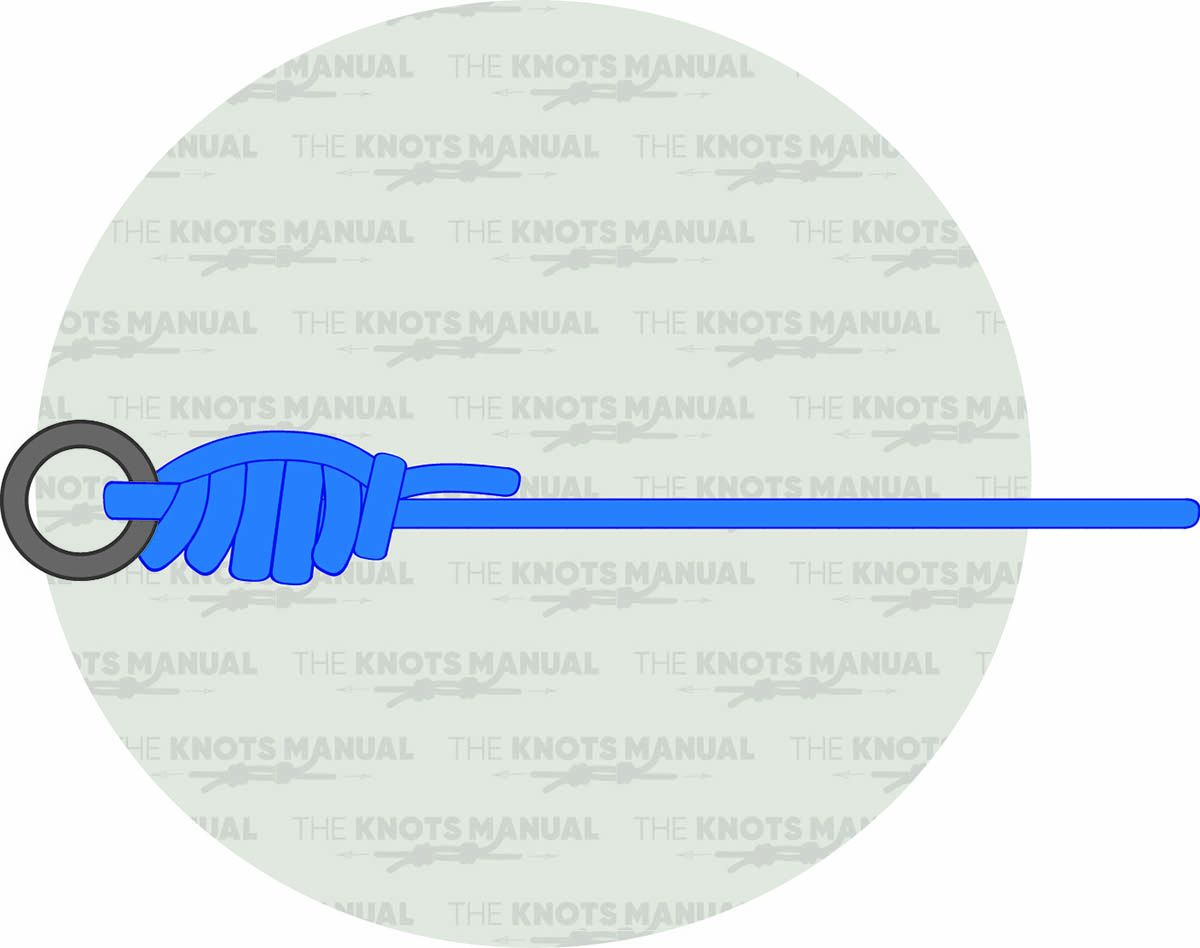
Step 4:

Lubricate the knot with saliva or water and tighten it to finish the knot.