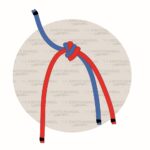
A water knot creates a fixed loop in a webbing, which you can use as an anchor or a sling. You can also use it for connecting two different ropes.
It has other names as well, such as the Ring Bend, the Tape Knot, the Grass Knot, or the Overhand Follow Through Knot.
Quick Guide: How to Tie a Water Knot
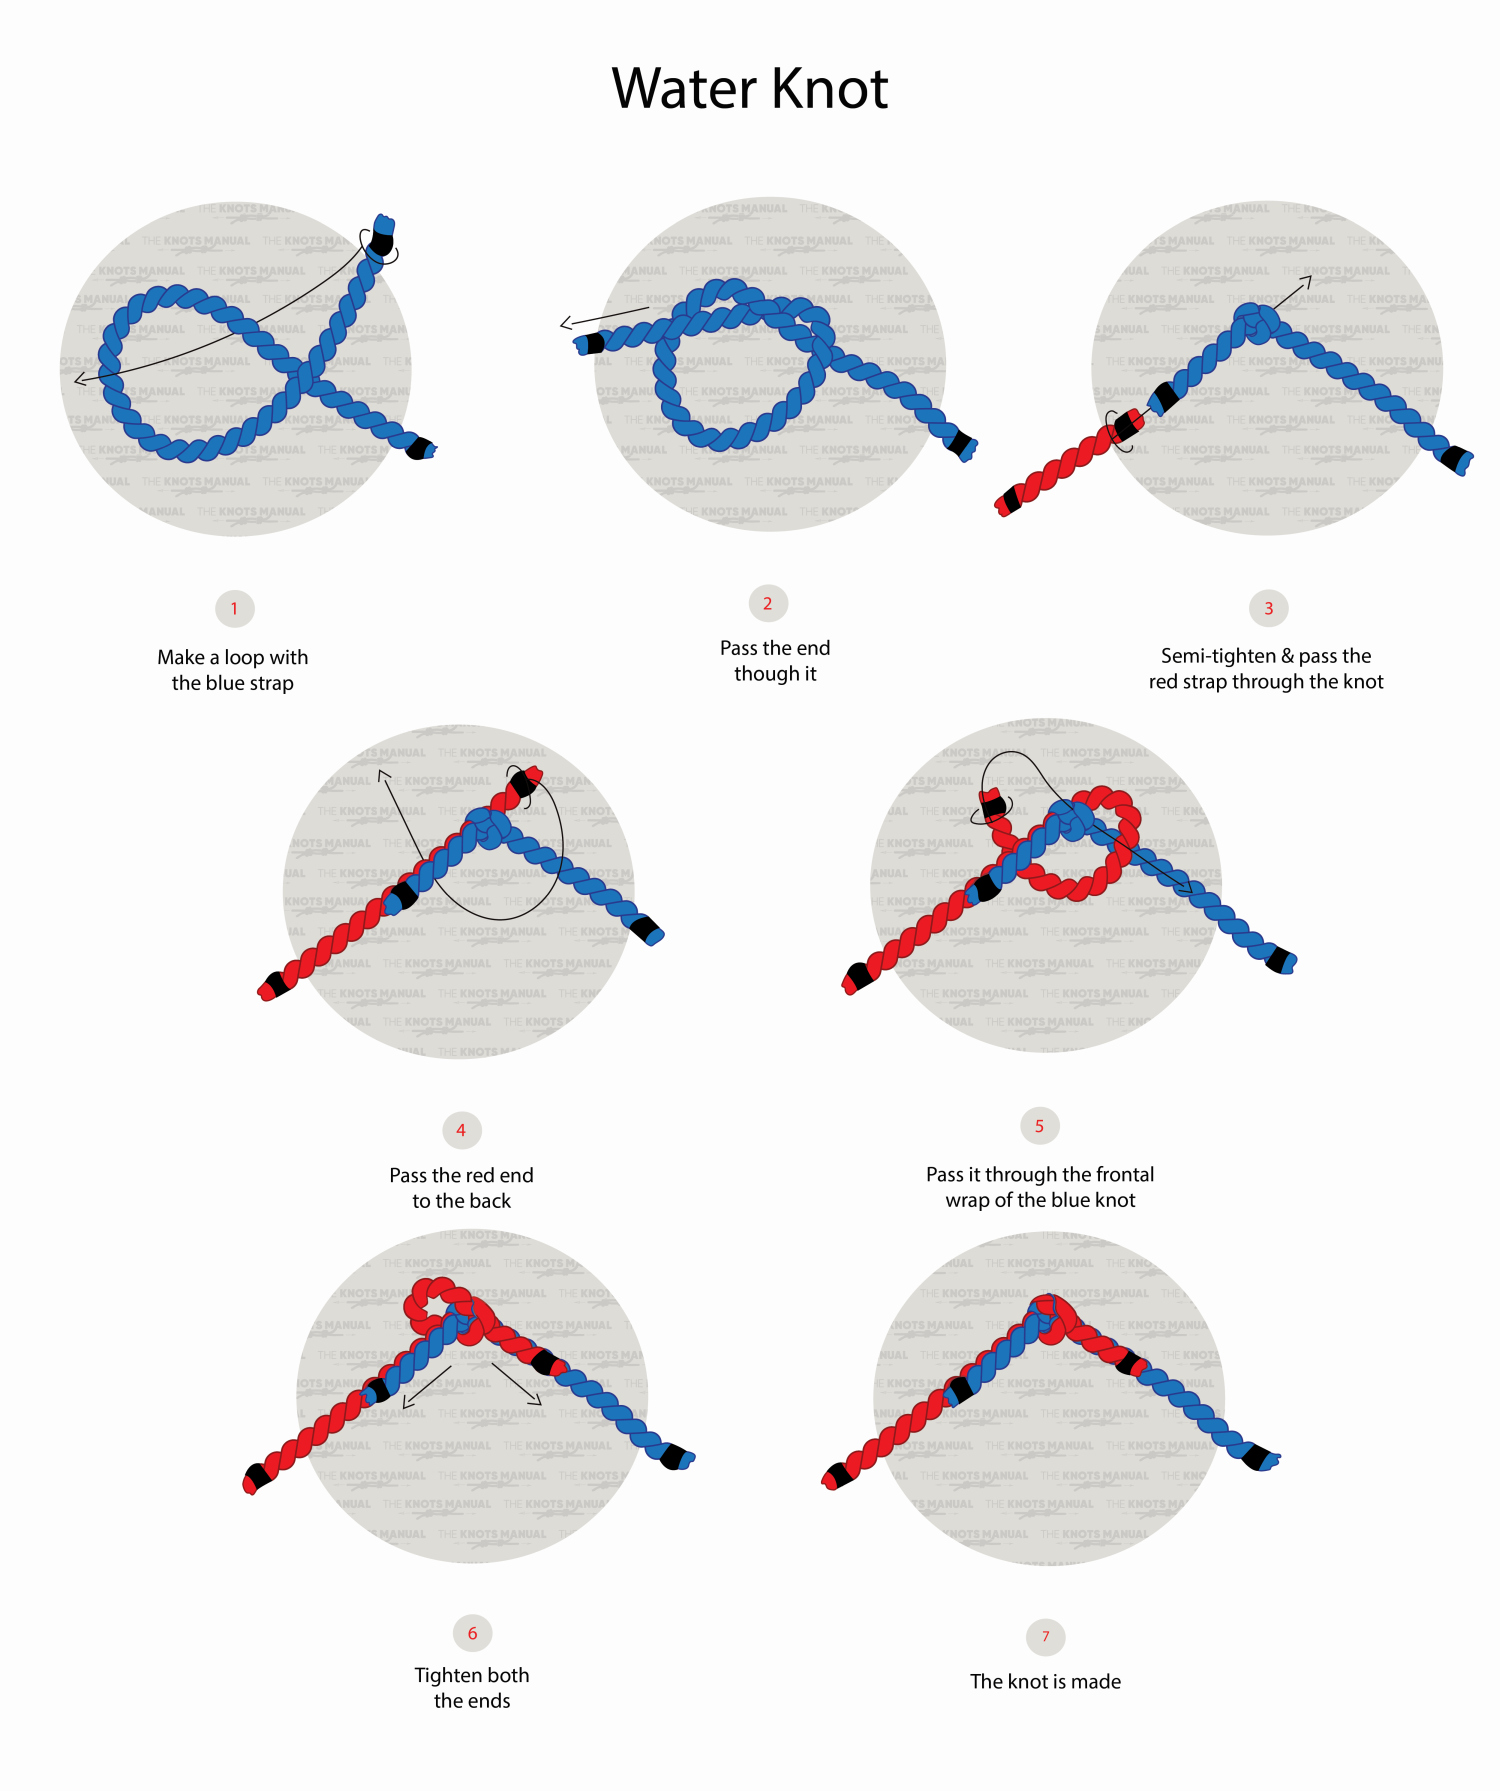
To tie a Water Knot, you need to tie a simple Overhand Knot with the first (blue) webbing. You can do this by creating a loop in the webbing and then passing the end through it. Then retrace it in the other direction with the other (red) webbing to finish the knot.
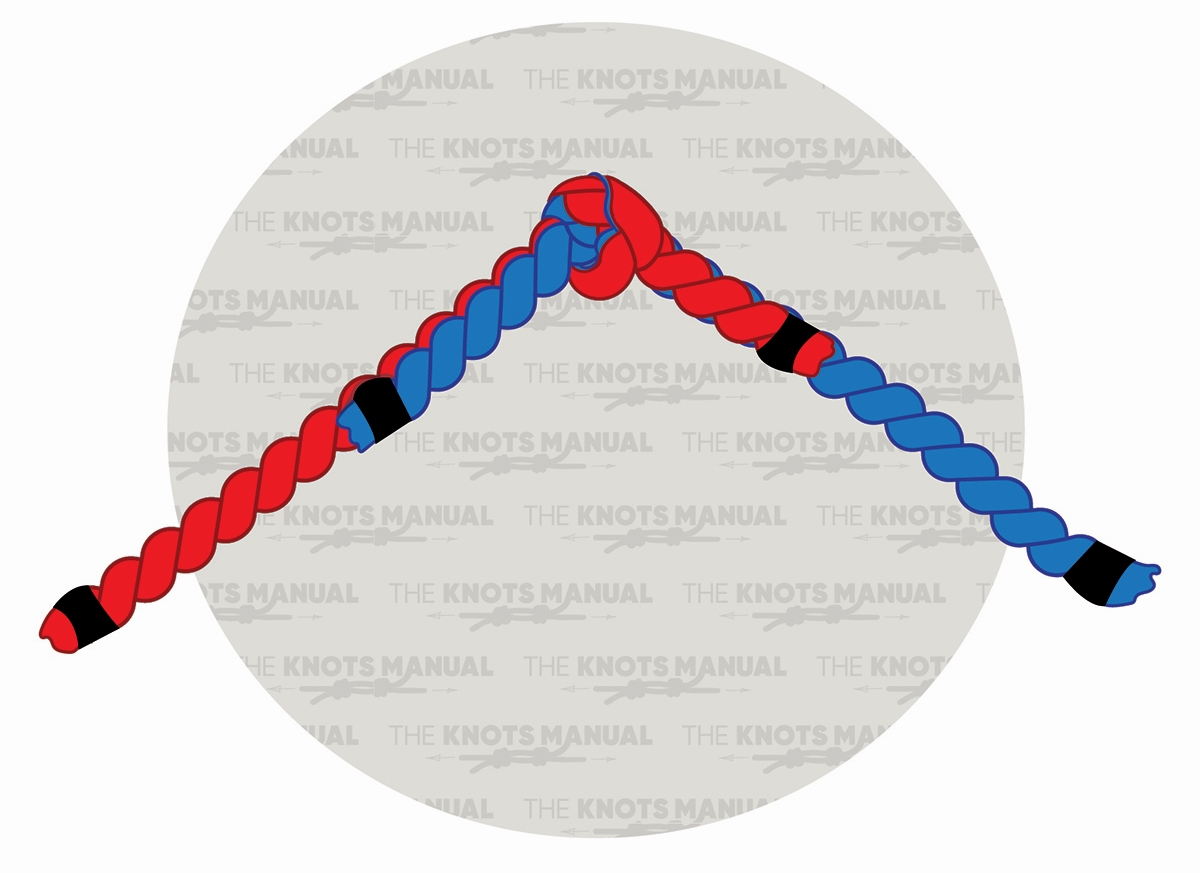
You can also use this knot with regular rope but it’s most commonly used with flat webbing. If used with webbing, make sure that there aren’t any twists in the knot and that it looks clean. Both ends should exit in opposite directions.
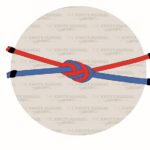
You should keep the ends somewhat long – at least 3-5 inches (8-13 cm). That’s because the first time when you load it with weight, it will slip until it sets in. There can also be some slippage when applying cyclical loads. Keeping the ends long accounts for this.
Before using the Water Knot in critical applications, visually inspect that it isn’t slipping under load. For extra protection, you can keep the ends longer and tie a double overhand stopper knot on each side.
Pros and Cons of the Water Knot
The Water Knot is very easy to tie and easy to explain to beginners. It’s also a rather strong knot – if tied correctly and with proper webbing, it can be used in critical applications, like climbing.
This knot also works very well with flat ropes, which isn’t the case with a lot of other knots. You can use it with strips of leather, webbing, and other flat ropes.
One of the main downsides of the Water Knot is that it is very hard to untie once force has been applied to it. It can jam, especially when used with flat webbing.
Tests have also shown that under intermittent loads, the Water Knot tends to slip. But the slippage is minimal and the knot still holds its integrity after each slip. This can be accounted for with long enough ends.
It can also catch against other objects and shake loose. Specifically, the outermost loop of the red webbing is the most vulnerable part. That’s why you should always align it in a way where the red webbing is unlikely to catch against anything.
Common Uses for the Water Knot
The Water Knot is most commonly used with webbing that doesn’t have a hollow center. If the webbing has a hollow center, then a Beer Knot is usually used instead.
Most commonly, Water Knot is used in climbing to create a sling, which is a fixed loop that can be used as an anchor or in combination with carabiners. But it can also be used in other similar applications, like caving, rigging heavy loads, or by arborists. It’s also often used for setting up slacklines.
It also offers a simple way of connecting two ropes. The resulting bend doesn’t offer the strongest connection, but it can be used for simple applications, where the integrity of the knot isn’t too important.
Knots Like The Water Knot
Beer Knot: A Beer Knot is the more commonly used variant of the Water Knot because it’s stronger. It’s tied by making a simple overhand knot and then sliding it over the place where the two webbings are joined together. It’s most commonly used in combination with the Basket Hitch.
Flat Overhand Knot: This bend knot is most commonly used for connecting two ropes. It’s almost identical to Water Knot, except the ropes enter and exit from the same direction. In Water Knot, they exit from opposite directions.
Fisherman’s Knot: This is a more secure way of connecting two ropes. It’s tied by tieing two overhand knots in opposite directions.
Double Fisherman’s Knot: This is an even more secure knot compared to the Fisherman’s Knot. It follows the same principle, only with Double Overhand Knots.
Figure 8 Bend: The Figure 8 Bend is one of the most secure ways of connecting two ropes. You can also use it to create a fixed loop, just like with the Water Knot. It’s less likely to untie and it also isn’t very likely to catch on other objects because it has a slim profile.
Alpine Butterfly Bend: Some climbers prefer to use this knot instead of Water Knot for creating slings. That’s because it’s stronger, easier to untie, and also very easy to tie and check.
Zeppelin Bend: This is another bend knot that can be used for creating fixed loops. It has a slim profile and it’s very secure, even with cyclical loads. Its only downside is that it is harder to tie and difficult to untie once loaded.
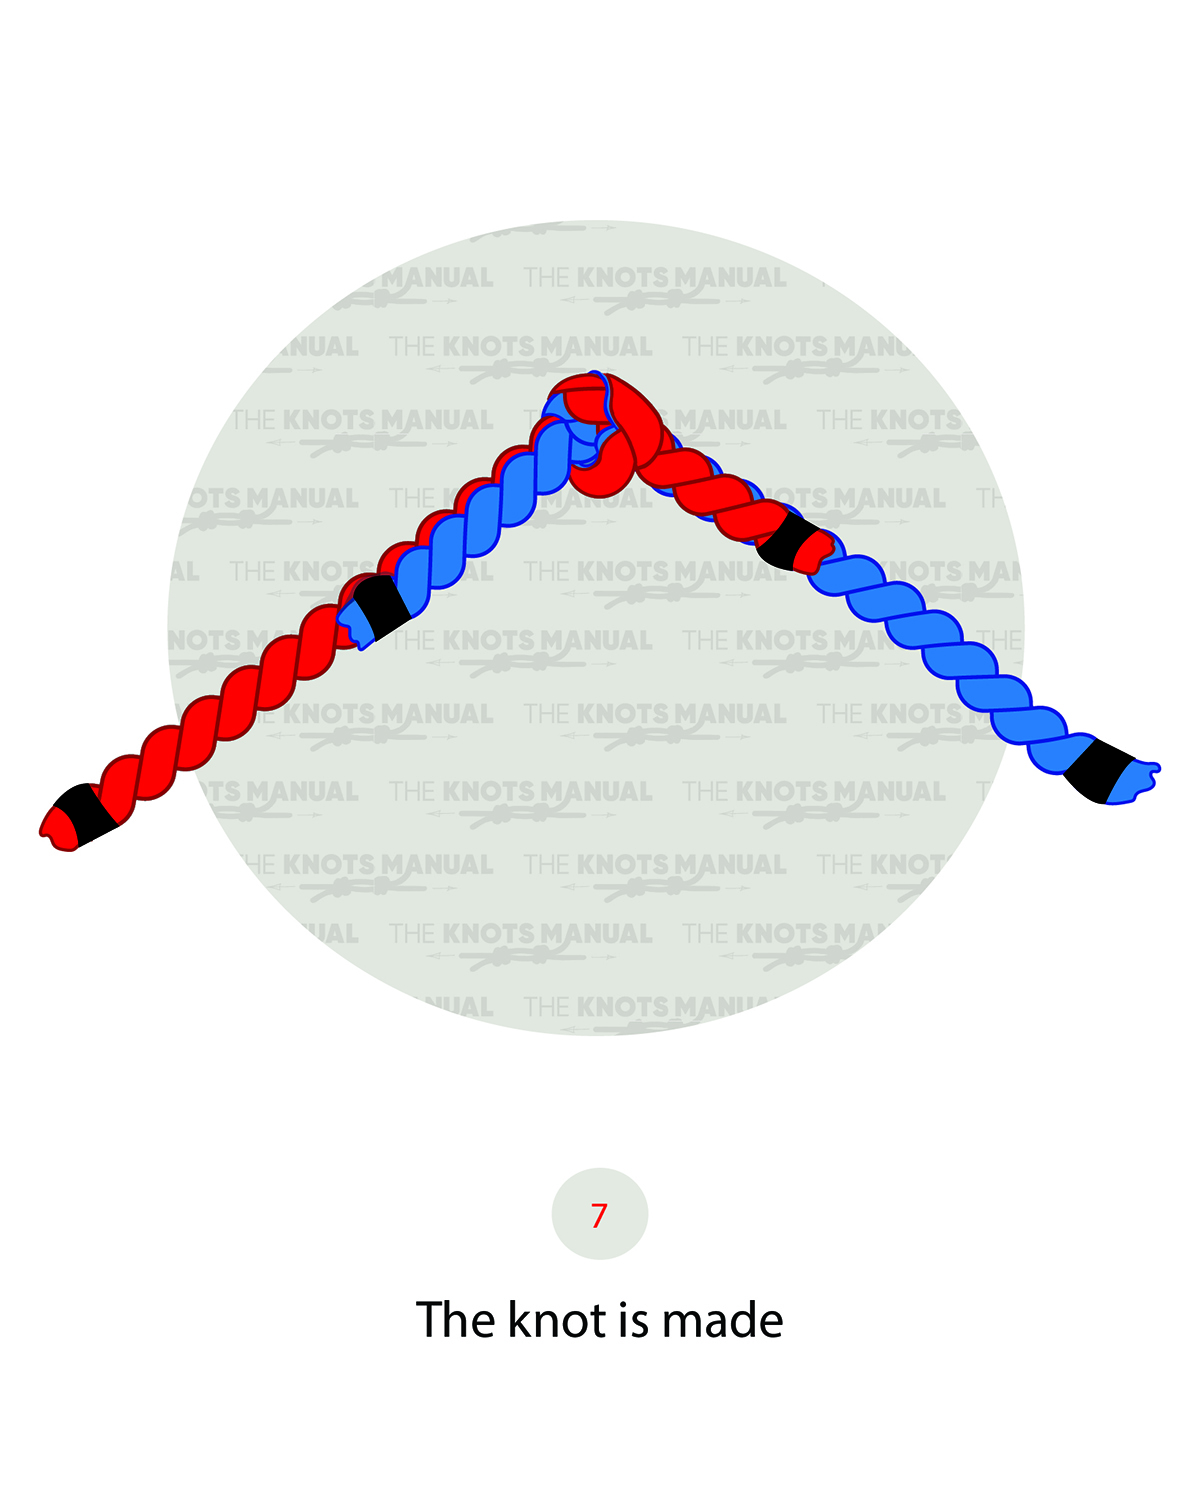
Step-By-Step Guide: How to Tie the Water Knot
A step-by-step guide on how to tie a Water Knot.
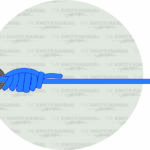
Step 1:

Make a loop with the first webbing.
Step 2:
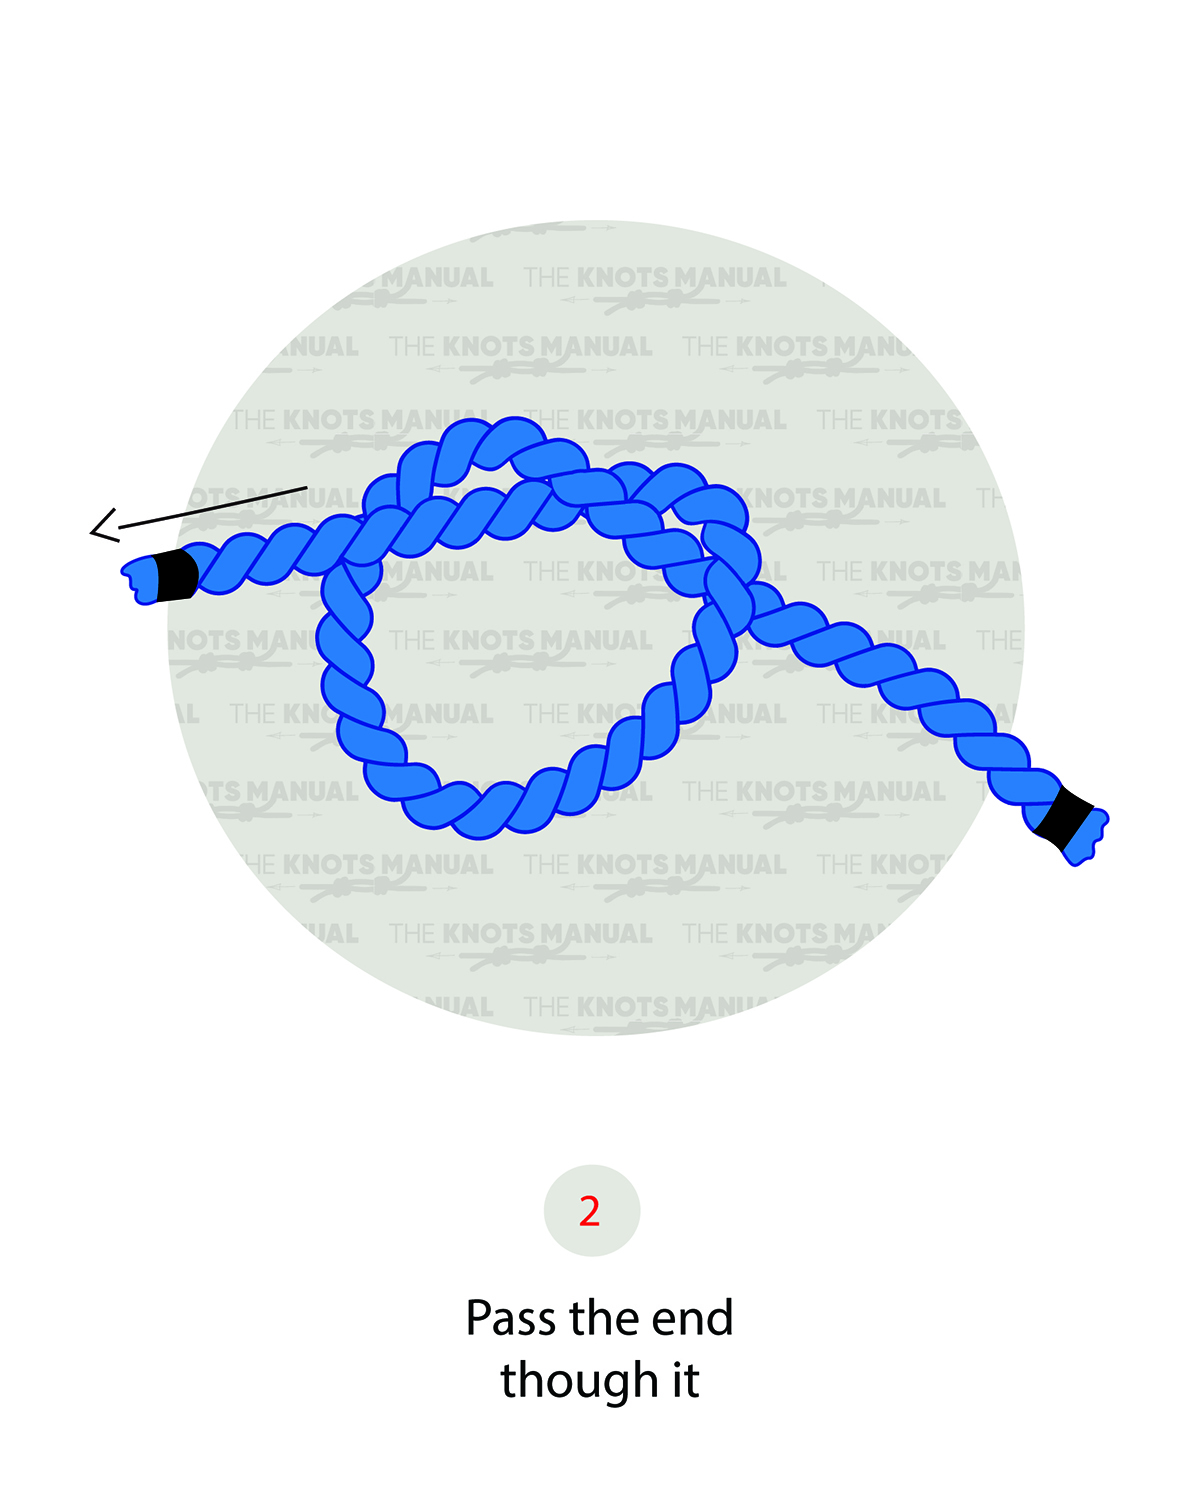
Pass the working end of the first webbing through this loop to create a simple overhand knot. Don’t tighten it fully.
Step 3:
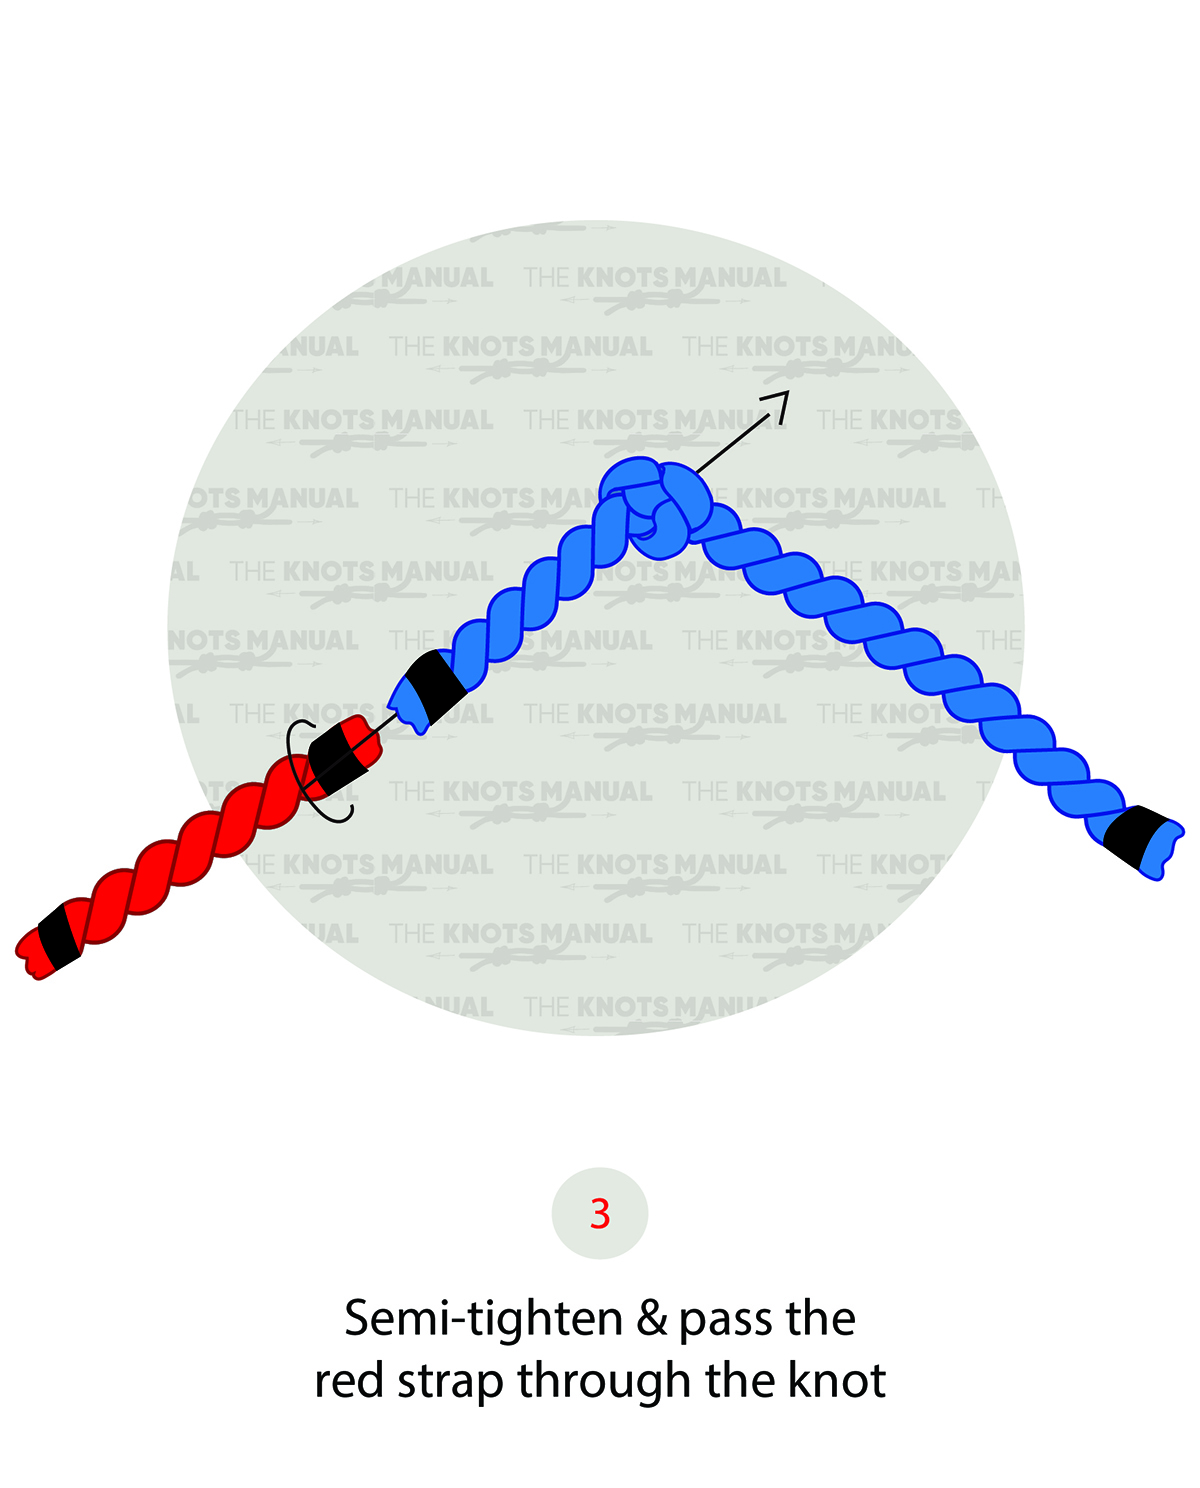
Pass the end of the second webbing through the last opening in the overhand knot that you made in step 2, only in the other direction.
Step 4:
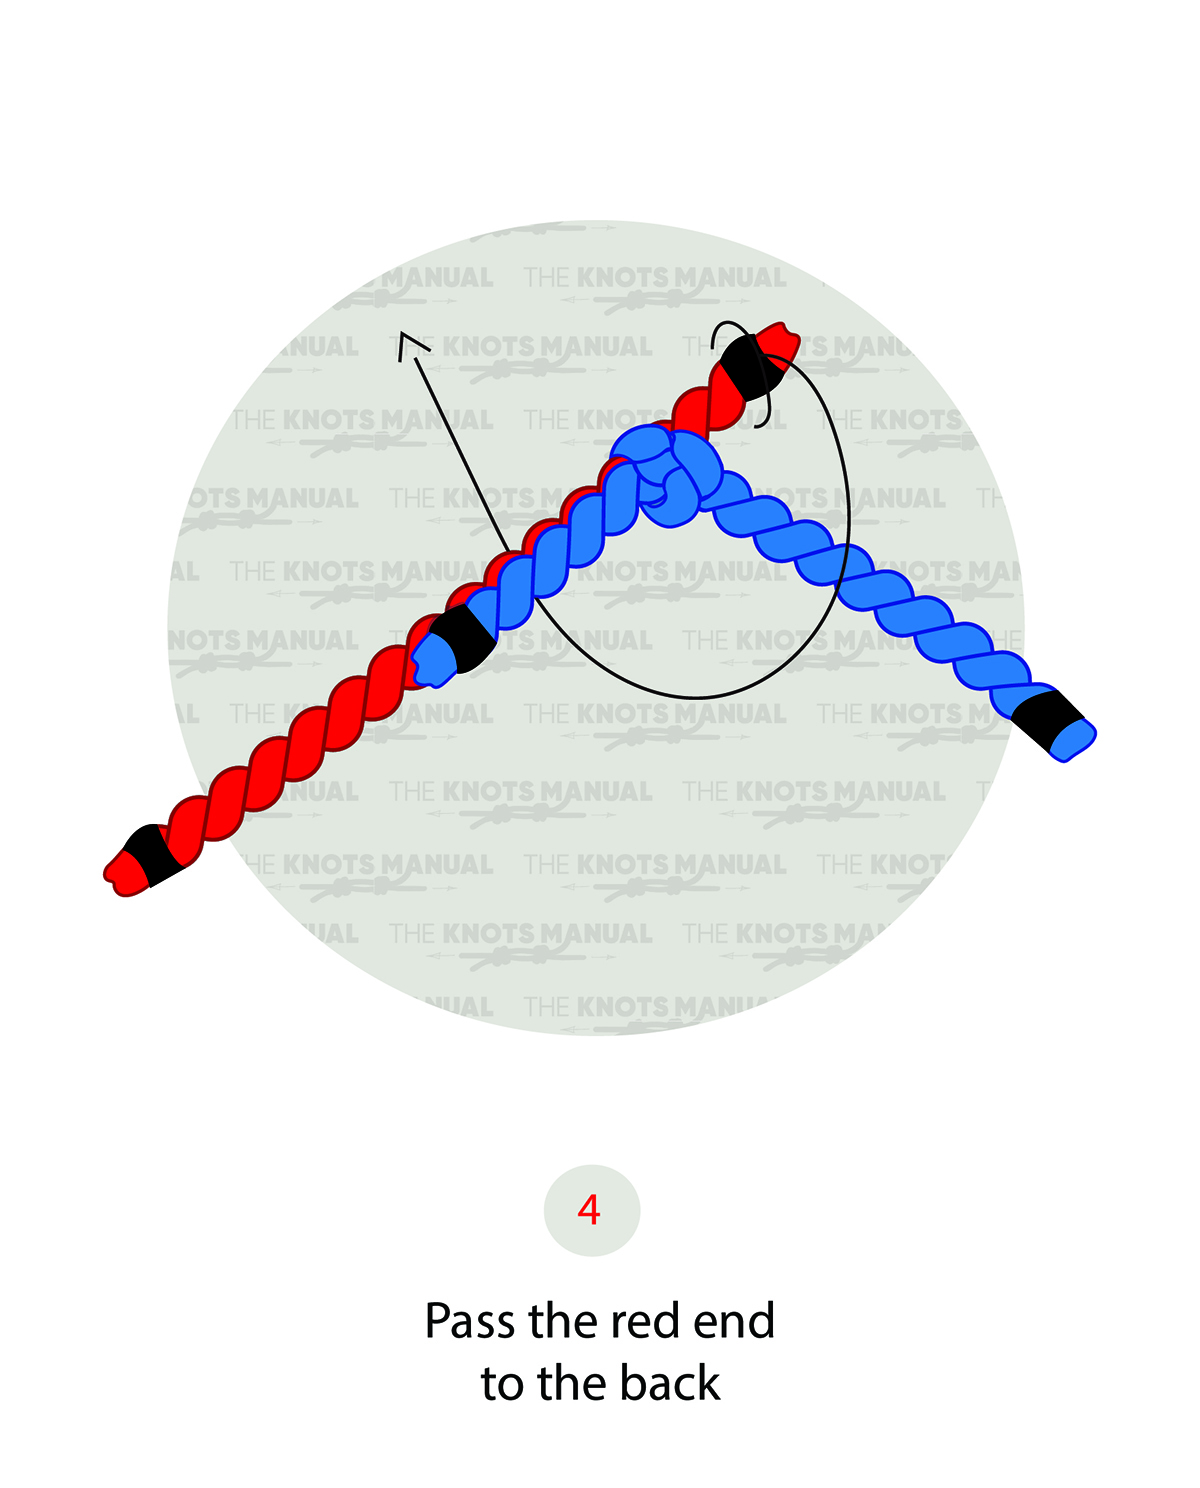
Continue passing the end around the knot.
Step 5:
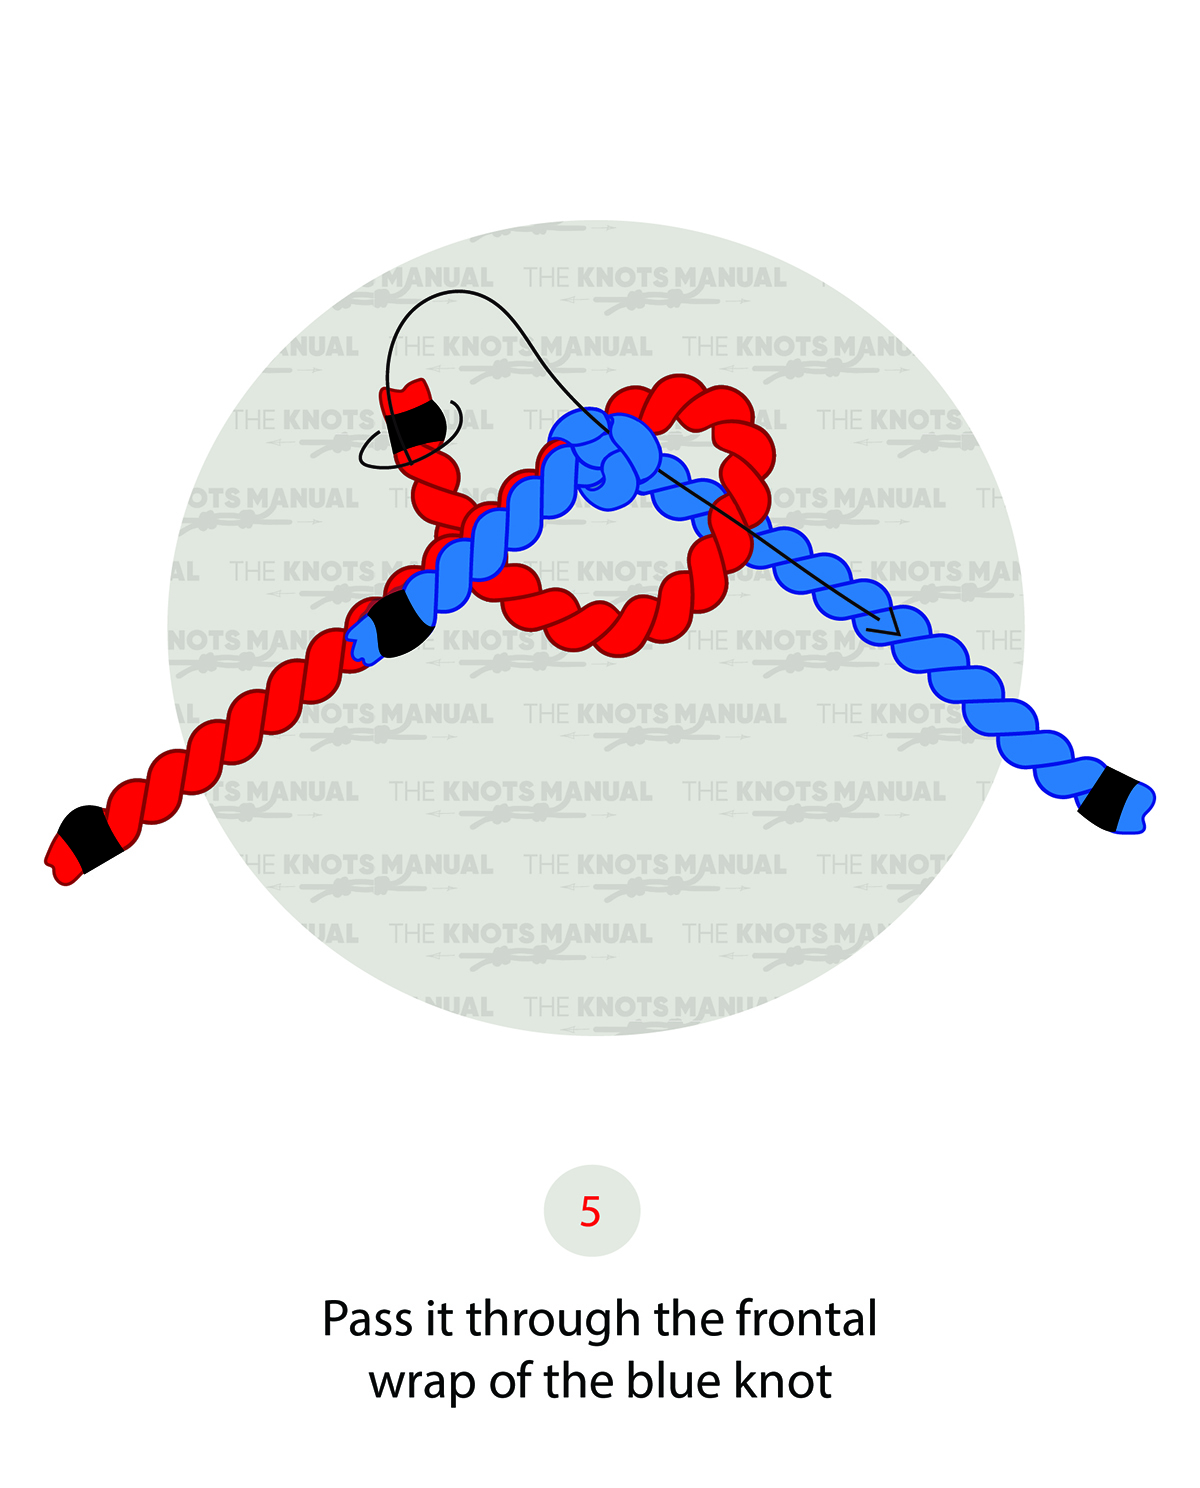
Finally, pass the end through the last opening.
Step 6:
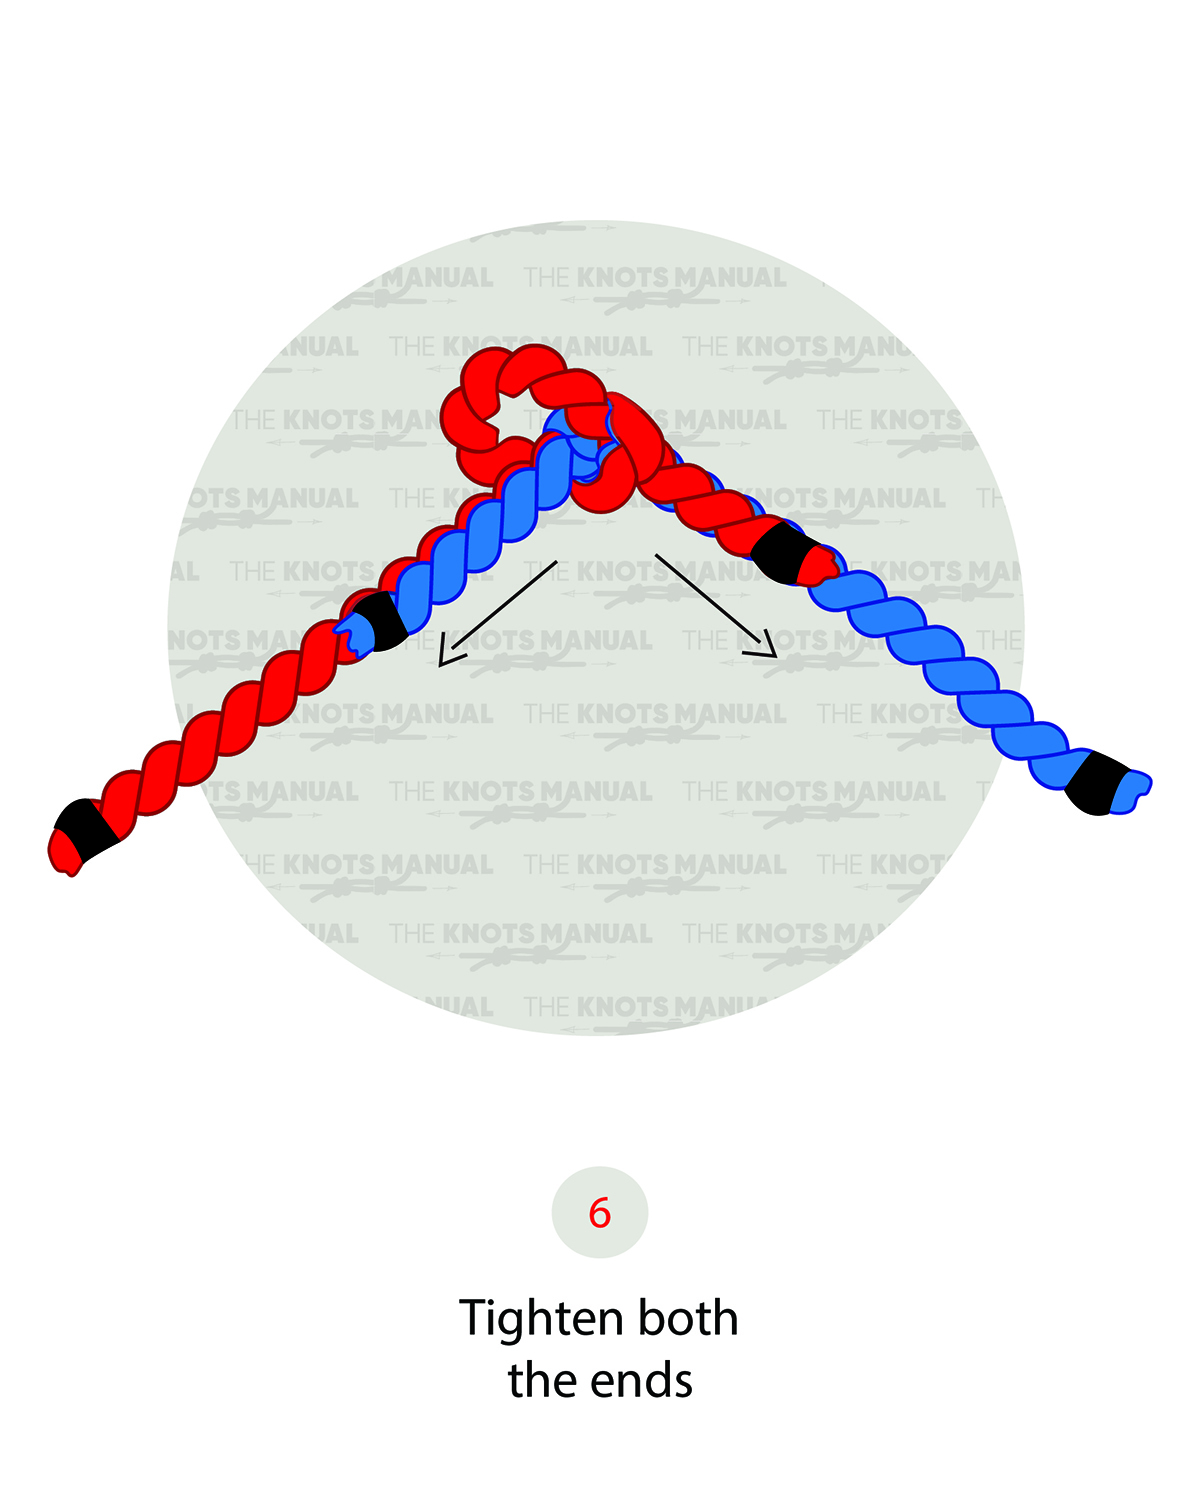
Each working end should exit in the opposite direction.
Step 7:
Finish the knot by pulling both webbings in opposite directions.
Frequently Asked Questions
How Strong Is the Water Knot?
A properly tied Water Knot keeps roughly 60-70% of the original strength of the webbing. A more secure and more commonly used variant is the Beer Knot, which holds about 70-80% of the original strength. This is because the webbing is intertwined and the Beer Knot is placed on top of it.
Is the Water Knot Safe to Use for Climbing?
If tied correctly, Water Knot can be used for climbing for creating slings and anchors. You have to keep the ends after the knot rather long, at least 3-5 inches, to account for slipping and cyclical loads. You also need to check that the ends exit from opposite directions. And finally, the webbing inside the knot should look clean and there shouldn’t be any twists in it. But before using it for climbing, always test the knot first to check that it doesn’t slip and is safe to use.