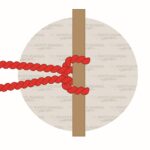
A basket Hitch offers an easy way to create a reliable anchor point around a horizontal object (for example, a tree branch). It consists of one closed loop that’s placed on top of the support.
In construction and logistics, the term “basket hitch” refers to something similar, but different. It refers to slings and chains for lifting up objects using a crane, where the sling wraps around the object from the bottom.
Quick Guide: How to Tie the Basket Hitch
To tie a basket hitch, you’ll need a webbing sling (a closed loop). You can make it using tubular webbing and tieing it with a beer knot. But you can also buy premade webbing slings, which will already be rated for certain loads.
Place the webbing sling on top of your support, making sure that the beer knot is right on top of the support. The beer knot weakens the strength of the strap by about 20%. Keeping it right on top of the support reduces the loss of strength.
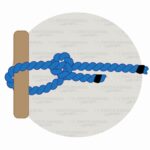
After that, tie into both loops formed at the bottom of the support.
If you’re using a long webbing sling, you can wrap it twice around the support for a more secure anchor. In this case, the beer knot should be placed at the bottom of the support.
You can also use a rope instead of a webbing sling but testing has shown that flat webbing slings perform best in this application.

Benefits and Downsides of the Basket Hitch
The Basket Hitch provides a very secure anchor point because it divides the force of the load into four straps. It won’t untie unless the beer knot breaks or the strap fails. It’s also easy to form and easy to visually confirm.
Its main downside is that it can slip along the support if it isn’t perfectly aligned. In this case, it’s better to wrap the webbing sling two or three times around the branch. This provides a better grip and reduces the chances of slipping.
Where the Basket Hitch Is Used
The Basket Hitch is most commonly used by arborists and in industrial climbing to create a safe anchor point around tree branches and other horizontal supports.
But this knot can also be used the other way around for lifting loads. You can place the beer knot on the bottom of the object that needs to be lifted up, and attach the two upper loops to the hook that’s meant for lifting it up. But it only works with specific objects because the webbing sling can slip off.
Calculating the Maximum Strength of the Basket Hitch
If you’re using pre-made webbing slings, they come in different colors which indicate their maximum loads. For example, purple can lift up to 1 tonne and orange up to 10 tonnes. Look at the specified Work Load Limit indicated on the sling.
But if you’ve created a DIY webbing sling, you need to calculate the maximum load yourself. For example, if the maximum breaking load of a webbing strap is 2000 kg, then you need to multiply it by 4 (because the weight is divided into 4 straps). Then you need to multiply the result by 0.8 (because the beer knot reduces its strength), which results in 6400 kg (2000 x 4 x 0.8). For critical loads, for example, climbing, the safety ratio should be 1:15, so the maximum that you could carry would be 426 kg (6400 / 15). For non-critical ones, you can also choose a ratio of 1:7, which would amount to 914 kg (6400 / 7).
Knots Like the Basket Hitch
Figure 8 Follow Through Knot: This knot creates a very secure loop around an object that doesn’t tighten when pulled. Its main disadvantage is that it’s much harder to tie than using a Basket Hitch.
Two-Half Hitch Knot: This knot creates a secure way to attach to an object. It’s very easy to tie but it can’t be used for lifting heavy loads.
Clove Hitch Knot: An easy knot that allows you to tie a rope around support. It’s a strong knot, but not as secure as the Basket Hitch.
Buntline Hitch Knot: This is a very reliable and strong knot that ties around an object because it tightens under load. It’s main downside is that it is very difficult to untie.
Rolling (Magnus) Hitch Knot: This knot forms a strong and secure loop around an object. It tightens when pulled away from the object, and is easy to untie. It shouldn’t be used for critical loads, like the Basket Hitch, but it’s perfect for hauling less-important items.
Step-By-Step Guide: Tieing the Basket Hitch Knot

How to form the Basket Hitch in a few easy steps.
Step 1:

Get a secure webbing sling that’s tied with a tightened beer knot.
Step 2:

Place it on top of the object with the beer knot centered on top.
Step 3:

Two loops should form at the bottom.
Step 4:

Tie into these two loops using a Carabiner or another type of knot (for example, the Figure 8 Follow Through).
Frequently Asked Questions
Are There Any Alternatives to Webbing Slings?
Although nowadays, webbing slings with beer knots have become the industry standard, in older days people used to create similar fixed loops using a water knot. In this case, the ends after the knot need to be left a bit longer because over time the water knot can slip and the loop can become wider. It’s not as strong as modern webbing slings, but it’s much easier to recreate in home conditions and is strong enough to secure moderate loads.
Can You Use a Basket Hitch for Climbing?
Basket Hitches are strong enough to use for climbing applications. For example, you can tie in a rope around a tree using a Basket Hitch (although something more secure is advised like a Figure 8 Follow Through). Or you can extend old nuts and pitons using a basket hitch and a carabiner.