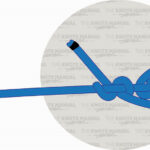
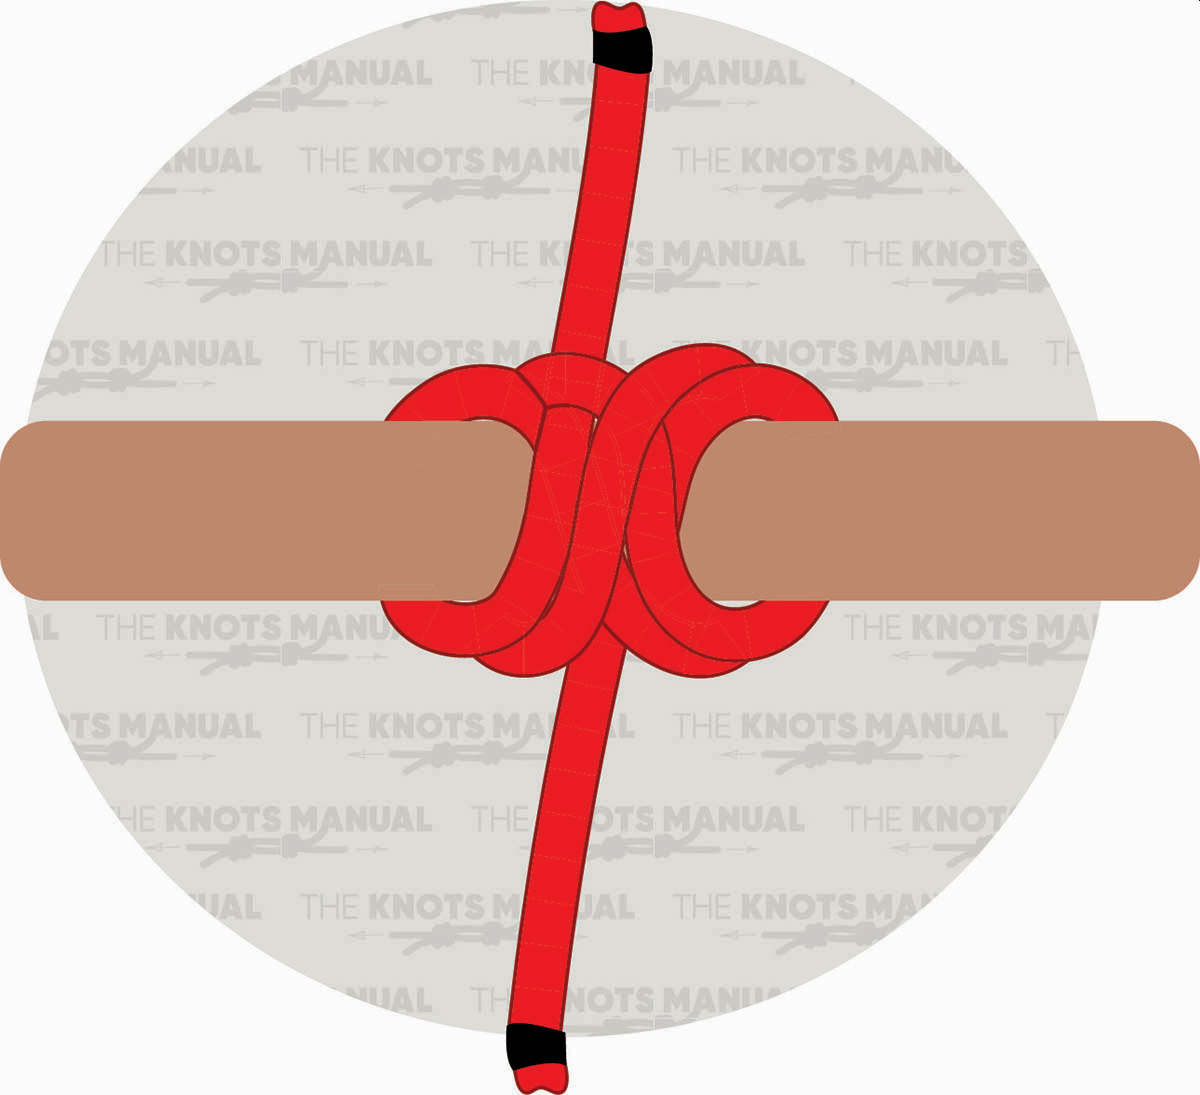
The Boom Hitch is a secure knot that attaches the rope end to a post, pipe, and other round objects. It’s also sometimes referred to as the Decorative Hitch.
Quick Guide: Tying a Boom Hitch
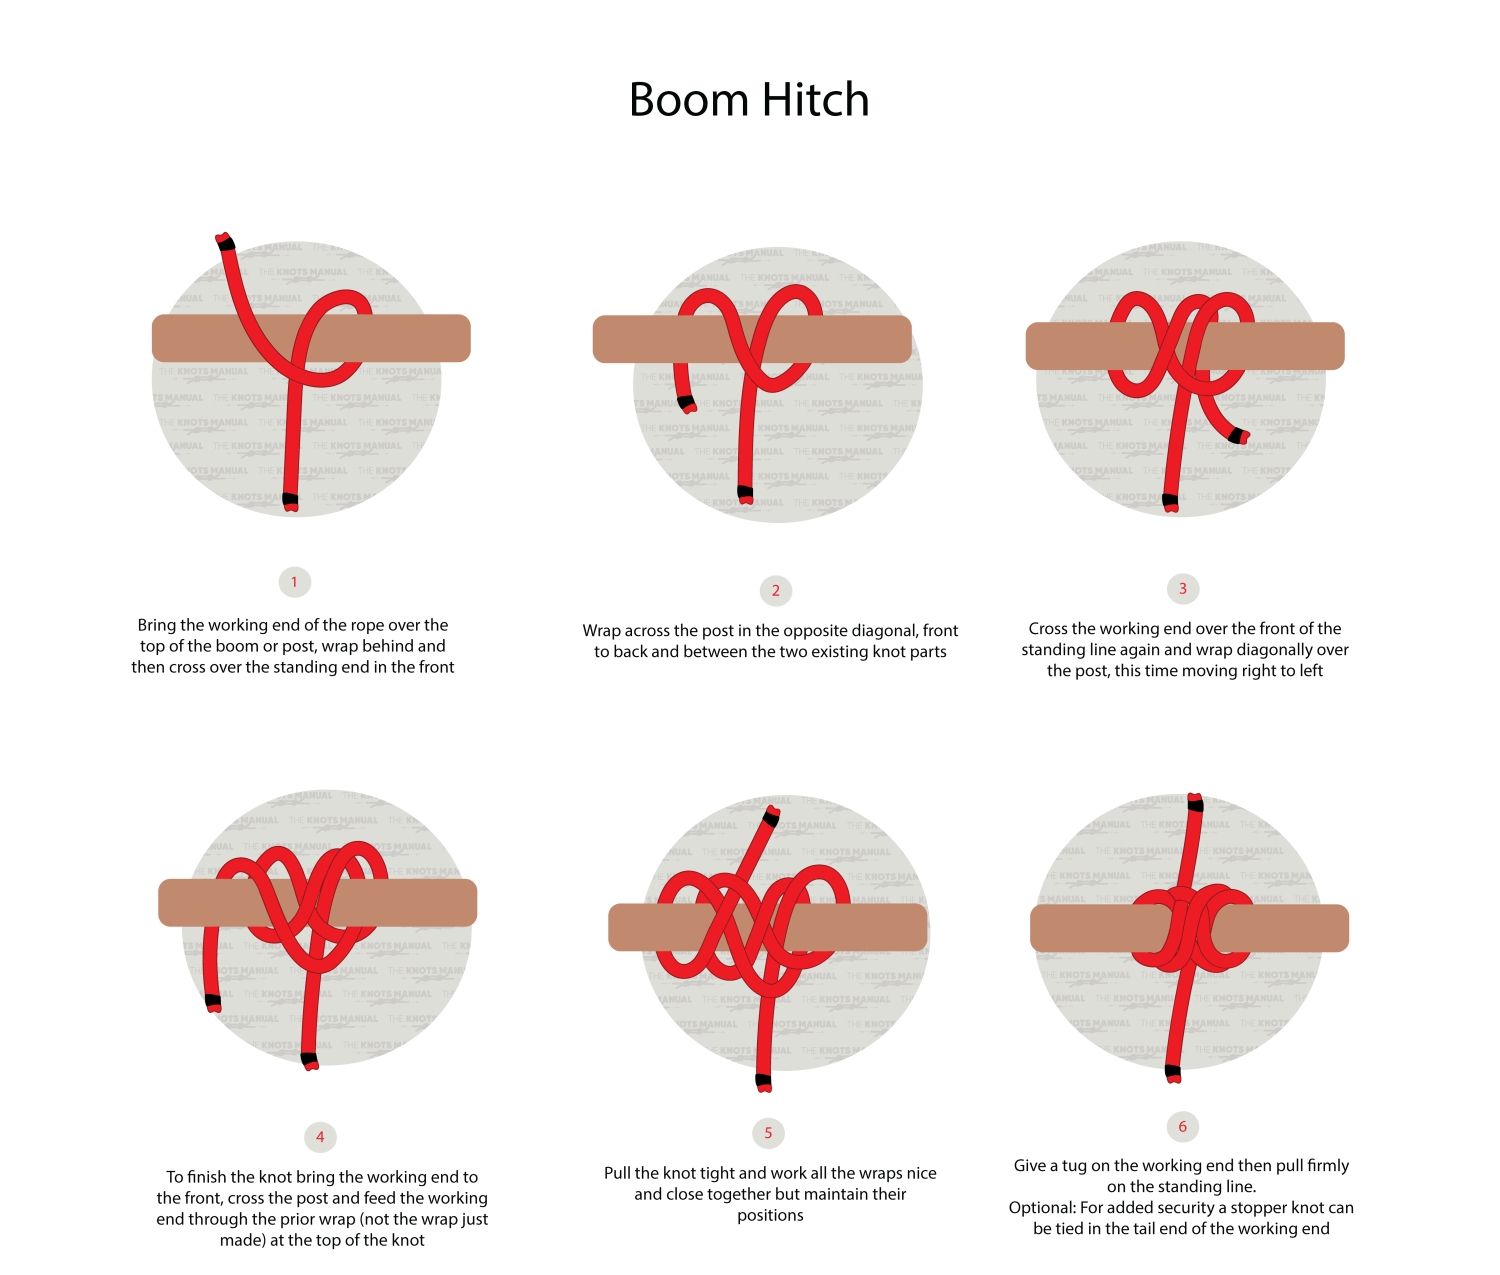
To tie the Boom Hitch, first, free up a long section near the end of the rope because this knot requires many turns.
Wrap the working end around the post on the right side (step 1). Then take it over to the left side and do another wrap (step 2). On the third wrap, move it over to the right side, but just before the first turn (step 3). Do the fourth wrap on the left side, right next to the second wrap (step 4). Tuck the working end underneath the second turn and tighten to finish the knot (steps 5 and 6).
When tightening, it’s important to slide all the wraps together to avoid any slack in the knot when it’s loaded with weight. To make it more secure, you can tie another Overhand Stopper Knot on the working end so that it can’t slip through the Boom Hitch.
You can also make a quick-release version of the Boom Hitch by making a bight in step 5.
Pros and Cons of the Boom Hitch
The main advantage of the Boom hitch is that it is very easy to tie. It’s just a series of wraps around the post overlapping one another. You only have to pay attention in the third and fourth wraps, to make sure that they’re placed on the left side of the previous wraps.
It’s also one of the strongest hitches, especially when tied with a stopper knot in the end. You can even use it in critical, life-threatening situations because it’s very unlikely to untie, even under cyclical loads.
The Boom Hitch works especially well with smooth round pipes, as it resists sideways movement. This is due to the number of turns around the pipe in combination with the binding nature of the knot.
Another advantage is that the Boom Hitch is quite easy to untie. It’s passed only under one strand, which you can shake loose without too much effort.
The only disadvantage of the Boom hitch is that it needs a long section of rope because it involves four full turns around the post.
Common Uses for the Boom Hitch
The Boom Hitch is used universally in many situations whenever you need a secure and reliable hitch. You can use it to attach to trees, posts, pipes, or sail booms. It’s easy to tie and very secure, which makes it the ideal hitch knot.
Knots Like the Boom Hitch
Gnat Hitch: Another secure and easy-to-tie hitch knot. It isn’t as secure as the Boom Hitch, but it’s much easier to tie, requires a smaller section of the rope, and is also easier to untie.
Buntline Hitch: A very commonly used hitch knot. It’s only marginally less secure than the Boom Hitch but is easier to tie. Its main downside is that it can jam very badly.
Two Half Hitches: A very easy and also a somewhat secure hitch. It’s one of the most popular hitch knots out there. It isn’t as strong as the Boom Hitch, but is much easier to tie.
Tensionless Hitch: The most secure and reliable hitch knot out there. It also involves four wraps around the post. It’s secured around the standing end with a Figure 8 on a Bight and a carabiner. Because of the way that it’s formed, it achieves almost 100% rope-breaking strength.
Clove Hitch: This hitch isn’t very secure. But its ease of use and its ability to bind and constrict make it a good choice to use for quick, temporary situations.
Constrictor Knot: Essentially, a simpler version of the Boom Hitch with only two turns. It’s less secure but easier to tie and it doesn’t jam as badly. Because of this, it’s great to use for temporary solutions.
Step-by-Step Guide: How to Tie the Boom Hitch
A step-by-step guide on how to tie the Boom Hitch Knot.
Step 1:
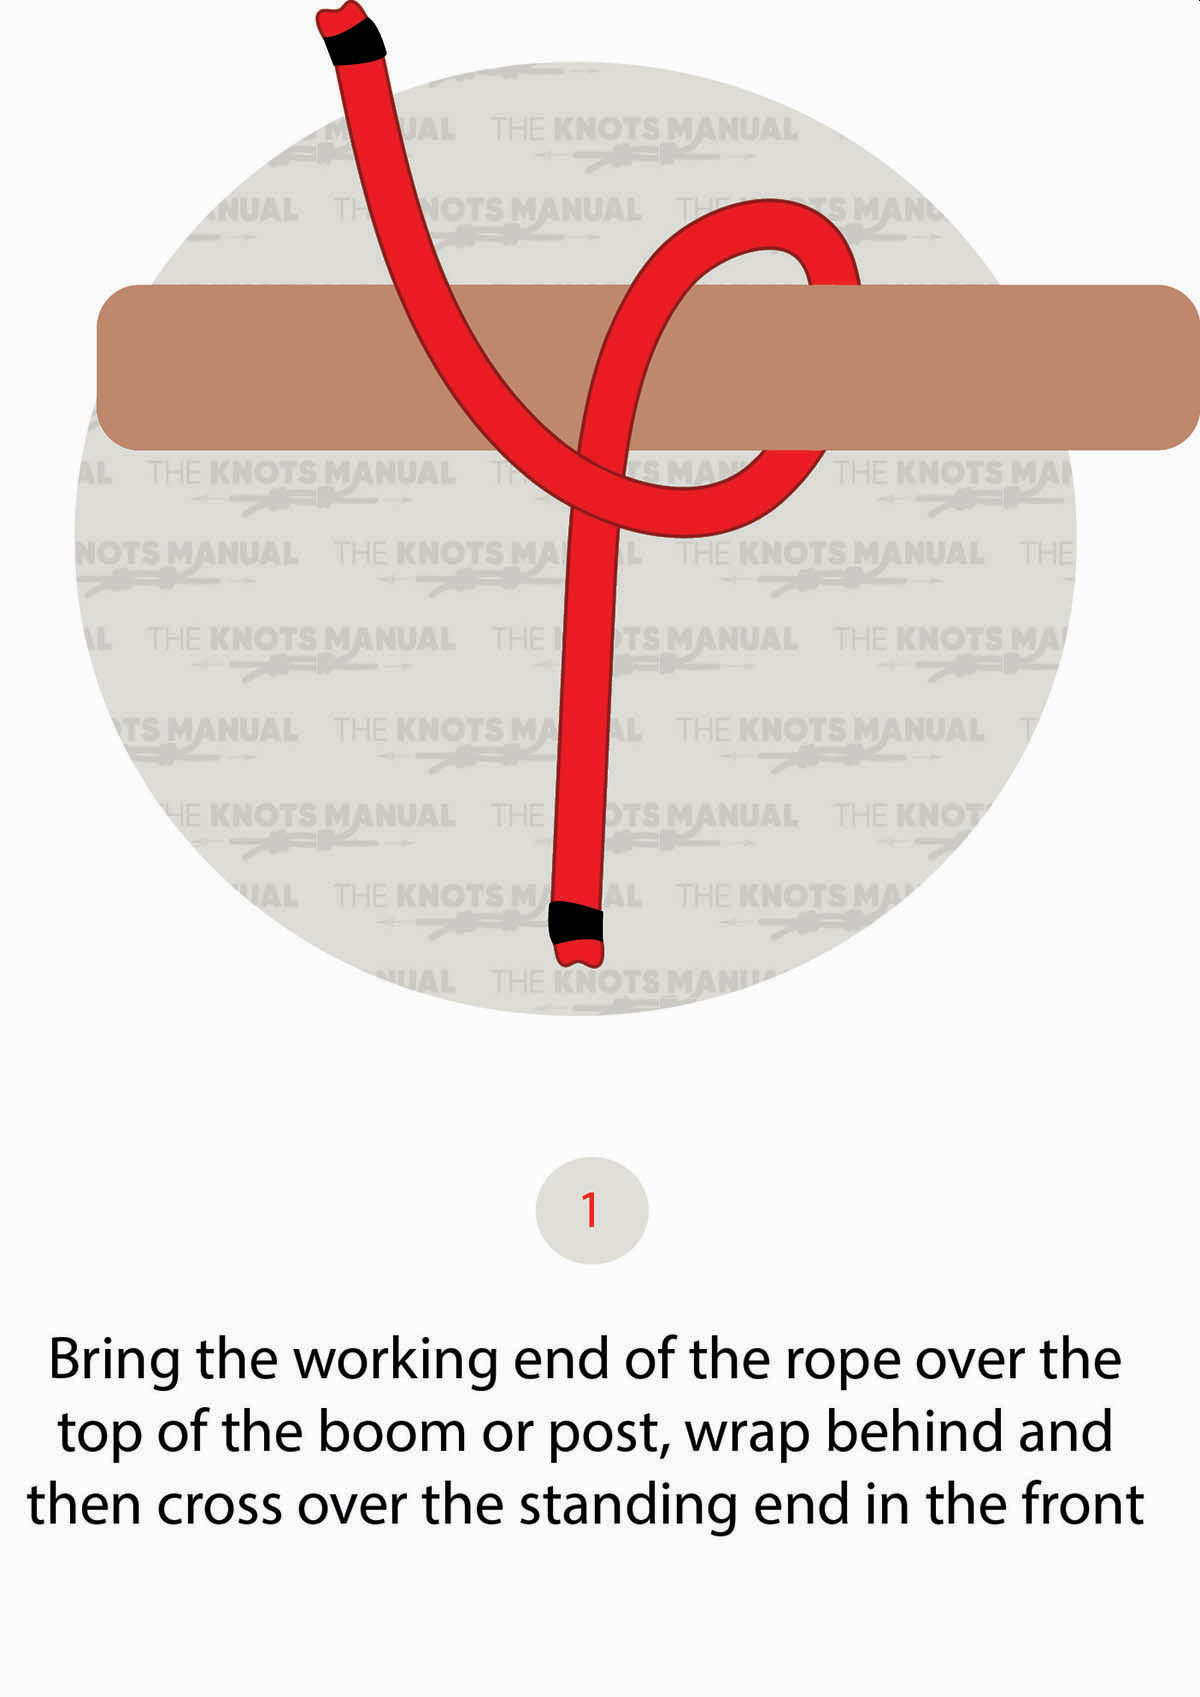
Wrap the end of the rope around the post on the right side from the standing end.
Step 2:
Bring it over to the left side and do another turn around the post.
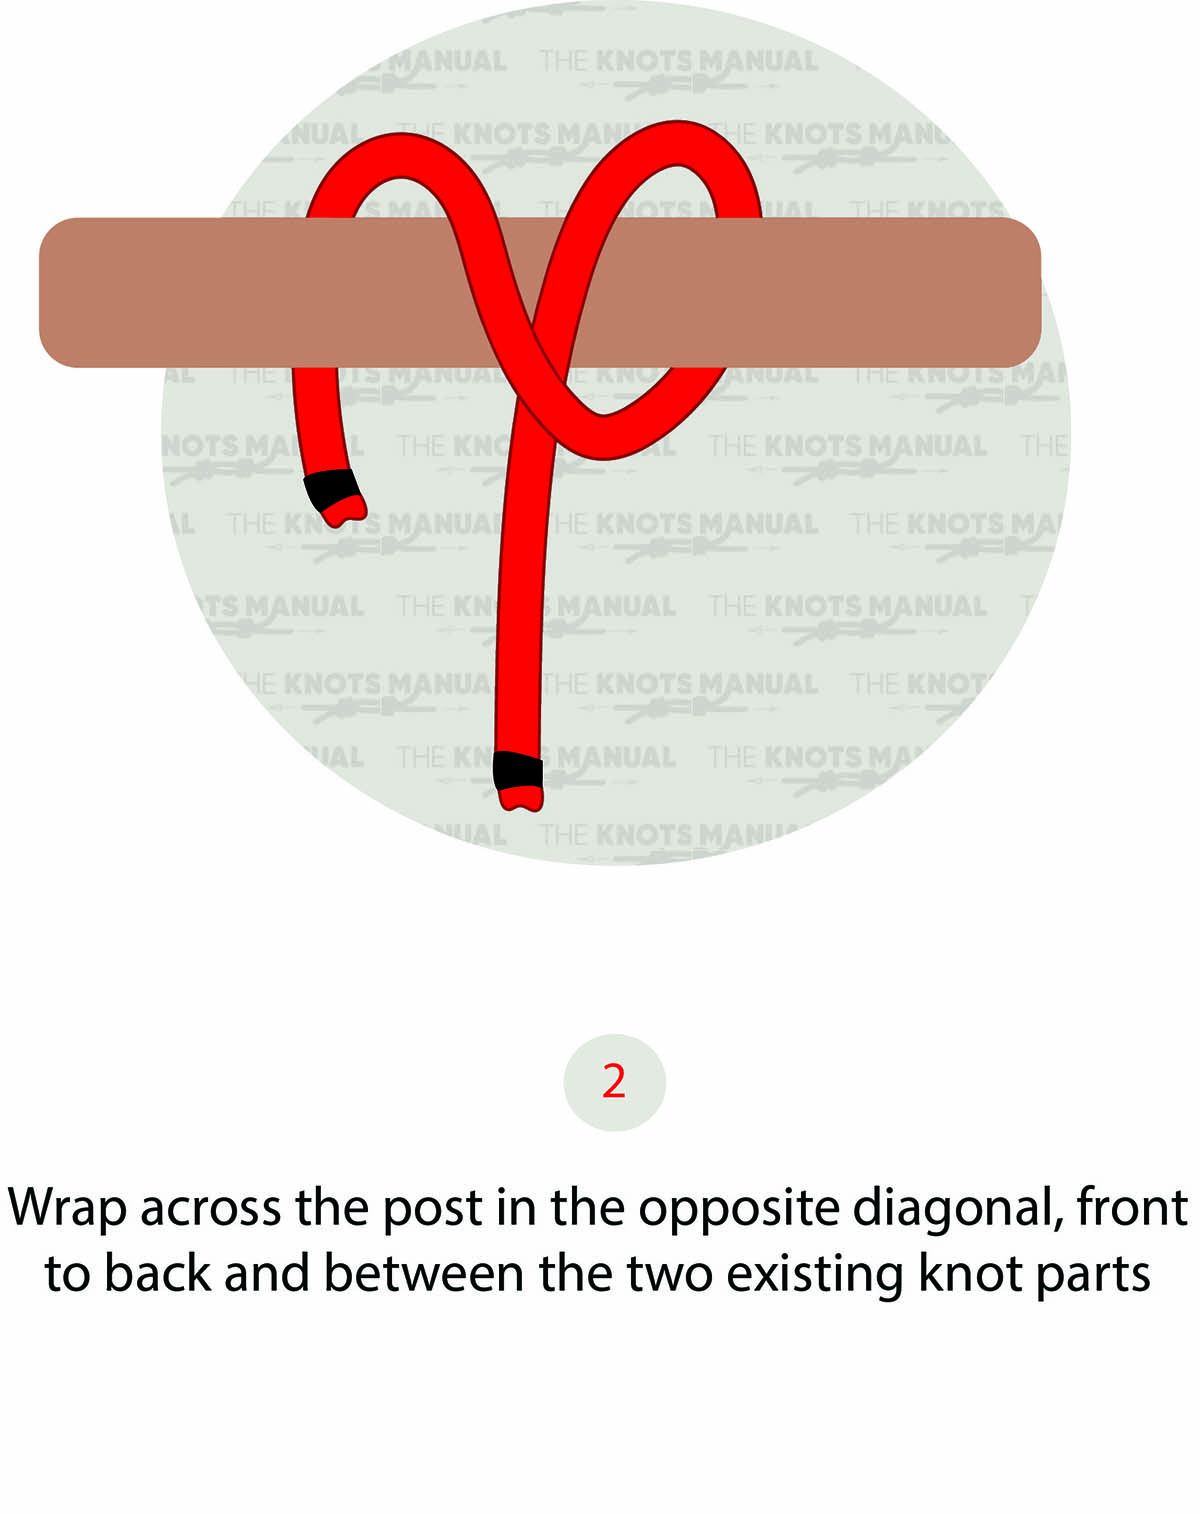
Step 3:
Pass it over to the right side and do a third turn.
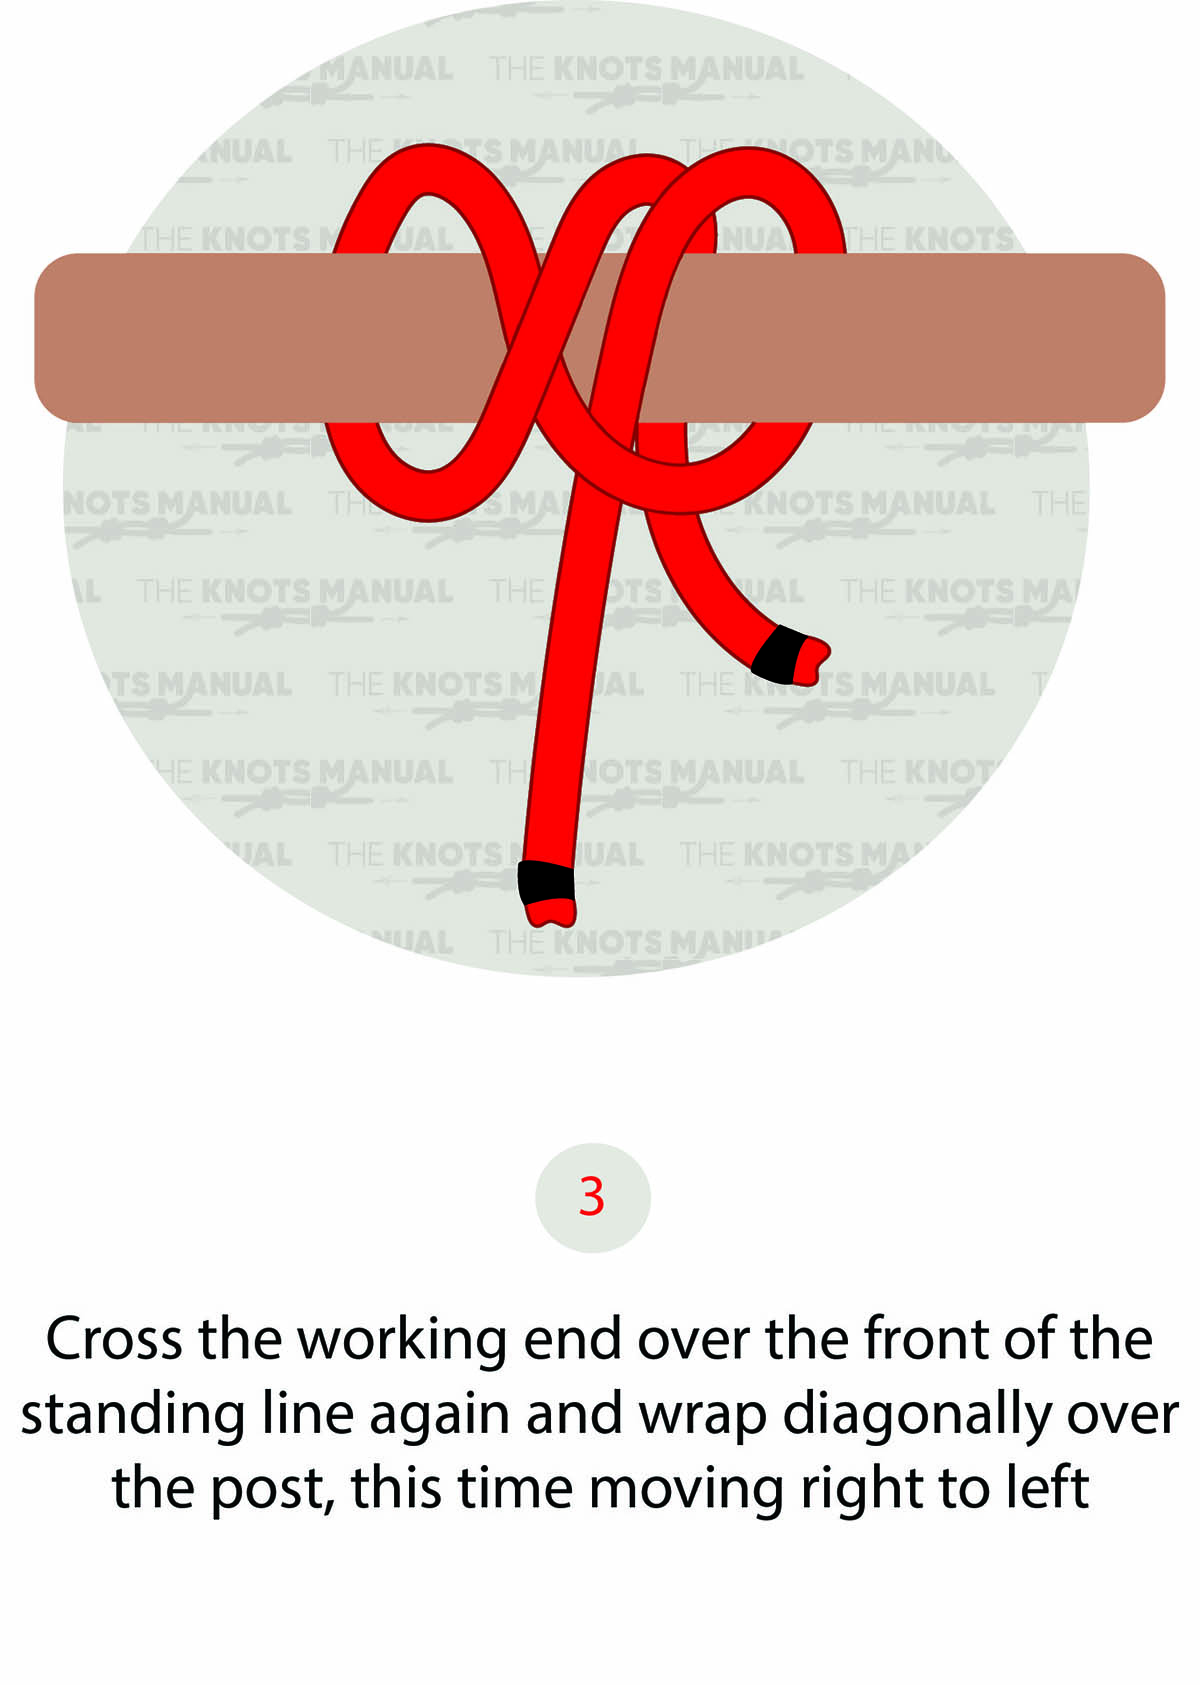
Step 4:

Do the fourth turn on the left side.
Step 5:
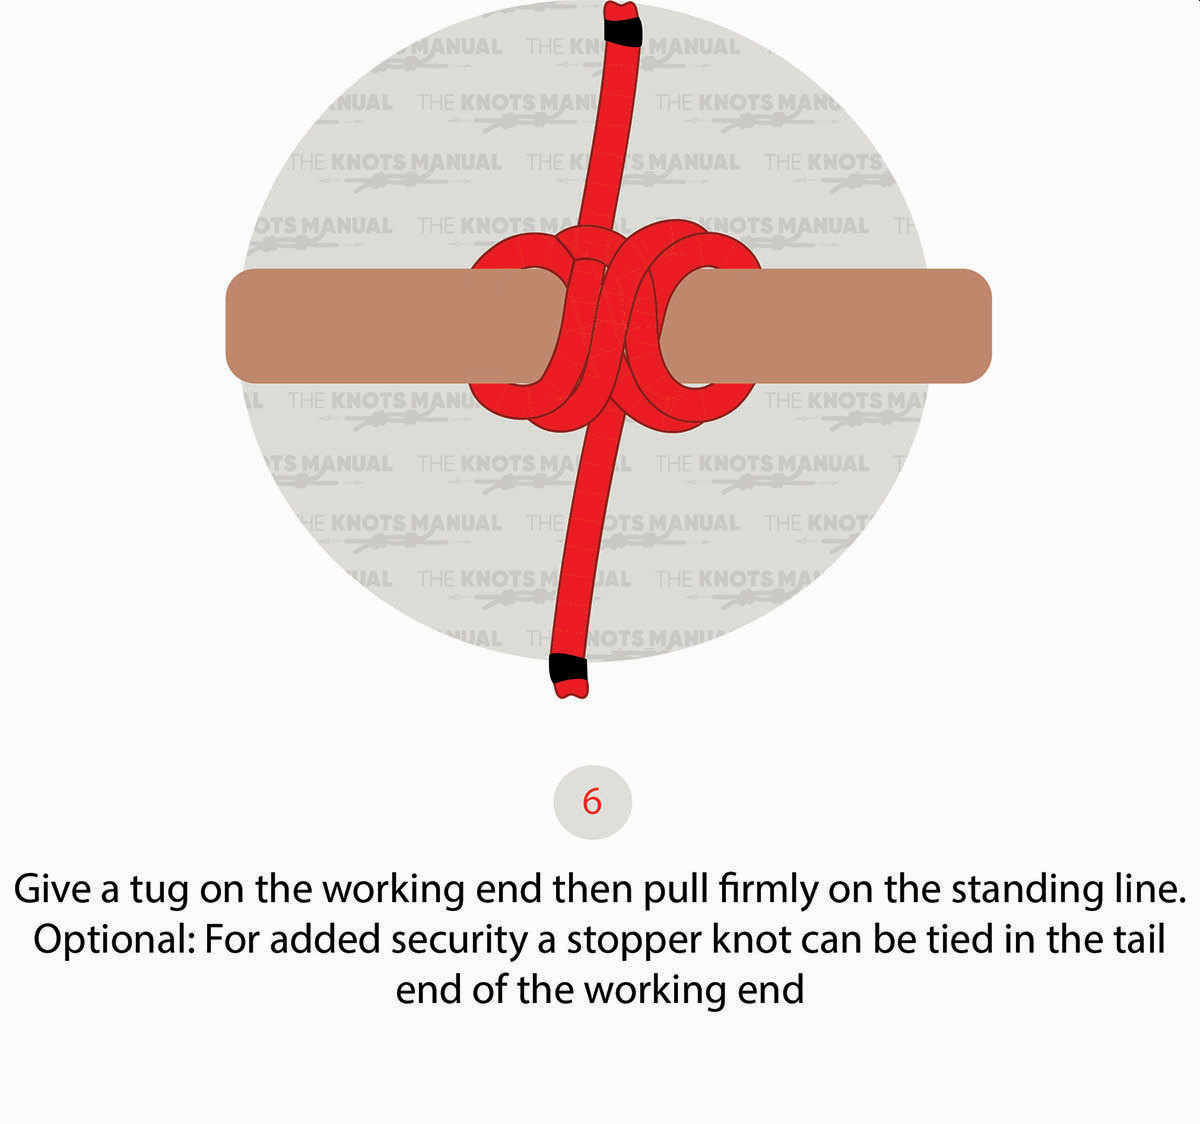
Tuck the working end underneath the second turn, made in step 2. Finally, tighten it to finish the knot.