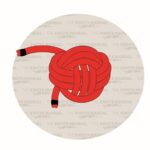
The Heaving Line Knot creates a bulky knot at the end of the rope. It’s beneficial in situations when you need to accurately throw the rope over or through something.
Quick Guide: Tying a Heaving Line Knot
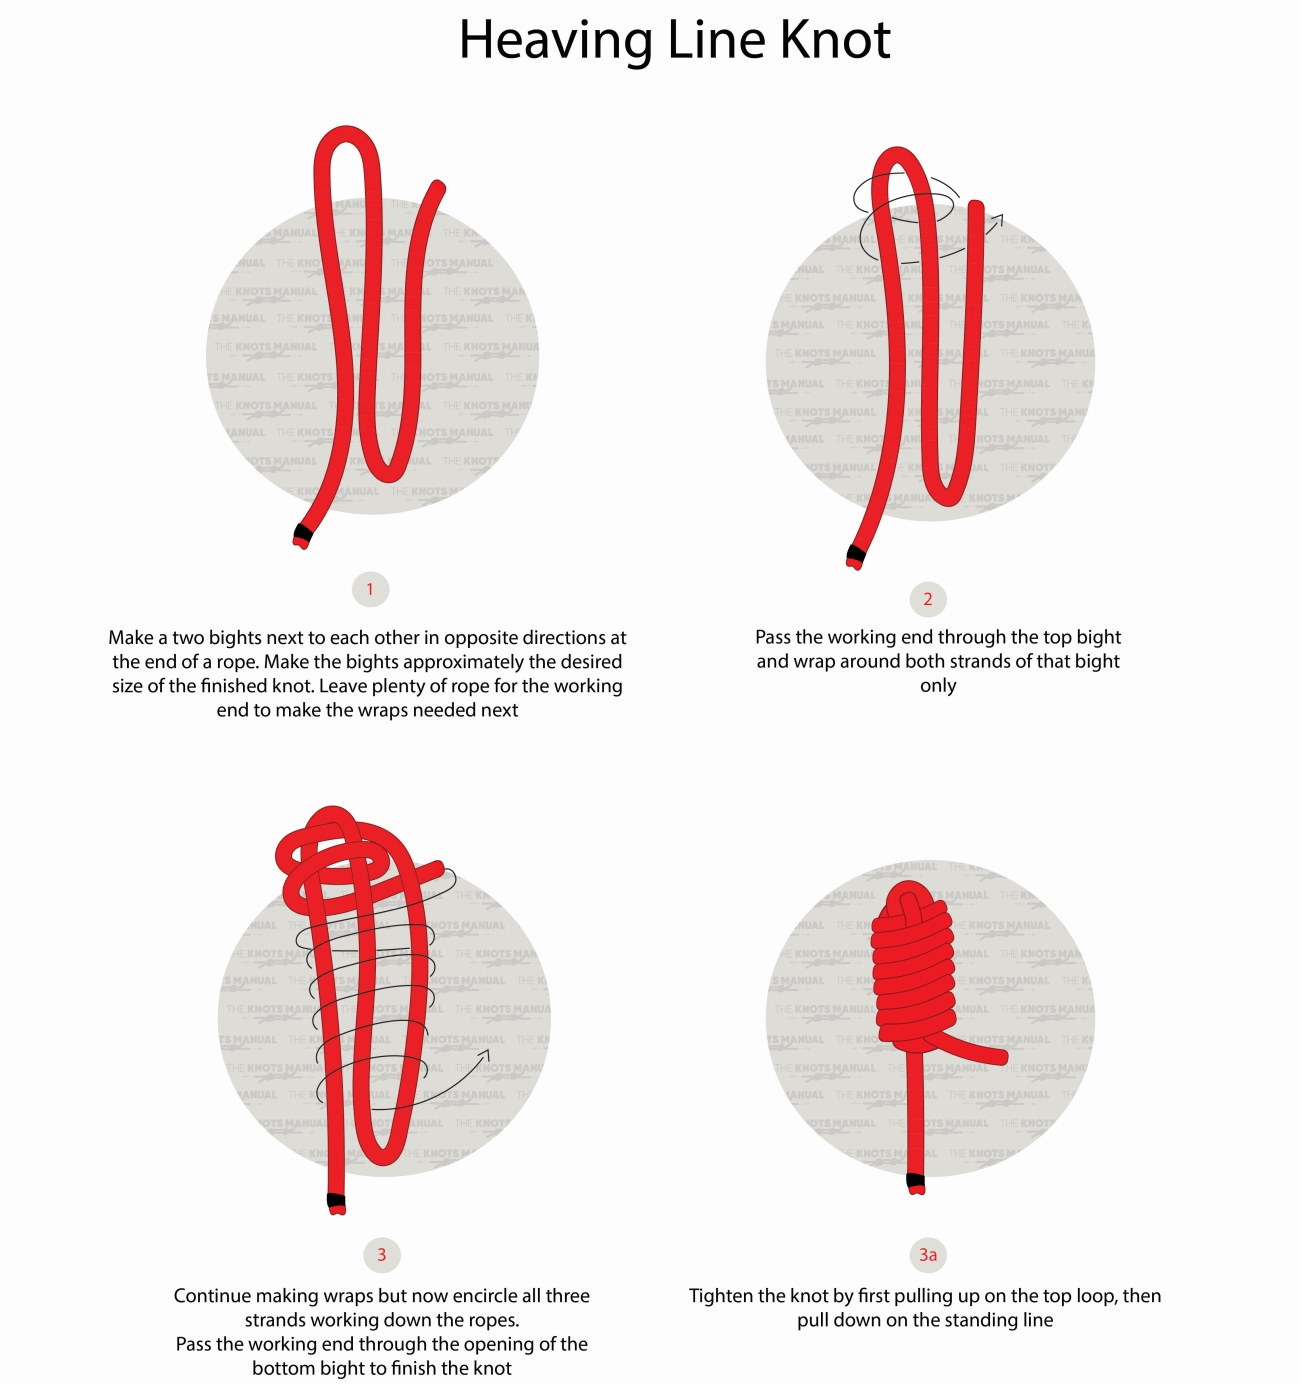
To tie the Heaving Line Knot, start by making an S-shape roughly 40 inches (1 meter) from the end of the rope (step 1). Pass the working around the left-most strand, then around the two left-most strands, and then around all three strands (step 2). Continue doing another 5-10 full turns, depending on the desired size of the knot. Finally, pass the working end through the bottom loop (step 3).
To tighten it, first pull the top loop until the bottom one tightens and secures the end of the rope. Then pull the standing end to tighten the top loop and finish the knot (step 4).
Tip: To achieve a well-formed knot in the end, with each turn that you do, tighten the last one.
Pros and Cons of the Heaving Line Knot
The main advantage of the Heaving Line Knot is that it is very easy to tie. It also doesn’t need any extra objects or weights – only a long section of the rope.
Another benefit is that it doesn’t jam. So if you’ll need to use the rope for other purposes later, you can easily untie it after you’ve successfully thrown it.
The Heaving Line Knot creates a very bulky knot at the end of the rope. Because it uses up a lot of the rope, it also holds a good amount of weight, which makes it easy to throw over far-to-reach objects.
The only disadvantage of the Heaving Line Knot is that it isn’t heavy enough for some situations. For a permanent heaving line, usually, the Monkey’s Fist Knot is used. It incorporates a metal weight in the middle of the knot, which adds a lot more weight in a smaller size.
Common Uses for the Heaving Line Knot
As the name suggests, most commonly the Heaving Line Knot is used as a heaving line. The added weight at the end of the rope is used for throwing the rope over or through other objects. In sailing, a heaving line is used to throw into the water in case someone accidentally falls overboard. It’s also used by arborists to throw the rope over a tree branch.
It also can be used as a stopper knot for decorative and functional purposes. It’s advantageous because it doesn’t jam even when loaded with heavy loads.
Knots Like the Heaving Line Knot
Monkey’s Fist Knot: A knot that’s commonly used instead of the Heaving Line Knot for creating a weighed element at the end of the rope. It’s advantageous because it’s formed with a heavy metal in the center of the knot, which makes it easier to throw. But it’s not ideal for temporary solutions because it’s hard to untie and more difficult to tie.
Heaving Line Bend: A bend knot that’s commonly used for connecting ropes with different diameters. A heaving Line Knot is often tied on a smaller rope and then the other end of the rope is connected to a heavier rope with a Heaving Line Bend. By doing this, you can pull a heavier rope over other objects more easily.
Hangman’s Knot: A sliding noose knot that’s tied very similarly to the Heaving Line Knot.
Common Whipping Knot: Another knot that is tied very similarly to the Heaving Line Knot. It’s used to secure the ends of large ropes to keep them from unraveling.
Step-By-Step Guide: How to Tie a Heaving Line Knot
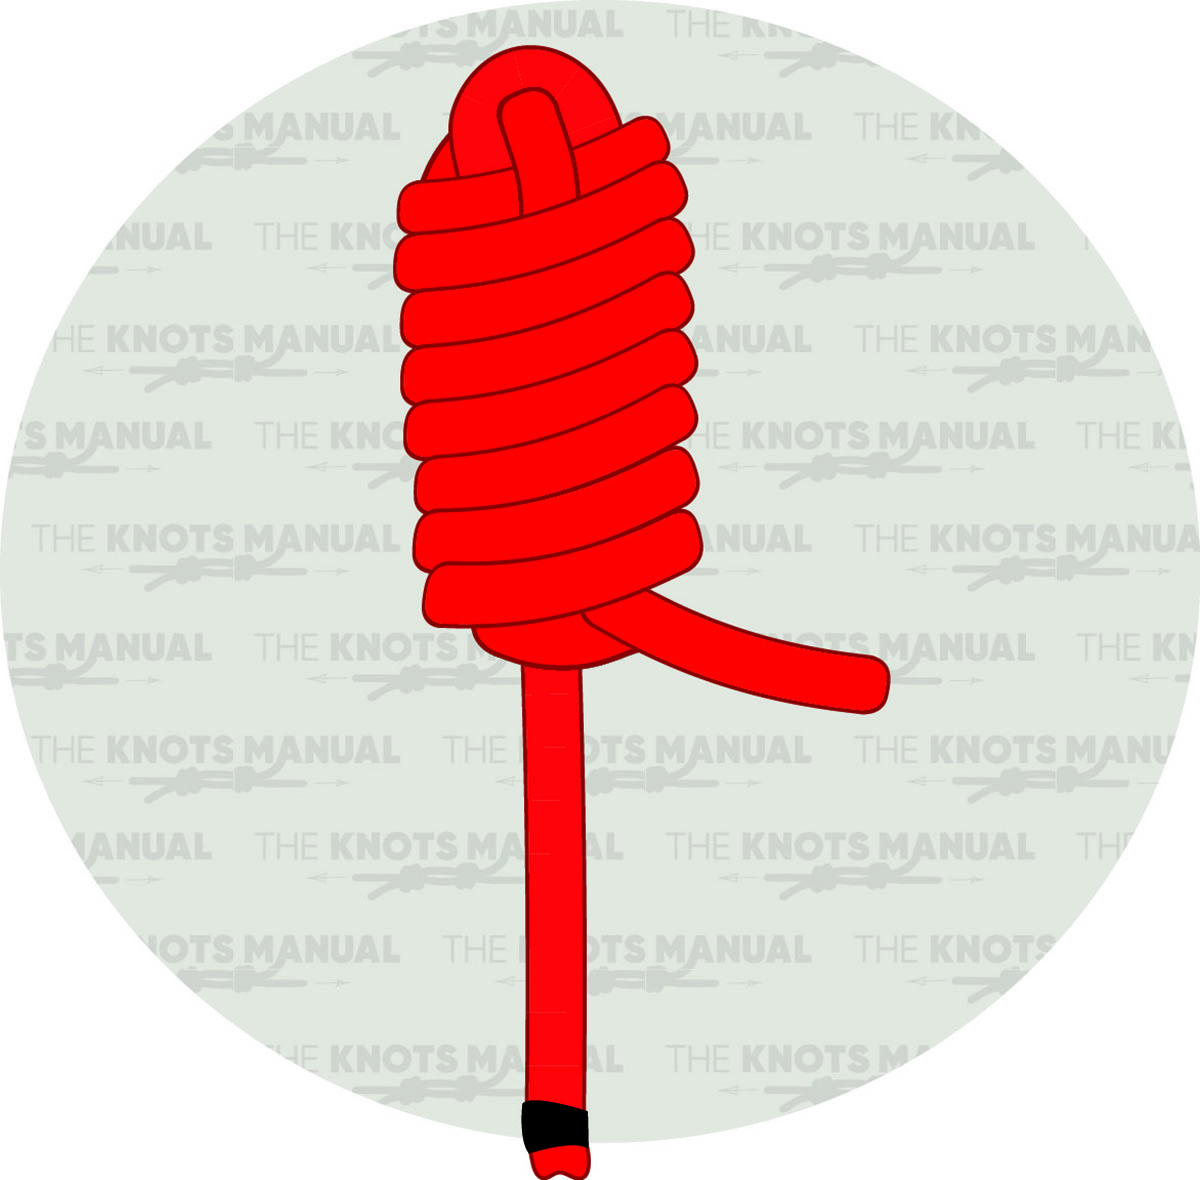
A step-by-step guide on how to tie a Heaving Line Knot.
Step 1:
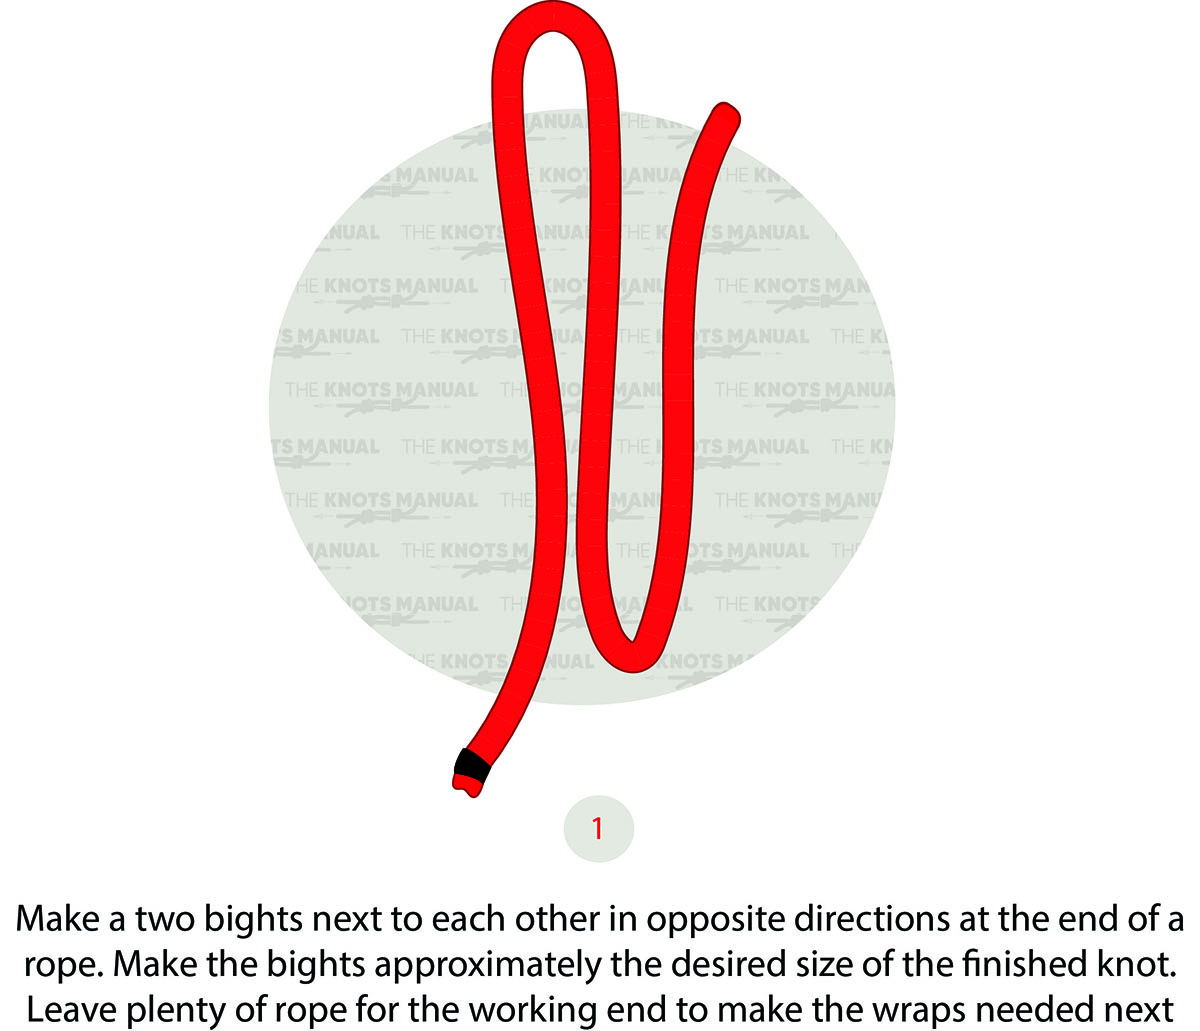
Make an S-shape near the end of the rope at the desired knot height. Leave the working end very long, at least 40 inches (1 meter) in length.
Step 2:
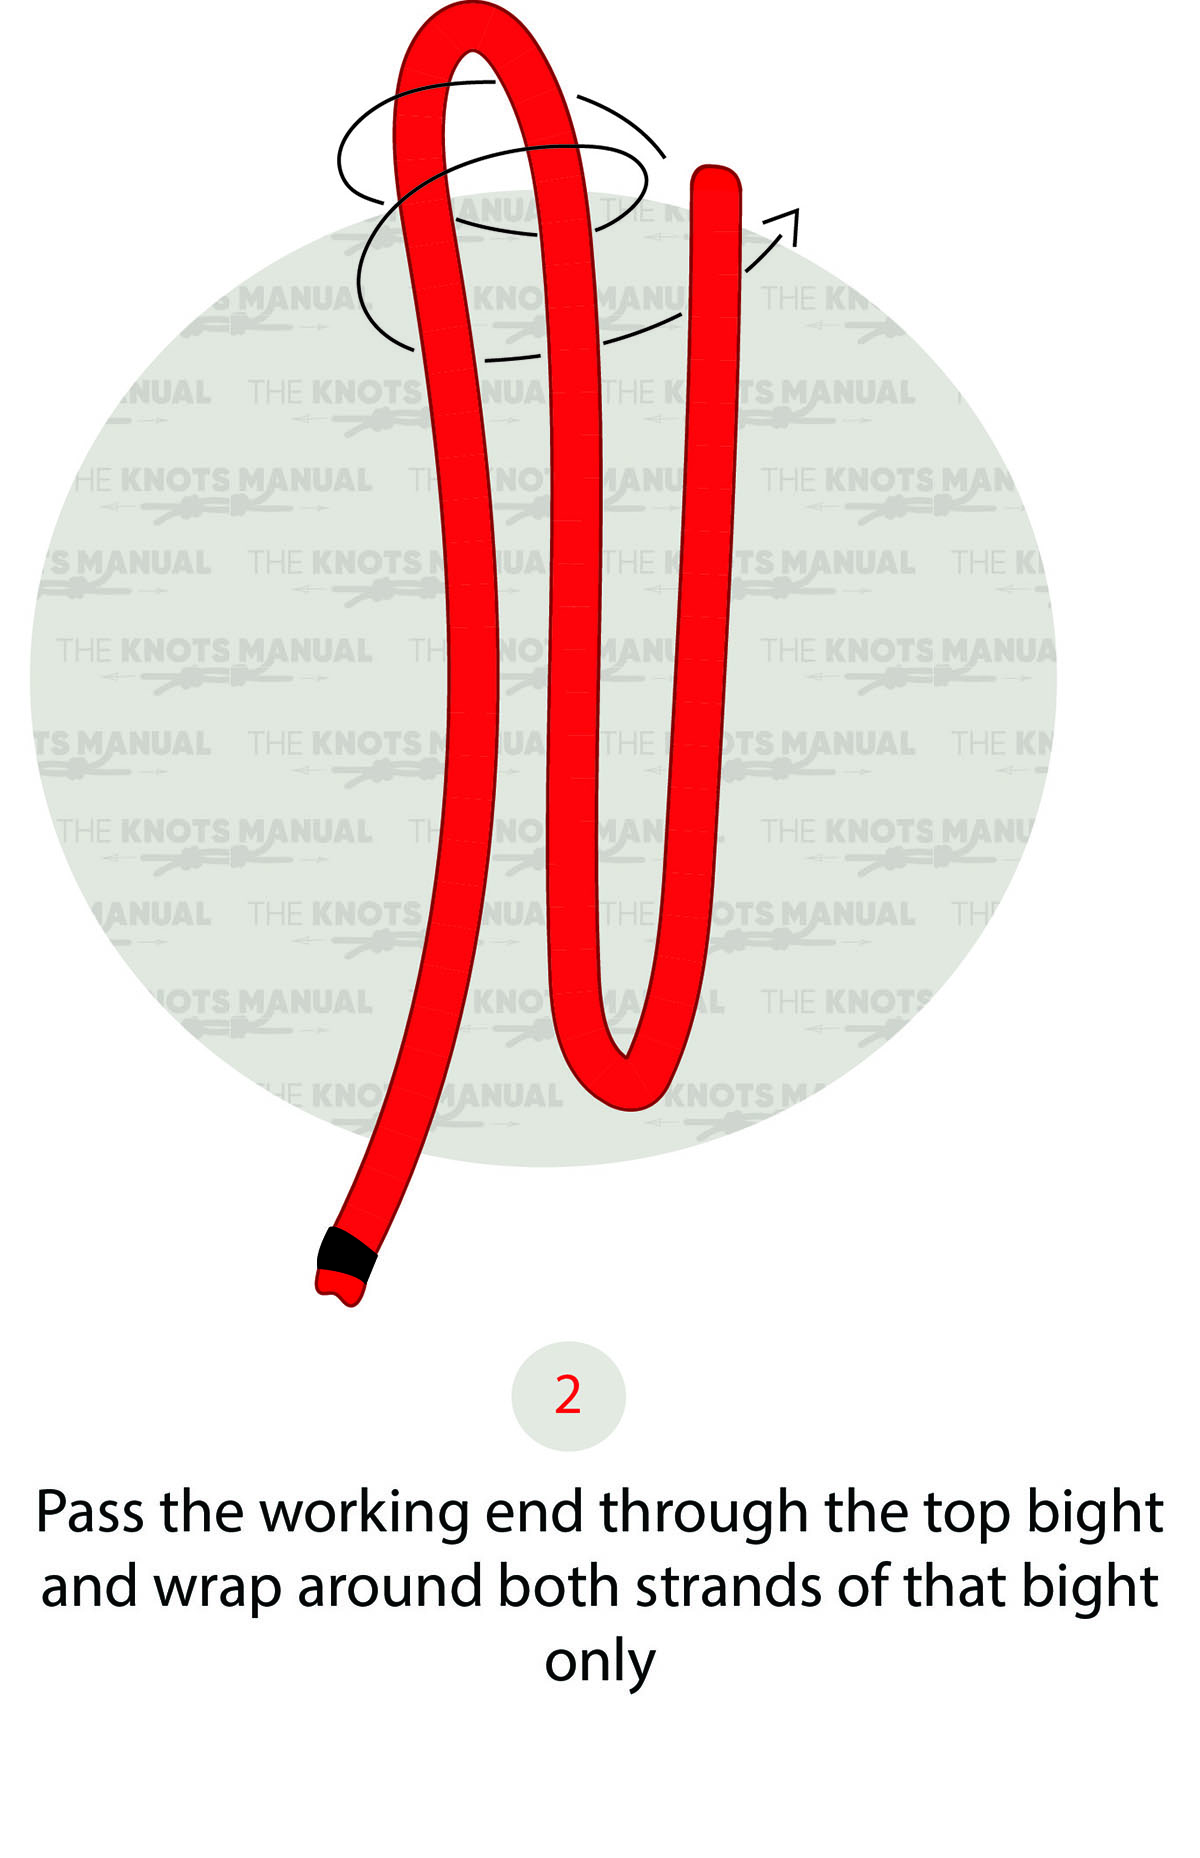
Pass the working end through the top loop, then only around the bight, and then around the whole knot.
Step 3:
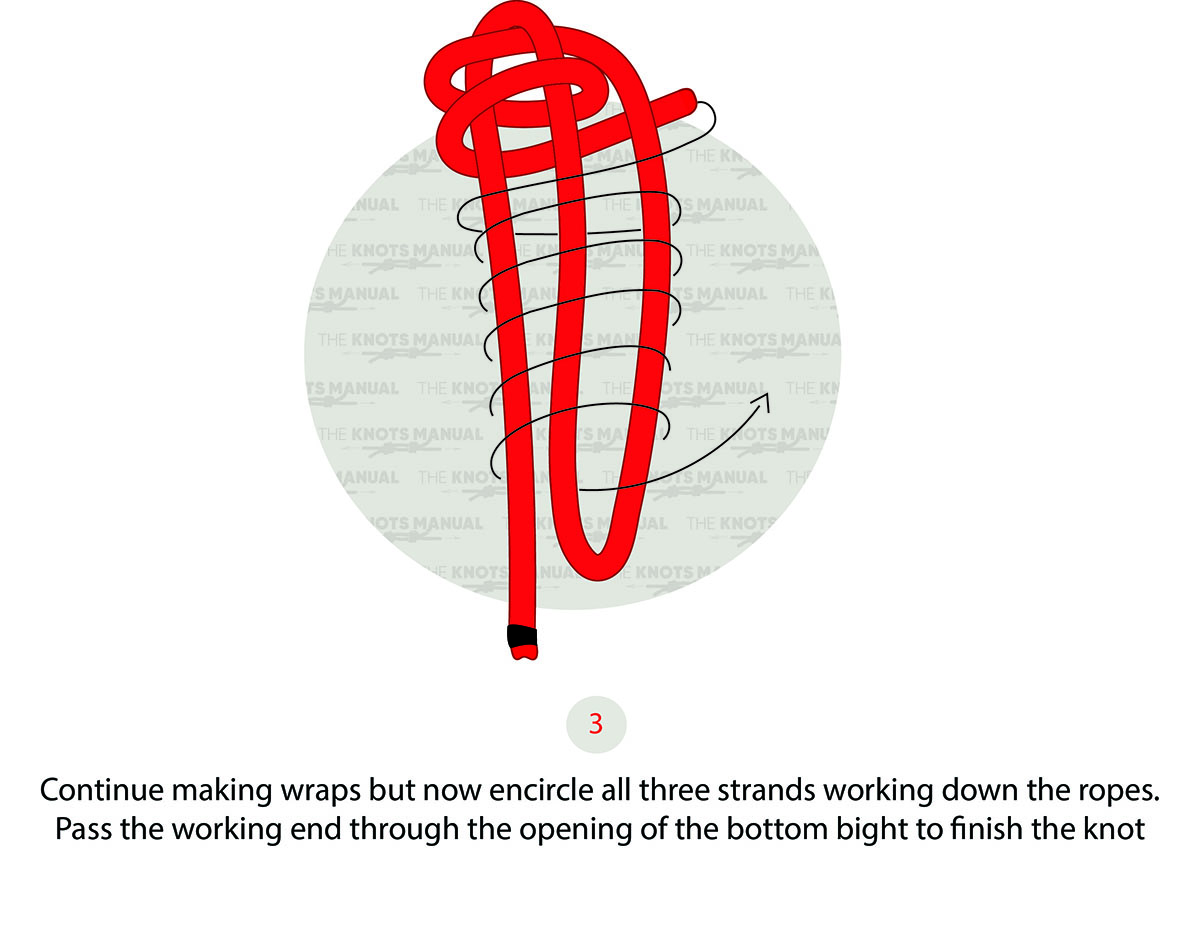
Keep wrapping the end around the knot until you reach the end. Finally, pass the end through the bottom loop.
Step 3a:
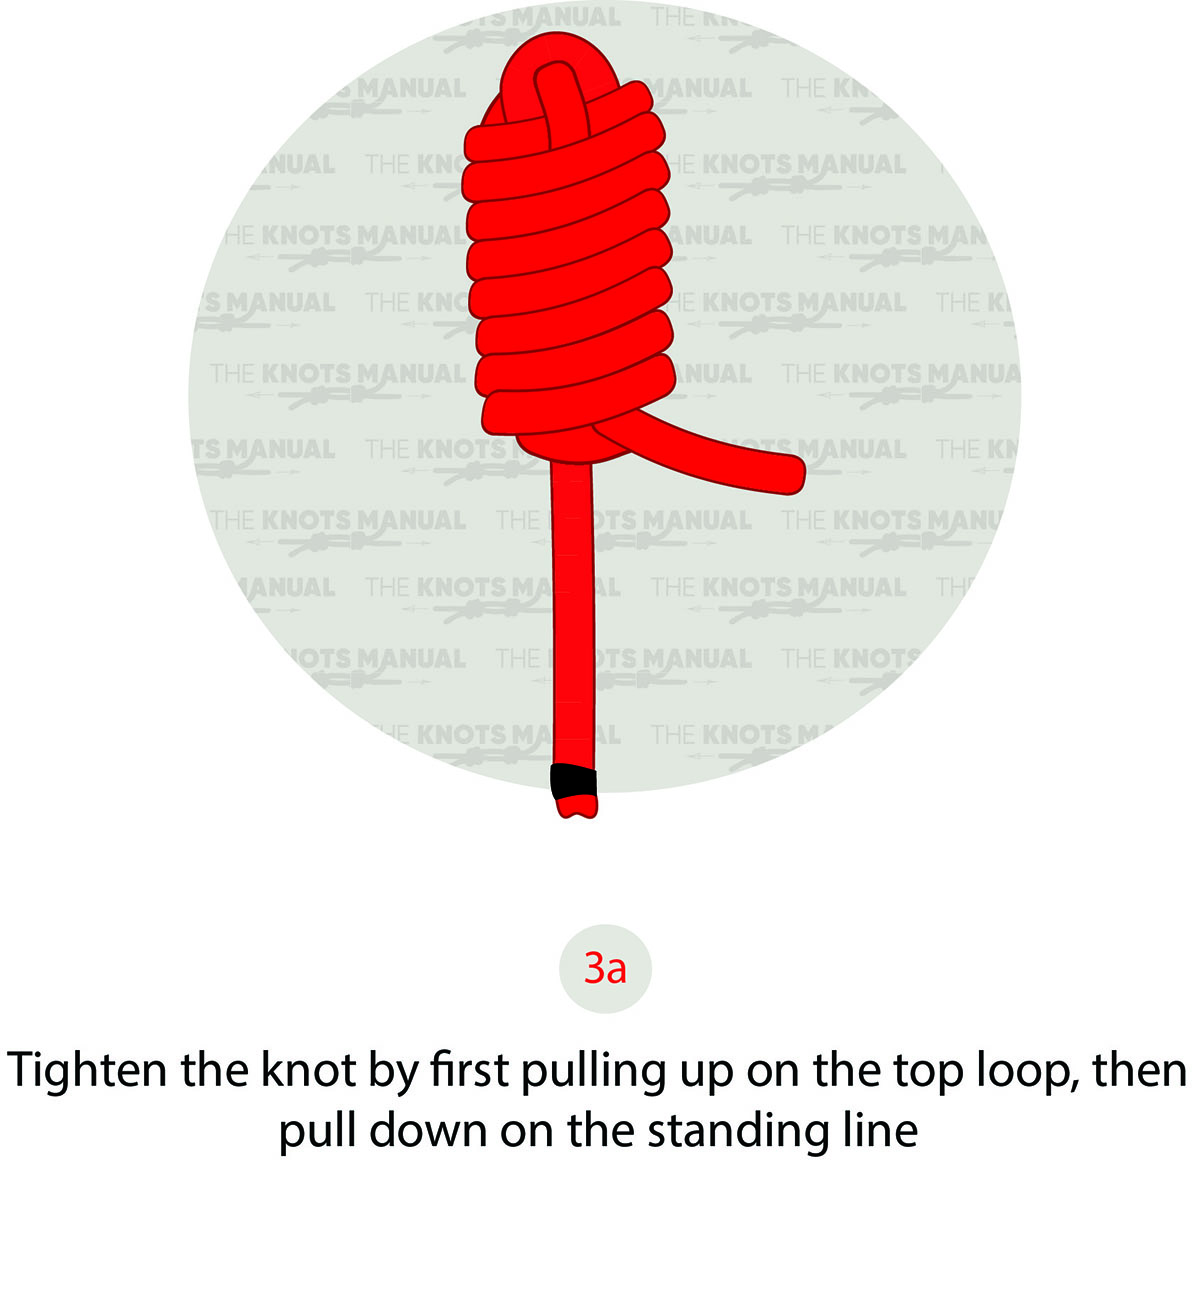
Tighten the knot by pulling the top loop until it secures the working end, and then pulling the standing end.
