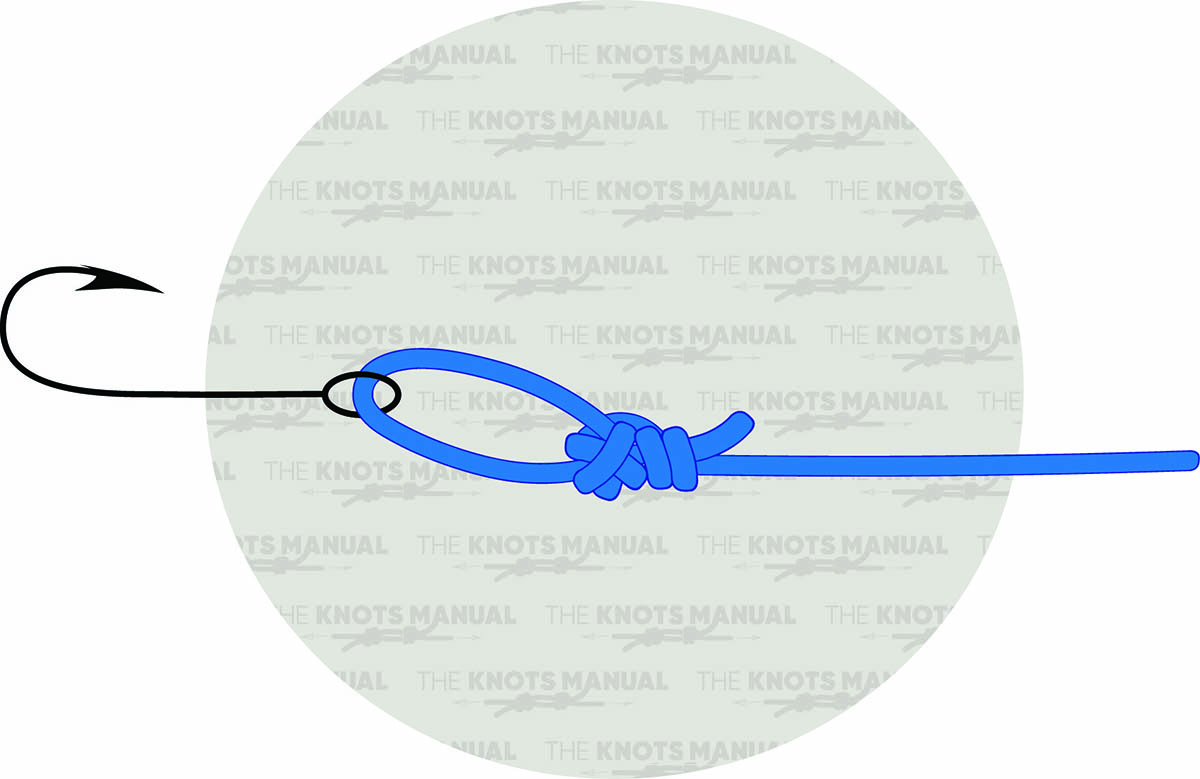
The Rapala Knot is a fishing knot that creates a fixed loop near the end of the fishing line. It’s usually used to attach monofilament and fluorocarbon lines to lures, hooks, or swivels.
Its name comes from the popular Rapala company that makes fishing lures. They recommend it to be used with their lures when attaching to monofilament lines. In fact, this knot was invented by them.
Quick Guide: Tying the Rapala Knot
To tie the Rapala Knot, first tie a loose Overhand Knot 10 inches (25 cm) from the end of the fishing line.
Pass the tag end through the eye of the lure/hook and then back through the loose Overhand Knot. Then wrap it 3 times around the standing end, take it back through the loose Overhand Knot, and tuck it under itself to finish the knot.
Lubricate it with saliva or water and tighten the knot. Finally cut off the tag end short so that it doesn’t get caught in the grass.
Pros and Cons of the Rapala Knot
The Rapala Knot is one of the strongest fixed-loop fishing knots. It’s said that it holds about 90% of the line strength when tied with monofilament fishing lines.
The main advantage of the Rapala Knot is that when it’s tied to a lure, it gives a lot of room for movement. This makes the lure move in a natural way, which increases the chances of catching fish.
It’s usually used only with monofilament and fluorocarbon lines. That’s because when used with braided lines, it is more likely to slip and untie.
One downside of the Rapala Knot is that it’s somewhat complicated. It’s usually hard for beginners to learn and remember this knot. It’s also difficult to tighten.
Another disadvantage is that the tag end exits over to one side. This makes it more likely to catch against grass and twigs. So you have to cut it off very short to avoid this from happening.
Common Uses for the Rapala Knot
Most commonly, the Rapala Knot is used to attach monofilament or fluorocarbon lines to lures. It’s especially useful when used in tougher conditions because it has strength very similar to the line’s breaking strength.
But you can use it for other purposes as well, like attaching fishing lines to hooks and swivels. You can even use it in loop-to-loop connections, for example, when attaching a leader.
Knots Like the Rapala Knot
Perfection Loop: This knot can be used as an alternative to the Rapala Knot because it’s equally strong. Just like the Rapala Knot, it’s also fairly difficult to tie and remember. One advantage is that it also works with braided lines, not only monofilament and fluorocarbon.
Bimini-Twist loop: A popular end loop knot that works with all types of fishing lines. It’s even more secure than the Rapala Knot and is said to hold 100% of fishing line strength. But it’s even more difficult to tie because it involves a fairly complicated procedure for tightening the knot.
Non-Slip Loop (Kreh) Knot: An end loop knot that’s tied very similarly to the Rapala Knot. Its only difference is that it isn’t tucked under itself in the end. This makes it slightly less reliable, but a bit easier to tie.
Spider Hitch Knot: A very easy knot that can be tied as an alternative to the Rapala Knot. It’s only slightly less reliable but much easier to tie in very cold conditions or in darkness.
Australian Braid Knot: Another very secure end loop fishing knot, usually used for loop-to-loop connections. It’s slightly easier to tie than the Bimini Twist and also has 100% line-breaking strength.
Surgeon’s Loop Knot: A very easy knot that creates a fixed loop at the end of the fishing line. It’s usually used in loop-to-loop connections. It’s formed by tying a Double Overhand Knot on a bight. It isn’t as reliable as the Rapala Knot.
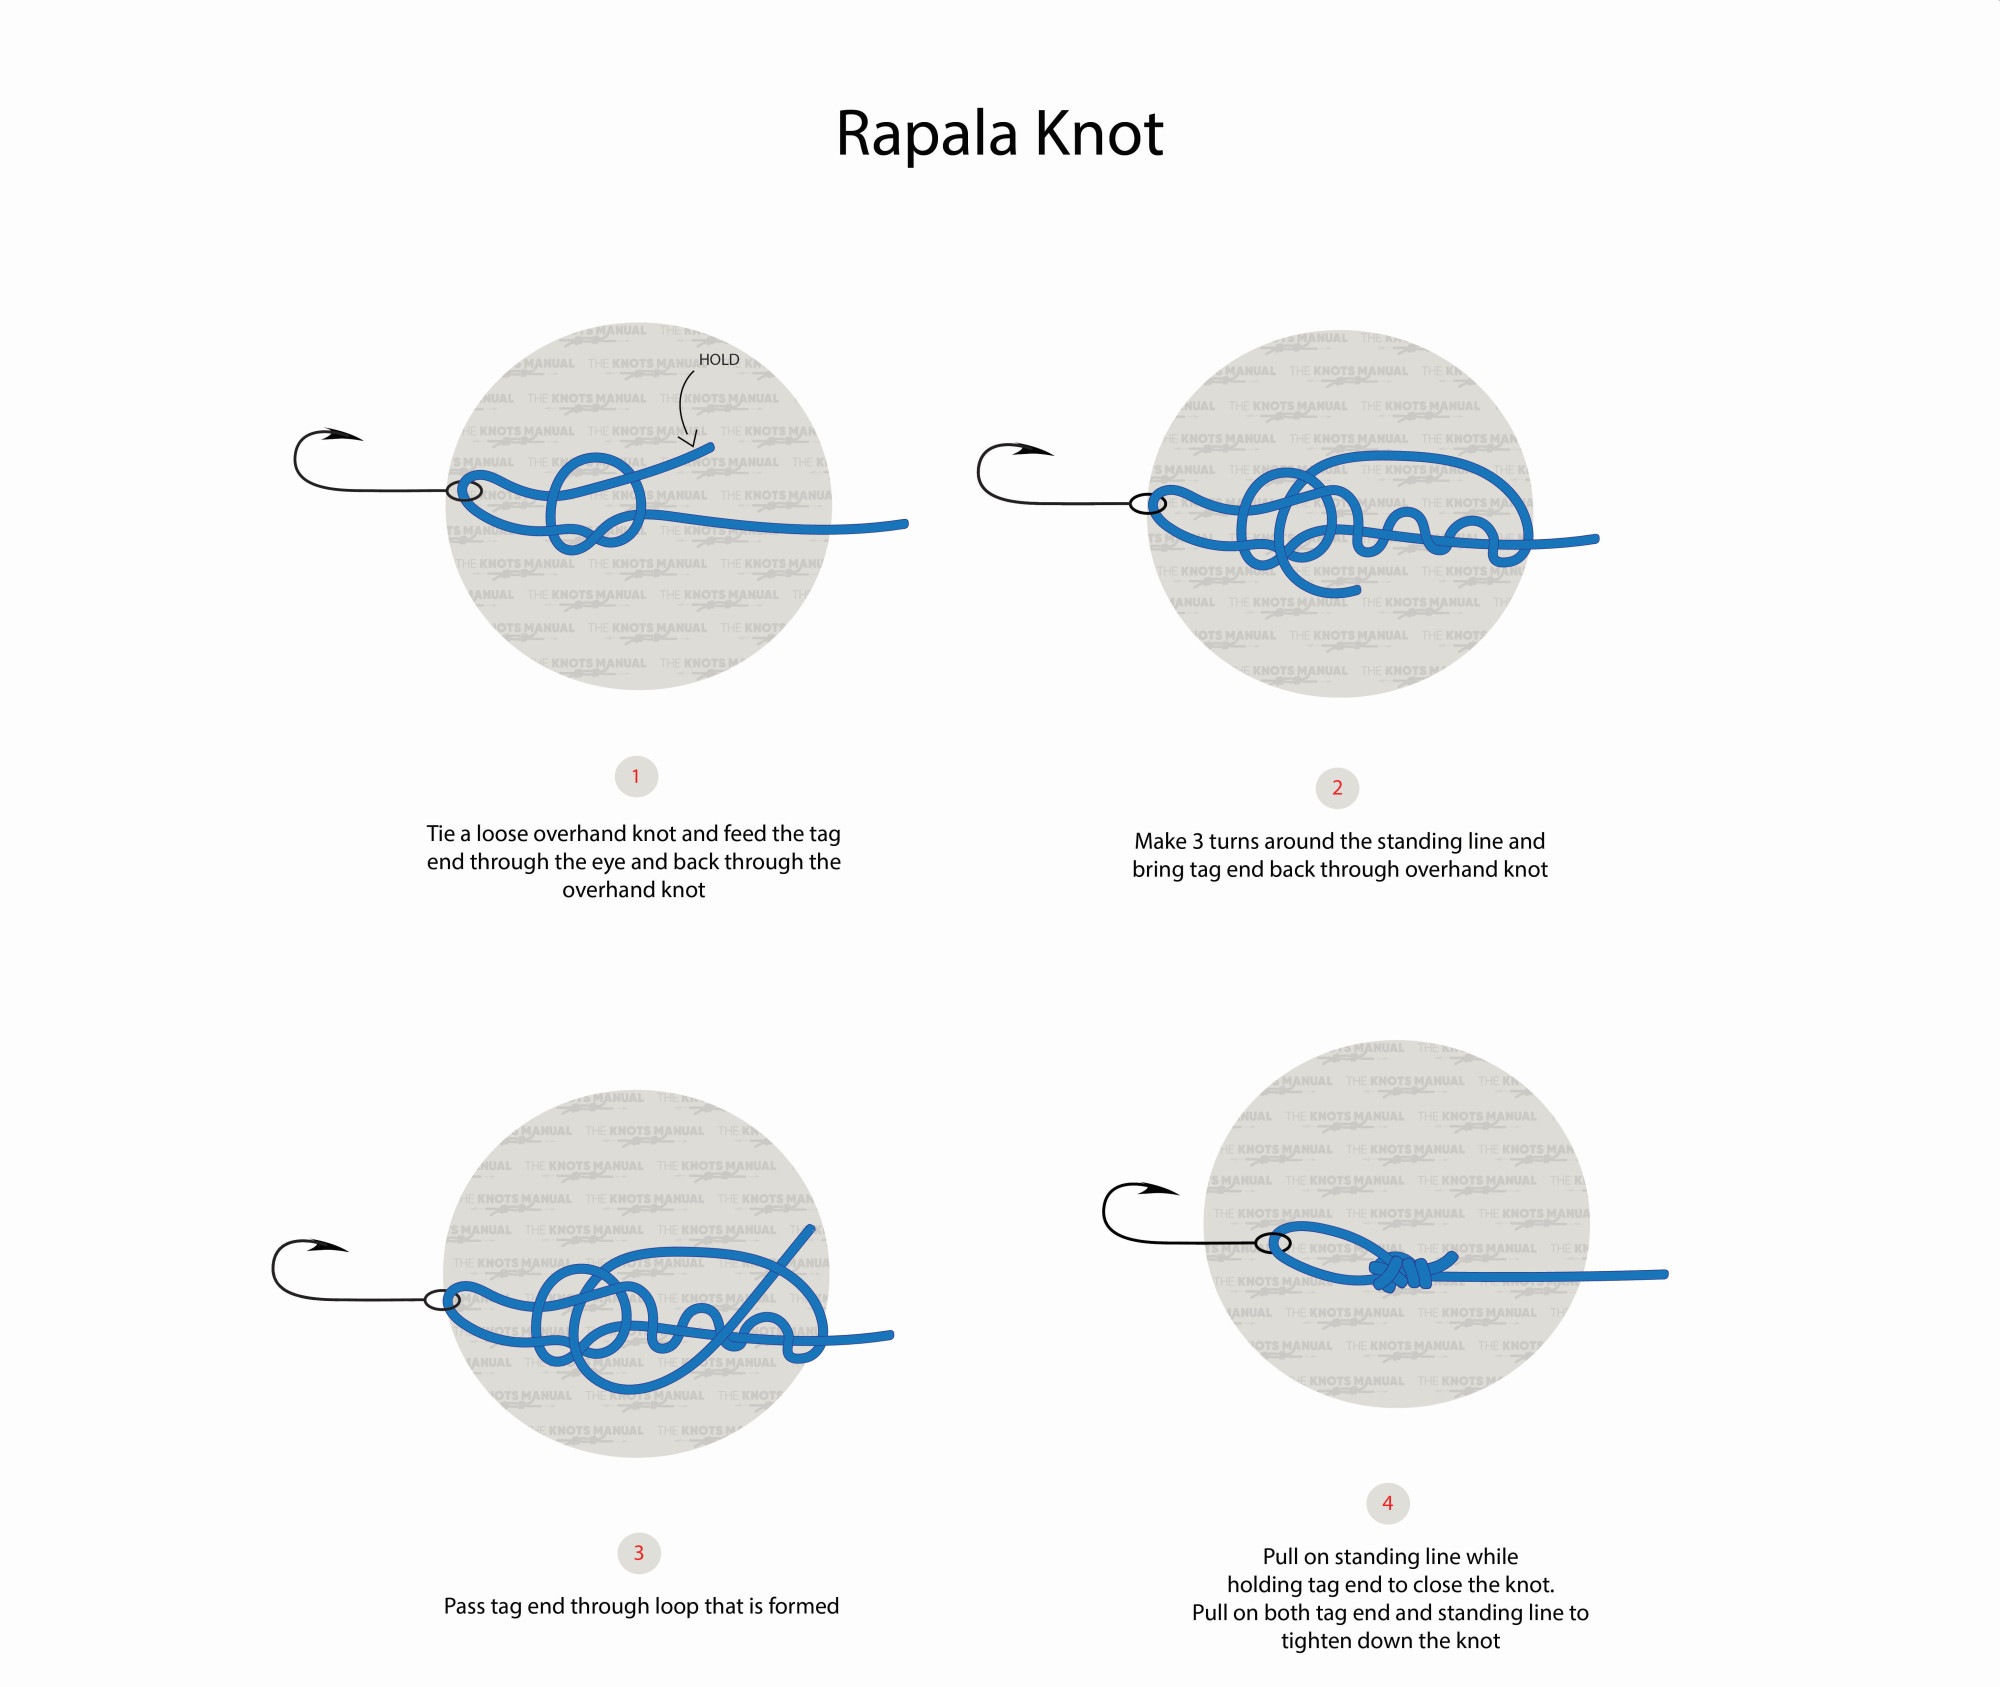
Step-By-Step Guide: How to Tie the Rapala Knot
A step-by-step guide on how to tie the Rapala Knot.
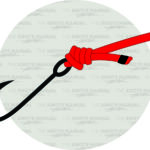
Step 1:
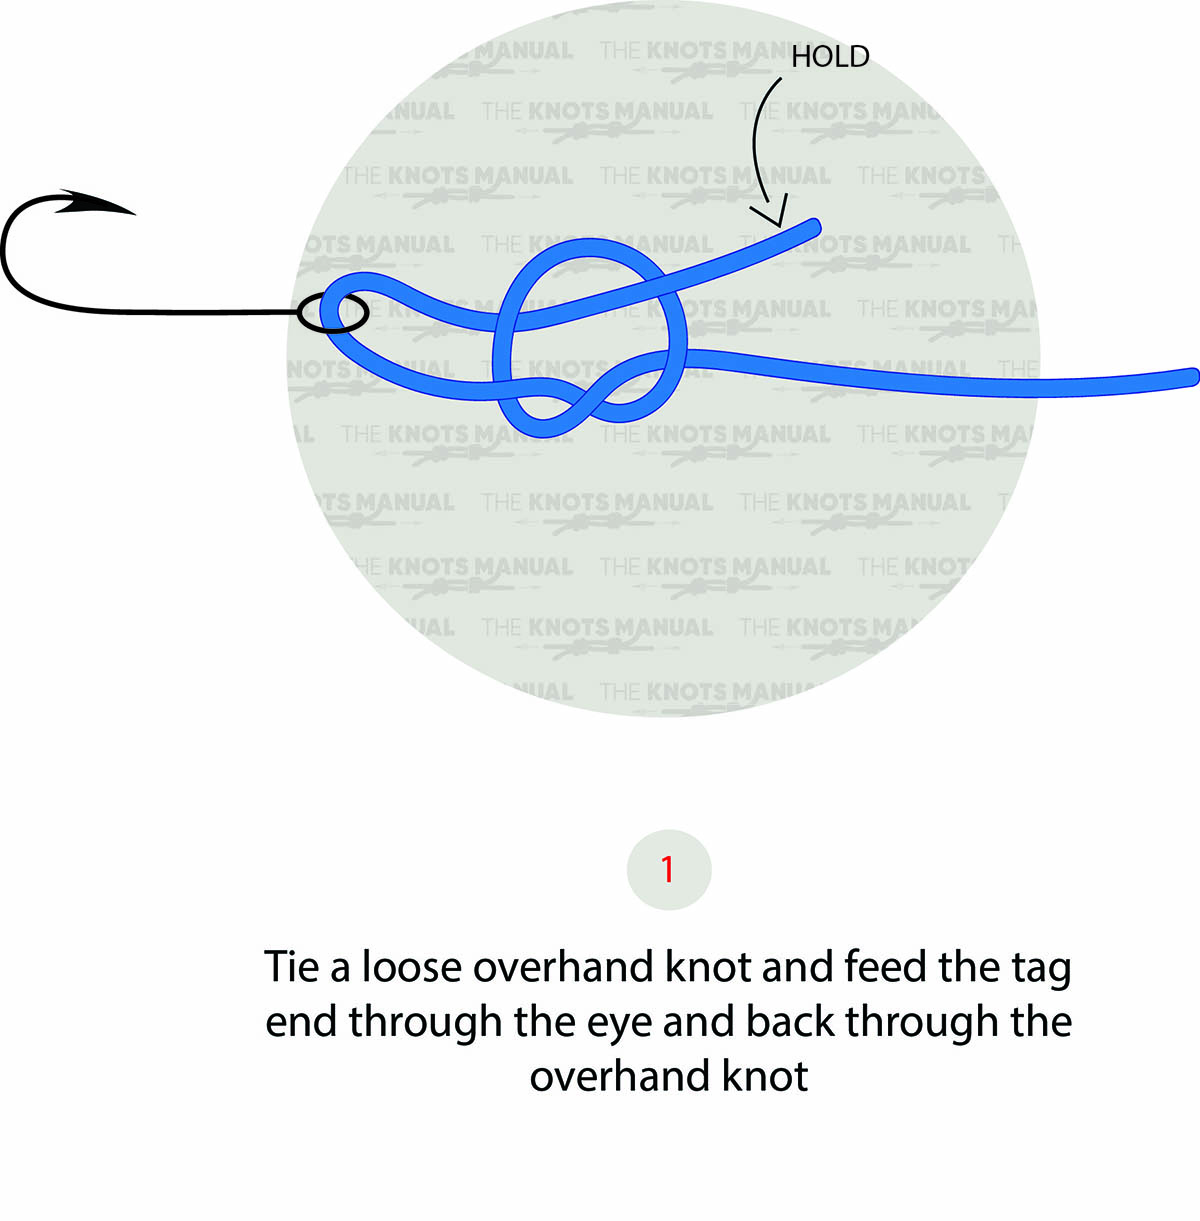
Tie a loose overhand knot near the end of the line and then pass the tag end through the eye of the knot and back through the overhand knot.
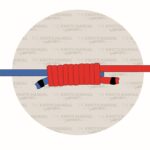
Step 2:
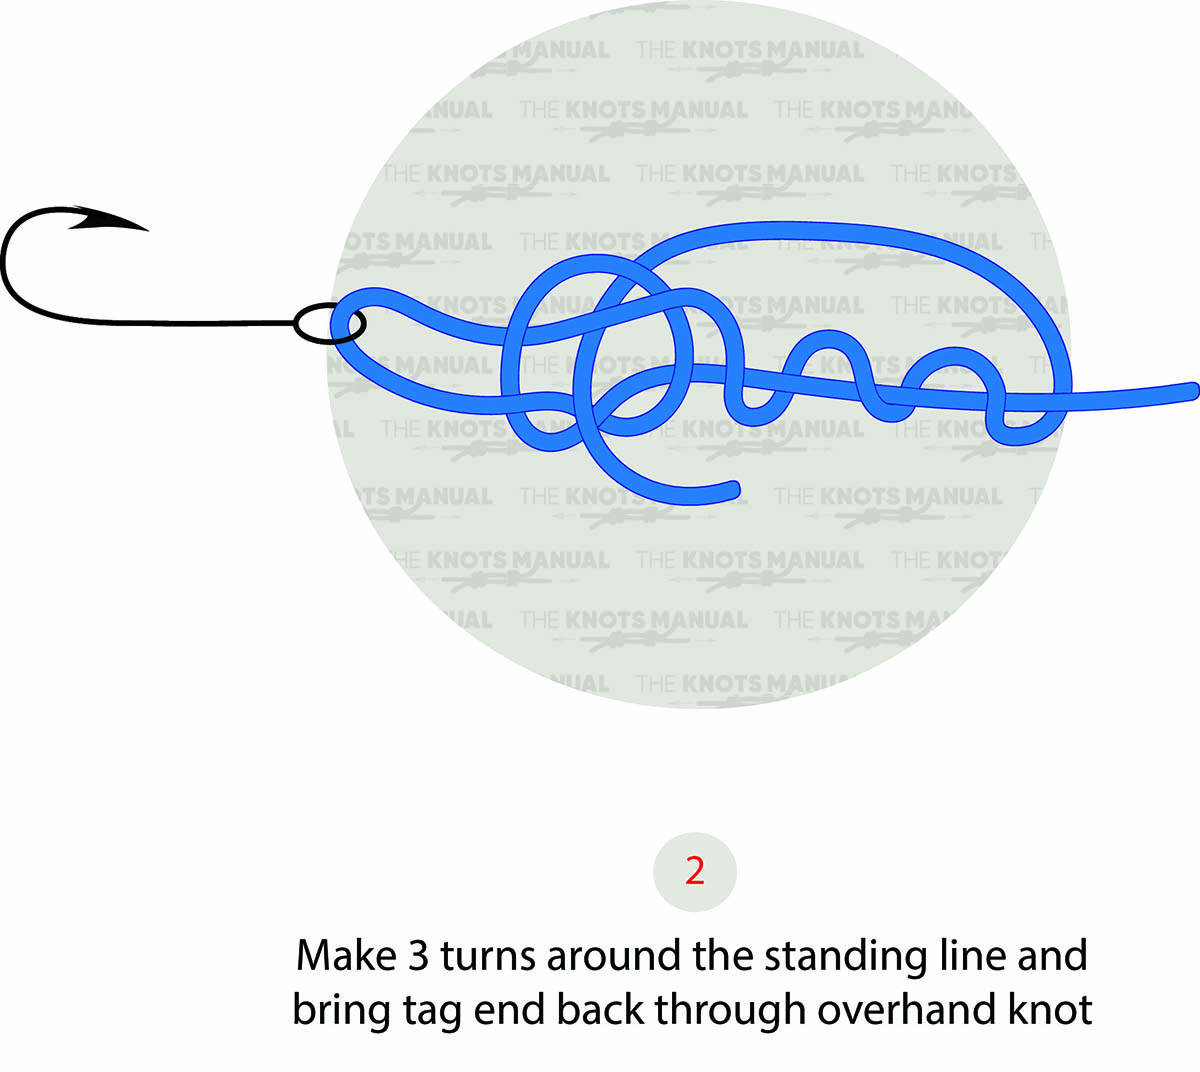
Wrap the tag end 3 times around the standing end. Then take it back through the overhand knot.
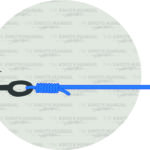
Step 3:
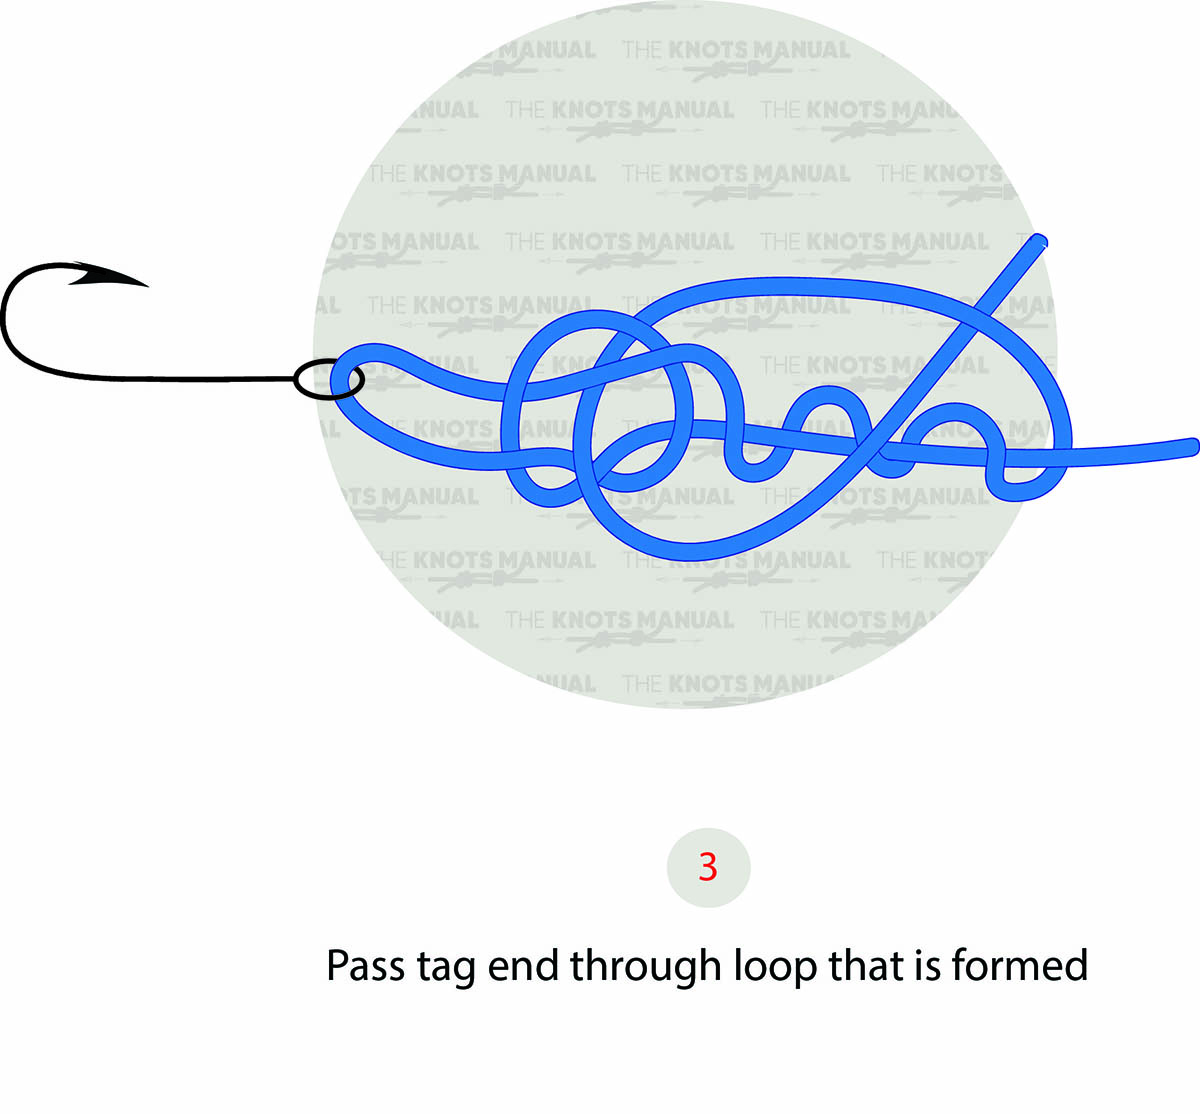
Finally, tug the tag end under itself.
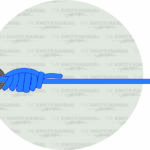
Step 4:
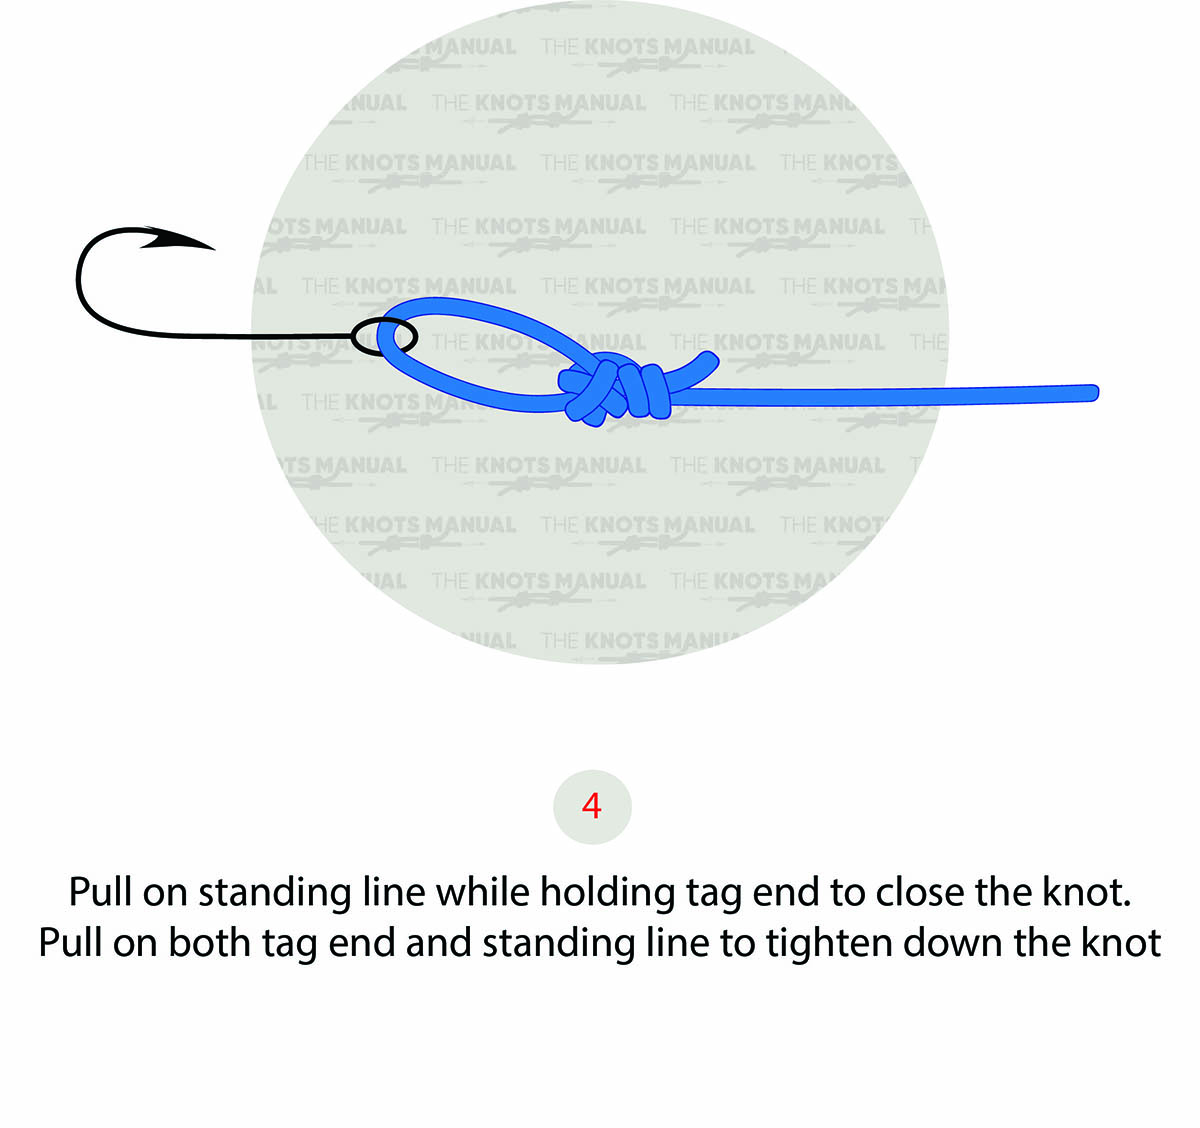
Lubricate with saliva or water, and tighten to finish the knot.