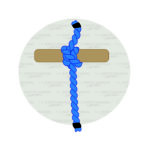
The Diagonal Lashing Knot offers a secure and rigid way of connecting two poles at a 45-90-degree angle. It gets its name from the fact that it is tied diagonally between both poles.
Quick Guide: Tying a Diagonal Lashing Knot
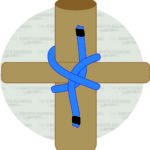
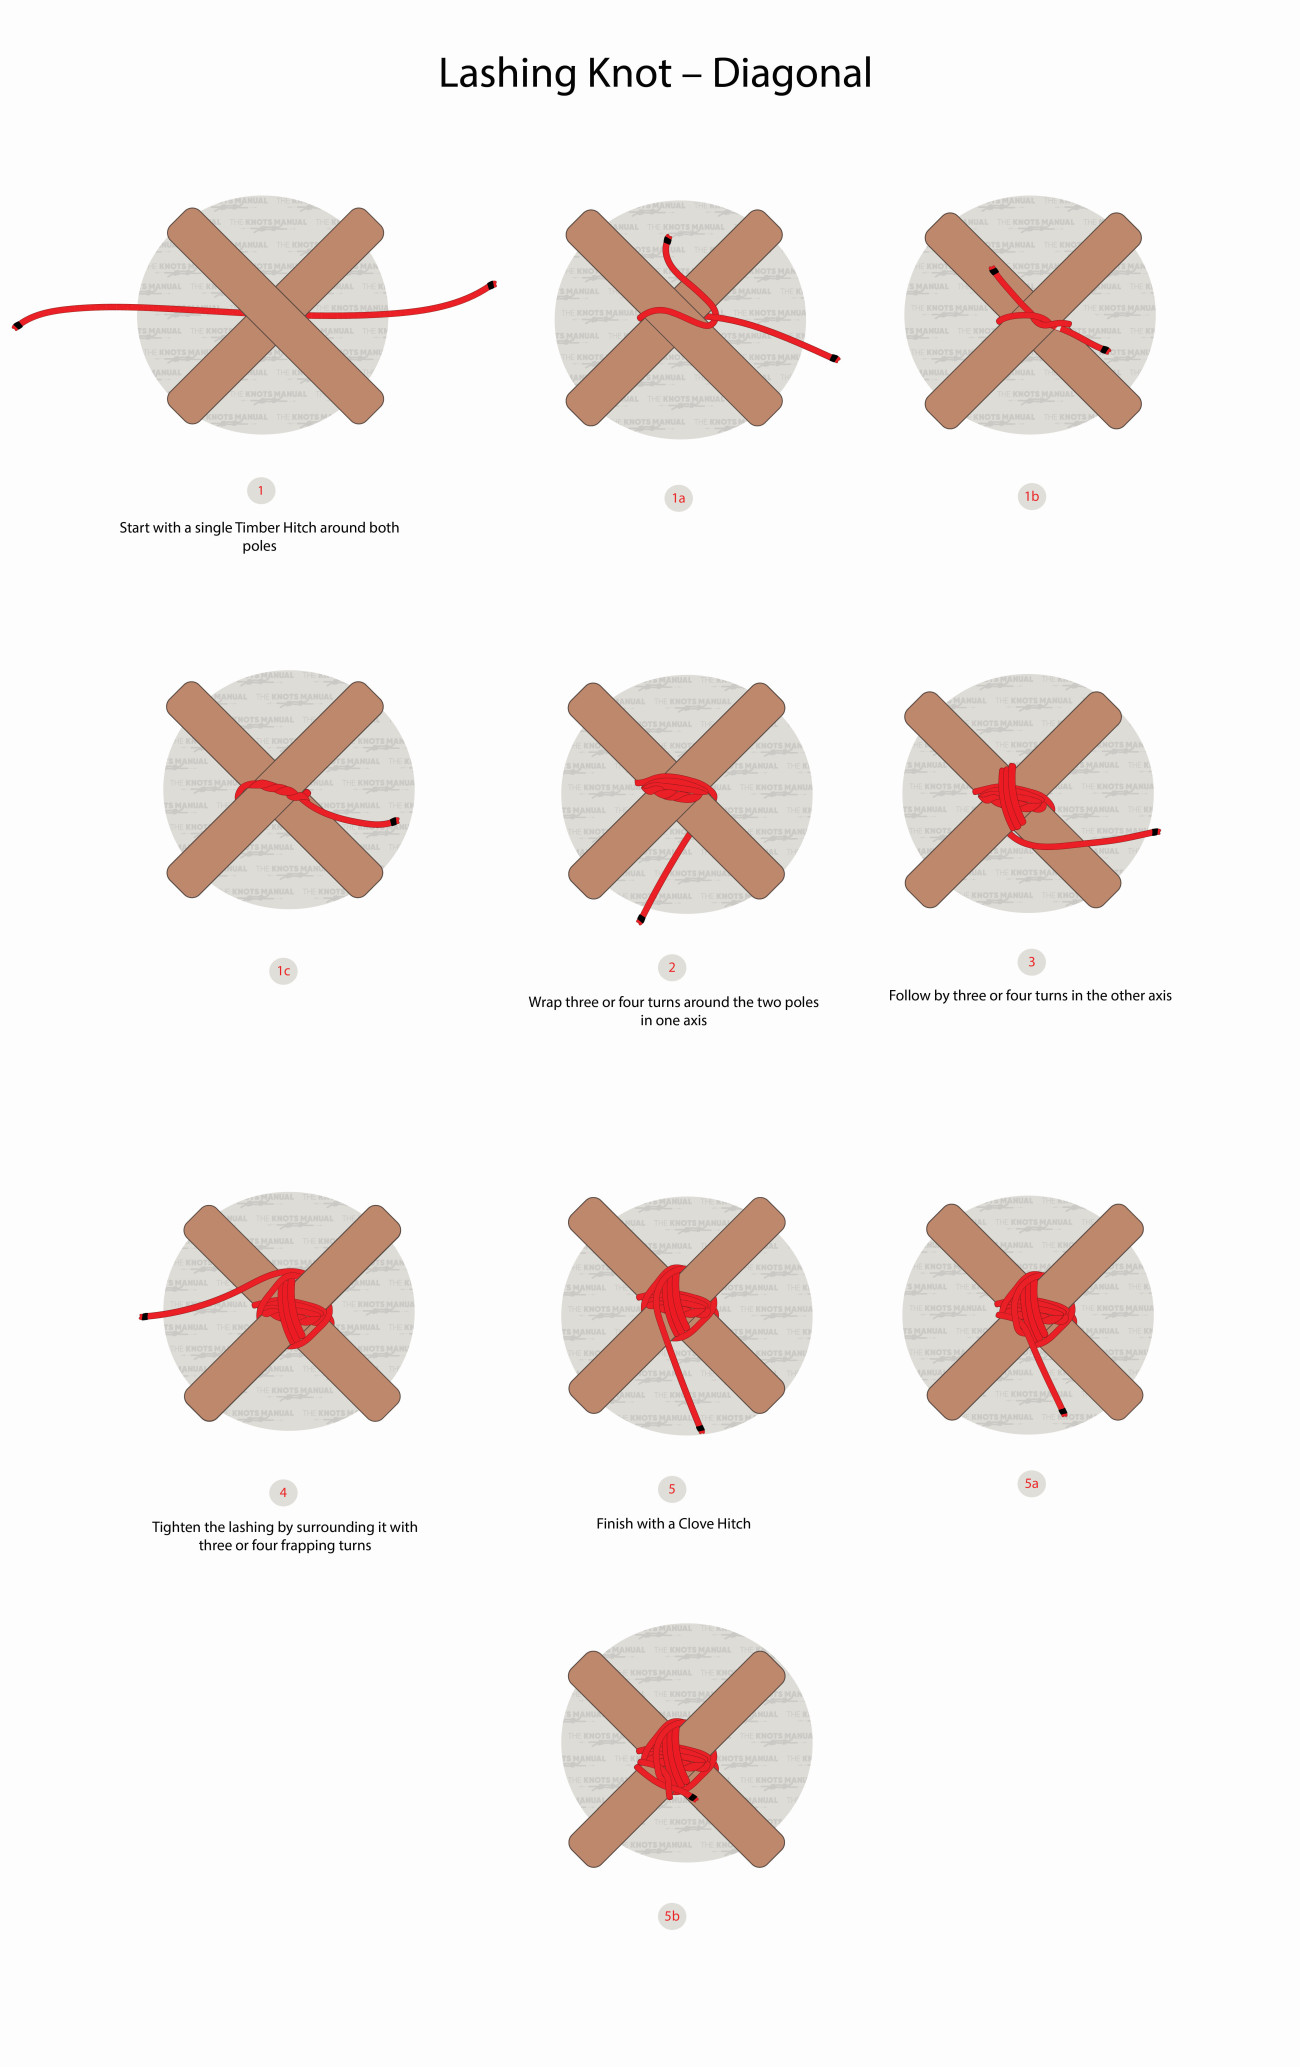
To tie the Diagonal Lashing Knot, first tie a Timber Hitch around both poles (steps 1-1c). Then do 3-4 turns along one diagonal axis (step 2), and then the other one (step 3). Before you make each next wrap, tighten the last one first to make it more rigid.
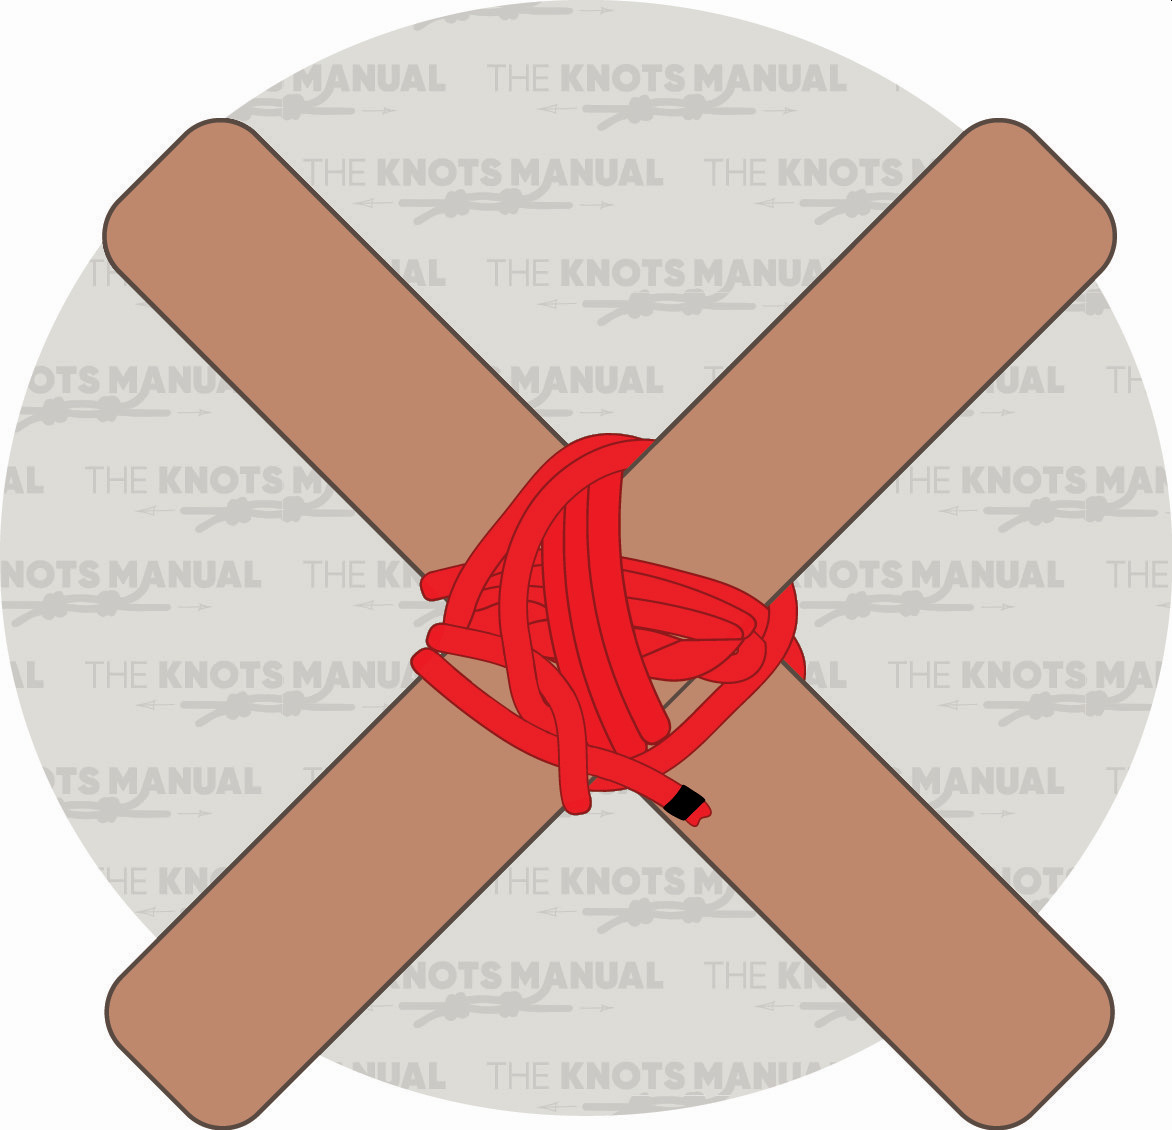
Then do another 3-4 turns along the plain formed by both poles (between them, shown in step 4). This will tighten all the current lashings, so make sure to do a good job of tightening the rope while making these turns.
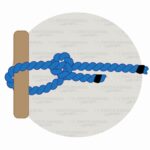
Finally, do a Clove Hitch around one of the poles to keep the end from unraveling (steps 5-5b). Form it as close to the knot as possible.
Tip: You should learn how to tie a Timber Hitch and a Clove Hitch separately before you attempt tying the Diagonal Lashing Knot.
Pros and Cons of the Diagonal Lashing Knot
The main advantage of the Diagonal Lashing Knot is that it is very strong and rigid. If you do a good job at keeping the rope tight with each turn that you do, then there won’t be almost any wobble left in the lashing.
It’s also somewhat easy to tie if you know how to tie the Clove and Timber Hitches. If you don’t – they’re both really easy to learn, so do that first before learning the Diagonal Lashing Knot.
Another benefit of the Diagonal Lashing Knot is that both poles don’t need to sit at exactly 90-degree angles. You can tie it starting from a 30-45 degree angle and wider. This makes it an ideal choice to use for adding cross braces to a structure.
It also can be untied relatively easily if needed because it’s held in place by a simple Clove Hitch, which doesn’t jam over time.
Common Uses for the Diagonal Lashing Knot
If you have a structure with two crossed poles that are sitting next to each other but aren’t touching, then the Diagonal Lashing Knot will pull them closer. It’s achieved with the Timber Hitch tied in the beginning as well as the square lashings tied in step 4.
The Diagonal Lashing Knot is also often used in wooden and rope structures to introduce diagonal bracing. This makes the structure much more rigid. Other lashings can’t be used here because a lot of times, the angles aren’t sitting at exactly 90 degrees.
In scouting, it’s used to form a Trestle.
Knots Like the Diagonal Lashing Knot
Transom Knot: A very simple lashing knot that connects two poles at a 90-degree angle. It’s usually used only for temporary lashings because it isn’t very secure or rigid.
Square Lashing Knot: This lashing can be used as an alternative to the Diagonal Lashing Knot. It’s more useful if the poles are sitting at a perfect 90-degree angle but it can also be tied with slightly smaller angles. It isn’t as rigid as the Diagonal Lashing Knot.
Round Lashing Knot: A lashing used to connect two poles by putting them side by side with a small overlapping section. The Round Lashing Knot is then tied around them to hold them together.
Tripod Lashing Knot: A lashing knot that connects three poles at the end to form a tripod. This is very useful for creating a DIY shelter.
Timber Hitch: A knot that’s used in forming the Diagonal Lashing Knot. It’s generally used to pull heavy logs with rope or to carry kindling to a firepit.
Clove Hitch: A simple hitch that attaches the end of a rope to a round object. It’s used in forming the Diagonal Lashing Knot to keep the knot from untying.
Step-By-Step Guide: How to Tie the Diagonal Lashing Knot
A step-by-step guide on how to tie a Diagonal Lashing Knot.
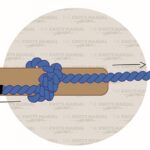
Step 1:
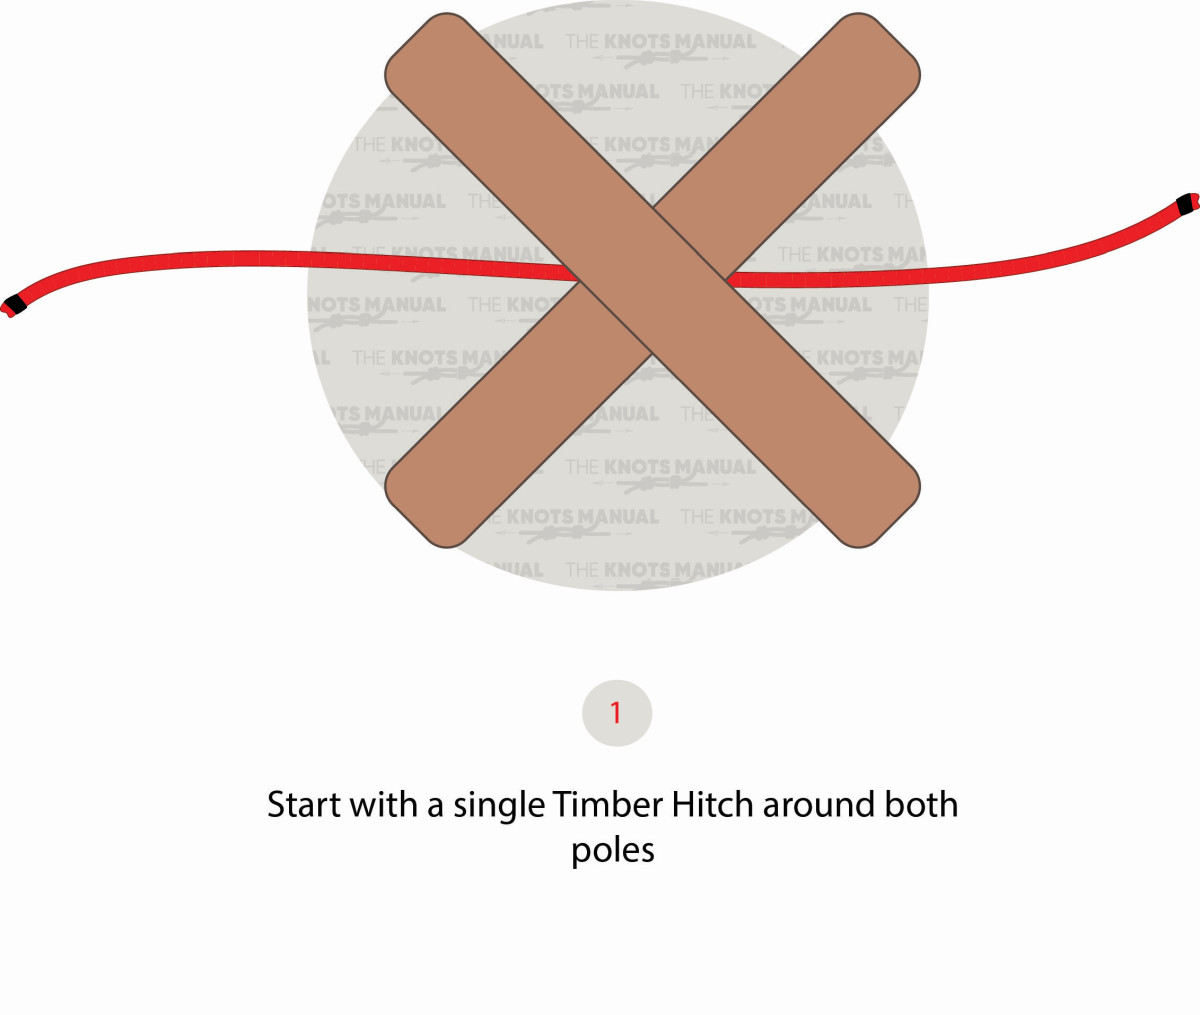
Place the end of the rope behind both poles with the short (working) end on the left side.
Step 1a:
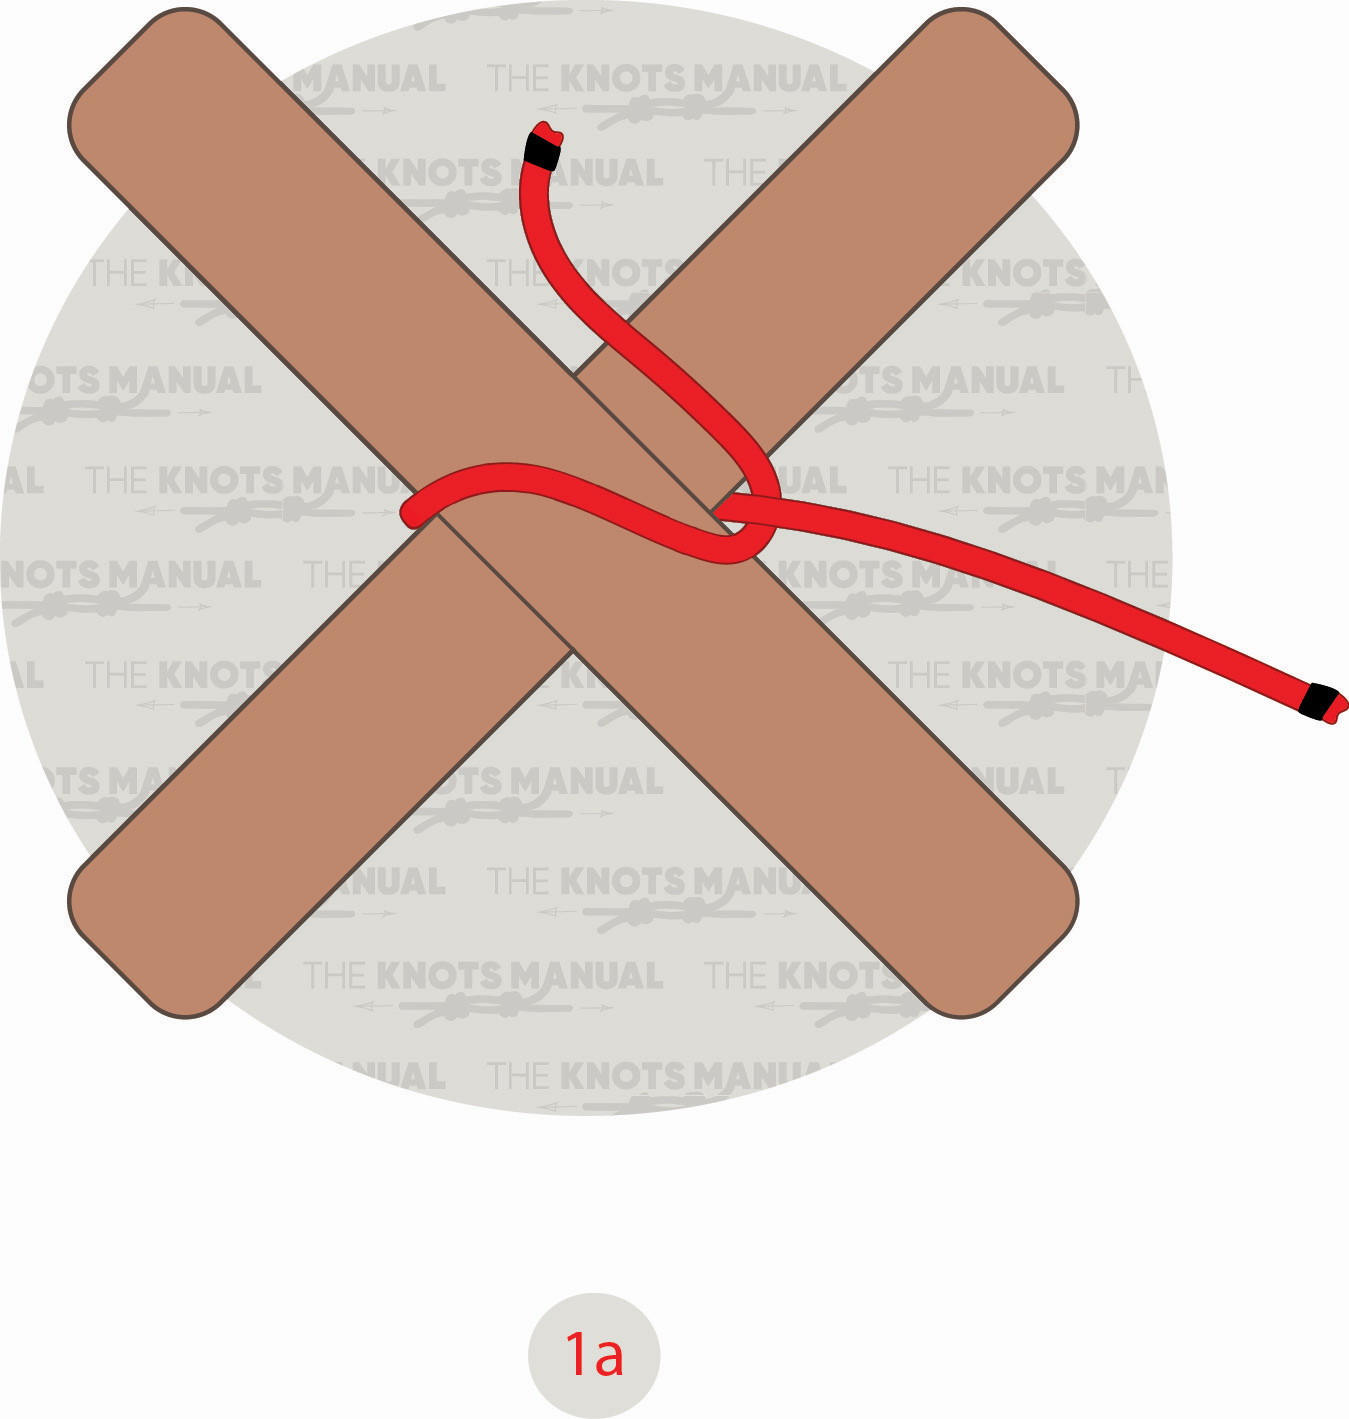
Pass the working end behind the standing end.
Step 1b:
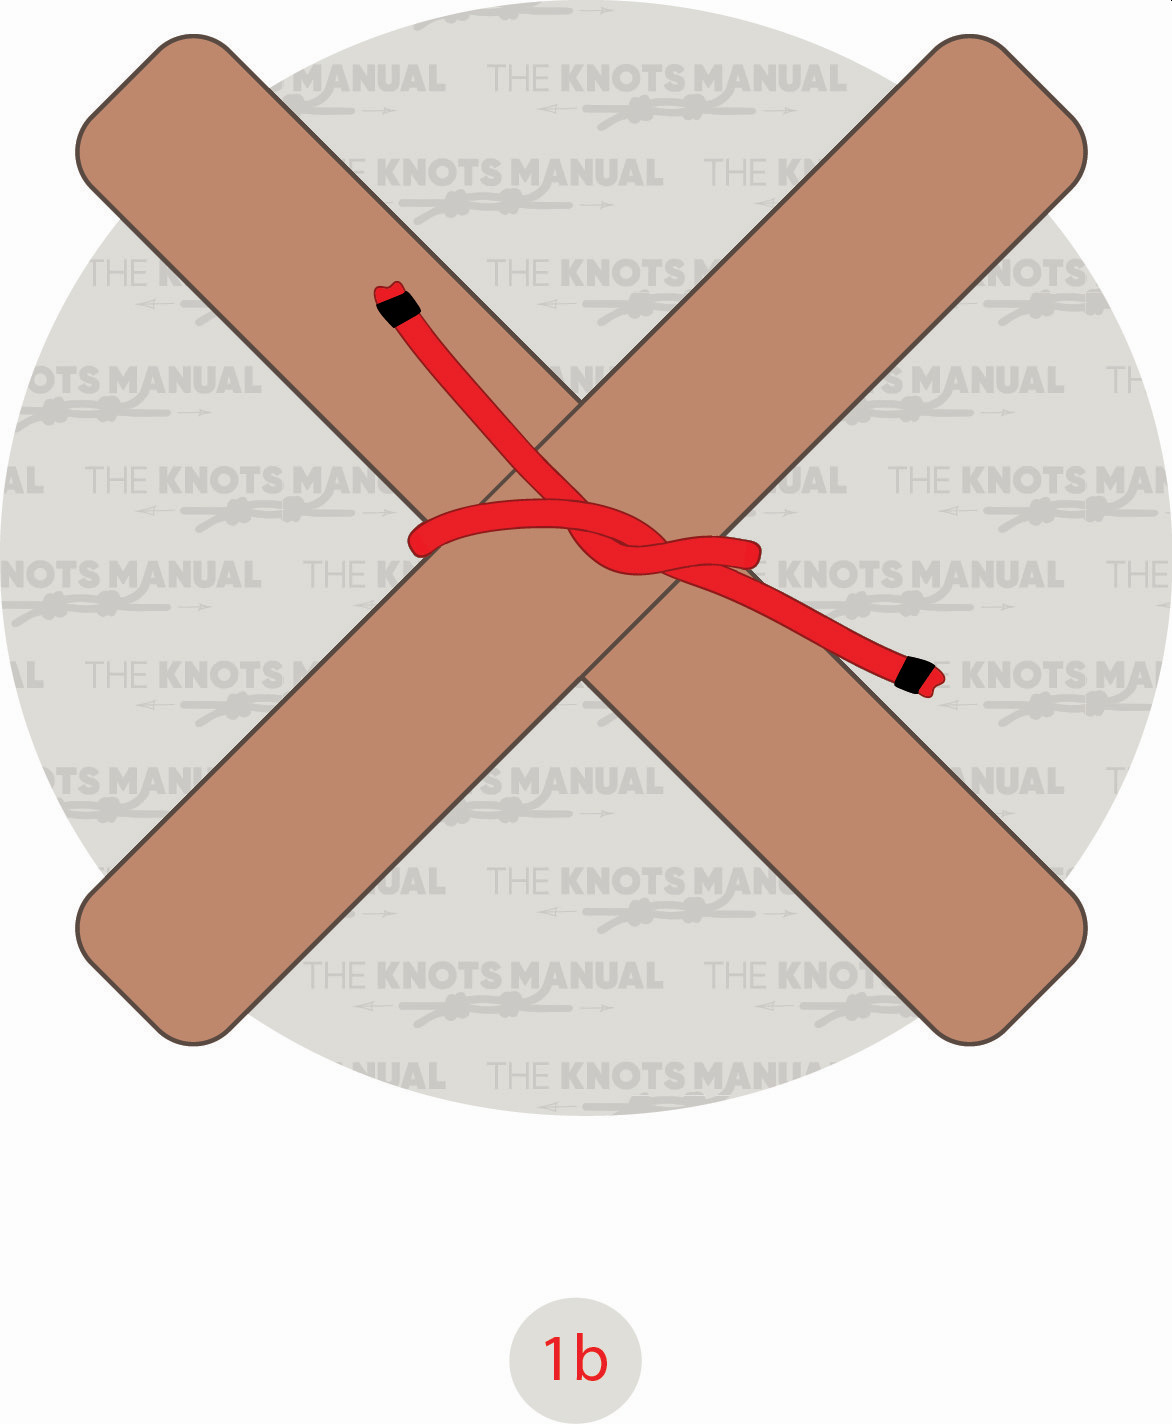
Pass the working end underneath itself.
Step 1c:
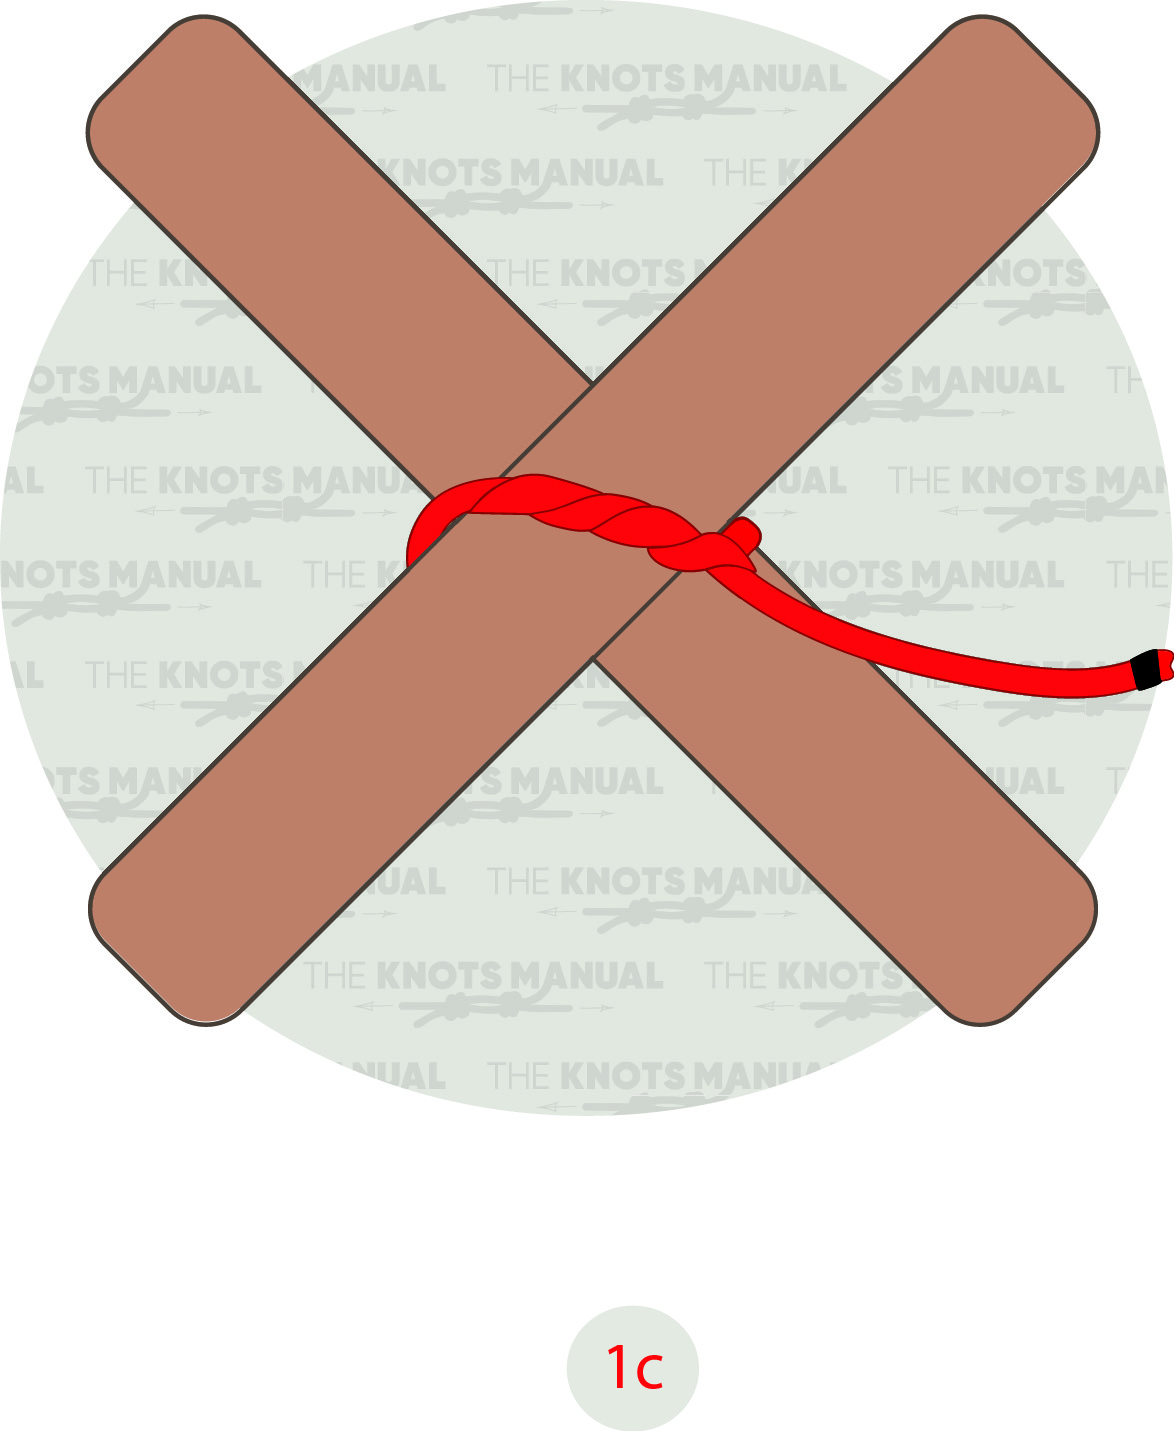
Wrap the working end around itself 3 times to finish a Timber Hitch.
Step 2:
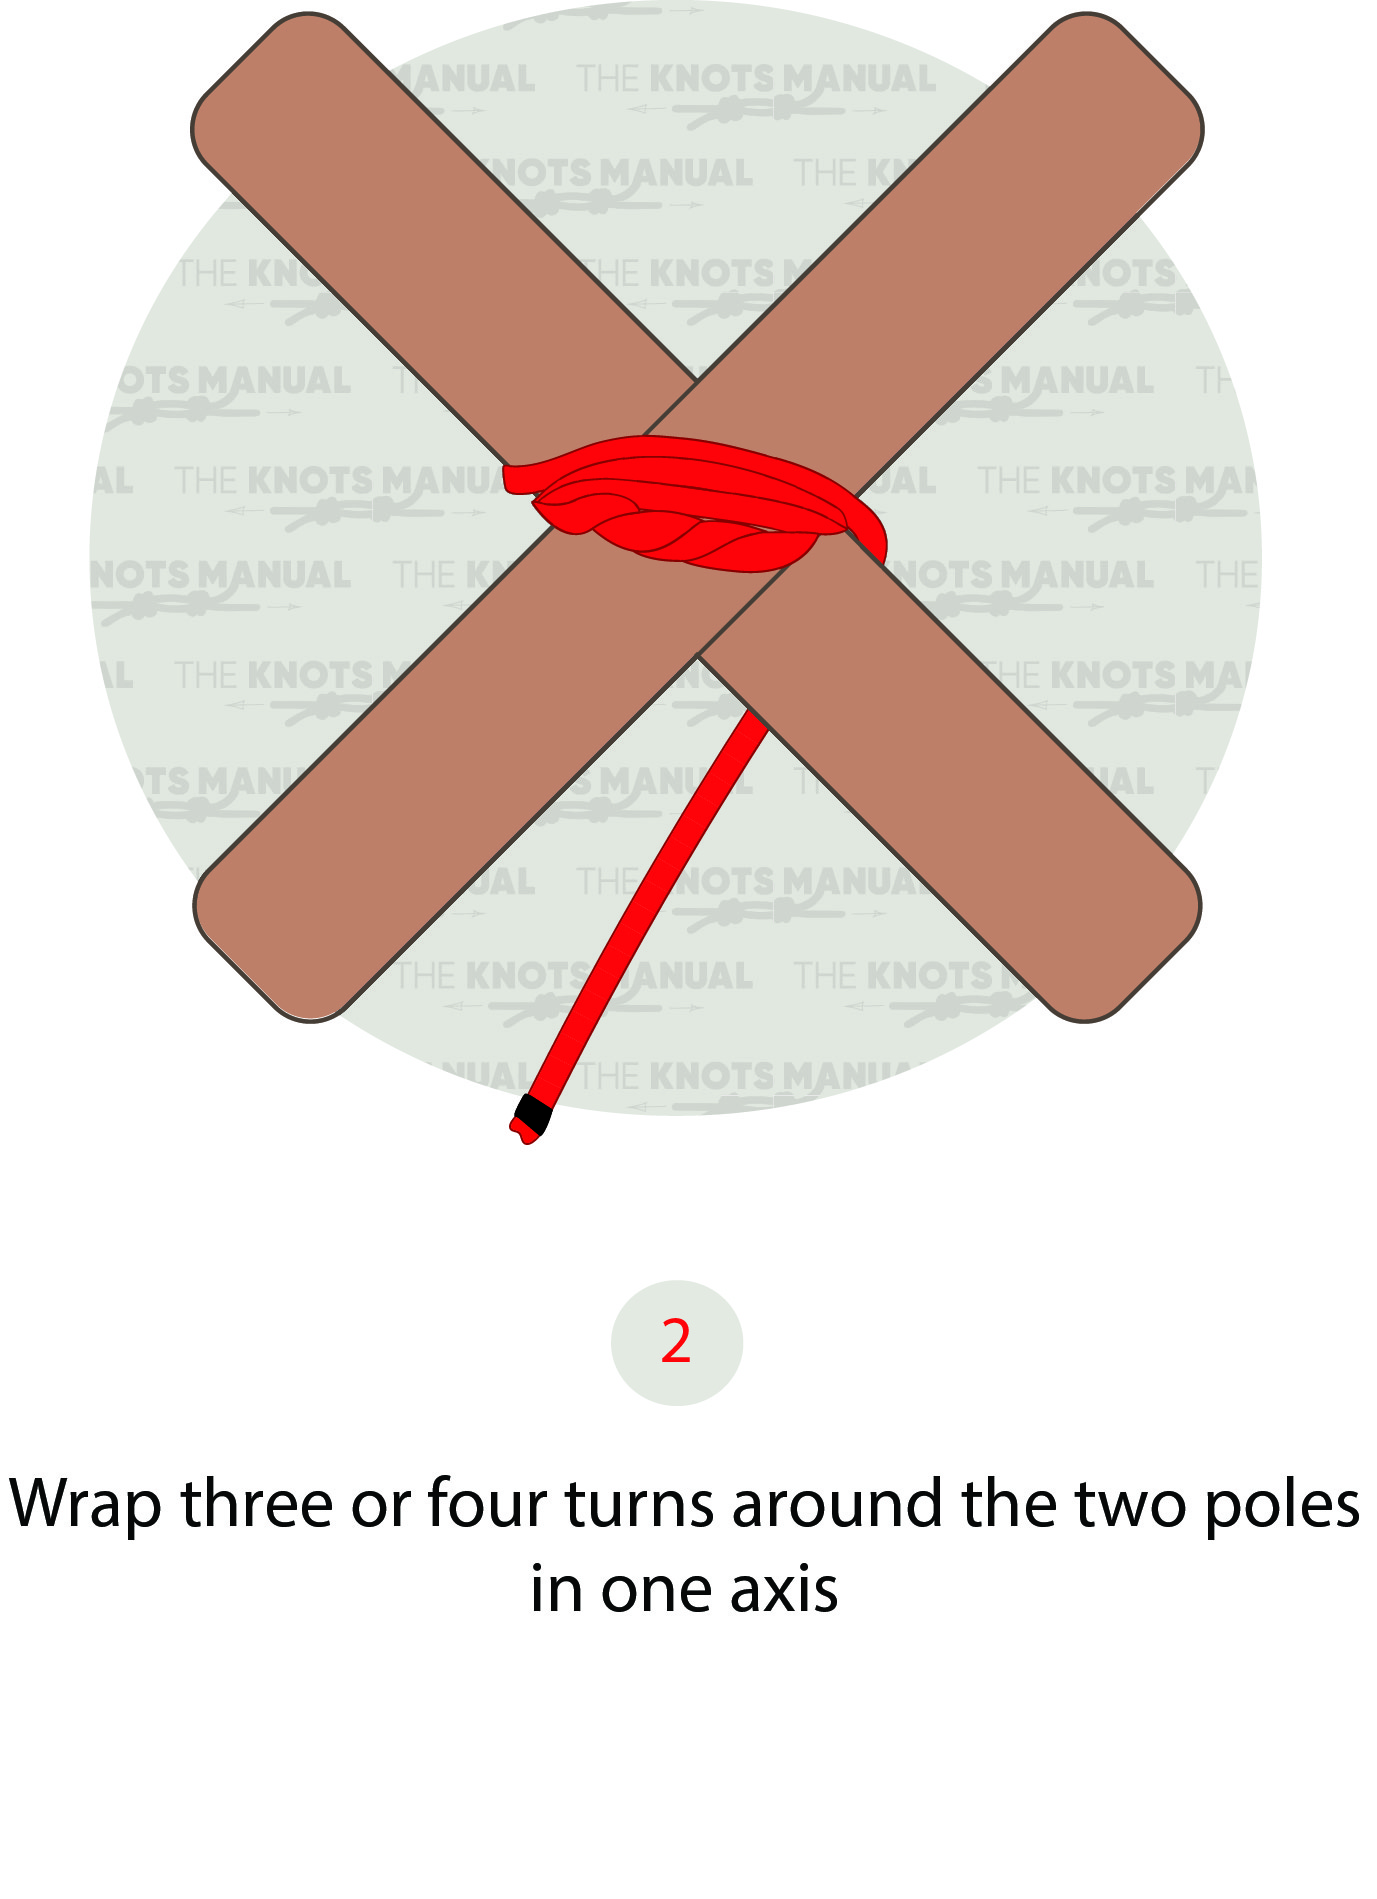
AWap the rope 3-4 times around the first diagonal axis.
Step 3:
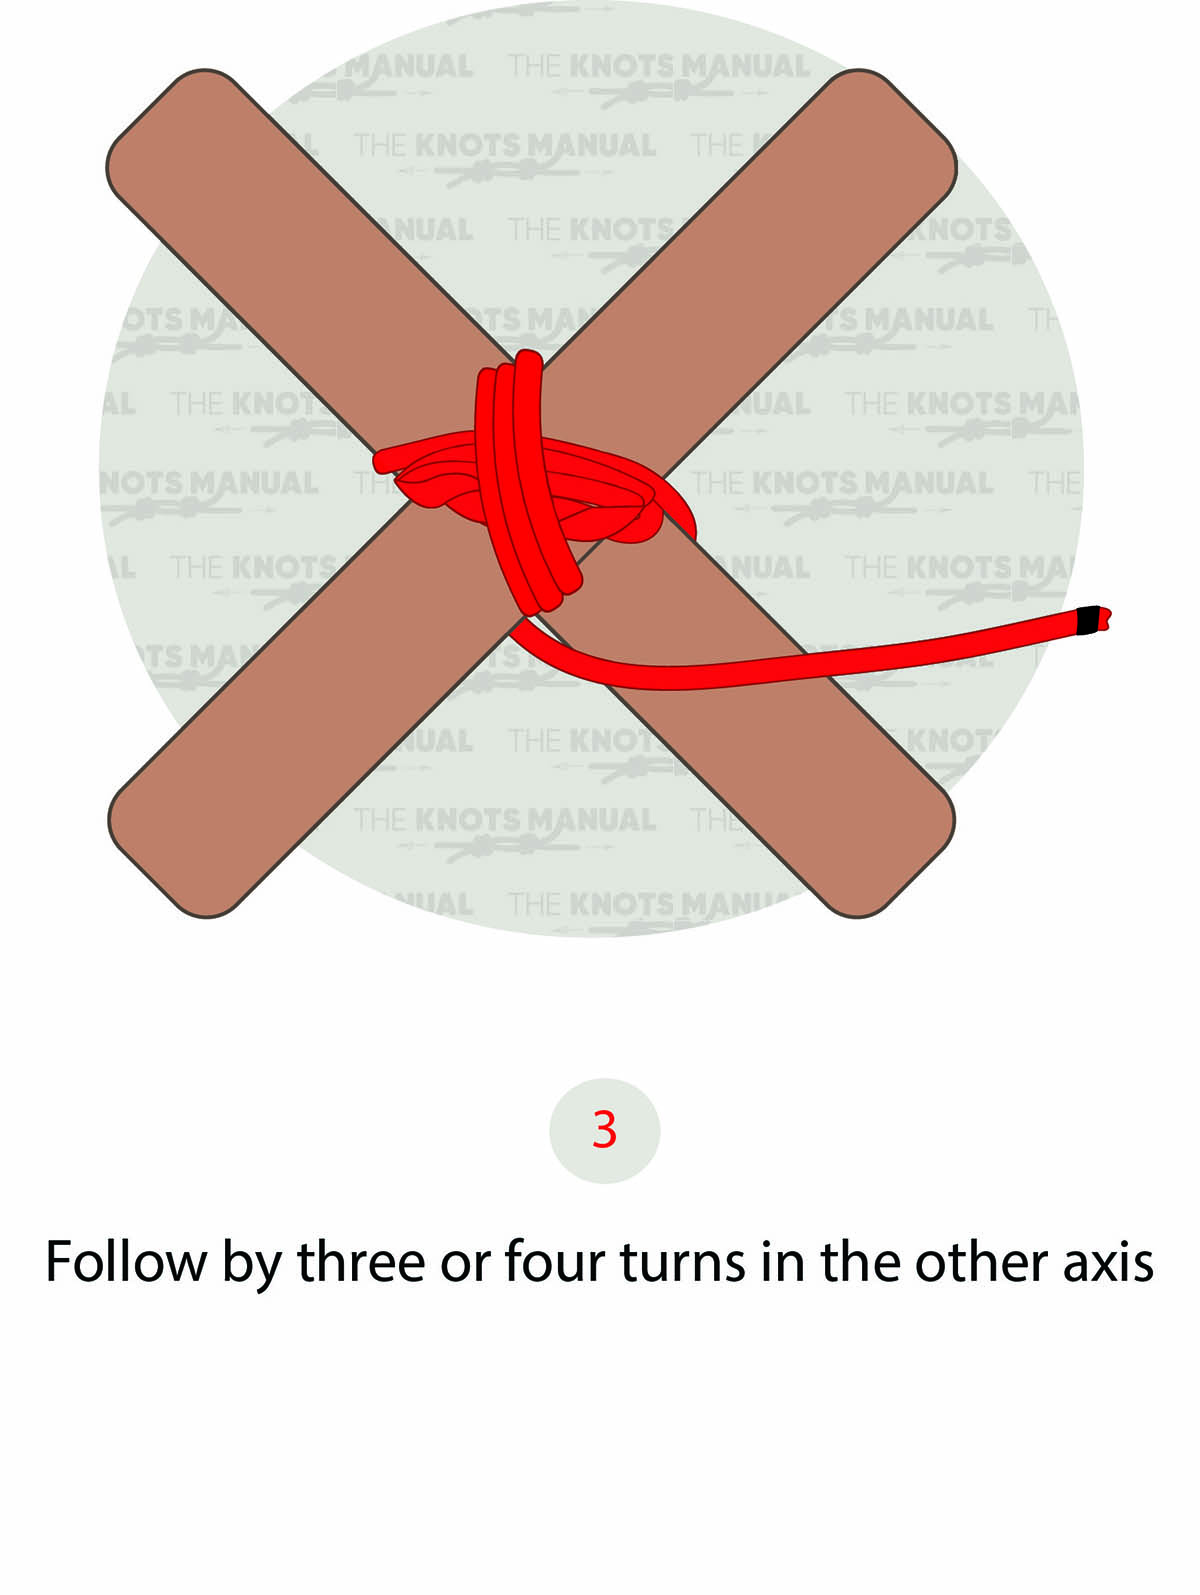
Now do another 3-4 wraps in the other diagonal axis.
Step 4:
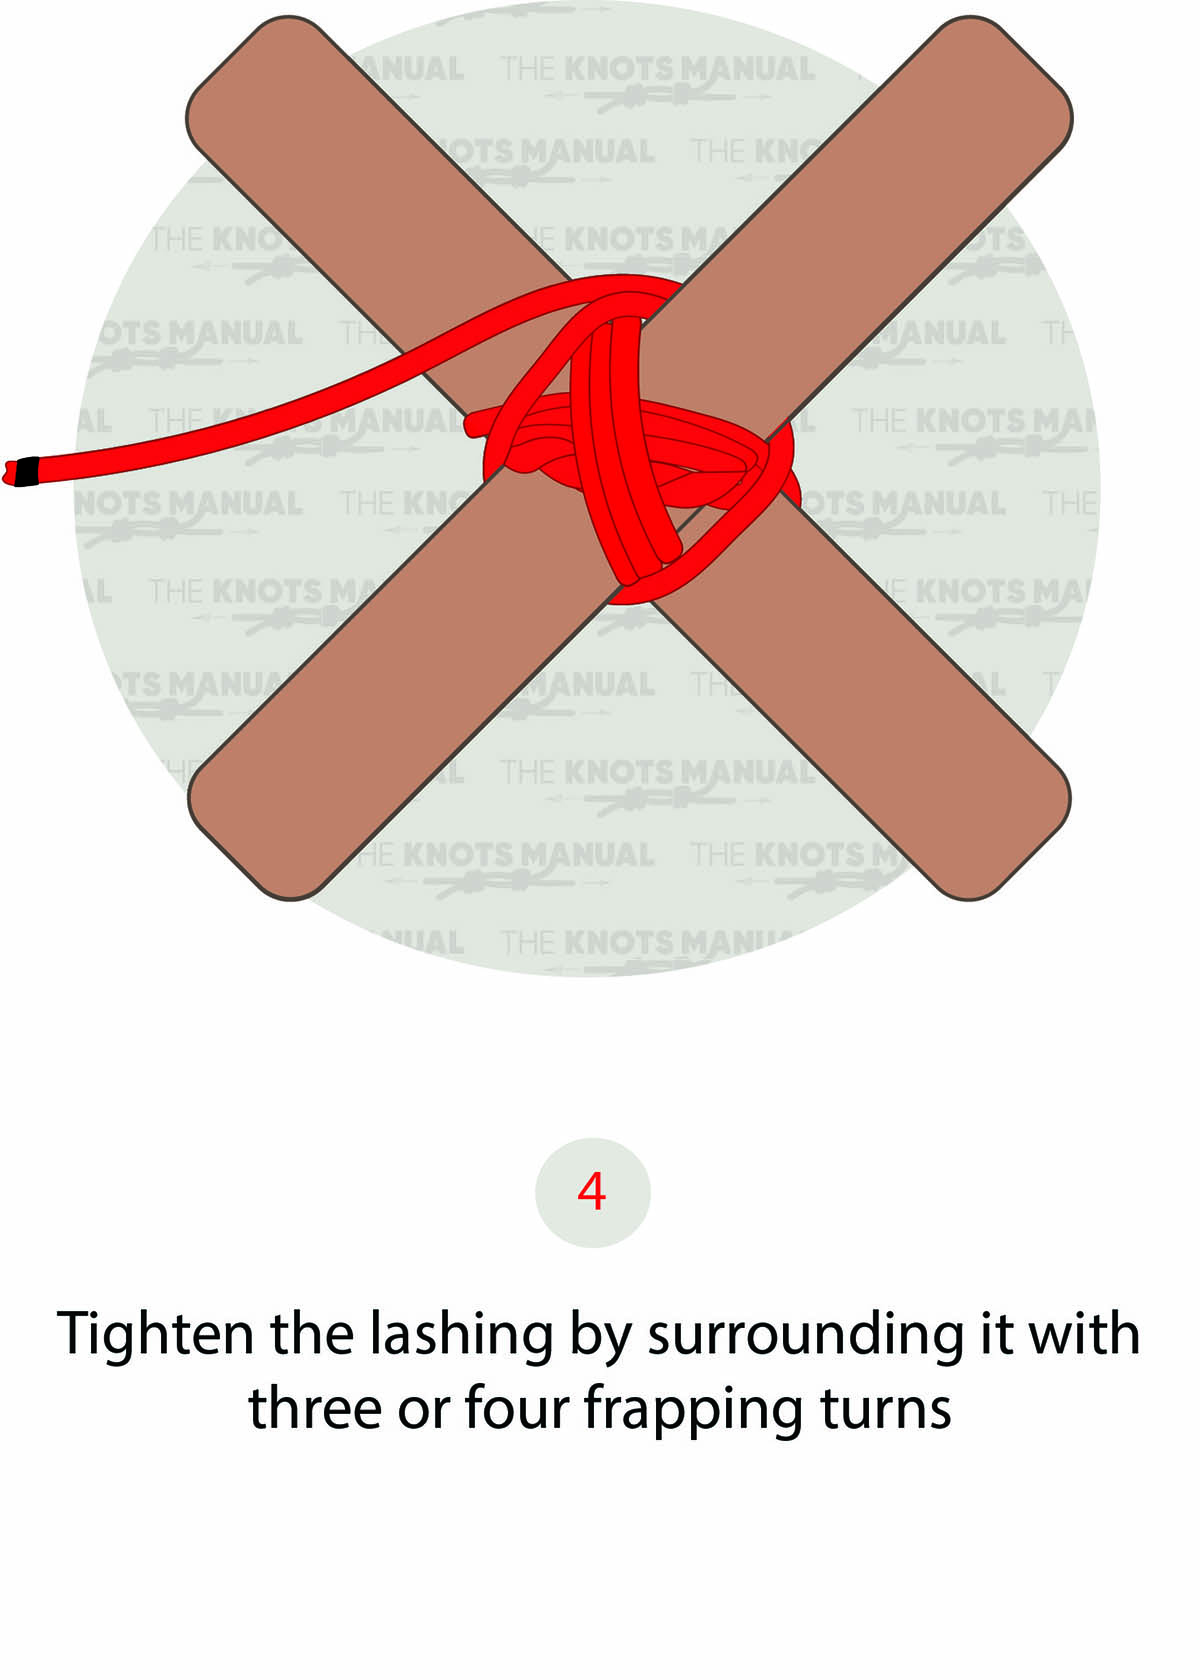
Tighten the wrappings by doing another 3-4 turns alongside the plane of both poles (as illustrated above).
Step 5:
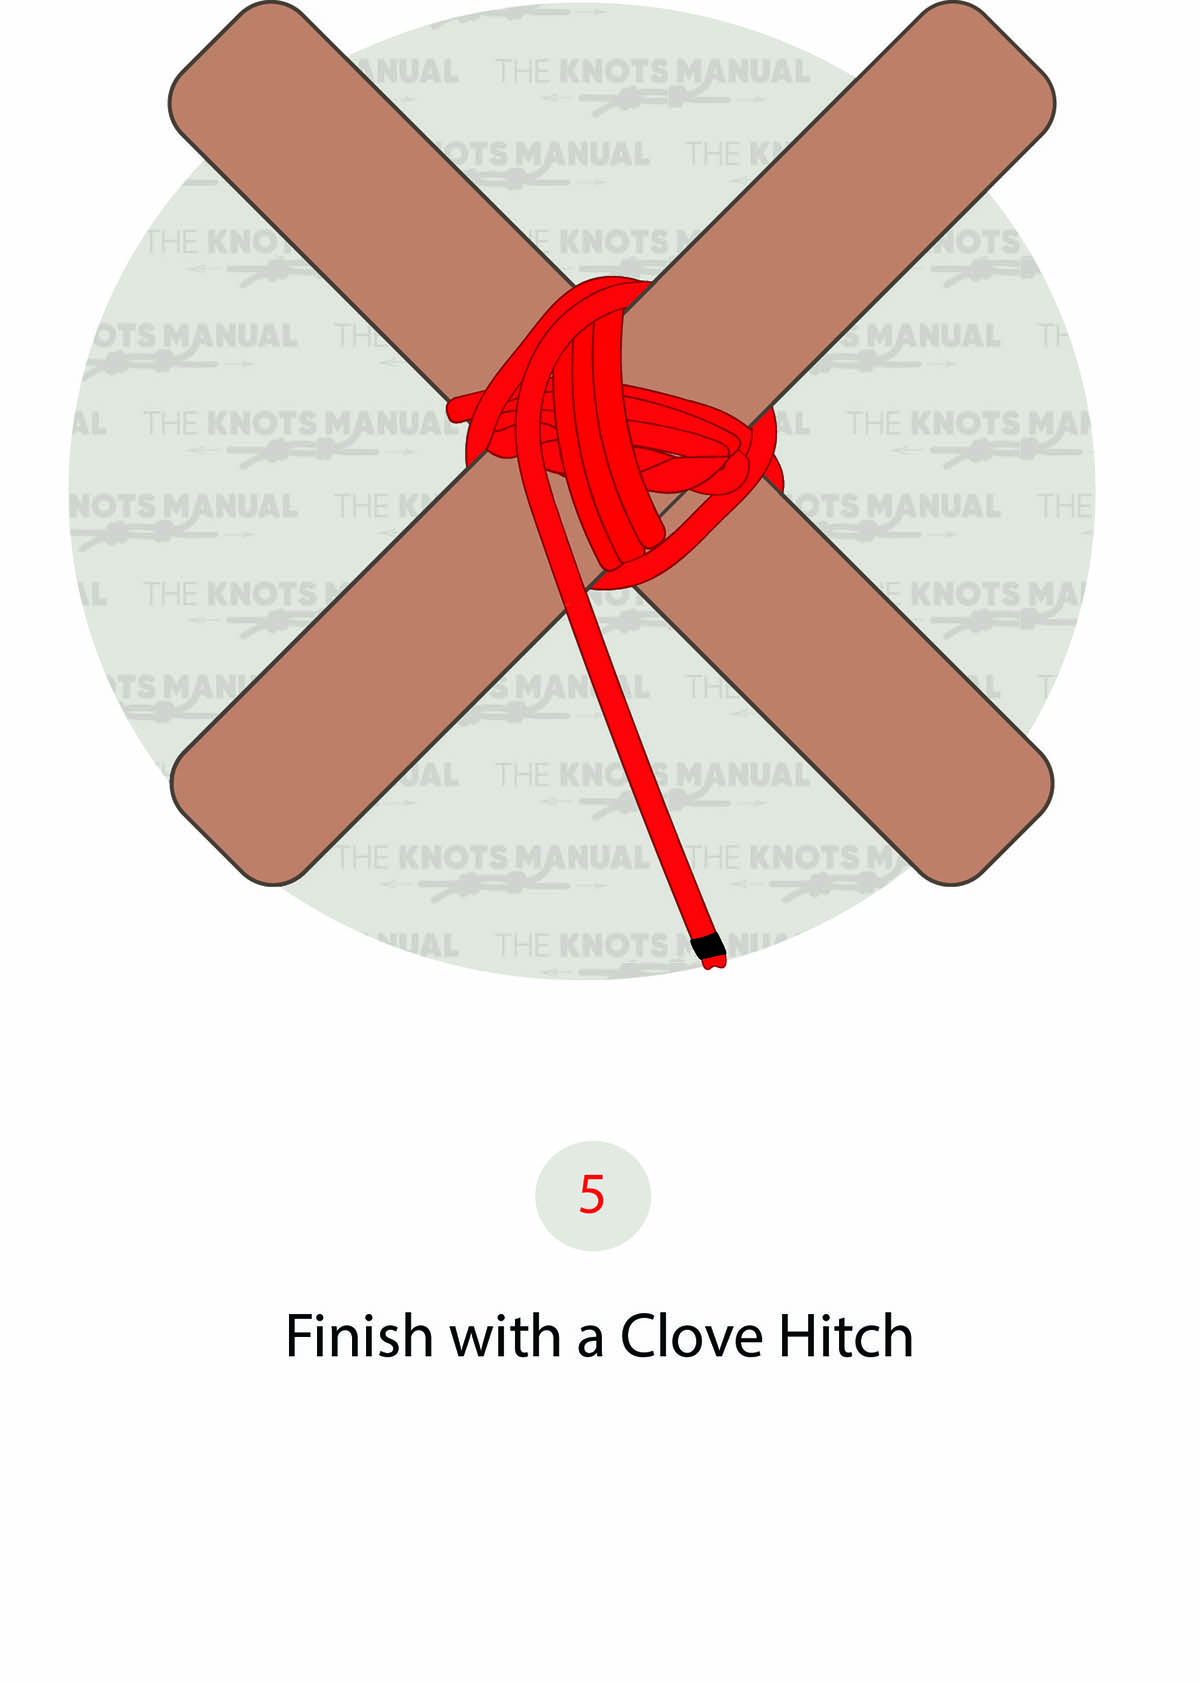
Now you’ll need to tie a Clove Hitch. Wrap the working end around one of the poles.
Step 5a:
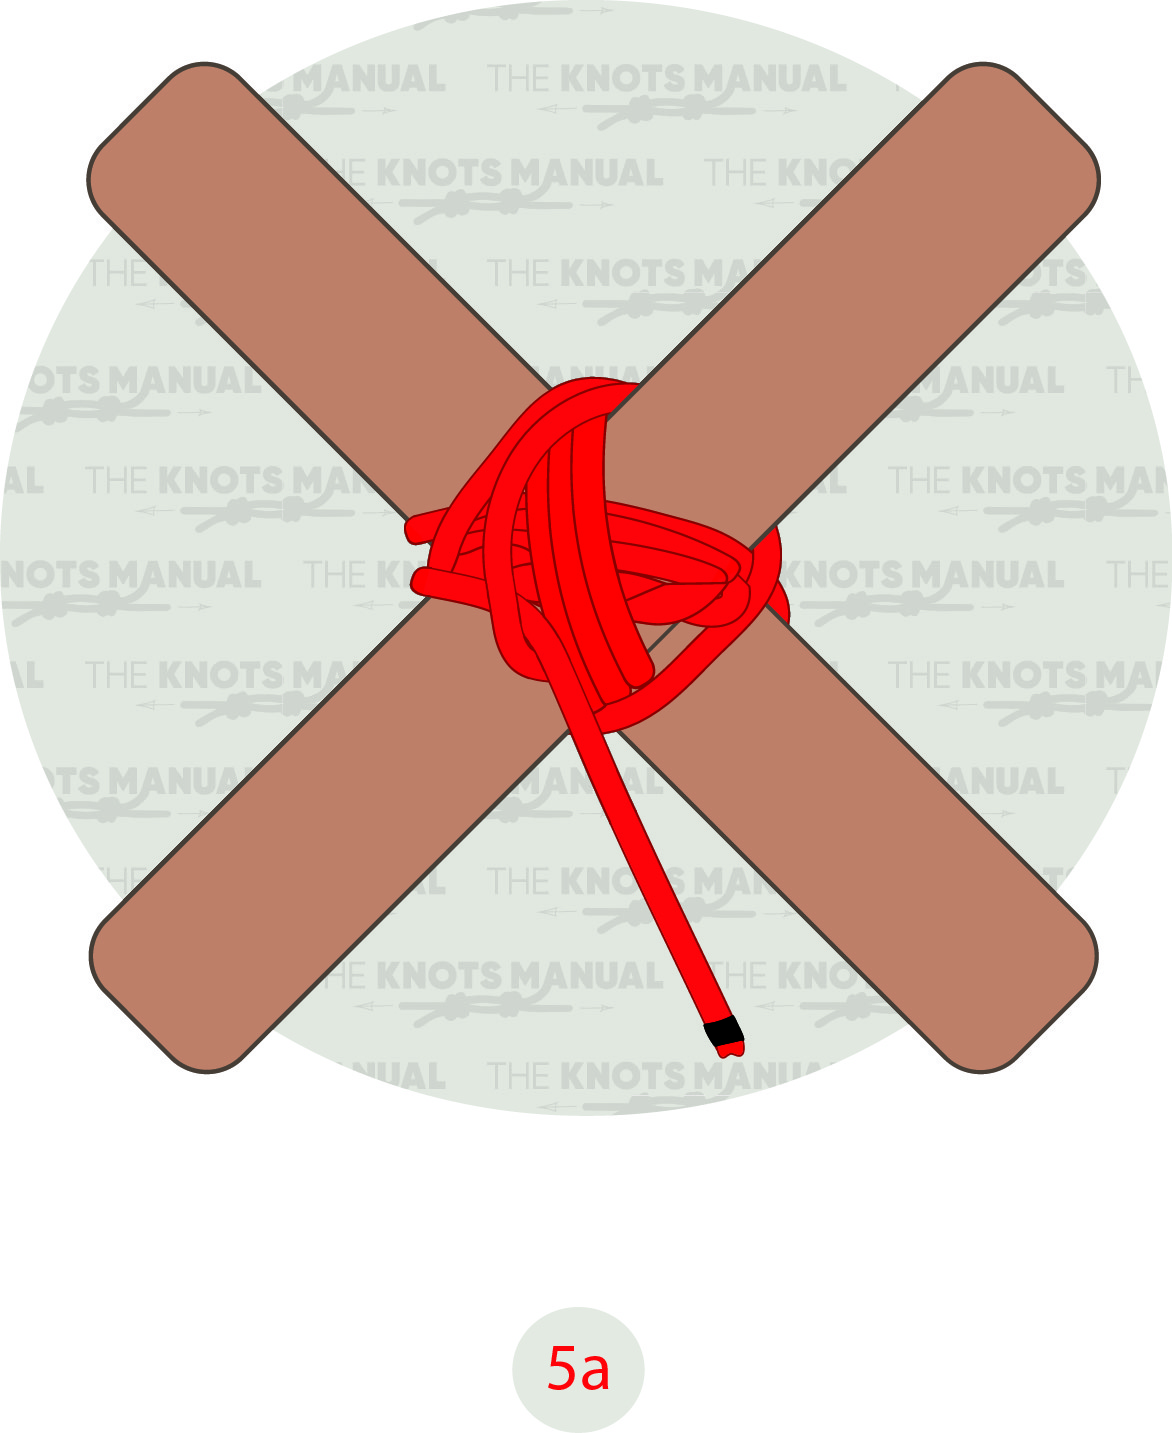
Pass the working end through the first wrap and do another full turn.
Step 5b:
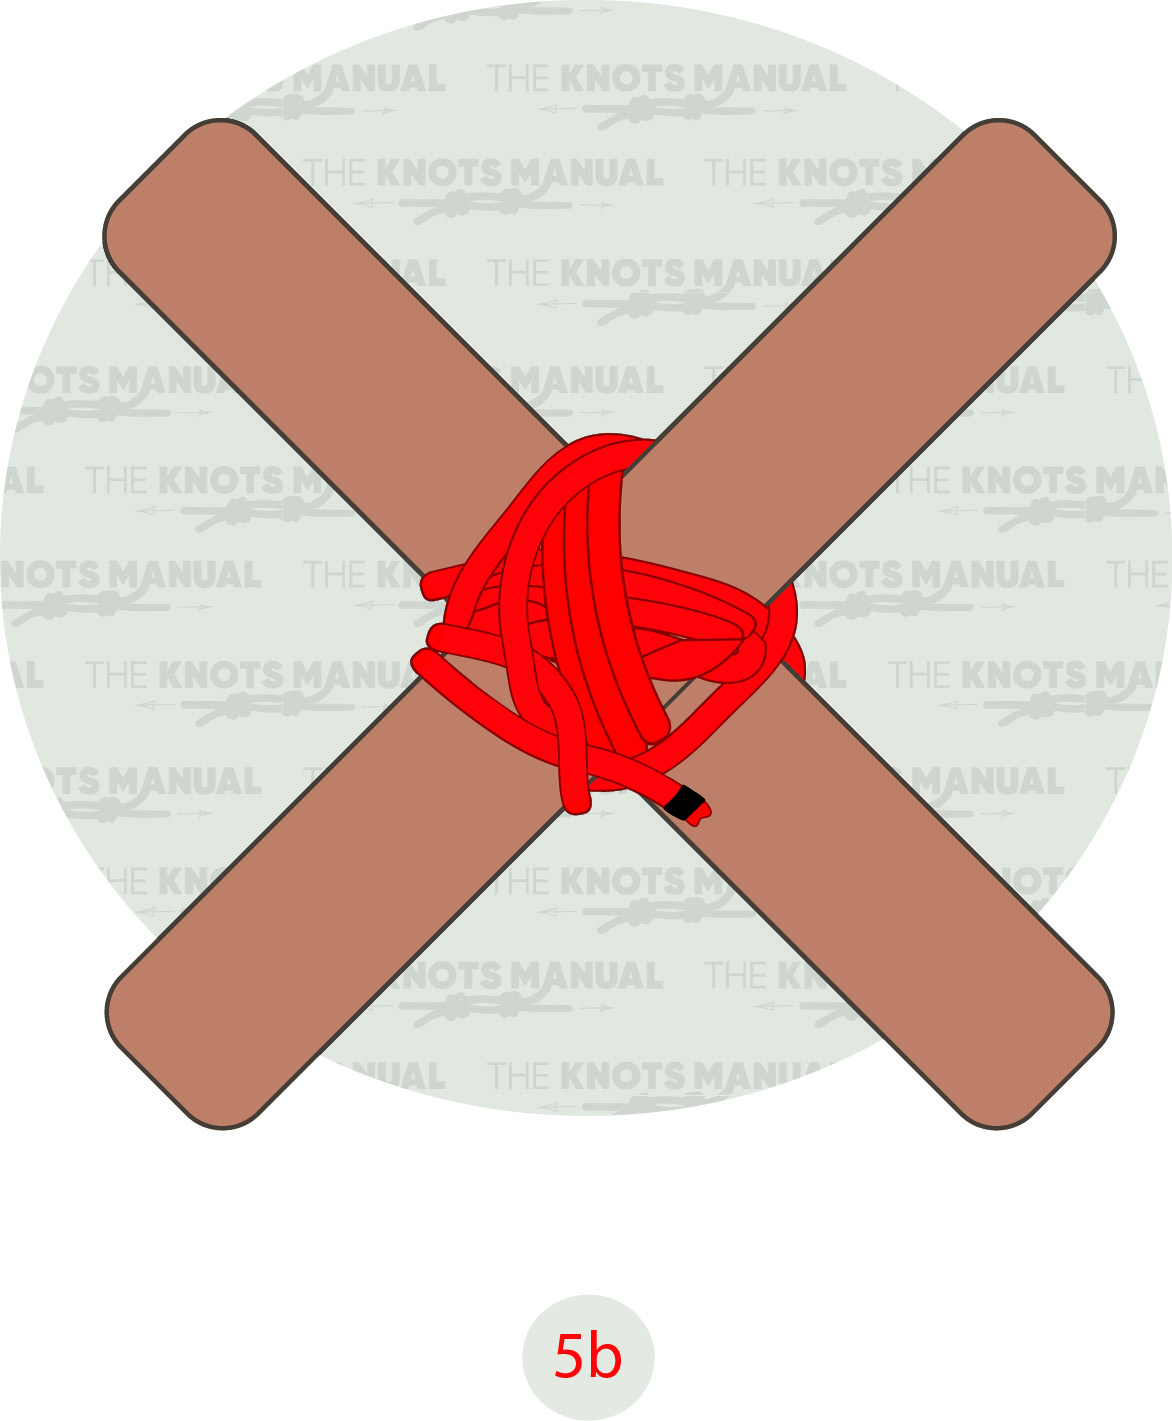
Pass the working end underneath the last turn to finish a Clove Hitch.